I have heard about this Andhra Raw Mango Dal (Pachi Mamidikaya pappu in Telugu) from my friends. It is nothing but toor dal cooked with raw mango and seasoned with spices. Basically I am a big fan of raw mango recipes. So every year I wait for the mango season to explore new recipes with raw mango and ripe mango as well. This year, I wanted to start my mango recipes with this super easy and quick Andhra style raw mango dal recipe. I got this recipe from my Telugu Brahmin friend Sandhya in my apartment. She taught me this no onion no garlic Andhra style mango pappu. After getting the recipe from her, I browsed & found many recipes with variations. But I blindly followed Sandhya’s recipe as this is my first try. It came out really well. Dal is known to be the best comfort food for rice. This mango dal with a mild tangy and spicy taste is no exception. Sendhil & myself enjoyed this dal by mixing with plain rice adding ghee! I am happy that I learnt an easy and delicious raw mango recipe. Thank u so much Sandhya . As Ugadi festival is fast approaching, most of you must be buying raw mangoes to make Ugadi pachadi. Do try this dal recipe too. You will love it. Ok, Now lets see how to make Andhra mango dal recipe with step by step photos. I will try to share a video recipe soon !
Dry roast 1 tbsp of methi seeds/Fenugreek seeds till it starts to splutter and turn light golden brown in color. Do not burn the seeds while roasting. Remove it when golden and let it cool. Powder it nicely. You can add 1/2 tsp of this powder in this mango dal. Store the remaining powder in a box and use it while making pickles, tamarind rice, vatha kuzhambu etc. My MIL adds a pinch of this powder while making filter coffee decoction. It lends a great flavor and mild bitterness to the coffee.
In a pressure cooker base, take the toor dal and add 2 cups of water. Cook in low flame for 2 whistles.In the mean time, wash and peel the skin of raw mango. ( For variations, you can add chopped mango amd slit green chillies along with toor dal in pressure cooker).
Chop into small pieces and set aside.Discard the seed. In a kadai, heat oil + ghee and splutter mustard seeds, cumin seeds, curry leaves, pinched red chillies, slit green chillies.Saute for few seconds. Add hing and roasted fenugreek seeds powder. Mix well and add the chopped raw mango pieces.
Saute the mango pieces for few minutes till it turns soft. Now add 1cup of water and add the required salt. Cover the kadai with a lid and cook for few minutes till mango pieces are completely cooked and mushy.Now take a masher and mash the mango pieces roughly.
Remove the cooked toor dal and mash it with a whisk.Add this dal to the cooked mango mixture. Mix well and add 1/2 cup of water if its too thick. Add turmeric powder, required salt and 1/4 tsp chilli powder ( optional). Mix well and boil the dal for few minutes. This dal thickens when it cools down.So adjust its consistency accordingly. Transfer the dal to a bowl and serve hot with rice. Add a tsp of ghee while serving. Tastes yum !!
Enjoy !
Note
Adding methi seeds powder gives a nice flavor to this dal.
I have added more turmeric powder.So mine looked more yellow in color. Please reduce it for mild color.
Try this easy mango recipe in this season and enjoy with rice & roti !
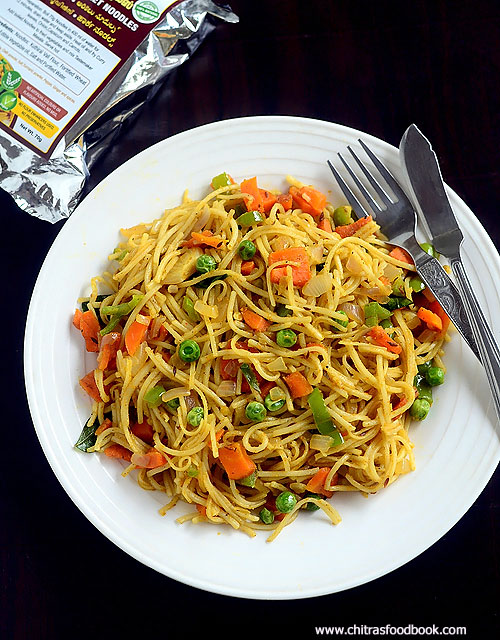
Recently I got a mail from Native Food Store – An Online millet stores in Chennai, to try their millet products and share few recipes with them. I visited their website Nativefoodstore.comand found wide range of millets and their products like Instant millet mix, millet flour, millet flakes, millet noodles and many more. Rates are also reasonable when compared to other online stores.I found millet noodles, millet flakes are interesting and new to me. So I decided to try it and asked them to send me the products. As I haven’t shared any millet recipe in my blog for long time, I wanted to take this as a chance to make varieties of millet recipes in my kitchen and share with you all. My contact at Native food store was very much responsive and sent me the products immediately.They sent me Samai/Little millet noodles, Kuthiravali/Barnyard millet noodles, Varagu/kodo millet noodles, thinai aval /foxtail millet flakes and Kambu aval/ Pearl millet flakes. I tried Samai veg noodles recipe for the first time in Indian style. They had also given their own tastemaker masala along with the noodles just like Maggi and other branded noodles. As its my first attempt, I just followed the recipe given in the packet, added all the colorful vegetables and made this millet noodles for our breakfast. It came out really well and I couldn’t find any difference in taste, color or flavor from our regular, plain noodles.We loved it to the core. I feel the tastemaker does the magic to the recipe. It can be prepared in less than 15 minutes. So bachelors and working women can make this healthy as well as quick recipe for their breakfast, lunch box or for dinner. I am sure its a very healthy choice for kids and adults as well. You can try varieties like hakka noodles, Schezwan noodles, vegetable Chinese style noodles and much more. I will try to make some interesting recipes with it and share here soon. I strongly recommend all my readers to try these products from their online stores. They deliver their products in Chennai, all over Tamil nadu, Karnataka and Andhra as of now.They told they will be expanding their service all over India very soon. Now lets see how to make Veg Millet Noodles recipe with step by step photos !
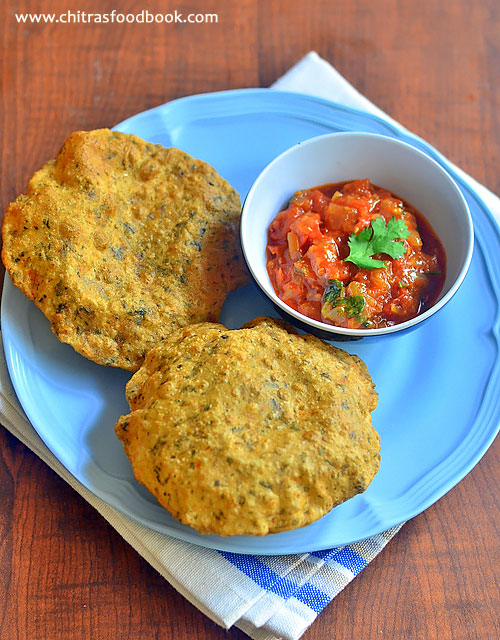
When my father was working in Mumbai, he learnt this recipe from his North Indian friend. Whenever my dad comes to Salem for holidays, he used to cook for us. We love our dad's cooking a lot . We love his Kara kuzhambu, rasam and this onion tomato sabji. My dad used to say this tomato sabzi is their go to recipe for every day's dinner.They also make it for their lunch box as a side dish for chapathi or poori . Its so easy to make and tastes great too. Sometimes my dad make this sabji by adding boiled potato, peas and even ladies finger. We love this simple sabzi with idli,dosa as well. I don’t say this is the authentic Maharashtrian style tomato sabji or tomato bhaji. This is just an easy, one pot version which is ideal for working women and bachelors. Last weekend I made methi poori and this tomato sabji for our breakfast. It was a nice combo.Sendhil and Raksha loved it a lot. It tastes the best with roti and poori. Do try this tomato sabji recipe and share your feedback with me :)
Tomato sabji recipe for chapathi, poori
How to make tomato sabji in a pressure cooker - Easy & quick side dish for poori and roti/chapathi !
Red chilli powder - 1/2 – 3/4 tsp ( I used Kashmiri chilli pwd)
Dhania powder/coriander seeds powder - 1/2 tsp
Turmeric powder - 1/4 tsp
Garam masala powder - 1/2 tsp
Sugar - 1/2 tsp
Salt & water - as needed
To temper
Cooking oil - 2 tbsp
Mustard seeds - 1/2 tsp ( optional)
Cumin seeds - 1/2 tsp
Curry leaves - few
Coriander leaves - to garnish
METHOD
Wash and chop the onion and tomato into small pieces. In a cooker base, heat oil and splutter cumin seeds.
Saute onion until transparent and then add ginger-garlic paste and curry leaves. Saute till the raw smell of g&g paste goes off.
Now add the tomato pieces and saute for a minute. Add salt, turmeric powder, sugar, red chilli powder, Dhania powder, garam masala powder and saute till tomato turns mushy.
Now add 3/4 cup of water, mix well and pressure cook in high flame for 2 whistles. Open the cooker after the steam is released. Oil would float on top. Mix well with a ladle and garnish with chopped coriander leaves. Boil for few minutes if the sabji is watery. Make it thick. Serve hot with poori or roti !
Enjoy !
Note
For variations, you can add equal quantity of tomato and onion but adjust the quantity of spice powders accordingly.
You can also add some cooked peas or boiled potato cubes.
You can skip dhania powder if u wish. But flavor varies.
Adding sugar helps to enhance the taste. It gives a mild sweetness to the bhaji.
You can also make this sabji in a kadai instead of pressure cooker.
For variations, you can add coarsely crushed peanut powder ( 1 tbsp )
Try this easy, yummy tomato sabji at home and enjoy !!
Elephant Yam ( Also known as Elephant foot yam in English, Senai kizhangu in Tamil, Chena in Malayalam, Suran/ Jimikand in Hindi) is a tuberous vegetable which has lots of amazing health benefits. It helps to reduce bad cholesterol, reduces hypertension, good for piles, controls diabetes, balances hormones, rich in anti oxidants etc. I am a big fan of yam chops/ Senai kizhangu roast that is made in dosa tawa. I have tried so many recipes but nothing was like the one I had in a marriage feast. I will share that recipe once I get it perfect. Today’s recipe is a very simple South Indian style Yam fry/ Poriyal recipe for rice that is usually made in my house. I learnt this recipe from my MIL. Generally Yam creates an itchiness in the tongue after eating. To avoid this, my MIL adds tamarind while cooking yam. It helps to reduce the itchy feeling to some extent.Last month I made this yam fry as a side dish for Instant more kuzhambu. It was a nice combo and tasted good. Do try this easy senai kizhangu fry at home and share your feedback with me. I am planning to try more yam recipes like varuval, masiyal, kuzhambu , roast etc.Stay tuned ! Now lets see how to make Elephant Yam Fry recipe with step by step pictures !
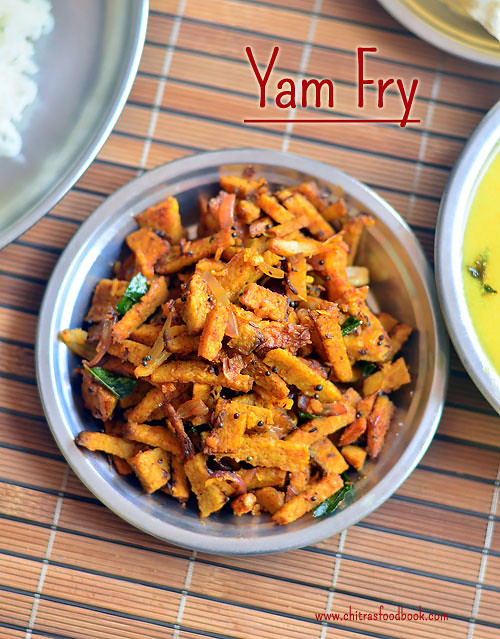
Yam fry recipe - Senai Kizhangu poriyal
How to make Yam Fry - Senai kizhangu poriyal for rice
Tamarind extract – 1/4 cup ( Soak gooseberry size tamarind)
Turmeric powder - 1/4 tsp
To Temper
Cooking oil - 2 tbsp
Big onion - 1 no ( Sliced)
Curry leaves - few
Hing/asafetida - 2 pinches
Grated coconut - 1/ 4 cup
METHOD
Cut the yam into big slices. Peel its skin and discard the skin.Chop the yam into small cubes or thin 1 inch strips as I did. I chopped it like this after tasting this poriyal in a hotel.
Soak small gooseberry size tamarind and take extract using 1/4 cup water. In a pressure cooker base, take the chopped yam, turmeric powder, salt and 1/4 cup thin tamarind extract. Mix well and pressure cook in high flame for just 2 whistles. Over cooking makes the yam mushy. Adding more water while cooking also makes it mushy. So take care while cooking. You can also cook the yam in a kadai or bowl instead.
Open the cooker after the steam is released. Mix well and drain the excess water if any. Heat oil in a kadai, splutter mustard seeds, urad dal, cumin seeds and curry leaves. Saute onions till transparent.
Add the cooked yam pieces, sambar powder and mix well for few minutes. Mix well till raw smell goes off. Lastly garnish with grated coconut. Mix well and switch off the flame . Serve hot with sambar or more kuzhambu.Tastes yum !
Enjoy !
Note
For masala flavor, you can add 1/2 tsp of garam masala powder or fennel seeds powder along with sambar powder.
If you wish, you can use lemon juice after switching off the flame and skip tamarind. In that case, cook the yam pieces with plain water.
Yam cooks quickly.So pressure cook it only in high flame adding very less water for just 2 whistles else it will be mashed.
Easy, healthy Elephant Yam poriyal is ready to serve with rice !
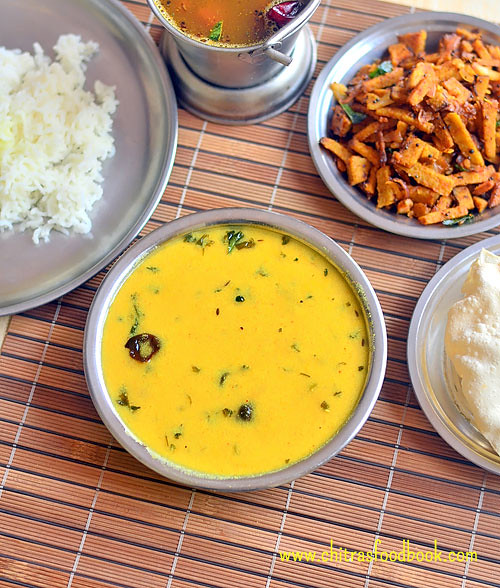
Mor kuzhambu ( Vegetarian buttermilk gravy in English) is our family favorite kuzhambu varieties for rice. Usually I follow my MIL’s or MOM’s recipe. But sometimes I make this easy mor kuzhambu recipe when I have to cook for myself and Raksha as Sendhil is not fond of this version. Its a very simple, no grind mor kuzhambu recipe without coconut. I started making this by following Revathy Shanmugam mam’s recipe from Aval vikatan supplementary issue. But then I made some changes and making it in my own way! I won’t say this one tastes so good like authentic more kuzhambu. But this recipe is surely a quick fix for bachelors & working women who wants to whip up a gravy within 10 minutes for lunch or dinner after coming back from office. It tastes great with fried papad and potato fry or brinjal roast. I served it with yam fry. The taste of this kuzhambu reminds me North Indian style Dahi kadhi slightly. This kulambu can be prepared with or without vegetables.Sometimes I add fried manathakkali or sundakkai vathal too. If you wish to add vegetables, you can add cooked lady’s finger (Vendakkai) or pumpkin( Poosanikai in Tamil). Do try this easy, Instant mor kuzhambu recipe and let me know your feedback ! Lets see how to make South Indian style Mor Kuzhambu with step by step photos.
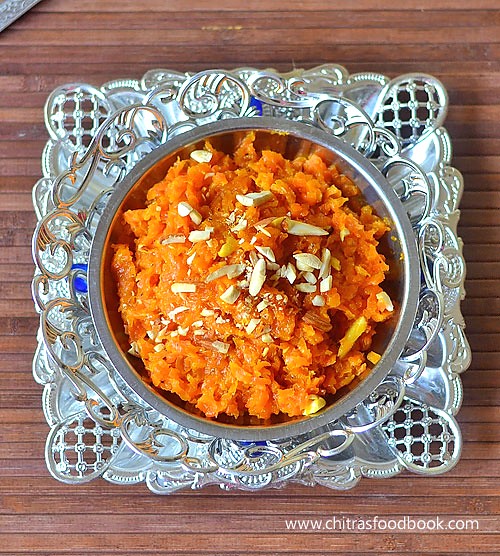
Carrot halwa recipe cooked in a kadai with step by step photo and a video !
Carrot halwa (Gajar Ka halwa In Hindi) is one of the most popular Indian desserts that is loved by all. Long back I had shared “How to prepare carrot halwa in pressure cooker”. That’s my go-to recipe for making easy and quick carrot halwa.
Yesterday for a change, I prepared this traditional method of making carrot halwa in a kadai by using milk, sugar and ghee. I offered it as prasadam for my Friday Lakshmi Pooja. For making carrot halwa, Delhi carrots are mostly used by North Indians whereas I made it with our South Indian orange carrots(Ooty carrot).
Traditionally it is prepared in a big iron kadai but I used my non-stick kadai that suits my Induction stove as I wanted to make a video recipe as well. So there are mild deviations from the perfect traditional ones but this one tastes and looks equally good. I have not used condensed milk ( Milk maid) Or Khoya/ mawa. So the preparation time and cooking time takes a bit longer than pressure cooker version. Still the final result makes you forget all the pain. Lets see how to make carrot halwa/ Gajar Halwa at home with step by step photos and video !!
Carrot Halwa Recipe - Gajar Ka Halwa
How to make carrot halwa - Gajar Halwa Recipe using milk
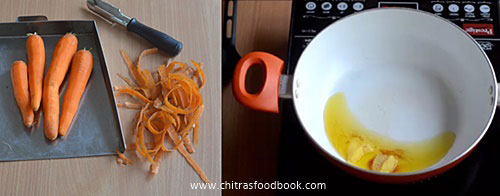
Wash and peel the skin of carrots. Grate it using a big sized holes grater. Do not use a small hole grater because halwa turns mushy and the end of cooking. Grate and keep in a plate.
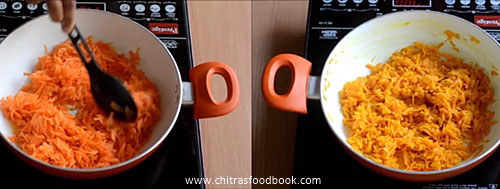
In a kadai, heat 2 tbsp ghee and add the grated carrot.Saute well till the raw smell goes off and color of carrot changes to pale orange. It takes nearly 3-5 minutes.
Now add 1 cup of milk and mix well.Keep the flame medium and cover the kadai with a lid. Carrots get cooked in milk. Wait till all the milk is absorbed by the milk. Open the kadai every now & then, stir till bottom to avoid burning. Cooking takes nearly 10-15 minutes.
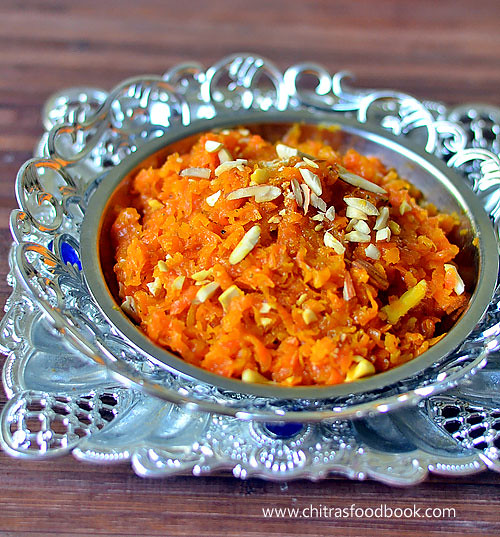
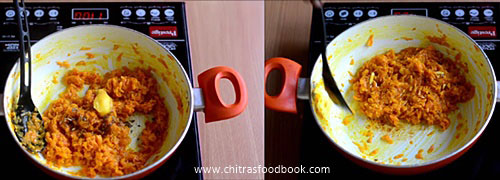
Now add 1/2 cup (heaped)sugar and mix well. Sugar melts and mixture will become watery.Check for taste and add 2 tbsp more sugar if needed. Keep the flame medium and keep stirring till 3/4th of the moisture is lost. When the halwa becomes thick and starts to leave the sides of kadai, add cardamom powder, 1tbsp ghee and mix well. When the halwa becomes thick, gathers in the center with very little moisture, remove it and sprinkle chopped nuts. Serve warm with ice cream or cold !
** Do not stir the halwa for long time to become thick & dry because when the halwa cools down, it will become hard & chewy.So remove it when there is very little moisture content. This halwa can be refrigerated and stored for a week.Reheat in a microwave for 1 minute and serve warm if needed.
Enjoy !
Note
Add more sugar ( 2 tbsp extra) for more sweetness.Sugar can be added any time while cooking carrot halwa.
You can use Delhi carrots instead of the regular orange carrot for bright color.
Serve warm with your favorite ice cream to enjoy its best taste !
Enjoy this delicious carrot halwa with a scoop of vanilla ice cream. Its a blissful combo !!
Poha( Flattened Rice/Rice flakes in English, Aval In Tamil, Avalakki In Kannada, Poha in Hindi) is used to make quick and easy, Instant breakfast recipes like Poha upma, Poha idli , Poha pongal etc. Mostly I make Poha recipes using white poha but red poha is considered to be high in nutrition with lots of health benefits.It is prepared from red rice.It is good for diabetes and is rich in fiber, vitamin B and minerals like calcium, zinc, iron, manganese, magnesium. Recently one of my readers suggested me to share some red aval recipes. So last time when I went to Salem, I bought a pack of Red Aval ( Sivappu aval in Tamil), Kambu aval and Ragi aval from Barathi supermarket. I followed my usual aval upma recipe and made this instant sigappu aval upma recipe quickly for our breakfast. It was very nice,flavorful and tasty. Above all, we got a satisfaction of having a healthy food. Ok, Lets see how to make red aval upma with step by step photos !
Gobi Paratha is Sendhil’s most favorite Paratha recipe. After marriage he took me to In-swing restaurant in BDA complex, Banashankari and got this cauliflower paratha for me as he loves it very much. That’s the first time I tasted a stuffed paratha in my life. He told me to try the same at home. As I was a beginner in cooking, I did not have any idea about the stuffing part, how to roll paratha etc.
When I tried it, all the stuffing came out while rolling and the paratha became a disaster. Still he appreciated me for my attempt and ate well. And that’s my man. Now after so many years of cooking, I can make a good gobi paratha for him. So I wanted to share this recipe in my blog with step by step photos and a detailed video recipe to help beginners.
You can try this yummy paratha recipe for dinner or lunch box. Even Kids would love this paratha if you cook it adding ghee or butter. It comes out soft and stays good for hours. Lets see how to make Gobi paratha/Cauliflower paratha at home easily !
Gobi paratha recipe/ Cauliflower paratha recipe
How to make gobi paratha/Cauliflower paratha at home with step by step photos and video !
Cauliflower - 1 no or Grated cauliflower - 1.5 cups
Cooking oil - 2 tbsp
Green chilli - 1 no ( finely chopped)
Grated ginger - 1 tsp
Ajwain/Carom seeds – 1 tsp
Red chilli powder - 1 tsp
Dhania powder/coriander seeds powder - 1 tsp
Garam masala powder - 1 tsp
Cumin seeds powder - 1/4 tsp
Turmeric powder - 1/4 tsp
Aamchur powder - 1/4 tsp ( optional)
Coriander leaves - 2 tbsp. ( to garnish)
Salt - as needed
METHOD
In a wide bowl, take the wheat flour, add required salt and 1/2 tbsp. of cooking oil. Mix well. Add water little by little and make a smooth, non-sticky dough.Knead well, apply a tsp of oil and cover the dough with a dry cloth, leave it for 20 minutes. In the mean time, lets prepare the stuffing.
Take the cauliflower and remove the leaves, cut into 4. Remove the stem part and separate the florets in a plate. In a wide bowl, boil water and add the florets. Boil for few minutes, parboil and drain the excess water. Remove the half cooked cauliflower florets to a dry kitchen towel/cloth. Pat it dry.
Grind the florets in a dry mixer jar without water. Wipe the sides of jar and grind in batches. You can also grate it. But grinding is easy. Take in a plate.
Heat oil in a kadai and when it gets heated , add the finely chopped green chilli, grated ginger (If u wish u can add very finely chopped onions at this stage) and saute well. Add the grated cauliflower, salt, red chilli powder, dhania powder, cumin powder, garam masala powder,aamchur powder and ajwain. Mix well till all the moisture is absorbed. Let the mixture cool down.Divide the stuffing into lemon sized balls.
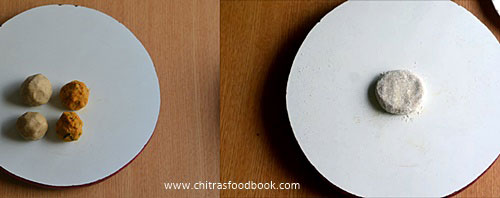
Take the chapathi dough and make lemon sized balls. The size of dough ball & stuffing ball should be equal.
Take one dough ball, dust it in wheat flour and roll into small poori size.Make the corners thinner than center. Keep the stuffing ball in the center and seal it. Again dust in the flour and roll to a thick or thin paratha as u wish. Sendhil likes it medium thick.So I do it accordingly.
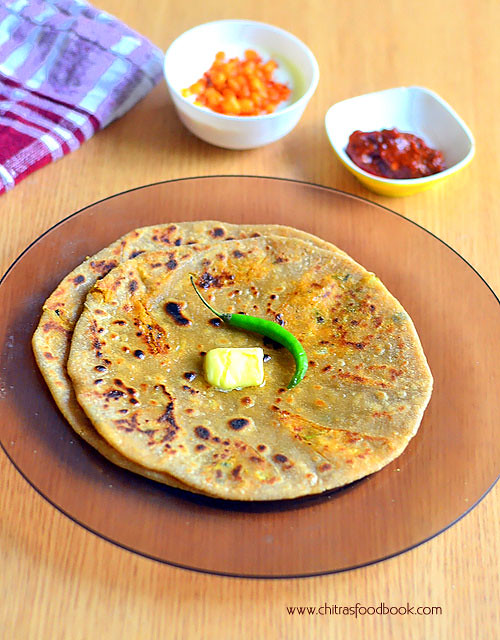
Heat a dosa tawa, cook the paratha on both the sides till half cooked in medium flame. Brush one side of paratha with ghee or cooking oil and cook for few seconds till brown spot appear.Flip the paratha and brush the other side of paratha.Cook for a minute. Keep flipping and cooking till brown spots appear all over the paratha. Brush with ghee and remove in a plate. Serve hot immediately with raita or pickle OR stack the paratha in a clean kitchen towel or thermal foil for later use. (Remember the more you brush with ghee, softer the paratha would be.)
Enjoy !
Note
Do not make the chapathi dough very sticky. Rolling will be difficult. You may have to dust the paratha with more flour which leads to dry paratha.
You should grease the paratha with cooking oil or ghee for best taste.
Cauliflower stuffing should be free from moisture so that paratha won’t become sticky while rolling.
Adding aamchur powder gives a mild tangy taste. Skip if you don’t have it.
Enjoy this yummy, flavorful gobi paratha with your favorite side dish or simple masala raita.


 How to make Andhra style raw mango dal - Mamidikaya Pappu recipe with step by step photos !


 . We love his