Search Chitra's Food Book

Showing posts with label BREAKFAST RECIPES. Show all posts

June 24, 2017

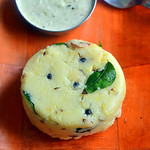
Rava Pongal Recipe – Sooji Pongal– How To Make Rava Pongal

Rava Pongal is one of the easy to make South Indian breakfast recipes. It is very popular in Tamil nadu. Rava khara pongal recipe ( sooji pongal) is prepared with  roasted semolina ( Sooji in Hindi) and  pressure cooked yellow moong dal as major ingredients. Its cooking method is very similar to our Ven pongal recipe/Ghee pongal but semolina is used instead of rava.
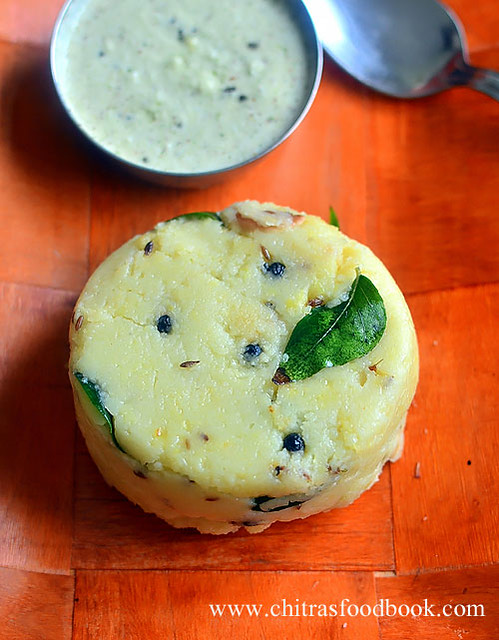
Rava pongal recipe
Even though rava pongal is not widely available in Tamil nadu hotels, this must be a favorite breakfast recipe to many of us. In my home, Sendhil loves rava recipes a lot more than me & Raksha. So I try to make rava upma, rava dosa or this rava pongal at least once in a week. I started making this recipe after watching a cookery show by our beloved Chef Damu. After making it several times, I started preparing in my own comfortable way. I have shared the same in this post. Quantity of water, little oil and more ghee is the key for soft pongal. If you have cooked moong dal in hand, rava pongal can be prepared quickly and easily. Bachelors and working women can try this for breakfast. Ok, lets see how to make sooji pongal/ Tamil nadu style rava pongal with step by step photos and a video ( Video is under editing). I will try to share it soon.
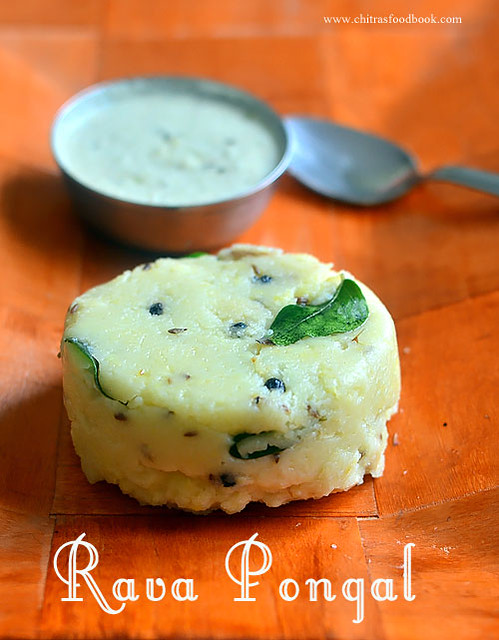
How to make rava pongal

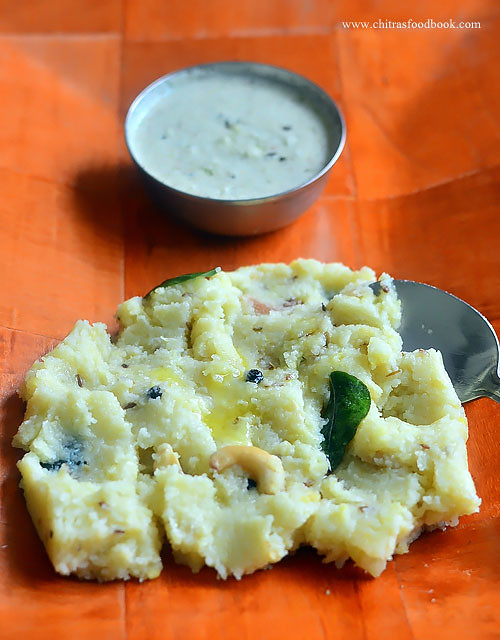
Rava Pongal Recipe - Sooji Pongal


Rava Pongal Recipe - Sooji Pongal How to make rava pongal recipe - Easy, yummy South Indian breakfast recipe
Cuisine: Indian
Category: Breakfast
Serves: Serves 2
Prep time: 10 Minutes
Cook time: 20 Minutes
Total time: 30 Minutes


INGREDIENTS

1 cup - 250ml
  • Semolina / Sooji / Rava - 3/4 cup ( Upma rava)
  • Yellow moong dal - 1/4 cup (roast in 2 tsp ghee)
  • Water - 1.5 cups ( for dal) + 2.5 cups ( for rava)
  • Salt - As needed
To temper
  • Ghee + cooking oil - 3 tbsp + 1 tbsp
  • Pepper corns - 1 tsp
  • Cumin seeds - 1 tsp
  • Cashew nuts - 5 nos ( break into two)
  • Ginger - 1 inch piece ( chopped finely)
  • Curry leaves - Few
  • Asafetida/ Hing - A pinch

METHOD

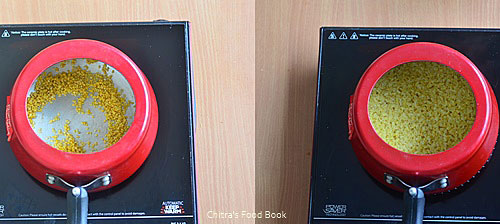
  1. In a pressure cooker base, heat 2 tsp of ghee and roast the moong dal till nice aroma comes out. Add 1.5 cups of water and pressure cook in very low flame for 2 whistles. Open the cooker once its done and mash the dal.
    How to make rava pongal
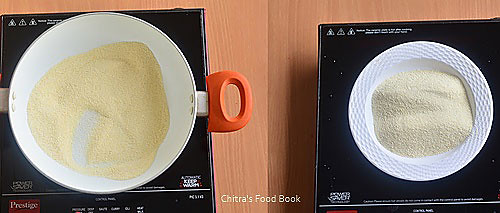
  2. Heat a kadai and dry roast the rava in medium flame for 5 minutes. Take care, Rava should not burn. Transfer it to a plate.
    How to make rava pongal
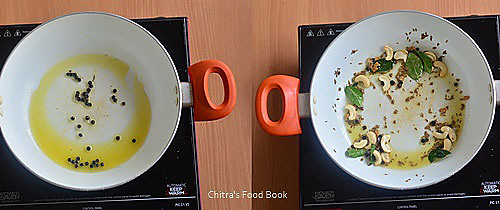
  3. In the same kadai, heat 2 tbsp ghee + 1 tbsp oil and add pepper corns.When the pepper corns starts to splutter, add finely chopped ginger, cashews and curry leaves. When the cashews start to turn golden, add cumin seeds and hing.
    How to make rava pongal
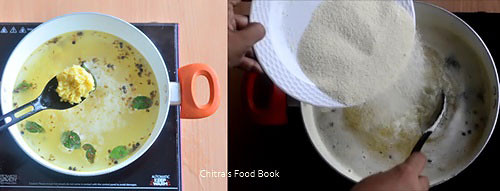
  4. Mix well and add water 2.5 cups of  water immediately ( I used 1:3 ratio of rava & water). Add the required salt, cooked moong dal in the water.

  5. When the water starts to roll boil, simmer the flame completely or switch off the flame if you are a beginner. Add the roasted rava slowly in one hand while mixing the water in other hand. This is most important to avoid lump formation.
    How to make rava pongal
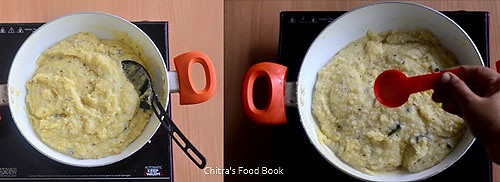
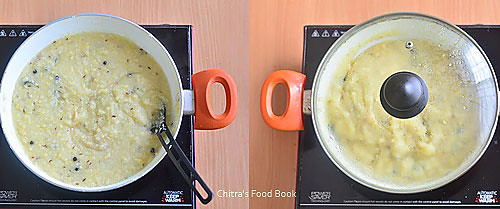
  6. After the rava is mixed well with water, it becomes thick. Cover & cook for 5 minutes in low flame. Open the lid and mix it once. Again cover cook for 2 minutes till rava becomes soft and well cooked.
     How to make rava pongal
  7. Add 1tbsp of ghee at the end, mix well and switch off the stove. Initially, when the pongal is hot, it looks mushy. But it will become non-sticky and stay soft when it becomes warm. Serve with your favorite side dish like coconut chutney or gosthu.
How to make rava pongal
Enjoy !


Note
  • Do not reduce the quantity of ghee mentioned in the recipe. U can always add more if you want. Oil helps to keep the pongal non-sticky.
  • You can add more water for cooking rava. 1:4 ratio of rava & water is also fine.
  • Use upma rava/coarse sooji not chiroti/fine rava.

Enjoy this easy, yummy South Indian breakfast Rava pongal at home !
Rava pongal - How to make rava pongal
Continue Reading...


June 15, 2017

Bread Pizza Recipe On Tawa,Oven, Microwave With Video

Bread pizza recipe on tawa, oven, microwave(with video)
Vegetable Bread Pizza is an easy and quick breakfast and snack recipes for kids.It tastes good with or without cheese.Actually Bread pizza can be made in 3 ways.It can be made without oven ie. in dosa tawa ( Stove top) or it can be baked in convection oven or microwave if you have at home. All are easy to make and tastes good in its own way.Its a great idea to use the leftover bread slices. I feel tawa and microwave options are easier as it takes less time to cook than baking in convection oven. But we should do it carefully as the chances of burning is more.This morning I prepared bread pizza recipe on stove top, oven and microwave just to make this post. I have shared all of the 3 methods below with a short video. Choose & try whichever is convenient to youHappy. I have used store bought pizza sauce and pizza seasoning/ spice mix. You can make it  just by using tomato ketchup & pepper powder. To make a pucca Indian version, sprinkle some garam masala powder or tandoori masala powder, marinated paneer cubes if you have in hand. You can top with lots of cheese for kids & without cheese if making for you & your husband ( If you are calorie conscious)Winking.Adding grated mozzarella cheese is just for attracting kids because taste of this pizza comes from the sauce, mixed vegetables and spice mix.Just play around with your favorite veg and non-veg toppings and enjoy it. Now lets see how to make this easy and simple recipe for vegetable bread pizza without oven( on tawa), microwave and convection methods with step by step photos and video.

Bread pizza on tawa

How to make bread pizza on tawa, oven and microwave


How to make bread pizza on tawa, oven and microwave Easy, yummy, kids friendly bread pizza recipe on tawa/stove top, convection oven and microwave methods
Cuisine: Indian
Category: Kids Recipes Indian
Serves: 5
Prep time: 10 Minutes
Cook time: 10 Minutes
Total time: 20 Minutes


Ingredients

1 cup - 250ml
  • Bread slices - 5 nos
  • Grated Cheese - 1/2 cup to 1 cup ( I used Amul Mozzarella cheese)
  • Capsicum - 1 no ( finely chopped)
  • Big onion - 1 no ( finely chopped)
  • Ripe tomato - 1 no ( finely chopped)
  • Black Olives - 5 nos ( sliced)
  • Boiled Sweet corn - 1/4 cup ( optional)
  • Pizza sauce or paste sauce or schezwan chutney - as needed ( I used pizza sauce around 3-4 tbsp)
  • Pepper powder - 1/2 tsp
  • Salt - a pinch
  • Chilli flakes - 1 tsp ( optional)
  • Oregano mix or pizza seasoning mix - 1 tsp

  • Butter - to grease the tawa & bread

Method

  1. To make bread pizza, wash and chop all the vegetables finely. Grate the cheese and keep aside.Take a bread slice and apply butter on both the sides.Keep in a plate.
    Bread pizza recipe without oven
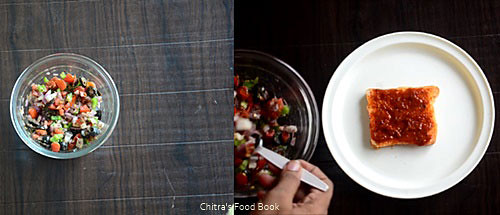
  2. In a wide bowl, mix all the finely chopped vegetables, pepper powder, salt and pizza seasoning mix.Keep it ready.
    Take the bread slice and apply the pizza sauce on one side.Spread the mixed vegetables. Top with grated cheese. You can either cook them on tawa/pan, microwave or bake in convection oven.
    Bread pizza recipe without oven
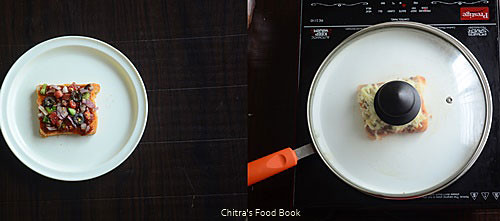
  3. Bread pizza in tawa : Heat a dosa tawa and apply some butter. Keep the loaded bread slice.Cover cook in very low flame for 3-4 minutes or until the cheese melts.Remove in a plate and serve hot. Cover cook is very important. If you don’t cover cook, cheese won’t melt and bottom of bread slice may burn.
    Bread pizza on tawa / Bread pizza without oven
  4. Bread pizza in microwave : Place the bread slice in microwave and cook in high power( mine is 800w) for 1 minute or until cheese melts.If the power is less, it may take 1.5 to 2 minutes. If power is more, it can be done under 1 minute.So keep an eye.
    Bread pizza in microwave
    Bread pizza without oven
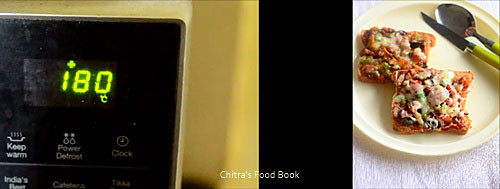
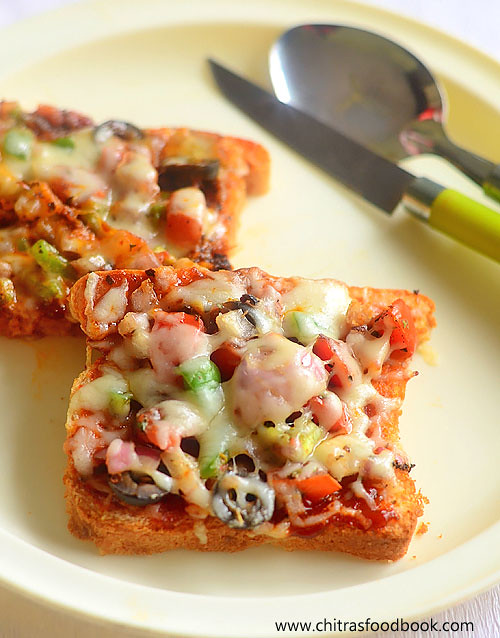
  5. Bread pizza in convection oven : Preheat convection oven in 180c. Keep the bread pizza in a baking tray. Bake it for 5 minutes at 180c. Cheese melts and the sides of bread slice turns slightly crispy. Remove and enjoy !
    Bread pizza baked in oven


Note

  • The quantity of chilli flakes, pizza mix and pepper powder depends on our taste.
  • You can add any number of toppings like paneer, mushroom, jalapeno, sweet corn etc..
  • Do not cook the pizza on open tawa, it takes long time for the cheese to melt.
  • Microwave bread pizza takes very less time to cook.If you keep for more time, pizza would burn.
Enjoy this easy, yummy bread pizza at home ! Kids would love it for sure !!
Bread pizza in oven


Continue Reading...


June 6, 2017

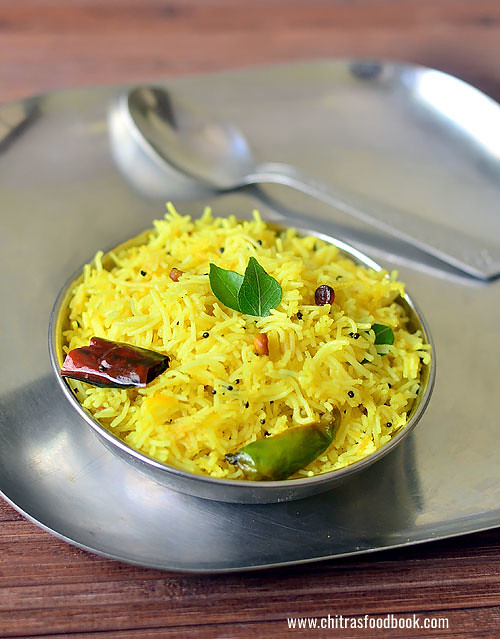
Lemon Sevai Recipe – Instant Rice Sevai Recipes

Lemon sevai recipe
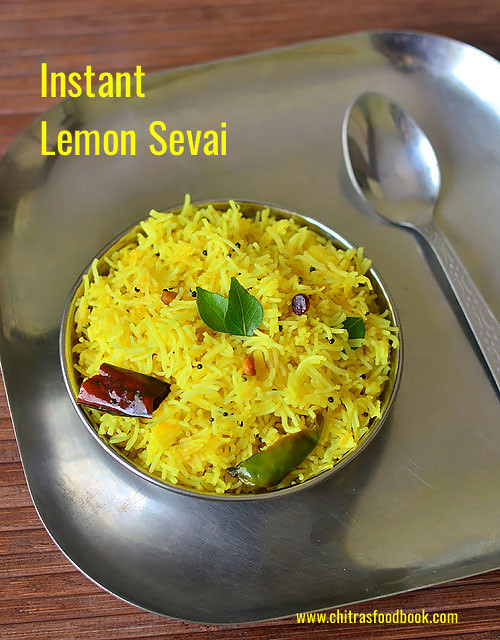
Lemon sevai is our family favorite breakfast recipe. Sevai also known as Idiyappam sevai is one of the popular South Indian breakfast. Making soft idiyappam at home needs some practice and expertise. So to ease our job, readymade rice vermicelli ( Rice sevai or rice idiyappam in Tamil, Rice vermicelli in English) is available in the market.Though there are many brands, I have tried Anil rice vermicelli and Concord rice sevai. Basically rice sevai is cooked by soaking in hot water for 15 minutes and made instantly just like noodles. Once we know how to cook the rice sevai properly, we can make varieties of sevai recipes by adding different flavors and prepare lemon sevai, tamarind sevai, tomato sevai, coconut sevai, masala vegetable sevai and even sweet sevai by adding sugar or jaggery. Usually I make lemon sevai and sweet sevai as both are our family favorite. I make this dish mostly for breakfast during busy weekday mornings as it saves lot of time when compared to our traditional idiyappam. So today I have shared this post on how to cook the instant rice sevai and make this flavorful, yummy lemon sevai with it. Lets move on with step by step photos !

Do check my homemade basic idiyappam recipe, lemon idiyappam recipes, side dish for idiyappam.
Instant Lemon sevai recipe

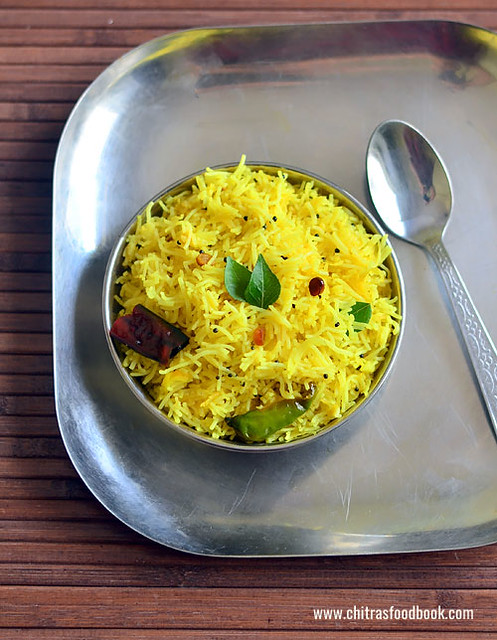
Lemon sevai recipe - Instant lemon sevai using rice vermicelli


Lemon sevai recipe - Instant lemon sevai using rice vermicelli How to make lemon sevai using instant rice vermicelli/rice noodles for easy breakfast or dinner
Cuisine: Indian
Category: Breakfast
Serves: Serves 3-4
Prep time: 20 Minutes
Cook time: 10 Minutes
Total time: 30 Minutes


INGREDIENTS

1 cup - 250ml
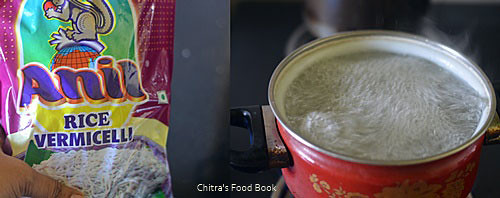
  • Rice vermicelli - 200gms packet ( I used Anil rice vermicelli)
  • Water - approx. 4 cups
  • Salt - as needed
  • Cooking oil - Few drops
To prepare lemon sevai
  • Cooking oil or gingely oil - 2 tbsp
  • Mustard seeds - 1/2 tsp
  • Urad dal - 1 tsp
  • Chana dal - 1/2 tbsp
  • Peanuts - 2 tbsp ( optional)
  • Curry leaves - few
  • Red chilli - 1 no ( Pinched )
  • Green chilli - 2 nos ( slit)
  • Hing - a pinch
  • Turmeric powder - 1/4 tsp
  • Lemon juice - 2 tbsp or as needed
  • Salt - as needed
  • Water - 1 tbsp to add in lemon juice
  • Coriander leaves - to garnish ( optional )

HOW TO MAKE LEMON SEVAI

  • Roll boil 4 cups of water adding few drops of cooking oil. In the mean time, squeeze two small lemon and take the juice.Discard the seeds. Add 1 to 2 tbsp water to it. Mix well and keep aside.
    Lemon sevai recipe
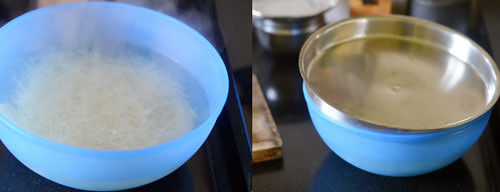
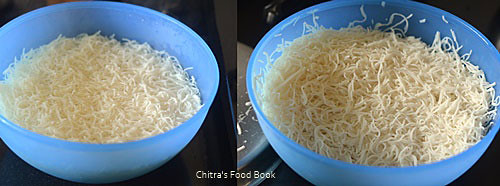
  • Take the vermicelli in a wide bowl and add the boiled water. Level of water should be 1 inch above the vermicelli. Cover & soak it for 20 minutes.
    Lemon sevai recipe
  • After soaking, drain the excess water completely using a colander and keep the cooked rice vermicelli ready. Make sure there is no trace of water. It should be fluffy and separate.
  • Spread the vermicelli in a greased idli plate. Boil water in an idli pot. Place the idli plate and steam it for 5 to 10 minutes. Remove and fluff the cooked sevai in a plate. (This step is optional). You can proceed without steaming too.
    Lemon sevai recipe
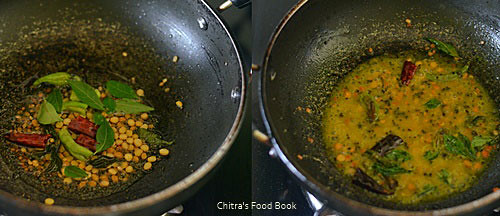
  • Heat oil in a kadai,splutter mustard, urad dal, chana dal, peanuts, red chilli, green chilli and curry leaves.Saute till dals become golden. Add the turmeric powder, required salt, lemon juice.Mix well and switch off the flame.
    Lemon sevai recipe
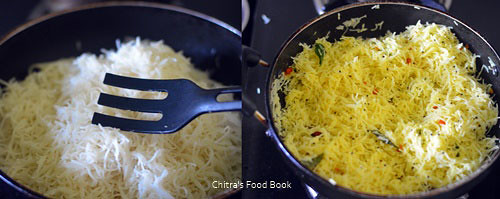
  • Add the cooked rice vermicelli to it. Mix gently using a fork like ladle. Check for taste and add more lemon juice if needed. Cook in very low flame for 2 minutes till all the moisture goes off. Garnish with coriander leaves and serve hot for best taste !
    Lemon sevai recipe
  • Enjoy !

Note

  • The quantity of lemon juice and chilli varies as per the sourness of lemon.
  • If you want, you can use a part of cooked vermicelli to make sweet sevai adding sugar or jaggery syrup, grated coconut and cardamom powder.
  • Do not add more water to soak the vermicelli because it may become mushy.
  • Make sure, you drain all the excess water completely without even a single drop left out. It helps to keep the vermicelli soft and looks fluffy too.
  • Steaming the soaked vermicelli makes it soft like homemade idiyappam. You can try this way for variations. 
Enjoy this easy, instant lemon sevai using rice vermicelli for your breakfast or dinner.
Instant lemon sevai - Rice sevai recipes

Continue Reading...


May 29, 2017

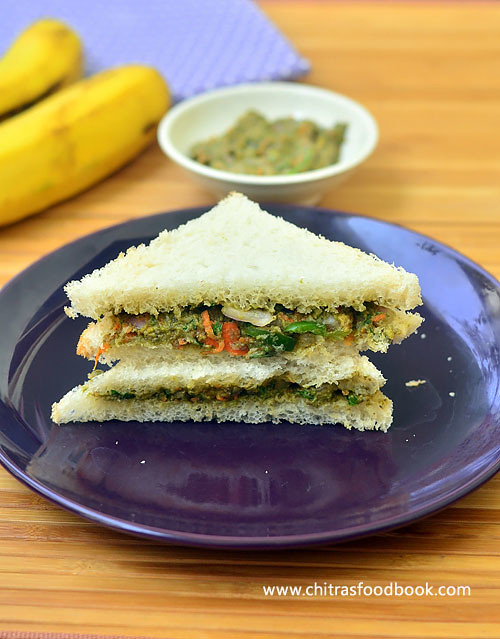
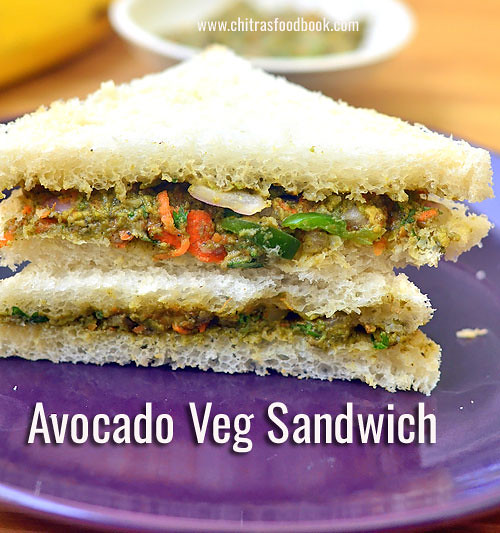
Indian Vegetarian Avocado Sandwich Recipe – Guacamole Sandwich Recipe

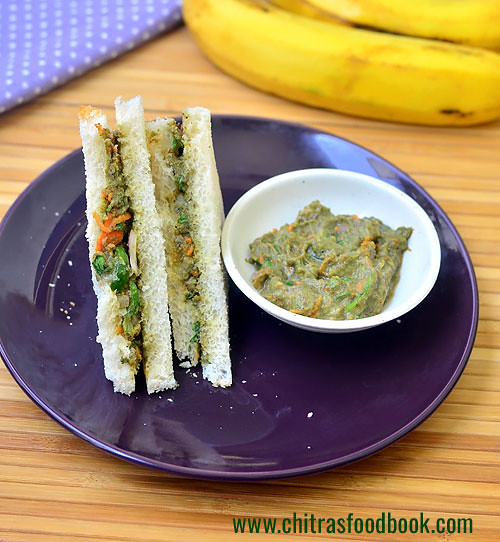
After a long gap, I am sharing a recipe with avocado because this healthy fruit is very rarely available in my placeSad. So whenever I see it in Reliance fresh, I take one to try some interesting recipes with it. Avocado is popularly known as “Butter fruit” in India. So far I have tried and posted avocado paratha, avocado milkshake and Guacamole recipes and that too very long back. So this time I made Indian style, vegetarian avocado sandwich for a change. This no cook sandwich is a quick and easy breakfast/dinner recipe. Its a vegan recipe as well. You can use whole wheat bread to make it healthy and low in calorie. I don’t think kids would like this sandwich. If you use milk bread, add lots of grated cheese to the sandwich filling and toast it with butter, kids may like to have itWinking. But this is an ideal recipe for adults who look for weight loss. One sandwich, a banana and a glass of milk was very much filling for meHappy. You too give a try ! Lets see how to make this easy and quick Indian style vegetarian Avocado sandwich recipe with step by step pictures.
Avocado sandwich recipe Indian

Indian Avocado sandwich recipe


Indian Avocado sandwich recipe Indian vegetarian style avocado sandwich recipe - A very healthy breakfast/dinner recipe !

Cuisine:Indian
Category: Sandwich Recipes
Serves: Serves 2
Prep time: 5 Minutes
Cook time: 5 Minutes
Total time: 10 Minutes


INGREDIENTS

  • Ripen avocado - 1 no ( Big)
  • Green chilli - 1 no ( finely chopped)
  • Big onion - 1 no ( finely chopped)
  • Grated carrot - 1/4 cup
  • Lemon juice - Few drops
  • Coriander leaves - 2 tbsp (finely chopped)
  • Chopped capsicum - 2 tbsp
  • Ripe tomato - 1/2 no ( finely chopped)
  • Salt - As needed
  • Pepper powder - 1/2 to 1 tsp
  • Chat masala powder - 1/2 tsp ( add more if needed)
  • Olive oil or cooking oil - 1 tsp
METHOD

  • In a plate, wash and cut the avocado into two pieces vertically.Remove the seed with a knife. Scoop out the pulp and discard the skin.
    Vegetarian avocado sandwich recipe
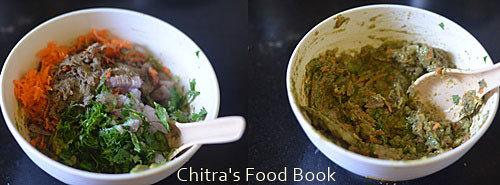
  • In a wide bowl, take the paste, grated carrot, finely chopped green chilli, onion, tomato, coriander leaves, required salt, chat masala and pepper powder. Mix well.
    Vegetarian avocado sandwich recipe
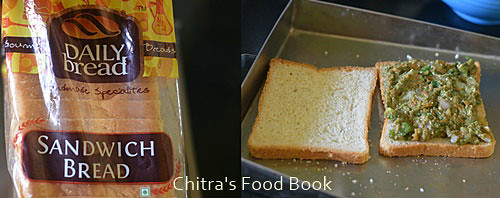
  • Take two bread slices, trim off the sides if needed. Apply butter on one bread if needed.Apply the sandwich filling on the other bread.Cover it and grill or toast the sandwich if needed. I served it raw.
    Indian style avocado sandwich recipe
  • Enjoy!

Try this easy, healthy avocado veg sandwich for your breakfast or dinner. You will like it for sure !
Avocado sandwich recipe Indian

Continue Reading...


May 16, 2017

Ragi Poori Recipe – Finger Millet Poori – Ragi Recipes

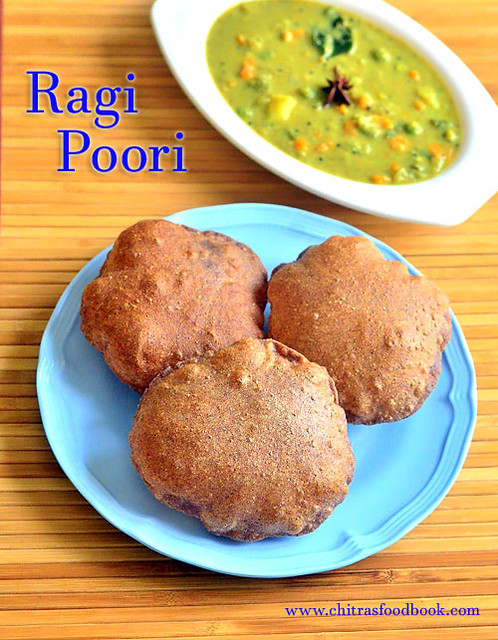
Ragi Poori Recipe
I am happy to share a millet recipe after a long time in my space. As you all know, I have been trying varieties of Poori recipes during weekends and sharing the same in my web page. Soon I will make a collection of them in my page for quick reference. 

Last weekend I tried ragi poori for our Sunday breakfast. Ragi (Finger millet in English, Kezhvaragu in Tamil, Mandua in Hindi, Ragi in Kannada, Koovaragu in Malayalam, Ragulu in Telugu) is a very healthy millet that is rich in calcium & iron.Usually I make recipes with ragi flour at least once in a week to include it in our regular diet.  Most of the time I prepare ragi dosa as its a quick, easy and instant dosa recipe. Sometimes Ragi porridge/Ragi kanji and ragi idli. 

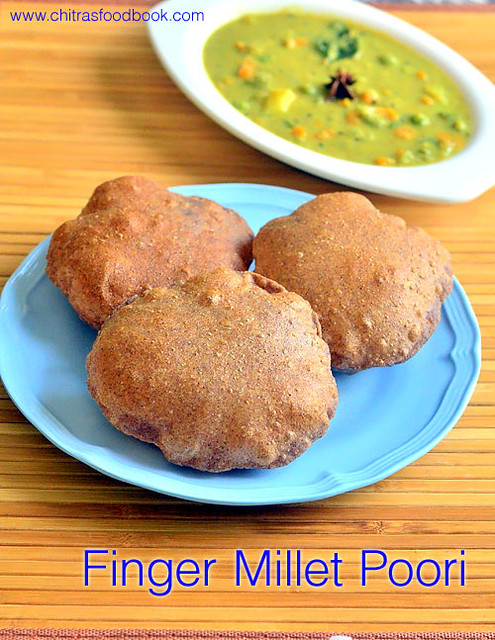
Recently I came across this finger millet puri in some websites. I quickly browsed for the recipe, made some changes and tried it. It came out really well and soft.Though it looks hard & dry in the picture, the actual texture and taste was really nice. We are adding equal quantity of wheat flour to the ragi flour to give a binding to the poori dough. Rava is used to maintain the puffiness of poori for long time. Ghee is to give softness.

Do try this poori  for a change with a healthy addition of Ragi.You will like it I think :). Lets move on to the recipe of how to make Ragi poori with step by step pictures ! Please watch my basic Poori video for reference as the ingredients and the method of making this ragi poori is almost the same.


Finger millet poori

Ragi Poori - Finger Millet Poori Recipe


Ragi Poori - Finger Millet Poori Recipe How to make Ragi Poori/Finger millet poori recipe for breakfast - Basic poori recipe with a healthy addition !
Cuisine: Indian
Category: Breakfast Recipes
Serves: 9
Prep time: 20 Minutes
Cook time: 2 Minutes
Total time: 22 Minutes


INGREDIENTS
1 cup - 250ml
  • Ragi flour / Finger millet flour - 1/2 cup
  • Wheat flour / Atta - 1/2 cup
  • Ghee - 1/2 tsp
  • Rava/Sooji - 1 tsp ( I used upma rava,coarse ones)
  • Salt & water - as needed
  • Cooking oil - to deep fry poori
HOW TO MAKE RAGI POORI - METHOD

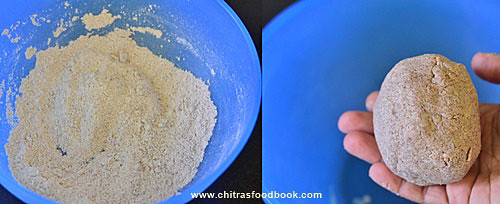
  • In a wide bowl, take the ragi flour, wheat flour, required salt, rava, ghee and mix well. Now add water gradually and make a thick dough.No problem if the dough is slightly sticky and have cracks.
    Ragi Poori recipe
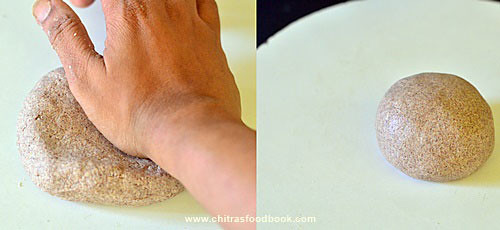
  • Now grease your hands with oil lightly.Knead the dough very well for 5 minutes.Dough will become smooth and non-sticky. Do not rest the dough. Make poori immediately else it may drink oil.
    Ragi Poori recipe
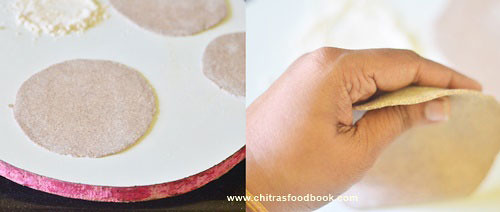
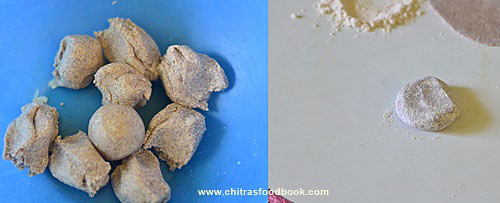
  • Make small balls from the dough and set aside.Keep it covered with a plate. Take one ball, dust in wheat flour and roll into small, thick poori. Poori won’t puff up if rolled thin.
    Ragi Poori recipe
    Ragi Poori recipe
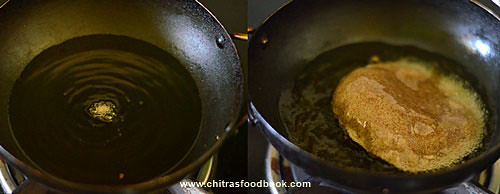
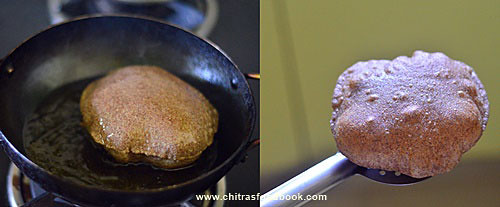
  • Heat oil in a kadai and when it gets heated , drop a pinch of dough.If it rises to the top immediately, oil temperature is right.Oil should not be smoky hot.Drop one poori and when it starts to float on top, press it with a ladle gently. Poori puff up well. Flip the poori and lower the flame to medium.
    Ragi Poori recipe
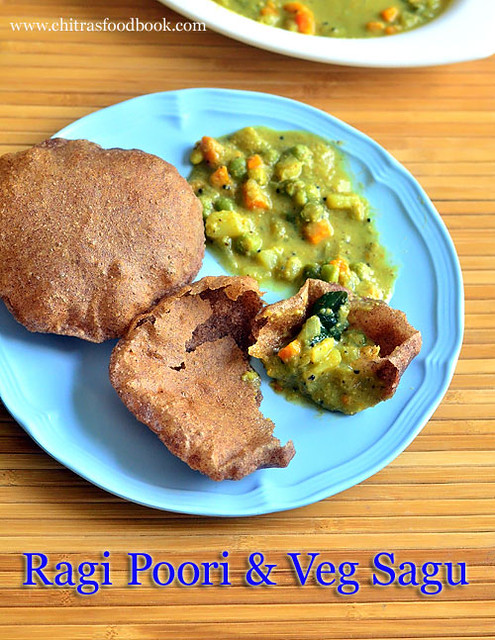
  • Cook the other side and remove in a tissue paper. Again increase the flame and drop another poori. Repeat this and make all the puri. Serve hot with kurma! I made Karnataka style vegetable sagu as side dish.
    Ragi Poori recipe
  • Enjoy !


Note

  • Do not add more ghee. Poori won’t puff up.
  • Poori should be rolled thick to puff up well.
  • Adding Rava is also optional.
  • Do not rest the dough for long time. Poori may absorb more oil.
  • Poori won’t puff up if oil temperature is less. So maintain proper heat.
Ragi Poori with mixed vegetable kurma is an yummy combination. Do try it !
Ragi Poori - Finger millet puri
Continue Reading...