Search Chitra's Food Book

Showing posts with label INSTANT POT RECIPES. Show all posts

February 8, 2021

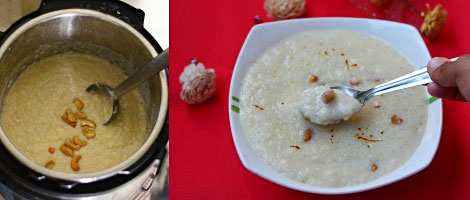
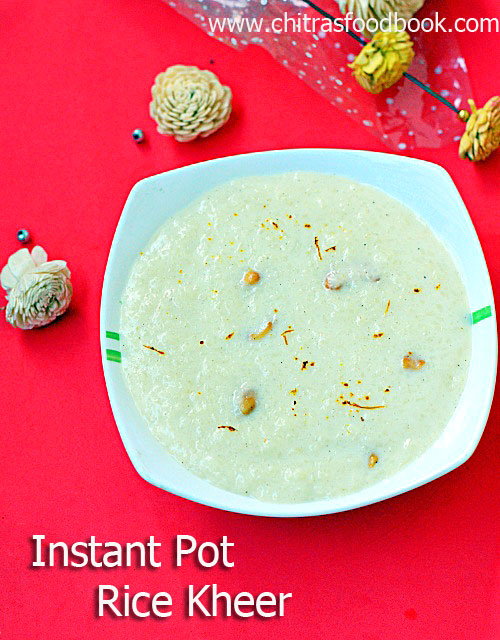
Instant pot rice kheer / Indian rice pudding in Instant pot

Instant pot rice kheer

Rice kheer / rice pudding (arisi payasam in Tamil) was the very first recipe I tried in my instant pot for Thursday Guru pooja prasad. Rice kheer is a creamy Indian dessert recipe that is prepared for festivals and special occasions at home. The ease of this recipe has made me prepare this dish almost every week Thursday or Friday poojai. All we have to do is to just add in roasted basmati rice, water, milk, sugar, cardamom powder and few saffron threads. Cook in pressure cooker mode in instant pot for just 12 minutes and your creamy rice kheer is done ! It tastes more like restaurant style rice kheer.

Before making this rice kheer in instant pot, I referred so many recipes for perfect measurement, procedure and cooking time. Most of the recipes called for cooking rice in milk (in porridge mode or pressure cook mode) and then add sugar or condensed milk, flavoring ingredients like cardamom, saffron, nuts etc.  But I wanted a recipe like one pot one shot just like my pressure cooker semiya payasam.

When I was discussing about this with my friend Shalini, she suggested me to try this method. She has been doing making rice kheer in instant pot for the potluck, get togethers and weekend party following this procedure. Its a hassle free and easiest method to make this yummy Indian dessert even in the last minute. You can serve 10 people easily with just 1 cup of rice.

In Instant pot rice kheer, most of the people complain about curdling of milk or rice sticking to the bottom of instant pot or kheer getting burnt in the bottom. Don’t worry, this method doesn’t disappoint you in any way. Addition of water is the key here. You will get a rich, super creamy, thick and yummy rice kheer all the time.

I have used basmati rice, sugar and milk in this recipe. You can use raw rice, condensed milk or soy milk, Almond milk, coconut milk( for Vegan options) instead. You can also use evaporated milk.

Friends, do try this easy and creamy rice kheer in instant pot. You will love it and make it more often like me. Lets see how to make Indian rice pudding / rice kheer in instant pot with step by step pictures.

rice kheer in instant pot

Instant pot rice kheer / rice pudding in Instant pot


Instant pot rice kheer / rice pudding in Instant pot

Rice kheer / Rice pudding - Rich and creamy Indian dessert recipe using Instant pot


Cuisine: Indian
Category: Sweet
Serves: 6
Prep time: 5 Minutes
Cook time: 25 Minutes
Total time: 30 Minutes


INGREDIENTS
1 cup =250ml
  • Basmati rice - 1/2 cup
  • Sugar - 3/4 cup
  • Water - 1 cup
  • Milk - 4 to 5 cups
  • Cardamom powder - 1/2 tsp
  • Saffron – 3 pinches
  • Cashew nuts - 10
  • Ghee - 2 tbsp
HOW TO MAKE RICE KHEER IN INSTANT POT
  1. Grind basmati rice coarsely. Wash and set aside.
  2. Switch on Instant pot. Press SAUTE mode. Add 1 tbsp ghee.
  3. Roast cashews till golden and remove in a plate.
  4. Add the rice and roast for a minute. Firstly add water, mix well.
  5. Then add milk, sugar, cardamom powder, saffron threads. Mix well.
  6. Press CANCEL. Press PRESSURE COOK and set the time to 12 minutes in normal pressure.
  7. Make sure pressure valve is in SEALING position. Let the pressure release NATURALLY (NPR). Open the cooker and mash the rice well.
  8. Add more milk and sugar if needed.
  9. Add roasted cashews. Mix well and serve hot. Enjoy !
METHOD - STEP BY STEP PICTURES
  • Take basmati rice and grind coarsely using pulse button in mixie. Wash it well and set aside.
  • Wash the instant pot vessel and the inner ring portion of the lid thoroughly. Dry it completely. This helps to prevent curdling of kheer.
  • Instant pot rice kheer
  • Switch on the instant pot and press SAUTE button. Heat 1 tbsp ghee in the instant pot base vessel. Add cashew nuts and roast it till golden in color. Remove in a plate. 
  • Instant pot rice kheer
  • Add washed rice and roast for a minute. Add water (DO NOT SKIP WATER) and mix well. Add boiled milk (at roon temperature), sugar, cardamom powder and saffron threads. Mix well to scrape the rice sticking to the bottom of the vessel.
  • Instant pot rice kheerInstant pot rice kheer
  • Now press CANCEL button and press PRESSURE COOK button. Set the timer to 12 minutes in NORMAL pressure. Close the instant pot lid and keep the pressure valve in SEALING position.
  • Instant pot rice kheer
  • After 12 minutes, instant pot goes to warm mode and pressure releases. Let the pressure release naturally (NPR). Open the lid after the pressure button drops down. Mix well. Do not release the pressure forcefully. Milk will be splashed everywhere and make a mess. I removed it after 40 minutes. Kheer would be well cooked and looks thick. Mix well and check for taste and consistency. Add more milk and sugar if needed. I used 1/2 cup more milk. So totally I used 4.5 cups milk. Lastly add roasted cashewnuts. Mix well and serve hot.
  • Instant pot rice kheerInstant pot rice kheer
    Enjoy !

Note

  • Wash the instant pot vessel, lid and dry it properly before cooking . It helps to avoid curdling of kheer.
  • Do not skip water. It helps to avoid the kheer burning in the bottom.
  • Make sure your scrape the bottom of vessel to avoid the rice sticking to the vessel and getting burnt.
  • You can also use PORRIDGE Mode in instant pot but it takes longer time to cook.
  • You can make the kheer thick or thin as per your wish.
  • For variations, you can use condensed milk instead of sugar.
  • Do not use JAGGERY. Kheer will curdle. If you want to use jaggery, make a thin syrup. Add it only after cooking the rice in milk and water.
  • You can also make vermicelli kheer in the same way. You can set the cooking time even lesser as it cooks quickly.
  • Do not try to quick release because hot milk spills from the vent.


Try this easy, yummy rice kheer in instant pot. You will love it !
 Instant pot rice kheer

Continue Reading...


December 29, 2020

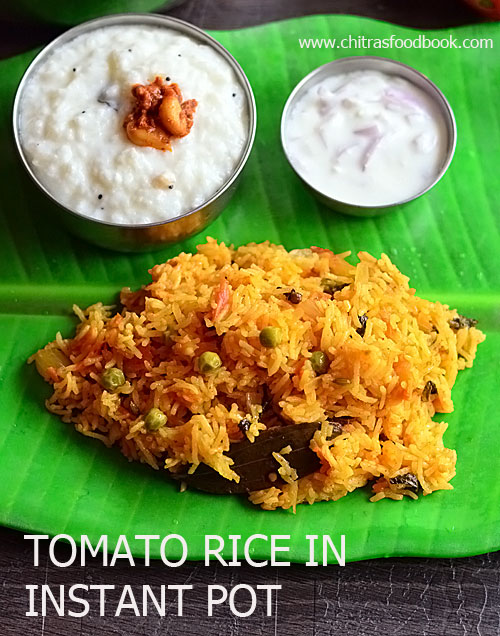
South Indian Tomato rice in Instant pot–How to make tomato rice in Instant pot

iNSTANT POT TOMATO RICE

Here is a South Indian style (Tamil nadu style thakkali sadam) tomato rice as my first recipe post using Instant pot. I bought an instant pot for my own use few months back and started cooking some easy, one pot meals. I tried rice kheer, ven pongal, vegetable biryani, North Indian lunch menu and tomato rice so far. Everything came out so well and satisfactory in my first attempt. I just love this gadget.

In my opinion, I would say an instant pot is more like a pressure cooker or electric rice cooker with advanced features like delay start, slow cooking etc. It will be so helpful if you are a working women, student or a bachelor for hassle free cooking.

Even though I am a housewife, I like to cook everything quickly , spend less time in kitchen without any compromise in taste and health. So most of the time, I do use my pressure cooker for my cooking. So this instant pot, better than a pressure cooker in some aspects has won my heart. 

You can just saute all the ingredients directly, add water and pressure cook with delay start mode on. By the time you come back from office, your food will be ready, hot and fresh. Soon I will try to make a series of some easy and quick instant pot recipes. I hope you will find it useful.

Now lets see how to make our South Indian style tomato rice / thakkali sadam in instant pot with step by step pictures.

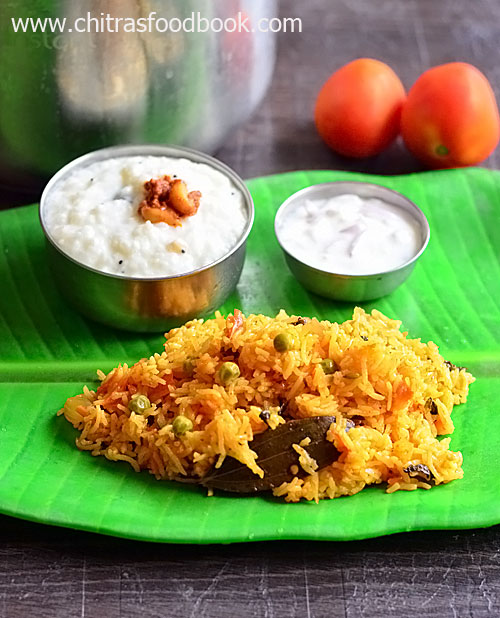
iNSTANT POT TOMATO RICE

Instant pot tomato rice


instant pot tomato rice

How to make tomato rice in instant pot


Cuisine: Indian
Category: Main course
Serves: 3
Prep time: 10 Minutes
Cook time: 20 Minutes
Total time: 30 Minutes


INGREDIENTS

  • Cooking oil – 3 tbsp
  • Cinnamon – 1
  • Cloves – 3
  • Cardamom –1
  • Bay leaf – 1
  • Black stone flower / kalpasi – 1
  • Fennel seeds – 1/2 tsp
  • Ginger garlic paste – 1 tbsp
  • Ripe tomato – 4
  • Big onion – 2
  • Mint leaves – handful
  • Green peas – handful
  • Red chilli powder – 1 to 1.5 tsp
  • Turmeric powder – 1/4 tsp
  • Garam masala powder – 1/4 tsp
  • Water – 1.5 cups
  • Basmati rice – 1 cup (soaked in water for 15 minutes)
HOW TO MAKE TOMATO RICE IN INSTANT POT
  1. Wash and chop onion, tomato finely. Wash and soak basmati rice for 15 minutes.
  2. Switch on Instant pot and press SAUTE button. Add oil and heat it.
  3. Saute whole garam masala items and fennel seeds. Add onion and saute till transparent. 
  4. Add ginger garlic paste and mix till raw smell goes off. Add mint leaves and mix well.
  5. Add tomato pieces, required salt and saute till mushy. 
  6. Add red chilli powder, turmeric powder, garam masala powder and mix well. 
  7. Add water and washed rice. Mix well and check for taste.
  8. Close the lid. Keep the pressure valve button in sealing position.
  9. Press CANCEL button and press PRESSURE COOK button. Set the time for 8 minutes in normal pressure. After cooking, instant pot will go to warm mode and releases the steam naturally.
  10. Wait till the pressure valve button moves to vent position naturally. It takes 11 minutes.
  11. Now press OFF button and open the lid. Fluff the rice gently and serve hot with onion raita.


METHOD - STEP BY STEP PICTURES
  • Wash and soak the basmati rice for 15 minutes. In the mean time, wash and chop onion, tomato finely.
  • Switch on the instant pot and press saute button. Add oil and once its heated, add the whole garam masala one by one. Add fennel seeds and saute for a minute.How to make tomato rice in instant pot
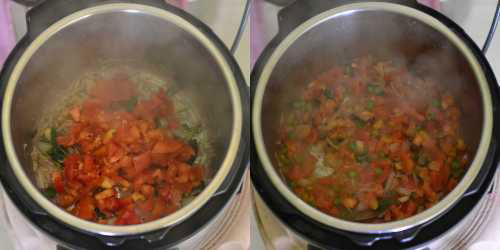
  • Add onion, ginger garlic paste and saute till onion turns transparent. Add mint leaves and mix well. Now add tomato pieces and required salt.How to make tomato rice in instant pot
  • Saute till tomato turns mushy. Add red chilli powder, turmeric powder and garam masala powder. Saute for a minute.How to make tomato rice in instant pot 
  • Lastly add the soaked rice. Mix well and check for taste. Add more salt or chilli powder if required. Add green peas. Mix well and close the instant pot.How to make tomato rice in instant pot
  • Press cancel button to suspend the saute mode. Now press pressure cook button and set the time to 8 minutes in normal mode. Make sure pressure valve button is in sealing position.How to make tomato rice in instant pot 
  • Once its cooked, instant pot will go to warm mode by itself and pressure starts to release. Wait till the pressure valve handle moves to vent position naturally. It took 11 minutes for me. Press Off button.How to make tomato rice in instant pot
  • Now open the instant pot and fluff the rice gently with a fork like ladle. Serve hot with onion raita !


  • Enjoy !

Note

  • Make sure pressure valve/ steam release button is in sealing position before turning on pressure cook mode.
  • For variations, you can skip garam masala powder.


Easy, yummy tomato rice is ready in instant pot under 20 minutes. Try and enjoy !

How to make tomato rice in instant pot


Continue Reading...


March 23, 2020

Instant Pot Bascis - How To Use Instant Pot Buttons, Cooking Times Chart/list


In this post, I have discussed how to use Instant pot buttons / Preset Programs also known as IP cooking modes and Instant pot cooking time chart/ table or cheat sheet for beginners. Hope the chart/list would be useful for beginners to get some idea.  Please adjust the quantity of water and cooking time for Indian dishes based on your Instant pot model, quantity and usage. Do check out my first post on Instant pot.  

In my Instant pot, there are 10 preset modes /smart programmable options. I have shared how to use each mode for people who are getting started with Instant pot. Please check this link to view my instant pot model. 

  1. Saute

  2. Pressure cook ( In some IPs, its mentioned as Manual button)

  3. Slow cook

  4. Steam

  5. Yogurt

  6. Rice

  7. Porridge

  8. Soup / broth

  9. Bean chili

  10. Multigrain.

Smart Programs / Instant Pot Buttons


  1. Sauté Button
  • Don’t use the lid on sauté mode.
  • Press the “Sauté” button.
  • You can choose to sauté in Normal, More or Less temperatures.
  • Press sauté (also works as an adjust button) several times to toggle between the   temperature levels.
  • Use Normal sauté for Pan searing.
  • Use Less sauté for Simmering & thickening sauce.
  • Use More sauté for stir-frying & browning.
  • Press +/- keys to adjust the sauté time.
  • You can sauté for a maximum of 30 mins.
  • When you press the saute, the display changes to “ON” after ten seconds and starts heating up.
  • Then it shows “Hot”, and you can start adding the ingredients.


  1. Pressure Cook Button (Manual)
  • Use this smart program for Manual Programming.
  • Lock the lid in pressure cook mode, or it will prompt you to lock the Lid.
  • Turn the steam release handle to “Sealing” position.
  • Now press the “Pressure Cook” button.
  • You can pressure cook in Normal, More or Less temperature settings.
  • Use the “Pressure Level” button to cook in “High” or “Low” pressure your recipe calls for.
  • Use +/- keys and set the pressure cook time.
  • Instant Pot will show “ON” to indicate the cooker is heating up and developing pressure.
  • Once pressurized, the timer will start a count-down.
  • When cooking is done, the instant pot will beep and goes to “Keep Warm” mode.
  • Do a quick release or natural release based on the food type.  
  • Natural Release: Leave the steam release handle in “Sealing” position. The cooker will depressurize naturally over time and the float valve pops down. May take 10-40 mins based on the quantity of food.
  • Quick Release : Turn the steam release handle from “Sealing” to “Venting” position. For precaution don’t stay close while doing a quick release.
  1. Slow cook Button
  • Use this smart program for All-day-cooking.
  • Lock the Lid and remember to keep the steam release handle in “Venting” position since it is going to cook all day long.
  • Press the “Slow Cook” button.
  • You cannot use +/- keys in this mode.
  • Press the slow cook button several times to choose Normal (Medium cooking time 6 hrs), More(Fastest cooking time 4 hrs) or Less(More cooking time 8 hrs).
  • When cooking is complete, the instant pot will beep and goes to “Keep Warm” mode.
  1. Steam Button
  • Steaming creates more pressure than pressure cooking.
  • Always use a trivet or steamer basket to elevate the food and fill the bottom of the pot with water. 
  • Lock the lid and turn the steam release handle to “Sealing” position.
  • Press the “Steam” button.
  • Choose between Normal, More or Less temperature settings based on the food type.
  • Always do a Quick release to prevent overcooking and preserve the nutrients.
  1. Yogurt Button
  • Use this smart program to make fresh home-made yogurt.
  • Pour milk into the Instant Pot.
  • Press the “Yogurt” button several times until it shows “boil”.
  • Instant Pot beeps when boiling is done.
  • Let the milk cool down for 15-20 mins.
  • Add some yogurt (with live cultures) into the cooled down milk.
  • Whisk well.
  • Lock the Lid, no need to keep the steam release handle.
  • Press the “yogurt” button until it shows 8 hrs.
  1. Rice Button
  • It is an Automated cooking program to cook rice.
  • Lock the lid and turn the steam release handle to “Sealing” position.
  • Press the “Rice” button.
  • You can choose between Normal(12 mins), More(15 mins) or Less(8 mins) setting based on the type of rice.
  • Instant pot displays “Auto” while heating up and then the timer starts a count-down. 
  • Wait for Natural Release to get fluffy rice, or you can also opt  to do Quick Release after 10 mins of Natural Release.
  1. Porridge Button
  • Use this smart program to prepare oatmeal, porridge, kheer etc.
  • Lock the lid and turn the steam release handle to “Sealing” position.
  • Press the “Porridge” button.
  • You can cook in Normal, More or Less heat based on the grain you use for porridge.
  • Always do Natural Release when cooking food that expands.
  1.  Soup/Broth Button
  • Use this smart program to make vegetable soup and broth.
  • Always do Natural Release.
  1. Bean/Chilli Button
  • Use this smart program to cook beans or legumes.
  • Choose temperature setting based on the type of bean and texture (soaked/dry).
  • Ensure the food is completely immersed in water.
  • Always do Natural Release.
  1. Multigrain Button
  • Use this smart program to cook tough grains or mixture of grains and beans.
  • Choose temperature setting based on the type and texture.
  • Always do Natural Release.

Other Controls / Buttons

  1. Cancel:

  • Press the Cancel button any time to stop a smart program.
  1. Delay Start:

  • Use this to postpone cooking up to 24 hours.
  • Select any smart program (except sauté) and then press the “Delay Start” button.
  • Use +/- button to adjust the hours & minutes before cooking will begin.
  1. Keep Warm:

  • It goes on by default for all smart programs except sauté, sous vide and yogurt.
  1. Sound On/Off:

  • Press and hold - key for 5 secs or until the display shows “S off”.
  • Press and hold + key for 5 secs or until the display shows “S on”
  1. Temperature unit F or C:

  • Press and hold + and - keys together for 5 secs to toggle between F and C.
Instant Pot Cooking Time Chart

Here is the basic times chart for Instant Pot Cooking, however it may vary based on your instant pot model. Please do some experiment with your instant pot to come up with the exact cooking time based on size, texture & quantity of food you prefer to cook.


Rice / Grains (cook on HIGH pressure)
Rice/Grains
Rice : Water Ratio
Cooking Time (mins)
Release Mode
Rice - Sona Masoori
1:2.5 (adjust)
4 - 5 mins
NR
Rice - Basmati
1:1.25 (adjust)
4 - 5 mins
NR
Brown Rice
1:1.5 (adjust)
20 - 22 mins
NR
Rice Congee
1:4
16 - 20 mins
NR
Millets
1:2
10 - 12 mins
NR
oats
1:2
3 - 4 mins
QR


Vegetables (Cook on HIGH pressure, +2 mins if using steamer basket or Pot-in-Pot)
Vegetables
size
Cooking Time (mins)
Release Mode
Cabbage
shredded
3 mins
QR
Carrot
whole / sliced
3 - 4 mins
QR
Green Beans
whole / sliced
3 - 4 mins
QR
Beets
sliced
4 mins
QR
Corn
whole
5 mins
QR
Corn
kernels
2 mins
QR
Cauliflower
florets
2 - 3 mins
QR
Broccoli
florets
1 - 2 mins
QR
Potato
whole
8 mins
QR
Potato
cubed
4 - 5 mins
QR
Sweet Potato
cubed
2 - 4 mins
QR
Eggplant
cubed
3 - 4 mins
QR
Okra
Thick cut
3 mins
QR
Raw Banana
cubed
3 - 4 mins
QR
Pumpkin
cubed
2 - 3 mins
QR
Chayote
cubed
3 - 4 mins
QR
Mixed Vegetables
any
3 - 4 mins
QR


Lentils & Beans (immersed in water, cook on HIGH pressure)
Lentils & Beans
Dry / Soaked
Cooking Time (mins)
Release Mode
Toor Dal/Split pigeon pea
Dry
8-10 mins
NR
Masoor Dal
Dry
8 - 10 mins
NR
Moong Dal / Green gram
Dry
8 mins
NR
Chana Dal
Dry
8 mins
NR
Black Gram / Urad Dal
Soaked
20 mins
NR
Red Kidney Beans
Soaked
25 - 30 mins
NR
Black Eyed Peas
Soaked
15 - 20 mins
NR
Black Beans
Soaked
25 mins
NR
Chickpeas
Soaked
25 - 30 mins
NR
Lima Beans
Soaked
15 - 20 mins
NR
Peas
Soaked
15 mins
NR


Continue Reading...


March 14, 2020

What Is An Instant Pot – Uses, Things To Know, Accessories

Hi Friends,

I am very happy to share this article about the most trending kitchen gadget across the globe, Instant Pot. When I was planning to buy from Amazon, my younger sister Radha who is in US volunteered to help me out by adapting my stove top recipes to instant pot and to share the Indian recipes with me with step by step pictures and video in her YouTube channel, Cyber kitchen

She has been using Instant Pot for more than a year and she has gone crazy with this gadget. She has also posted few basic instant pot Indian recipes video in her channel. So with the help of my sister, I am planning to share some instant pot recipes in my blog. Stay tuned ! To begin with, here is a basic post about what is Instant pot, Is it useful and beneficial for Indian cooking, difference between pressure cooker and Instant Pot, accessories of Instant Pot, where to buy etc. I hope this post will be helpful for people who are looking to buy one or how to get started with it.

Please check how to use Instant pot buttons, cooking time chart. 


INSTANT POT BASICS

What is an Instant Pot

Instant Pot is an all-in-one multi-programmable cooking device that works as a pressure cooker, sauté pan, slow cooker, steamer, yogurt maker, warming pot etc. With instant pot you can make all your favorite meals with minimum effort and less time. People love it because it is convenient, a time-saving device that lets you cook quickly without any supervision. So it is truly a useful addition to our kitchen.

Benefits of Instant Pot

  1. An Instant Pot can replace many kitchen appliances so half of your kitchen space is saved.
  2. Compared to cooking with other appliances, instant pot saves energy up to 70%.
  3. Unlike a stove-top pressure cooker, you don’t have to keep checking the food. Just set the time and forget it.
  4. Safe to use. Instant Pot is designed to operate within safety limits. For example it doesn’t allow pressure cooking when the Lid is not firmly clamped.
  5. Interior comes in stainless steel which is healthier than the non-stick pans that contain harmful Teflon coating.
  6. It is easy to clean. 

Instant Pot : How to get started

  1. Perform a water test in your new instant pot before making your first meal.
  2. Wash the inner pot with hot water and soap before first use (sterilize).
  3. Wipe clean the bottom and sides of the inner pot with a damp cloth and ensure the heating element is dry and free of food debris.
  4. Always check the sealing ring is properly installed before closing the Lid.
  5. Don’t overfill food in the inner pot, it may cause clogging the venting knob. Make sure to fill food within the Max level.
  6. Don’t touch the lid when cooking.
  7. Replace the sealing ring every year as it stretches over time.

Things to know about Instant Pot

  1. You need to lock the lid for all instant pot functions except sauté.
  2. The cooking time you set is not exactly the time Instant Pot takes to cook your food. It takes some extra time to preheat and develop pressure (4 - 5 mins) before the timer begins.
  3. Instant Pot needs at least 1 cup of liquid to create pressure and cook.
  4. Instant pot will show a "Burn" message when there's no enough liquid in the food. Press cancel and stop cooking.
  5. Steaming is not the same as pressure cooking, steaming creates more pressure inside the pot, so make sure to fill the bottom of the pot with water and the food is elevated in a trivet or steamer basket.
  6. Instant pot cooking time and depressurization time (Natural Release) varies based on how much food you put into it.
  7. You can use the handles on either side of instant pot as a lid holder as well.
  8. You can use Instant Pot for reheating your food by keeping food in the stackable pans with water filled outside.
  9. Instant Pot is not suitable for deep frying. In some models baking options are available. Grilling can be done in airfryer mode.

Instant Pot Accessories

  1. Steamer Basket - used to steam veggies or eggs without losing its nutrients and texture.
  2. Trivet with handle - used to steam potatoes, corn, cauliflower, broccoli etc, also serves as a pan lifter when baking.
  3. 3 tier stackable pans -  used for pot-in-pot cooking, variety of foods can be cooked simultaneously, can also be used separately as a dessert pan for cheesecakes or baking pan.
  4. Silicone oven mitts - used to hold/lift the hot inner pot when cooking is done.
  5. Idli plates - used to steam idli, puttu, momos, rice dumplings etc.
  6. Glass Lid - can be used if needed in Sauté and keep warm modes.
Indian cooking accessories like stackable pan, idli plate have to be bought on our own. My sister bought from Patidar Super market. You can also find in Amazon or buy from India based on your need. 


Source : howstuffworks.com

Instant Pot vs Pressure Cooker

We all grew up using stovetop pressure cookers and have been using stovetop cooking methods for many years to make elaborate meals. But nowadays due to lack of time people seek out something that cooks quick & easy and saves time. So based on modern needs kitchen accessories are evolving from traditional pressure cooker to electric cooker and then came the Instant Pot - a multi-functional pressure cooker.

Traditional stovetop cooking is definitely the best choice for certain types of food, but when it comes to safety features and ease of use, Instant pot is the best. The main difference between a standard pressure cooker and the Instant Pot comes down to usability, technology and control. While our good old pressure cookers were often subject to explosion, causing mess and  injuries, the Instant Pot is designed with safety mechanisms that make it much safer to use. Instant Pot comes with many pre-programmed smart features and is designed to make easy & mess-free cooking without compromising the taste and hygiene.

Cooking with a stovetop pressure cooker needs inspection like watching the whistle sound and switching off, whereas in Instant Pot we just click a button and don’t have to watch it at all. So the level of control you get from instant pot is a major advantage. With the newer editions of instant pot, you have Alexa and WIFI connectivity too.

Instant pot can be used anywhere with a power outlet so you can take it with you on a vacation and cook a tasty meal instead of opting for unhealthy junk food from shops.

I cook almost all Indian recipes everyday with my Instant Pot for more than a year now. Especially when making rice, one-pot meals, curries and desserts, it comes out perfect every time.

Finally pressure cooked or instant pot always depends on one’s personal preference. Most of the features of instant pot are user-friendly and novel that cannot be matched by other kitchen devices. 
All you need to do is spend some time with your instant pot to master it in order to make the most out of it. So Instant Pot makes life easier and is definitely worth buying.


Where To Buy

There are various models in instant pot that comes with different features. So please do some research  and buy the best one that suits your needs.  My sister bought from Costco that came with all accessories. I have shared the link below. 
  1. Costco - My sister bought from here. 
  2. Walmart
  3. Amazon.com
  4. Amazon.in
  5. Amazon.co.uk
Indian cooking accessories like idli steaming plate, stackable pans are bought from Patidar super market. You can also get in Amazon.


Next I will share how to use instant pot in different modes in a separate post !

Ok friends, catch you all in the next post ! Take care :))
Continue Reading...