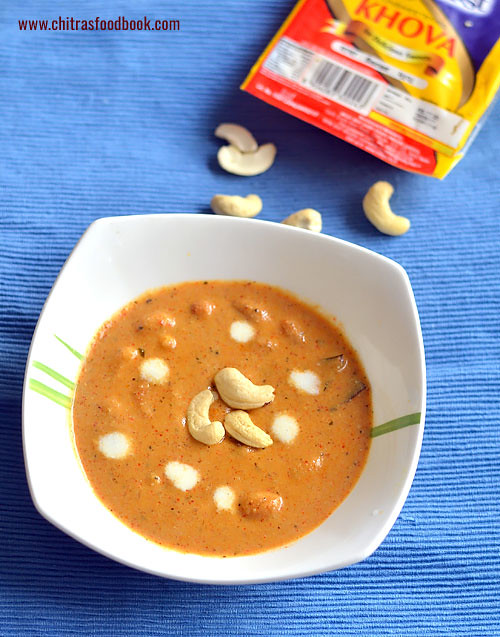
I have never heard about khoya kaju gravy until my reader friend Dheepika requested me to try this recipe after having in an Indian restaurant. When she told me about this recipe, I browsed and shared the recipe links from 2 different websites to her. She went through them and told me about the color & texture of the gravy along with a picture of one she had in the restaurant.When I browsed for the recipe, I found khoya kaju gravy tastes sweets with mild spices basically.But Dheepika told the restaurant people made it red in color by adding red chilli powder as they asked for a spicy version. Based on her inputs, I followed the recipe of white based khoya kaju curry from spice up the curryand I used red chilli powder in place of green chillies.I tried it yesterday for our dinner.After tasting this, Sendhil told Khoya kaju curry would be white in color in most of the hotels. Some people may add food color to present it red in color, he added. Whatever it is, gravy came out delicious and very flavorful.We loved it with roti. Thanks to you Dheepika for making me try this restaurant style gravy. Soon I will try to share the recipe of khoya kaju white gravy. Though this gravy is very high in calories with full of ghee, cashews and khoya, everyone must give a try at home as it tastes so good & delicious . We can indulge in these type of gravies at least once in a while for celebrations and occasions.So friends, do try it and share your feedback with me .Lets see how to make this restaurant style khoya kaju gravy with step by step pictures and video !
Khoya Kaju Gravy Recipe
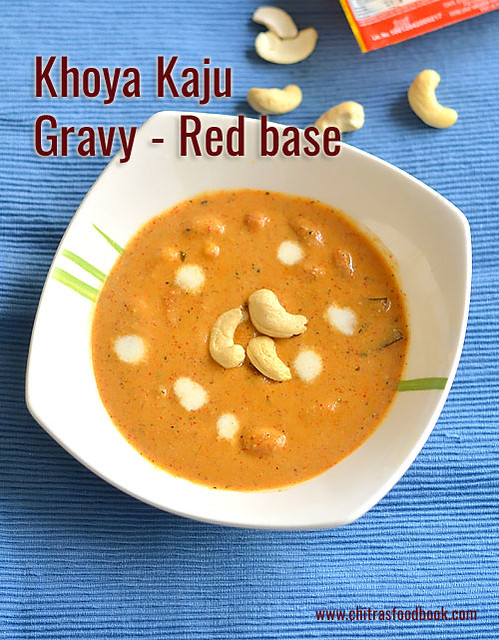
Khoya kaju gravy recipe - Side dish for roti, naan, kulcha
In a wide bowl, take the chopped onion, cashews, pepper corns, cinnamon, cloves along with water. Boil and cook for 5 minutes till onion turns soft. Grind everything to a smooth paste and keep aside.
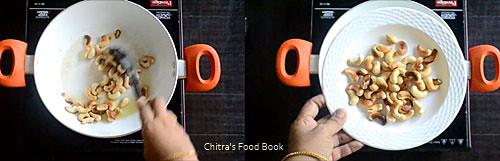
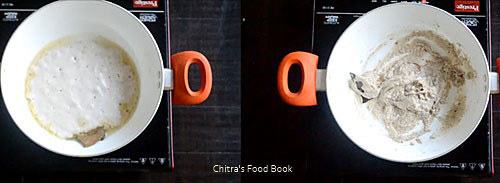
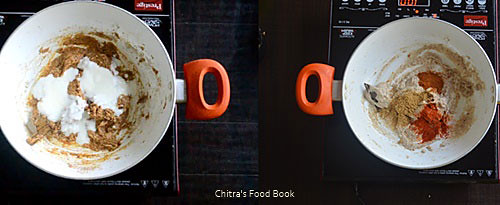
Heat oil + ghee in a good non-stick pan and roast the cashews till golden.Remove in a plate. In the remaining oil+ghee, saute bay leaf and add the ground onion paste. This paste gets stuck to the bottom easily as it has cashews.So keep the flame very low and mix it till thick. Scrape the bottom and sides if needed and mix well.
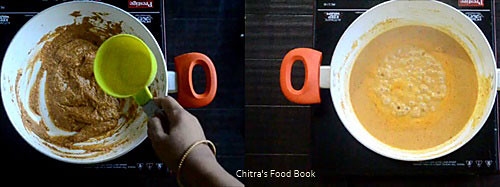
Add red chilli powder, coriander powder, salt, sugar, cardamom powder and garam masala powder. Mix for a minute in low flame. Then add curd and mix well. Add 1 cup of water and boil the gravy till oil starts to float on top.
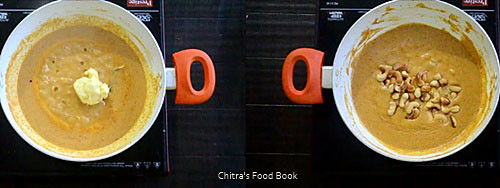
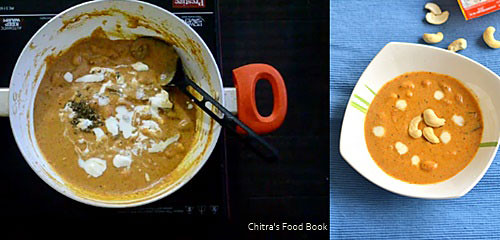
Lastly add the crumbled khoya and mix well. Gravy look orange in color. Add the roasted cashews,mix well and switch off the flame. Then add crushed kasoori methi, fresh cream and mix well. Serve with roti, naan or kulcha !
Enjoy !
Note
Reduce the quantity of red chilli powder if you want mildly spiced gravy.
Skip red chilli powder, dhania powder, garam masala powder and add green chillies while boiling onions to make a white based gravy.
You can add more khoya if you want more creamy gravy.
Adding kasoori methi is optional. But it adds flavor.
Try this yummy, creamy, rich & delicious Khoya kaju gravy at home !
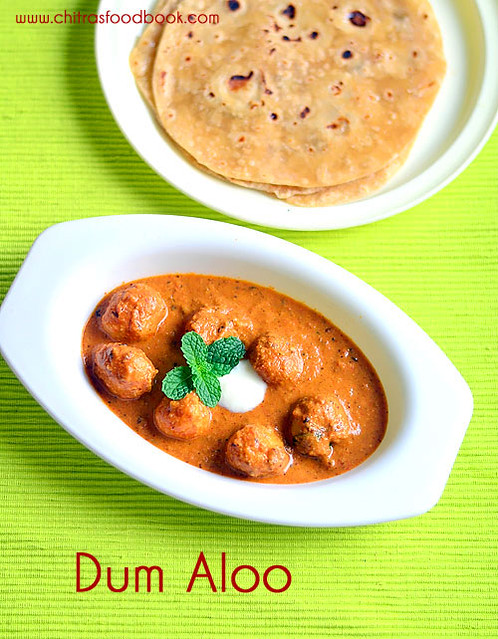
Dum Aloo or Aloo dum is a potato based gravy which is very popular in Kashmir. I browed few recipes and found deep fried small potato /Baby potato is used in this dish. Authentic Kashmiri dum aloo is prepared without onion and tomato. Curd & Kashmiri red chilli are the most important ingredients for the base of gravy apart from spice powders. So the recipe I have shared here is not the authentic one.
Recently I tasted Dum aloo for the first time in my friend Megha’s house birthday party. I loved its taste and got the recipe from her. Based on her recipe, I browsed and found this Punjabi style dum aloo in Spice up the curry. After going through rave reviews from the readers comments, I tried this recipe confidently. Yes, it came out finger licking good with a nice flavor. It tastes similar to restaurant style gravies.
In this method, baby potato is sautéed in less oil instead of deep frying to reduce the calories. Still it tasted great. Sendhil liked it very much. Raksha has gone to Salem ( to my in-laws house) for vacation. I must prepare this for her as soon as she comes to Bangalore. I am sure she will love it. Try this for your kids birthday parties. They will like it for sure. Lets see how to make Dum aloo at home with step by step pictures and a video !
Dum aloo recipe - Restaurant style Dum aloo recipe
How to make restaurant style Punjabi dum aloo recipe at home
Red chilli powder - 1 tsp ( Kashmiri chilli powder)
Dhania powder - 2 tsp
Garam masala powder - 1 tsp
Crushed Kasoori methi - 1.5 tsp
Fresh curd – 1to 2 tbsp
Fresh cream - 1 tbsp ( I used Amul fresh cream)
To grind
Cooking oil - 2 tbsp
Cinnamon - 1 inch piece
Cloves - 2 nos
Cardamom - 2 nos ( small)
Fennel seeds - 1/4 tsp (optional)
Green chilli - 1 no
Big onion - 1 no
Tomato - 2 nos
Cashew nuts or almonds – 6 to 10 nos
Ginger&Garlic paste – 1/2 to 1 tsp
Coriander leaves – to garnish ( I din’t use it)
HOW TO MAKE DUM ALOO
Wash and pressure cook baby potato in a cooker adding 2 cups of water. Cook for 2-3 whistles in low flame. It takes 15 minutes. In the mean time, lets prepare the masala for gravy.
Heat 1 tbsp cooking oil in a kadai. Saute cinnamon, cloves, cardamom, fennel seeds and green chilli for a minute. Add chopped onions and saute till transparent. Add ginger, garlic paste and saute for a minute.
Add chopped tomato, salt and saute till tomato turns pulpy. Add cashews, mix once and switch off the flame. Let the mixture cool down. Grind to a smooth paste adding enough water. Set aside.
Take the pressure cooked potato. Drain the excess water and peel the potato skin. Keep in a plate. Prick all over the potato with a fork. Heat 2 tbsp cooking oil in a kadai. Shallow fry the potato till it turns golden in color and looks roasted. Remove in a plate.
In the remaining oil, splutter cumin seeds. Add ground tomato paste and saute for a minute. Add red chilli powder, dhania powder, sugar, garam masala powder and curd. Saute for a minute. Gravy will become thick and leaves the sides of pan. Add 1/2 to 1 cup water, mix well and check for taste. Add salt if needed.
Cover cook and boil till oil floats on top. Open the lid, mix the gravy and add 1/2 cup more water if needed. Now add the baby potato and mix well. Add fresh cream, crushed kasoori methi and mix well. Boil for a minute. Add water to adjust consistency. Garnish with coriander leaves. This gravy thickens when it cools down. So add more water whenever needed. Boil and serve hot with roti !
Enjoy !
Note
Add more red chilli powder if you want spicy gravy.
Originally baby potato should be deep fried in oil. But I shallow fried it to reduce the calorie.
You can use butter instead of cooking oil.
Adding fresh cream is optional. Skip if you don’t have it. But adding cream makes the gravy rich.
This gravy tastes the best if you give a standing time of 1 to 2 hours after preparation. So if you are making for birthday parties, make it in advance and reheat it adding some water.
Try this yummy, creamy dum aloo recipe at home & enjoy with chapathi/Naan/Kulcha !
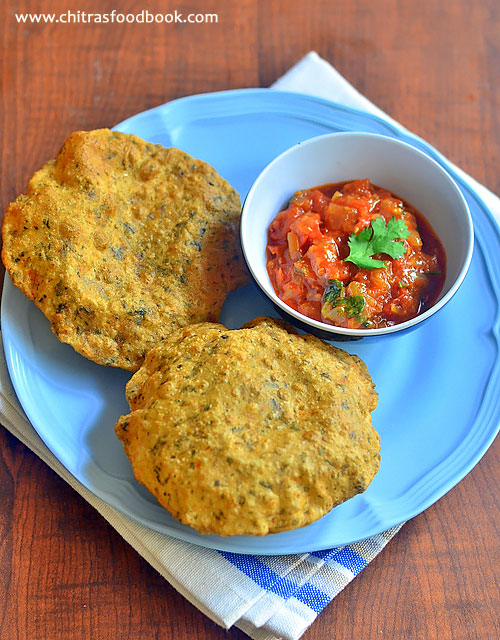
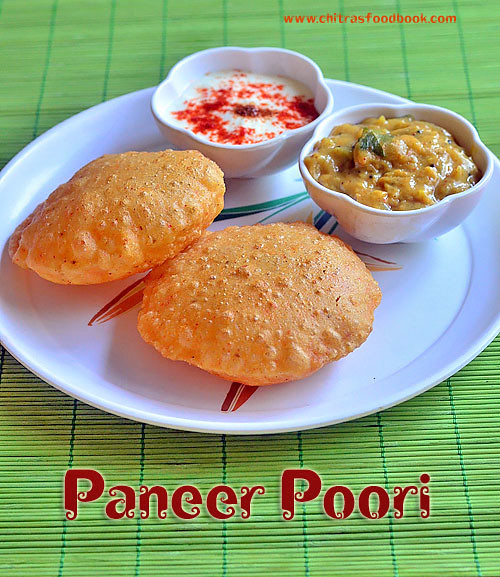
During weekends, I am making varieties of poori for our breakfast and I have been sharing the same in my blog. Last Sunday I prepared this paneer poori (Indian cottage cheese in English) for our breakfast with the leftover paneer cubes. Its a stuffed paneer puri recipe. So you just have to add grated paneer to the wheat flour and make dough with it. Its so simple.
When I was searching for different types of puri recipes, I saw this one in Ramki’s one page cookbook. I liked the idea of paneer stuffed poori and tried this recipe in my own way. It came out really well, puffy and soft. Even though it tastes like masala poori, Paneer gives an additional softness to it and make it healthy too. Semolina/ Rava helps to keep the poori puffy and hold its shape for long time. So kids would love it for sure.
Do try this different type of poori during this vacation for your kids and family. Enjoy the breakfast ! I made masala raita and onion masala as side dish for this poori. It was a good combination. You can make tomato bhaji, potato masala or even chana masala as a side dish. Ok, Lets see how to make yummy, soft paneer poori with step by step photos and a video !
Paneer Poori Recipe - Poori varieties
How to make masala poori with paneer - Paneer puri recipe
Grate the paneer using a grater and measure 3/4 cup from it. Keep it aside.
In a wide bowl or plate, take the wheat flour, besan flour, rava, salt, red chilli powder, garam masala powder, ajwain/Omam OR cumin seeds and grated paneer. Mix everything well without adding water. Mixture looks crumbly.
Now add water gradually and make a smooth dough. Dough should not be too hard or too sticky. Knead it for 5 minutes. Make poori immediately. Keep the remaining dough covered while rolling the poori. Take a portion of dough and make uniform sized balls.
Dust the ball in wheat flour and roll into small thick poori. Remember thin poori won’t puff up. So roll it thick. Refer picture below for thickness.
Heat oil in a kadai to deep fry. Check its temperature by dropping a pinch of dough. If it rises to the top immediately, oil heat is just right. If the heat of oil is less, poori won’t puff up. So check it before deep frying. Reduce the flame to medium and take one rolled poori. Pat it between your palm to remove the excess flour. Drop the poori in oil. When it starts to come up, press the poori with a ladle gently. It puffs up well. Now flip the poori and cook for a minute till bubbles cease. Remove & drain in a tissue paper. Serve hot with masala raita and some bhaji/Poori masala.
TIPS: Increase the flame to high till you drop the next poori. Reduce the flame to medium as soon as u drop it. You can follow this to maintain the heat throughout deep frying. If oil becomes smoky hot, switch off the flame for few minutes. After the oil comes to desired temperature, fry the poori.
Enjoy !
Note
Do not make the dough too sticky or soft. No need to rest the dough. Make poori immediately to prevent oil absorption.
Thickness of poori is very important to puff up. So roll it small and thick.
Heat of oil is also an important factor for puffy poori. Check its temperature.
Oil should not be smoky hot.
Try this yummy paneer poori at home for your weekend breakfast and enjoy !
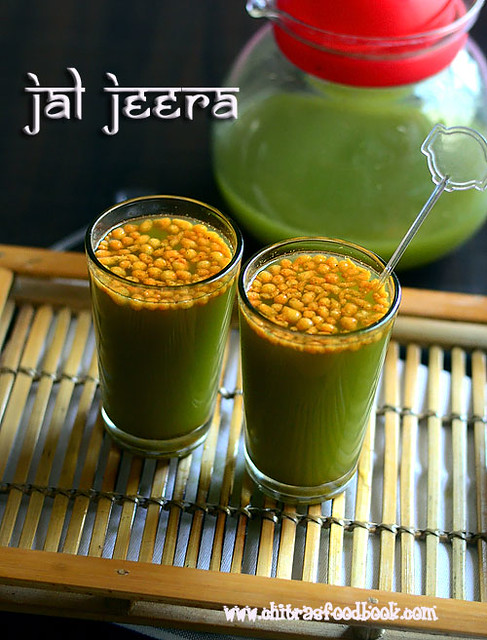
Jal Jeera / Jaljira is a healthy summer drink that is most popular in North India. In Hindi, Jal means water and Jeera means cumin seeds. This drink is prepared with special spice mix masala powder that is mixed with water or soda. Jal jeera spice powder is made of roasted cumin, pepper, mint leaves, black salt, ginger, amchoor powder and lemon juice. So it has lots of health benefits. Basically it helps to improve digestion and aids for weight loss too. I have tasted this jaljira several times in “The Village” restaurant and in some other hotels as well. Mostly it is served as an appetizer in restaurants whereas I like to have this drink after a heavy meal. I love this drink very much and I don’t mind drinking at any time or any season of the year. So I bought a packet of jaljeera powder from the shop and prepared this drink at home for the first time. We loved it very much. Then I started serving this to my guests as a welcome drink. Everybody liked it so much and asked me the recipe too. Even though I make it with store bought powder, I used to tell the ingredients roughly and ask them to buy this jal jeera powder from the market. Yesterday I was thinking to start summer recipes in my blog. The most refreshing summer drink jaljeera flashed in my mind. I tried it this morning by watching Sanjeev Kapoor’s YouTube video and made it from scratch. I altered the recipe slightly by looking at the ingredients list of store bought jaljira packet. It came out very well and tasty. Traditionally tamarind is used in jaljeera but have used lemon juice instead. So lets check how to make this refreshing, fresh, yummy, healthy, easy Indian drink for this summer – Jal jeera recipe with step by step pictures and a video. Do try it and enjoy !
Check out my other summer recipes in THIS LINK
Jal jeera Recipe - Jaljira - How to make Jal jeera at home
Jal jeera Recipe - Jaljira - How to make Jal jeera at home
Dry roast cumin seeds in a hot kadai for one minute. Do not burn the jeera. It tastes bitter and spoils the taste of jaljeera.
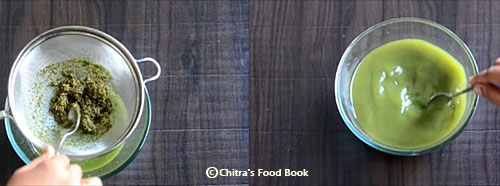
Take all the ingredients given in the list in a mixie jar. Add the roasted cumin seeds. Grind to a smooth paste adding required water. I used 1/2 cup water to grind it.
Transfer the ground paste to a bowl and wash the mixie jar with one cup of water. Add the washed water to the paste. Place another bowl, keep a metal strainer and filter the drink. Press it with a spoon to filter well and discard the residue.
Add 1.5 - 2 cups more water and mix well. Check for taste and add more salt, sugar or lemon juice if needed. If you need more cumin flavor, add 1/2 tsp readymade cumin powder if u have in hand.
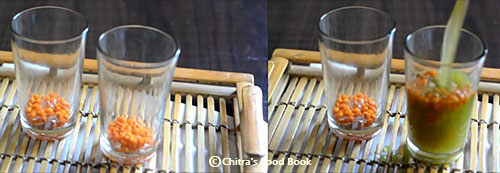
To serve : Take a tall glass, add some crushed ice or ice cubes, top it with 2 tsp of kara boondhi and pour the jaljeera till the rim. sprinkle a pinch of cumin powder if u wish. Serve immediately. Refrigerate the remaining drink for later use. Stays fresh for 2-3 days in refrigerator.
Enjoy !
Note
You can add more black salt, amchoor powder , sugar and lemon juice at anytime after making the drink. Adjust them based on your taste.
Jaljeera tastes the best when its served chilled. So always use ice cold water for preparation or refrigerate it / add ice cubes while serving !
Never try this recipe without black salt and chat masala or amchoor powder.It adds a unique taste to this drink.
Try this easy drink at home and have it after or before a heavy meal. It helps to improve digestion and increases appetite !
When my father was working in Mumbai, he learnt this recipe from his North Indian friend. Whenever my dad comes to Salem for holidays, he used to cook for us. We love our dad's cooking a lot . We love his Kara kuzhambu, rasam and this onion tomato sabji. My dad used to say this tomato sabzi is their go to recipe for every day's dinner.They also make it for their lunch box as a side dish for chapathi or poori . Its so easy to make and tastes great too. Sometimes my dad make this sabji by adding boiled potato, peas and even ladies finger. We love this simple sabzi with idli,dosa as well. I don’t say this is the authentic Maharashtrian style tomato sabji or tomato bhaji. This is just an easy, one pot version which is ideal for working women and bachelors. Last weekend I made methi poori and this tomato sabji for our breakfast. It was a nice combo.Sendhil and Raksha loved it a lot. It tastes the best with roti and poori. Do try this tomato sabji recipe and share your feedback with me :)
Tomato sabji recipe for chapathi, poori
How to make tomato sabji in a pressure cooker - Easy & quick side dish for poori and roti/chapathi !
Red chilli powder - 1/2 – 3/4 tsp ( I used Kashmiri chilli pwd)
Dhania powder/coriander seeds powder - 1/2 tsp
Turmeric powder - 1/4 tsp
Garam masala powder - 1/2 tsp
Sugar - 1/2 tsp
Salt & water - as needed
To temper
Cooking oil - 2 tbsp
Mustard seeds - 1/2 tsp ( optional)
Cumin seeds - 1/2 tsp
Curry leaves - few
Coriander leaves - to garnish
METHOD
Wash and chop the onion and tomato into small pieces. In a cooker base, heat oil and splutter cumin seeds.
Saute onion until transparent and then add ginger-garlic paste and curry leaves. Saute till the raw smell of g&g paste goes off.
Now add the tomato pieces and saute for a minute. Add salt, turmeric powder, sugar, red chilli powder, Dhania powder, garam masala powder and saute till tomato turns mushy.
Now add 3/4 cup of water, mix well and pressure cook in high flame for 2 whistles. Open the cooker after the steam is released. Oil would float on top. Mix well with a ladle and garnish with chopped coriander leaves. Boil for few minutes if the sabji is watery. Make it thick. Serve hot with poori or roti !
Enjoy !
Note
For variations, you can add equal quantity of tomato and onion but adjust the quantity of spice powders accordingly.
You can also add some cooked peas or boiled potato cubes.
You can skip dhania powder if u wish. But flavor varies.
Adding sugar helps to enhance the taste. It gives a mild sweetness to the bhaji.
You can also make this sabji in a kadai instead of pressure cooker.
For variations, you can add coarsely crushed peanut powder ( 1 tbsp )
Try this easy, yummy tomato sabji at home and enjoy !!

 . We can indulge in these type of gravies at least once in a while for celebrations and occasions.So friends, do try it and share your feedback with me
  .Lets see how to make this restaurant style khoya kaju gravy with step by step pictures and video !
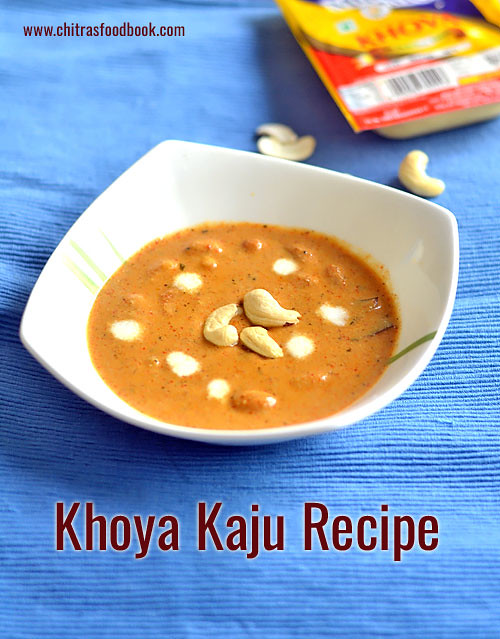
 Khoya kaju gravy recipe - Side dish for roti, naan, kulcha
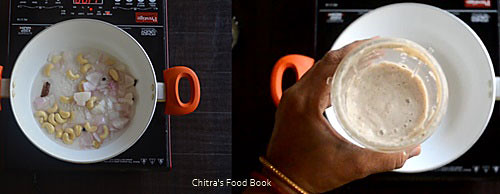


 . So I bought a packet of jaljeera powder from the shop and prepared this drink at home for the first time. We loved it very much. Then I started serving this to my guests as a welcome drink. Everybody liked it so much and asked me the recipe too
 . Yesterday I was thinking to start summer recipes in my blog. The most refreshing summer drink jaljeera flashed in my mind. I tried it this morning by watching Sanjeev Kapoor’s YouTube video and made it from scratch. I altered the recipe slightly by looking at the ingredients list of store bought jaljira packet. It came out very well and tasty. Traditionally tamarind is used in jaljeera but have used lemon juice instead. So lets check how to make this refreshing, fresh, yummy, healthy, easy Indian drink for this summer – Jal jeera recipe with step by step pictures and a video. Do try it and enjoy !