Search Chitra's Food Book

June 18, 2015

Cabbage Vada Recipe | Urad Dal Vada With Cabbage - Muttaikose Vadai

Few years ago I posted Mixed vegetable Urad dal vada. But I have not tried Urad dal vada adding cabbage alone / Muttaikose vadai in Tamil. Yesterday I made this cabbage vada for our No moon Day No onion No garlic lunch menu. I was scared whether vada would get the raw smell of cabbage. But to my surprise, it was so crispy and superb in taste. It’s a nice tea time snack. I couldn’t even find the trace of cabbage smell in it. Infact cabbage acted as a binding agent and made the batter thick enough to shape the vada easily too. It’s a great replacement for onion. Just give a try. You will come to know. Lets see how to make cabbage vadai in detail.


Please refer my urad dal vada/Medhu vadai video recipe for better understanding of grinding and shaping the batter.

check out this recipe with video for grinding vada batter using grinder.

Cabbage Vada Recipe


Cabbage Vada Recipe Cabbage vada recipe - Urad dal vada adding cabbage
Cuisine: Indian
Category: Snacks
Serves: 10 
Prep time: 40 Minutes
Cook time: 10 Minutes
Total time: 50 Minutes


INGREDIENTS

  • Round Urad dal - 1/2 cup
  • Finely chopped Cabbage - 1 cup
  • Curry leaves - few
  • Green chilli - 2 nos ( finely chopped)
  • Coriander leaves - few
  • Ginger - 1/2 inch piece
  • Hing /Asafetida - 1/4 tsp
  • Salt & water- as needed
  • Cooking oil - to deep fry
HOW TO MAKE CABBAGE  VADA WITH URAD DAL - METHOD
  • Wash and soak the urad dal for at least 45 minutes and maximum 4 hours. Drain all the excess water and take the urad dal in a mixie jar. First grind the dal adding very little water( 2 tbsp). Grind the dal to the maximum by wiping the sides of jar. No need to add salt. Wipe the sides of jar and add a tbsp of water. 
  • Again grind the dal till it turns smooth and thick. Add water only in a tbsp at a time. So add more if needed. The batter should be stiff and smooth. Just drop a pinch of batter in a bowl of water. If the batter floats, the consistency is right. If it drowns, it shows you have added more water. Please refer my Urad dal video grinding for better understanding.
  • Remove the batter in a bowl. Add little water to the mixie jar and grind it. Collect that water and use it for dipping your hands before shaping the vada. 
  • Beat the batter with your hands for few minutes to remove air bubbles. This helps to prevent vada from bursting in oil. To the batter, add finely chopped cabbage, green chillies, curry leaves, coriander leaves and ginger bits. Mix well. Add the required salt. After you mix all these ingredients, batter would become thick and you will be able to shape the vada easily.

  • Heat oil to deep fry. Drop a pinch of batter in oil. If it rises immediately to the top, oil is just right. Now keep the flame medium. Take a golf sized ball from the vada batter. Pat it slightly and make a hole in the center.
  • Drop the vada in the oil and deep fry till cabbage turns golden brown. The color of vada may vary based on the time you cook. I love to take my vada golden brown. So I always cook the vada in high flame for few seconds before removing from oil.
    Serve hot with chutney.Enjoy !
Note
  • Grinding urad dal in mixie yields less batter than grinding in grinder. But you can make 10 medium sized vada for this quantity.
  • You can also add coarsely ground pepper along with other ingredients.
  • For kids you can grind green chillies along with ginger and add to batter.
  • If u feel the batter is too watery and if you are not able to make shapes, add little rice flour. But consume the vada when it is hot because adding rice flour makes the vada hard when it cools down.
  • My MIL adds a tsp of toor dal while soaking urad dal to avoid oil absorption. But proper grinding of batter with right amount of water gives you oil free vada.


Try this no onion Urad dal vada recipe for your tea time. Tastes yummy !


Continue Reading...


June 17, 2015

South Indian Lunch Menu Recipes For Amavasya -No Onion No Garlic Lunch Menu

No onion No garlic lunch menu
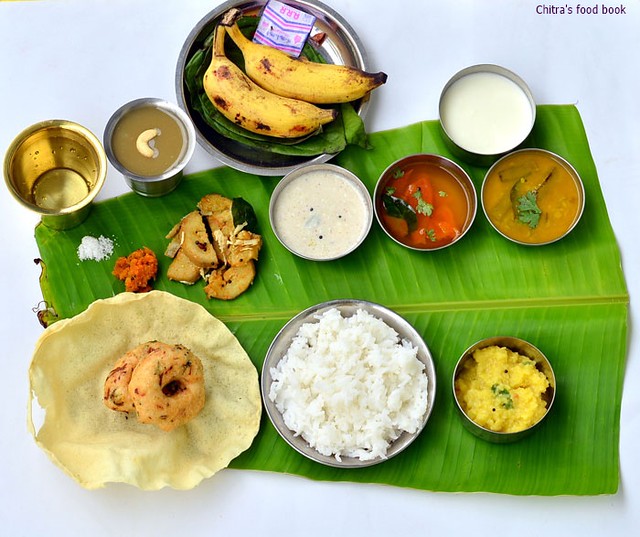
I have been thinking to share our amavasai vazha ilai saapadu for years. But somehow I couldn’t do it.Yesterday I made this South Indian style No onion No garlic thali for No moon day/Amavasya (Mahalaya amavasya). 

Every month on No moon day my FIL used to do “Tharpanam” by keeping all these dishes in banana leaf. So we make Vadai and payasam along with Rice, Sambar, Kootu or curry, Pachadi, Paruppu, Rasam, Appalam and Pickle.Vada and Payasam/Kheer are optional. Some people make it every month.Vaikasi and Aadi amavasai are very special to us for which Vadai and payasam are compulsory.

Yesterday I prepared all these dishes especially for this post. I love cooking this Amavasai lunch menu as it is very easy to prepare with less chopping and grinding works. It takes just 45 minutes to make this platter if you don’t prepare Payasam and vada. I have shared the method of preparation and recipes with links. Please click them to view the particular recipe. I have also shared more ideas for cooking a no onion no garlic lunch menu. 

Hope this post would help the South Indian beginners who want to cook a No onion No garlic food for their lunch. Please check out my Tamil nadu lunch menu ideas – 1 , Lunch menu ideas – 2  and a complete South Indian thali for guest with a detailed serving procedure if interested !

As I told in my South Indian full meals post,I will share a North Indian Thali very soon. Stay tuned !!


South Indian lunch menu ideas
Vegetables to be used for No moon day lunch menu
Lady’s finger, Broad beans, Cluster beans, Raw mango, Red pumpkin,White pumpkin, Chayote/chow chow, Raw banana, Sweet potato, Yam, Karunai kizhangu, Seppan kizhangu, Stem of greens ( Keerai thandu), Banana stem, Banana flower, Bitter gourd, Sundakkai/Turkey berry.

Vegetables to be avoided
Drumstick, Brinjal, Bottle gourd, Carrot, Beans, Potato, Onion, Garlic, Green leaves ( Keerai)

South Indian Lunch Menu

No onion No Garlic Lunch Menu


No onion No Garlic Lunch Menu South Indian style No onion No Garlic Lunch Menu for No Moon Day/Amavasya
Cuisine: Indian
Category: Lunch menu
Serves: Serves 3
Prep time: 45 Minutes
Cook time: 40 Minutes
Total time: 85 Minutes


INGREDIENTS
How to prepare this amavasya lunch menu
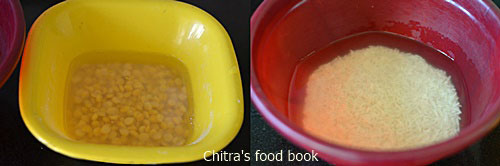
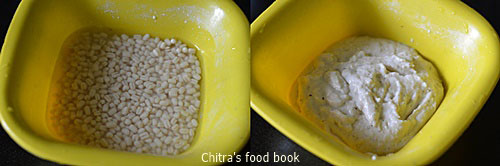
  • Wash and soak Urad dal for 30-45 minutes for making vada. Refrigerate and soak it. Use the soaked ice water for grinding to get crispy vada. Within this soaking time,u can prepare this lunch menu if you follow the below steps.
  • Soak the tamarind for sambar and rasam.Crush a tomato and add to tamarind soaked for rasam. Add some salt for quick soaking.
South Indian lunch menu ideas
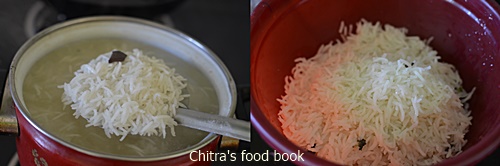
  • You need to use 2 pressure cooker and 2 burner gas stove. Take one cooker, wash and pressure cook the rice till its done. In another cooker, take the toor dal for sambar and keep a small bowl inside the cooker. Place the moong dal needed for serving dal/paruppu. Pressure cook them in low flame for 15 minutes. This takes nearly 15 minutes for both the cooker to release the steam.

  • In that 15 minutes, chop all the vegetables need for making sambar, poriyal, pachadi etc. For this menu, you have to chop Lady’s finger, Green chillies for sambar. Raw banana for poriyal and Gooseberry for pachadi. Grate 1/4 cup of coconut for Pachadi and poriyal.

  • First grind coconut, green chilli, amla, salt and hing for pachadi. Mix the paste to curd and keep aside. Pachadi is ready. You can temper at the end.
South Indian lunch menu ideas
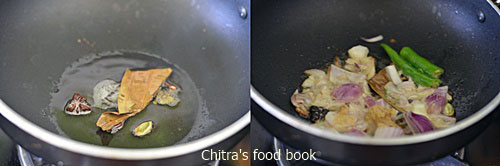
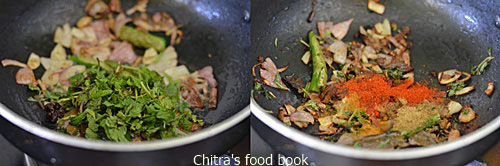
  • Now let's make sambar and rasam. Heat oil in a kadai and when it gets heated splutter mustard, methi seeds and saute the lady’s finger, green chilli, red chilli, curry leaves for making sambar. Add tamarind extract and boil well.
South Indian lunch menu ideas
  • When it is boiling, heat another kadai and temper with mustard seeds,jeera for making rasam. Prepare the rasam in this kadai. The steam would have released in the cooker. So remove the dal, mash it well and add to the boiling sambar and little dal water to the boiling rasa as well.
  • Now sambar and rasam would be ready. Heat little oil in a kadai and splutter mustard seeds, urad dal and cumin seeds for topping the moong dal and thayir pachadi. Add this tempering to pachadi and dal. Add little water to adjust the consistency of dal and pachadi. Both are ready now.
South Indian lunch menu ideas
  • In the same kadai,roast the sago for making payasam. Roast till it becomes white and puffs up well. I used Nylon variety sago. If you are using big white ones, soak it for 30 minutes in hot water and then cook it. Add water and cook the sago by covering the kadai with a lid. Keep the flame medium.
South Indian lunch menu ideas
  • In another burner,cook the raw banana in a kadai adding sambar powder, a seed of tamarind, water and salt. Raw banana and sago takes almost the same time to cook. So keep an eye on both. Make sure nothing gets burnt. Raw Banana should not become mushy. It should be firm in shape.
  • After the sago is cooked well, add crushed jaggery, cardamom to it. Boil well by adding some water. Lastly add some plain milk or coconut milk and switch off the flame immediately.
South Indian lunch menu ideas
  • Take the cooked raw banana and drain the excess water. Temper mustard seeds, cumin seeds and curry leaves. Put the raw banana pieces and saute well. Lastly add some grated coconut. All the dishes are ready now. Lets make vada.
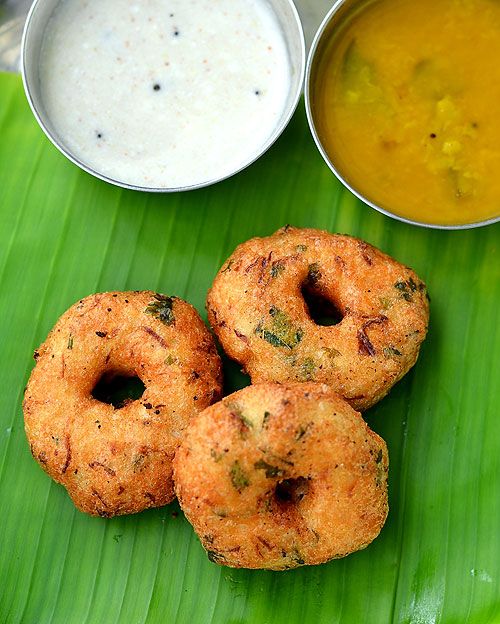
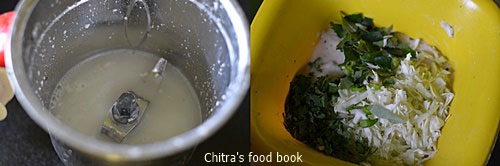
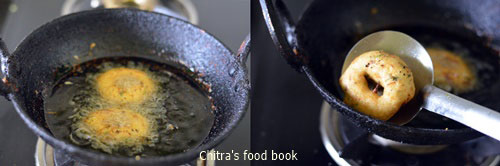
By this time, urad dal would have soaked well. Heat oil in a kadai to deep fry the vada.Keep the flame medium. Grind the dal adding pepper corns and hing in mixie. Add little water ( say few tbsp at a time) and grind a thick batter.

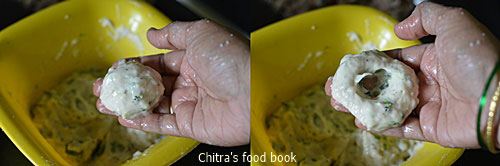
To the ground batter, add salt, chopped curry leaves and mix well. Check the oil temperature and make vada. Lastly roast few papad if you wish and switch off the flame.
South Indian lunch menu ideas

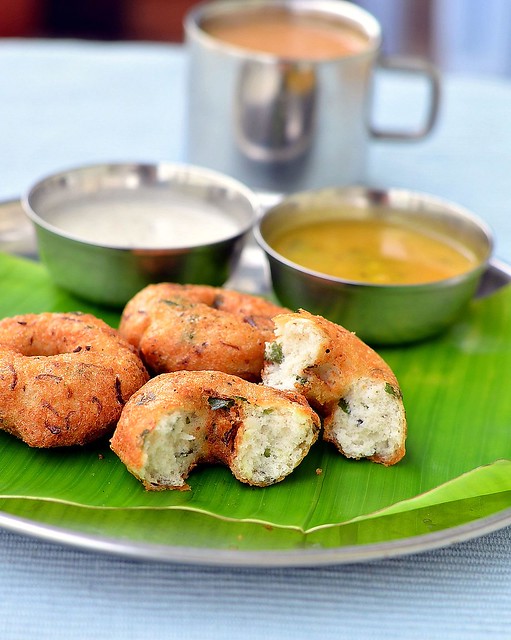
Rice, sambar, rasam, Poriyal, Pachadi, Vada, appalam are ready to serve.
I had already made and kept mango thokku. U can keep any pickle as you wish.
Enjoy this no onion no garlic thali !


Please refer my

No Onion No Garlic Recipe collection for more ideas .

Other Options
  • You can replace Lady’s finger with Broad beans or cluster beans to make sambar. In that case, pressure cook the veggies along with dal.
  • You can make the same poriyal using sweet potato or lady’s finger too.
  • For Pachadi, you can make simple curd raita by grinding coconut+green chilli+ginger or Lady’s finger raita.
  • You can also make masala vada instead of urad dal vada but do not add onions in the batter.
  • Instead of Sago payasam, you can make moong dal payasam,Aval payasam or Vermicelli kheer too. Please go through my 15 payasam varieties for more ideas.
Please refer my No Onion No Garlic Recipe Collection for more ideas .

South Indian lunch menu ideas

Make this No onion No garlic lunch feast for occasions and celebrate the day !

Amavasya Lunch menu


Continue Reading...


June 15, 2015

Sindhi Biryani Recipe-Pakistani Biryani-Sunday Lunch Recipes Series 19

Sindhi biryani recipe
Sindhi biryani is a very popular biryani recipe originated in Sindh province of Pakistan.It is usually made with mutton or chicken.I read from Wikipedia that this biryani is served in almost all the flights of Pakistan Airlines.I was looking forward to try Sindhi biryani recipe.Recently I came to know about Anisa,the owner of Zaiqa-The Spice store through my facebook friends.My friends suggested me to use Zaiqa masala saying it gives a nice restaurant touch to the recipes.I went through her website and amazed to see the wide range of masala products especially for Non-vegetarians.I chose Sindhi biryani masala,Chicken 65 masala and Chole masala powders and ordered them.I got the masala powders the next day through courier.I tried this biryani using Zaiqa’s Sindhi biryani masala.It tasted more like homemade masala powder.I followed the recipe given in the back of packet.Biryani came out really well. Now I am eager to try out Zaiqa's other products too.Friends,u can visit this website  & order online to buy Zaiqa products.I am sure these masala powders will take your recipes to the next level Happy. Now lets see how to make Pakistani Sindhi Biryani Recipe.
Visit my other biryani and pulao recipes here

Continue Reading...


June 13, 2015

Roasted Phool Makhana Recipe-Easy Evening Snacks Recipe

Roasted phool makhana recipe

I started using Phool makhana (lotus seeds/Foxnut seeds in English) very recently. Nowadays I am making recipes like phool makhana curry, phool makhana kheer and masala roasted phool makhana very often in my kitchen. I will share the kheer recipe very soon. This roasted phool makhana is a very simple, quick, healthy and guilt free evening snack recipe which you can do in the next 10 minutes. Phool makhana has amazing health benefits and nutritional values. It helps in cardiac protection, good for digestion, helps to improve appetite and much more. Even though it is bit costlier, we can buy and consume it at least once or twice in a month to enjoy its health benefits. In Bangalore, you can find phool makhana in Nilgiris, Total, D- mart and Metro. Now lets see how to make this quick phool makhani recipe for evening teatime snacks.

Phool makhana recipe

Phool Makhani

Roasted phool makhana recipe


Roasted phool makhana recipe Roasted phool makhana recipe- Easy,healthy,guilt free evening snack
Cuisine: Indian
Category: Snacks
Serves: Serves 2
Prep time: 2 Minutes
Cook time: 8 Minutes
Total time: 10 Minutes


INGREDIENTS
1 cup - 240ml
  • Oil  or ghee- 2 tsp + 1 tbsp
  • Lotus seeds/Phool makhani -2 cups
  • Red chilli powder or sambar powder - 1 tsp
  • Chaat masala - 1/2 tsp
  • Salt - as needed
  • Curry leaves & curshed garlic - few(optional)
  • Black salt- a pinch ( optional)
METHOD

  • In a pan, heat oil and roast the phool makhana in medium flame for 4-5 minutes. Make sure you don’t burn them. To check whether it is roasted well, take one in your finger and try to crush it or gobble a few. If it crushes well, it is roasted properly. If you feel it is soggy to press, you have to roast more. Similarly if you eat, it should be crunchy else roast for few more minutes. 

  • After it is roasted well, transfer to a plate. Heat 1 tbsp oil or ghee in the same kadai. Lower the flame completely. Add red chilli powder,  salt and chaat masala or garam masala powder. Keep the flame low else spice powders would burn.
  • Add the roasted makhana and coat the masala well in low flame.. Switch off the flame and let it cool in the kadai for 3-4 minutes. Now serve them in a bowl with hot tea. Tastes yummy and crunchy !
.
NOTE
  • You can replace chaat masala powder with garam masala powder. You can also add a pinch of aamchur powder for tangy taste.
  • Adding curry leaves or garlic is optional.
  • Ghee gives a nice flavor. So don’t skip it. You can add some crushed garlic cloves along with spice powders to get a nice garlic flavor.

Easy, healthy roasted masala phool makhana is ready to munch with hot tea !
Masala roasted phool makhana recipe


Continue Reading...


June 11, 2015

Aloo Paneer Bonda Recipe - Potato Paneer bonda - Snacks Recipes

Aloo paneer bonda recipe
I usually make aloo bonda/potato bonda at home. Recently when I was looking for some snacks recipes in my hand written cook book, I came across this aloo paneer bonda recipe shared by Mrs. Revathy Shanmugam mam in a cookery show. I made some changes in the actual recipe and tried this for my guests. They loved it a lot. Does any kid say no to a snacks with paneer and potato combo??.

Yeah, this potato paneer bonda recipe was a super hit among the kids and elders as well. Try this recipe for your kids in this evening when they are back from school.They would ask you more. It’s a good tea time snack. It can be relished with tomato sauce. You can make many variations in this recipe as per your wish. So let me share my recipe of making aloo paneer bonda recipe.

Don’t forget to check out my daughter’s favorite Instant mangalore bonda recipe, besan flour bonda & Onion bajji recipe.

Aloo paneer bonda recipe

Aloo paneer bonda recipe


Aloo paneer bonda recipe Aloo Paneer Bonda Recipe - Kids friendly evening snacks
Cuisine: Indian
Category: Snacks
Serves: 12
Prep time: 10 Minutes
Cook time: 15 Minutes
Total time: 25 Minutes


INGREDIENTS
For masala 1 cup = 250 ml
  • Grated paneer - 1 cup
  • Boiled potato - 2 nos ( medium size)
  • Cooking oil - 1 tbsp
  • Cumin seeds - 1/2 tsp
  • Big onion - 1 no ( finely chopped)
  • Ginger&garlic paste - 1/4 tsp
  • Red chilli powder - 1 tsp
  • Turmeric powder - 1/8 tsp
  • Garam masala powder - 1 tsp
  • Coriander leaves - to garnish
  • Lemon juice - few drops
  • Salt - as needed
For bonda batter
  • Besan flour - 1/2 cup
  • Rice flour - 3 tbsp
  • Cooking soda - 1/8 tsp
  • Red chilli powder - 1/2 tsp
  • Ginger & Garlic paste - 1/2 tsp
  • Salt - as needed
  • Water - 1/2 cup + 2 tbsp more if needed 
  • Cooking oil - to deep fry
HOW TO MAKE ALOO PANEER BONDA - METHOD
  • Pressure cook the potatoes and peel the skin. Mash it well. Set aside. Grate paneer. Chop the onions finely.
Aloo paneer bonda recipe

  • Heat oil in a pan and splutter cumin seeds. Add the onions and saute till transparent. Add g&g paste and saute till raw smell goes off. Now add the red chilli powder, turmeric powder, garam masala powder.
Aloo paneer bonda recipe
  • Add the grated paneer, mashed potato and mix well. No need to add water. Mix well so that masala is coated well. Lastly add the lemon juice and coriander leaves.
Aloo paneer bonda recipe
  • Now allow the masala to cool down and make balls of small lemon size.
Aloo paneer bonda recipe
  • For making bonda batter take the besan, rice flour, red chilli powder, g&g paste, salt, cooking soda and mix well. Add water to make a thick batter. The consistency of batter should not be too thick or too thin. It should fall like a thick ribbon. I used 1/2 cup + 2 tbsp water. Take this as an approx measure.
Aloo paneer bonda recipe
  • Heat oil to deep fry. Check the temperature of oil by dropping a pinch of batter. If it rises immediately, oil temperature is right.
  • Now take a dough ball and dip in the bonda batter. Drop it in the oil immediately. Drop 3-4 balls in one batch. Cook until golden brown by turning the bonda whenever needed. Keep the flame medium. Drain the bonda in a tissue paper.
Aloo paneer bonda recipe
Serve with coconut chutney or tomato sauce ! Enjoy !
Note
  • Do not add more rice flour. Usually besan and rice flour should be added in the ratio of 3:1 to get a thick coating. But here I used little more rice flour to maintain crispiness.
  • You can follow the same batter recipe for making bajii too.
  • Replace ginger&garlic paste with hing.
  • Potato is used as a binding agent for the dough. You can skip adding potatoes and use little corn flour and maida to make the tight dough.
Try this kids friendly evening snack for your daughter and son after they are back from school. Enjoy your tea time !
Aloo paneer bonda recipe


Continue Reading...


June 9, 2015

Kabuli Biryani Recipe-Hyderabadi Chana Dal(Qabooli) biryani-Sunday Lunch Recipes Series - 18

Kabooli biryani recipe
Sorry for this week's delayed post.My younger sister Radha was here for the past week.We had a great time together after years by spending most of the time in chatting,shopping etcDancing.So i gave a small break to my blog postsWinking
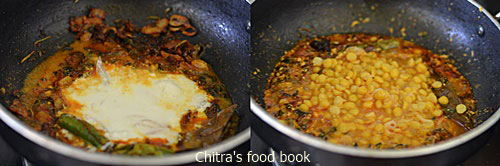
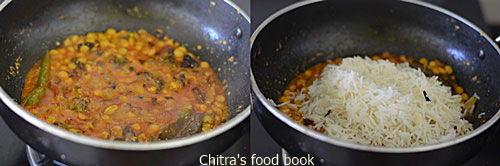
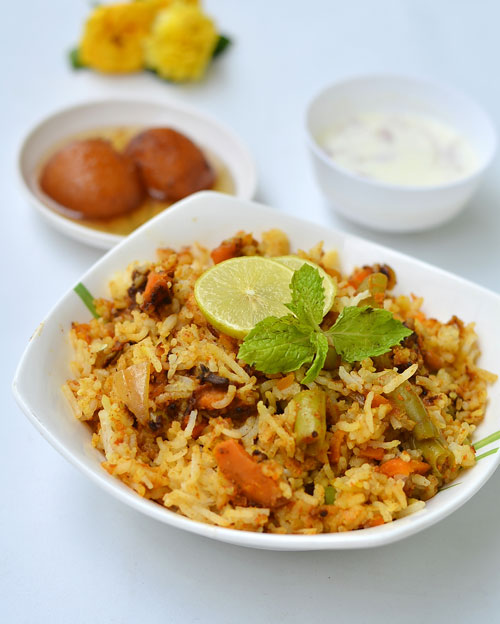
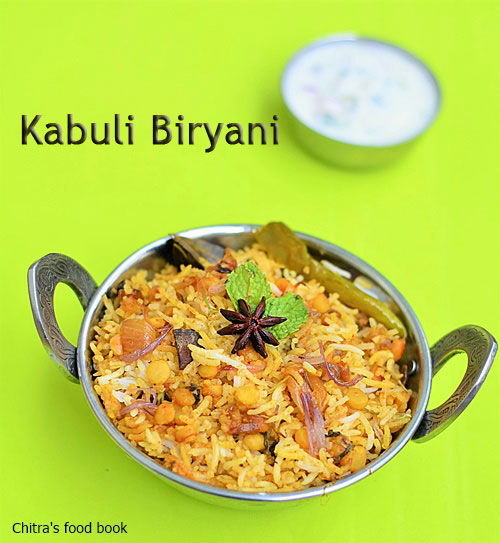
.Today’s Sunday biryani recipe is Hyderabad’s most popular qabooli biryani made using chana dal.I made this for my sister and she loved it a lot.When I heard about the title of this biryani,I wondered how come a biryani can be made just by using chana dal.But when I prepared it,I was really amazed with the flavor and taste.For any biryani,it’s the whole garam masala and spice powders that matters the taste.Even if u add vegetables,meat or make plain biryani,the right amount of spices is the key.For this biryani,Curd chutney is the best side dish that is served in Hyderabad,Andhra.So I made perugu pachadi/Curd chutney(Dahi chutney) by referring Preeti’s blog.For this biryani recipe,I watched Vahchef’s video and referred preeti’s recipe too.Friends,do try this kabuli chana biryani with curd chutney for your Sunday Lunch.Relish it with your family.
Curd chutney for biryani

Kabuli biryani recipe


Kabuli biryani recipe Hyderabad popular qabooli biryani recipe using chana dal
Cuisine: Indian
Category: Lunch
Serves: Serves 3
Prep time: 30 Minutes
Cook time: 20 Minutes
Total time: 50 Minutes


INGREDIENTS

  • Basmati rice - 1 cup( India Gate)
  • Water - 6 cups
  • Salt - as needed
  • Whole garam masala - 1 each (cinnamon,cloves,cardamom,bayleaf)
For masala
  • Chana dal - 1/4 cup
  • Cooking oil – 2 tbsp
  • Ghee – 1 tbsp
  • Whole garam masala( Cinnamon,cloves,cardamom,kalpasi and bayleaf) – 1 each
  • g&g paste - 1 tsp
  • Big onion – 1 no ( sliced)
  • Green chilli – 1 no (slit)
  • Mint leaves – a handful
  • Red chilli powder – 1 tsp
  • Dhania powder – 1.5 tsp
  • Curd – 1/2 cup
  • Lemon juice – few drops
Big onion – 1 no to caramelize
CURD CHUTNEY FOR BIRYANI
  • Fresh thick curd – 1 cup
  • Finely chopped green chilli – 1-2 nos
  • Mint+coriander leaves – 2-3 tbsp
  • Big onion – 1 no ( finely chopped)
  • cumin powder- 1/8 tsp
  • Salt – as needed
METHOD
  • Wash and soak the basmati rice and chana dal for 30 minutes. Slice the big onion and deep fry till it turns golden brown.Set aside.

  • Boil 6 cups of water and some salt.Add the whole garam masala.Drain the excess water from the soaked rice.When the water comes to roll boil,add the rice and boil for 5-7 minutes in medium flame.Remove the rice when it is cooked till 90%.Let it cool.Do not drain the boiled water.
  • In the same water,add the soaked chana dal and cook till its firm and soft.Drain the excess water and keep the cooked chana aside.
  • Heat oil+ghee in a kadai and saute the whole garam masala.Now add the sliced onions,g&g paste and green chilli.Saute till onion turns transparent.Add mint leaves and mix well.


  • Add the spice powders and salt one by one and mix well.Lastly add the curd and mix well.Add the cooked chana dal and give a nice boil till the gravy thickens a bit. Make sure there is little water and the gravy is not too dry.
  • Once the gravy is done,layer the cooked rice and sprinkle some chopped mint leaves.
  • Garnish with caramalized onions and add some lemon juice.Cover the kadai tightly with a lid and keep the flame low.Put in DUM for 15 minutes.Nice aroma will waft through.It shows your biryani is done.Remove and fluff it with a fork.Serve with curd chutney or mirchi ka salan.These two are meant to be the best side dish for this biryani.
HOW TO MAKE CURD CHUTNEY
  • Finely chop the green chilli,mint leaves,coriander leaves and onions.Take them in a bowl.Mix thick curd and salt.Beat well and serve.
    Enjoy !
Note
  • I saw some kabuli biryani using black chana. If you are using that,soak the chana overnight and then cook them in pressure cooker till done.
  • Increase the quantity of green chilli for more spicy biryani.

Enjoy kabuli biryani with this simple curd chutney.It’s the best side dish !
Qabooli biryani recipe


Continue Reading...