Search Chitra's Food Book

Showing posts with label DINNER RECIPES. Show all posts

April 22, 2016

Veg Hakka Noodles Recipe | Hakka Noodles Recipe

Veg Hakka Noodles Recipe 
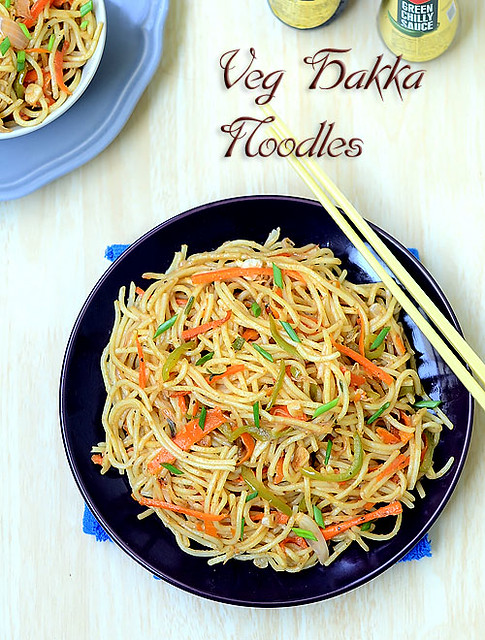
Hakka noodles, or Hakka mee, is a type of noodles - It is yellow in color, normally served in soup and with meat such as pork or chicken fillet, with vegetables and egg ( Source: Wiki). Usually I make Veg noodles with store bought plain noodles. For the first time, I bought Ching’s Hakka noodles and made Vegetable noodles for our breakfast combining Indian & Chinese style. I never thought its so easy and quick to make. 

I followed the instruction given in the pack on how to cook hakka noodles and cooked it perfectly. Noodles was firm yet soft. It came out well and tasty. Sendhil & Raksha loved it so much. Rice Vinegar & Soy sauce are the star ingredients for this recipe. But I used White vinegar and little tomato ketchup too. I am happy that I tried hakka noodles at home.

For a no onion, no garlic version, just skip those ingredients from the list and follow the recipe. Soon I am planning to try Schezwan and more varieties with hakka noodles. Now lets see how to make this Kids friendly, quick and easy Veg Hakka noodles.
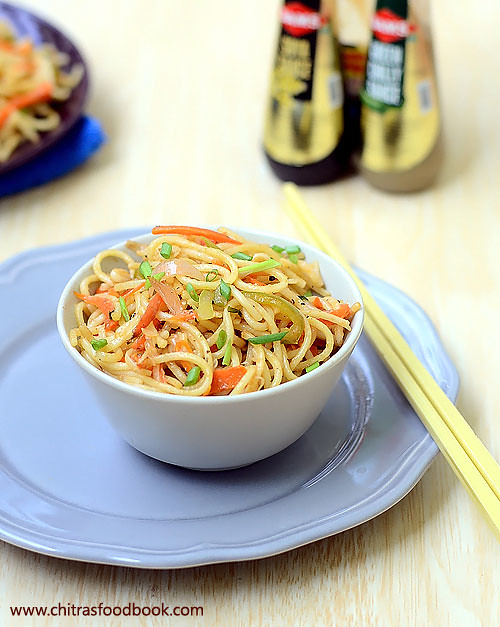
Veg Hakka Noodles

Veg Hakka Noodles Recipe


Veg Hakka Noodles Recipe How to make Indo Chinese style Vegetable Hakka Noodles recipe
Cuisine: Indian
Category: Main course
Serves: 3
Prep time: 10 Minutes
Cook time: 20 Minutes
Total time: 30 Minutes


INGREDIENTS
To cook noodles
  • Hakka Noodles - 200 gm Packet ( I used Ching's brand)
  • Water - 10 cups
  • Cooking oil - 1 tsp
  • Salt - as needed
To saute
  • Cooking oil or olive oil - 2 tbsp
  • Garlic - 5 cloves ( finely chopped)
  • Spring onion - 2 tbsp (-do-)
  • Big onion - 1 no ( sliced)
  • Carrot - 1 no ( medium)
  • Capsicum - 1/4 no
  • Shredded cabbage - 1/4 cup
  • Soya sauce - 1 tsp
  • Green chilli sauce or red chilli sauce – 1-2 tsp
  • Tomato sauce – 1.5 tsp
  • White Vinegar – 1/2 tsp (optional)
  • Black or white pepper powder – 1 tsp
  • Salt - as needed
  • Sugar - 1 tsp
METHOD

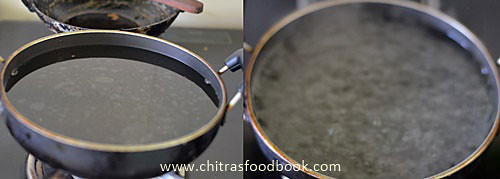
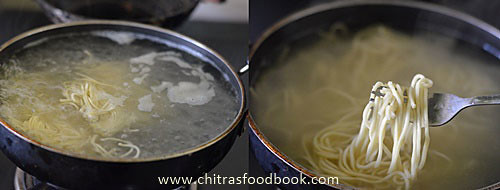
  • Boil 10 cups of water in a wide bowl.Add a tsp of cooking oil and some salt. When the water comes to roll boil, add the noodles. Break the noodles into two while adding in water. Let it cook in open bowl for 10 minutes. In the mean time, finely chop garlic & spring onions, shred cabbage, slice onions, capsicum and carrot thinly.
Veg hakka noodles
Veg hakka noodles
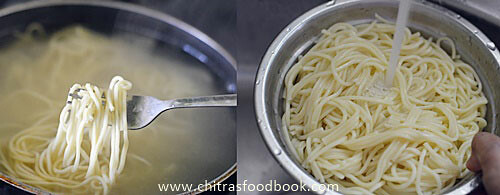
  • Toss the noodles once or twice in between.Make sure the noodles is not over cooked and mushy. So toss it every once and then.Check it after 10  minutes. Take a small string. Press it. It should break and soft.Then drain the excess water using a colander and wash the cooked noodles under tap water to stop its cooking process. This step helps to keep the noodles stay firm in shape. So do not skip this step. Let the noodles become warm.
Veg hakka noodles
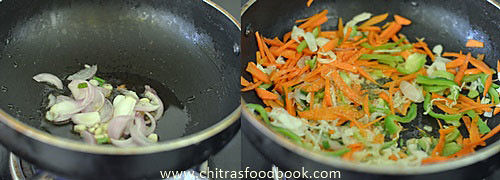
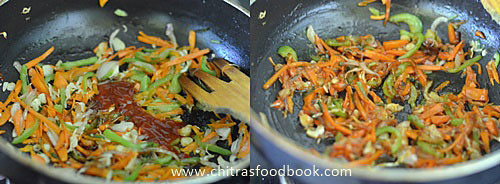
  • Now heat oil in a kadai. Saute garlic and half of spring onions. Add sliced onion, carrot, shredded cabbage, capsicum and saute well. Sprinkle sugar and required salt. Keep tossing the vegetables in high flame till its 3/4 th cooked. Now add the tomato sauce, chilli sauce, soy sauce and vinegar.Keep the flame low and mix well.
Veg hakka noodles
Veg hakka noodles
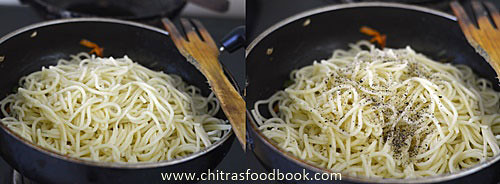
  • Add the cooked noodles and mix well. Add the black pepper powder and mix well.Noodles should be coated well with the sauce. Check for taste. Add more sauce if needed.
Veg hakka noodles
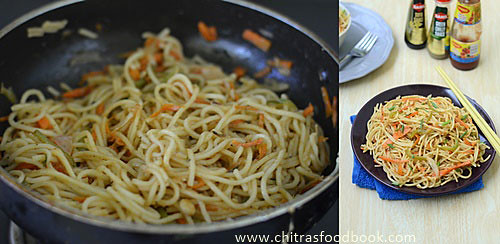
  • Toss the noodles in high flame for few minutes. Remove and serve hot. Enjoy !
Veg hakka noodles


Note
  • Adjust the quantity of sauces as per your taste.
  • You can use white pepper powder instead of black pepper powder.
  • Noodles should be cooked properly. So stay nearby and remove it at the right time.
  • You can add sliced mushroom, Green peas and french beans if you like.

Enjoy yummy Hakka noodles at home along with manchurian as side. Tastes great !!
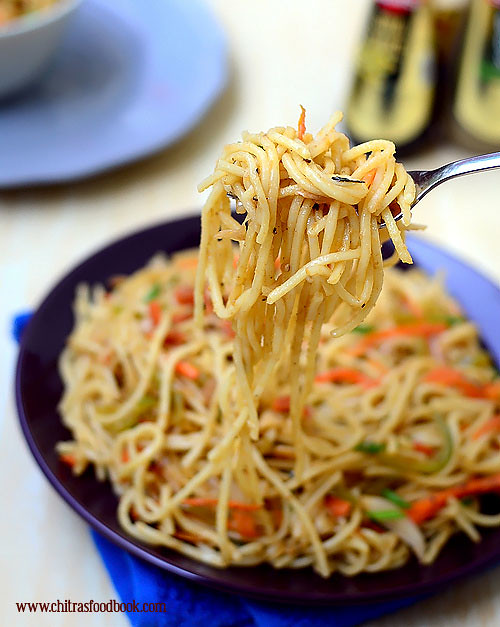
Veg hakka noodles

Continue Reading...


April 8, 2016

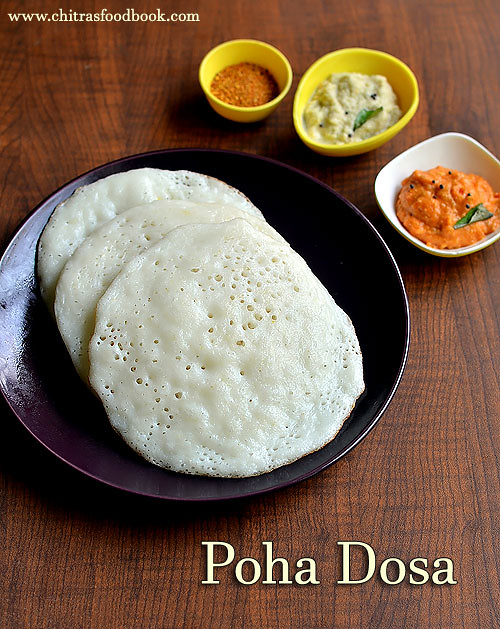
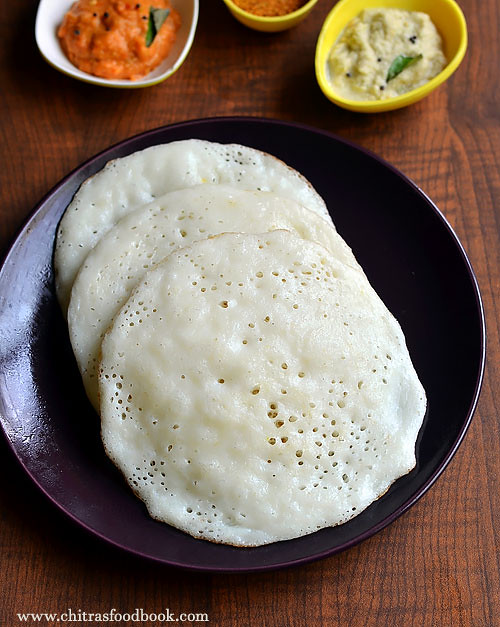
Poha Dosa Recipe | Aval Dosai | Instant Atukula Dosa Recipe

Poha dosa recipe
I have heard about Andhra’s Instant atukula dosa (Atukula Attu in Telugu, Avalakki Dosa in Kannada, Poha Dosa in Hindi, Aval Dosai in Tamil, Flattened rice in English) but I haven’t tried at home. For the first time, I tried this soft and spongy poha dosa yesterday for my in-laws as both of them have tooth problem. It came out super soft and everyone loved it at home with tomato chutney as side dish. 

This dosa batter is made without urad dal and the best part is that the batter doesn’t need over night fermentation. It can be made instantly after grinding. This aval dosai is sure a welcome change from the aval upma. I followed the recipe from Sailu’s blog but I altered the quantity of ingredients and made it without adding cooking soda/ baking soda. This recipe works great for this summer season. I prepared the dosa batter in the afternoon and made the dosa without adding baking soda for dinner. I gave a resting time of 6 hours for the batter. So I have mentioned it as instant poha dosa as I din't ferment the batter overnight. Also you can make this dosa instantly by adding baking soda. 

Do try it for your breakfast or dinner. You will love it and make it very often. Lets see how to make Andhra special South Indian Aval dosa recipe with step by step photos.

Check out my other variants of this dosa

Puffed rice dosa

Sponge Dosa

Set dosa

Also check out my 50 chutney recipes collection and choose any tomato chutney as a side dish for this dosa.
Atukula dosa

Poha dosa/Atukula dosa/Aval dosa recipe


Poha dosa/Atukula dosa/Aval dosa recipe Easy, spongy, no ferment Poha dosa batter recipe - Andhra style atukula dosa
Cuisine: South Indian
Category: Breakfast
Serves: 20
Prep time: 3Hours
Cook time: 10 Minutes
Total time: 3Hours 10Minutes


INGREDIENTS
1 cup = 250ml
  • Idli Rice - 2 cups
  • Thick Poha/Aval - 1 cup
  • Methi seeds - 1/2 tsp
  • Butter milk - 4.5 cups ( use 1 cup sour curd)
  • Salt - as needed
  • Cooking soda / baking soda – 1/4 tsp ( optional, I din’t add)
HOW TO MAKE POHA DOSA - METHOD

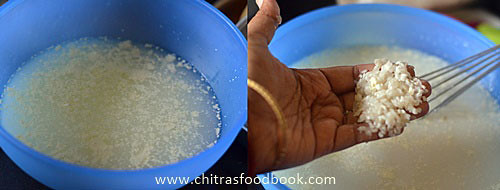
  • Wash the Poha and rice together for 3 times. Whisk 1 cup of sour curd adding 4 cups of water. Soak the rice+poha in buttermilk for 3-4 hours. Add 1/2 cup of more water if Poha absorbs all the buttermilk.( I soaked the rice & aval at 9am in the morning, ground the batter at 1pm in the afternoon and made dosa at 7 pm. So I did not add cooking soda)
Poha dosa
  • Grind the rice and poha using the soaked buttermilk. Add little water only if necessary during grinding. Add the required salt and make a smooth batter. Make sure you grind the batter thick because the batter will become watery when you make the dosa.
Poha dosa
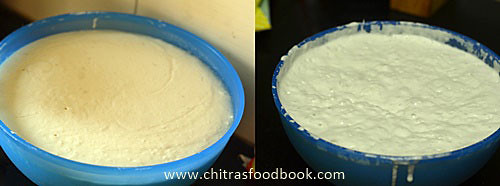
  • Cover the batter and keep it aside for 5-7 hours. If you wish, you can make the dosa immediately adding 1/4 tsp of cooking soda. If you want to make it without cooking soda, ferment the batter for few hours.  If you rest the batter,  it will become sour and rise a bit as well.
Poha dosa
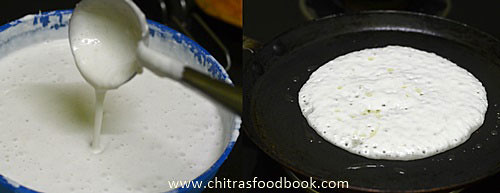
  • Heat a dosa pan and pour a ladleful of batter. Make it thick like uthappam. Drizzle little oil around the dosa and cover the dosa pan with a lid.
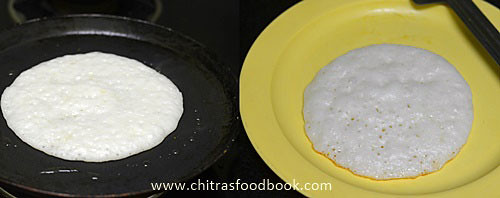
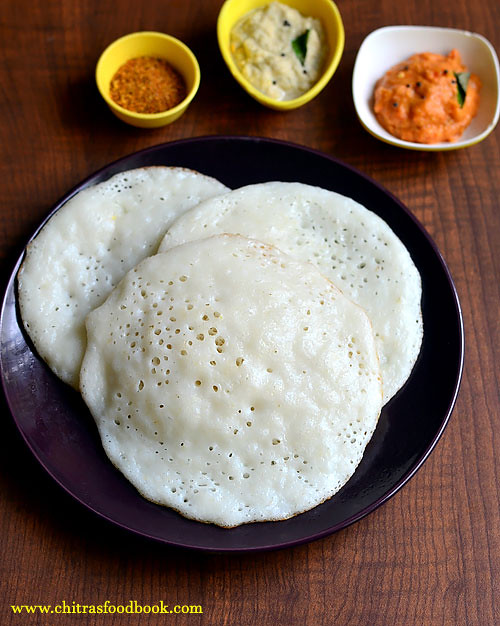
  • Cook in medium flame till the top of dosa cooks well with small holes here and there. No need to flip the dosa. Remove the dosa in a plate and enjoy with tomato chutney. I feel It tastes the best with tomato chutney more than coconut chutney.Its your choice finally.

    Poha dosa
  • Enjoy this soft dosa for breakfast & dinner
NOTE : If you want to make this dosa for breakfast, soak the rice+aval in buttermilk overnight. The next morning, grind the batter. Add cooking soda,mix well and make dosa immediately.

Note
  • Batter will become sour quickly as it is Summer now. During winter season, its better to soak the rice+aval in sour buttermilk overnight and then grind the batter. It helps to get soft dosa with mild sour taste.
  • Adding cooking soda is optional. If the batter tastes and smells sour, you don’t have to add cooking soda. But holes will be less. But If you want to see more holes in the dosa, you can add soda.
  • This dosa batter can be stored in refrigerator and use it later. But softness will be slightly reduced.

Enjoy this soft, spongy dosa for your breakfast or dinner with tomato chutney. Tastes awesome !!
Aval dosa
Continue Reading...


February 11, 2016

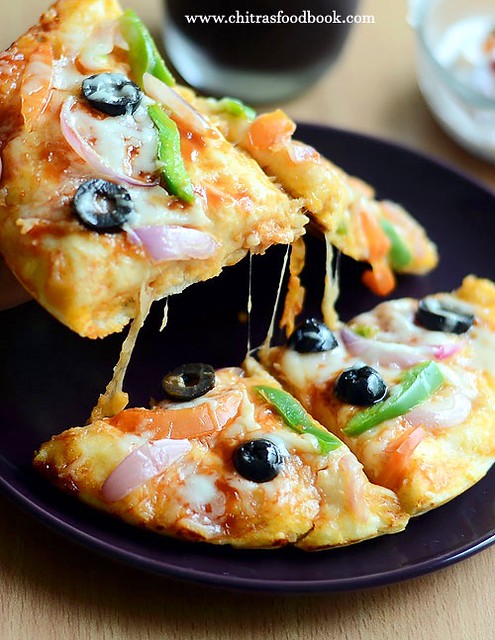
Homemade Stovetop Pizza – No Oven Veg Pizza

stovetop pizza
Making homemade pizza must be the dream for many.Me too not an exceptionBatting Eyelashes.Whenever I order Pizza online from Dominos or Pizza Hut,i used to think “When I am i going to make it on my own???Day dreaming” Of course,I have tried pizza using readymade pizza base and shared a post in my blog years ago.But i was waiting to make a perfect pizza from scratch following a simple recipe.Recently my friend Shalini shared me an easy,no knead,no wait, stovetop pizza recipe(Also known as Tawa pizza/skillet pizza) video in youtube.I was super excited to see the ease and quickness of this recipe and tried it on the same day.I used a simple topping with onions,tomato,olives and capsicum.It was excellent in taste and got a big thumbs up from my family members!! Raksha loved it very much and asked me to make it the next day too.I tried a no yeast stovetop pizza as well.I will try to share that recipe by next week.As Valentine’s day is nearing,i thought this post would be useful for people to cook pizza without oven and treat your familyHappy.You can make the pizza base/crust thick or thin as per your wish.This recipe uses Self rising flour.As a susbtitute you can use maida + baking powder + salt.Check its quantity in ingredients section.I am sure this recipe would surely help you in making a great Veg pizza at home and that too within 20 minutes.You can enjoy it for breakfast,dinner or as an evening snack.Just give a try and share your feedback here,I am waitingggg Winking .Ok, lets check how to make this super easy,quick Tawa Veg pizza on stovetop with step by step pictures.
Continue Reading...


January 25, 2016

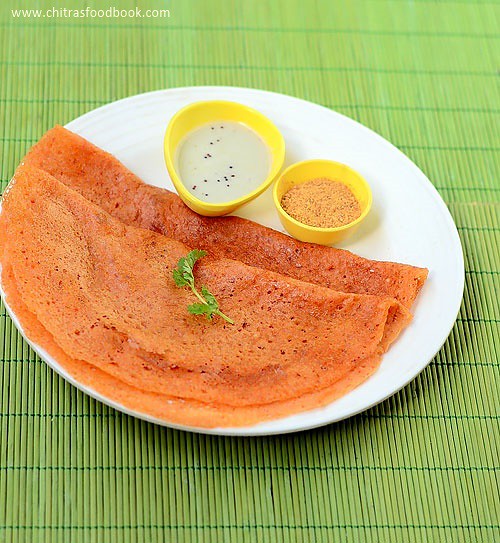
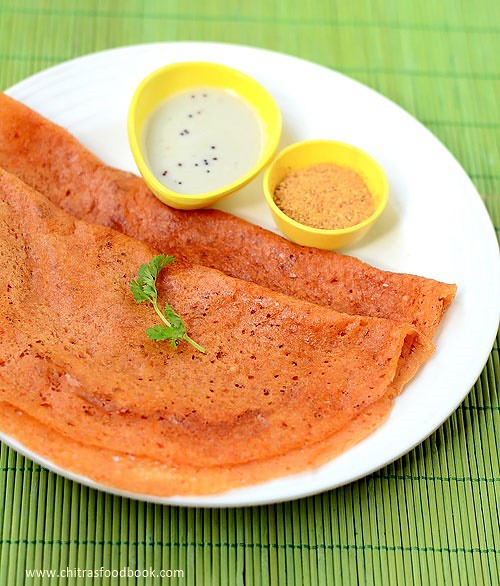
Sorakkai Dosa / Bottle Gourd Dosa Recipe–Sorakkai Recipes

bottle gourd dosa
Usually I make Kootu with Sorakkai (Suraikai, Sorekai in Tamil, Sorakaya in Telugu, Lauki in Hindi, Bottle gourd in English). But this time for a change, I tried dosa with bottle gourd as suggested by my MIL.She usually adds it while grinding rice flour dosa/verum arisi dosa or in paruppu adai to make the dosa very soft. But I added some spices along with rice & bottle gourd to make a spicy, flavorful dosa like adai. 

My friend Shalini used to tell me about her Karam dosa recipe. So I just used those spices for grinding this batter. It came out very well with a nice color as I expected. With coconut chutney as side dish, we loved it a lot. I was very happy that I could make a spicy, yummy, flavorful dosa variety adding a healthy vegetable. 

Friends, if you buy bottle gourd/Sorakkai, don’t forget to try this dosa. You can enjoy it for your breakfast and dinner as well. Ok, lets see how to make bottle gourd dosa with step by step pictures.

Here is my Sorakkai Kootu Recipe – 2 versions,check it out !

Sorakkai dosa

Sorakkai Dosa/Bottle gourd dosa Recipe


Sorakkai Dosa/Bottle gourd dosa Recipe Spicy,soft dosa made of bottle gourd.
Cuisine: Indian
Category: Breakfast
Serves: 15
Prep time: 120 Minutes + 12 hours
Cook time: 5 Minutes
Total time: 125 Minutes
INGREDIENTS
1 cup = 250ml
  • Idli rice - 2 cups
  • Sorakkai/Botlle gourd - 1 cup (chopped)
  • Red chilli - 8 nos ( I used Byadge chilli to get bright red color)
  • Ginger - 2 inch piece
  • Cumin seeds/Jeera - 2 tsp
  • Hing/asafetida - 1/4 tsp
  • Salt & water - as needed
HOW TO MAKE SORAKKAI DOSAI - METHOD

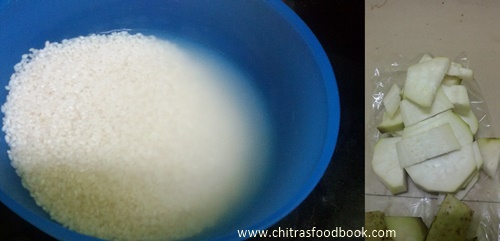
  • Wash and cut the bottle gourd. Scrape the outer skin and discard it. Now slit the bottle gourd into two pieces and remove the central soft, spongy part. Discard it. Chop the remaining bottle gourd into pieces and add to batter.
  • Wash and soak the idli rice for 2 hours. After 2 hours, take the big mixie jar and add the chopped bottle gourd flesh part, red chillies, cumin seeds, hing and ginger piece. Grind it to a smooth paste. Now add the rice draining the soaked water and required salt and water. Grind it to a smooth paste.
  • Transfer the batter to a bowl and let it ferment for 8 hours or over night. The next morning, mix the batter well and add some water if its very thick. Heat dosa pan and pour a ladleful of batter. Spread it thin and drizzle a tsp of oil around the dosa. Cook the dosa in medium flame and flip the other side. Cook for few minutes and remove. Serve hot with coconut chutney.
Sorakkai dosa
    Enjoy !
Note
  • If you don’t want to flip the dosa, cover and cook the dosa for few minutes, fold it and serve.
  • I used byadge chillies to get more color and less spicy taste. Please adjust the quantity of chillies as per your need.
  • If you wish to make this dosa as thick adai adding lentils, soak 1/4 cup of toor dal and 1/4 cup of chana dal with rice and grind the batter.


Enjoy this yummy, colorful, healthy bottle gourd dosa with coconut chutney and Idli podi !!
How to make bottlegourd dosa
Continue Reading...


January 21, 2016

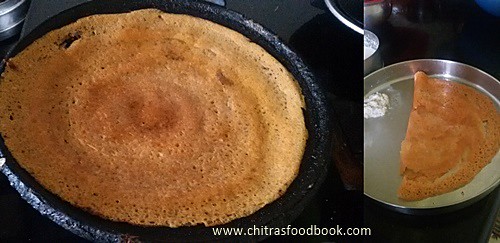
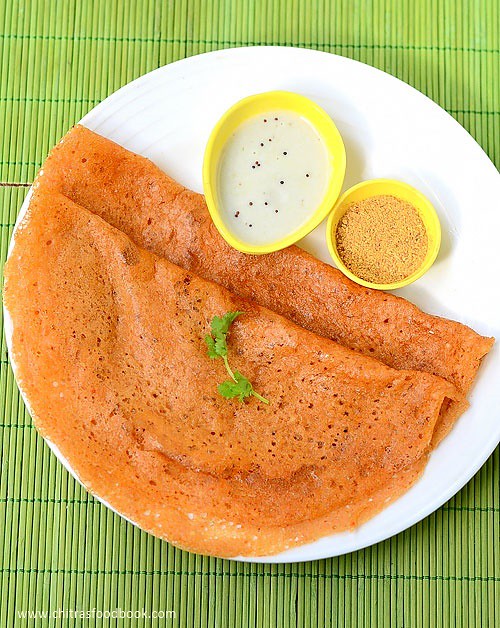
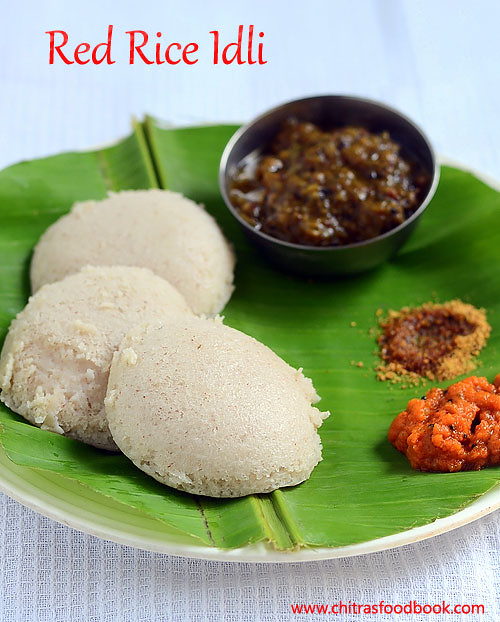
Red Rice Idli Dosa Recipe – Kerala Matta Rice Idli dosa - Healthy Idli Recipes

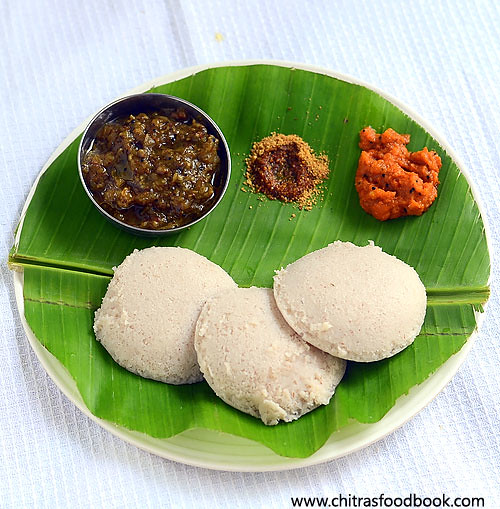
Red rice idli recipe

We all know Red rice has amazing health benefits when compared with our usual white rice. So I always think to include it in my regular diet. Last week I made this healthy red rice (Kerala Rosematta) idli recipe for the first time. I have tried varieties of idli recipes using millets, brown rice, oats and even with barley. 

When I saw 1/2 kg of Kerala red rice in my pantry which I bought for my Onam sadya, red rice idli & dosa flashed in my mind. I browsed through many recipes and watched some youtube video recipes too. Finally I came up with this version. Idli came out super soft and dosa was very flavorful except the color was dull white. I was very happy with the result and including this in my Idli varieties collection.

Sorry, I am not able to post this recipe with stepwise pictures as they got deleted by mistake. Please find the picture of red rice I used in this recipe. Lets see how to make this healthy, soft idli recipe using Kerala Red rice. 

Check out my Idli varities collection HERE


Red rice

Red rice idli,dosa

Red rice idli,dosa recipe


Red rice idli,dosa recipe Red rice idli, dosa recipe - Healthy breakfast ideas
Cuisine: Indian
Category: Breakfast
Serves: 25 
Prep time: 18 Hours
Cook time: 15 Minutes
Total time: 18Hrs15Min


INGREDIENTS
1 cup = 200ml
  • Red rice - 2 cups ( I used Kerala Red Rice)
  • Salem Idli rice - 1/2 cup
  • White round urad dal - 1/2 cup
  • Thick Poha/Aval – 1 tbsp
  • Methi seeds - 1/4 tsp
  • Salt & water - as needed
METHOD
  • Wash and soak Red rice + Idli rice + poha together for 2-3 hours. Wash & soak urad dal + Methi seeds for 2 hours.
  • Grind the soaked urad dal first adding water little by little in regular intervals. I used nearly 1 to 1.25 cups of water. Make a smooth, fluffy batter. Remove in a bowl.
  • Grind the rice to a smooth paste adding required salt & water. Remove the batter and mix with urad dal batter. Use your hands and mix it well.  Allow the batter to ferment for 15 hours or overnight.
  • The next day morning,batter would have raised a bit with sour smell. Batter din’t double for me. Mix the batter well and make idlis. Heat idli pot with water. Grease the idli plate with little oil and pour the batter. Steam the idlis for 10 to 15 minutes till the back of spoon comes out clean. Remove the idlis and serve hot with chutney & sambar.
  • For making dosa, mix the batter well. Add little water if its very thick. Heat dosa pan, pour a ladleful of batter and spread it thin. Drizzle a tsp of oil around the dosa. Cook both the sides and remove. Enjoy !
I served it with  Chidambaram kathirikai gothsu and tomato chutney.

Note
  • Here I have used 5:1 ratio of rice & dal. You can use 4:1 if you use red rice alone.
  • I used a small portion of white rice just for the taste. You can skip it if you wish.

Enjoy this healthy, super soft red rice idli recipe for your breakfast & dinner !!

I served it with  Chidambaram kathirikai gothsu and tomato chutney.

Red rice idli,dosa
Continue Reading...


December 11, 2015

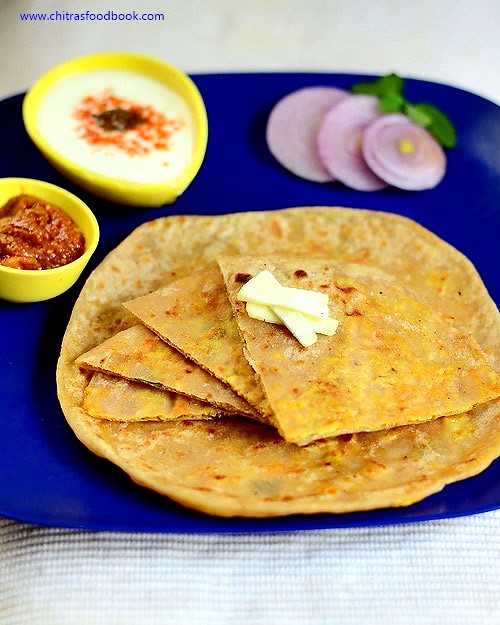
Paneer Paratha Recipe - Stuffed Paratha Recipes

Paneer paratha recipe
Basically I love to try different varieties of paratha recipes at home.I make aloo paratha and mooli paratha most often. But I have not tried paneeer paratha & gobi paratha recipes so far.I have tried many paneer recipes like paneer gravies, korma, Paneer Kheer,  Paneer biryani & even Paneer bonda. But somehow I haven’t tried my hands on the most popular paneer paratha recipe.Yesterday I bought a 200gms block of paneer just to make this stufffed paratha.It was so easy to make and it came out so tasty, flavorful and soft. This paratha would be loved by kids and adults as well. For variations, you can mix some grated cheese along with paneer and make it for kids.Try making this paratha for you lunch or dinner. It tastes yum. Lets see how to make this easy & healthy paneer paratha recipe !

Continue Reading...


November 17, 2015

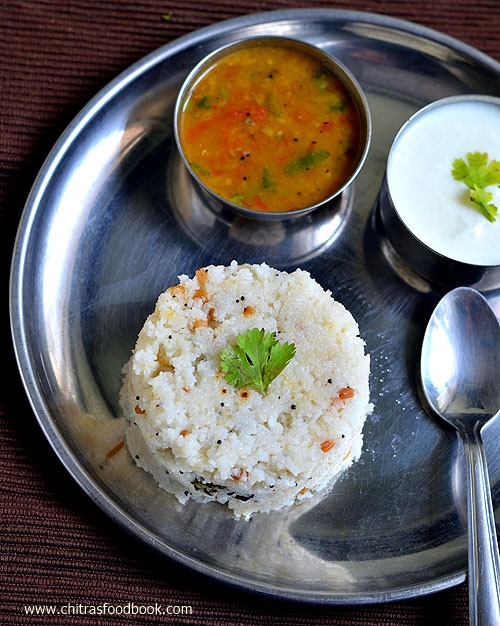
Easy Arisi Upma | Rice Upma Recipe In Pressure Cooker - Fasting Lunch Recipes/Vrat Food

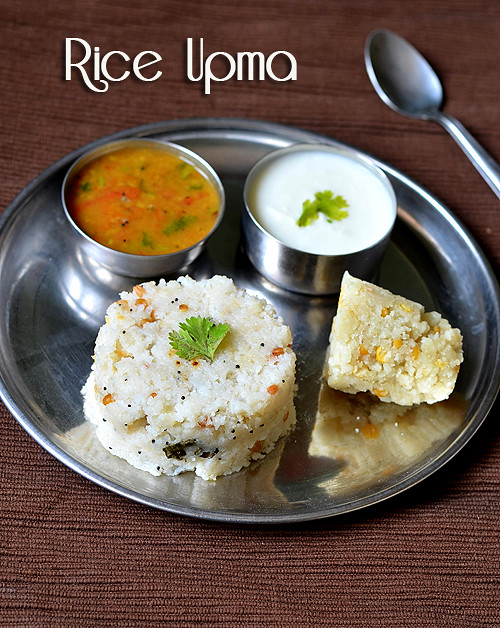
Arisi upma
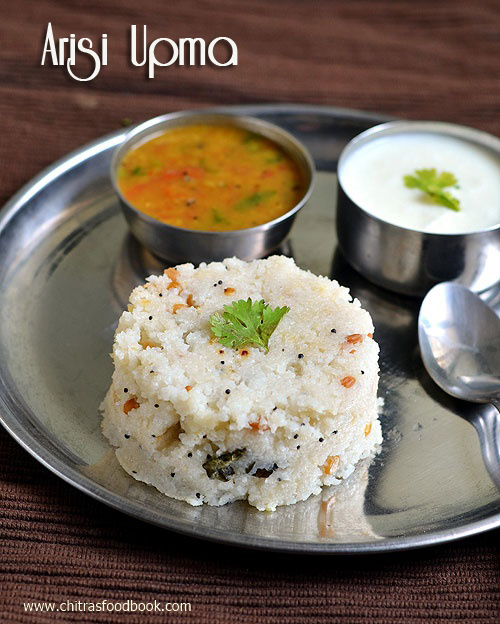
Arisi upma /Rice upma is our family favorite recipe. I learnt this from my MIL.Its one of our traditional recipes in which raw rice & toor dal is soaked in water for 2 hours,ground coarsely and slowly cooked in Vengala paanai/Brass pot with seasoning. It takes nearly 45 minutes to prepare in pot. This upma is also prepared by Iyengars/Iyers. 

Mostly we make this upma for Lunch and sometimes for breakfast or dinner during fasting/Vrat/Vratham days like Maha Shivratri, Ekadesi, Kanda Shasti and Karthigai. Today for Kanda Shasti,  we made this rice upma along with no onion no garlic sambar recipe and sweet puttu for our lunch.You can make some payasam, pongal or some sweet dishes adding jaggery and offer for Neivedyam. Sambar & coconut chutney are the best side dishes for this upma. 

My MIL taught me how to make this upma quickly & easily using pressure cooker without even soaking rice & dal. You can make in instant pot too. So I thought of sharing this simple and easy fasting lunch recipes idea for you all to make your food quickly under 15 minutes on fasting days. If you are allowed to take raw rice on Vrat days, do try this easy upma recipe. You will love it.  Lets see how to make our South Indian breakfast recipe - Rice Upma/Arisi upma easily in a pressure cooker without soaking rice.

I have discussed the traditional method in Notes section. Please have a look at it !

Rice upma

Rice upma recipe/Arisi upma


Rice upma recipe/Arisi upma How to make rice upma recipe for fasting - Vrat food !
Cuisine: Indian
Category: Breakfast/Dinner
Serves: 2
Prep time: 10 Minutes
Cook time: 20 Minutes
Total time: 30 Minutes


INGREDIENTS
1 cup - 240ml
  • Raw rice/Pacha arisi - 1 cup
  • Toor dal - 1.5 tbsp
  • Salt - as needed
  • Water - 2.25 cups
  • Pepper corns - 1/2 tsp  ( crushed powder)
To temper
  • Cooking oil - 2 tbsp
  • Mustard seeds - 1/2 tsp
  • Urad dal -1 tsp
  • Chana dal - 2 tsp
  • Red chillies - 2nos
  • Ginger - 1 inch piece( finely chopped)
  • Curry leaves - few
  • Asafetida/Hing - 1/8tsp
Click HERE for Sambar Recipe ( Omit onions)
METHOD
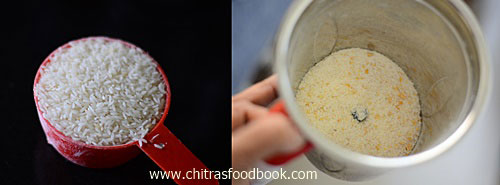
  • Take raw rice & toor dal in a big mixie jar and grind it coarsely like rava. Remove in a bowl. Wash well, drain the water and set aside. If you are using small sized jar, grind in batches. Crush the pepper and set aside.
Arisi upma recipe
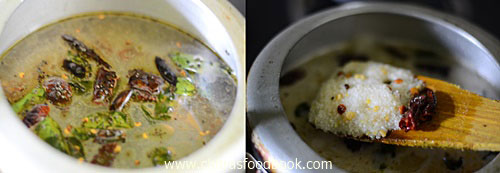
  • Heat a cooker base with oil and temper mustard seeds, urad dal and chana dal. Saute until dals turn golden brown. Now add the pinched red chillies, ginger, curry leaves and hing. Saute for a while. Add water and required salt.
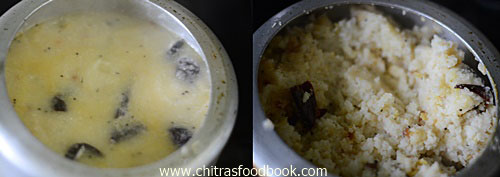
  • When the water comes to a roll boil, add the ground rice+dal. Keep mixing in high flame till 80% of the water is absorbed by the rice. Close the cooker and put the weight valve. Cook in low flame for one whistle. It will take 10-15 minutes based on the size of cooker.
    Arisi upma

  • Open the cooker after the steam is released. Add the crushed pepper powder. Mix well and serve hot with sambar or chutney ! This upma looks mushy when hot but it will separate as it cools down.
Arisi upma
Note
  • Traditionally rice & dal should be washed & soaked for 2 hours. Then it should be spreaded in a towel or paper for 10 minutes. It should be ground coarsely in batches. By doing this way, you get really soft upma. But the method I have suggested saves time and this upma can be done quickly.So its finally your choice of making it : ))
  • You can replace red chillies by green chillies too.
  • You can make the same upma using broken rice/Noi.

Enjoy this traditional, easy rice upma recipe for your breakfast or dinner with sambar or Chutney !
Arisi upma recipe

Continue Reading...


July 10, 2015

Iyengar Bakery Bread Toast - Bangalore Style Masala Vegetable Sandwich Recipe

Iyengar bakery bread toast
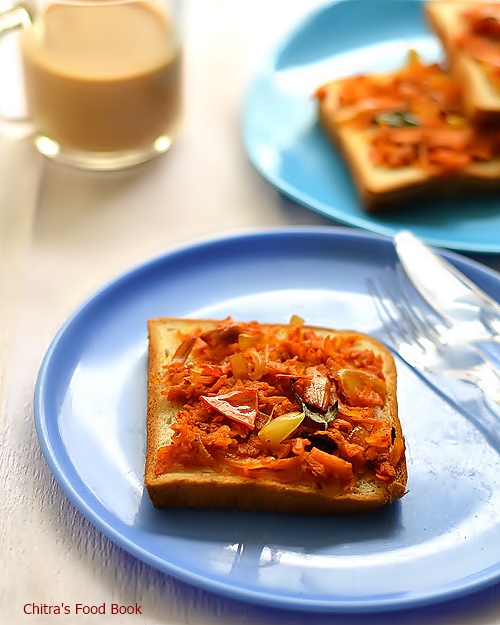
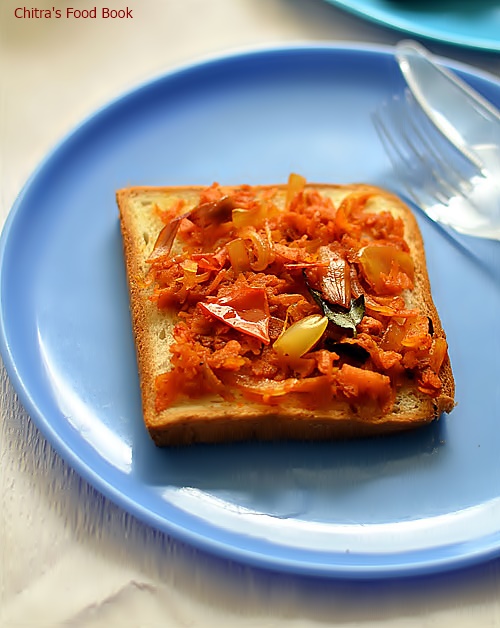
 Iyengar Bakery’s masala vegetable bread toast also known as open sandwich is very popular in Bangalore. I have tasted this many times but never thought of sharing this simple and easy bread recipe here.You can call this as “Indian Bruschetta”, hehe. Yesterday I bought a pair of toast from the bakery and relished it with tea. I got tempted to make it at home. This morning I made it for Raksha and Sendhil’s lunch box. Yes, this sandwich tastes good even if it cools down. The spicy vegetable masala used here is a very simple one with onion,tomato and grated carrot. So no kid would say NO to this combo. I have made it as an open sandwich. You can even grill this sandwich recipe.I am sure it would taste great in all the ways. Last year I shared Iyengar bakery style benne biscuit recipe which is super hit in my blog. I am happy to share yet another Iyengar Bakery style recipe in my blog. I have made this sandwich with milk bread.You can also replace it with whole wheat bread.I hope you will try this recipe and like it. Lets see how to prepare this yummy and easy bread sandwich recipe.

Iyengar bakery vegetable masala toast

Iyengar Bakery Bread Toast Recipe


Iyengar Bakery Bread Toast Recipe Masala vegetable toast - Iyengar Bakery Style Recipe
Cuisine: Indian
Category: Snacks
Serves: Serves 3
Prep time: 10 Minutes
Cook time: 20 Minutes
Total time: 30 Minutes


INGREDIENTS

  • Bread slices - 5 no
  • Carrot - 1 big
  • Big onions - 2 nos
  • Tomato - 1 no
  • Green chilli – 1 no
  • Capsicum - 2 tbsp ( chopped)
  • Curry leaves - few
  • Grated cabbage - a fistful ( optional)
  • Turmeric powder - 1/8 tsp
  • Cumin powder – 1/4 tsp
  • Red chilli powder - 1/2 tsp
  • Garam masala powder - 1/2 tsp
  • Tomato ketchup / sauce - 1 tbsp
  • Salt - as needed
  • Cooking oil - 2 tbsp
  • Cumin seeds - 1/2 tsp
  • Ghee or oil - to toast the bread
HOW TO MAKE IYENGAR BAKERY MASALA TOAST - METHOD
  • Wash and grate the carrot using a grater.Slice the onions and chop the tomatoes. Chop & slit the green chilli. Set aside.
  • Heat oil in a kadai, splutter cumin seeds and saute the onions,green chillies, capsicum, curry leaves, grated carrot together. Lastly add the tomato pieces and mix well till it starts to turn mushy.
Iyengar bakery bread sandwich

  • Add salt, turmeric powder, chilli powder, cumin powder, garam masala powder, tomato sauce and mix well.
Iyengar bakery bread toast
  • Heat a dosa pan and toast the bread slices by adding oil or ghee. Apply the masala on one side.Serve hot !
Iyengar bakery bread toast

Enjoy !
Note
  • Adding grated cabbage is optional. If you don’t want to add onions, you can use cabbage in place of it.
  • I used more carrot for my daughter’s sake. But in Iyengar bakery original recipe,they had used more onions than carrot. So change the quantity of ingredient as per your liking.
  • You can replace garam masala powder by chat masala powder.

Enjoy this easy sandwich for your tea time !
Iyengar bakery vegetable masala toast


Continue Reading...