Search Chitra's Food Book

Showing posts with label HOLI RECIPES. Show all posts

September 15, 2020

Rabri Recipe - How To Make Rabdi Without Condensed Milk

Making traditional rabdi/ rabri at home without condensed milk and khoya was in my long time pending list. Rabdi is basically a North Indian special dessert recipe prepared by boiling and reducing the milk till thick by collecting the malai(skin of milk). Its also known as lachha rabdi in Hindi.

Last year, when I prepared instant Malpua, I tried instant rabdi recipe with condensed milk in microwave. It was so quick and easy. After that, I prepared this traditional method of making rabdi for Krishna jayanthi to post under North Indian Krishna Janmashtami special recipes. Though this traditional rabdi is a time consuming process, the end result makes you forget the pain.

I have always thought rabdi and South Indian special dessert basundi are the same. But after preparing this rabri from scratch, I found there are some differences between rabdi and basundi in consistency, taste and method of preparation. Rabri is thicker than basundi. You can enjoy it warm or serve it chilled. You can enjoy eating as such or with malpua, jalebi, shahi tukda or even with gulab jamun. Tastes so good !

Ok friends, lets see how to make rabdi / rabri at home with step by step pictures and video.


Rabdi Recipe - How to make Rabri for malpua


Rabdi Recipe - How to make Rabri for malpua

Rabdi Recipe - How to make Rabri for malpua at home


Cuisine: North Indian
Category: Sweet
Serves: 2
Prep time: 5 Minutes
Cook time: 20 Minutes
Total time: 25 Minutes


INGREDIENTS
1 cup = 250ml
  • Full cream Milk - 1/2 liter ( 2 cups)
  • Sugar – 1.5 to 2 tbsp (adjust)
  • Chopped cashews, almond, pista - a handful
  • Saffron threads - few
  • Cardamom powder - 1/4 tsp
  • Rose water - few drops
HOW TO MAKE RABDI / TRADITIONAL RABRI RECIPE
  1. Pour the full cream milk in a kadai.
  2. While the milk boils, keep collecting the malai/ cream/skin that forms on top.
  3. Bring the cream to the sides of kadai and collect it.
  4. Add sugar, saffron and cardamom powder once the milk is reduced to 1/3rd.
  5. Boil for few more minutes till its reduced to 1/4th of its quantity. Switch off the flame.
  6. Scrape the malai from sides of kadai and mix with the milk.
  7. Remove and add rose water, garnish with chopped nuts.
  8. Serve warm or chilled with Malpua, Gulab jamun, Shahi tukda, Jalebi !
METHOD - STEP BY STEP PICTURES
  • Pour the thick, full fat milk in a wide based kadai. Boil well. When the milk starts to rise, lower the flame and let it boil. Keep a wooden ladle over the kadai diagonally. It helps to prevent spilling of milk when it boils in medium flame. While it boils, cream/skin forms on top of milk which is called as malai in Hindi / paalaadai in Tamil . Keep the flame low to medium.

  • Use a ladle or spoon and move the cream to the sides of kadai. Repeat the same and collect it in the sides of kadai. Do not stir the milk continuously because malai won’t form on top. So boil the milk patiently in low to medium flame such that malai keeps forming on top. But don’t forget to stir the milk occasionally till the bottom of kadai because there are chances of milk getting burnt in the bottom.
    rabdi recipe
  • Collect the malai and deposit in the side of kadai. Milk boils and reduce in quantity. In the mean time, you can chop the nuts and set aside. Once it is reduced to 1/3rd of its quantity, add sugar, saffron threads, cardamom powder.
    rabdi recipe
  • Mix well and boil till the sugar melts. Milk turns slightly yellow in color. When the milk is reduced to 1/4th of its quantity, switch off the flame. Scrape the malai from the sides of kadai and add to the milk. Mix well and serve. Rabri thickens as it cools down. So switch off at the right stage. Make sure its not thick.
    rabdi recipe
  • Lastly add few drops of rose water and chopped nuts.(I din't blanch the badam. I used it with skin). Mix well and serve warm or chilled by refrigerating it for an hour. You can serve and consume as such or serve with rabri with malpua, gulab jamun, jalebi, Imarti or with shahi tukda. Enjoy !

Note

  • Do not stir the milk continuously or often because it prevents the formation of cream on top of milk.
  • Don’t forget to stir the milk occasionally otherwise milk gets burnt in the bottom of pan.
  • Adjust the quantity of sugar as per your taste buds.
  • Do not skip rose water or use kewra essence for a nice and unique flavor to rabdi.
  • Do not make it too thick because rabri thickens as it cools down. So switch off the flame when its slightly thin in consistency. Adding malai makes it thick.
  • I din't blanch / peel the skin of almonds/ badam. If you wish, you can do it by soaking in hot water for 30 minutes.

Try this traditional Rabdi recipe at home and enjoy !


Continue Reading...


October 26, 2018

Shakkarpara Recipe With Wheat Flour–Wheat Flour Shankarpali Recipe

shakkarpara recipe with wheat flour
Shakkarpara/ Shankarpali is a most popular North Indian style deep fried snacks recipe prepared during Diwali and Holi festivals. It is popular in Gujarat and Maharashtra. It tastes mildly sweet and is served as a teatime snack. In South India, it is known as sweet maida biscuit. It is usually added in South Indian mixture. I have already shared that recipe HERE. Traditionally shakkarpara is prepared using maida, sugar, ghee and milk or water.

 Today I have shared shankarpali recipe using wheat flour/ atta. I watched few YouTube video recipes and came up with this version. As I wished,  it came out really well. It was super crunchy and mildly sweet in taste. Sendhil and Raksha loved it very much. They started munching even before it cooled down completely. I was very happy that my first recipe for Diwali and it was a big hit with my family.

 There was no big difference in the ingredients and taste of maida Shakkarpara and wheat flour Shakkarpara. Only thing is the color of wheat flour shankarpali is darker than maida ones. People who are looking for snacks and sweets using wheat flour must give this a try. You will love it for sure. For healthier options, you can also use jaggery instead of sugar and bake them instead of frying in oil. Ok, lets see how to make Shakkar para with wheat flour.

Check out my sweet maida biscuits and spicy diamond cuts too.

 
Shankarpali with wheat flour

Shakkarpara Recipe Using wheat flour - Wheat flour shankarpali


Shakkarpara Recipe Using wheat flour - Wheat flour shankarpali

Shakkarpara Recipe Using wheat flour - Wheat flour shankarpali


Cuisine: North Indian
Category: Sweet
Serves: 1 cup
Prep time: 10 Minutes
Cook time: 20 Minutes
Total time: 30 Minutes


INGREDIENTS

1 cup = 250 ml
  • Wheat flour / Atta - 1 cup
  • Semolina / Sooji / Rava - 1 tbsp ( fine or coarse)
  • Melted ghee - 2 tbsp
  • Sugar - 1/4 cup
  • Water - 1/4 cup (adjust upto 1/3 cup)
  • Cardamom powder - 1/2 tsp
  • Cooking oil - to deep fry

HOW TO MAKE SHAKKARPARA WITH WHEAT FLOUR

  1. To make Shakkarpara, heat sugar and water in a kadai.
  2. After the sugar is melted, switch off the flame.
  3. Add ghee, cardamom powder and set aside to cool.
  4. Add wheat flour, sooji, a pinch of salt and make a non-sticky dough.
  5. Roll to a thick chapathi and cut into squares.
  6. Heat oil to deep fry. Drop a batch of Shakkarpara and deep fry till golden in medium flame.
  7. After the bubbles cease, remove the Shakkarpara and cool down to become crunchy.
  8. Store in a box and enjoy for a week.

SHAKKARPARA WITH WHEAT FLOUR - STEP BY STEP PICTURES

  • In a kadai, take sugar and add water, ghee. Heat and melt the sugar. No need to bring any consistency. Switch off the flame. Add cardamom powder. Mix well.
  • Shakkarpara with wheat flour
  • Let the sugar water cool down completely. Add wheat flour, semolina / sooji, a pinch of salt and mix well.
  • Shakkarpara with wheat flour
  • Knead to a smooth, non sticky dough. Roll into thick 1 inch chapathi and trim the cracked edges. Cut into small squares using a knife or a pizza cutter.

  • Finish the entire dough by making shapes. Collect them in a bowl.
  • Shakkarpara with wheat flour
  • Heat oil to deep fry. Drop a pinch of dough. If it rises to the top immediately, oil temperature is correct.  Fry the Shakkarpara in batches in low to medium flame till bubbles cease completely. As soon as you put the shakkarpara in oil, do not disturb it for a minute. It will break it you touch it now. Let it cook in low flame. Then flip and toss it gently. Toss it whenever needed for uniform color.
  • Shakkarpara with wheat flour
  • Color of wheat flour shankarpali would be darker than maida ones. So do not panic. Try to cook in low flame patiently by tossing it regularly. It helps to get nice golden color as shown in the pictures. But remember to remove them only after the bubbles cease. Remove them in a tissue paper. It tastes soft when hot. But it becomes crunchy once it cools down completely.
  • Deep fry all the Shakkarpara in batches. Cool down and store in a box. It stays good for one week to 10 days. Enjoy !
Note

  • You can add sugar and water up to 1/3 cup based on the quality of wheat flour because some flour takes more water while kneading the dough.
  • Deep fry shakkarpara only in low to medium flame else the outer layer darkens soon without cooking inside. So the next day it will become soggy and soft.
  • Similarly deep fry all the batches properly. Even if one batch is not fried well, it will spoil the entire sweet. So please fry them patiently.

Try this yummy shakkarpara with wheat flour, you will love it !
wheat flour shakkarpara


Continue Reading...


February 27, 2018

Mawa Malpua Recipe | Instant Malpua Recipe Step By Step

Mawa malpua recipe

Mawa malpua recipe with step by step pictures / Instant malpua recipe. Holi festival is around the corner. Most of the North Indians make Malpua / malpura, Gujiya and Thandai for Holi celebration. Malpua is basically a pancake kind of dessert recipe that is deep fried in ghee and dunked in sugar syrup ( Chasni). It is usually served with rabri / Rabdi. Malpua is a most popular street food in Rajasthan, Bihar, West Bengal, Maharashtra and Odisha. Each recipe has its own variations. Authentic malpua recipe calls for maida, semolina / suji, milk and yogurt.Its batter is allowed to ferment for few hours before deep frying in ghee/ oil.

 In some places, its batter is prepared by adding fruits like banana, mango or pineapple and even coconut. In Odisha, Malpua fritters are dipped in sugar syrup (chasni) after they are fried. The Bihari version of this dish has sugar added to the batter prior to frying.  Today I have shared a simplified version of malpua recipe by using khoya / mawa. 

I followed this Instant, mawa malpua recipe from Sailu’s food twice successfully. I am sure even a beginner can try it and get perfect results if you follow this recipe and method carefully. For variations, condensed milk or milk powder can also be used in place of khoya. Friends, do try this easy, yummy malpua recipe for this Holi festival and have a colorful celebration.

Do check out my Gujiya and Thandai recipe, Homemade thandai masala powder too.

Malpua recipe

Mawa malpua recipe - Instant malpua recipe


Mawa malpua recipe - Instant malpua recipe

How to make malpua recipe with khoya.


Cuisine: North Indian
Category: Dessert
Serves: 10 
Prep time: 10 Minutes
Cook time: 10 Minutes
Total time: 20 Minutes


INGREDIENTS

1 cup = 250ml
  • Maida / All purpose flour - 1/2 cup
  • Sugarless Khoya / Mawa - 1/4 cup
  • Warm milk - 3/4 cup + 2 tbsp
  • Crushed fennel seeds - 1/2 tsp
  • Sugar - 1/2 tbsp
  • Salt – small pinch
  • Cooking oil or ghee – To deep fry malpua ( use flavorless oil)
For Sugar Syrup
  • Sugar – 1/2 cup
  • Water – 1/2 cup
  • Saffron threads – Few
  • Cardamom powder – 1/4 tsp
  • Chopped nuts (Cashews, Pista) – To garnish
  • HOW TO MAKE MALPUA - METHOD

    1. To make malpua batter, take crumbled khoya in a bowl. Add 1/2 cup warm milk.
    2. Whisk without lumps. Add maida, fennel seeds, sugar and salt.
    3. Mix without lumps and make a smooth batter.Set aside for 15 minutes.
    4. Make sugar syrup by boiling for few minutes. Add cardamom powder, saffron threads.
    5. Heat oil or ghee to deep fry malpua. Cook both sides till golden. Remove and dunk in sugar syrup. Soak for 2 minutes by flipping it once.
    6. Arrange in a plate and garnish with chopped nuts. Top with rabri if you wish and serve immediately for best taste.

    METHOD - STEP BY STEP PICTURES

    • In a wide bowl, take 1/4 cup of crumbled or grated khoya. Add 1/2 cup warm milk. Whisk to make it smooth.
      How to make malpua recipe
    • To this, add maida, fennel seeds, a small pinch of salt, sugar and mix well using a whisk. Add the remaining milk and make a smooth, lump free batter.
      How to make malpua recipe
    • Consistency of batter should be neither too thick nor too thin. It should fall like a thin ribbon. Remember thick batter gives thick and bulgy malpua.You should press it with two ladles while draining from the oil. Similarly if the batter is too thin, malpua may disperse in oil with lots of  big holes in it. So batter should be slightly thin and right in consistency. After you make the first malpua, check for the result and based on its texture you can add more milk if needed to make the batter thin. If the batter became too thin, add little maida to bring the right consistency.
      How to make malpua recipe
    • Rest the batter for 10 to 15 minutes. In the mean time, you can make sugar syrup. In a wide or deep kadai, take sugar and water. Mix well and boil for 3 to 5 minutes in low flame or till the sugar syrup becomes slightly sticky like gulab jamun syrup.  No need of bringing to one string or two string consistency. Just sticky and thin syrup is enough.
      How to make malpua recipe
    • Heat oil or ghee in a flat bottomed kadai or pan. I used refined oil. Oil should be just 1inch in height ( like frying jalebi). Do not use more oil. Malpua may bulge and puff up if the oil is more.To make flat malpua, oil should be less. If malpua puffs up in oil, use two ladles, press it well while removing it from oil. This helps to make the malpua flat and drain the excess oil too.
      How to make malpua recipe
    • Add a drop of batter to the oil. If it rises to the top immediately, oil temperature is just right. Simmer the flame to low to medium and pour one small ladleful of batter to the oil. Malpua spreads by itself and cooks in oil. Splash some oil on the top if needed. Flip it as soon as the edges become golden brown in color. Cook the other side for a minute and remove from the oil. Drain the oil completely.  You can deep fry one by one or 2 to 3 based on the size of pan.
      How to make malpua recipe
    • Add the cooked malpua to the sugar syrup immediately. Soak for 2 to 3 minutes. Flip it and soak both the sides. Similarly add all the fried malpua based on the size of sugar syrup bowl. Remove after 2 to 3 minutes by draining the excess sugar syrup.  Deep fry the remaining malpuas, soak in syrup. Arrange in a plate and garnish with chopped nuts. Serve immediately or warm to enjoy its best taste. You can also top it with rabri and serve it rich !
      How to make malpua recipe
      Enjoy !
    Note

    • Malpua batter should be in right consistency.
    • Its better to use flat pan for deep frying. 
    • Sugar syrup should be just slightly sticky.
    Try this easy, yummy Malpua for the Holi and enjoy the festival !
    How to make malpua recipe

    Continue Reading...


    March 21, 2017

    Easy Beetroot Halwa Recipe In Pressure Cooker

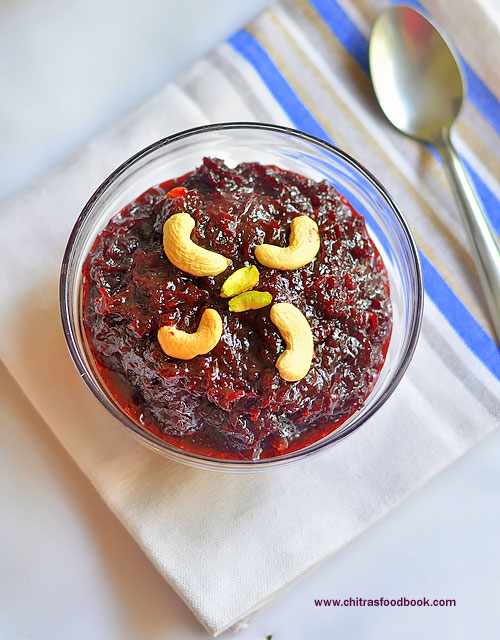
    Beetroot halwa recipe in pressure cooker
    Every Thursday and Friday , I perform Guru Pooja and Mahalakshmi Pooja at home. Usually I make Payasam/Kheer or sweet pongal for neivedyam/Prashad. As I am bored of making the same, I am trying out easy sweets recipes like burfi, halwa for every week pooja. Check out my earlier posts suji ka halwa, atta halwa, bread halwa and carrot halwa.  

    Last week Thursday, I prepared this beetroot halwa for the first time following my carrot halwa recipe using pressure cooker. As I did not have Khoya/mawa or condensed milk in hand, I just used milk and sugar. It came out really well. This halwa takes less ghee and sugar unlike other halwa recipes. Still it tasted rich, looked colorful and shiny. Sendhil & Raksha loved it a lot. I am sure kids would love to taste this halwa just by seeing its color. 

    Overall its a healthy and nice alternative from the carrot halwa/ Gajar halwa. But remember to add the right amount of ingredients mentioned in the recipe. Adding more sugar makes the halwa hard like burfi. Stirring the halwa for long time makes it chewy. This halwa thickens as it cools down. Keep these points in mind and start making it. You can make a perfect beetroot halwa ! 

    Beetroot halwa stays good for a week when refrigerated. You can serve it chilled or reheat for few seconds in a microwave oven or a kadai with little ghee to serve it warm. It tastes really great when served warm with a scoop of ice cream. Now lets see how to make this yummy, easy, colorful , healthy, Indian dessert recipe –Beetroot halwa with step by step photos and a video !


    Easy beetroot halwa recipe

    Beetroot halwa recipe in a pressure cooker


    Beetroot halwa recipe in a pressure cooker How to make beetroot halwa in a pressure cooker just by using milk and sugar !
    Cuisine: Indian
    Category: Sweet
    Serves: 4
    Prep time: 5 Minutes
    Cook time: 20 Minutes
    Total time: 25 Minutes


    INGREDIENTS
    1 cup - 250ml
    • Grated beetroot - 3 cups
    • Sugar - 3/4 cup ( Reduce 2 tbsp for less sweet)
    • Ghee - 3 tbsp
    • Boiled milk - 1. 5 cups
    • Cashew nuts – 5 nos
    • Cardamom powder - 1 tsp
    HOW TO MAKE BEETROOT HALWA IN PRESSURE COOKER - METHOD

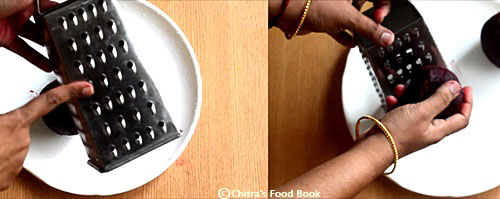
    • Wash 2 big sized beetroot, slice the top and bottom portion and peel its skin using a peeler. Grate it using a big holed grater. If we use small holed grater, beetroot becomes mushy after cooking and resembles jam. So I always prefer big sized holes for grating. Measure it after grating and keep 3 cups ( loosely packed) aside !
      Easy beetroot halwa recipe in pressure cooker
      Easy beetroot halwa recipe in pressure cooker
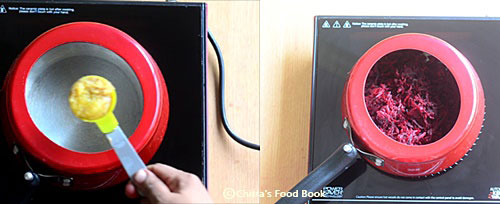
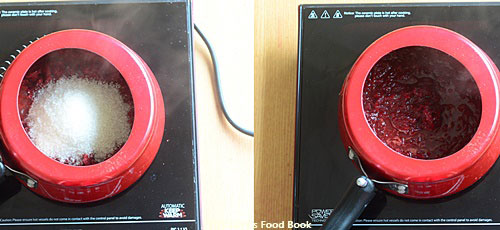
    • In a pressure cooker base, heat 1.5 tbsp of ghee. Add the grated beetroot and saute till its raw smell goes off completely & beetroot turns pale in color. It takes 7 to 10 minutes.
      Easy beetroot halwa recipe in pressure cooker
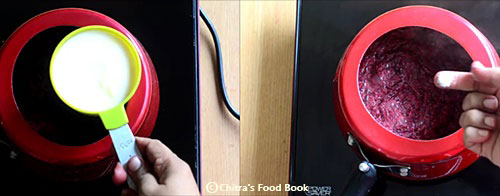
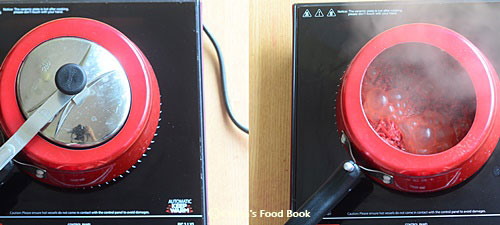
    • Now add the boiled milk( at room temperature) and add a small pinch of salt. Addition of salt helps to enhance the sweetness of halwa. Mix well and pressure cook in very low flame for 3-4 whistles. It takes nearly 15 minutes. Open the cooker after the steam is released.
      Easy beetroot halwa recipe in pressure cooker
    • Boil till 3/4th of the excess milk gets absorbed by the halwa.When the halwa starts to become thick, add sugar. Mix well till sugar melts. The mixture will become watery. Keep mixing in medium to high flame till the halwa starts to leaves the sides and bottom of cooker. Stay nearby and keep mixing else halwa may burn in the bottom. This process takes more than 20 minutes in medium flame.
       Easy beetroot halwa recipe in pressure cooker
    • When the halwa becomes thick, glossy and leave the sides of cooker, reduce the flame to low and keep mixing for one minute. Halwa leaves the pan completely and gathers in the center. Switch off the flame and remove the cooker from the stove. It looks moist now. Let the halwa be in cooker for few minutes.In the mean time, roast the cashews.
      Easy beetroot halwa recipe in pressure cooker
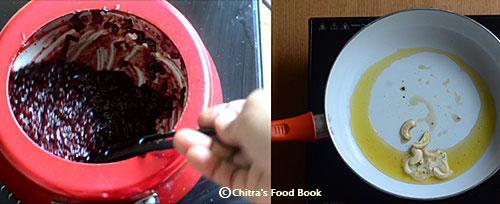
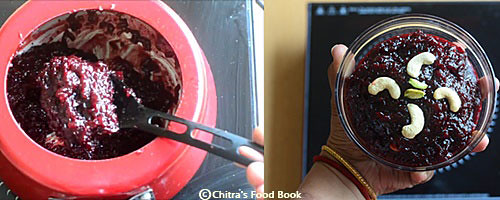
    • Heat the remaining 1.5 tbsp. ghee in a kadai and roast the cashew nuts till golden. Add it to the halwa in the cooker. Mix well and transfer the halwa to another bowl. Halwa looks slightly moist and sticky when hot.  As it cools down, it becomes thick and set well. Original taste and sweetness of this halwa can be known only after it becomes warm. If you want more sweetness, heat halwa & sugar in a kadai and Consume after it becomes warm. You can even refrigerate the halwa for an hour to serve chilled ! Beetroot halwa recipe
      • I like to have it warm with a scoop of ice cream! Tastes yummy !!!


    Note


    • This halwa stays good for one day without refrigeration.But it stays good for 3-4 days if stored in an air tight box in a refrigerator. Use clean spoon for handling !
    • Reduce the quantity of sugar if the beetroot is too sweet. But do not add more sugar than the mentioned quantity. Halwa may become hard like a burfi after mixing.
    • Mix the halwa till it becomes thick and leaves the sides of pan. It will thicken as it cools down.
    • Adding cardamom powder helps to give a nice flavor. Do not avoid it.
    • If you want to add condensed milk, reduce the quantity of sugar or skip it completely.
    • You can add sugarless khoya at the end, mix well and remove the halwa. It makes the halwa more rich in taste !

    Try this easy, yummy beetroot halwa for festivals and occasions. You will love it !
    Easy beetroot halwa recipe in pressure cooker
    Continue Reading...


    March 10, 2017

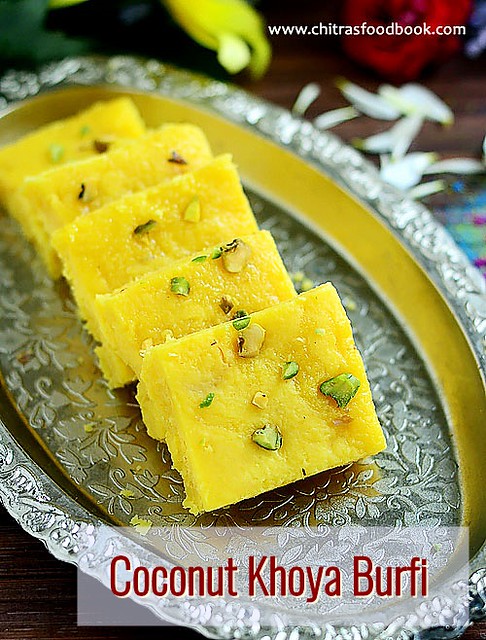
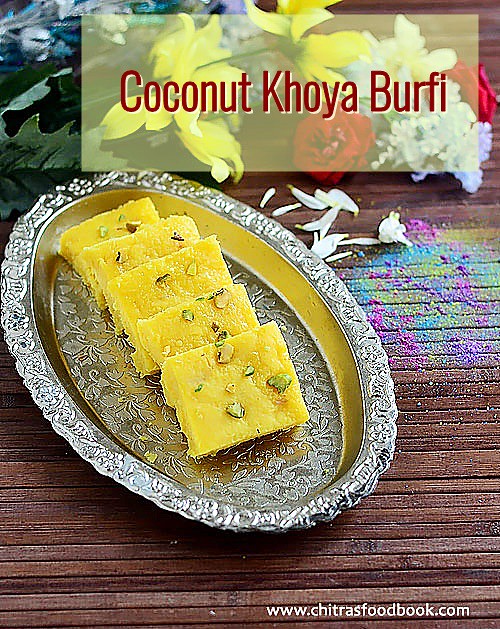
    Coconut Khoya Burfi Recipe – Nariyal Ki Barfi With Khoya

    Coconut burfi recipe with khoya
    I must thank my reader friend Harini for requesting me to try Chennai Ganga sweets shop style coconut burfi with khoya ( Thengai burfi in Tamil, Nariyal Ki burfi in Hindi). When she told me, I had no clue about its taste and texture. Recently I bought that coconut burfi from Ganga sweets during my Chennai trip. When I tasted it, I found the barfi is made with coconut and khoya. I browsed for the recipe and tried it by watching Dr.Shalini’s YouTube video. Even though its my first attempt, I am quiet happy with the results.I won’t say it came out 100% close to the sweet shop ones but it tasted similar. 

    Usually South Indian coconut burfi is made by cooking freshly scraped coconut in sugar syrup of one string consistency. But this coconut burfi with khoya is prepared by cooking khoya/mawa, desiccated coconut, sugar and water together till it reaches the burfi consistency. You don’t have to check for one string sugar syrup. But this burfi takes long time to cook and set as it has khoya in it. 

    I have not used milk, milk powder or condensed milk in this recipe as I had used yellow food color to resemble the sweet shop burfi. If you want to make white colored coconut burfi, use milk instead of water. I am happy that I could try this North Indian style nariyal ki burfi successfully at home. I am sharing this colorful recipe as my contribution for Holi festival. Do try this easy and yummy coconut mawa burfi at home for this festival and have a great celebration. Lets see how to make coconut khoya burfi with step by step photos and a VIDEO !

    Do check out my Holi special recipes COLLECTION for more sweets and snacks ideas!


    coconut khoya burfi recipe

    Coconut khoya burfi recipe - Nariyal Ki barfi with mawa


    Coconut khoya burfi recipe - Nariyal Ki barfi with mawa How to make coconut khoya burfi recipe at home - North Indian style coconut burfi with khoya !
    Cuisine: Indian
    Category: Sweet
    Serves: 10 
    Prep time: 5 Minutes
    Cook time: 30 Minutes
    Total time: 35 Minutes


    INGREDIENTS
    1 cup - 250ml
    • Desiccated coconut - 1.5 cups ( I used store bought dry coconut)
    • Unsweetened Khoya / Mawa - 1 cup ( I used  200gms of Milky mist khoya)
    • Sugar - 1 cup
    • Water - 3/4 cup
    • Saffron threads - Few
    • Yellow food color - A pinch
    • Cardamom powder - 1/4 tsp
    • Chopped pistachios – 2 tbsp ( To garnish)
    • Ghee – 1 tsp ( to grease the plate)
    METHOD

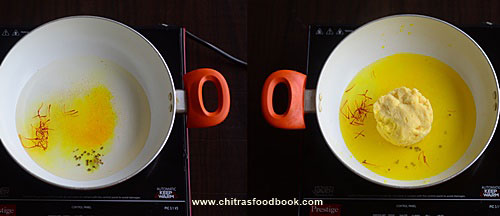
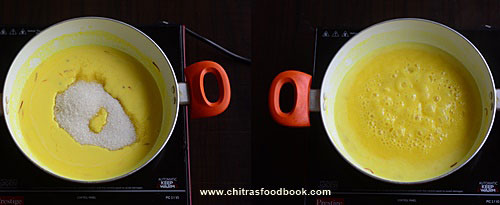
    • Grease a tray with ghee and keep it ready. Mash the khoya well and measure 1 cup. Keep aside.In a kadai, take 3/4 cup of water, add saffron threads, food color and cardamom powder. Mix well and let it start to boil. Add 1 cup of mashed khoya and mix well without lumps. It resembles condensed milk after mixing.
      coconut khoya burfi recipe
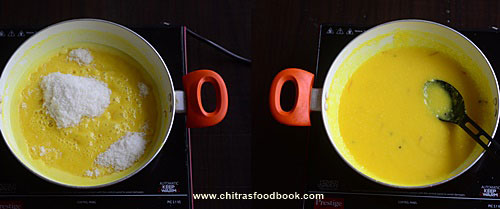
    • When it starts to boil with bubbles, add sugar and mix well.Sugar melts and the mixture starts to roll boil. Let it boil for a minute.
      coconut khoya burfi recipe
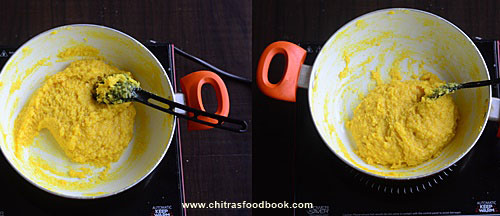
    • Then add 1.5 cups of desiccated coconut and mix well. Mixture will start to thicken. Keep mixing till the burfi mixture is thick and leaves the sides of pan completely. It becomes a whole mass with nice coconut smell. Stay nearby and keep stirring to prevent burnt bottom. It takes nearly 10–15 minutes to reach the final stage if mixing in medium to high flame. Make sure there is very less moisture. It should not be too wet. Remember over mixing makes the burfi too hard and chewy.So remove it at the right time.
      coconut khoya burfi recipe
      coconut khoya burfi recipe
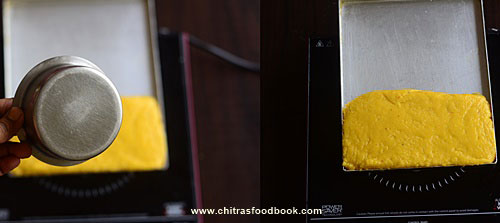
    • Grease the bottom of a small bowl with ghee. Put the burfi mixture to the greased tray and press it well with a greased bowl. Level it and sprinkle the chopped pista pieces. Press it well.
      coconut khoya burfi recipe
    • Freeze the burfi mixture for one hour OR refrigerate it for 2-3 hours. It helps to set the burfi quickly and make shapes perfectly. Mark square shape using a greased knife.As the burfi mixture is cold and frozen, it would be difficult to handle. So press it hard to mark shapes. Remove it after few minutes. It tastes slightly chewy when consumed on the same day. Tastes perfect the next day. This burfi needs a setting time of 8 hours. Be patient. Leave over night and taste it the next day to know its actual taste.
      coconut khoya burfi recipe
      coconut khoya burfi recipe 
    • Enjoy ! This burfi stays good for 2 days in room temperature and 4 – 5 days under refrigeration.
      Note
      • If you want to use fresh coconut, you can use instead of desiccated coconut. But it takes longer time to cook and reach the final stage as fresh coconut has some water content.
      • Shelf life of the sweet reduces if you use fresh coconut.

      Nariyal ki barfi with khoya

      Try this easy, yummy coconut khoya burfi at home and enjoy the festival !
      coconut khoya barfi recipe
      Continue Reading...