Search Chitra's Food Book

Showing posts with label HOLI RECIPES. Show all posts

March 21, 2016

Gujiya Recipe With Mawa, Suji - How To Make Gujiya With Step by Step Pictures

Gujiya recipe
Holi festival is around the corner.When I was looking for Holi special recipes, I found Gujiya is a must to do recipe for this festival. When I browsed for the recipe, I found it was very similar to Sweet samosa/Karanji , Chandrakala and Suryakala sweet recipes. Of course there are some slight variations between each of them. So this time I tried an Authentic North Indian style Gujiya recipe using mawa and suji by following the recipe shared by Sandhya Soni, a member of Facebook’s Chef at large group. Here is the link. It came out very well.

 I was very happy & satisfied with the result. Sendhil & Raksha loved it too. So I thought of sharing this wonderful recipe as my contribution to Holi festival recipes. I used khoya/mawa for gujiya filling as mentioned in the original recipe. If you wish to try without khoya, you can replace it with dessicated coconut and powdered nuts. Please refer my Sweet samosa recipe to know its procedure. Try it and share with your friends and relatives on HOLI day !! Have a colorful celebration. Lets see how to make Gujiya recipe with mawa and sooji stuffing with step by step pictures.

Gujiya recipe

Gujiya recipe


Gujiya recipe How to make gujiya with khoya/mawa filling - Holi festival recipes
Cuisine: Indian
Category: Sweet
Serves: 8-10 
Prep time: 30 Minutes
Cook time: 20 Minutes
Total time: 50 Minutes


INGREDIENTS
1 cup = 240ml
  • Maida - 1 cup
  • Melted ghee - 1.5 tbsp ( at room temp)
  • Water - as needed
For filling
  • Unsweetened khoya - 1/2 cup  ( I used Amul)
  • Powdered sugar - 1/2 - 3/4 cup ( based on taste)
  • Chopped nuts - 2 tbsp ( badam, cashew,pista)
  • Roasted sooji - 3 tbsp
  • Cardamom powder - 1/8 tsp
  • Cooking oil - to deep fry
HOW TO MAKE GUJIYA - METHOD

  • Take a wide bowl and add the flour. Add the melted ghee at room temperature and mix the flour. After the ghee is well mixed with the flour, add water little by little and make a smooth dough. Knead the dough for 5 minutes and rest it for 30 minutes. Cover the dough with a wet cloth.
Gujiya recipe
Gujiya recipe
  • In the mean time,make the filling. Take the unsweetened khoya in a non-stick kadai. Heat the khoya in medium flame and mix until it leaves the pan and starts to rotate with the ladle. The color of khoya will turn golden brown. This process takes around 10 minutes or more. So do it patiently in low to medium flame. Remove in a plate. Dry roast the sooji well. Collect in another plate.
  • Gujiya recipe
  • Let the cooked khoya  & roasted rava cool down completely. Now mix the finely chopped nuts, powdered sugar, khoya and rava very well till the mixture looks crumbly. Add cardamom powder, mix well. Stuffing is ready.
Gujiya recipe
Gujiya recipe
  • Now take the dough and roll it to a cylinder.Make balls of equal size. Roll the ball into small poori and keep a tbsp of stuffing in the center. Apply water on the corners and fold the poori into a half moon shape. Now fold the edges as shown in the pic OR press the corners with a fork.
Gujiya recipe
Gujiya recipe
Gujiya recipe
  • Heat oil and drop a pinch of batter. If it rises to the top and does not brown, oil heat is just right. Now keep the flame low to medium and drop the gujiya. Deep frying the gujiya patiently in low to medium flame give you really crispy gujiyas. So do not  hurry up while frying. Do not over crowd the kadai. Fry 2-3 gujiyas based on the size of kadai. Deep fry them in batches.
Gujiya recipe
  • Cook the gujiya patiently on both sides by flipping now and then. Once the bubbles cease and gujiya turn golden brown, remove them in a tissue. Drain the excess oil and serve hot OR store them in an air tight box after it comes to room temperature. It stays good for a week !! But to enjoy its best taste, eat it on the same day of preparation. Enjoy !
Gujiya recipe


Note

  • Adjust the quantity of powdered sugar based on your taste buds.
  • Deep frying in medium flame for long time gives a crispy gujiya.
  • For best taste, serve gujiya as soon as you prepare them.
  • Another important point is “Rolling” . Roll the dough like a thick poori. It should be thick in the centre and slightly thin in the corners. If you make it very thin , stuffing will ooze out in the oil while deep frying and the oil becomes a waste . Please be careful. I had experienced this. 
  • If you make it too thick , it takes more time to cook and spiral corners may not be cooked properly.To avoid this disaster , first make one , deep fry in little oil. If you get it right , proceed making the remaining ones. Else adjust the rolling and try again.This will surely help.
  • Suppose if the stuffing ooze out in oil , immediately switch off the stove and remove the sweet. Strain the oil and reuse it.
Enjoy these yummy Gujiya & Thandai on HOLI Day and have a great celebration !
Gujiya recipe
Continue Reading...


November 4, 2015

Gulab Jamun Recipe With Khoya - Diwali Sweets Recipes

gulab jamun recipe
Diwali celebration would not be fulfilled without Gulab Jamun for Indians. Not just for Diwali, we make this delicious sweet recipe for celebrations like New year, Birthday, anniversary to make it more special. It’s one of the most popular dessert recipes that tastes the best with Vanilla ice cream. Even beginners who are new in making sweets never fail to try jamun at least with store bought gulab jamun mix like MTR, Aachi, Gits during Diwali. 

Long back,I had tried gulab jamun with homemade khova and posted here too. Then due to my laziness, I started making jamun using instant mix every year. But this year for Diwali, I was determined to try gulab jamun with khoya or milk powder. I used store bought khoya here. To make this sweet, I watched many youtube video recipes like Samayal Samayal with Venkatesh Bhat , Vahchef , Sanjeev kapoor & went through many recipes for the ratio of ingredients and tips to make perfect jamun. I came across few recipes with khoya and paneer too.

As its my first attempt with store bought khoya, I chose the gulab jamun recipe with khoya alone and tried it. After so many trial & errors, I made a perfect gulab jamun following Chitra Viswanathan Mam’s recipe with slight changes. I was very happy to see my golden colored, soft and juicy gulab jamun. I made them like mini jamuns in very small size to suit my serving bowls. It did double in size & well soaked too. I have given the recipe for lesser quantity. 

If you are attempting jamun with khoya for the first time, go ahead with this recipe. Once you get it perfect you can double this recipe and make in large quantity. Beginners, do follow the tips I have shared in this post. I am sure you will get the same results like me. Lets see how to make Gulab jamun using store bought khoya !

Gulab jamun recipe with khoya

Gulab jamun recipe with khoya


Gulab jamun recipe with khoya How to make gulab jamun with store bought khoya
Cuisine: Indian
Category: Sweet
Serves: 12 nos
Prep time: 10 Minutes
Cook time: 20 Minutes
Total time: 30 Minutes


INGREDIENTS
1 cup - 200ml
  • Store bought sugarless khoya - 1/2 cup Grated ( I used Milky mist brand)
  • All purpose flour / Maida - 3 levelled tbsp
  • Cooking soda - A pinch (approx. half of 1/8th tsp)
  • Salt - a pinch
  • Water - as needed
  • Cooking oil - to deep fry jamun
For sugar syrup
  • Sugar -1 cup
  • Water - 1.5 cups
  • Cardamom powder - 1/8 tsp
  • Saffron threads - few ( Optional)
  • Note : Double the recipe for more quantity
METHOD
  • Take the khoya from the refrigerate and bring it to room temperature.If the khoya is too moist n soft to handle,crumble it well using your hands. If its dry and slightly hard,grate it using a grater. Measure 1/2 cup of khoya and knead it well for 2-3 minutes using the heel of your palm. Make it smooth and soft without any grains.
Gulab jamun recipe
Gulab jamun recipe

  • After kneading add the maida,a small pinch of salt & cooking soda. Mix well to make a crumbly mixture. Add water very little by little and make a smooth,non-sticky dough. If the khoya is too moist, you don’t need to add water. So add water only if needed. Its not necessary that the dough should be completely crack free. No issues if there are mild cracks. Keep the dough covered for 5-10 minutes.
Gulab jamun recipe
Gulab jamun recipe

  • In the mean time, make the sugar syrup. Take the sugar & water in a bowl, mix well. Melt the sugar and boil it for 5 minutes in medium flame.Syrup should reach sticky consistency.i.e If you take the syrup in your finger, it should coat well with a glossy look and sticky to touch. No need of half thread or single thread consistency.
  • Add cardamom powder and few saffron threads if using. Switch off the flame and let the syrup become warm. As we have added more water, the syrup won’t become thick. If you wish, you can add 2 tsp of lemon juice to avoid crystallization of sugar syrup. But I din’t add it.
Gulab jamun recipe

  • Beginners,please do this testing step.Heat a kadai with oil and take a small ball from the dough. Make it round and crack free. Check the temperature of oil by dropping a pinch of dough. If it rise to the top slowly, oil temperature is correct. Stir the oil twice and drop the small ball which we kept for testing. Flame should be low to medium. Check whether the balls are not dissolved in oil and crack free. It should be doubled in size and cook properly. The color of jamun should change slowly. If the flame is high,jamun will become brown quickly but it won’t be cooked inside.So open the jamun and see whether its properly cooked inside. Please do this testing to make a perfect jamun.
  • The balls will dissolve in oil if cooking soda is more.In that case,add little more maida and make the dough by sprinkling few drops of water.If there are cracks in the ball after cooking, sprinkle a tsp of water and mix well to make the dough moist. If the ball comes out properly, make the remaining balls using the dough and proceed cooking. Switch off the flame till you make the remaining balls.
Gulab jamun recipe
  • Make small crack free balls by rolling the dough between your hands. Grease your hands with ghee if needed. Make sure the balls should be crack free & smooth. This is more important to get crack free,smooth gulab jamun.If there are more cracks in the balls, slightly dip one edge of the ball in milk or water and make the balls smooth.
  • Now heat the oil in medium flame and check the temperature.Stir the oil and drop the balls one by one. Do not mix it for few seconds. Then mix the oil using the ladle without touching the jamun. Stirring the oil helps to cook the jamun evenly with nice color. Make sure the flame is medium low. Color of jamun should change gradually. If the flame is high, it will brown quickly and inner portion won’t cook well. Gulab jamun will almost double in size after cooking.
  • Please watch Vahchef’s gulab jamun video if you wish to see the cooking process in detail. Remove the jamun after it becomes golden brown to a tissue paper. Drain the excess oil and immediately transfer the jamun to the warm sugar syrup. Let it soak in the syrup for 1-2 hours.
Gulab jamun recipe
Gulab jamun recipe
Enjoy ! It stays good without refrigeration for 2 days if its properly handled. Use a clean spoon every time to take the jamun. Do not use your hands. Refrigerating the jamun may make it slightly harder and chewy.
Note
  • Gulab jamun will dissolve in oil if you add more cooking soda.
  • If the moisture content is more in khoya,u don’t have to add water for making the dough. The wetness of khoya is enough to make the smooth dough.
  • Gulab jamun will become flat if the moist in khoya is more. In that case you should add little more maida.
  • Adding more maida make the jamun hard.So add the mentioned quantity.
  • Do not make the dough too sticky or watery. In that case, grease your hands with ghee and make crack free ball. Do the oil test and proceed.
  • Cook the jamun slowly and patiently else it won’t cook inside properly.
  • If the sugar syrup is too hot, jamun won’t absorb the syrup. So add the hot jamun to the warm syrup.Allow it to soak for minimum 1 hour.Do not refrigerate the jamun.Use a clean spoon to handle every time.
  • You can also use boiled,cooled milk to make the dough instead of water.

Gulab Jamun Recipe
Make yummy,juicy Gulab jamun for this Diwali and have a great celebration !
Gulab Jamun Recipe with khoya

Continue Reading...


October 26, 2015

Easy Atta Ladoo Recipe - Wheat Flour Laddu

Atta ladoo
Atta laddu/Whole Wheat flour ladoo is one of the easy to make Indian dessert recipes just like Rava laddu , Moong dal ladoo , coconut laddu and Poha ladoo. Whenever I plan for Diwali sweets menu, I usually include few ladoo varieties too. Last year I tried Malai Laddu/Paneer laddu & coconut ladoo and shared here. For Diwali 2015,I wanted to try motichoor & this atta laddu. I will share the recipe for motichoo laddu next week.Atta ladoo/ Wheat flour laddu can be prepared in many ways.Some recipes call for cooking atta in ghee.Some recipe uses jaggery instead of sugar.In North India especially in Gujarat & Rajasthan people make wheat flour ladoo adding jaggery which is popularly known as Churma Laddu. Today I have made this laddu in a very simple way adding powdered sugar. It was very tasty and all the laddus vanished within no timeWinking.If you are looking for an easy & healthy laddu recipe,bookmark this ladoo in your try list for this Diwali.I am sure everybody would enjoy this sweet !
wheat flour laddu

Wheat flour ladoo / atta laddu recipe


Wheat flour ladoo / atta laddu recipe Wheat flour ladoo / atta laddu recipe - Easy diwali sweets recipe
Cuisine: Indian
Category: Sweets
Serves: 8-10 nos
Prep time: 10 Minutes
Cook time: 10 Minutes
Total time: 20 Minutes


INGREDIENTS
1 cup = 200 ml
  • Atta / Wheat flour - 1 cup
  • Sugar - 1/2 cup
  • Cardamom - 2 nos
  • Melted ghee - 1/3 cup
  • Salt – a small pinch
  • Cashews & nuts - as needed
METHOD
  • Dry roast wheat flour in a wide kadai till it changes to light golden brown in color.Stay nearby & do it in low to medium flame. It takes 4-5 minutes.Take care the flour should not be burnt.Remove in a bowl and let it become warm.
Atta ladoo recipe

  • In the mean time,powder the sugar adding cardamom seeds.You will 1-2 tbsp more sugar than 1/2 cup .But its fine.Add it as such.
Atta ladoo recipe
  • Add the powdered sugar , melted ghee,roasted chopped nuts ( If using) and a pinch of salt to the wheat flour.Mix well and make a crumbly mixture. Do not add all the ghee. Add it little by little and mix well.Stop adding ghee if you are able to shape the ladoo.
Atta ladoo recipe

  • Make balls and arrange in a plate.I roasted few dry grapes in ghee and studded over the ladoo. You can stud roasted cashews or dip a small portion of ladoo in ghee & coat with nuts powder. Decorate it as per your wish.
  • Store them in an air tight box and use it for a week.
Atta ladoo recipe
    Enjoy !
Note
  • You should roast the flour well else laddu will have a raw smell.
  • Do not burn the flour.Roast in low to medium flame only.
  • You can add finely chopped nuts to the laddu mixture before shaping them.I din’t add it.
  • The quantity of ghee may vary from 1/3 cup to 1/2 cup.
Try this easy,healthy ladoo during this Diwali & enjoy with your family !
Wheat flour laddu


Continue Reading...


October 7, 2015

Butter Badusha Recipe / Balushahi With Video - Diwali Sweets Recipes

Badusha recipe
Badusha/Balushahi recipe is one of the must try sweets recipes during Diwali or any occasions. Most of the people in India make badusha for Diwali. So I thought of starting my diwali recipes with this most popular sweet recipe.

Basically I am not a big fan of sweets. But there are very few sweets for which I don’t say NO. Badusha is one among them. I love it for its flaky, layered texture with mild sweetness. Every year during Diwali, my MIL makes Maida burfi and Badusha without fail. She is my inspiration to try sweets on my own. She usually adds Dalda/Vanaspati or butter to make badusha. 

Based on my MIL’s recipe and after few trial & errors, I am making badusha successfully for the past two years. I have shared some tips, do’s & don’ts below for beginners. I took a complete video for badusha preparation and shared the same below. I love the traditional doughnut shaped badusha more than the swirled ones. But still swirled badusha looks more attractive like suryakala. 

In this post, I have just shared a small video of how to make badusha swirls for beginners to learn. Hope it is easily understandable. Lets see how to make the most popular Indian sweet balushahi aka badhusha in detail with a video on how to shape the badusha.

How to shape badusha

Badusha recipe

TIPS TO MAKE PERFECT BADUSHA
  • Generally beginners complaint about badusha disperses/dissolves in oil. It is due to the addition of more cooking soda or fat content ( ghee or butter). If the oil temperature is too low, badusha may dissolve in oil.
  • Sometimes you may get more cracks in badusha after frying. It may become shapeless too. It is also due to the quantity of cooking soda.So please be very careful while adding soda.
  • The secret of getting flaky, layered badusha lies in slow deep frying in low flame. Adding curd doesn’t make the difference. My MIL never add curd. Still it comes out flaky. But curd helps to give softness to Badusha. So do not skip it. 
  • You can replace butter with melted ghee. But use melted ghee or butter only at room temperature. It should not be hot.
  • No need to knead the dough very hard or beat as you do for chapathi dough. Its enough to make a soft, crack free dough to get good badusha.
  • The recipe I have shared here gives badusha which may be slightly hard as soon as you prepare. But it will become soft the next day and tastes much better.
butter badusha

Butter badusha recipe


Butter badusha recipe How to make butter badusha - Diwali sweets recipes
Cuisine: Indian
Category: Sweets
Serves:
Prep time: 30 Minutes
Cook time: 20 Minutes
Total time: 50 Minutes


INGREDIENTS

  • All purpose flour/Maida - 1 cup (tightly packed & levelled)
  • Melted butter - 1/4 cup ( at room temp, butter should not be hot)
  • Curd - 1 tbsp
  • Cooking soda / Baking soda - 1/8 tsp 
  • Water - as needed ( I used 2-3 tbsp)
  • Salt - a small pinch
For sugar syrup
  • Sugar - 3/4 cup
  • Water - 1/3 cup
  • Cardamom powder - 1/2 tsp
  • Lemon juice - 1/2 tsp
  • Saffron threads & dessicated dry coconut,nuts - for decoration
HOW TO MAKE BADUSHA - METHOD
  • Take a wide bowl and add the melted butter,cooking soda & curd. Mix well with a whisk till it becomes a creamy paste.It will take 1-2 minutes. Take sugar in a bowl and add water. Mix well & set aside. Let it dissolve for making syrup.
badusha recipe
badusha recipe
  • To this paste, add maida and a pinch of salt. Mix well and make a crumbly mixture. Butter & curd mixture should spread well with the flour. The mixture should resemble bread crumbs. Sprinkle some water and make a soft, non-sticky dough ( I used around 2-3 tbsp of water. It may vary based on the water content in curd)
butter badusha recipe

  • Rest the dough for 30 minutes. After the resting time, the dough would be very soft. Smoothen it using your hands to remove cracks by just pressing it gently. Do not knead it. Take small ball sized dough and make a crack free smooth ball. Flatten it using your palm and make a dent in the center using your pointer finger. Make a deep impression.
butter badusha recipe
  • For making swirl shaped badusha, take a ball from the dough and pinch in a corner. Fold it and again pinch the swirled end. Repeat this to make a circle. Refer video for more reference.
butter badusha recipe

  • Heat oil in a kadai and when it gets heated, drop a pinch of batter. As soon as the batter rises to the top, drop 3-4 badusha and switch off the flame. Let the badusha cook in off fire till it floats on top of oil. After it starts to float, flip the badusha and switch on the flame. Keep the flame medium and cook the badusha till it turns golden in color. One batch takes nearly 8-10 minutes.
butter badusha recipe
  • The swirled badusha takes more time to cook and looks dark in color compared to the donut shaped ones. Don’t panic.It also tastes little more crispy compared to the round ones. Deep frying patiently is more important to get layers in badusha. So please follow this carefully.
  • While frying badusha, you can make sugar syrup. Boil the syrup till one string consistency. i.e when you take a drop of syrup between your fingers & release, it will form a single string. Add cardamom powder & lemon juice and switch off the flame. Lemon juice prevent crystallization of sugar syrup. Refer this post for detailed sugar syrup consistencies.
  • Remove the badusha in a tissue. Drop them into the warm syrup. Let it soak for 5-10 minutes. Flip them in the syrup for even coating.  In the mean time, deep fry the next batch of badusha. Remove the badusha from the syrup and arrange in a plate. Once it cools down, sugar syrup with crystallize and make a nice coating. Store it once badusha is cooled down completely. Enjoy ! It stays good for 3-4 days if properly done.
If the sugar syrup is crystallized while you soak the badusha, add few drops of water, heat it. Bring the one string consistency & then drop the badusha.
Try this yummy sweet for Diwali and have a great celebration !
Butter badusha recipe


Continue Reading...


March 5, 2015

Easy Paneer Kheer|Paneer Payasam Recipe-Holi Recipes

Paneer kheer
Wish u all a very happy HOLIDancing
On this holi day,i have come up with an easy peasy kheer recipe which can be made under 15 minutes.This paneer ki kheer/cottage cheese pudding also known as Chenna kheer is an awesome bengali dessert recipe which they usually make it for festivals like dussehra,Durga pooja,Diwali and Navratri.Actually i had planned to share paneer burfi or Balushahi/Badusha recipe today as my Holi special dish.But unfortunately,all the pics gots deleted from my SD card by mistakeSad.I struggled to retrieve it but i couldn’tNot talking
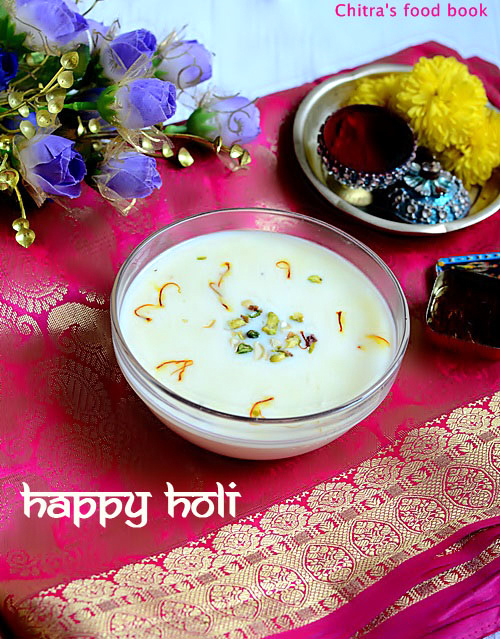
.I became very much disappointed but still i don’t want to give up making a sweet post on this festival day.Suddenly I remembered about this Paneer kheer recipe which i had tried for my last year’s Holi lunch menu.It was a super hit recipe in my house.So i prepared the same and refrigerated it to serve chill for my daughter and husband this evening.I am sure they will love it.Friends,if u have not planned anything for today’s celebration and if u wish to make something special and rich,this paneer kheer is a wise choice.You can make it in the next 15 minutes if u have store bought paneer ready in hand.Of course,freshly made chenna/Paneer tastes the best but still store bought paneer works fine.Its one of the best ways to make our kid consume paneer and as u all know,its a protein rich, healthy recipe for them.Try this easy paneer payasam for this festival of colors & have a fun filled,colorful celebration Party!!
Lets see how to make this paneer ki kheer..
Paneer kheer recipe

Easy paneer kheer recipe


Easy paneer kheer recipe Paneer kheer/Paneer payasam recipe-Easy n delicious dessert recipe for celebrations.
Cuisine: Indian
Category: Sweet
Serves: Serves 3
Prep time: 5 Minutes
Cook time: 10 Minutes
Total time: 15 Minutes


INGREDIENTS

  • Fresh paneer block - 100 gms/Grated paneer - 3/4 cup
  • Milk - 2.5 cups ( 500ml)
  • Sugar – 4-5 tbsp
  • Corn flour or rice flour - 1.5 tsp ( dissolve in 2 tbsp of water)
  • Condensed milk - 1 tbsp ( optional)
  • Cardamom seeds - 2 no ( crushed )
  • Chopped nuts - a fistful
  • Rose essence - few drops
  • Saffron threads - few ( optional)
METHOD

  • Wash and grate the paneer using a small holed grater.Set aside.Boil the milk in a pan and when it comes to boil,add sugar and corn flour water.
Paneer kheer
  • Allow it to roll boil for 5 minutes.In the mean time,chop the nuts and keep it ready.Add the cardamom powder and condensed milk.Lastly add the grated paneer and give a boil for 2 minutes.U will find the kheer becomes thick.Switch off the stove and add few drops of rose essence.Refrigerate for an hour and serve chilled OR enjoy it warm by sprinkling the chopped nuts and few saffron threads!
Paneer kheer
Looks rich and colorful,tastes rich and delicious!!

This kheer tends to thicken as it cools down.So dilute it by adding more milk & sugar if u wish.


Note

  • You can add freshly made chenna/paneer too.It tastes even more delicious and gives melt in mouth texture.
  • When u use store bought paneer,make sure u use the fresh ones.Else u may get a tangy taste.
  • Never boil the kheer for longer time after adding paneer because paneer may turn chewy.
  • Adding cardamom seeds & rose essence gives a nice flavor to the kheer.So do not skip it.
  • I used saffron threads only for photos.I did not add it in the actual recipe.


Paneer kheer

Enjoy this creamy paneer kheer with your loved ones.Tastes even more delicious !! Happy Holi Happy

Paneer payasam recipe

Continue Reading...