Masala idli fry is an easy, kids friendly recipe that can be made using leftover idli.We can prepare this idli fry with fresh mini idli too. It can be served as breakfast, dinner or as an evening snack for kids. Usually I make South Indian, Tamilnadu style masala idli fry. This time I prepared it in North Indian style adding Pav bhaji masala powder.Actually speaking, recipe of masala idli varies from place to place.It can also be prepared in a simple way adding garam masala powder or fennel powder.
As this is my first attempt in North Indian style, I followed this recipe from Spice up the curry & Red Chilly and tried for our breakfast. I adjusted the spice level as per my family’s taste. It came out really well. Sendhil & myself loved it a lot. I hope Raksha will like it too. If making for kids, you can try the same with deep fried idli pieces. This recipe is a great way to use the leftover idli. You can also add vegetables like finely chopped carrot, cooked peas along with capsicum to make this dish more healthy and colorful ! Now lets see how to make Indian style masala idli at home using leftover idli with step by step photos & video.
Heat oil in a kadai. Temper cumin seeds. Saute onion, ginger, garlic and tomato.
Add all the spice powders, salt and mix well.
Add 1/4 cup of water to the masala and boil for a minute.
Lastly add the idli cubes, mix gently to coat the masala.
Garnish with coriander leaves. Sprinkle ghee & lemon juice if needed.Serve hot !
Masala idli recipe - How to make masala idli fry - Step by step pictures
Take the leftover idli and chop into big cubes. You can chop each idli into 8 or 9 pieces.Set aside.
Heat oil in a kadai. Splutter cumin seeds. Saute onion, capsicum, garlic and ginger pieces. After onion becomes transparent,add tomato and saute for a minute.
Add turmeric powder, red chilli powder, pav bhaji masala powder, sugar and mix well. Saute till tomato becomes mushy. Add 1/4 cup of water and boil for 2 minutes till masala becomes semi dry.
Lastly add the idli cubes, mix gently without breaking.Coat the idli with masala. If masala has more water content, idli will break. So make sure masala is almost dry. Mix idli & cook for a minute.Switch off the flame. Garnish with chopped coriander leaves, few tsp of ghee and sprinkle some lemon juice. Mix well and serve hot!
Mash few banana pieces and cook for 2 minutes in low flame. Switch off the flame, sprinkle lemon juice and garnish with coriander leaves if desired.I did not add it.Remove and serve with rice.
Note:
Adjust the quantity of pav bhaji masala powder as per your spice level.
Make sure the tomato masala mixture is semi dry before adding idli pieces.
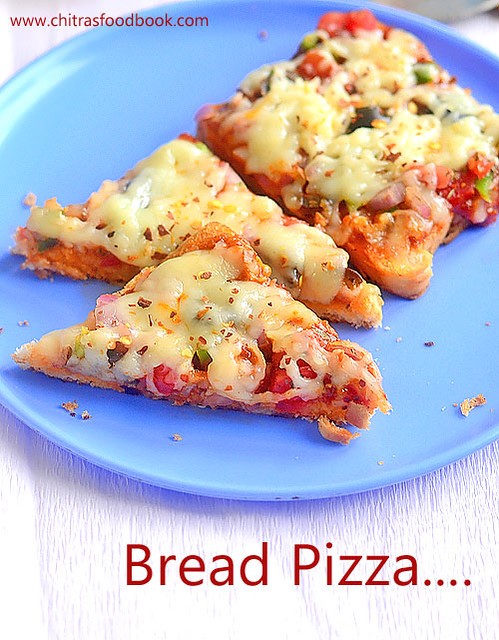
Vegetable Bread Pizza is an easy and quick breakfast and snack recipes for kids.It tastes good with or without cheese.Actually Bread pizza can be made in 3 ways.It can be made without oven ie. in dosa tawa ( Stove top) or it can be baked in convection oven or microwave if you have at home. All are easy to make and tastes good in its own way.Its a great idea to use the leftover bread slices. I feel tawa and microwave options are easier as it takes less time to cook than baking in convection oven. But we should do it carefully as the chances of burning is more.This morning I prepared bread pizza recipe on stove top, oven and microwave just to make this post. I have shared all of the 3 methods below with a short video. Choose & try whichever is convenient to you. I have used store bought pizza sauce and pizza seasoning/ spice mix. You can make it just by using tomato ketchup & pepper powder. To make a pucca Indian version, sprinkle somegaram masala powder or tandoori masala powder, marinated paneer cubes if you have in hand. You can top with lots of cheese for kids & without cheese if making for you & your husband ( If you are calorie conscious).Adding grated mozzarella cheese is just for attracting kids because taste of this pizza comes from the sauce, mixed vegetables and spice mix.Just play around with your favorite veg and non-veg toppings and enjoy it. Now lets see how to make this easy and simple recipe for vegetable bread pizza without oven( on tawa), microwave and convection methods with step by step photos and video.
Grated Cheese - 1/2 cup to 1 cup ( I used Amul Mozzarella cheese)
Capsicum - 1 no ( finely chopped)
Big onion - 1 no ( finely chopped)
Ripe tomato - 1 no ( finely chopped)
Black Olives - 5 nos ( sliced)
Boiled Sweet corn - 1/4 cup ( optional)
Pizza sauce or paste sauce or schezwan chutney - as needed ( I used pizza sauce around 3-4 tbsp)
Pepper powder - 1/2 tsp
Salt - a pinch
Chilli flakes - 1 tsp ( optional)
Oregano mix or pizza seasoning mix - 1 tsp
Butter - to grease the tawa & bread
Method
To make bread pizza, wash and chop all the vegetables finely. Grate the cheese and keep aside.Take a bread slice and apply butter on both the sides.Keep in a plate.
In a wide bowl, mix all the finely chopped vegetables, pepper powder, salt and pizza seasoning mix.Keep it ready. Take the bread slice and apply the pizza sauce on one side.Spread the mixed vegetables. Top with grated cheese. You can either cook them on tawa/pan, microwave or bake in convection oven.
Bread pizza in tawa : Heat a dosa tawa and apply some butter. Keep the loaded bread slice.Cover cook in very low flame for 3-4 minutes or until the cheese melts.Remove in a plate and serve hot. Cover cook is very important. If you don’t cover cook, cheese won’t melt and bottom of bread slice may burn.
Bread pizza in microwave : Place the bread slice in microwave and cook in high power( mine is 800w) for 1 minute or until cheese melts.If the power is less, it may take 1.5 to 2 minutes. If power is more, it can be done under 1 minute.So keep an eye.
Bread pizza in convection oven : Preheat convection oven in 180c. Keep the bread pizza in a baking tray. Bake it for 5 minutes at 180c. Cheese melts and the sides of bread slice turns slightly crispy. Remove and enjoy !
Note
The quantity of chilli flakes, pizza mix and pepper powder depends on our taste.
You can add any number of toppings like paneer, mushroom, jalapeno, sweet corn etc..
Do not cook the pizza on open tawa, it takes long time for the cheese to melt.
Microwave bread pizza takes very less time to cook.If you keep for more time, pizza would burn.
Enjoy this easy, yummy bread pizza at home ! Kids would love it for sure !!
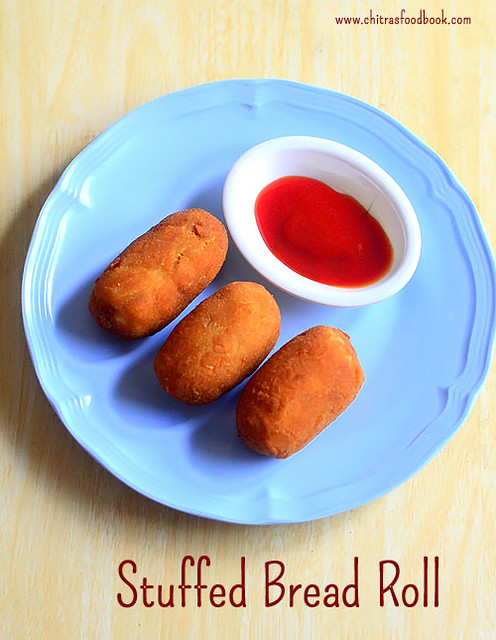
I have few snacks recipes using bread in my try list for long time. So I started with this bread roll recipe and thought of trying them one by one to share in my blog. This potato stuffed bread roll recipe is a yummy, kids friendly snack with their 2 favorite major ingredients – Potato and bread. Recently I tasted this bread rolls in a simple birthday party conducted in my neighbor’s house.It was a snack party.So she had served this bread roll with tomato sauce/ketchup,a cake slice, store bought potato chips and a glass of store bought drink. Bread roll was crispy outside and soft inside. When I asked about the recipe, she gave a gist about it. After getting the idea from her, I watched a chicken bread roll video in YouTube to find out how to make it crispy. I tried it last week for Raksha and her friends. I made some lemon popsicle too. All of them loved it. Myself and Sendhil stopped with one as its deep fried. I guess these aloo bread rolls can be baked as well. Friends, Do try this easy, kids friendly evening snack & party snack – Indian style Stuffed bread roll at home and enjoy. Lets see how to make bread roll recipe with step by step photos and video.
Eggless vanilla cake using a pressure cooker is my long time pending readers requested recipe. Many readers who tried my eggless cakes using convection oven had requested me to share some eggless cake recipes using a pressure cooker. Long back I had shared an eggless chocolate cake in a pressure cooker. But its procedure and recipe is completely different from the usual cooker cake. I used water in the bottom of cooker instead of salt or sand.
Today I have shared the proper & perfect pressure cooker cake using powdered salt. I followed my eggless tutti frutti cake recipe and made it using pressure cooker instead of baking in oven. This simple, eggless cake recipe is made without using condensed milkor butter. Curd and cooking oil are the major ingredients. Cake came out really well, spongy and very soft as expected. The texture of the cake is equally great with the oven ones. There is no much difference in baking time as well. This vanilla sponge cake can be used as the base, decorate it with simple frosting and enjoy for birthday & anniversary celebrations Or it can be relished as simple tea time cake as well.For variations, you can mix in some tutti frutti to make this cake colorful.
Friends, do try this cake during this vacation for your kids. I am sure you will get perfect results. I tried frosting the cake using Amul fresh cream.It tasted great but its texture was not so perfect. Soon I will try to make a simple and easy frosting recipe using fresh cream and share here. Lets see how to make eggless vanilla sponge cake in a pressure cooker with step by step pictures and video !
Cooking oil - 1/2 cup (I used refined oil. Any flavorless oil works)
Milk - 1 to 2 tbsp ( optional)
Vanilla essence – 1.5 tsp
Maida & cooking oil – 1 tsp to grease the baking pan
HOW TO MAKE EGGLESS VANILLA CAKE IN PRESSURE COOKER - METHOD
In a wide bowl, take the curd. Add sugar and mix till sugar dissolves in curd. Then add baking powder and baking soda. As soon as u mix them, bubbles appear in the curd. Mix gently and keep the curd bowl aside for 5 minutes. It foams up well.
After 5 minutes, add vanilla essence and cooking oil in the curd mixture. Mix gently.
Add sieved maida to the curd mixture little by little. If the cake batter is too thick, add 1 to 2 tbsp milk and loosen the batter slightly. Batter should be thick but pourable.
Take an aluminium baking pan and grease with oil. Spread 1 tsp maida all over the pan and pat the excess flour. Pour the cake batter and pat it twice to spread the batter evenly.
Take the pressure cooker, remove the gasket and whistle in the lid. Spread 1/2 kg powdered salt evenly in the bottom of cooker. Put a slotted plate or any plate over the salt.
Heat the cooker in high flame for 5 minutes. Salt gets heated well. Now open the cooker and place the cake pan inside it carefully. Close with the lid and heat the cooker in very low flame for 30 to 40 minutes. Open the cooker after 30 minutes and insert a toothpick or back of spoon. If it comes out clean, cake is done else cook for another 5 minutes. Mine got done in 35 minutes.
Remove the cake pan carefully and rest it for 10 minutes. Run a knife around the cake and invert in a plate. Cut the cake into pieces after it becomes warm. Enjoy. Store the leftover pieces in an air tight box. Do not refrigerate or let it open, cake will become dry. It stays good for 2 days.
Enjoy !
Note
Adjust the quantity of sugar as per your taste. For me 1 cup sugar was fine.
Do not add more milk than the mentioned quantity.
Baking time varies from 30 to 40 minutes. So keep an eye after 30 minutes. Make sure you don’t burn the cake.
Try this soft and spongy eggless pressure cooker cake. You will like it ! I tried frosting the cake using fresh cream. Soon I will try to make a perfect frosting recipe and share here !
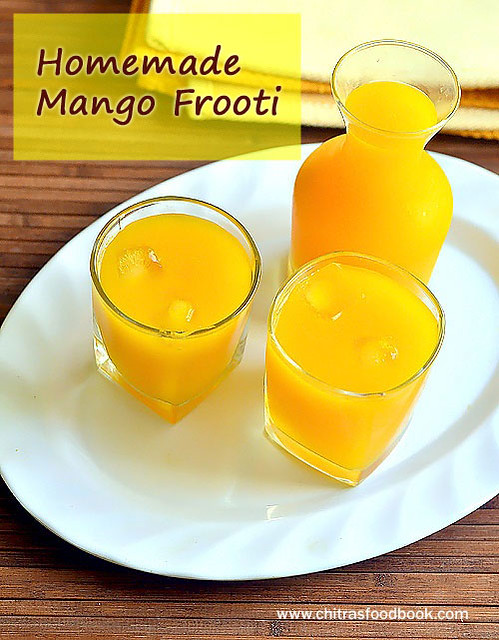
Homemade mango frooti recipe with video and step by step pictures. Frooti is my most favorite mango drink since childhood. I guess most of you are like me. On those days, for any small functions at home like birthday party or guest visits, Frooti bottle makes its presence without fail. My mom used to serve it as a welcome drink. Even though there are many soft drinks available in the market, the craze for this store bought mango drinks like Frooti, Maaza or Slice never goes away. But once my family had a bad experience after drinking Frooti in a tetra pack. It must be an old stock I guess. So we stopped buying it and started running miles away whenever I see it in functions or parties. I restrict Raksha & Sendhil too.
Last week I bought few alphonso mangoes and a raw mango to try some interesting recipes with it. When I was browsing for it, I saw few homemade Frooti recipe. I never imagined Frooti making process at home would be so easy with very less ingredients and that too without any preservatives. What else I need to try this !. I became very happy and tried it immediately with an over ripen mango which I wanted to finish off. This juice came out yummilicious in taste. It tasted very close to Frooti, Maaza or any store bought mango drink.
Sendhil & Raksha loved it and gave a big thumbs up. You can make this as concentrate, refrigerate & store it, add ice cold water to dilute it and drink chilled anytime.The best part is we didn’t get any stomach pain, loose stools, cold/throat infection or fever.
As everyone says, homemade is always the best !! Now I don’t have to buy the highly priced mango drink from shops anymore. I have tried this drink thrice so far with different mangoes and observed few points.
To make a perfect homemade Frooti recipe, you must follow this.
1. Use only Alphonso mangoes. It works the best ! Taste differs for Badami, malgova or Banganapalli mangoes. 2. Mango should be over ripen. Make sure it doesn’t have sour taste. You can clear off the over ripen ( about to decay) mangoes by making this drink. 3. The ratio of ripe mango & raw mango should be 2:1 based on the size of raw mango. Raw mango is just to give mild tanginess. 4. Quantity of sugar differs as per the sweetness of mango. 5. Color of the juice also varies based on the color of mango.
Now I can confidently prepare this mango juice for my guests. You too try this recipe in this summer vacation for your kids and family. I am sure your kids will sing “ Mango Frooti Fresh and Juicy”.
Ok, Lets see how to make Homemade mango Frooti recipe with step by step pictures and a video !
Homemade Mango Frooti Recipe - How to make Frooti drink at home
Mango Frooti Recipe - How to make mango frooti drink at home without any preservatives and very less ingredients !
Raw mango - 1/2 no (If small sized mango or 1/4 part of big mango) (1/2 cup chopped)
Sugar - 1/4 to 1/2 cup (Adjust)
Water - 3 to 4 cups
Ice cubes – while serving
METHOD
Wash and peel the skin of raw mango & ripe mango. Chop into pieces.
In a pressure cooker, take the chopped mango pieces, add 1/3 cup sugar and 2 cups of water ( If you want to make thick concentrate, add 1 cup of water). Pressure cook in very low flame for 2 whistles or till mango cooks soft.
Open the cooker after the steam is released.Strain it and filter the cooked water. Keep it aside till use.
Grind the cooked mango to a pulp without adding water. Mix this pulp with the cooked mango water. Mix well and strain it again to remove the fiber part of mango. Discard the fiber part.
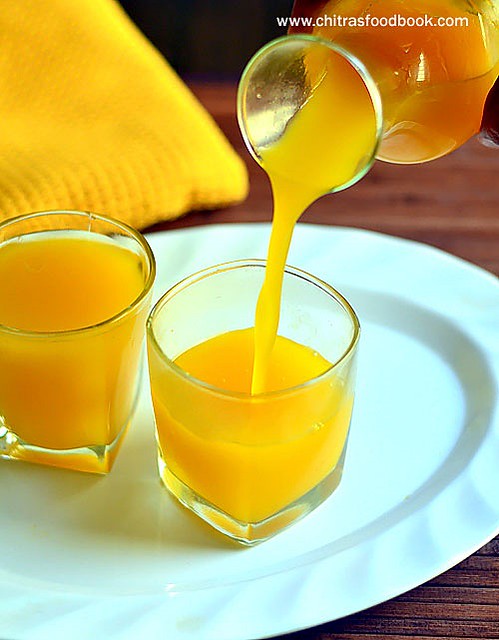
Mix the mango juice well and check for taste and thickness. If you want to store as concentrate, pour in a glass bottle and refrigerate it. If serving immediately, add 1/2 to 1 cup water and adjust the consistency. If sugar is less, add little more sugar and mix well. Refrigerate for 3-4 hours till chilled.
Put some ice cubes in a glass and pour the drink. Serve immediately ! This drink stays good for 3 days if refrigerated !
Enjoy !
Note
Use over ripen alphonso mango for best taste.
Adjust the quantity of sugar and water as per taste and desired consistency.
Some recipes suggested equal quantity of ripe mango and raw mango. But I feel 2:1 ratio would be fine.
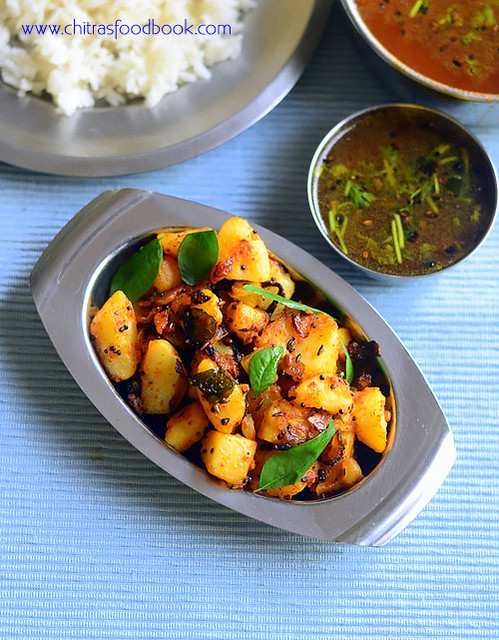
Potato curry ( Urulai Kizhangu poriyal in Tamil) is known to be one of the best side dish recipes for sambar rice, rasam rice, Dal rice or even curd rice for many South Indians. Sometimes I love to have it rolled in chapathi as its a dry curry.Indian style potato roast or potato fry ( Aloo curry in Hindi) can be done in ‘N’ number of ways. People prepare it with their own variations and style. Most of us have adopted our mom’s recipe when we were beginners in cooking. Yes, I too learnt this way of making boiled potato curry from my mom. She makes it for rasam rice. Every Thursday Dal/Paruppu,Tamarind pachadi/ Puli pachadi, Rasam, Potato curry and Papad would be our lunch menu before my marriage. But amma makes spicy potato curry whereas I prepare a less spicy version. So adjust the quantity of chilli powder according to your taste. In most of our houses, potato curry makes it appearance once in a week at least for our kids sake as this would be the favorite side dish for many. In my house too, I make this potato poriyal mainly for Raksha’s lunch box as she loves to take it without any complaints and brings back empty lunch box in the evening.So I pack Dal rice( Paruppu sadham) and Potato curry (Urulai kizhangu poriyal in Tamil) at least once in a week for her lunch box.Its also an easy side dish to prepare during busy morning hours.When you have boiled potato ready in hand, this poriyal can be done under 10 minutes.I am sure bachelors and working women find this recipe useful. Do try this easy and simple boiled potato fry and let me know your feedback. I love it with Sambar & Rasam sadam. Lets see how to prepare South Indian style Potato poriyal with step by step pictures and a video !
Check out myMIL’s Potato poriyal version which I make it specially for my guests .Also check out my no onion no garlic Brahmin style potato curry !

 As this is my first attempt in North Indian style, I followed this recipe from Spice up the curry & Red Chilly and tried for our breakfast. I adjusted the spice level as per my family’s taste. It came out really well. Sendhil & myself loved it a lot. I hope Raksha will like it too. If making for kids, you can try the same with deep fried idli pieces. This recipe is a great way to use the leftover idli. You can also add vegetables like finely chopped carrot, cooked peas along with capsicum to make this dish more healthy and colorful ! Now lets see how to make Indian style masala idli at home using leftover idli with step by step photos & video.


 . I have used store bought pizza sauce and pizza seasoning/ spice mix. You can make it just by using tomato ketchup & pepper powder. To make a pucca Indian version, sprinkle some
  .Adding grated mozzarella cheese is just for attracting kids because taste of this pizza comes from the sauce, mixed vegetables and spice mix.Just play around with your favorite veg and non-veg toppings and enjoy it. Now lets see how to make this easy and simple recipe for vegetable bread pizza without oven( on tawa), microwave and convection methods with step by step photos and video.


 . Myself and Sendhil stopped with one as its deep fried