Search Chitra's Food Book

Showing posts with label KIDS SNACKS. Show all posts

May 18, 2016

Whole Wheat Nankhatai – Atta Nankhatai Recipe

wheat flour nankhatai
Yesterday I saw this wheat flour nan khatai recipe/Atta nankhatai post in a facebook group and got tempted to try it. So I was watching an Youtube video for the recipe. When Raksha saw the video, she was more excited than me and told she would help me in making it.I gave her all the ingredients and she did the mixing and shaping part as per my instructions.I was happily capturing the video for this cookie.Earlier I had shared benne biscuit/ Butter biscuit using ghee & maida and multigrain naan khatai recipe using ragi, oats and oil. This recipe is very similar to my benne biscuit but it is really a healthy option when compared with my maida version. Do try this whole wheat flour nankhatai following this recipe.You will get melt in mouth cookies for sure. Kids would love it. Lets see how to make wheat nankhatai with step by step pictures and a video.


wheat flour nankhatai


Whole wheat nankhatai recipe


Whole wheat nankhatai recipe How to make nankhatai using wheat flour/Atta
Cuisine: Indian
Category: Cookies
Serves: 8 nos
Prep time: 10 Minutes
Cook time: 15 Minutes
Total time: 25 Minutes


INGREDIENTS
1 cup - 200 ml
  • Wheat flour -1/2 cup I used pillsburry
  • Powdered sugar - 1/4 cup
  • Melted ghee - 1/4 cup ( at room temp)
  • Baking powder - 1/8 tsp
  • Baking soda - 1/8 tsp
  • Vanilla essence – 1 tsp
  • Water or milk - 1-2 tsp ( completely optional)
METHOD

  • Powder the sugar nicely and measure 1/4 cup of it. In a wide bowl, take the melted ghee at room temperature, powdered sugar and vanilla essence.Mix well with a whisk without lumps.
wheat flour nankhatai
  • To this add 1/8 tsp of baking powder, 1/8 tsp of baking soda and wheat flour little by little.Make a non-sticky dough.Don’t worry dough would be slightly crumbly. If you feel, the dough is too dry after mixing, add a tsp of boiled milk or water.Mix well. Gather to make a dough and cover it. Let it rest for 20 minutes.
whole wheat nankhatai

  • Then take a small ball sized dough and make a smooth round.Flatten it slightly and make a plus mark using a knife.Cracks may appear while shaping the cookies. Just seal it with your fingers. You can also make swirls in the cookies using a round spoon as shown in the video.
whole wheat nankhatai
  • Preheat the oven at 200c.Line a cookie tray with butter paper and arrange the cookies. Bake at 200c for 14-15 minutes. Remove the tray and let the cookies cool down. Do not remove it. It may break. After the cookie cools down, it will become soft with melt in mouth texture. Enjoy with tea !
whole wheat nankhatai


Note


  • I used Pillsburry atta in this recipe.
  • You can replace melted ghee with melted butter but the flavor may be different.For low cal version, u can use cooking oil.
  • If the dough is too dry, add a tsp of milk or water. But do not add more. Baking time of cookies would vary and its shelf life would be reduced.
  • For variations, u can use crushed cardamom+ one clove instead of vanilla essence.
Enjoy this healthy, easy nankhatai recipe using wheat flour and enjoy it for your tea time !
whole wheat nankhatai recipe
Continue Reading...


May 13, 2016

Potato Bajji | Aloo Pakora - Urulaikilangu Bajji Recipe

Potato bajji 
I make Potato bonda and onion bajji very often as both are Raksha’s favorite. But I have seen my mom making Potato bajji, Brinjal bajji and many more varieties of bajji before my marriage. So recently I too tried Potato bajji and Karpooravalli leaves bajji for the first time in my kitchen.Its preparation is very easy. If you make the basic bajji batter, you can prepare any number of bajji varieties with it. Both came out very well and we all loved it a lot. Raksha enjoyed potato bajji( Aloo pakora in Hindi, Urulaikizhangu bajji in Tamil) with tomato ketchup.Try this easy, yummy bajji recipe for your kids as evening snacks during this holidays. They will love it for sure. Lets see how to make this crispy, puffy Potato bajji at home.

Continue Reading...


April 20, 2016

Samosa Recipe – How To Make Punjabi Samosa

Punjabi samosa recipe
Long back I have shared a samosa recipe with potato stuffing. This version is purely a Bakery style Punjabi Samosa recipe. I learnt this recipe by watching an Youtube Video by chef Harpal singh and from this blog. Chef had explained the folding part very well. Even though the folding technique looked simple, it needs some practice to make it perfect.

After 2 attempts I got it right but not so perfect. I have given stepwise pictures for folding.Hope it is easily understandable. For variations, you can make the stuffing with mixed vegetables instead of potato. It stayed crispy for half an hour, but its better to eat it hot to enjoy its actual taste. Lets see how to make this most popular Punjabi Samosa recipe with step by step pictures to make at home.

Samosa recipe

Samosa Recipe - How to make Punjabi samosa


Samosa Recipes - How to make Punjabi samosa How to make Bakery style Veg samosa at home
Cuisine: Indian
Category: Snacks
Serves: 8
Prep time: 30 Minutes
Cook time: 20 Minutes
Total time: 50 Minutes


INGREDIENTS
For Samosa cover
  • All purpose flour/Maida - 1 cup heaped ( 1 cup=250ml)
  • Melted ghee or cooking oil - 1 tbsp ( at room temperature)
  • Salt & water - as needed
  • Ajwain/Omam - 1/2 tsp
For Stuffing
  • Potato - 3 nos ( big)
  • Green peas - 1/4 cup
  • Chopped ginger - 1 tsp
  • Cumin seeds - 1/2 tsp
  • Chopped green chilli - 1 no
  • Fennel/Saunf powder - 1/2 tsp
  • Red chilli powder - 1/2 tsp
  • Dhania powder - 1 tsp
  • Aamchur powder - 1/2 tsp
  • Garam masala powder - 1/2 tsp
  • Chopped mint leaves + coriander leaves - 1 tbsp ( optional)
  • Salt & water - as needed
  • Lemon juice - few drops
HOW TO MAKE SAMOSA - METHOD

  • Take maida in a bowl.Add salt, ajwain and melted ghee or oil at room temperature (Not hot). Mix well with your fingers. It will look crumbly. Now add water little by little and make a tight dough. You may need to use nearly 1/4 cup +/- 1 tbsp of water. So make the dough properly. It should not become soft or sticky. It should be tight but not dry. Cover the dough with a wet cloth. Let it rest for 30 minutes.
Samosa recipe
Samosa recipe
  • In the mean time, Cut the potato into two and pressure cook it.Add enough water and 1/4 tsp of turmeric powder. In a small box, put the green peas and keep it inside the cooker. No need to add water. Green peas would cook well with the help of steam inside the cooker. Pressure cook them in very low flame for 2 whistle. Remove after the steam is released. Drain the excess water and drop the potatoes in cold water so that you can peel the skin quickly. 
Samosa recipe
  • Peel the potatoes and mash it roughly like chunks. Do not mash it completely. Make sure there are some pieces here and there. Heat oil in a kadai. Splutter jeera.Saute ginger pieces. Add the masala powders like fennel seeds powder, red chilli powder, dhania powder, garam masala powder and  aamchur powder. 
  • Mix well without burning them. Keep the flame low. Now add the mashed potato and cooked peas. Add salt, mix well. Add chopped mint+coriander leaves and sprinkle some lemon juice. Mix well and switch off the flame. Stuffing is ready.
Samosa recipe
Samosa recipe
  • Now take the samosa dough.Divide into 4 equal sized big balls. Dust a ball in maida and roll it to a slightly oblong shape. Cut into two semi circles. Apply water on the straight side. Now join the edges and make a cone shape. Press it well. Hold the cone between your thumb finger and pointer finger. Stuff 2 tbsp of potato masala till its 3/4th filled. Cover the remaining dough balls with a wet cloth.
Samosa recipe
Samosa recipe
Samosa recipe
  • Make a single pleat by folding the middle part. It should come just opposite to the sealed part. Apply water all over the edges completely. Now pull the pleated part and seal the samosa. It make a flat base to the samosa and forms a back bone to the samosa. Now your samosa can stand beautifully ; )) Make all the samosa and arrange in a plate.
Samosa recipe
Samosa recipe
  • Heat oil and check its temperature by dropping a pinch of batter. It should rise but not so quickly. Oil should be medium hot. Now drop the samosa. 2 or 3 at a time based on the quantity of oil. Deep fry the samosa in low to medium for long time.It takes nearly 8-10 minutes for one batch. Cook both the sides till it becomes golden.
Samosa recipe
  • Cooking for long time helps to make the samosa become crispy and stay crispy longer. This is one of the most important point for crispy samosa. Remove in a tissue and serve hot with sweet chutney or ketchup.
Samosa recipe
Enjoy !

Note
  • Do not add too much oil or ghee than the mentioned quantity. Adding more gives soft samosa instead of crispy ones. Adding oil gives the bakery kind of samosa than adding ghee. I have tried with both. The smell & flavor of samosa was good with oil than ghee. So its your choice.
  • Add more spice powders based on your taste. Adding lemon juice is optional. I used it to balance the spiciness.
  • You can use mixed vegetables instead of potato.

Enjoy this crispy, yummy samosa with sweet chutney & green chutney in your teatime !
Samosa recipe

Continue Reading...


April 6, 2016

Corn Vada Recipe - Sweet Corn Fritters

Corn vada recipe
Whenever I buy corn ( Cholam in Tamil, Makai in Hindi) from the market, I make either corn cheese balls or cup corn for Raksha . This time, I tried Corn vada/corn fritters for a change. I browsed for the recipe and found Andhra style Corn vada ( Known as Mokkajonna Garelu/Vadalu in Telugu) & corn fritters recipe with mild variations in method & ingredients. I just combined both the recipes and made this South Indian sweet corn vada. It came out really well with crispy exterior and soft interior. Raksha and Sendhil loved it very much. Its a kids friendly tea time snack recipe.Ugadi festival is nearing. If you have plans to make any vada recipe, do try this one for a change.Your kids at home during this summer vacation would ask for more and moreWinking
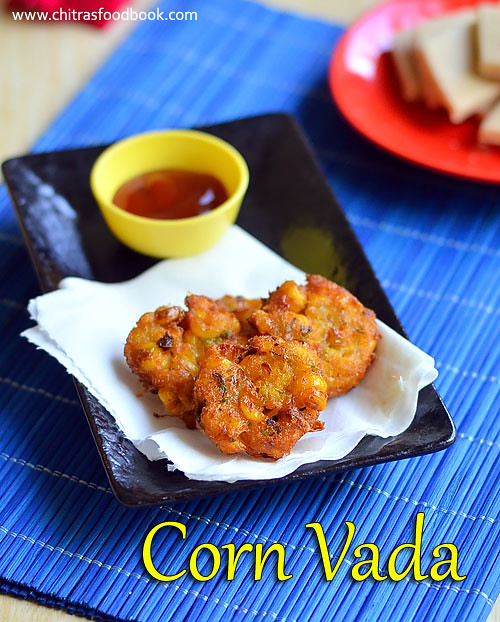
.But remember, to enjoy its best taste, you should serve and eat it hot.Ok,Lets see how to make this yummy, crispy sweet corn vada recipe !
Do check out my Masala Vada, Mixed Vegetable Vada, Cabbage Vada, Sabudana Vada and Urad dal vada recipes.

Continue Reading...


March 11, 2016

Paneer 65 Recipe – Dry Paneer Fry

Paneer 65 recipe
Paneer 65 is an yummy, kids friendly, deep fried snack for teatime and parties. I am planning to share a collection of Paneer recipes from my blog. But before that, I wanted to post some more yummy and interesting paneer recipes which are in my try list for long time. Recently I tasted paneer 65 in a restaurant buffet lunch under starters. Raksha & myself loved it so much. So I tried to recreate the same at home after watching few YouTube videos.Actually Paneer 65 ( Dry Paneer fry) can be made in Chinese or Indian style.Here I followed Indian version and added masala powders. If you want to make in Chinese style, add tomato sauce, soya sauce, chilli sauce and pepper powder. As I wished, It came out with super crispy exterior and soft interior. As a general rule, this deep fried starter recipe should be eaten hot to enjoy its best taste. Summer vacation is going to start in another 2 weeks in India. Kids would demand varieties of snacks recipes from their moms. So friends, make this yummy, kids friendly Paneer snacks for them.Serve it with a fresh juice.They are going to enjoy it for sure. You too can enjoy a plate of paneer 65 with a cup of hot tea/coffee as I did. Lets see how to make this crispy, homemade Paneer 65 for evening snack or as a starter for lunch/dinner.
Do check out my Gobi 65, Baby corn fry, Chilli Idli fry
Paneer 65 recipe

Paneer 65 recipe


Paneer 65 recipe How to make paneer 65 at home - Kids friendly evening snack !!
Cuisine: Indian
Category: Snacks
Serves: Serves 2
Prep time: 30 Minutes
Cook time: 10 Minutes
Total time: 40 Minutes
INGREDIENTS

For marination
  • All purpose flour/Maida - 3 tbsp
  • Rice flour - 2 tbsp
  • Corn flour - 2 tbsp
  • Curd – 1 tsp or lemon juice – 1 /2 tsp
  • Ginger & garlic paste - 1 tsp
  • Dhania powder - 1 tsp (optional) 
  • Red chilli powder - 1 tsp ( Use Kashmiri chilli powder to get the same color)
  • Garam masala powder - 1/2 tsp
  • Salt, water - as needed
  • Chat masala powder - to sprinkle while serving (optional) 
METHOD

  • Take the paneer block and cut into thin strips of 2 inches length. Boil water till it starts to bubble. Switch off the flame.  Add the paneer pieces to hot water and set aside.Dropping paneer in hot water is optional if you thaw it completely.  It comes out well even without this step but softness would be less. 
  • In a wide bowl, take the flours, red chilli powder, dhania powder, garam masala powder, G&G paste, curd or lemon juice  & salt. Mix well without adding water.
Paneer 65
  • Then add the required water and make a batter similar to thick bajji batter. Check the consistency in the picture below. If the batter is thin, tails will form.
Paneer 65
Paneer 65
  • Now remove the paneer pieces from the hot water and drain the excess water gently.Do not squeeze too hard. Add the paneer pieces to the batter and coat it well.
Paneer 65
  • Let it marinate for 15 minutes.Do not marinate for more than an hour. Batter will become sour.It spoils the taste of dish. ( If you want to marinate for long time, refrigerate the marinated mixture till you fry them)
  • Heat oil to deep fry. Drop a pinch of batter and if it raises to the top immediately, oil temperature is just right. Now keep the flame low to medium and take the paneer pieces using a spoon. If you take it using your fingers, the coating may go off. So take it with a spoon and make sure the paneer piece is completely coated with the batter.
Paneer 65 recipe
  • Drop the paneer pieces and cook in batches. Do not crowd the oil. After dropping the paneer pieces, let it cook for few seconds. Then try to move the pieces with a slotted ladle else they will stick to the bottom of kadai. Keep moving them in between. Cook for a minute in medium flame and turn the pieces upside down. Cook the other side for a minute and remove when the bubbles start to cease and paneer pieces turn golden brown.Do not wait for all the bubbles to stop.If you over fry, paneer will become chewy. So remove at the right time.
Paneer 65 recipe
  • Remove in a tissue paper. Sprinkle chat masala if you like. Enjoy serving & eating hot !!

Note
  • If you don’t have corn flour in hand, use 4 tbsp of rice flour alone.
  • You can replace curd with a tsp of lemon juice.
  • Marination gives a nice crispy exterior and soft interior. If you are in a hurry, you can make it immediately too. If you want to keep the marinated paneer for long time, its better to refrigerate the batter till you deep fry.
  • Do not over fry the paneer pieces, it would turn chewy & hard.
  • Its better to use low fat paneer cubes to avoid becoming too soft or crumbly.
  • Frying in low to medium heat is important. If the oil is too hot n smoky, paneer 65 would turn dark brown in color.
  • Use Kashmiri chilli powder to get this color. I have not used any coloring agent here.
Enjoy this crispy, yummy snack/starter recipe at home with tea/coffee/Juice!!
Paneer 65 dry

Continue Reading...


February 11, 2016

Homemade Stovetop Pizza – No Oven Veg Pizza

stovetop pizza
Making homemade pizza must be the dream for many.Me too not an exceptionBatting Eyelashes.Whenever I order Pizza online from Dominos or Pizza Hut,i used to think “When I am i going to make it on my own???Day dreaming” Of course,I have tried pizza using readymade pizza base and shared a post in my blog years ago.But i was waiting to make a perfect pizza from scratch following a simple recipe.Recently my friend Shalini shared me an easy,no knead,no wait, stovetop pizza recipe(Also known as Tawa pizza/skillet pizza) video in youtube.I was super excited to see the ease and quickness of this recipe and tried it on the same day.I used a simple topping with onions,tomato,olives and capsicum.It was excellent in taste and got a big thumbs up from my family members!! Raksha loved it very much and asked me to make it the next day too.I tried a no yeast stovetop pizza as well.I will try to share that recipe by next week.As Valentine’s day is nearing,i thought this post would be useful for people to cook pizza without oven and treat your familyHappy.You can make the pizza base/crust thick or thin as per your wish.This recipe uses Self rising flour.As a susbtitute you can use maida + baking powder + salt.Check its quantity in ingredients section.I am sure this recipe would surely help you in making a great Veg pizza at home and that too within 20 minutes.You can enjoy it for breakfast,dinner or as an evening snack.Just give a try and share your feedback here,I am waitingggg Winking .Ok, lets check how to make this super easy,quick Tawa Veg pizza on stovetop with step by step pictures.
Continue Reading...


December 18, 2015

Eggless KulKuls Recipe-Kalkal(Gul Gul)-Goan Christmas Recipes

Kulkuls recipe
I was thinking to make some special Christmas recipes apart from cakes and cookies. Last year I shared Kerala’s Achappam/Rose cookies recipe. Similarly this year I wanted to try something interesting and unique. So I asked Raksha’s Christian friend Reena’s mom. She told me about this kulkul/Kalkal recipe which is most commonly made in all South Indian Christian houses during Christmas. I browsed for the recipe and found Kulkuls (Gul Gul,Kidiyo,Kidyo, Gala Gala, Kala Kala in Tamil nadu) is a Goan special Christmas sweet recipe. This sweet is most popular among the Anglo Indians as well.

 Traditionally the Christmas goodies, called kuswar are specially prepared by the Catholics in Goa and are distributed to neighbors, friends and relatives during Christmas. It is a deep fried sweet recipe made of maida/All purpose flour,sugar,eggs,semolina and coconut milk. Being a Vegetarian, I was looking an easy, eggless version and found the recipe from HERE. It came out very well with a crispy & crunchy taste.

Raksha & Sendhil loved it a lot and finished the whole batch in few minutes. This recipe din’t disappoint me even if it’s a first attempt. So Friends do try this easy,yummy & unique kulkuls recipe during this Christmas. I am sure your family members would enjoy it to the core. Lets see how to make this Goan special Christmas sweet recipe – KULKULS with stepwise pictures !!
Continue Reading...