After having all the Diwali stuffs, all we needed is a simple vatha kuzhambu & sutta appalam for our lunch today. As I have shared enough variants of
vatha kuzhambu in my blog, I wanted to try & post this Iyengar style milagu kuzhambu/Pepper gravy recipe as it was requested by a reader long time back in my
facebook page. I usually make milagu kuzhambu in
this way adding onions & garlic. But when the reader asked me to share this no onion no garlic version, I immediately asked my school friend Sumi for her recipe.
Based on the ingredients she told, I browsed few websites and prepared this gravy. As Sendhil is very much fond of pepper recipes, he loved this gravy a lot. Though it is a no onion no garlic recipe, it was very flavourful and yummy. Its very easy to make in busy morning hours as there is no chopping works at all. Even bachelors can give this a try. I found sutta appalam & Daangar pachadi are the best combinations for this gravy. When I read this, I got tempted to try Daangar pachadi. I must try & taste that combo soon. Ok, lets see how to make this yummy Iyengar, brahmin style milagu kuzhambu.
Do check out my Brahmin style easy manathakkali vatral kuzhambu recipe
here.

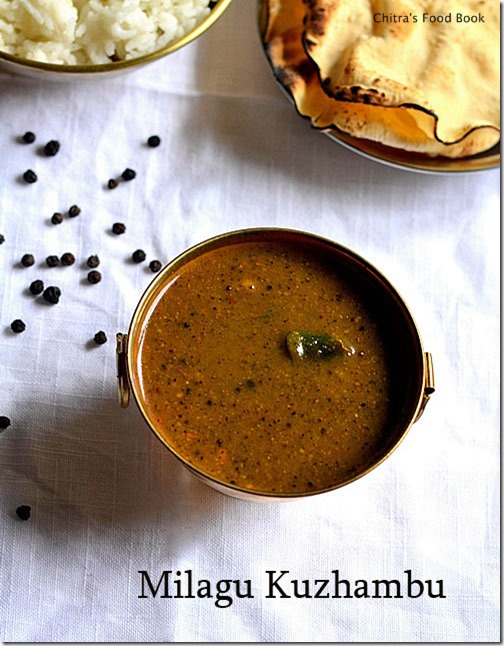
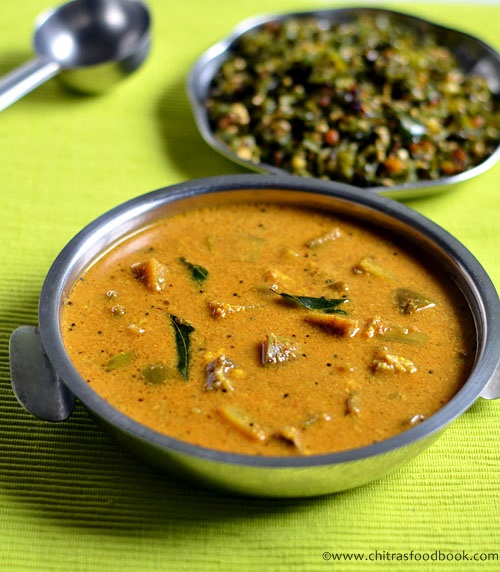
Iyengar milagu kuzhambu
 Iyengar style, flavourful pepper gravy/Milagu kuzhambu for rice!
Cuisine: Indian
Category: Gravies
Serves: 2-3
Prep time: 5 Minutes
Cook time: 15 Minutes
Total time: 20 Minutes
INGREDIENTS
- Tamarind - a big gooseberry size
- Salt & Water - as needed
- Turmeric powder - 1/8 tsp
To roast & grind
- Cooking oil - 1 tsp
- Pepper corns - 1.5 tsp
- Urad dal - 1 tsp
- Red chillies - 1 no ( use 2 for more spicy)
- Cumin seeds/Jeera - 1/2 tsp
- Curry leaves - 5-7 nos
To temper
- Gingely oil - 1 tbsp
- Mustards seeds - 1/2 tsp
- Urad dal - 1/2 tsp
- Hing/Asafetida - a big pinch
|
HOW TO MAKE MILAGU KUZHAMBU - METHOD
- Soak tamarind in warm water for 10 minutes and take the extract. Set aside. In the mean time, lets do the roasting part.
- In a small kadai, roast all the ingredients given under “ to roast & grind” till pepper corns start to splutter and urad dal turns golden brown. After its cooled down, grind it to a smooth paste adding required water.

- In a kadai, heat gingely oil and temper all the ingredients given under”to temper”. Add the tamarind extract, salt, turmeric powder and few pinched curry leaves. Let it boil till its raw smell goes off. Add a small piece of jaggery while the gravy boils. Then add the ground pepper paste and boil well till the gravy thickens a bit.

- Remove the gravy. Serve hot with plain rice adding few drops of ghee. Enjoy with sutta appalam & kootu.

Enjoy ! |
Note
- Some people also add 1 tsp of toor dal while roasting. If you want to use toor dal, reduce urad dal to 1tsp.
- Add more red chillies or pepper corns while roasting to make a spicy gravy.
- If you want to add onions & garlic,chop it finely & saute it after you temper.
|
Enjoy this milagu kuzhambu mixing with plain rice topped with few drops of ghee & sutta appalam as side dish. It tastes yum!
Continue Reading...


 Ridge groud gravy recipe for rice- Simple n delicious gravy !