Search Chitra's Food Book

Showing posts with label LUNCH BOX IDEAS. Show all posts

April 22, 2015

Thakkali Kuzhambu for rice/Tomato Kulambu Recipe Without Coconut and Tamarind

Thakkali kuzhambu recipe
I usually make thakkali kuzhambu for idli,dosa (tomato gravy) using my mom’s method. It is our family favourite too. But I wanted to try tomato gravy / thakkali kulambu for rice for long time. I have also tried a couple of times but I made in kurma style with coconut. So it was not a good pair for rice instead it went well with idiyappam and roti. So I was looking for a tomato kuzhambu recipe without coconut and tamarind that suits well for rice. I got a perfect recipe from Jeyashri’s blog

I made few changes in the recipe based on my easy brahmin style vatha kuzhambu and tried it for Sendhil’s lunch box yesterday. It was very easy to make with less chopping works and without grinding job. So Bachelors and working women can give this a shot for making a quick lunch. It was not only easy but also very tasty and finger licking good.

 Being a tomato lover, I loved this gravy a lot. I am happy that its a no onion no garlic recipe too. Hope this recipe would be useful for my Jain readers. Lets see how to make this yummy,tangy tomato kulambu without coconut for rice.

Check out my 30 kuzhambu varieties for rice if interested !

Thakkali kulambu recipe
 

Thakkali kuzhambu recipe


Thakkali kuzhambu recipe Thakkali kuzhambu/Tomato gravy without coconut for rice
Cuisine: Indian
Category: Gravies
Serves: 2
Prep time: 5 Minutes
Cook time: 10 Minutes
Total time: 15 Minutes


INGREDIENTS

  • Ripe tomato - 4 nos
  • Sambar powder – 2-3 tsp ( add 4 tsp for more spicy taste)
  • Turmeric powder - 1/8 tsp
  • Rice flour - 1 tsp
  • Salt & water - as needed
To temper
  • Gingely oil or cooking oil - 1 tbsp
  • Mustard seeds - 1/2 tsp
  • Urad dal - 1/2 tsp
  • Toor dal - 2 tsp
  • Cumin seeds/Jeera - 1/2 tsp
  • Methi seeds - 1/8 tsp
  • Red chilli – 1 no 
  • Curry leaves - few
  • Hing/asafetida - a pinch
HOW TO MAKE TOMATO KUZHAMBU FOR RICE - METHOD

  • Wash and chop the tomatoes finely. Dilute rice flour in little water and set aside.
  • Heat oil in a kadai and splutter mustard seeds, methi seeds, urad dal, toor dal, Pinched red chilli and jeera. Saute for a second until dal turns golden. Now add the sambar powder and curry leaves. Saute in medium flame for a minute and immediately add the finely chopped tomatoes. Make sure sambar powder is not burnt.
  • Saute until tomato turns pulpy. Add 1 cup of water and bring to boil. Check for salt and spice. Add more if required. Lastly add the diluted rice flour and Mix well. The gravy will become thick. Add little water and bring to boil. Switch off the flame and serve hot with rice.
How to make thakkali kuzhambu

Enjoy !


Note

  • The quantity of sambar powder may vary based on the tanginess of tomato.
  • Rice flour water acts as a binding agent. Skip if you don’t want to use. Actual recipe din’t call for it.

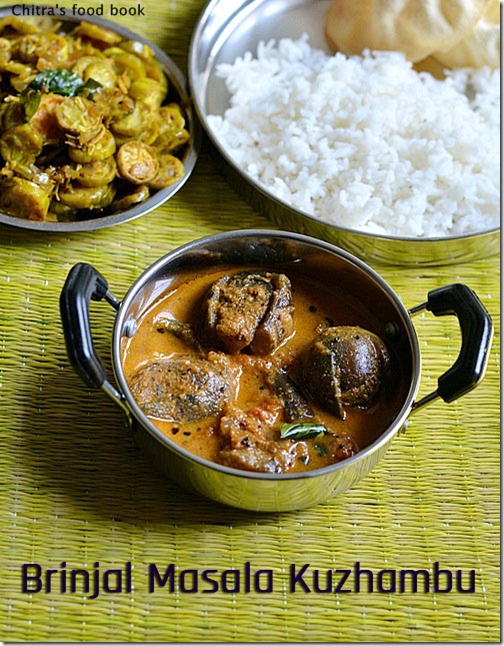
I served this easy thakkali kuzhambu with rice & easy potato curry. It was yum !
Thakkali kuzhambu recipe

Continue Reading...


April 2, 2015

Sweet Corn Pulao Recipe-Corn Pulav-Lunch box Recipes

Corn pulao recipe

Corn pulao is an yummy,easy to make lunch box recipe.It would be an instant hit among the kids as it has sweet corn.I learnt this recipe from my friend Shalini.I modified her recipe slightly & tried it for Sendhil & Raksha’s lunch box.It has become their favourite rice varieties.I don’t make any gravies or curries as side dish for this rice.A simple onion raita would do.You would have come across many versions for this particular recipe.Here is my style of making it.You can make any variations to this recipe by adding capsicum,green peas etc.The color of this rice would be light green.If u want to have white colored rice,saute all the spices instead of grinding.You can make it as per your wish.It comes out well.Try this easy,one pot rice recipe for your lunch and let me know your feedbackHappy
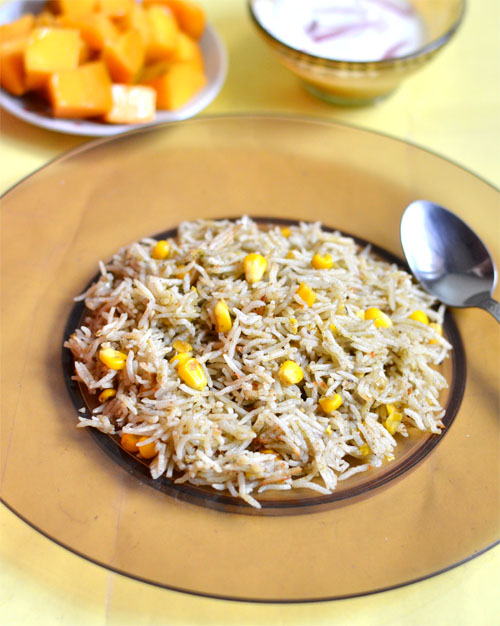
.Lets see how to make this Indian style corn pulao recipe with step wise pictures.

Corn pulao recipe

Sweet corn pulao recipe


Sweet corn pulao recipe Sweet corn pulao recipe-An easy lunch box recipe for Kids !
Cuisine: Indian
Category: Lunch
Serves: Serves 2
Prep time: 30 Minutes
Cook time: 20 Minutes
Total time: 50 Minutes


INGREDIENTS

  • Basmati rice - 1 cup (I used India gate super)
  • Water - 1.75 cups ( use 2 cups if u soak for 30 minutes)
  • Salt - as needed
  • Cooking oil - 1.5 tbsp
  • Ghee - 2 tsp
  • Bayleaf - 1no
  • Big onion - 1 no ( finely chopped)
  • Sweet corn - 1/2 cup ( frozen or fresh ones)
To grind to a paste
  • Cinnamon - 1 inch piece
  • Cardamom - 1 no
  • Cloves - 2 nos
  • Soambu/Fennel/Saunf - 1/4 tsp
  • Green chillies - 2 nos ( use 3-4 for more spice)
  • Ginger - 1 inch piece
  • Garlic - 4 cloves
  • Mint leaves - 5 nos
  • Coriander leaves - 1 tbsp
  • Cashewnuts - 5 nos
METHOD

  • Wash and soak the basmati rice in water for minimum 30 minutes and maximum 6 hours.The quantity of water will vary based on the soaking time.If u soak for 30 mins or less,u should add 2 cups of water.If u soak more time,u can add 1.5-1.75 cups of water to get a soft n firm rice.I soaked the rice for 6 hours.So i used 1.75cups of water.So measure the water u need and set aside( you can also use milk & water in equal quantity)

  • Take all the ingredients given under “to grind”  to a smooth paste using 1/4 cup of water from the measured 1.75 cups of water.So now u will have 1.5 cups of water in hand,remember.
    Sweet corn pulao recipe
  • In a pressure cooker base,heat oil and put the bay leaf.Then add the finely chopped onions and saute till they turn transparent.Now add the ground masala paste and required salt.Mix well till raw smell goes off.To this,add the corn kernels( to remove corn kernels easily,take a knife and run through the corn from the top.Kernels will fall off easily.U can use it for the recipe)U can use frozen corn too.
Corn pulao recipe
  • Mix well and add the measured water.Let it come to roll boil.Now add the soaked basmati rice by draining all the soaked water.Cover & pressure cook in low flame for one whistle.It takes 10-12 minutes in very low flame.After the steam is released,remove the lid and fluff the rice with a fork.Serve hot with onion raita.
Corn pulao recipe
Corn pulao recipe

Enjoy !


Note


  • For variations,u can add 2 tbsp of finely chopped capsicum along with onions.
  • You can add 2 tbsp of coconut in place of cashews. 
  • You can also add a handful of peas to make it healthy.
  • If u want to make white colored pulao,just saute the masalas instead of grinding them.Replace half of the water with milk.
  • To make this pulao more flavorful,add kalpasi/balck stone flower along with bayleaf.
  • No side dish is needed for this recipe.If u want,u can make any tomato based gravies.

Try this easy,one pot corn pulao for lunch box.It tastes yummy !
Sweet corn pulao recipe

Continue Reading...


February 22, 2015

Bitter Gourd Biryani Recipe-Pavakkai Sadam-Sunday Lunch Recipes-7

Bitter gourd biryani recipe
Bitter gourd biryani/Pavakkai masala rice -Yeah, you heard it right. Its an easy, yummy biryani recipe using bitter gourd. If you love bitter gourd like me, you must try this rice. It tastes super flavorful with mild bitter taste. When I was looking for this week’s Sunday Biryani Recipes, my MIL suggested me to try this biryani by reading this recipe from a Tamil Magazine.

Initially I was hesitant to try this worrying about its bitter taste but she also told suggested me a method to remove its bitterness. So I tried it confidently & the result was unbelievably great with a very mild bitter taste only in pavakkai pieces and not in rice at all. Raksha took two servings of this rice without knowing it had pavakkai. 

U can make it very easily in busy morning hours as it has no grinding job and pack it for your lunch box too. But soak the bitter gourd pieces in curd+salt mixture and refrigerate it overnight so that you can prepare this biryani instantly in the morning. You can also use vinegar as suggested in the original recipe. But squeeze and rinse the bitter gourd thoroughly to remove vinegar smell.

Bachelors & working women can try this biryani if you love bitter gourd recipes. Try and share your feedack with me. Lets see how to make this yummy bitter gourd biryani.

Pavakkai rice recipe

Bitter gourd biryani recipe


Bitter gourd biryani recipe Bitter gourd biryani/Pavakkai Masala rice- Easy n delicious rice variety
Cuisine: Indian
Category: Lunch
Serves: 2
Prep time: 30 Minutes
Cook time: 15 Minutes
Total time: 45 Minutes


INGREDIENTS

  • Basmati rice - 1 cup
  • Milk - 1 cup
  • Water - 0.75 cups
  • Salt - as needed
  • Oil - 1 drop
To soak for 30 minutes ( helps to remove bitterness)
  • Bittergourd – 1 no ( medium size)
  • Sour curd – 1/2 cup
  • Salt – little(u can use vinegar in place of curd)
  • To saute
  • Cooking oil - 1.5 tbsp
  • Cinnamon - 1 inch piece
  • Cloves - 3nos
  • Biryani leaf- 1 no
  • Kalpasi/Black stone flower - 1 no
  • Big onion - 1 no ( sliced)
  • Turmeric powder - 1/4 tsp
  • Red chilli powder - 1 tsp ( use more for extra spicy taste)
  • Mint & coriander leaves - a fistful
  • Ginger & Garlic paste - 1/2 tbsp ( Grind 2 inch ginger & 7 cloves garlic)
  • Ghee - 1/2 tbsp
  • Lemon juice – 2 tsp
HOW TO MAKE BITTER GOURD BIRYANI - METHOD

  • Wash and slice the bitter gourd pieces thinly as possible. Remove the seeds if any OR If you like the crunchy taste of seeds,retain it. Take half cup of sour curd. Add some salt, mix well and soak bittergourd for 30 minutes. Similarly wash and soak the basmati rice in water for minimum 30 minutes. Chop the onions,coriander & mint leaves and set aside.
Pavakkai rice
  • After 30 minutes, squeeze the bitter gourd pieces very well using your hands and discard the curd mixture. Take the bitter gourd pieces alone in a plate.
Pavakkai rice
  • Heat oil in a pressure cooker base and put the cinnamon, cloves, biryani leaf, kalpasi. Add onions and saute for a minute and then add the ginger, garlic paste.
Pavakkai rice
  • Mix well for few seconds and add the mint+coriander leaves. Mix it. Now add the turmeric powder & red chilli powder, salt. Lastly add the squeezed bitter gourd pieces and saute well for a minute till it shrinks a bit. Add little more oil if needed.
Pavakkai sadam
  • Now add the soaked basmati rice without water. Add 1 cup of milk and 0.75 cups of water. Add 1/2 tbsp of ghee & 2 tsp of lemon juice in water. Check for salt & spiciness. 
  • Pressure cook in low flame till one whistle. It takes 8-10 minutes. Remove & fluff with a fork after the steam is released. Serve it hot with onion raita.
Pavakkai sadam

Enjoy !


Note

  • Add more chilli powder if you want extra spicy taste.The quantity I have mentioned here would be just right.
  • U can also add 1/2 tsp of biryani masala powder or garam masala powder for more spicy flavor.
  • I have used milk + Water. U can also use coconut milk for more richness.
  • Do not skip mint & coriander leaves as they lend a special fragrance.
  • I din’t use biryani leaf here. 
  • I used freshly ground ginger, garlic paste. U can use store bought too.
  • Soak basmati rice for minimum 30 minutes to get lengthy rice after cooking.


Try this unique and healthy bitter gourd biryani. It tastes yum with simple onion raita !
Pavakkai sadam

Continue Reading...


January 18, 2015

Veg Fried Rice Recipe In Rice Cooker(Indian)-Sunday Lunch Recipes-3


I am glad i have successfully reached the 3rd post in my Sunday lunch Recipes SeriesHappy.I have been sharing biryani,pulao & other rice varieties that i make in weekends.This week,i have blogged my vegetable fried rice recipe in Indian style using electric rice cooker.I know most of u make veg biryani & veg pulao in rice cooker.But making a fried rice in rice cooker may be new to some of u.Not just this,the method i have shared here may also be new & it is somehow different from our usual fried rice recipe.A very big thanks to my dear friend Shalini for teaching me this easy,hassle free,wonderful ,Indian style fried rice recipe.Whenever i go out for shopping in weekends with my family,i make this rice recipe along with curd rice.It stays warm & as soon as we reach home,i just saute the required amount in ghee & serve it hot hot.As we love to have fried rice with tomato sauce as side dish,i don’t make any specifically.But my friend suggested peas butter masala & paneer butter masala as the best side dish for fried rice.So make it as per your choice.Ok,Lets see how to make fried rice recipe in electric rice cooker.
Check out my tomato rice recipe using rice cooker & Chinese veg fried rice recipe


Veg fried rice recipe in rice cooker


Veg fried rice recipe in rice cooker Indian style Vegetable fried rice recipe using Rice cooker
Cuisine: Indian
Category: Lunch
Serves: Serves 3
Prep time: 60 Minutes
Cook time: 20 Minutes
Total time: 80 Minutes


INGREDIENTS
To cook in rice cooker
  • Basmati rice - 1 cup
  • Water - 2.25 cups
  • Lemon juice - 1/4 tsp
  • Oil - 1 tsp
  • Finely chopped vegetables - 1/2 cup ( 1 carrot,5 beans,1 potato,green peas)
  • Salt - as needed
To saute in oil
  • Cooking oil - 2 tbsp
  • Shredded cabbage - 1/4 cup
  • Capsicum - a small piece
  • Spring onion - 2 sprigs
  • Big onion - 1 no (optional)
  • Garlic cloves - 5 nos ( optional) 
  • White pepper powder - 1tsp ( add more for spicy taste)

  • Ghee - 1 tsp ( for one person)
  • spring onions – to garnish
METHOD

  • Wash the rice twice & drain the water.Soak it adding 2.25 cups of water,lemon juice & oil for 1 hour.Rice will be soaked well.In the mean time,finely chop the vegetables,onion,capsicum & spring onion.Keep it ready.

  • Switch on the rice cooker,keep in cooking mode & allow it to heat for sometime. As soon as the plate is heated,add the soaked rice along with water,finely chopped carrot,beans & potato.Add the required salt,mix well & cover the rice cooker.Let the rice cook well.Open it once in the middle & fluff it with a fork.Once its cooked,rice cooker will switch to Keep Warm mode automatically.
Veg fried rice-1

  • Finely chop the cabbage,onions,garlic cloves,bottom part of spring onion & capsicum. Heat oil in a kadai & saute them well adding little salt( remember we have added salt in rice) Add this to the cooked rice.Add pepper powder & keep it closed till use.Now the rice cooker will be in”Keep warm” mode.
Veg fried rice-2
Veg fried rice-3
  • Just before serving,heat ghee in a kadai and add the required amount of fried rice.Saute well in high flame for a minute,Keep tossing & serve hot immediately.Enjoy with any side dish or tomato sauce.
Veg fried rice-4


Note

  • I have not used soya sauce here.You can use it if  u need.
  • Adding onions & garlic is purely optional.My friend doesn’t add it.
  • Adding lemon juice in rice helps to give u white colored rice after cooking.But do not add more.
  • I don’t add ajinomotto as it is not good for health.


Try this easy veg fried rice recipe using rice cooker & enjoy ur weekend lunchHappy


Continue Reading...


January 11, 2015

Averakalu Methi Pulao Recipe - Avarekalu Bath - Avarekalu Recipes

avarekalu pulao recipe

Today I have shared a simple Karnataka special avarekalu rice bath / avarekalu pulao with methi leaves (menthya soppu). Its Avarekalu (Hyacinth beans / Flat beans / Indian liva beans in English, Surti papdi in Hindi, Chikudukaya/Anapakayalu in Telugu and avarekai/Mochakottai in Tamil) season in Bangalore. Here people buy them in Kgs and make avarekalu pulao / rice bath, avarekalu saaru/sambar, uppittu/upma, avarekalu sagu etc with it. You can find avarekalu recipes in all the houses, hotels and even in marriage feast in this season. I too learnt few yummy recipes with avarekalu from my School moms friends

Yesterday we had a small get together at Tara’s house to celebrate this new year and we all prepared a quick and yummy lunch menu. I made eggless chocolate cake. Megha made this avarekalu-methi pulao also known as avarekalu bath and Tara made Karnataka’s one of the most popular masoppu saaru recipe along with white rice, onion raita and gram flour bonda. It was a simple yet very filling, delicious and healthy lunch menu. I learnt this pulao from Megha and clicked the stepwise pictures too for my reference. 

Today I made it in my house for our lunch and for the sake of my Sunday special lunch recipe series too. So here you go my second recipe in this series, Avarekalu Methi Pulao. Its a very yummy, flavourful one pot meal which can be made under 15 minutes. You can prepare this pulao easily for your lunch box during busy morning hours easily in a pressure cooker if you have avarekalu ready in hand. 

For variations, you can skip methi leaves and make it with avarekalu alone. Very less chopping works and moreover this recipe would be apt for avarekalu sesaon. I used sona masoori raw rice instead of basmati rice as I felt this recipe tasted yummy with raw rice. Finally the choice of rice is yours ! Do try this easy and yummy avarekalu methi pulao recipe with simple onion raita as side dish for your Sunday lunch menu, enjoy and spend time with your family.

Check out my first post in this series : Dindigul Thalappakatti Biryani using Msuhroom & Soya chunks

avarekalu-pulao-recipe

Avarekalu-Methi Pulao Recipe


Avarekalu-Methi Pulao Recipe Avarekalu methi pulao recipe / avarekalu bath recipe - Easy rice recipe to prepare in weekend & lunch box !
Cuisine: Indian
Category: Lunch
Serves: Serves 3
Prep time: 10 Minutes
Cook time: 15 Minutes
Total time: 25 Minutes


INGREDIENTS 
1 cup= 250ml

  • Avarekalu/Flat beans/Mochakottai - 1/2 cup
  • Methi leaves/Fenugreek leaves - 1/4 cup 
  • Good quality sona masoori raw rice - 1 cup ( soak for 15 minutes)
  • Cooking oil + Ghee - 2 tbsp + 1 tsp
  • Bay leaf - 1 no
  • Big onion - 1 no
  • Water - 2 cups  
  • Salt - as needed
To grind
  • Grated coconut - 2 tbsp
  • Green chillies – 3-4 nos (medium)
  • Cinnamon - 2 inch stick
  • Cloves - 3 nos
  • Cardamom - 2 nos
  • Big onion - 1/2 no
  • Coriander leaves - 3 sprigs
  • Turmeric powder - 1/8 tsp
  • Ginger – A small finger size
  • Garlic cloves - 5 nos
HOW TO MAKE AVAREKALU PULAO - METHOD

  • Wash and chop methi leaves. Keep avarekalu ready. For avarekalu, you don’t need to remove the skin. Just wash and keep aside. Wash and Soak rice in water for 15 minutes.
Avarekalu-pulao-1
  • Grind all the ingredients given under “to grind” to a smooth paste adding water. Set aside.
Avarekalu-pulao-2
  • In a pressure cooker base, heat oil+ghee. Add the bay leaf, saute for a while. Now add the chopped onions and saute till transparent. Add methi leaves & avarekalu.
Avarekalu-pulao-3
  • Mix well for a minute and add the ground masala paste. Saute till its raw smell goes off. Now add the soaked rice with the required water and salt. Cook in low flame for one whistle. Remove and serve hot with raita !
Avarekalu-pulao-4

    Enjoy !


Note

  • For variations, you can use only methi leaves & make this pulao.
  • You can replace methi leaves with mint leaves along with avarekalu. But use mint leaves in very small quantity.
  • Adding more oil+ ghee makes this rice taste yummy. So use accordingly.
  • Use less coconut and onions for grinding else coconut make the rice look dry.
  • U should use more spices to get a nice aroma. So I used 3 cloves, 2 cardamom and 1 big stick cinnamon.
  • My friend used 1.75 cups of water for fluffy rice. 


Enjoy this yummy averakalu pulao recipe with simple onion raita & curd rice !

Avarekalu bath recipe

Continue Reading...


January 4, 2015

Dindigul Thalappakatti Veg Biryani-Mushroom,Soya Chunks Biryani Recipe--Sunday Lunch Recipes -1

Dindigul-thalapakatti-biryani

In this New year, with all your support and blessings, I have planned to start biryani series from this week. I guess most of you make ( Both vegetarian & Non-vegetarian) make biryani in weekend especially on Sunday. Even I too make biryani mostly on Sundays, make myself free and enjoy my time with my family. To me, Biryani is an easy to make yet very rich & delicious one pot meal that make everyone drool over its smell & color. I love to try varieties of biryani recipes by watching TV shows, by referring blogs or cookbooks. I thought of blogging the same here as it might be useful to vegetarians who look for varieties of biriyani recipes. So every Sunday, you can expect some yummy biryani & pulao recipes in my blog. Actually I wanted to start this series with “How to cook Basmati rice” post. But I still have some work pending to bring that post here. As I am in Salem, I couldn’t do it. So I thought of starting this series with this most popular Dindigul thalappakatti biryani recipe in which I used jeera rice. Generally vegetarians have less options for biryani varieties. So I used to refer non-veg biryani recipe too & try it  by replacing chicken or mutton with vegetables like mushroom, Gobi/cauliflower and soya chunks. You can find one such example here.  Even today I have shared Dindigul thalapakatti biryani which is the most popular mutton biryani of Dindigul district. For this recipe, I referred so many sites and read readers comments to get some idea about its color, the rice used in it etc. Finally I landed upon here & tried this biryani by making small changes in the actual recipe to achieve its brown color. I used mushroom & soya chunks/meal maker in place of mutton ;). The taste was awesome. It came out super flavourful with minimum masala. Raksha & Sendhil loved it a lot. Raksha told me to make the same biryani next day too for her lunch box . So I made a minimum quantity for her using rice cooker. Now I can confidently try this biryani for my guests too. I served this biryani with simple onion raita as a side dish. I made fruit custard for dessert & curd rice as well. So last week we had this biryani, raita, fruit custard and curd rice for our lunch. It was simple yet divine ! I have updated this recipe with a full video. Do watch it !

I will try my level best to collect the best biryani recipes, try them in my kitchen and share it here.Wish me Good Luck. Leave your feedback or share the picture if you try any biryani recipes from this series. It will motivate me to try n post more. Check out my other biryani & pulao recipes that are popular in my blog.

I have updated this recipe with a video. Please check it !


Continue Reading...


December 2, 2014

Brinjal Masala Kuzhambu/Kathirikai Kuzhambu Recipe

Brinjal masala kuzhambu recipe
I learnt this brinjal masala gravy recipe from my friend Megha. Its a kurma kind of gravy that goes well with rice, idli, dosa and even chapathi too. Here in Bangalore, people make a brinjal gravy named as “Ennegaayi gojju” as a side dish for akki roti. This gravy tastes similar to that but not exactly. I will share authentic ennegaayi recipe soon.

I tasted this gravy once in Megha’s house and liked it a lot. I got the recipe from her immediately and wrote in my cook book. I have made this many times in my kitchen but somehow I couldn’t blog it. Today I made this brinjal gravy along with tindora curry(yet to post) for Sendhil’s lunch box and thought of sharing here. 

Basically I am a big fan of brinjal recipes. I keep trying one or the other new recipes using brinjal. When I made this gravy, I became very happy that I got yet another easy, interesting brinjal gravy recipe just like my Ennai kathirikai kuzhambu and brinjal kara kuzhambu recipes. Brinjal lovers, do try this gravy. Its very simple to make and yummy too ! The best part is this brinjal gravy can be made directly in a pressure cooker. Do try this brinjal masala gravy for rice and enjoy !

Brinjal masala kuzhambu

Brinjal masala kuzhambu


Brinjal masala kuzhambu Brinjal masala kuzhambu recipe - A kurma kind of gravy for rice,idli n dosa !
Cuisine: Indian
Category: Gravies
Serves: Serves 2
Prep time: 10 Minutes
Cook time: 15 Minutes
Total time: 25 Minutes


INGREDIENTS

  • Brinjal - 6 nos
  • Tomato - 1 no
  • Big onion - 1 no(finely chopped)
  • Salt & water - as needed
To grind
  • Grated coconut - 3 tbsp
  • Big onion - 1 no
  • Ginger & garlic paste – 1 tsp ( heaped) 
  • Cinnamon - 1 small piece
  • Cloves - 2 nos
  • Coriander leaves - a fistful( 2 tbsp,chopped)
  • Red chilli powder - 1 tsp ( add 1.5 tsp for spicy gravy)
  • Dhania powder - 3/4 tsp
  • Turmeric powder - 1/8 tsp
To temper
  • Cooking oil - 1.5 tbsp
  • Mustard seeds - 1/2 tsp
  • Urad dal - 1/2 tsp
  • Curry leaves – few
Coriander leaves – little ( to garnish)
HOW TO MAKE BRINJAL MASALA KUZHAMBU - METHOD

  • Wash and slit the brinjals into 4. Keep it immersed in water till use.
  • Grind all the items given under “ to grind” to a smooth paste.
Brinjal masala kuzhambu 1

  • In a pressure cooker base, heat oil and splutter mustard seeds,urad dal and cumin seeds. Saute finely chopped big onions till transparent. Add curry leaves and then add the slitted brinjals. Saute till the skin of brinjal shrinks lightly. Now add the ground masala paste and saute till raw smell vanishes.
Brinjal masala kuzhambu 2
  • Then add a roughly chopped tomato and saute till slightly mushy. Lastly add water and pressure cook in low flame for one whistle. Remove the lid after the steam is released completely. Mix well.Garnish with finely chopped coriander leaves and serve with plain rice adding ghee.
Brinjal masala kuzhambu 3

    Enjoy !
Note

  • You can replace brinjal with avarekalu/mochakottai/hyacinth beans.
  • This gravy tastes the best when mixed with plain rice adding ghee. Ghee is a must here.
  • You can also have this as a side dish for idli, dosa
  • Here I have not used tamarind.If u want u can replace tomato with a small gooseberry size of tamarind.
  • Garnish with coriander leaves for more flavor.

Enjoy this masala gravy mixing with plain rice and ghee.

brinjal gravy

Continue Reading...


August 21, 2014

PANEER SANDWICH RECIPE-KIDS LUNCH BOX RECIPES


paneer-sandwich-recipe-for-kids

I tried paneer sandwich recipe for the first time using homemade paneer for our breakfast .I referred few websites and came up with my own combination.We all liked it very much.More than us,Raksha enjoyed it a lot.The combination of paneer masala,green chutney and tomato sauce with bread was yummy.Its a simple yet filling breakfast recipe for kids as well as adults.It can be packed for lunch box too.I made few colourful open sandwich to serve my daughter.It was more appealing Happy.

Paneer-sandwich

Paneer sandwich recipe


Paneer sandwich recipe Easy & colorful paneer sandwich recipe for kids breakfast and lunch box
Cuisine: Indian
Category: Breakfast
Serves: Serves 2
Prep time: 10 Minutes
Cook time: 10 Minutes
Total time: 20 Minutes


INGREDIENTS
For paneer masala
  • Homemade paneer cubes - 20 nos
  • Big onion - 1/2tsp
  • Ginger garlic paste – 1/2 tsp
  • Red chilli powder – 1/2 - 1 tsp
  • Garam masala powder – 1/2 tsp
  • Salt & water - as needed
  • Turmeric powder - 1/8 tsp
  • Kasoori methi - a big pinch
  • Coriander leaves - to garnish
For green chutney
  • Mint leaves or coriander levaes - A handful
  • Green chillies - 2 nsos
  • Garlic - 2 cloves
  • Lemon juice - few drops
  • Cashew nuts - 5 nos
  • Salt & water - as needed
For Sandwich
  • Bread slices - 10 nos
  • Tomato sauce - as needed
  • Butter/ghee or oil - to toast
METHOD

  • Crumble paneer cubes into small pieces.Set aside.Grind green chutney with the ingredients given above and keep aside.
Paneer sandwich recipe 1
  • In a pan,heat oil and splutter cumin seeds.Saute onions.G&G paste.Mix well till raw smell leaves off.Now add the crumbled paneer,red chilli powder,turmeric powder & Garam masala powder.Add the required salt and mix well.Saute till u get a nice smell.Lastly add kasoori methi,give a toss and switch off the flame.Garnish with coriander leaves.
Paneer sandwich recipe 2
  • Now take one bread slice and apply green chutney on one side.Toast the other side for few seconds adding butter or ghee.Remove in a plate.Take another slice of bread and apply tomato sauce on it.Toast the other side with ghee or butter or oil.Now spread the paneer masala on top of tomato sauce bread.cover it with green chutney bread and toast both the sides for few seconds till u get browned top. Remove & cut it diagonally.
Paneer sandwich recipe 3
  • Serve & Enjoy !

Note
  • U can replace tomato sauce with red garlic chutney & make it more spicy.
  • U can also remove the corners of bread slices if needed.But  i dint remove as my bread slices were very small.
  • U can also do the grill & make a grill sandwich.

Paneer sandwich with tomato sauce tastes yummy.Do try it for ur kids !
paneer sandwich recipe
Continue Reading...