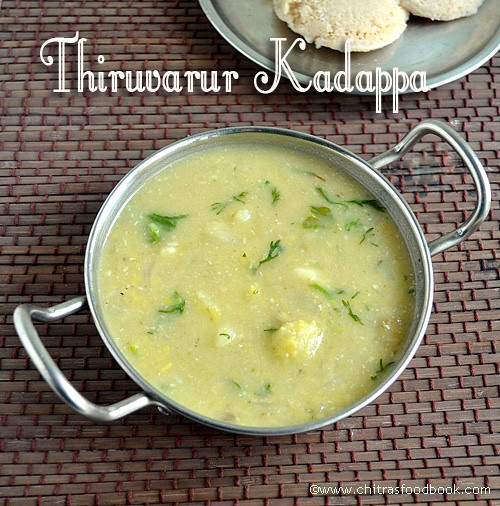
Kumbakonam Kadappa as the title says, it is a very famous side dish recipe for idli, dosa in Kumbakonam, Thiruvarur & Thanjavur district, Tamil nadu. It tastes more like kurma but its consistency is between sambar and kurma. I have tasted this once in Sendhil’s uncle’s house in Kumbakonam.
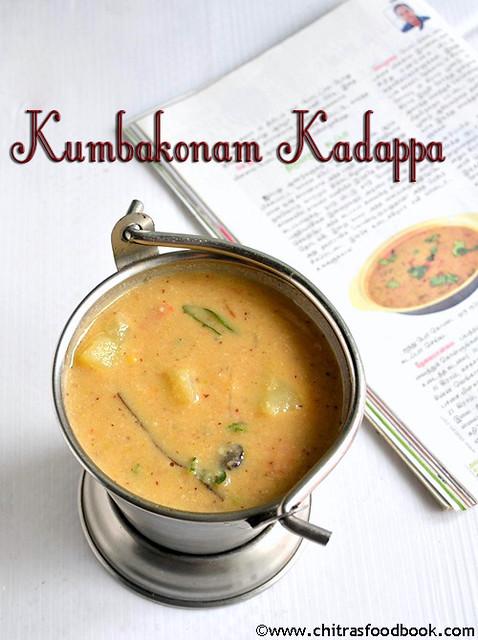
Long back I tried two versions & posted here too. But this recipe is the authentic, restaurant style one from Chef, Master Ravi of the famous “Vaasan cafe”, Thiruvarur, Kumbakonam. I took this recipe from Aval vikatan Magazine. Last month I prepared this when my in-laws were here. We all loved it & relished with idli. I have tried this many times after that.
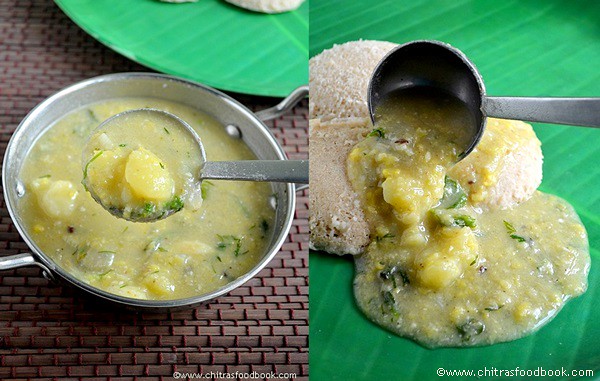
The color of kadappa is usually white. In some hotels/restaurants, they make with or without tomato, carrot. Even the recipe given the book had carrot and tomato. So I tried two versions. Hope U can find the difference in color in pictures. Do try any based on your liking. I am sure you’ll love this mildly spiced, kurma like gravy for idli, dosa. Procedure seems a bit lengthy. But its worthy to try. Lets see how to make restaurant style kumbakonam kadappa recipe with step by step pictures.
Kadappa with tomato & carrot
Kumbakonam/Thanjavur kadappa recipe
Kumbakonam/Thanjavur kadappa recipe - Authentic recipe from a chef. A tasty side dish for idli,dosa!
Cuisine:Indian
Category:Side dish
Serves:Serves 4
Prep time:20 Minutes
Cook time:20 Minutes
Total time:40 Minutes
INGREDIENTS 1 cup - 240ml
To pressure cook
Yellow moong dal - 1/4 cup
Potato - 1 no
Water - as needed
Oil - a drop
To powder
Cinnamon - 1 inch piece
Fennel - 1/2 tsp
Garlic cloves - 5 nos
To saute
Oil - 1 tsp
Green chilli – 4- 5
Fried gram dal /Pottukadalai – 2 tsp
To grind with above
Grated coconut - 1/4 cup
Khus-Khus/Poppy seeds - 1 tsp
Soambu/Fennel seeds - 1 tsp
Garlic cloves - 5 nos
Ginger - 1 inch piece
To temper & saute
Oil - 2 tbsp
Cloves - 2 nos
Biryani leaf / bay leaf - 1 no
Star anise - 1 no
Small onion - 10 nos OR Big onion - 1
Garlic cloves - 10 nos
Tomato – 1 no (optional)
Curry leaves - few
Carrot - 1 no (small,optional)
Mint, coriander leaves - 2 tbsp
Lemon juice - few drops
HOW TO MAKE KADAPPA - METHOD
Pressure cook moong dal adding required water & a drop of oil. Keep a whole potato inside it. Cook them for one whistle in low flame. Remove, peel the potato skin & cut into cubes. Mash the dal & set aside.
In a kadai, heat a tsp of oil & saute the green chillies & fried gram dal. Take this in a mixie jar & add grated coconut, ginger, garlic cloves, poppy seeds & fennel seeds. Grind everything to a smooth paste adding required water. Set aside.
Crush the cinnamon, fennel & garlic cloves & set aside. In the same kadai, heat 2 tbsp of oil. Saute cloves,star anise,cardamom and biryani leaf.
Now add the crushed cinnamon powder. Then add onions, garlic cloves & saute till transparent. Now add tomatoes & saute for a minute. No need to become mushy. Adding tomato & carrot is optional.
Add sliced carrots, saute well. Add water to cook the carrots and cover cook for few minutes.
After the carrots are cooked well, add the ground coconut paste and cooked moong dal. Boil for sometime. Check for salt. Add the potato cubes, allow the gravy to boil till thickens slightly.
Before removing, add the chopped coriander and mint leaves. Give one boil and switch off the flame.
This gravy would thicken after it cools down.So make it slightly watery.
Adding tomato & carrots are optional. I have not seen them in the kadappa I tasted in kumbakonam restaurants. But I added as it was mentioned in the recipe.
To make it white, omit tomato & carrots. Add more green chillies if you want it more spicy.
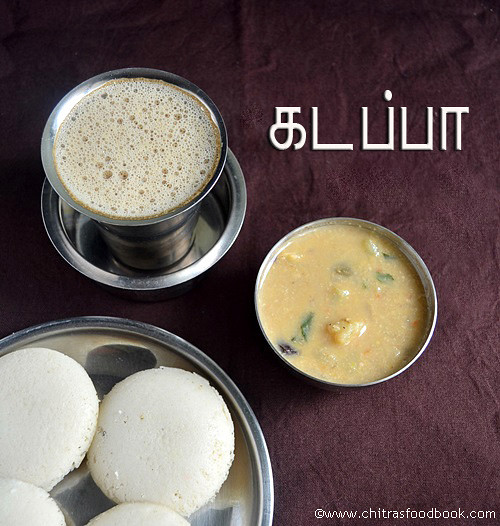
Enjoy this Kumbakonam kadappa for idli,dosa with Kumbakonam degree coffee !
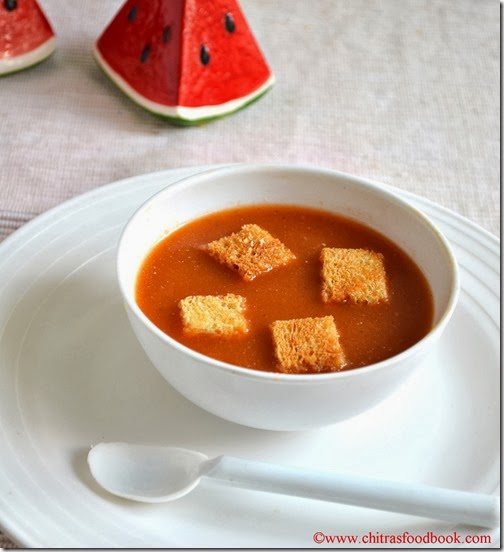
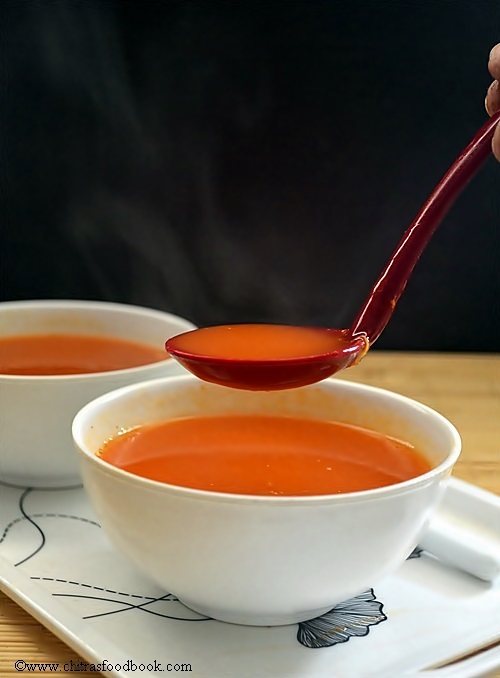
This is my first post on soup recipes. Tomato soup using fresh tomatoes is the one and only soup I order whenever we go out for dinner. But no two restaurants serve tomato soup (thakkali soup) in same taste. Everybody has their own variations. Among all the soups I have tasted, I would say the best tasting soup is the one I had in Salem”Lakshmi Hotel - Salem, Tamilnadu’'. It was the bestest. My total family is a big fan of that soup and sometimes we have gone there for dinner just to taste that soup. Every time I keep sniffing/smelling the soup to find out the ingredients and I tried many times to recreate the same. At last I succeeded in my attempt. This tomato soup tastes 90% close to that soup. I got the same color and taste. I have not used carrot, beetroot or cream . This is just the original color of fresh tomatoes. Sendhil and Raksha loved it a lot. Do try this simple,easy and yummy restaurant style recipe and let me know your feedback. Here is my small attempt in capturing the steam..How is it ? 😉 Lets see how to make this easy south indian tomato soup recipe.
Tomato soup recipe
Indian Restaurant style yummy tomato soup recipe without cream.
Cuisine:Indian
Category:Soup
Serves:Serves 3
Prep time:10 Minutes
Cook time:20 Minutes
Total time:30 Minutes
INGREDIENTS
To saute
Butter - 1 tbsp
Cinnamon - 1 inch piece
Cloves - 1 no
Bayleaf - 1 no
Garlic cloves - 10 nos
Big onion - 1 no(small size)
Ripe tomatoes - 4 nos(chop finely)
To mix in the soup
Salt - as needed
Sugar - 1/4 tsp
Tomato sauce / tomato ketchup -1 tbsp
Corn flour - 1 tbsp
Water- 3 cups
Pepper powder - to serve
METHOD
In a pressure cooker base,melt butter. Add the cinnamon,clove and bay leaf. Saute for few seconds. Add onions,chopped garlic cloves and saute well. Finally add the chopped tomato pieces and saute till mushy.
To this, add 3 cups of water, salt and pressure cook in high flame for 3-4 whistles. After the steam is released,remove the bayleaf, cinnamon and grind it with a hand blender or a juicer.
Strain the sediments and discard. Add the bay leaf and cinnamon back to the strained soup.
Now add sugar, tomato sauce, 1/4 tsp of white pepper powder and allow it to boil for a minute. Dilute corn flour in little water and add to the soup. Allow it to boil till raw smell emanates completely.
Serve hot with bread croutons.
NOTE
Generally a piece of carrot or beetroot would be added to the tomatoes while cooking to give a nice color. But I din’t use any as my tomatoes itself were ripe with a nice color.
If you add carrot or beetroot,do not grind it along with tomatoes. Please discard them after you pressure cook.
For making bread croutons,cut the bread into slices, apply little oil. Bake in a convection oven at 180c for 20 mins. Flip it once in the middle. U’ll get a super crispy bread croutons which you can serve with this yummy soup. It tastes great !
Serve hot topped with bread pieces and pepper powder ! It tastes yummy!
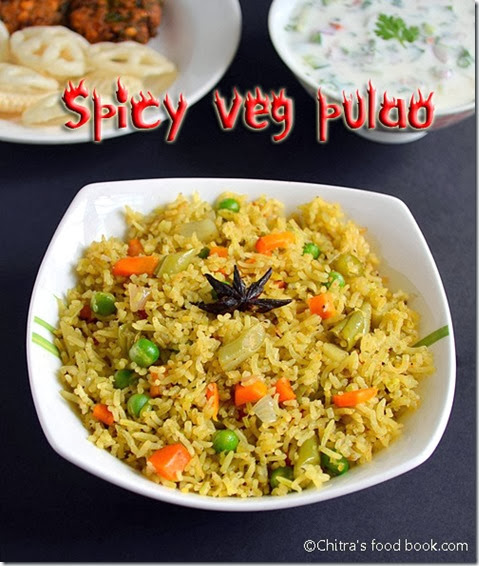
I got this restaurant style veg pulao recipe from a friend who is an expert in cooking non-veg recipes. She shared her South Indian style Vegetable pulao recipe with me. In Karnataka, all my friend call it as vegetable pulao/palav. In my house, mom and MIL call these kind of recipe as either biryani or vegetable rice. I tried this recipe for the first time. It came out super flavourful and tasty. When you cook this biryani, I bet your house will be scented with this masala flavour. U can feel the smell in your hands even after you finished eating it:) I am not exaggerating, its true. Try it :) Its totally my kind of recipe with full masala flavour.
Whenever my neighbours make biryani, I keep sniffing the aroma. Every time I feel like rushing to their house to get the recipe. As they cook mostly non-veg biryani, I hesitate to ask because I was thinking the same flavours cannot be achieved with vegetables. I thought its only because of chicken or mutton. Of course chicken/mutton may also be one of the reasons. But the major thing is the masala/spices we use. I got to know this only after making this biryani. U’ll get the taste and smell of non-veg biryani when you try this recipe. Its a keeper recipe for vegetarians like me.
If you make this for parties, make it directly in electric rice cooker like i did in my tomato rice recipe but with generous amount of oil and ghee. Rice cooker helps to keep the pulao hot till u eat. Last week i attended a birthday party. They kept this rice in their menu. It was awesome.So I thought of sharing this recipe before posting the party menu.
Ok, enough of boring, let us move on and see how to make spicy veg biryani & raita with step by step pictures :)
Lichen or Black stone flower – Kalpasi – 1/2 tsp (please see the picture in step by step & refer notes)
Vegetables - 3/4 cup (carrot-1no ,beans-8nos, green peas-1/4cup, potato - 1no)
Big onion – 2 nos (medium sized)
Red chilli powder - 1/2 - 1 tsp
Turmeric powder - 1/4 tsp
To grind
Big onion - 1/4 no (use only quarter piece)
Green chillies - 3- 4 nos (small finger size)
Mint leaves - 10 nos
Fennel seeds - 3/4 tsp
Cinnamon - 1 small piece
Clove -2 nos
Cardamom - 1 no
Ginger - 1 inch piece
Garlic - 5-6 pods(small)
Cashews - 2 nos (optional)
HOW TO MAKE HOTEL VEG PULAO - METHOD
Wash and soak the basmati rice for at least 30-45 minutes. Else you have to add 2 cups of water for 1 cup of rice. Chop all the vegetables and onions(finely) & grind the masala. Keep it ready.
In a pressure cooker or rice cooker base, heat oil+ghee and add the bay leaf, star anise and kalpasi. Then add the onions, saute for a minute or two. Now add the ground masala paste. Wash the jar with very little water and add it. Saute well in medium flame till you get a nice aroma(People sitting in living room will definitely come to your kitchen by the aroma;))
Add turmeric and red chilli powder. Saute for a minute. Lastly add the vegetables and required salt. Mix well. Drain the water from the soaked rice and add it. Mix well for a minute.
Lastly add 1.5-1.75 cups of water (depending on the basmati rice brand) and a tsp of ghee and pressure cook in low flame till one whistle or 10-12 minutes.
Remove, mix with a fork like ladle.
Serve hot with any raita.I served with mixed vegetable raita and its recipe follows.
Do not add more mint leaves and onion than the above mentioned quantity. Do not use turmeric powder to get white colored pulao. Add more green chillies if you want too spicy.
Add oil/ghee generously when you make for parties or guests.
If you have Lichen or Black stone flower - Kalpasi, please add it. Mostly U’ll get this ingredient in biryani masala packet. It gave a nice smell to the pulao. Please click this link to see the picture of this ingredient. Skip if you don’t have it.
Adding water depends on the amount of soaking. If you soak for one hour, add 1 to 1.5 cups of water. Here I used around 1.75 cups of water after soaking the rice for about 15 minutes as my husband likes that way. I used India gate basmati rice.
RAITA FOR PULAO/BIRYANI
This raita was served along with this pulao in that party. It was a nice combo for this pulao. We loved it.
Mixed vegetable raita
Raita recipe for pulao/biryani
Cuisine: IndianCategory: Lunch side dishYields: Serves 4
Finely chop all the vegetables. Mix well in a big bowl adding the required salt. Just before serving add the curd, Mix well without adding water. Tempering is not needed. Serve with pulao/biryani.
Note
Cucumber will leave water and the mixture will become watery if you mix curd in advance. So add curd only 10 minutes before serving. After mixing, if you feel the mixture is too thick, add little water. Else do not add water.
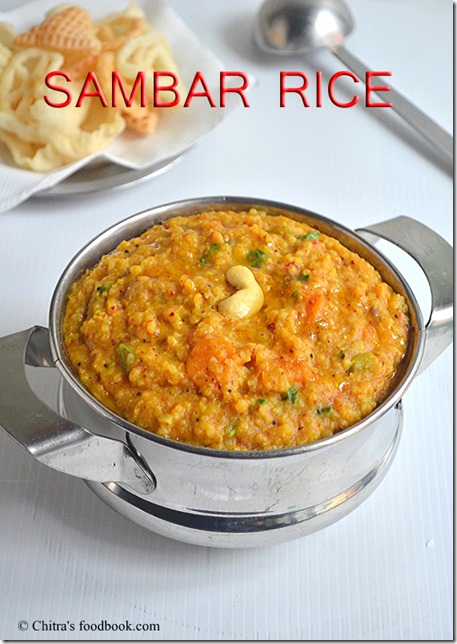
I wanted to post one pot sambar sadam recipe ( Sambar rice in a pressure cooker) after tasting in hotels. Saravana bhavan sambar sadam is very popular in Tamil nadu. I usually make rice and sambar separately and mix them. Every week I used to watch Podhigai channel’s Asathal suvai if it is hosted by “ Mrs.Revathy shanmugam”. Last week she gave the recipe for sambar rice. I tried it the next day.It was a huge success at home.We loved its flavor and taste. I have not used any garam masala here. So It tastes like our Tamil nadu hotel style sambar sadam. It has a goey texture when hot and thickens after it cools down. It tasted great when hot as well as cold. Addition of ghee is a must here. It gives a nice aroma. :) I have updated this recipe with a full video. Please watch it below.
Pressure cook drumstick separately. Remove the flesh & keep aside
Wash and pressure cook rice. Wash & pressure cook rice n dal along with chopped carrots ,beans , peas ,turmeric powder , salt & hing. Add 6 cups of water & Cook for 2-3 whistles till rice n dal turns mushy. Open the cooker & mash it well. Set aside.
In a pan , add a tsp of oil and roast all the ingredients given under “to roast & grind” . Powder them nicely and set aside.
In the same pan, heat oil + ghee and saute the onions, chopped tomatoes & curry leaves. Saute till tomato turns mushy. Then add 1 cup of tamarind extract, sambar powder, turmeric powder , hing & salt if required. Let it boil for sometime till onion gets cooked. If you want , you can directly add the tamarind extract, sauteed onion, tomato mixture to the cooked rice and dal & proceed.
Now add this mixture to the cooked rice . Add the masala powder, drumstick flesh and mix well.Simmer the flame and allow it to boil well for 10 minutes . All the flavour gets into the rice.Stir once or twice in the middle. Add ghee to avoid rice sticking to the bottom of pan. Mix well. Lastly temper the mustard seeds & add. Garnish with coriander leaves..
Serve hot drizzled with little ghee & papad !! !
Note
For variations , u can use steamed rice instead of raw rice. Add water according to the quality of rice.
I used byadge chillies in this recipe. It gave a nice color to the rice and less spicy too. If you use spicy chillies, use 5-6 as per your taste buds.
Adding coconut is purely optional. If you add it, add more chillies to compensate.
Delicious sambar sadam, creamy curd rice, crispy fryums and spicy pickle, mor milagai is ready to enjoy !
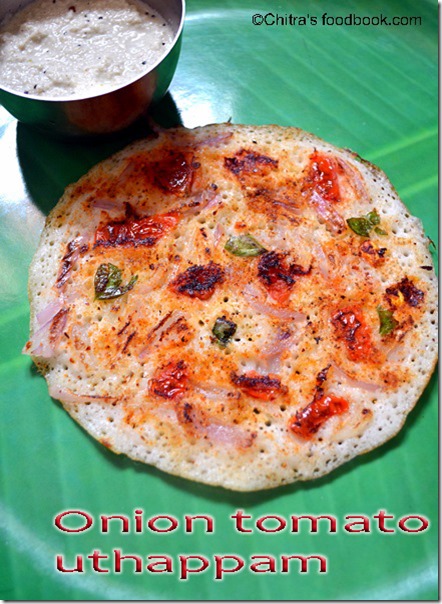
Last month we had a trip to kodaikanal and we ordered this uthappam for breakfast in a restaurant.We loved it very much because the taste was something different from the usual ones. I usually make onion tomato uthappam sprinkling some pepper powder or finely chopped green chillies. But in that dosa they sprinkled idli milagi podi and it was very nice with full of flavours.Also the tomato pieces were well roasted to black in color.The roasted tomato pieces had a nice flavour. Also the dosa was not too thick like our regular uthappam & above all not much oily . Overall i liked that dosa very much..Last week I tried the same in my kitchen with left over idli batter and i was happy i could bring in the same taste. I think most of u know & make this combination at home.But still i am posting this recipe for beginners & bachelors .. So here is the recipe ..
As mentioned above , slice cut the onions , chop the tomatoes and curry leaves and set aside.Take the idli batter in a bowl and add little water( say 1/4 cup) to make it slightly thin..
Heat dosa tawa and pour a ladleful of batter. The batter will spread automatically , if not spread it little. ( Please make sure u don’t spread it too thin )
Now sprinkle the sliced onions , tomato pieces and curry leaves all over the dosa .. Please do not add too much of tomato pieces..Add 4-5 small pieces for one dosa.
Now sprinkle idli milagai podi all over the dosa and drizzle gingely oil in the sides as well as top of dosa.Let it cook for sometime in medium flame.
Now flip the dosa carefully. Do not press the dosa..Keep the flame medium for a minute & then high for another minute for the tomatoes & onions to get cooked & roasted..Again add a drop of oil..Remove and serve..
I tasted this pepper idli in Salem “Lakshmi hotel” . They served mini idli flavored with pepper masala. It was served with onion raita. As my husband is fond of pepper recipes , we ordered this recipe to try. It was very simple and yet very tasty. Though the idlies are not deep fried , I felt it was too oily. I tried the same recipe at home with moderate quantity of oil and it was a success . If yu have left over idli batter at home , you can try this recipe.This recipe is a nice replacement for kaima idli and chilli idli..If you r a pepper lover,do try this .. U’ll love its flavour for sure .. Even if you can’t make button idli, you can use the left over idli by cutting them into bite sized cubes and try the same. Recently my MIL told me after reading a magazine that eating 10 pepper corns per day helps better digestion , prevents stroke and heart attack.. So friends lets try to eat the whole pepper corns in ven pongal and include more pepper powder in our cooking .
INGREDIENTS
Mini idli / button idli ( small idli) – 15 nos
Big onion – 1 no
Tomato – 1 no ( I used Bangalore tomato)
Garlic cloves – 8 nos
Curry leaves – few
Coarsely ground pepper powder – 1.5 tsp (adjust)
Salt – As needed
Cooking oil – 2 tbsp
Coriander leaves – To garnish
Ghee - 1 tsp ( to garnish)
METHOD
Make mini idli ( small idli) and keep in a separate plate.Let it cool down. Grind the pepper corns coarsely and set aside.
Chop the tomato into big cubes. Its better if you use bangalore tomatoes ( less pulpy ones) .. Slice half of the big onion and finely chop the remaining half . Chop the garlic cloves finely in round shape..
In a wide kadai , heat oil and add the big onions , garlic cloves and whole curry leaves.. Saute till curry leaves turn crispy.
Saute well and then add the tomato pieces.Saute for a minute.Tomato should not turn mushy.It should be visible.
Finally add the pepper powder & salt. Mix well and then add the idli pieces.Give a quick mix and make sure the pepper powder coats the idli well.
Sprinkle coriander leaves, drizzle a tsp of ghee and serve hot immediately !!
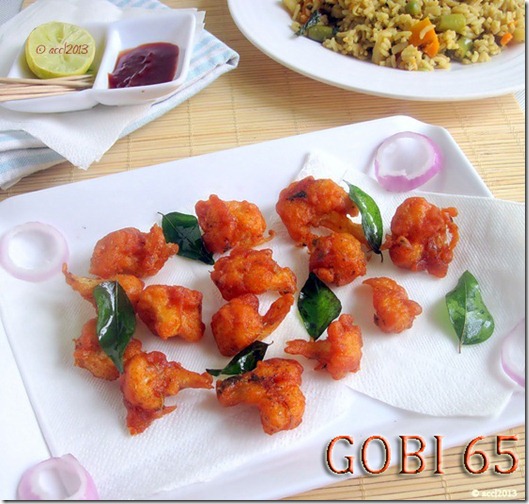
I got this crispy Gobi 65 / Cauliflower 65 recipe from Aval vikatan’s “ 30 Restaurant style recipes” supplementary. This is a dry version. Before I got this book, I used to try Chef Damodaran’s recipe which is also similar to this. This recipe has dry kasoori methi leaves in addition. I have tried this several times and it comes out super crispy , tasty with nice flavour like hotel style cauliflower 65. We love it a lot. I usually make in weekends with veg pulao or biryani.
Sometimes, I make this cauliflower fry for my daughter after she comes from school. This is one of her favourite snacks. U can prepare this recipe well in advance for parties or get together & fry it when required. The more time the cauliflower marinates, the tastier it would be. You can try without marination as well.. Please go through the Notes section for do’s & dont’s.. Lets see how to make crispy Gobi 65 recipe with step by step photos and video !
Gobi/Cauliflower – medium size flower (20 florets)
All purpose flour / Maida – 1/2 cup
Corn flour – 1/2 cup OR rice flour + corn flour - 1/4 cup each
Red color powder – 1/4 tsp
Red chilli powder or green chilli paste – 2 tsp
Ginger – garlic paste – 1.5 tsp
Garam masala powder – 1 tsp
Crushed fennel seeds - 1 tsp
Lemon juice – Few drops
Dry Kasoori methi leaves – 1.5 tsp (crushed )
Salt & water – As needed
Cooking oil – To deep fry
HOW TO MAKE GOBI 65
Remove florets from cauliflower. Parboil adding salt and turmeric powder.
Take a bowl and mix all the ingredients to make the batter.
Add water to make bajji batter consistency.
Lastly add cauliflower florets. Marinate for 30 minutes to 1 hour.
Heat oil and deep fry the cauliflower pieces. Fry till golden in both the sides.
Remove from oil once its crispy. Drain in a tissue paper. Enjoy with tomato ketchup.
METHOD - STEP BY STEP PICTURES
Remove the florets from the cauliflower & par boil it for 5 minutes adding salt and turmeric powder. Make sure cauliflower florets are small in size.
When the water roll boils, switch off the flame. Leave it for 3 minutes and drain the hot water completely & wash it in cold water immediately to avoid over cooking of cauliflower. Drain all the water completely.
Now in a wide bowl, add all the powders, crushed spices & salt, lemon juice mix well . Add water carefully to make bajji batter consistency. The batter should fall like a ribbon. Now put the florets, mix well & marinate for minimum 30 minutes to 2-3 hours. Please watch video for better understanding. Cauliflower should be well coated with flour.( watery batter absorbs more oil). If you don't have enough time, you can fry it instantly without marination.
Heat oil in a kadai and put the cauliflower florets in a sprinkled way one by one. Deep fry on both the sides till all the bubbles cease. Do it batches in medium flame Deep fry curry leaves in the last batch & decorate it while serving !!
Super crispy gobi 65 is ready !! Enjoy eating hot with tomato sauce !!
NOTES
It will stay crispy for 30 minutes. But for best taste, you should eat it hot hot !!
While you make the batter add less water & bring to bajji batter consistency. If you add more water, gobi 65 may absorb more oil. Adding less water & more flour makes it hard.. Please be careful while adding water. Approximately it takes 3/4 to 1 cup of water I guess. If you add more water, add some more flour to bring the right consistency.
If you feel adding maida is unhealthy , add wheat flour instead of maida.
Adding food color is optional. But it gives a nice look to the fries like we get in restaurants.