Search Chitra's Food Book

Showing posts with label Rice varieties. Show all posts

March 3, 2022

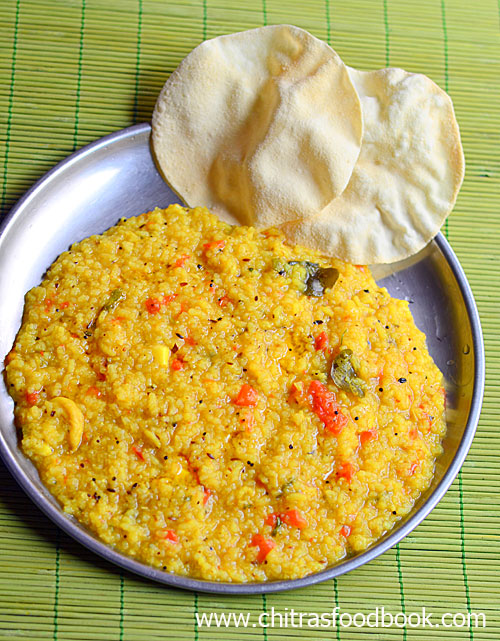
Avarekalu Rice Bath Recipe – Karnataka Avarekalu Bath

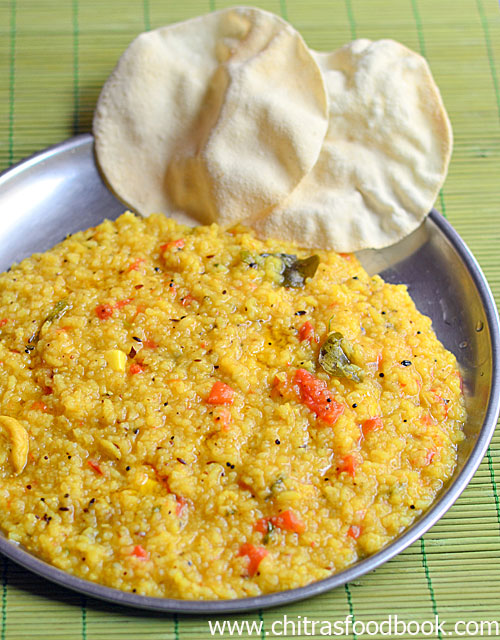
Avarekalu rice bath

Avarekalu bath is one of the most delicious rice varieties that is prepared every year during avarekalu season. People in Karnataka make use of this season and prepare avarekalu recipes every single day. I too started making them after learning from my friends and neighbours. People here make Avarekalu sagu, avarekalu pulao, uppittu, avarekalu sambar, palya, avarekalu huli etc.

Every year, avarekalu mela is conducted at food street in V V puram and in different places of Bangalore during January to March. I have also attended one and relished some of the yummy avarekalu dishes, sweets and snacks from different stalls. I have shared many avarekalu recipes in my blog so far. But I wanted to try this most popular, restaurant style avarekalu rice bath for long time. Finally it happened this year. 

This Hyacinth beans rice / Avarekalu rice bath is a simple and quick one pot recipe that can be made in a pressure cooker easily.Its a working women and bachelor friendly recipe. I have used only avarekalu in this recipe. You can also use vegetables like carrot, beans, potato to make it more healthy and colourful. 

Lets see how to make this yummy Karnataka style Avarekalu rice bath with step by step pictures.

Check out my other AVAREKALU RECIPES  too.
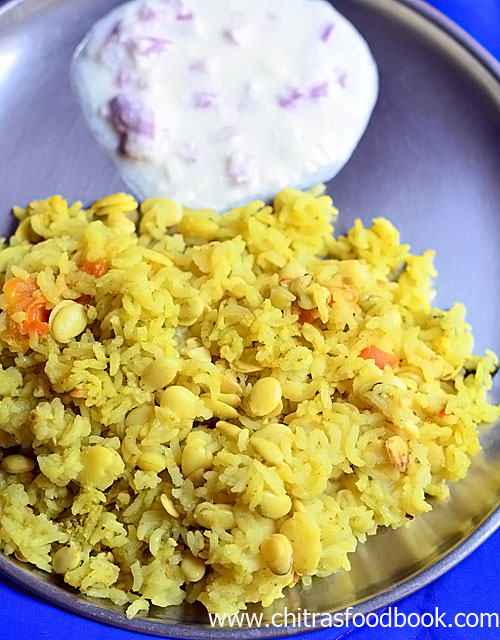
avarekalu rice bath recipe

Avarekalu rice bath recipe - Karnataka Avarekalu Bath


Avarekalu rice bath recipe - Karnataka Avarekalu Bath

Avarekalu rice bath recipe - Karnataka style Lilva beans rice


Cuisine: Karnataka
Category: Main course
Serves: 4
Prep time: 10 Minutes
Cook time: 20 Minutes
Total time: 30 Minutes


INGREDIENTS
1 cup = 250ml
  • Lilva beans / Hyacinth beans / Avarekalu - 1/2 cup
  • Sona masoori rice - 1 cup
  • Water - 2 cups
  • Cooking oil - 2 tbsp
  • Bay leaf - 1
  • Black stone flower - 1
  • Cardamom - 1
  • Big onion – 1(finely chopped)
  • Tomato – 1 (-do-)
  • Coriander powder – 1/2 tsp
  • Salt - as needed
To grind
  • Coconut - 2 tbsp
  • Cinnamon - 1
  • Cloves - 2
  • Green chilli - 2 to 3
  • Ginger - 1 inch
  • Garlic - 5 cloves
  • Mint leaves - few
  • Coriander leaves - few
HOW TO MAKE AVAREKALU RICE BATH
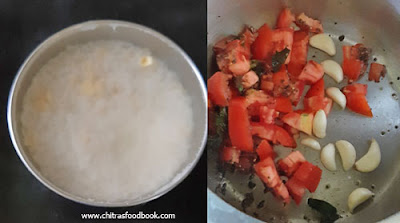
  1. Wash and soak Sona masoori water in 2 cups of water.
  2. Grind all the ingredients given under “to grind” to smooth paste.
  3. Heat oil in a cooker. Add bay leaf, cardamom and black stone flower.
  4. Saute onion till transparent. Add tomato and saute till mushy.
  5. Now add the ground masala and saute till mushy.
  6. Lastly add dhania powder, salt and soaked rice with water. Let the water roll boil.
  7. Cover the cooker. Pressure cook in low flame for one whistle.
  8. Open the cooker after the steam is released naturally. Fluff the rice and serve with raita.
METHOD - STEP BY STEP PICTURES
  • Wash and soak the Sona masoori rice in 2 cups of water. Set aside. Wash Avarekalu and set aside.
  • avarekalu bath
  • Grind all the ingredients given under “To grind” to a smooth paste. Wash the avarekalu. I have used Hitikida avarekalu ( i.e squeezed ones). You can use whole ones with skin.

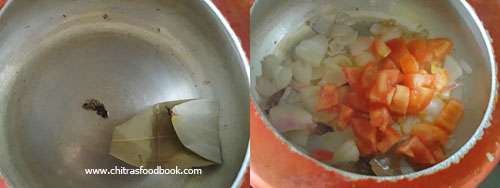
  • Heat oil in a cooker base. Saute bay leaf, cardamom and black stone flower. Saute onion till transparent.
  • avarekalu bath
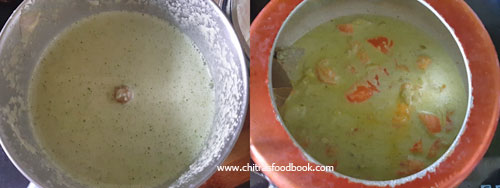
  • Add tomato and saute till mushy. Then add the ground masala paste and saute for few minutes. Add avarekalu and saute for a minute.
  • avarekalu bath
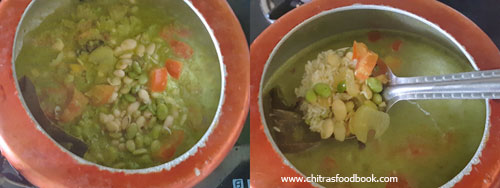
  • Add soaked rice along with water, coriander powder and salt. Mix well and wait for the water to come to a boil. This helps for the masala to blend with rice else masala floats on top after the rice is cooked. Now cover the cooker with a lid and pressure cook in very low flame for one whistle.
  • avarekalu bathavarekalu bath
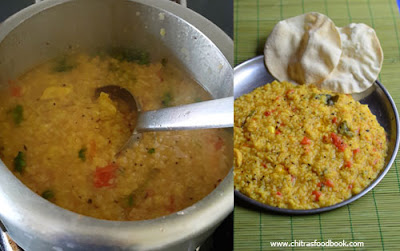
  • Open the cooker after the steam is released naturally. Fluff the rice gently and serve with raita. Enjoy !

Note

  • I have used Hitikida avarekalu. You can use whole ones.
  • For variations, you can add more vegetables like carrot, beans and potato.
  • For variations, you can saute all the ingredients given under “to grind” in little oil and then grind to smooth paste.


Try this easy, yummy Avarekalu rice bath at home and enjoy !

Avarekalu bath


Continue Reading...

February 14, 2022

Pressure Cooker Rasam Rice – One Pot Rasam Rice | Rasam Sadham

Rasam rice

One pot rasam rice / Rasam sadam in pressure cooker is one of my favourite when it comes to one pot recipes. Usually I make it for Raksha and Sendhil whenever I go out for monthly shopping. I prepare potato curry and appalam / papad along with this rasam rice as side dish. Tastes yummy and great. We love this combo. I have been making this rice for years but somehow I din’t post in my blog. So today I thought of sharing this simple and yummy one pot rasam rice as it would be helpful for packing lunch box and for a short trip /picnic during this summer holidays.

I followed this recipe from Yogambal Sundar’s YouTube channel. I made some small changes in the recipe as per my needs. Every time it comes out so well. Consistency of this rasam rice can be varied as per your liking. I like it slightly goey and watery. So I used rice and water in 1:5 ratio.

Friends, come lets see how to make this easy and yummy one pot rasam rice in a pressure cooker. You can make the same in an Instant pot as well by setting in pressure cook mode.

Do check out my One pot Sambar rice too. 

Pressure cooker rasam rice - One pot rasam rice recipe


Pressure cooker rasam rice - One pot rasam rice recipe

Pressure cooker rasam rice - One pot rasam rice recipe - Tamilnadu style rasam sadam.


Cuisine: Tamil nadu
Category: Main course
Serves: 3
Prep time: 10 Minutes
Cook time: 20 Minutes
Total time: 30 Minutes


INGREDIENTS
1 cup = 250ml
  • Raw rice or Steamed rice - 1/2 cup
  • Toor dal - 1 tbsp
  • Water - 2.5 cups
  • Salt - as needed
  • Ripe tomato - 1 (finely chopped)
  • Tamarind - Small gooseberry size
  • Turmeric Powder - 1/4 tsp
  • Rasam Powder or sambar powder - 1/2 tsp
To temper
  • Ghee - 1 tbsp
  • Mustard seeds - 1/2 tsp
  • Asafoetida / Hing - 1/4 tsp
  • Pepper Cumin Powder - 1 tsp
  • Crushed garlic – 4 cloves
  • Red Chilli - 1
  • Green Chilli - 1
  • Curry Leaves - Few

  • Coriander Leaves - to garnish
HOW TO MAKE RASAM RICE
  1. Wash the rice and toor dal. Add water and soak till use or around 30 minutes.
  2. Heat ghee in a pressure cooker base. Splutter mustard seeds, hing, curry leaves, red chilli and green chilli.
  3. Add a tsp of pepper cumin powder, garlic and saute for a minute.
  4. Now add the tomato and saute till mushy. Add sambar or rasam powder.
  5. Add 1/2 cup of tamarind extract. turmeric powder, salt and mix well. Lastly add the soaked rice and toor dal. Add  2.5 cups water and required salt.
  6. Pressure cook in low flame for 2 whistles. Switch off the flame and allow the pressure to release naturally.
  7. Open the cooker and mix well. Garnish with coriander leaves.
  8. Enjoy with potato curry and papad.
METHOD - STEP BY STEP PICTURES
  • Wash and soak raw rice or steamed rice along with toor dal. Add 2.5 cups of water and soak it for 30 minutes.

  • Grind equal quantity of pepper and cumin seeds to a fine powder. Set aside.
  • rasam sadam
  • Heat ghee in a pressure cooker base. Splutter mustard seeds, hing, curry leaves, red chilli and green chilli. Add 1 tsp of pepper cumin powder and crushed garlic. Saute for a minute.
    • rasam sadam
  • Add tomato and saute till mushy. Add tamarind extract, sambar powder or rasam powder, turmeric powder and salt. Mix well.
  • rasam sadamrasam sadam
  • Add the soaked rice and toor dal. Add water and mix well. Check for taste.
  • rasam sadam
  • Pressure cook in low flame for 2 whistles or cook till rice becomes mushy. Switch off the flame. Open the cooker after the steam is released. Mix well and serve with papad and potato curry.
  • rasam sadam

    Enjoy !

Note

  • Adjust the quantity of water as per your need. I love mushy rasam rice. So I used more water.
  • Do not skip pepper cumin powder. It helps to give nice flavor.
  • Add rasam powder for typical rasam rice taste. I used sambar powder.

Easy, yummy, one pot rasam rice is ready to enjoy !

one pot rasam rice


Continue Reading...


April 27, 2021

Soya Chunks Biryani Recipe–Meal maker biryani recipe

Soya chunks biryani

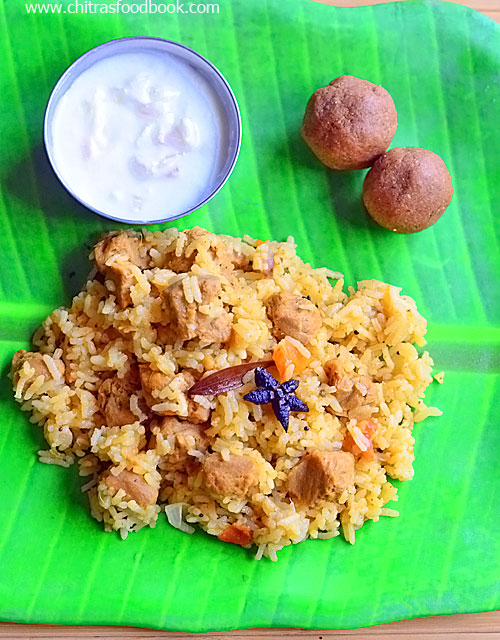
Soya chunks biryani recipe / Meal maker biryani is an easy and yummy vegetarian biryani recipe. I have already prepared so many biryani recipes with soya chunks when I was doing my Sunday biryani series. But this meal maker biryani recipe is a completely different one. Here we are making this biryani by marinating the soya chunks in curd and masala mixture. So the taste of this biryani was so good.

Actually I tried this biryani after watching an YouTube channel. As the chef mentioned, the taste of this biryani was similar to non veg biryani. The flavor was so good. Friends, If you are a vegetarian like me and want to try a veg biryani in non veg taste, you must give this a try. Hope you will love it.

Lets see how to make soya chunks biryani / meal maker biryani recipe with step by step pictures.

Check out my soya chunks kurma for rice, roti

Soya chunks manchurian

Dindigul thalapakkatti biryani

Soya chunks biryani

Soya chunks biryani / Meal maker biryani recipe


Soya chunks biryani / Meal maker biryani recipe

Soya chunks biryani recipe - Easy and healthy biryani recipe adding meal maker


Cuisine: Indian
Category: Main course
Serves: 3
Prep time: 10 Minutes
Cook time: 20 Minutes
Total time: 30 Minutes


INGREDIENTS
1 cup = 250ml
  • Steamed rice or basmati rice - 1 cup
  • Meal maker / Soya chunks - 1 cup
  • Big onion - 1 (Sliced)
  • Tomato - 1
  • Turmeric powder - 1/4 tsp
  • Red chilli powder - 1/2 tsp
  • Biryani masala powder or garam masala powder - 1/4 tsp
  • Mint & coriander leaves - 2 tbsp
  • Lemon juice - 1 tsp
  • Salt & water - as needed
To grind & marinate
  • Green chilli -1 or 2
  • Ginger - 1 inch piece
  • Garlic - 5 cloves
  • Mint leaves - 2 tbsp
  • Coriander leaves - 2 tbsp
  • Water - to grind
  • Curd - 1/4 cup (to marinate)
  • Salt - little
  • Red chilli powder - 1/2 tsp
  • Garam masala powder or biryani masala powder - 1 /4 tsp
  • Turmeric powder - 1/4 tsp
To Temper
  • Cooking oil - 2 tbsp
  • Ghee - 1 tbsp
  • Cinnamon - 1 inch piece
  • Cloves - 2
  • Cardamom - 1
  • Star anise - 1
  • Black stone flower / Kalpasi - 1
  • Bay leaf - 1
  • Fennel seeds - 1/2 tsp
HOW TO MAKE SOYA CHUNKS BIRYANI
  1. Wash and soak soya chunks /meal maker in hot water for 10 minutes.
  2. Wash and soak the rice in 2 cups of water for 15 minutes.
  3. Grind green chilli, ginger, garlic, coriander and mint leaves to smooth paste.
  4. Mix half of this paste with curd, chilli powder, biryani masala powder, salt.
  5. Squeeze soya chunks and add to curd mixture. Mix well and marinate for 15 minutes.
  6. Heat oil + ghee in a pressure cooker base. Add the whole garam masala spices.
  7. Add fennel seeds. Saute onion. Add the remaining green paste. Saute for a minute.
  8. Add tomato and saute till mushy. Add the marinated soya chunks. Mix well.
  9. Add the soaked rice along with water, mix well. Add lemon juice and mint+coriander leaves in the water.
  10. Pressure cook in low flame for one whistle. Open the cooker after the steam is released.
  11. Fluff gently and serve with onion raita !
METHOD - STEP BY STEP PICTURES
  • Wash and soak soya chunks in hot water for 10 to 15 minutes. Wash and soak the rice in 2 cups of water for 15 minutes.
  • soya chunks biryani
  • Grind green chilli, ginger, garlic, coriander leaves and mint leaves to smooth paste.
  • soya chunks biryani
  • Take half of this paste and mix with curd, chilli powder, biryani masala powder and little salt. Squeeze soya chunks and add to curd mixture. Let it marinate for 15 minutes.
  • soya chunks biryani
  • Heat oil in a pressure cooker base. Add cinnamon, cloves, cardamom, bay leaf and black stone flower. Add fennel seeds.
  • soya chunks biryanisoya chunks biryani
  • Saute onion till transparent. Add the remaining green paste and saute till its raw smell goes off. Add tomato and saute till mushy. 
  • soya chunks biryani
  • Add the marinated soya chunks and mix well. Add the soaked rice along with water, lemon juice, coriander and mint leaves. Pressure cook in low flame for one whistle. Switch off the flame.
  • Open the cooker after the steam is released. Fluff gently and serve hot with onion raita.
  • soya chunks biryanisoya chunks biryani
    Enjoy !

Note

  • Adjust the quantity of chilli powder as per your need.
  • You can use basmati rice or jeera rice. I used normal Sona masoori rice.
  • If you are using basmati rice or jeera rice, wash and soak it for minimum 30 minutes and use 1.5 cups of water for 1 cup of rice.


Try this easy and healthy Soya chunks biryani. Enjoy with onion raita !

Meal maker biryani

Continue Reading...


July 31, 2013

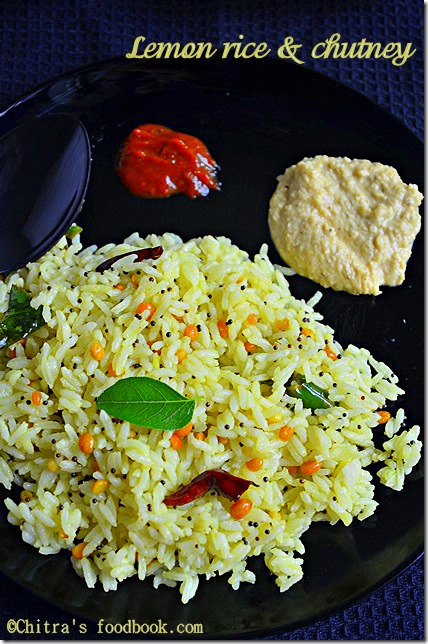
LEMON RICE RECIPE | ELUMICHAI SADAM WITH SIDE DISH, POTTUKADALAI CHUTNEY

Lemon-rice-recipe

Lemon rice (elumichai sadam in Tamil) is my most favourite among all the variety rice recipes for lunch. Its a very simple and a healthy rice recipe that can be prepared quickly for lunch box. I can have a plateful of lemon rice without any side dish like thogayal or pickle. But my mom makes a thick chutney with coconut and fried gram dal ( pottukadalai) as a side dish for lemon rice. My dad never eats lemon rice without this chutney and a pickle. 

Once I tried this combo for my husband and he too liked it. Recently we went to Meenakshi amman temple in Bannergatta. We had lemon rice as prasadam and it tasted out of the world. I would say it is the best lemon rice I have ever tasted. It was mild yellow in color & I found they had used raw rice & added some coriander leaves along with dals & chillies.. Usually I use steamed rice for making lemon rice. But after tasting that prasadam , I too started using raw rice and added some coriander leaves.

As aadi 18 festival is nearing , I thought of posting this lemon rice recipe. This is one among the 5 rice varieties ( lemon rice , puliyodharai , coconut rice , sakkarai pongal and curd rice) we offer to God on aadi perukku along with  pepper vada and payasam.. Do try this chutney & lemon rice combo , u will love it..

Lemon-rice-recipe

INGREDIENTS
1 cup - 250ml
  • Raw rice – 1/2 cup (Good quality sona masoori) OR (steamed rice , basmati rice)
  • Big sized Lemon –  1   ( adjust based on the size & tanginess of lemon)
  • Salt – as needed
  • Hing / asafetida – 1/4 tsp
  • Turmeric powder – 1/4 tsp
To temper
  • Cooking oil – 1 tbsp
  • Mustard seeds – 1 tsp
  • Urad dal – 1 tbsp
  • Chana dal – 1/2 tbsp
  • Peanuts – 1 tbsp (optional)
  • Red chillies – 2 nos
  • Green chillies – 2 nos
  • Curry leaves – few
Coriander leaves – 1 tbsp ( to garnish)
Gingely oil – 1 tbsp ( to add while mixing)

METHOD
  • Pressure cook raw rice adding 1: 2.5 cups of  rice and water ratio. Add a drop of oil before cooking. Cook it separate & fluffy. Spread them in a plate & let it cool down.
  • In a bowl, squeeze the lemon juice by removing the seeds. Add salt , turmeric powder & hing. set aside.
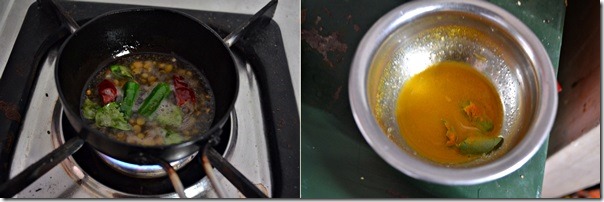
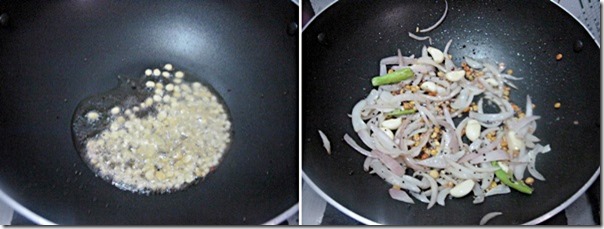
  • In a kadai , heat oil and temper the mustard seeds. After it splutters completely , add the dals & peanuts. Fry till they turn golden brown. Then add the pinched red chillies & slitted green chillies, curry leaves and a pinch of hing.
lemon rice tile1
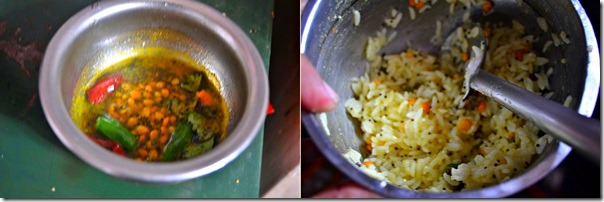
  • Saute well , add the lemon juice , switch off the flame immediately & transfer to a bowl. Add 2 tsp of water in the kadai, give a swirl and add to the lemon juice mixture.
  • Add this mixture & gingely oil to the rice , mix well. Check for salt. Garnish with coriander leaves. Initially it tastes more tangy..But all the taste blends well when its rested for 30 mins to 1 hour before serving.
lemon rice tile2

NOTE
  • The water quantity may differ based on the quality of rice. If you use basmati rice, use 1:2 cups of water.
  • You can add also add the lemon juice directly in the rice instead of adding to the tadka..
  • Addition of peanuts is optional. I dint use here.  I dint add coriander leaves as it was out of stock. But addition of coriander leaves gives a nice taste.
  • Add gingely oil while mixing the rice.

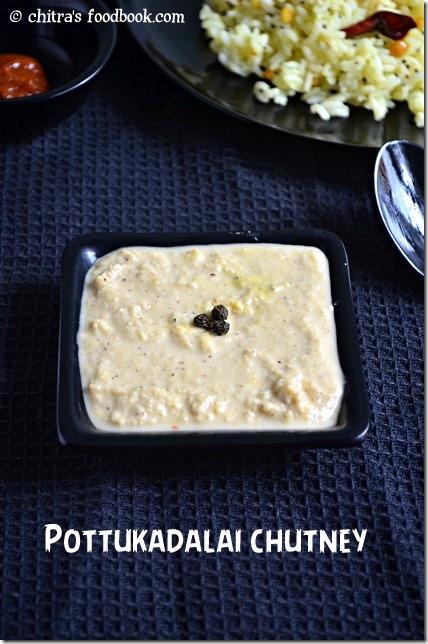
POTTUKADALAI CHUTNEY / FRIED GRAM DAL CHUTNEY - SIDE DISH FOR LEMON RICE

dalia - chutney


INGREDIENTS
1 cup - 250ml
  • Dalia/fried gram – 1/4 cup
  • Grated coconut – 1 tbsp
  • Green chillies – 2 nos
  • Salt – As needed
  • Garlic cloves – 2-3 nos

METHOD
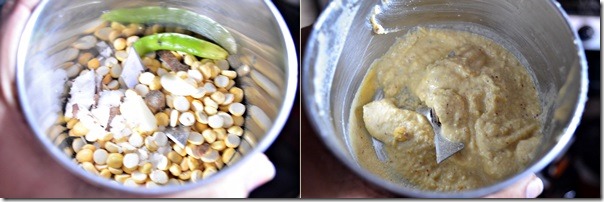
  • Grind all the above ingredients to a thick paste adding less water. Serve !
dalia chutney tile

lemon rice - plate

Continue Reading...


April 30, 2013

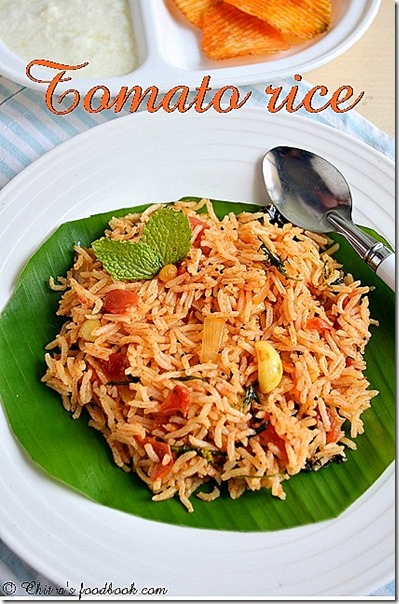
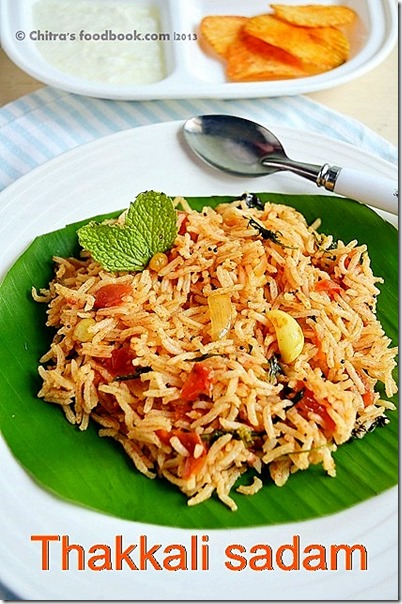
TOMATO RICE RECIPE ,THAKKALI SADAM| LUNCH BOX RECIPES


Tomato rice recipe
Tomato rice is my favourite variety rice recipe but Sendhil don’t like this as it has more spices.Even then I wanted to make him eat my tomato rice and praise me Winking smile.. I tried many combinations and at last i settled with this recipe.. He liked it a lot and i got credits as i wished Smile . In the beginning I used to add fennel seeds along with spices but he hate the taste of fennel seeds while eating. So i omitted fennel seeds  & other spices and i used garam masala powder , coriander & mint leaves which gave a nice flavour & taste to the rice..I have made this so many times for his lunch box and this has become a routine lunch box dish for me Smile.. Check out my tomato pulao recipe if interested..
thakkali sadham

INGREDIENTS
1 cup - 200ml

  • Basmati rice – 1/2 cup
  • Water - 1 cup
  • Ripe tomatoes – 4 nos (small sized, I used bangalore tomato)
  • Big onion – 1 no
  • Garlic cloves – 8 nos
  • Green chillies – 1- 2 nos
  • Red chilli powder – 1 tsp
  • Turmeric powder – 1/8 tsp
  • Garam masala powder – 1/2 tsp
  • Mint leaves & coriander leaves – few (chopped)
To temper
  • Cooking oil – 2 tbsp
  • Mustard seeds – 1/2 tsp
  • urad dal – 1 tsp
  • Channa dal – 1 tsp
Coriander leaves – to garnish
Ghee  or gingely oil – to add while mixing with rice

METHOD

  • Cook the basmati rice adding 1:2 cups of water..Here i used 1 cup of water.. Add a drop of oil and little salt while rice is cooking. Pressure cook it and spread the rice in a plate to cool down..
  • Slice cut the onions , slit the green chillies , chop the mint & coriander leaves , peel the garlic cloves and roughly chop the tomatoes and set aside..
  • In a kadai , heat oil and splutter mustard , urad & channa dal.Then add the onions , green chillies and saute well. Now add the garlic cloves and mix well..
tomato rice tile1
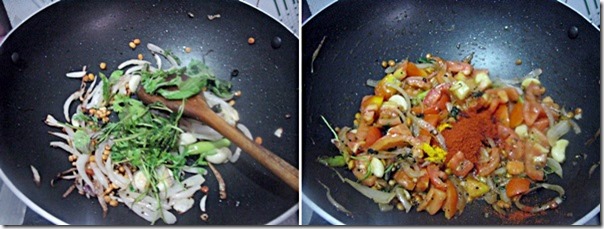
  • Then add the mint & coriander leaves and saute well.Finally add tomatoes and all the spice powders along with salt.
tomato rice tile2
  • Mix well till tomato turns to a paste.Add little water if necessary..Make sure tomato paste has some moisture content ..The paste should not be dry..Garnish with coriander leaves , paste is ready..
tomato rice tile3
  • Now add the tomato paste to the rice adding gingely oil and mix well with a fork like ladle..Add a tsp of ghee before serving if u wish..Add more paste while mixing because the rice may absorb all the paste and it will taste bland after the rice cools down. So i have given more tomatoes to make the paste. Add the required paste , mix , give some setting time and then serve !
tomato rice tile4

NOTE

  • For variations u can try adding fennel seeds while tempering which gives an additional flavour.
  • U can also try adding 1/2 tsp of ginger garlic paste instead of whole garlic cloves ..


Continue Reading...


April 7, 2013

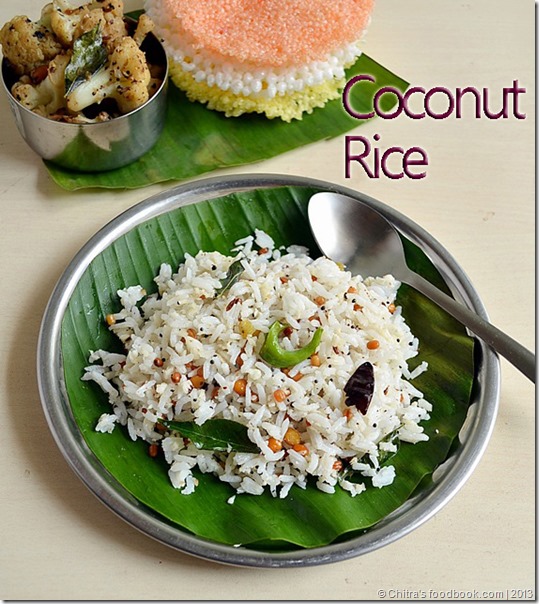
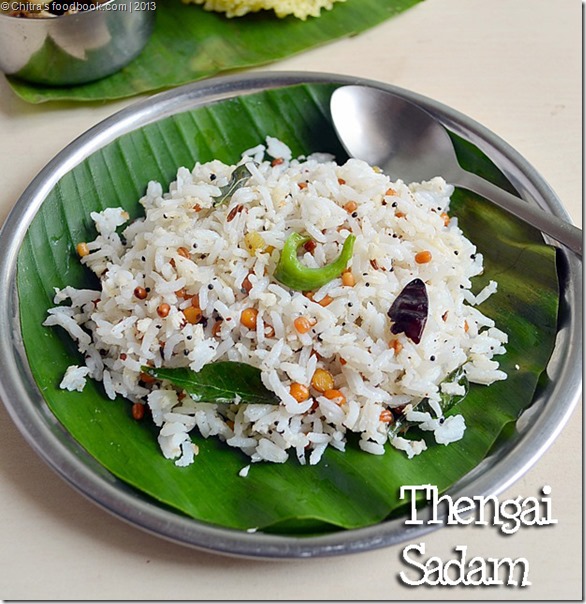
THENGAI SADAM | COCONUT RICE


coconut rice

Thengai sadam/Coconut rice is Sendhil's favourite rice variety.I am not a big fan of this rice . So I make this only for my husband..Its very easy to make and very flavourful too..My Mom & MIL makes it very well.They make in a slightly different way.My MIL adds lot of soaked & roasted urad dal. But my mom adds roasted urad and channa dal without soaking them.I combine both their methods and it comes out very tasty.When u make this rice , ur house will be filled with nice aroma of coconut oil. The roasted smell of coconut , crunchy urad and channa dal, nice flavour of ginger and coconut oil  are the highlights of this rice. Smile.Over to the recipe,

coconut rice1

INGREDIENTS
  • Cooked rice – 1/2 cup ( Boiled rice or raw rice would be fine)
  • Grated coconut – 1/2 cup
  • Salt – As needed
To temper
  • Coconut oil – 2 tbsp
  • Mustard seeds – 1 tsp
  • Urad dal – 2 tbsp (soak for 30 minutes – optional)
  • Channa dal – 1 tbsp
  • Jeera / Cumin seeds – 1/2 tsp
  • Red chillies – 1 no
  • Green chillies – 1 no
  • Finely chopped Ginger – 1 – 2  tsp
  • Curry leaves – few
Ghee – 1 tsp
Cashews – 5 nos

METHOD
  • Cook the rice adding 1:2 rice n water till fluffy .Add a tsp of oil or ghee while u cook the rice to get it separate and fluffy.Spread the cooked rice in a plate..
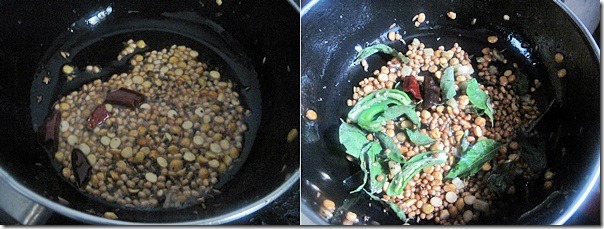
  • In a kadai , heat coconut oil and temper all the items given under “ To temper” in the same order..Then add the grated coconut ,salt and mix well.. Roast everything in a low flame till u get a nice aroma of dals and coconut.But roast the coconut without changing its color.
COCOnut rice tile
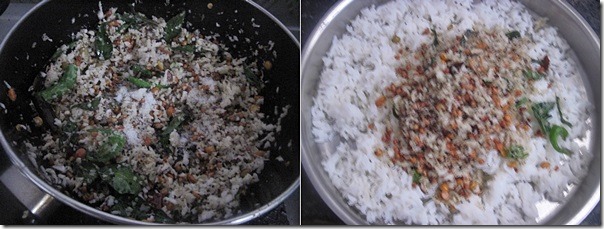
  • Finally add the mixture to the cooked rice ,check for salt ..
  • Roast the cashews in a tsp of ghee and  add to the rice.Mix well.
coconut rice tile1
  • Serve !!

Note My MIL makes it in a slightly different method by soaking the urad dal for 1 hour and roast them till golden brown and proceed in the above mentioned way. I too follow this method sometime. But when i forget to soak the dal , i use the above method. Both of them tastes ‘very nice.Do try any based on ur liking and the preparation time Smile .. Please don’t skip adding ginger . It adds a nice flavour to the rice and it helps for digestion as well..

Continue Reading...