Search Chitra's Food Book

Showing posts with label SAVOURIES. Show all posts

November 11, 2015

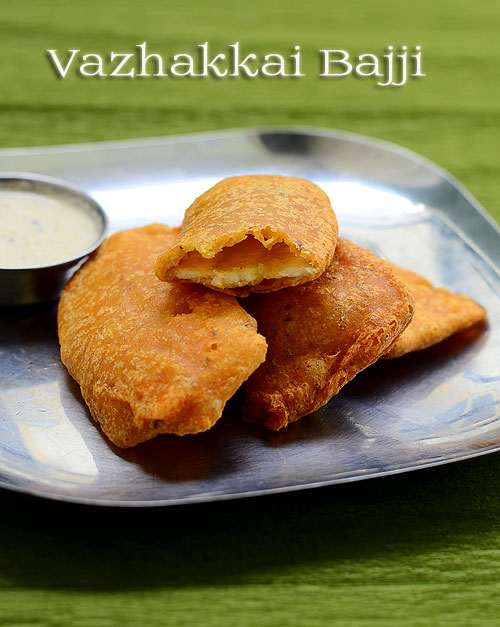
Vazhakkai Bajji Recipe | Raw Banana Bajji - How To Make Bajji

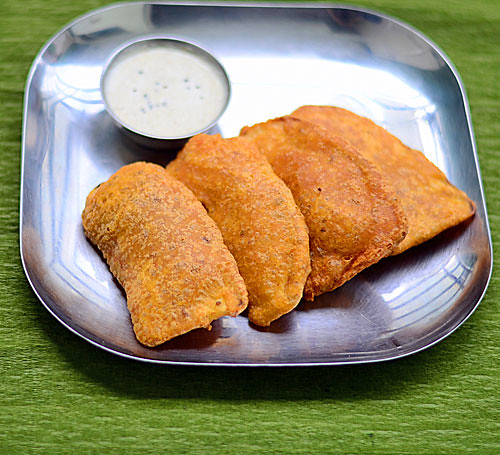
Vazhakkai bajji

Hi Friends, Hope you all doing good. I am sure you all had a great Diwali celebration.My Diwali went very well in my new house with my in-laws and family. As I was busy with some personal works, I was not able to make any post here. For Diwali, I made Badam burfi, Doodh peda, Wheat halwa, Thenkuzhal and Ribbon pakoda for my family. Apart from these sweets, I also made Adhirasam, Suzhiyan and Vazhakkai bajji on Diwali day. We love to eat these deep fried stuffs more than sweets and other savories.

Actually I had planned to make this post before Diwali. But I couldn’t do it. So Iam sharing it today. Every year my mom prepares potato bajji, Brinjal/Kathirikai bajji, Onion bajji and my most favorite Valakkai bajji( Raw banana fritters) on Diwali day morning. I guess many of you make bajji and bonda with store bought bajji, bonda mix/powder. But my mom and MIL makes bajji mix on their own. 

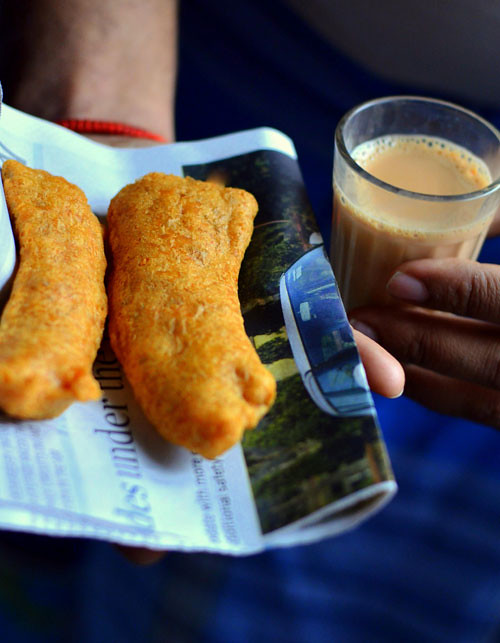
Basically I love tea shop Vazhakkai bajji a lot. Eating hot Vazhakkai bajji with a sip of steaming hot tea on a rainy day is a pure bliss! Try and experience it without worrying about the calories. Lets see how to make this easy, yummy South Indian style Vazhakkai bajji recipe.


Check out my Onion bajji , Chilli bajji & Stuffed chilli bajji recipes.

Vazhakkai Bajji Recipe

Vazhakkai bajji/Raw banana fritters


Vazhakkai bajji/Raw banana fritters How to make Vazhakkai bajji / Raw banana fritters !
Cuisine: Indian
Category: Snacks
Serves: 10 
Prep time: 10 Minutes
Cook time: 20 Minutes
Total time: 30 Minutes


INGREDIENTS
1 cup = 250 ml
  • Besan flour/Kadalai maavu - 1 cup
  • Rice flour - 1/3 cup
  • Red chilli powder - 2 tsp
  • Red food color – 2 pinches (optional)
  • Hing/Asafetida - 1/4 tsp
  • Ajwain OR Cumin seeds/Jeera - 1 tsp
  • Salt - as needed
  • Cooking soda / baking soda - 2 big pinch
  • Water - 1 cup + 2 tbsp ( adjust)
  • Cooking oil - to deep fry
HOW TO MAKE RAW BANANA BAJJI - METHOD
  • In a wide bowl , mix all the flours, powders, Ajwain or cumin seeds, salt, baking soda and add water to make a slightly watery batter( like dosa batter). If you make it too watery, bajji will have tails. At the same time, thick batter yields hard bajjis. The batter should be slightly thick and flow like a ribbon. It should coat the raw banana pieces well. Adjust water and flour accordingly.
Raw banana bajji
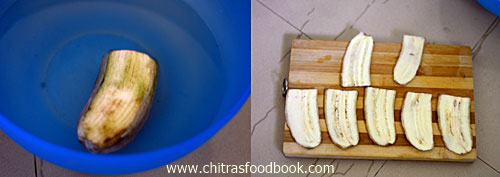
  • Wash and cut the raw banana into two horizontally. Peel the skin and discard it. Slice the raw banana thinly and arrange in a plate. Dip the raw banana in bajji batter.
Vazhakkai bajji

  • Heat oil in a kadai and check with a drop of batter to find the correct heating point. i.e. If you put a drop of batter , the batter will rise immediately and floats on top. As soon as you get this heating point, simmer the flame and drop the raw banana slices coated well with batter.
Vazhakkai bajji
  • Deep fry till the color changes golden brown and the bubbles ceases. Flip it and again cook for a minute. Drain & remove in a tissue paper. Enjoy with tea/coffee!
Vazhakkai bajji
Vazhakkai bajji
Note
  • Addition of food color gives a nice color to bajji as u see in stalls.
  • My mom & mil adds cumin seeds but i used ajwain for an enhanced flavour. Use any as per ur wish.
  • Please don’t skip adding soda. It gives a  puffy, soft bajji. Make sure you don’t add too much because bajji will be very oily and it is unhealthy too..
  • Adjust the consistency of batter. Batter should not be too thin or too thick. If your batter has become too thin, add besan & rice flour in 3:1 ratio and adjust the batter. If it is too thick add more water. Always add the extra water using a tbsp & check it.

Enjoy puffy, hot Vazhakkai bajji as an evening snack with your family !
Raw banana bajji


Continue Reading...


October 3, 2014

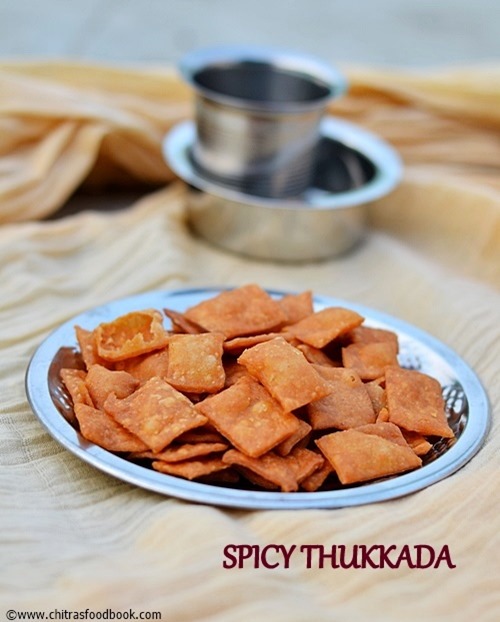
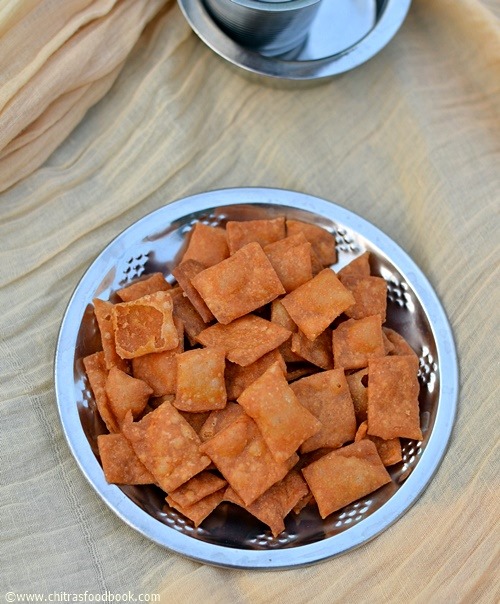
TIRUNELVELI THUKKADA RECIPE - WHEAT FLOUR SNACKS - DIWALI SNACKS RECIPES

spicy-thukkada-recipe
Thukkada is a Tirunelveli special tea time snack made with wheat flour. I came to Salem two days back to celebrate Saraswathi pooja & having a great time here. Yesterday I went to my mom's place for half a day. I had my mom's lunch happily after a long time. I told her to prepare this easy, Tirunelveli famous snack recipe,Thukkada. 

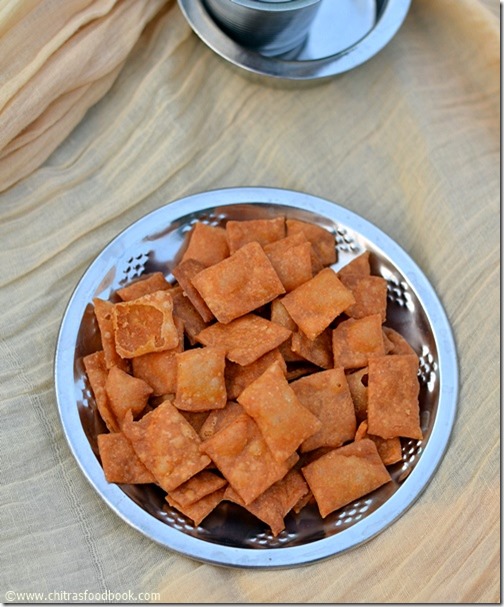
Thukkada is nothing but spicy wheat flour chips. Yes, its made of wheat flour spiced with chilli powder. I saw some versions using garlic and Red chillies paste. But my mom makes it very simple just by adding red chilli powder to wheat flour. She usually make this spicy snack at the time of Diwali along with Thenkuzhal. When I was thinking about easy savories recipes for Diwali, I reminded about this crispy, guilt free snack and thought of sharing here.  You can make it in square or diamond shapes as you wish. 

My MIL also makes a similar snack recipe using maida called as spicy diamond cuts. You can even make sweet thukkada adding powdered sugat. I will share that version soon. Do try this easy, crispy, yummy thukkada  this weekend & to crack this Diwali :) Its very easy to make and comes out crunchy too ! Don't forget to check "Notes" section.

Check out my sweet maida biscuit too.

THUKKADA

Easy, Nellai famous thukkada recipe


Spicy thukkada recipe Easy,spicy Nellai famous thukkada recipe for Diwali !
Cuisine: Indian
Category: Savory
Serves: 50 nos
Prep time: 5 Minutes
Cook time: 15 Minutes
Total time: 20 Minutes


INGREDIENTS
1 cup = 250ml

  • Wheat flour/Atta – 1 cup
  • Red chilli powder – 1 tsp ( heaped ) Levelled for low spice
  • Water and salt - As needed
  • Hot oil or melted butter – 1 tbsp 
  • Cooking oil - to deep fry
  • Hing - a big pinch

METHOD

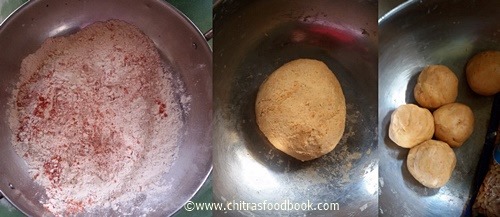
  • In a wide bowl, take the wheat flour, salt, red chilli powder and oil. Mix well, Then add water little by little and make a tight dough.( Add water carefully. If u make the dough sticky n soft, u won't get crispy thukkada & also do not add more flour if the dough becomes sticky, thukkada will become very hard).
thukkada-1

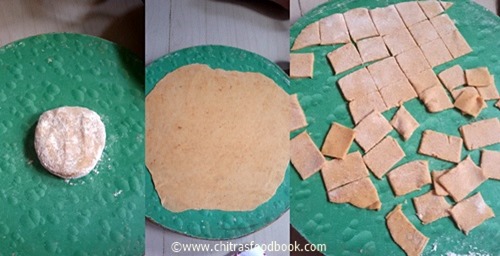
    Let the dough sit for 10 minutes.Then make uniform balls,dust with wheat flour and roll it like a thin chapathi. Use a knife or pizza cutter and cut into diamonds or squares. Place all the pieces in a news paper. No problem if the pieces stick to each other. Just sprinkle gradually. It will separate while frying.
    thukkada-2
     
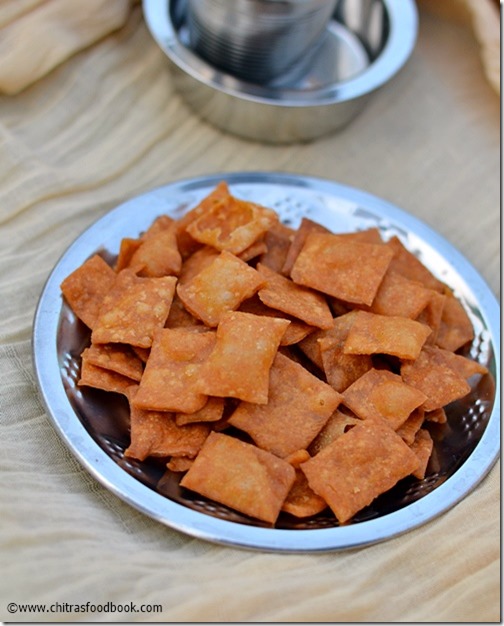
    Heat oil and deep fry them in batches till bubbles cease completely. U will get golden brown thukkada. Remove in a tissue and let it cool. Deep fry all the batches uniformly .If you don’t fry one batch properly, it will become soggy and it will spoil the entire snack.
    thukkada-3
    Store in a box n enjoy with tea or coffee!  It stays good for months if properly done.


Note

  • U can replace red chilli powder by garlic,chilli paste. To make this paste,grind 5 cloves of garlic along with 4-5 red chillies to a smooth paste.
  • The most important thing to make perfect thukkada lies in the dough. If the dough is too soft n sticky, thukkada will become either hard or soggy. So make the dough tight & perfect. Do not use more flour for dusting. Dust once or twice.

ENJOY THIS SPCIY THUKKADA WITH TEA/COFFEE ! ITS ADDICTIVE !
thukkada-recipe


Continue Reading...


April 15, 2014

Potato Chips Recipe - How To Make Potato Chips At Home (Indian Style )

potato chips recipe

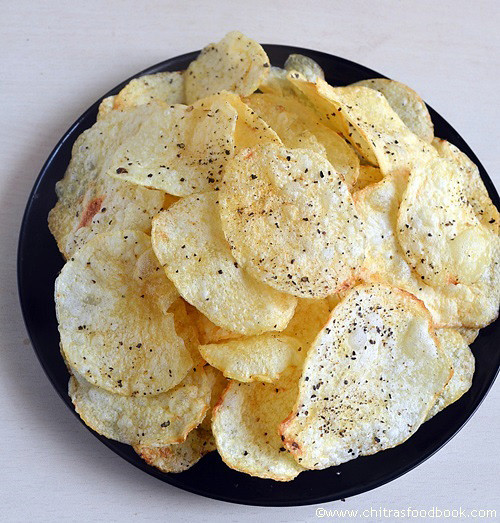
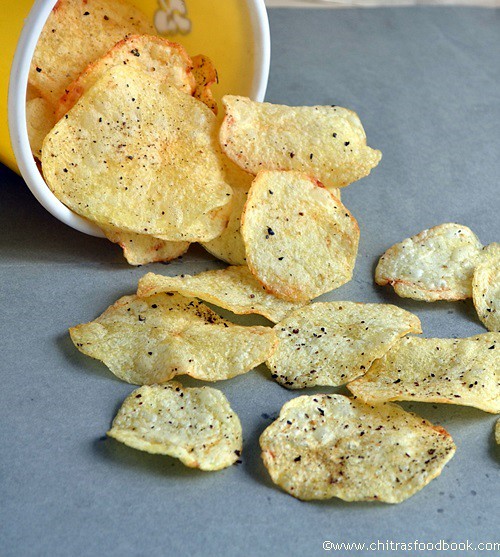
In this post, I have shared how to make crispy, white colored potato chips at home easily just like store bought ones. As you all know, crispy potato chips is loved by all irrespective of ages. Its our family favourite too. My Mil is an expert in making potato chips. She makes super crispy & white colored chips like in shops. 

By watching her, I have tried many times in my kitchen. It comes out crispy but turns reddish brown every time Initially I was thinking it was due to over heated oil. But then I found, the secret of making white colored chips lies in the variety of potato we use. 

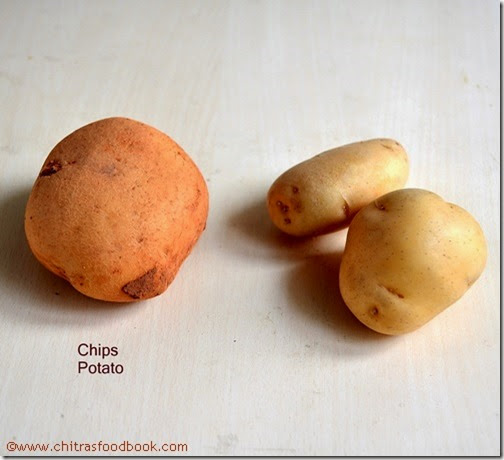
Generally, there are two varieties of potato available in the Indian market. One is the normal cream colored potatoes we use for potato curry and the other one is red colored covered with mud. The second variety is mostly used for making chips. It is called as “chips potato”. I have shared the picture of  both the potatoes to differentiate them. 

When you use this chips potato, your chips won’t turn brown even if you deep fry for long time. So Friends, if you plan to make potato chips at home, first ask for chips potato. Vendors would know better. Also, do follow the technique I have given below. U’ll get it perfect ! I will try to share a detailed video for the same. Hope it will be useful for beginners like me. 

U can make this easy, Indian style crispy potato chips for parties in advance & store them in a box. Refer "Notes" section for tips. Also check out the video below for more details.

If you are looking for baked or microwave potato chips recipe, do visit this link.

Video: Potato chips recipe

Check out homemade, crispy, white colored potato chips like store bought ones.


Potato varieties in India


As Sendhil is fond of pepper flavoured chips, my MIL always add coarsely ground pepper powder for her son. But I love the one with chilli powder like we get in shops. So she reserves last 2 batches for me for adding red chilli powder, how sweet !
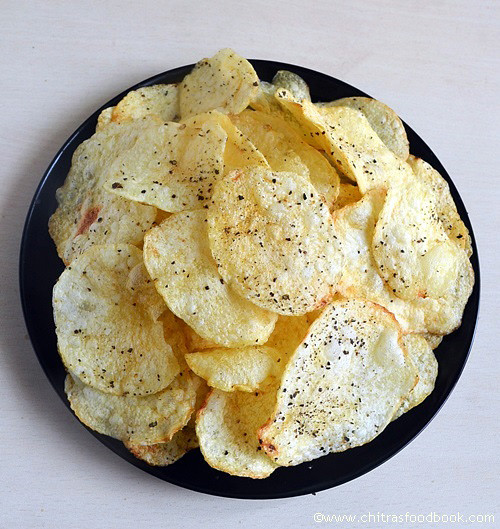


Homemade Potato chips


Homemade Potato chips How to make crispy and white potato chips at home.
Cuisine: Indian
Category: Snacks
Serves: 50nos
Prep time: 10 Minutes
Cook time: 10 Minutes
Total time: 20 Minutes


INGREDIENTS

  • Potato - 3 nos
  • Salt - as needed
  • Water - to wash and soak
  • Oil - to deep fry
  • Pepper powder or chilli powder – as needed to sprinkle ( 1 tsp)
HOW TO MAKE POTATO CHIPS - METHOD

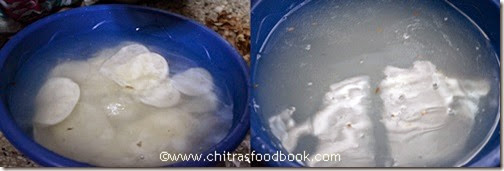
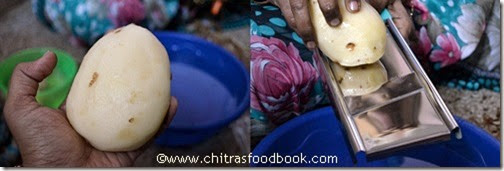
  • Wash and peel the potatoes. Take water in a wide bowl and slice the potatoes directly in the water. Keep the slices immersed in water to avoid discoloration. Rinse it well till the color of water changes to white. (You should remove the starch in potatoes).i.e Discard the water and again wash the potato slices. Repeat this for 2-3 times.
Potato chips recipe
Potato chips recipe
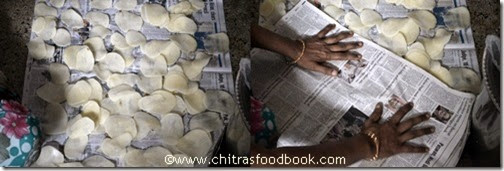
  • Spread the slices in a paper or cotton towel for 10 to 15 minutes. Pat it dry by covering with another paper or towel. Make sure there is no moisture in the slices.
Potato chips recipe
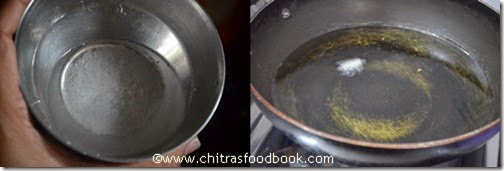
  • In a bowl, take the salt. Dissolve it by adding little water. Set aside.
  • In a kadai, heat the oil required for deep frying. Check the temperature by dropping a piece of potato slice. If it raises to top immediately, oil is just right.
Potato chips recipe
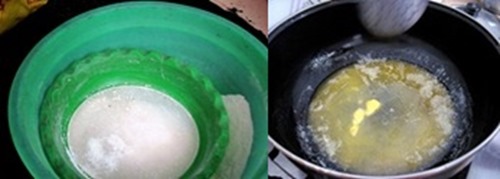
  • Keep the flame medium & drop the potato slices in batches. Do not dump more in one batch.  Keep tossing & pressing with a ladle till bubbles cease. Once the bubbles reduce & potato slices turns crispy, reduce the flame completely & carefully sprinkle the salt water standing a feet away.( If you are scared to do this step, skip it and sprinkle salt at the end after removing the chips from oil)
Potato chips recipe
  • As soon as you sprinkle the salt water, oil bubbles with crackling sound. Keep tossing the chips for salt water to get coated evenly. The noise is completely suppressed after a minute. Bubbles will cease completely. Flip the chips. Remove in a tissue paper.
Potato chips recipe
  • Sprinkle pepper powder or red chilli powder, mix well and enjoy with variety rice. Store in an air tight box when it is cooled down completely.
Potato chips recipe


Note
  • U can make this chips in advanced for birthday parties. Make the chips the previous day. After it cools down completely, keep it in a zip lock bag or polythene cover and store in a box. It stays crispy.
  • If you don’t want to sprinkle water directly on fire, deep fry the chips till crispy. Remove in a bowl. Mix salt with pepper powder or chilli powder. Sprinkle when the chips is hot. Toss well and serve !
  • Always deep fry the chips in correct flame. If you drop a pinch of potato, it should rise immediately. Reduce the flame to medium & then deep fry. Adjust the flame whenever necessary. Do not let the oil fume or smoke at any point. Then chips will become dark brown even if you use chips potato.
  • If you feel, the oil is overheated switch off the stove for sometime and let the oil cool down a bit. Then proceed again. By doing this way, you will get all the chips in uniform color.

Stay Connected  -     


Enjoy potato chips with rice varieties or as evening snacks .U can’t stop munching !!


Very good recipes Tags: , , ,
Continue Reading...


October 23, 2013

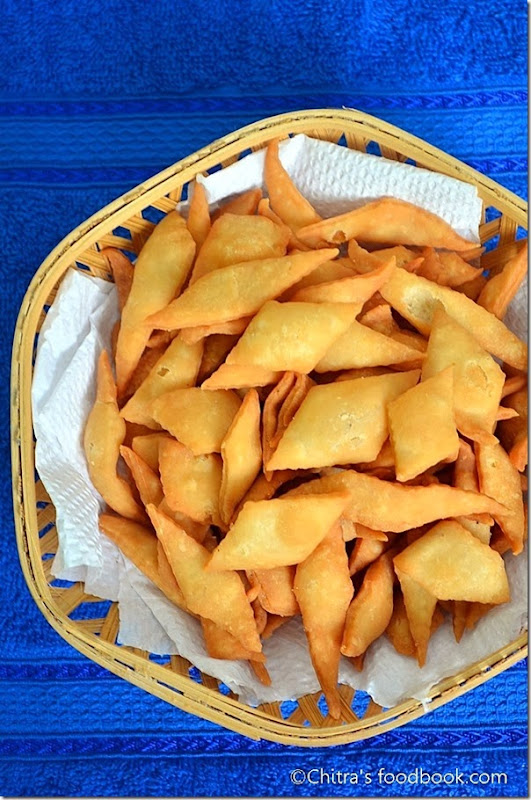
SPICY DIAMOND CUTS | SPICY MAIDA BISCUITS RECIPE – DIWALI SNACK RECIPES

spicy maida biscuits
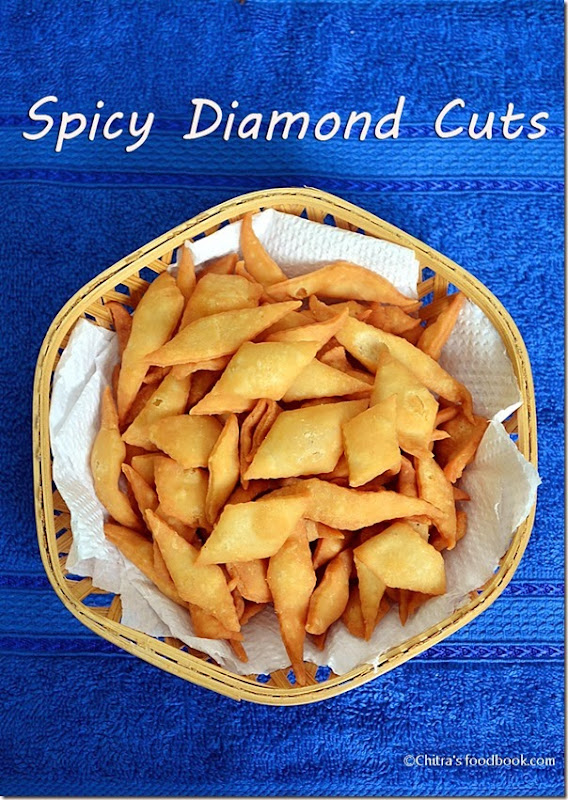
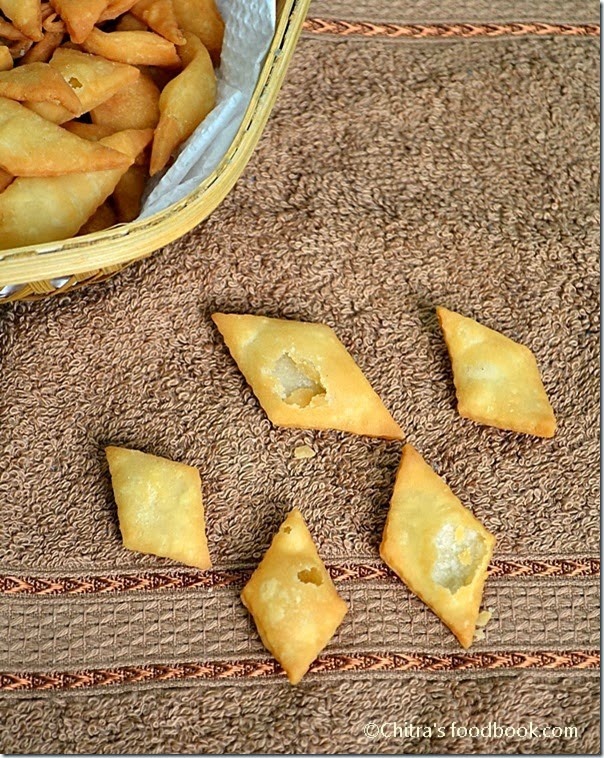
Maida khara biscuit /spicy maida biscuits / Diamond cuts is a very easy and tasty diwali snacks recipe.. I learnt this recipe from my MIL.My mom makes a similar one called “thukkada”, Tirunelveli special snack with wheat flour.  I’ll share it soon. This one is with all purpose flour/ maida. I hope most of you make this snack at home. Generally we all add red chilli powder and the color of this biscuit would be golden brown. I told my mil that i wanted white colored chips. She told me to use green chillies instead of red chillies. As she said , my biscuits were half white in color and not red/golden brown. Thanks a lot aunty. If you try sweet maida biscuit , you can make this one along with it. Both can be made together in 45 minutes..Do try this version. U’ll love it. It comes out crispy and tasty..
maida kara biscuit

INGREDIENTS
1 cup - 250ml
  • All purpose flour / Maida – 1.5 cups
  • Warm oil – 1/4 cup
  • Salt & water  – as needed
To grind
  • Green chillies – 2 nos
  • Ginger – 1 inch piece
  • Garlic cloves – 5 nos
Oil – to deep fry

METHOD
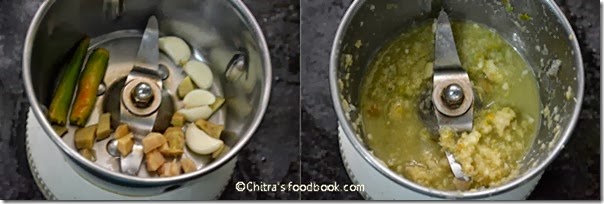
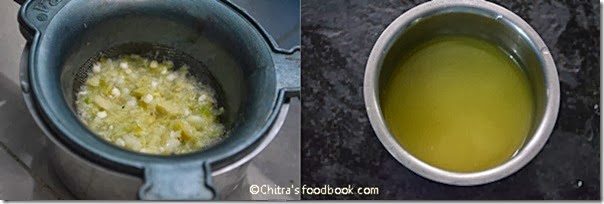
  • Grind all the ingredients given under”to grind” to a smooth paste adding 1/4 cup of water. No problem if it is ground coarsely.Strain the ground mixture completely and collect the water. Discard the ground mixture.
spicy maida biscuit
spicy maida biscuit
  • In a wide bowl, take the maida , warm oil , salt and ground masala water. Mix well to make it crumble. Add more water and make a dough.Dough should be plaible and soft. Knead well for few minutes and keep covered for 15 minutes.
spicy maida biscuit
  • Make 5 even balls out of the dough and roll chapathi dusting with maida.Make thin circles and cut them into diamonds using a samosa cutter.
spicy maida biscuit
  • Heat oil .Pinch little dough and put in oil.If it rises immediately , oil temperature is right.Take the cut diamonds together and drop in oil. It will be separated in the oil as it gets cooked.Turn every now and then.Deep fry till the bubbles cease.Deep fry them in batches.Remove in a tissue paper and store in an air tight box after it cools down completely.
spicy maida biscuit

TIPS
  • Oil should be luke warm and not too hot.Vanaspathi/dalda can be used instead of oil. If so use 3 tbsp..
  • Dough should not be sticky. It should be soft and pliable.Dust with maida while making chapathi. Roll chapthis thinly to get a crispy biscuit.
  • Deep fry in low to medium heat oil to get crispness as well as color.
  • These biscuits tastes great by next day .It needs minimum half day for all the flavours to infuse well.

spicy diamond cuts
Continue Reading...


December 2, 2011

Thenkuzhal Murukku Step By Step Recipe With Video - Diwali Snacks Recipes

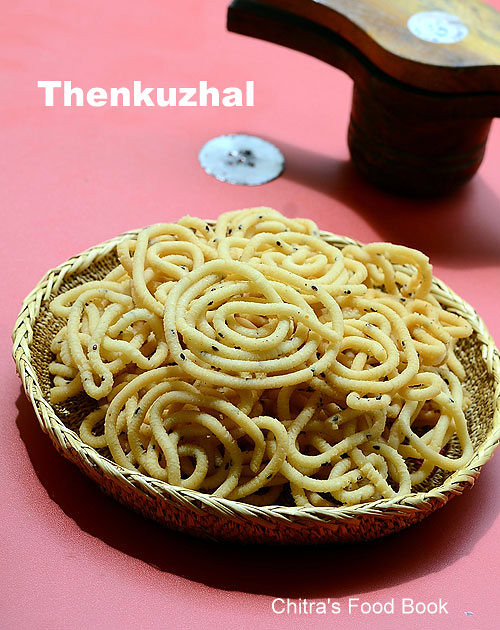
Thenkuzhal recipe

Mostly we all make thenkuzhal murukku for diwali or some special occasions. I love this murukku since my childhood days. I used to do all the pre preparatory works for making homemade murukku maavu like buying rice and urad dal, grinding it in flour mill, sieving etc. I sit with my mom & aachi when they make this for diwali especially to get the last batch of murukku. My mom make a batch of half cooked murukku ( we call it “arai vekkaadu” in tamil) for me. I love this murukku more than the crispy ones. I eat it hot immediately after taking out from the oil. 

Even today, my MIL make this specially for me. How sweet !!. I saw so many thenkuzhal recipes in blogosphere with different proportions of rice and urad dal. I wanted to share my version too. Hope this post helps beginners. Please go through the Notes section too. Now coming to my version with step by step pictures and video.


“””PLEASE HAVE A LOOK AT THE “POINTS TO REMEMBER” BEFORE STARTING..”””Thenkuzhal

Thenkuzhal murukku


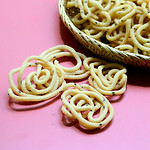
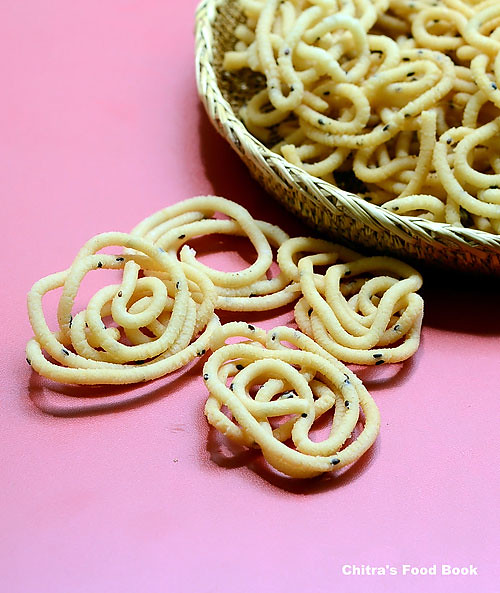
Thenkuzhal murukku White thenkuzhal murukku for Diwali !
Cuisine: Indian
Category: Snacks
Serves: 25 nos
Prep time: 15 Minutes
Cook time: 20 Minutes
Total time: 35 Minutes


INGREDIENTS
1 cup - 250ml
  • Raw rice/Maavu arisi - 5 cups
  • Round urad dal - 3/4 cup
  • Fried gram dal/Pottukadalai - 1/4 cup
  • Butter – 4-5 tbsp (1/4 cup)
  • Asafetida / hing – 1/2 tsp
  • Jeera / cumin seeds or Black sesame seeds – 2 tbsp
  • Salt & water – As needed.
  • Cooking oil – for deep frying.
For small quantity : 1 cup = 250ml
  • Rice flour - 1 cup ( Storebought dry rice flour)
  • Roasted urad dal flour - 2 tbsp
  • Melted Butter - 1 tbsp
  • Hot oil - 1/2 tbsp
  • Hing - 2 pinches
  • Cumin seeds or sesame seeds - 1 tsp
  • Salt & water - as needed
  • Cooking oil - to deep fry
METHOD

  • Heat a kadai and dry roast urad dal slightly without changing its colour. Roast till nice aroma comes from urad dal. Switch off the flame and add the fried gram dal. Now mix the rice, roasted urad dal and fried gram dal. Grind in flour mill or powder it in mixie. If you use mixie to grind the mixture, please don’t forget to sieve the flour. Flour should be very fine in texture. This is called “murukku maavu”. If you have store bought readymade murukku maavu, you can use it. OR you can use store bought dry rice flour and make urad dal flour at home. 
  • Melt butter and set aside. You can add soft butter at room temperature as well. 
thenkuzhal
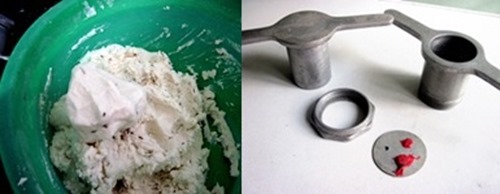
  • To this murukku maavu, add salt, melted butter, hot oil, hing, jeera or sesame seeds and water to make a non sticky dough. Take the murukku press and mould with one whole. Fill the dough and set aside..
thenkuzhal-recipe
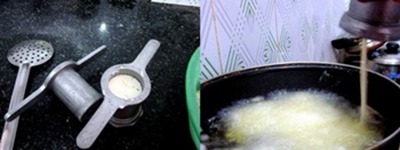
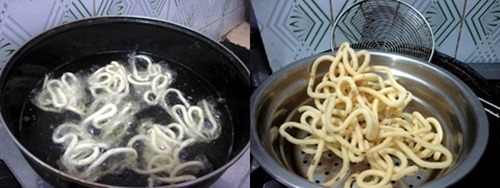
  • Heat the oil in a broad kadai and and press the murukku in circular motion directly in oil or press the murukku in a polythene sheet or in the back of ladle separately and then drop in hot oil. This way you get a nice shape. If the string gets cut while pressing, either urad dal flour is less or water is less. So add 1 tsp more urad dal flour and drizzle some water, mix well and try it.  After you press the murukku , please stand a few feet away from the kadai. Sometimes, very rarely murukku may burst like seedai . If it doesn’t burst, then proceed.
thenkuzhal-recipe-1
  • Cook for sometime. Flip and cook for some more time till the hiss sound and bubbles ceases. Do it in medium flame. Adjust the flame whenever needed. Remove and drain in a paper towel.. Store in an air tight container after it cools down.

thenkuzhal-recipe-2

Don’t forget to try the half cooked murukku in the last batch. For this, after you press the murukku in oil, just flip immediately and remove in 10 secs.. Eat it hot !!
White colored, crispy thenkuzhal is ready to enjoy !!

Note
  • When you make murukku in large quantities , make the dough in batches to avoid the dough from drying. Also cover the dough with a damp cloth or a lid while cooking murukku. This helps in getting white colored murukku for all the batches. Otherwise color may vary for the last batches.
  • If murukku breaks while pressing, there may be less water in the dough or urad dal flour is coarse. In that case, you can sprinkle some water to the dough and mix well OR add little hot oil and try pressing. It may come out well. 
  • We have added fried gram dal and butter to get the crispness & white color . But usually fried gram dal is not added in thenkuzhal. Its purely optional.
  • Adding too much of butter makes the murukku look oily and becomes soggy very soon. Shelf life gets reduced.
  • Adding more urad dal flour or too much of roasting the urad dal results in dark colored murukku.So make sure u roast the urad dal without changing the color..
  • The murukku flour should be very fine in texture otherwise it may burst while cooking. So I always sieve the flour for safer side. 
  • Use enough oil for deep frying. Add more oil after few batches if necessary.
  • Drop or press the murukku only when the oil becomes hot. U can find this by dropping a pinch of flour. It rises up quickly. This is the correct heating point. Do not let the oil fume. Always keep the flame in medium for even cooking.
  • Instead of pressing in oil directly, you can try pressing it in the back of ladle greased with oil or greased polythene sheets. This way you’ll get nice shape.  
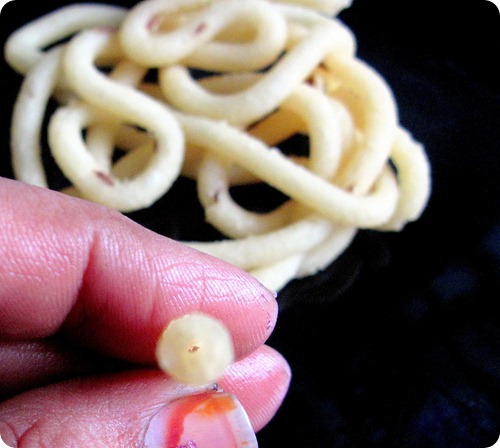
  • After cooking when you break the murukku, you can see a hole in the middle of the murukku like  funnel. This denotes the murukku is perfect !!
Thenkuzhal murukku

Perfect thenkuzhal must form a hole. Can you see the hole in the broken murukku piece ? :))
Thenkuzhal-murukku
Catch you all in my next post. Bye. Have a gr8 weekend.

Continue Reading...