Search Chitra's Food Book

Showing posts with label SIDE DISH FOR RICE. Show all posts

May 3, 2022

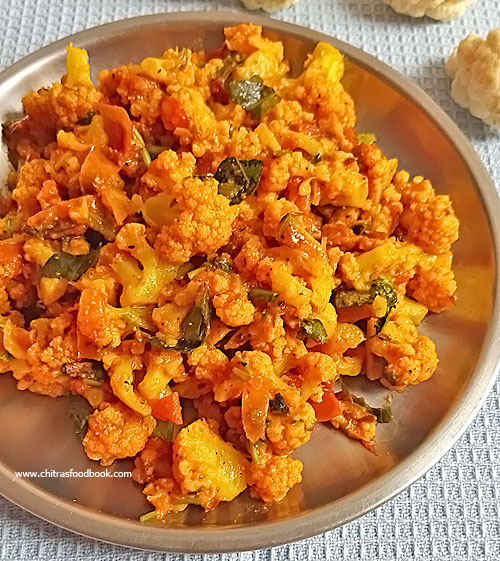
Cauliflower Curry Without Onion, Garlic - Cauliflower Poriyal Recipe

cauliflower poriyal without onion garlic

Its my long time wish to try different types of cauliflower curry without using onion and garlic. I have already posted a cauliflower curry without onion, garlic and tomato in Jain style.  Usually I make Cauliflower poriyal following my mom’s recipe. It has onion, ginger, garlic, tomato and spice powders. We love this version.

Recently when I was looking for a change from my version, I found this Dhaba style Cauliflower curry in Cooking Shooking YouTube channel. Chef had used both cauliflower and potato in this recipe but I used cauliflower alone. Also I tweaked the recipe slightly to make it a low calorie version. Still it came out great. Tasted awesome. Myself and Raksha loved it with Dal rice and rasam rice.

Friends, do try this easy and yummy Cauliflower curry without onion and garlic. You will love it like us. I made it dry like a poriyal. You can also add little water to make it like Sabji / gravy.  Ok, Lets see how to make North Indian style Cauliflower curry without onion and garlic with step by step pictures.

Cauliflower curry without onion garlic

Cauliflower curry without onion, garlic


Cauliflower curry without onion, garlic

Cauliflower curry without onion, garlic for rice, roti.


Cuisine: Indian
Category: Side dish
Serves: Serves 4
Prep time: 10 Minutes
Cook time: 20 Minutes
Total time: 30 Minutes


INGREDIENTS
1 cup = 250ml
  • Cauliflower - 1
  • Cooking oil - 2 tbsp
  • Cumin seeds - 1/2 tsp
  • Ginger - 1 inch piece (finely chopped)
  • Curry leaves - 1
  • Tomato - 1
  • Turmeric powder - 1/2 tsp
  • Red chilli powder - 3/4 to 1 tsp
  • Coriander powder - 1.5 tsp
  • Garam masala powder - 1/2 tsp
  • Curd – 1 tbsp
  • Coriander leaves - to garnish
HOW TO MAKE CAULIFLOWER CURRY WITHOUT ONION GARLIC
  1. Wash and separate the cauliflower into medium sized florets. Keep in water.
  2. Roll Boil 3 cups of water in a bowl and add turmeric powder, salt.
  3. Switch off the flame and add the cauliflower florets. Cover and keep it for 10 minutes till its half cooked. Drain the water and set aside.
  4. Heat oil in a kadai. Splutter cumin seeds, ginger, curry leaves.
  5. Add tomato and saute till mushy. Add turmeric, chilli powder, coriander powder, salt, garam masala powder and curd. Mix well. 
  6. Lastly add the cauliflower florets and toss it well. Add little water, cover cook till its soft but retains its shape. Switch off the flame.
  7. Garnish with coriander leaves and serve with rice, roti !
METHOD - STEP BY STEP PICTURES
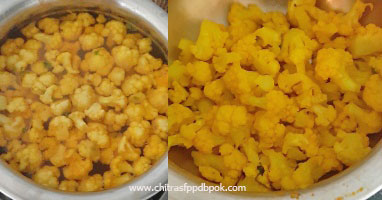
  • Wash and separate the cauliflower into medium sized florets. Keep in water till use. Roll boil 3 cups of water in a bowl. Add turmeric powder and salt. Switch off the flame and add the cauliflower pieces. Cover and keep it aside in hot water for 10 to 15 minutes. Drain the water completely and set aside. 
  • Cauliflower curry without onion garlic
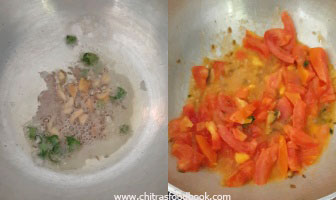
  • Heat oil in a kadai. Splutter cumin seeds, ginger and curry leaves. Add tomato and saute till mushy. Add salt, turmeric powder, chilli powder, coriander powder, garam masala powder and curd. Mix well.
  • Cauliflower curry without onion garlicCauliflower curry without onion garlic
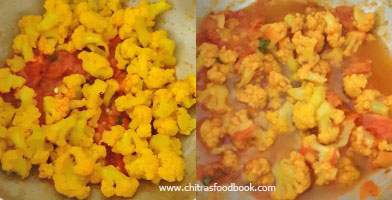
  • Lastly add the cauliflower florets and toss it well. Add little water, cover cook till its soft but retains its shape. Switch off the flame. Garnish with coriander leaves. Serve with rice and roti. Enjoy !Cauliflower curry without onion garlic

Note

  • Parboil cauliflower to remove the worms. Do not skip this step.
  • Make sure you do not over cook the cauliflower florets.
  • Adjust the quantity of spices as per your taste.

Try this easy, yummy Cauliflower curry without onion, garlic. You will love it !

cauliflower curry without onion garlic


Continue Reading...


April 8, 2022

Mangalore Padengi Batata Gassi Recipe–Sprouted Green Gram Curry

Padengi batata ghassi

Here is a yummy, tasty Mangalorean style sprouted Green gram curry known as Padengi Batata Ghassi i.e Green gram potato gravy for rice, roti and dosa. I was looking for some interesting gravy with sprouted green gram and I came across this recipe in YouTube. Basically we love Karnataka style gojju and this is one such gravy. Looks and tastes similar to gojju but this is a Mangalorean version which is popularly called as Ghassi.

I read that Mangaloreans make this gravy for festivals like Ganesh chaturthi, Dussehra and Gokulashtami along with other dishes. It tastes so good and its super healthy too. I referred many recipes and came up with this version. We all loved it very much. I am sure, I will make it more often in my kitchen.

Friends, do try this easy and yummy Mangalore special Padengi batata ghassi recipe and enjoy with rice, roti and dosa.

Mangalore padengi batata gassi

Mangalorean Padengi Batata Ghassi Recipe


Mangalorean Padengi Batata Ghassi Recipe

Mangalorean Padengi Batata Ghassi Recipe for rice, roti and dosa


Cuisine: Mangalore
Category: Side dish
Serves: Serves 4
Prep time: 10 Minutes
Cook time: 20 Minutes
Total time: 30 Minutes


INGREDIENTS
1 cup = 250ml
  • Green gram sprouts / Moong sprouts - 1 cup
  • Potato - 1 (cubed)
  • Coconut oil - 1 tbsp
  • Big onion -1
  • Tomato - 1
  • Tamarind - Small gooseberry size
  • Salt and water - as needed
To roast and grind
  • Cooking oil - 1 tbsp
  • Big Onion – 1/2
  • Coriander seeds - 1 tbsp
  • Byadgi Red chilli - 3 to 4
  • Cumin seeds - 1 tsp
  • Methi seeds – 1/4 tsp
  • Garlic cloves - 2
  • Curry leaves - 10
  • Grate coconut - 1/2 cup
  • Cinnamon - 1 inch (optional, I used it)
To temper
  • Cooking oil - 1 tbsp
  • Mustard seeds - 1 tsp
  • Crushed Garlic cloves with skin - 3
  • Dry red chilli - 1
  • Asafoetida / Hing - 1/2 tsp
  • Curry leaves - few
METHOD
  1. Heat oil in a kadai. Saute cinnamon(optional) , coriander seeds, methi, cumin seeds, red chilli.
  2. Add onion, garlic and saute well. Lastly switch off the flame and add grated coconut. Mix well and cool down.
  3. Grind to a smooth paste adding water. Set aside.
  4. In a pressure cooker base, add the moong sprouts, cubed potato, chopped onion, tomato, turmeric powder and salt. Mix well and pressure cook in low flame for one whistle.
  5. Open the cooker and add the coconut paste. Mix well and roll boil till thick and flavourful.
  6. Lastly, heat oil and temper mustard seeds, crushed garlic cloves, red chilli, curry leaves and hing. Add to the cooker and garnish with coriander leaves.
  7. Serve hot with plain rice, roti and dosa. Enjoy !
METHOD - STEP BY STEP PICTURES
  • Heat oil in a kadai. Add cinnamon (optional), coriander seeds, methi seeds, cumin seeds and red chilli. Saute for a minute. Add onion and garlic cloves. Saute well. Switch off the flame and add the grated coconut at the end. Mix well and let the mixture cool down.

  • Grind to a smooth paste adding required water. Set aside.

  • In a pressure cooker, take the green gram sprouts, cubed potato, chopped onion, tomato, turmeric powder and salt. Add required water and pressure cook in low flame for one whistle. Open the cooker lid after the steam is released naturally.
  • Sprouted green gram currySprouted green gram curry
  • Add the ground coconut paste. Mix well and check for taste. Add salt and chilli powder if needed. Let the gravy roll boil till it reaches desired consistency. Temper the ingredients given under "to temper" and add to the gravy. Mix well and boil for few seconds till gravy reaches desired consistency. I made it semi thick to suit rice, roti and dosa. Enjoy !

Note

                
  • Adjust the quantity of red chillies as per your taste.
  • Use Byadagi red chilli for bright color gravy.
  • Cinnamon is completely optional to grind. I used it after seeing few Ghassi recipes with Cinnamon.
  • You can skip potato if you don’t like it.
  • Traditionally Hog plum is also cooked along with sprouts. But I din’t use it.


Try this Mangalore special Sprouted green gram curry and Enjoy !

Sprouted green gram curry

Continue Reading...


February 23, 2022

Raw Banana Curry – Vazhakkai Curry Recipe

raw banana curry

I love raw banana curry with full of masala flavor. Especially the vazhakkai curry that is served in Tamil nadu weddings / marriages. I was looking for one such recipe for long time. Recently I came across one in an YouTube channel. But the recipe called for deep frying raw banana pieces before adding the masala. I was hesitant to deep fry it. So I shallow fried the raw banana pieces in little oil, covered and cooked it till soft. Then roasted it in masala. Addition of fennel seeds, onion, garlic and ginger in the masala took this poriyal to the next level. Though it doesn’t taste like original kalyana veedu vazhakkai curry, it came out so well and flavourful. We all loved it. I started making this curry often these days.

Friends, do try this masala flavoured raw banana curry for your lunch. It tastes great with sambar, rasam and curd rice. You will love it for sure.  I have also captured the video for this recipe. I will try to edit and share it soon. Now , lets see this yummy vazhakkai curry with step by step pictures. 

vazhakkai curry


Raw banana curry recipe / Vazhakkai curry


Raw banana curry recipe / Vazhakkai curry

Raw banana curry recipe / Vazhakkai curry for rice


Cuisine: Tamil nadu
Category: Side dish
Serves: Serves 4
Prep time: 10 Minutes
Cook time: 20 Minutes
Total time: 30 Minutes


INGREDIENTS

  • Raw banana - 2
  • Cooking oil - 2 tbsp ( to shallow fry banana pieces)
  • Big onion - 1
  • Fennel seeds - 3/4 tsp
  • Ginger - 1 inch piece
  • Garlic cloves - 5
  • Turmeric powder - 1/4 tsp
  • Sambar powder - 1 tsp
  • Tamarind - 1 small piece ( optional)
  • Salt and water - as needed
To Temper
  • Cooking oil - 1 tbsp
  • Mustard seeds - 1/2 tsp
  • Curry leaves - few
HOW TO MAKE RAW BANANA CURRY
  1. Wash and peel the skin of raw banana. Chop into small cubes.
  2. Heat oil and shallow fry the pieces. Cover and cook till it become soft.
  3. Remove in a plate. Grind onion, garlic, ginger, fennel seeds, tamarind, sambar powder and salt to smooth paste adding water.
  4. Heat oil and splutter mustard seeds, curry leaves. Add the masala paste and saute for few minutes.
  5. Now add the raw banana pieces. Mix well and cook till raw banana is roasted well with nice flavor.
  6. Switch off the flame and serve with rice . Enjoy !
METHOD - STEP BY STEP PICTURES
  • Wash and peel the skin of raw banana. Chop into small cubes. Keep immersed in water till use.

  • Heat 2 tbsp oil and shallow fry the pieces till light golden. Cover and cook till it becomes soft. Remove in a plate.
  • Raw banana curry
  • Grind onion, garlic, ginger, fennel seeds, tamarind, sambar powder and salt to a smooth paste adding required water.
  • Raw banana curry
  • Heat oil and splutter mustard seeds, urad dal and curry leaves. Add the ground masala paste and saute for few minutes.
  • Raw banana curry
  • Now add the raw banana pieces and mix well. Cook in low flame till raw banana pieces are roasted well, becomes dry with nice masala flavor. Raw banana turns soft.
  • Raw banana curryRaw banana curry
  • Switch off the flame. Remove in a plate and serve hot with sambar, rasam and curd rice. Tastes yummy !
  • Raw banana curry
    Enjoy !

Note

  • Adjust the quantity of chilli powder as per your need.
  • Make sure masala is well coated in raw banana pieces.
  • Saute till raw banana turns golden in color with nice masala flavor else it tastes bad


Try this easy, yummy raw banana curry and enjoy with rice.

raw banana curry

Continue Reading...


January 11, 2022

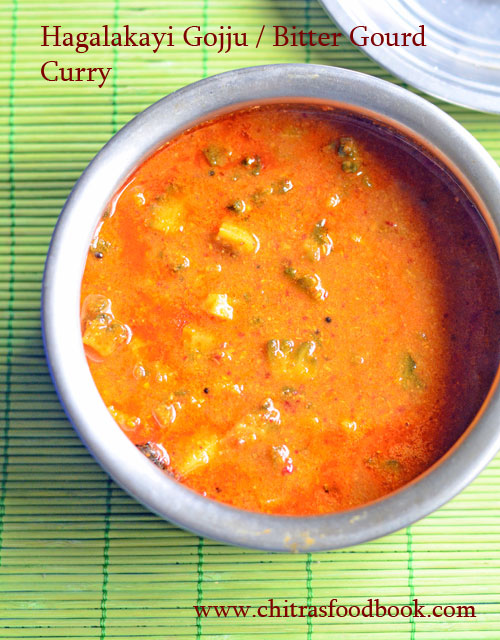
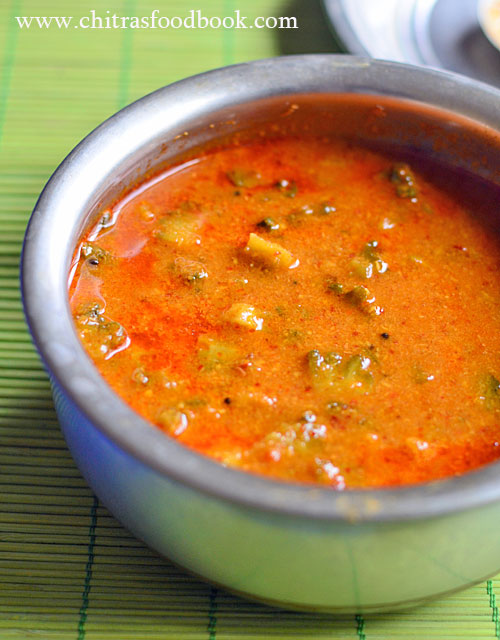
Hagalakayi Gojju – Karnataka Bitter gourd curry recipe

Hagalakayi gojju recipe
Karnataka brahmin style bitter gourd curry / Hagalakayi gojju is an yummy gravy for rice. This is the first time I am trying this recipe. It came out so well and yummy. There are many versions for this recipe. But this is a no onion, no garlic Udupi Brahmin style Hagalakayi gojju. I followed this recipe from a YouTube channel.

I am happy to include this recipe in my bitter gourd recipes list. I am sure I will make it often. Even Raksha had this gojju without any complaints as it has a mild sweet taste. Friends, if you are a bitter gourd lover, you must try this recipe for sure. Ok, lets see how to make Karnataka Brahmin style Hagalakayi gojju /Bitter gourd curry recipe with step by step pictures.

 Hagalakayi gojju recipe

Bitter gourd curry - Hagalakayi gojju recipe


Bitter gourd curry - Hagalakayi gojju recipe

Bitter gourd curry - Hagalakayi gojju recipe


Cuisine: Indian
Category: side dish
Serves: Serves 4
Prep time: 10 Minutes
Cook time: 20 Minutes
Total time: 30 Minutes


INGREDIENTS
Ingredients for dry roasting and grinding
  • Urad Dal - 1/2 tbsp
  • Sesame seeds - 1 tbsp
  • Cumin seeds - 1/2 tbsp
  • Fenugreek seeds - 1/4 tsp
  • Grated coconut - 3/4 cup ( I used fresh)
  • Red chilli - 8 (Byadgi chilli)

  • Bitter gourd - 1 (Finely chopped)
  • Tamarind - Small lemon size
  • Jaggery - 1 tbsp
  • Salt & water - as needed
For Tadka:
  • Cooking oil - 3 tbsp
  • Mustard seeds - 1/2 tsp
  • Red chilli - 1
  • Hing (asafetida) - 1/4 tsp
  • Curry leaves - few

  • Coriander leaves - to garnish
BITTER GOURD CURRY / HAGALAKAYI GOJJU
  1. Wash and chop bitter gourd finely.
  2. Heat a kadai and dry roast all the ingredients giver under “ roast and grind”.
  3. Cool down and grind to a smooth paste. Set aside.
  4. Heat oil in a cooker. Splutter mustard seeds, red chilli, hing and curry leaves.
  5. Add finely chopped bitter gourd and saute for few minutes.
  6. Add the ground masala, tamarind extract, jaggery, salt and water. Pressure cook in low flame for 2 whistles.
  7. Open the cooker and check the consistency. Boil till it becomes thick but pourable.
  8. Serve with plain rice adding ghee and enjoy !
METHOD - STEP BY STEP PICTURES
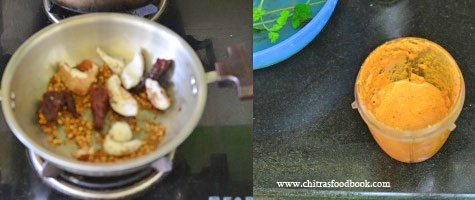
  • Wash and chop bitter gourd finely. Heat a kadai and dry roast all the ingredients given under “roast and grind”. Lastly add coconut, roast for few minutes and switch off the flame.
  • Hagalakayi gojju recipe
  • Cool down and grind to a smooth paste. Set aside.
  • Heat oil in a pressure cooker base. Splutter mustard seeds, red chilli, curry leaves, hing and asafetida.
  • Hagalakayi gojju recipe
  • Add finely chopped bitter gourd and saute for few minutes till bitter gourd shrinks in quantity. Now add tamarind extract, jaggery, salt and ground masala paste. Add required water and mix well.
  • Hagalakayi gojju
  • Pressure cook in low flame for 2 whistles. Open the cooker after the steam is released naturally. You can see a layer of oil floating in top. Check the consistency. If its watery or thin, boil for few minutes to become thick but pourable.
  • Hagalakayi gojju
  • Serve with plain rice adding few drops of ghee. Enjoy !

Note

  • Adjust the quantity of tamarind and jaggery as per the bitterness of bitter gourd.
  • Consistency of this gojju should be thick.You can adjust it as per your preference.


Try this Karnataka, Brahmin style Hagalakayi / Bitter gourd gojju.

Hagalakayi gojju recipe

Continue Reading...


December 21, 2021

Pirandai podi–Adamant Creeper Chutney Powder for Rice

Pirandai podi

I have kept an adamant creeper plant (Pirandai chedi in Tamil) in my balcony garden. Usually I make Pirandai thogayal or Pirandai kuzhambu. Sometimes, I make Pirandai dosa OR Red rice Pirandai dosai too.  This time, I tried Pirandai podi for a change. It came out so tasty and flavorful. We enjoyed it mixing with plain rice adding ghee. I personally liked this podi with idli, dosa too.

Friends, do try this Pirandai podi at home / Adamant creeper chutney powder recipe and store up to 2 weeks, enjoy with plain rice, idli, dosa if you like.

pirandai podi recipe

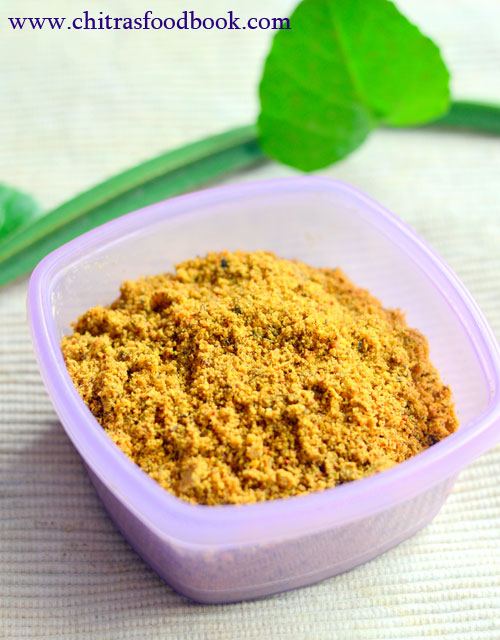
Pirandai podi / Adamant creeper chutney powder for rice


Pirandai podi / Adamant creeper chutney powder for rice

Pirandai podi / Adamant creeper chutney powder for rice


Cuisine: Indian
Category: side dish
Serves: 1/2 cup
Prep time: 10 Minutes
Cook time: 20 Minutes
Total time: 30 Minutes


INGREDIENTS

  • Pirandai / Adamant creeper sticks - 10
  • Urad dal - 2 tbsp
  • Chana dal - 2 tbsp
  • Sesame seeds - 1 tsp
  • Red chilli - 3
  • Pepper - 1 tsp
  • Cumin seeds - 1 tsp
  • Tamarind - Gooseberry size
  • Cooking oil / Gingely oil / Sesame oil - 2 tbsp
  • Salt - as needed
HOW TO MAKE PIRANDAI PODI
  1. Grease your hands with sesame oil generously to avoid itching.
  2. Wash and peel the ridges of Pirandai. Chop into small pieces and set aside.
  3. Heat oil and saute pirandai pieces till it shrinks in size and color turns light green or whitish.
  4. Remove in a plate. In the same oil, saute urad dal, chana dal, red chilli, sesame seeds, pepper and cumin seeds in medium flame till dals turn golden in color.
  5. Lastly add tamarind, salt and sauteed pirandai sticks. Mix well and let it cool down. 
  6. Grind everything to a smooth powder. Transfer to an air tight box.
  7. Store and use for 2 weeks.
METHOD - STEP BY STEP PICTURES
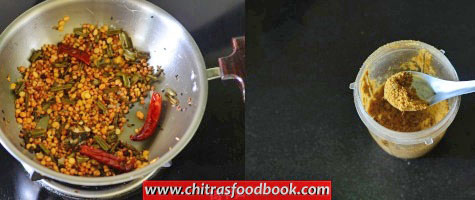
  • Wash the Pirandai sticks and set aside. Grease hands with sesame oil / Gingely oil generously. Peel the ridges of Pirandai sticks and chop into 1 inch pieces.

  • Heat oil and saute Pirandai sticks till it shrinks in size and changes in color to light green. Remove in a plate.
  • pirandai podi recipe
  • In the same oil, saute urad dal, chana dal, sesame seeds, pepper corns, cumin seeds and red chilli in low to medium flame patienly till the color of dal changes to golden.

  • Lastly add tamarind, salt and sauteed Pirandai sticks. Mix well and let everything cool down. Grind to smooth powder and store in an air tight box. Serve with plain rice adding ghee. pirandai podi recipe

Note

  • Pirandai podi can be prepared with many variations.
  • You can skip tamarind if you wish but I recommend using it as it helps to reduce the itchiness of Pirandai while eating it.
  • You can use either chana dal or Urad dal for variations.


  Healthy, tasty Pirandai podi is ready to use with plain rice, idli, dosa!
pirandai podi recipe


Continue Reading...


December 11, 2021

Murungai keerai thogayal - Drumstick leaves Chutney Recipe

drumstick leaves thogayal

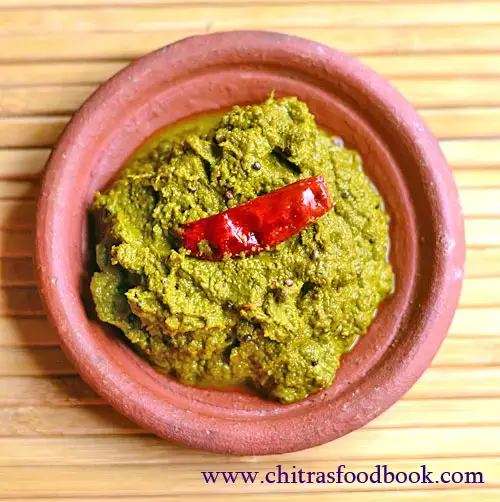
Murungai keerai thogayal is a super healthy and interesting thogayal recipe with drumstick leaves. Recently I started making drumstick leaves recipes regularly in my kitchen. Most of the time, I am making this soup recipe. Sometimes I try kootu, sambar, poriyal and this thogayal with it.

Among sambar, kootu, poriyal and thogayal, my choice is this thogayal. Then comes sambar. This drumstick leaves chutney / murungai keerai thogayal tastes so good even the kids in your house would love to have with plain rice adding ghee. Raksha who is a fussy eater when it comes to keerai recipes, loved this thogayal a lot.

Friends, do try this healthy and yummy murungai keerai thogayal / drumstick leaves chutney for rice and enjoy !. You can also try with idli, dosa if you like.

Murungai keerai thogayal / Drumstick leaves chutney for rice


Murungai keerai thogayal / Drumstick leaves chutney for rice

Murungai keerai thogayal / Drumstick leaves chutney for rice, idli, dosa


Cuisine: Tamil nadu
Category: Side dish
Serves: Serves 3
Prep time: 10 Minutes
Cook time: 20 Minutes
Total time: 30 Minutes


INGREDIENTS

  • Murungai keerai / Drumstick leaves - 1 cup
  • Big onion - 1
  • Tomato - 1
  • Tamarind - Small gooseberry size
  • Garlic cloves - 5
  • Red chilli - 3 to 4
  • Coconut - 2 tbsp
  • Turmeric powder - 1/4 tsp
  • Urad dal - 2 tsp
  • Chana dal - 2 tsp
  • Hing / Asafetida - a pinch
  • Salt & water - as needed
To temper
  • Sesame oil - 1 tbsp
  • Mustard seeds - 1/2 tsp
  • Red chilli - 1
HOW TO MAKE DRUMSTICK LEAVES CHUTNEY
  1. Wash the drumstick leaves. Set aside.
  2. Heat oil and roast urad dal, chana dal, red chilli, hing.
  3. Lastly add coconut, roast for a minute. Switch off. Remove in a plate.
  4. Add 1 tbsp oil again. Saute onion, tomato till tomato becomes mushy.
  5. Add drumstick leaves and saute for 5 to 10 minutes. Switch off the flame.
  6. Cool down and grind everything together to make a smooth paste.
  7. Heat oil in a kadai. Splutter mustard seeds. Add red chilli and the ground paste.
  8. Mix well and boil till thick. Remove and serve with plain rice adding ghee.
METHOD - STEP BY STEP PICTURES
  • Wash the drumstick leaves and set aside. Heat oil in a kadai. Saute chana dal, urad dal, red chilli and hing till dals turn golden in color. Lastly add coconut, mix well and switch off the flame.

  • Remove in a plate. Heat oil in the kadai. Saute onion, garlic and tomato till tomato becomes mushy. Add drumstick leaves and saute for 5 to 10 minutes till it becomes soft and shrinks in quantity. Switch off the flame.

  • At last grind everything together adding little tamarind to a smooth paste adding water and salt.

  • Heat oil in a kadai, splutter mustard seeds, red chilli. Add the ground paste and saute for few minutes till it becomes thick. Remove and serve with plain rice adding ghee.

Enjoy !

Note

  • Adjust the quantity of chilli as per your taste.
  • You can skip tomato and use tamarind alone. In that case, add BIG gooseberry sized tamarind.
  • To make it more healthy, you can add 1 tbsp of dry roasted sesame seeds too.


Healthy Drumstick leaves thogayal is ready to serve with plain rice.
Murungai keerai thogayal


Continue Reading...


September 28, 2021

Vazhaithandu Poriyal – Banana stem poriyal recipe

How to make Vazhaithandu poriyal

This is my MIL’s style Vazhaithandu poriyal recipe (Banana stem curry) which is a super healthy and excellent side dish for sambar rice. We try to include Banana stem in our diet at least once in a week as it is a rich source of fiber, Potassium and Vitamin B6. It helps to ease constipation and is good for treating and preventing Kidney stones.

Mostly I make banana stem juice with buttermilk and salt. Sometimes I make poriyal, kuzhambu, thayir pachadi or add in sambar. Recent days I started to make Vazhaithandu dosa as well. Soon I will try to post a collection of all the Vazhaithandu recipes in my blog for easy reference.

Today’s recipe is a very easy and simple Tamil nadu style poriyal recipe with Vazhaithandu. My MIL makes it without onion and garlic but I used garlic today. Also she uses red chilli for spicy taste whereas I used sambar powder for variation. It came out so well. We all loved it. Even Raksha who eats only dosa with Vazhaithandu ate this poriyal today without complaints.

Friends, do try this yummy and healthy raw banana stem poriyal for rice and enjoy with your family. But make sure you use tender and fresh banana stem for best taste.
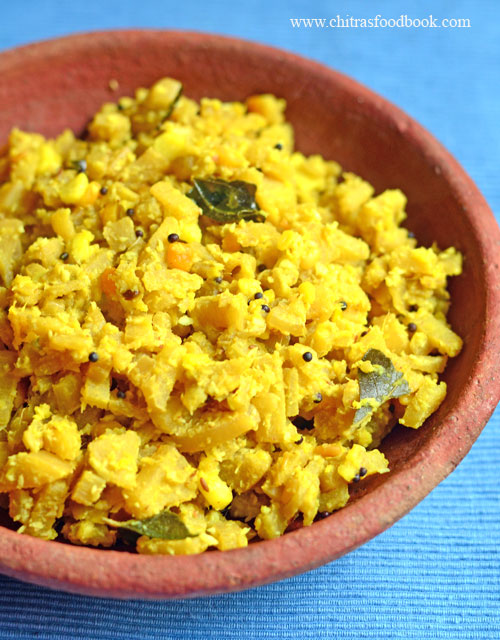
vazhaithandu poriyal recipe

Vazhaithandu poriyal / Banana stem curry for rice
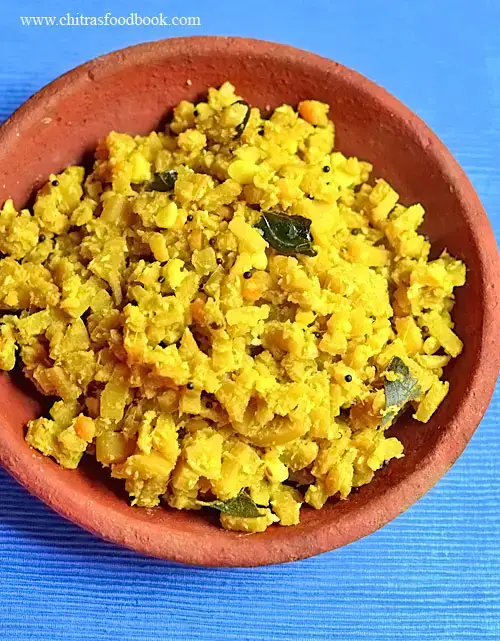

Vazhaithandu poriyal / Banana stem curry for rice

Vazhaithandu poriyal / Banana stem curry for rice - Easy and healthy side dish using Banana stem.


Cuisine: Tamil nadu
Category: Side dish
Serves: Serves 4
Prep time: 10 Minutes
Cook time: 20 Minutes
Total time: 30 Minutes


INGREDIENTS

  • Vazhaithandu / Banana stem - 1
  • Moong dal - 1 tbsp
  • Sambar powder or red chilli powder - 1/2 tsp
  • Turmeric powder - 1/4 tsp
  • Salt - as needed
  • Water - to cook
  • Grated coconut – 1/4 cup
To temper
  • Coconut oil - 1 tbsp
  • Mustard seeds - 1/2 tsp
  • Urad dal - 1 tsp
  • Chana dal - 2 tsp
  • Cumin seeds – 1/2 tsp
  • Curry leaves - few
  • Garlic - 5 cloves
  • Coriander leaves - to garnish
HOW TO MAKE BANANA STEM PORIYAL
  1. Remove the outer sheath of Banana stem.
  2. Wash and chop into circles and dip in thin buttermilk.
  3. Chop finely and keep it immersed in buttermilk till use.
  4. Take the chopped banana stem in a plate and add salt, moong dal.
  5. Mix well and keep the plate in a slanting way for 15 minutes. Water drains out. Discard the water. 
  6. Heat oil in a kadai. Splutter mustard seeds, urad dal, chana dal, cumin seeds and curry leaves. 
  7. Add garlic cloves and saute for a minute. Squeeze the banana stem and add to kadai.
  8. Add turmeric powder and mix well. Sprinkle some water and cover the kadai. Keep the flame low and cook till moong dal and banana stem turns soft.
  9. Lastly add the sambar powder and grated coconut. Mix well and cook for few more minutes.
  10. Switch off the stove and garnish with coriander leaves if you like.
  11. Serve with sambar and rasam rice. Enjoy !
METHOD - STEP BY STEP PICTURES
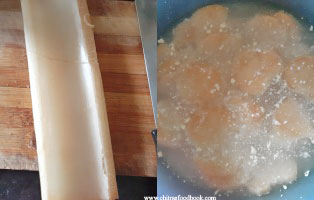
  • Remove the outer sheath of the banana stem and chop into thin roundels. Keep in buttermilk till use.

  • Now take the roundels and chop finely into small cubes. Keep them immersed in buttermilk.
  • vazhaithandu poriyal recipe
  • Take the chopped banana stem in a plate. Add salt, moong dal and mix well. Keep the plate in a slanting way so that banana stem leaves water which collects in the plate. Discard the water.
  • vazhaithandu poriyal recipe
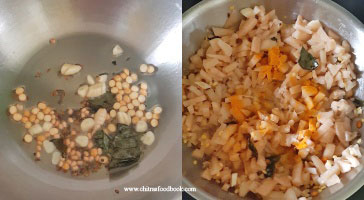
  • Heat oil in a kadai and when it gets heated, splutter mustard seeds, urad dal, chana dal, cumin seeds and curry leaves. Add chopped garlic and saute for few minutes.

  • Squeeze the banana stem and add to the kadai. Keep the flame low and saute for few minutes. Add turmeric powder and mix well.
  • vazhaithandu poriyal recipe

  • Sprinkle some water and cover cook till dal and banana stem turns soft and cooked well. Lastly add the grated coconut, sambar powder or red chilli powder. Mix well and cook for few minutes in low flame till raw smell goes off. Switch off the flame and garnish with coriander leaves (optional).vazhaithandu poriyal recipe
    Enjoy !

Note

  • You can saute red chilli along with garlic and skip chilli powder / sambar powder for less spice.
  • For variations, you can skip garlic and make it without onion and garlic.
  • If you like, you can add one finely chopped onion along with garlic and make this poriyal.
Healthy and tasty Vazhaithandu poriyal is ready !
Vazhaithandu poriyal

Technorati Tags: ,,,,,

Continue Reading...