Search Chitra's Food Book

Showing posts with label SNACK RECIPES. Show all posts

October 17, 2016

Garlic Murukku/Poondu Murukku Recipe - Easy Murukku Varieties

Poondu murukku recipe
Recently when I went to Salem - Tamil nadu, we visited Lakshmi sweet stall to buy some sweets and snacks for Sendhil’s friend.There I saw some interesting murukku varieties like Onion murukku, Poondu murukku, butter murukku and many more. As I had already tried butter murukku and vengaya murukku, I wanted to prepare garlic murukku at home. I browsed few recipes and came across this one. This is the first time I am trying a murukku recipe with garlic.The combination of rice flour, besan and butter worked out very well. It came out white, crispy and mildly spiced with a nice garlic flavor. Its a great teatime snack and we loved it very much.Friends, If you are looking to try a flavored murukku recipe for this Diwali, do try this easy murukku variety and enjoy with your family! Lets see how to make yummy poondu murukku ( Garlic chakli) at home with step by step photos and a video !
Do check out my Ribbon pakoda , Garlic Karasev , other murukku varieties too !


Poondu murukku recipe

Garlic murukku / Poondu murukku recipe


Garlic murukku / Poondu murukku recipe How to make easy garlic murukku with rice flour, besan flour, hot oil and butter
Cuisine: Indian
Category: Snacks
Serves: 12-15 nos
Prep time: 10 Minutes
Cook time: 2 Minutes
Total time: 12 Minutes


INGREDIENTS
1 cup - 250ml
  • Rice flour/Idiyappam flour - 1 cup
  • Besan flour/Kadalai maavu - 1/3 cup
  • Softened butter -  3/4 to 1 tbsp (Unmelted)
  • Hot oil - 1 tsp
  • Salt & water - as needed
  • Cumin seeds - 1/2 tsp ( optional)
To grind
  • Garlic cloves - 5 nos
  • Red chillies - 2-3 nos ( I used 2 spicy chillies)
  • Water – 1 tbsp ( To soak)
METHOD

  • Peel garlic cloves.Soak garlic and red chillies in 1tbsp water ( you can use hot water too).Let it soak for 10 minutes. Then grind it to a paste adding the soaked water.It won’t grind to a smooth paste as the quantity is less. So grind it continuously for a minute, wipe the jar and grind it till it turns smooth.Don’t worry , it looks watery after grinding. But make sure there are no garlic pieces or chilli seeds. It may block the chakli nozzle while squeezing.
    Poondu murukku recipe
    Poondu murukku recipe
  • In a wide bowl, take the rice flour, besan flour, salt and sieve it. To this, add softened butter.Heat oil in a mini pan and add 1 tsp hot oil to the murukku mixture. Add ground garlic paste. Mix well to spread the butter and oil with the flour. Check for salt. Add more if needed. Then add water little by little and make a smooth dough. No problem if the dough is slightly sticky.
    Poondu murukku recipe
    Poondu murukku recipe
  • Take the star mould and keep in the murukku press/Chakli press. Fill the mould with the dough and squeeze it to make a round, concentric circle. You can press the murukku in a butter paper or polythene sheet. Cover the remaining dough with a wet cloth or a plastic cover. This dough may tighten over time.So if needed, sprinkle some water, mix well and press it.
    Poondu murukku recipe
  • Heat oil in a kadai and when it gets heated, drop a pinch of dough and if it rises to the top immediately, oil temperature is right. Drop 2-3 murukku in hot oil and cook both the sides till bubbles cease. Remove in a tissue paper. You can also squeeze the murukku directly in oil, cook them and break into pieces just like butter murukku. Either ways would do. In Lakshmi stall, I saw it as pieces/Thool murukku and not as whole ones. So I made a batch in that way too. 
  • Store in an airtight box after cools down. Enjoy for weeks ! This murukku takes time to lend all its flavor. So try to consume the murukku after few hours of making.
    Poondu murukku recipe
    Enjoy !

Note
  • I am not sure about using ghee instead of butter. The color of murukku may vary.
  • You can use red chilli powder instead of red chillies. But grinding garlic would become difficult. In that case, grind garlic as much as possible and strain it adding some water. Add the garlic water to make the dough.
Try this easy, garlic flavored murukku for this Diwali and enjoy !

Garlic murukku recipe

Continue Reading...


October 11, 2016

Easy Potato Murukku – Potato Chakli Recipe - Murukku Varieties

Potato murukku

Murukku recipes comes to my mind only when Diwali is nearby. Thenkuzhal murukku is a must & should Diwali snack in my home.We prepare other murukku varieties too based on our interest. This year I have a big list of murukku recipes to try. To begin with, I started my Diwali Snack/Savories recipes with this crispy, all time favorite potato murukku recipe ( Urulai kizhangu murukku) also known as Potato chakli/Aloo chakli in Hindi. I tried it last week by referring Sharmi’s passions. Actually I asked her for using ghee instead of butter but then I tried it with butter as per her recipe.It came out really well and crunchy. Raksha and Sendhil loved it a lot. Its very easy to make without using urad dal powder or fried gram powder.I have heard about Gulab jamun made with potato but murkku with potato is really a new thing to me. When I saw its results, I became very happy. Butter and potato does the magic in this recipe.Soon I will try this recipe with ghee and update the results.Now, Lets see how to make this simple and easy potato murukku recipe with step by step photos and a video !
Continue Reading...


September 21, 2016

Soya Chunks Manchurian – Soya Chunks Recipes

How to make Soya chunks manchurian/ meal maker manchurian – Dry version with step by step pictures !
Soya chunks also known as meal maker & soya nuggets is a good source of protein for vegetarians. Usually I add them in biryani. Recently I bought a pack of mini soya chunks(Soya chunks nano) to try some curry or gravy with it. But I got tempted to make soya chunks Manchurian after watching Vahrevah Youtube video. Soya chunks fry came out very crispy like Gobi 65 and tasted great when hot.I made a dry Manchurian sauce and it stayed crispy for sometime even after adding in gravy. But It became slightly chewy and soft after its cooled down. So make and serve it hot to enjoy its actual taste because the moisture content inside the soya chunks makes it soft soon. Use mini soya chunks for best results.If you use big sized soya chunks, chop it after soaking in water to make a crispy fry. Do try this for your kids. I am sure they will love it. Lets see how to prepare Soya chunks Manchurian also known as meal maker Manchurian with step by step photos !
Check out my other Manchurian recipes

Gobi manchurian

Baby corn manchurian

Idli manchurian

Mixed vegetable manchurian

Continue Reading...


August 24, 2016

Uppu Seedai & Vella Seedai Recipe With Store Bought Rice Flour

Uppu seedai - Vella seedai
Uppu Seedai/Salt seedai and Vella seedai/Sweet seedai recipes using store bought rice flour with tips and tricks to avoid bursting. Seedai is one of the most important Neivedyam recipes for Krishna Jayanthi @ Gokulashtami festival in Tamil nadu. Usually we make seedai recipes with homemade processed rice flour and roasted urad dal flour. I have already shared our traditional uppu Cheedai and vella cheedai recipes long back. This year, I tried cheedai using store bought rice flour as it is easy and quick to make. I used Anil Kozhukattai flour.

I guess Idiyappam flour works well too. I won't say this seedai will melt-in-mouth like Adayar Ananda bhavan seedai, but it came out equally crispy and crunchy when compared with the traditional ones. Above all, It din’t burst. Cracks in the sweet seedai is unavoidable though. If you are a beginner, use the same quantity I mentioned here. Once you got them right, you can go for doubling the quantity. Friends, If you don’t have enough time to make processed rice flour but still want to make seedai, try this easy version with store bought rice flour. Follow the steps carefully if you are a beginner. You can make it really well.

Have a great Krishna Jayanthi celebration. Check out my other Gokulashtami recipes in THIS LINK. Lets see how to make uppu seedai and vella seedai with rice flour ( Kozhukattai flour) and tips to make it without bursting.

Please watch the video below for all the Gokulashtami recipes.


Vella seedai recipe


Uppu seedai recipe

Uppu seedai and Vella seedai recipes


Uppu seedai and Vella seedai recipes Uppu seedai and vella seedai recipe with store bought rice flour/Kozhukattai flour
Cuisine: Indian
Category: Snacks
Serves: 50
Prep time: 10 Minutes
Cook time: 20 Minutes
Total time: 30 Minutes


INGREDIENTS
1 cup - 250ml

For Vella Seedai
  • Idiyappam flour OR Kozhukattai flour - 1/2 cup
  • Roasted urad dal flour or Powdered gram flour – 1/2 tbsp
  • Softened butter – 1/2 tbsp / 1.5 tsp (at room temperature)
  • Sesame seeds or cumin seeds - 1/2 tsp
  • Finely grated coconut – 1 tsp (optional)
  • Grated jaggery - 1/4 cup + Water – 2 tbsp ( to melt jaggery)
  • Cardamom seeds - 1 no
  • Water - as needed
For Uppu seedai
  • Idiyappam flour OR Kozhukattai flour - 1/2 cup
  • Roasted urad dal flour or Powdered gram flour – 1 tbsp
  • Softened butter – 2 tsp ( at room temperature)
  • Finely grated coconut – 1 tsp (optional)
  • Sesame seeds or cumin seeds - 1/2 tsp
  • Asafetida/Hing - 1/8 tsp
  • Salt & Water - as needed
Cooking oil – to deep fry
HOW TO MAKE SEEDAI USING RICE FLOUR - METHOD

  • Dry roast 1 cup ( 250ml cup) of rice flour till it starts to emit vapour. Keep roasting in medium flame for few minutes to see the vapour. Try to draw a line to check if the flour is roasted well. Do not burn the flour.  Let the flour cool down. Follow the same steps for Idiyappam flour as well. If you have dry rice flour, you don't have to roast it.
Vella seedai

For Vella Seedai / Sweet seedai
  • Measure 1/2 cup of roasted rice flour in a sieve. To this, add either roasted urad dal flour OR roasted gram flour (Pottukadalai maavu). Sieve them very well in a bowl. This step helps to avoid bursting. So do not skip this step. Add sesame seeds or cumin seeds, salt, hing, ground coconut (optional) and softened butter ( unmelted butter). Mix well with your fingers. Make sure butter is well spread with the flour. Set aside.
Vella seedai
  • In a kadai, take the grated jaggery. Add 2 tbsp of water and melt the jaggery by boiling it. Strain the syrup through a metal strainer. Mix this syrup, cardamom powder with the sieved rice flour mixture. Mix well. Add little water and make a non-sticky smooth dough.
Vella seedai
Vella seedai
  • Make small balls out of it and spread them in a newspaper. Make one or two small cylindrical shaped Seepankuzhal too ( Refer main picture). Let it air dry for 20 minutes. ( If you are a beginner, go for frying seedai in a mini kadai ( tadka pan) with little oil to check whether seedai burst or disperses in oil. Put just 2 balls and stay a feet away. 
  • Check if the seedai burst or disperses in oil. If seedai disperses in oil, either oil temperature may be too low or jaggery syrup or butter may be more. In that case, add little more rice flour and make a non-sticky dough. Make balls and again fry them in little oil. If it works fine, go ahead with batch frying. 
Vella seedai

  • Heat oil in a kadai and when it gets heated, put a pinch of seedai dough and check the oil temperature. If it comes up immediately, oil temperature is correct. Now simmer the flame to medium and drop seedai balls. Stay 2 feets away for safer side. Do not disturb for a minute. Then toss the balls and put the balls and deep fry for few minutes. Keep turning both the sides for even cooking.
  • Remove after it turns golden brown. Do not wait for all the bubbles to stop. Drain them in a tissue. Cracks are unavoidable in sweet seedai. Store after it cools down. It may turn soft the next day. So to enjoy crunchy seedai, consume it on the same day !

Vella seedai

For Uppu Seedai Recipe / Salt seedai
  • In a wide bowl, take 1/2 cup of roasted rice flour, roasted urad dal powder or fried gram flour ( pottukadalai maavu). Sieve twice to avoid bursting. Add cumin seeds, asafetida, salt and mix well. Add in soft butter and mix well with your finger tips. Make sure butter is well spread with the flour. 
Uppu seedai
Uppu seedai

  • Add water little by little and make a dough. Make small balls using three fingers. Do not give pressure while rolling. Let the balls dry in a newspaper for 15-20 minutes.
Uppu seedai
  • Heat oil & check the oil temperature by dropping a pinch of dough. When it rises to the top, simmer the flame to medium & put a handful of seedai balls. Stay 2 feet away. Do not disturb the balls for few seconds. 
  • Then toss the seedai & cook till bubbles cease to 90%. Remove when the seedai turns golden. Let it cool down completely & then store in an air tight box. Enjoy for a week!
Uppu seedai
Uppu seedai


Note
  • First important thing to avoid bursting is to “SIEVE” the flour once or twice. U should sieve all the flour ( urad dal flour, rice flour). Sieving the flour properly reduces 90% of bursting.
  • Second thing, you should not roll the seedai very tightly. U should roll it to a loose ball using three fingers. No problem if its not a proper round.
  • One more tip is to prick the seedai with a small needle to avoid bursting. Dry the seedai in a paper or towel for 20 mins before frying.This is also very important.
  • Dry roast the flour till it starts to release vapour. Try to draw a line using the roasted flour.
  • Beginners can try deep frying few seedai in “small tempering kadai” .If it comes out well , proceed in a big kadai. Color variations may be there slightly. But u can check whether it bursts or disperses in oil.
  • If sweet seedai breaks or dissolves in oil , it means jaggery may be more or oil temperature is too high or too low.
  • If Seedai bubbles too much after u drop into oil ,it shows the fat ( ghee or butter or oil) content is more.So add more rice flour to the dough & make again.
  • The color of seedai depends on the color of urad dal flour. If u roast the dal to golden brown, seedai will also turn brown.
  • Uniform heating is also important. In my observation, I feel medium flame is enough to get a nice colored and crispy seedai.
  • Vella seedai turns soft the next day.So consume it on the same day to enjoy its best taste. 
  • Adding coconut to seedai dough may reduce its shelf life. 


Try this easy seedai recipes for this Krishna jayanthi and have a great celebration !
Seedai recipes
Continue Reading...


May 26, 2016

Karpooravalli Bajji – Ajwain Leaf Pakora – Oregano Fritters

Karpooravalli bajji recipe
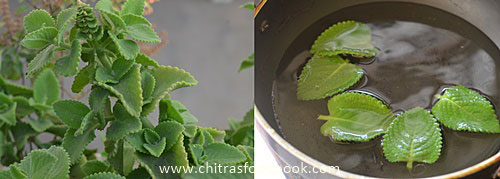
Karpooravalli @Omavalli is a well known plant to many of you. It is known as Oregano, country borage, French thyme, Indian borage, Spanish Thyme, Big Thyme, Thick leaf thyme or Broad leaf thyme(Guyana), Poor man pork or broad leaf thyme (Barbados), Cuban oregano, Mexican thyme,queen of herbs, mother of herbs in English, Doddapatre Soppu, Saviara sambara in Kannada, Panikoorka in Malayalam, Vaamu aku in Telugu, Pathorchur, patharcur, Patta ajvayin in Hindi( Source : Pinkandpink) . 

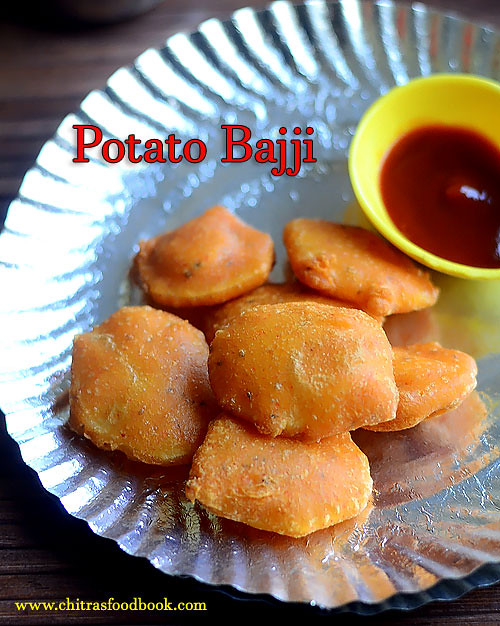
My MIL makes kashayam with beetel leaves & omavalli leaves for indigestion problem, cough, cold for kids and adults as well. So we have planted this leaves in our backyard as it has many health benefits. Recently I came this bajji recipe in a magazine and thought of giving a try. I made Karpooravalli bajji, Potato bajji and onion bajji using homemade bajji batter. Bajji came out very well with the shape of karpooravalli leaves. We couldn’t feel the bitterness or spicy taste of leaves as I thought. Sendhil and myself loved it a lot. 

Try this healthy, yummy, flavorful Karpooravalli leaves bajji for your evening snacks. Enjoy with hot tea/Chai !! Lets see how to make Ajwain leaves bajji/ Oregano fritters at home with homemade bajji, bonda batter.
Karpooravalli bajji recipe

Karpooravalli bajji recipe / Oregano fritters


Karpooravalli bajji recipe / Oregano fritters Healthy, herbal Karpooravalli leaves bajji recipe / ajwain leaf pakora for teatime. 
Cuisine: Indian
Category: Bajji recipes
Serves: 12 nos
Prep time: 10 Minutes
Cook time: 5 Minutes
Total time: 15 Minutes


INGREDIENTS
1 cup - 200 ml
  • Karpooravalli leaves/ Oregano leaves - 12 nos (medium sized)
  • Besan flour/Kadalai maavu - 3/4 cup
  • Rice flour - 1/4 cup
  • Red chilli powder - 1 - 2 tsp
  • Cumin seeds/Jeera - 1 tsp
  • Hing/asafetida - 1/4 tsp
  • Cooking soda / baking soda - 1/8 tsp
  • Red food color – a pinch ( optional)
  • Salt & water - as needed
HOW TO MAKE KARPOORAVALLI LEAVES BAJJI - METHOD

  • Pluck the leaves from the plant with stem.Wash it well to remove the mud. Wash it twice or thrice and Pat it dry using a towel.
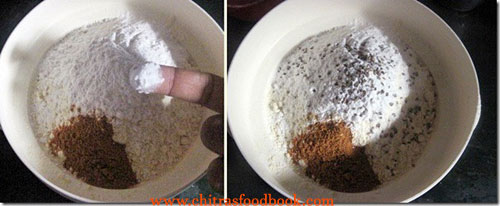
  • In a wide bowl, take the besan flour, rice flour, red chilli powder, cumin seeds, salt, hing and mix well. Lastly add the cooking soda/ baking soda and mix well. Add some water to make a thick batter. ( Refer my Onion Bajji post for more detailed pics)
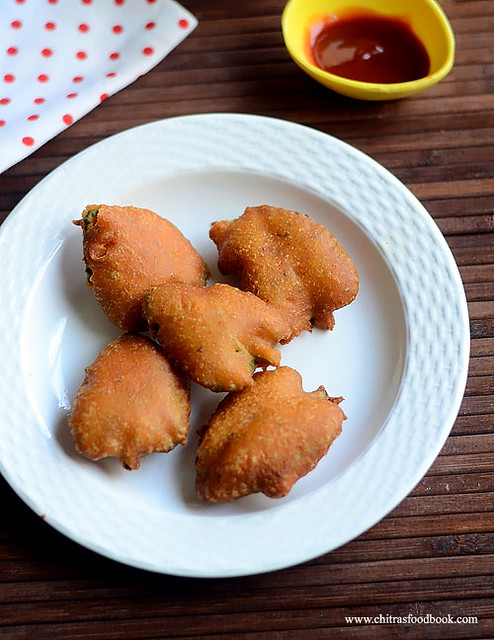
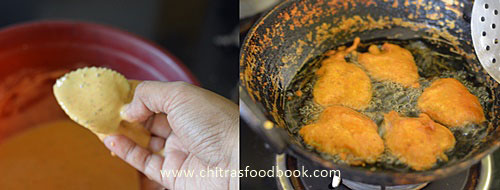
  • Heat oil to deep fry. Add a pinch of batter to check the heat of oil. If it rises immediately, oil temperature is just right. Now dip the karpooravalli leaves in the bajji batter and drop it in the oil. Repeat the same and drop 3-4 bajjis. Let the flame be medium. Cook both the sides till bajji turns golden in color. Remove from the oil and drain the excess oil in a tissue paper. Enjoy with tomato ketchup or coconut chutney !


  • NOTE
  • For variations, you can add g&g paste, garam masala powder to the batter. It tastes different.
  • You can top the bajji with finely chopped onions, coriander leaves. Sprinkle some lemon jucie and chat masala powder before serving just like I did in stuffed chilli bajji.
Ajwain leaves bajji

Healthy karpooravalli leaves bajji is ready for teatime !!
Karpooravalli bajji recipe
Continue Reading...


May 13, 2016

Potato Bajji | Aloo Pakora - Urulaikilangu Bajji Recipe

Potato bajji 
I make Potato bonda and onion bajji very often as both are Raksha’s favorite. But I have seen my mom making Potato bajji, Brinjal bajji and many more varieties of bajji before my marriage. So recently I too tried Potato bajji and Karpooravalli leaves bajji for the first time in my kitchen.Its preparation is very easy. If you make the basic bajji batter, you can prepare any number of bajji varieties with it. Both came out very well and we all loved it a lot. Raksha enjoyed potato bajji( Aloo pakora in Hindi, Urulaikizhangu bajji in Tamil) with tomato ketchup.Try this easy, yummy bajji recipe for your kids as evening snacks during this holidays. They will love it for sure. Lets see how to make this crispy, puffy Potato bajji at home.

Continue Reading...


April 20, 2016

Samosa Recipe – How To Make Punjabi Samosa

Punjabi samosa recipe
Long back I have shared a samosa recipe with potato stuffing. This version is purely a Bakery style Punjabi Samosa recipe. I learnt this recipe by watching an Youtube Video by chef Harpal singh and from this blog. Chef had explained the folding part very well. Even though the folding technique looked simple, it needs some practice to make it perfect.

After 2 attempts I got it right but not so perfect. I have given stepwise pictures for folding.Hope it is easily understandable. For variations, you can make the stuffing with mixed vegetables instead of potato. It stayed crispy for half an hour, but its better to eat it hot to enjoy its actual taste. Lets see how to make this most popular Punjabi Samosa recipe with step by step pictures to make at home.

Samosa recipe

Samosa Recipe - How to make Punjabi samosa


Samosa Recipes - How to make Punjabi samosa How to make Bakery style Veg samosa at home
Cuisine: Indian
Category: Snacks
Serves: 8
Prep time: 30 Minutes
Cook time: 20 Minutes
Total time: 50 Minutes


INGREDIENTS
For Samosa cover
  • All purpose flour/Maida - 1 cup heaped ( 1 cup=250ml)
  • Melted ghee or cooking oil - 1 tbsp ( at room temperature)
  • Salt & water - as needed
  • Ajwain/Omam - 1/2 tsp
For Stuffing
  • Potato - 3 nos ( big)
  • Green peas - 1/4 cup
  • Chopped ginger - 1 tsp
  • Cumin seeds - 1/2 tsp
  • Chopped green chilli - 1 no
  • Fennel/Saunf powder - 1/2 tsp
  • Red chilli powder - 1/2 tsp
  • Dhania powder - 1 tsp
  • Aamchur powder - 1/2 tsp
  • Garam masala powder - 1/2 tsp
  • Chopped mint leaves + coriander leaves - 1 tbsp ( optional)
  • Salt & water - as needed
  • Lemon juice - few drops
HOW TO MAKE SAMOSA - METHOD

  • Take maida in a bowl.Add salt, ajwain and melted ghee or oil at room temperature (Not hot). Mix well with your fingers. It will look crumbly. Now add water little by little and make a tight dough. You may need to use nearly 1/4 cup +/- 1 tbsp of water. So make the dough properly. It should not become soft or sticky. It should be tight but not dry. Cover the dough with a wet cloth. Let it rest for 30 minutes.
Samosa recipe
Samosa recipe
  • In the mean time, Cut the potato into two and pressure cook it.Add enough water and 1/4 tsp of turmeric powder. In a small box, put the green peas and keep it inside the cooker. No need to add water. Green peas would cook well with the help of steam inside the cooker. Pressure cook them in very low flame for 2 whistle. Remove after the steam is released. Drain the excess water and drop the potatoes in cold water so that you can peel the skin quickly. 
Samosa recipe
  • Peel the potatoes and mash it roughly like chunks. Do not mash it completely. Make sure there are some pieces here and there. Heat oil in a kadai. Splutter jeera.Saute ginger pieces. Add the masala powders like fennel seeds powder, red chilli powder, dhania powder, garam masala powder and  aamchur powder. 
  • Mix well without burning them. Keep the flame low. Now add the mashed potato and cooked peas. Add salt, mix well. Add chopped mint+coriander leaves and sprinkle some lemon juice. Mix well and switch off the flame. Stuffing is ready.
Samosa recipe
Samosa recipe
  • Now take the samosa dough.Divide into 4 equal sized big balls. Dust a ball in maida and roll it to a slightly oblong shape. Cut into two semi circles. Apply water on the straight side. Now join the edges and make a cone shape. Press it well. Hold the cone between your thumb finger and pointer finger. Stuff 2 tbsp of potato masala till its 3/4th filled. Cover the remaining dough balls with a wet cloth.
Samosa recipe
Samosa recipe
Samosa recipe
  • Make a single pleat by folding the middle part. It should come just opposite to the sealed part. Apply water all over the edges completely. Now pull the pleated part and seal the samosa. It make a flat base to the samosa and forms a back bone to the samosa. Now your samosa can stand beautifully ; )) Make all the samosa and arrange in a plate.
Samosa recipe
Samosa recipe
  • Heat oil and check its temperature by dropping a pinch of batter. It should rise but not so quickly. Oil should be medium hot. Now drop the samosa. 2 or 3 at a time based on the quantity of oil. Deep fry the samosa in low to medium for long time.It takes nearly 8-10 minutes for one batch. Cook both the sides till it becomes golden.
Samosa recipe
  • Cooking for long time helps to make the samosa become crispy and stay crispy longer. This is one of the most important point for crispy samosa. Remove in a tissue and serve hot with sweet chutney or ketchup.
Samosa recipe
Enjoy !

Note
  • Do not add too much oil or ghee than the mentioned quantity. Adding more gives soft samosa instead of crispy ones. Adding oil gives the bakery kind of samosa than adding ghee. I have tried with both. The smell & flavor of samosa was good with oil than ghee. So its your choice.
  • Add more spice powders based on your taste. Adding lemon juice is optional. I used it to balance the spiciness.
  • You can use mixed vegetables instead of potato.

Enjoy this crispy, yummy samosa with sweet chutney & green chutney in your teatime !
Samosa recipe

Continue Reading...