Search Chitra's Food Book

December 19, 2011

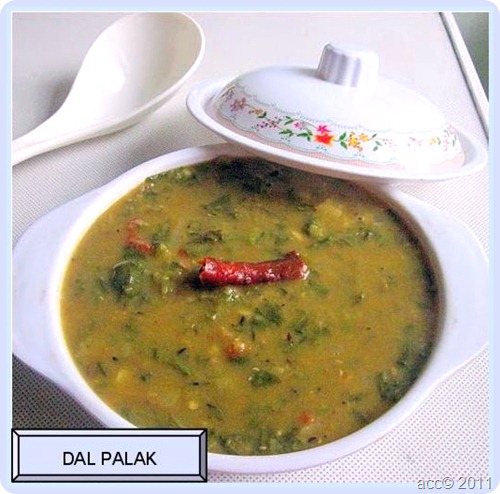
Dal Palak Recipe With Masoor Dal - Spinach Dal For Roti & Rice

I tried this dal palak recipe from Mrs. Mallika badrinath’s kurma book. I have tried with masoor dal. I googled so many recipes before trying this one but I found most of the recipes used toor dal / moong dal . I used masoor dal as mentioned in the cookbook.It’s a nice combination for roti. I made slight changes in the actual recipe according to our taste buds. Lets see how to make Dal palak with masoor dal / Spinach Dal Recipe.
dal palak

INGREDIENTS
1 cup - 200ml
  • Masoor dal – 1/4 cup
  • Palak / Pasalai keerai – 2 bunches  (hope u all the know the size we get in india) (roughly 2-3 cups after chopping)
  • Turmeric powder – 1/4 tsp
  • Salt and water – As needed,
To grind
  • Green chilly – 2 –3 nos
  • Ginger – 1 inch piece
To temper
  • Cinnamon – 1 small piece
  • Cloves – 2 nos
  • Methi seeds – 1/4 tsp
  • Jeera – 1/2 tsp
  • Red chilly – 1 no (pinched into two)
  • Garlic cloves – 5 nos (chopped finely)
  • Big onion – 1 no (chopped)
  • Tomato – 2 nos (-do-)
  • Curry leaves – a few
METHOD
  • Pressure cook masoor dal and palak with turmeric powder for 2 –3 whistles. The dal should be mushy.
  • Grind the ingredients given under “grind” to make a smooth paste by adding required water.
  • Now heat a kadai and temper all the items given above in the same order.
  • Add onions and tomatoes and saute till tomato turns mushy.
  • Add the ground masala and saute well for few mins.
  • Then add the cooked masoor dal & palak mixture and add the required water .
  • Allow it to boil well for few minutes.
Serve with roti.!!
Note: If u want to serve this for rice , just omit the cinnamon & cloves and try the same.

Continue Reading...


December 9, 2011

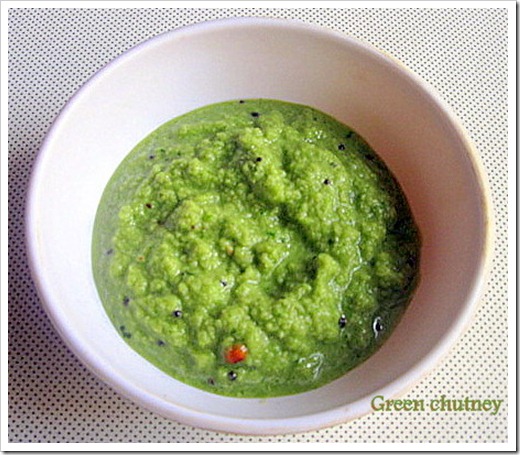
Coriander Leaves Chutney Recipe - Restaurant Style Kothamalli chutney

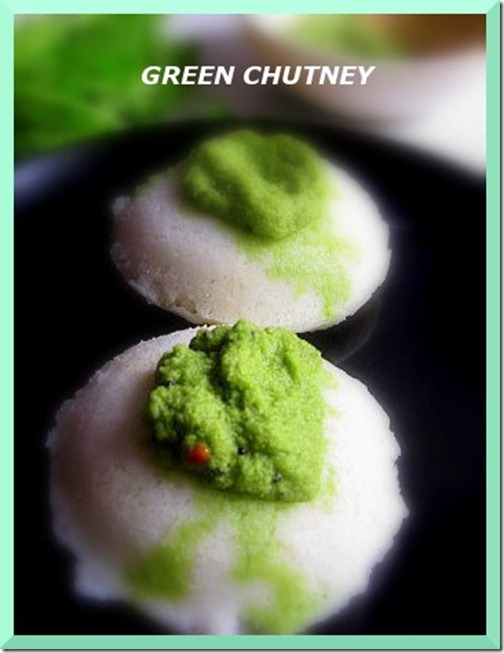
green chutney hotel style

I call this coriander leaves chutney as hotel green chutney. I’ve already posted hotel white and red chutney long back. This is also the same as white chutney but I added little coriander leaves. U can combine mint & coriander leaves in equal ratio and try the same. It tastes great with idli. I've given two versions. Please refer the notes section for the second version. Let’s see how to make this hotel style green chutney recipe.

Coriander leaves chutney recipe


Iyengar milagu kuzhambu Coriander leaves chutney/Green chutney recipe for idli, dosa!
Cuisine: Indian
Category: Chutney
Serves: 2
Prep time: 5 Minutes
Cook time: 5 Minutes
Total time: 10 Minutes


INGREDIENTS
1 cup - 250ml
    • Grated Coconut – 1/2 cup 
    • Green chilly – 3 - 5 nos ( add more for spicy chutney)
    • Dalia/ fried gram dal / pottukadalai – 1 tsp
    • Coriander leaves – 1/4 bunch
    • Turmeric powder – a big pinch
    • Garlic cloves – 3 nos
    • Tamarind - 1 small piece ( just 2 pinches)
    • Salt & water – As reqd.
    To temper:
    • Cooking oil – 1 tsp
    • Mustard seeds – 1/2 tsp
    • Urad dal – 1/2 tsp
    • Red chilly – 1 no (pinched into two)
    • Curry leaves – A few
HOW TO MAKE HOTEL STYLE CORIANDER LEAVES CHUTNEY - METHOD

    1. Take all the ingredients given above and grind it to a smooth paste by adding sufficient water. In a kadai, temper all the items given under “to temper”. Add to chutney.
    2. Serve with idli adding sesame oil
Enjoy !
Note
    • To get a good green colored chutney, Just saute the coriander & mint leaves in little oil for sometime, add a pinch of turmeric powder and then grind with other ingredients.
    •  Instead of sauting the leaves, you can just add a pinch of turmeric powder to get nice green color.
    • I make the same chutney in another way too.
METHOD - 2

I add little oil in a kadai and saute the green chillies, mint& coriander leaves, little dalia and finally coconut. Just saute everything one by one , mix well and grind together with salt and water. Do the seasoning. This is also a restaurant style green chutney. Do try this way too :)


    • The same chutney can be done using mint leaves or coriander leaves alone.
    • U can try the second method by just sauteing the leaves alone and grind with the other things raw.
    • At the end, add little lime juice for tanginess.

  • Check out my other versions of green chutney here & here.

hotel green chutney

Continue Reading...


December 2, 2011

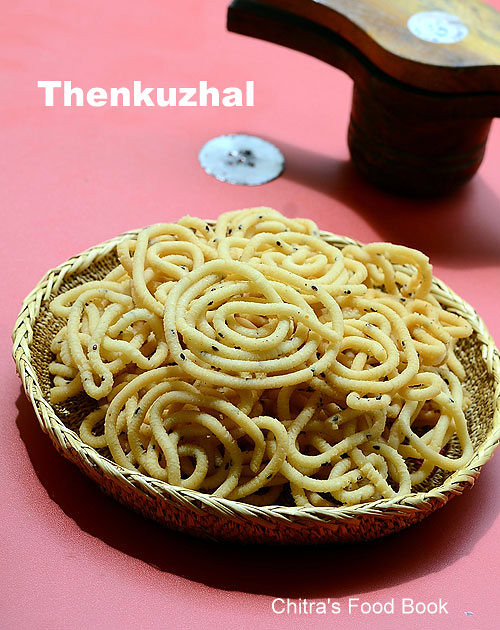
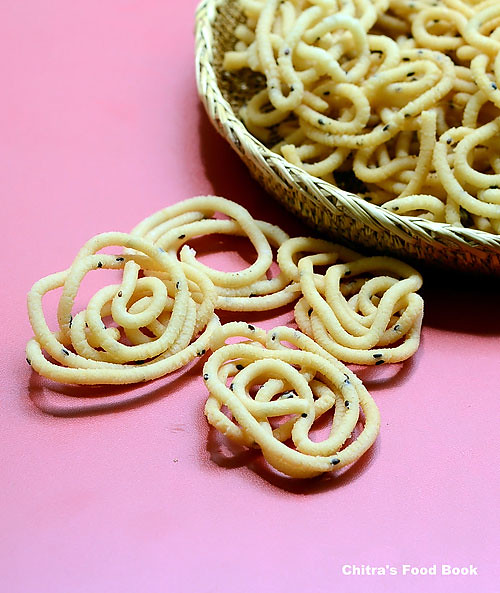
Thenkuzhal Murukku Step By Step Recipe With Video - Diwali Snacks Recipes

Thenkuzhal recipe

Mostly we all make thenkuzhal murukku for diwali or some special occasions. I love this murukku since my childhood days. I used to do all the pre preparatory works for making homemade murukku maavu like buying rice and urad dal, grinding it in flour mill, sieving etc. I sit with my mom & aachi when they make this for diwali especially to get the last batch of murukku. My mom make a batch of half cooked murukku ( we call it “arai vekkaadu” in tamil) for me. I love this murukku more than the crispy ones. I eat it hot immediately after taking out from the oil. 

Even today, my MIL make this specially for me. How sweet !!. I saw so many thenkuzhal recipes in blogosphere with different proportions of rice and urad dal. I wanted to share my version too. Hope this post helps beginners. Please go through the Notes section too. Now coming to my version with step by step pictures and video.


“””PLEASE HAVE A LOOK AT THE “POINTS TO REMEMBER” BEFORE STARTING..”””Thenkuzhal

Thenkuzhal murukku


Thenkuzhal murukku White thenkuzhal murukku for Diwali !
Cuisine: Indian
Category: Snacks
Serves: 25 nos
Prep time: 15 Minutes
Cook time: 20 Minutes
Total time: 35 Minutes


INGREDIENTS
1 cup - 250ml
  • Raw rice/Maavu arisi - 5 cups
  • Round urad dal - 3/4 cup
  • Fried gram dal/Pottukadalai - 1/4 cup
  • Butter – 4-5 tbsp (1/4 cup)
  • Asafetida / hing – 1/2 tsp
  • Jeera / cumin seeds or Black sesame seeds – 2 tbsp
  • Salt & water – As needed.
  • Cooking oil – for deep frying.
For small quantity : 1 cup = 250ml
  • Rice flour - 1 cup ( Storebought dry rice flour)
  • Roasted urad dal flour - 2 tbsp
  • Melted Butter - 1 tbsp
  • Hot oil - 1/2 tbsp
  • Hing - 2 pinches
  • Cumin seeds or sesame seeds - 1 tsp
  • Salt & water - as needed
  • Cooking oil - to deep fry
METHOD

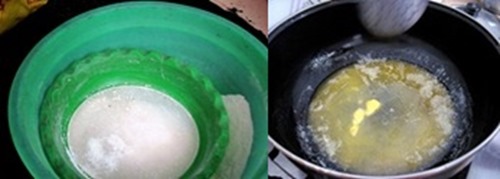
  • Heat a kadai and dry roast urad dal slightly without changing its colour. Roast till nice aroma comes from urad dal. Switch off the flame and add the fried gram dal. Now mix the rice, roasted urad dal and fried gram dal. Grind in flour mill or powder it in mixie. If you use mixie to grind the mixture, please don’t forget to sieve the flour. Flour should be very fine in texture. This is called “murukku maavu”. If you have store bought readymade murukku maavu, you can use it. OR you can use store bought dry rice flour and make urad dal flour at home. 
  • Melt butter and set aside. You can add soft butter at room temperature as well. 
thenkuzhal
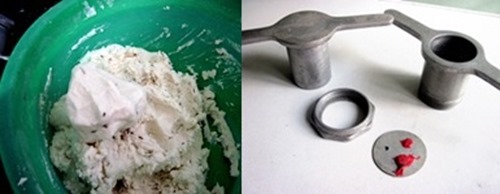
  • To this murukku maavu, add salt, melted butter, hot oil, hing, jeera or sesame seeds and water to make a non sticky dough. Take the murukku press and mould with one whole. Fill the dough and set aside..
thenkuzhal-recipe
  • Heat the oil in a broad kadai and and press the murukku in circular motion directly in oil or press the murukku in a polythene sheet or in the back of ladle separately and then drop in hot oil. This way you get a nice shape. If the string gets cut while pressing, either urad dal flour is less or water is less. So add 1 tsp more urad dal flour and drizzle some water, mix well and try it.  After you press the murukku , please stand a few feet away from the kadai. Sometimes, very rarely murukku may burst like seedai . If it doesn’t burst, then proceed.
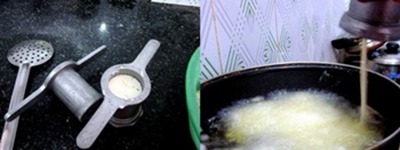
thenkuzhal-recipe-1
  • Cook for sometime. Flip and cook for some more time till the hiss sound and bubbles ceases. Do it in medium flame. Adjust the flame whenever needed. Remove and drain in a paper towel.. Store in an air tight container after it cools down.
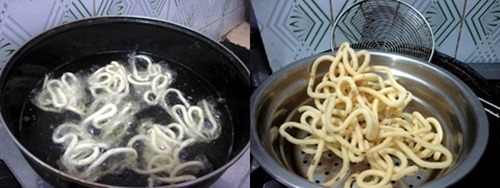
thenkuzhal-recipe-2

Don’t forget to try the half cooked murukku in the last batch. For this, after you press the murukku in oil, just flip immediately and remove in 10 secs.. Eat it hot !!
White colored, crispy thenkuzhal is ready to enjoy !!

Note
  • When you make murukku in large quantities , make the dough in batches to avoid the dough from drying. Also cover the dough with a damp cloth or a lid while cooking murukku. This helps in getting white colored murukku for all the batches. Otherwise color may vary for the last batches.
  • If murukku breaks while pressing, there may be less water in the dough or urad dal flour is coarse. In that case, you can sprinkle some water to the dough and mix well OR add little hot oil and try pressing. It may come out well. 
  • We have added fried gram dal and butter to get the crispness & white color . But usually fried gram dal is not added in thenkuzhal. Its purely optional.
  • Adding too much of butter makes the murukku look oily and becomes soggy very soon. Shelf life gets reduced.
  • Adding more urad dal flour or too much of roasting the urad dal results in dark colored murukku.So make sure u roast the urad dal without changing the color..
  • The murukku flour should be very fine in texture otherwise it may burst while cooking. So I always sieve the flour for safer side. 
  • Use enough oil for deep frying. Add more oil after few batches if necessary.
  • Drop or press the murukku only when the oil becomes hot. U can find this by dropping a pinch of flour. It rises up quickly. This is the correct heating point. Do not let the oil fume. Always keep the flame in medium for even cooking.
  • Instead of pressing in oil directly, you can try pressing it in the back of ladle greased with oil or greased polythene sheets. This way you’ll get nice shape.  
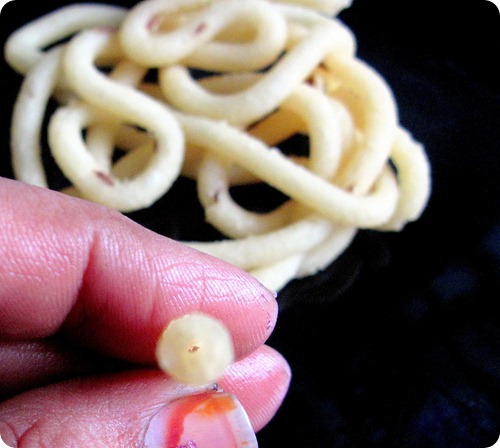
  • After cooking when you break the murukku, you can see a hole in the middle of the murukku like  funnel. This denotes the murukku is perfect !!
Thenkuzhal murukku

Perfect thenkuzhal must form a hole. Can you see the hole in the broken murukku piece ? :))
Thenkuzhal-murukku
Catch you all in my next post. Bye. Have a gr8 weekend.

Continue Reading...


November 28, 2011

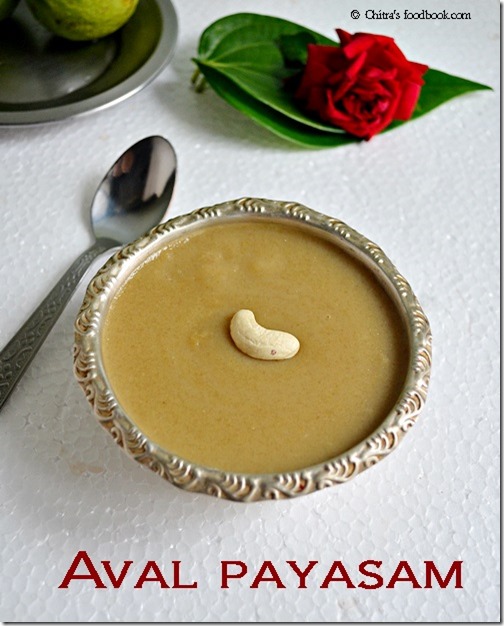
Aval Payasam with jaggery | Poha kheer with jaggery - Rice flakes payasam recipe

aval-payasam

I make this aval payasam every Friday for Lakshmi pooja. This is the simplest & delicious payasam that can be made in 10-15 minutes in a pressure cooker with a video below. 


INGREDIENTS
1 cup - 250ml

  • Thick rice flakes / Poha/ Aval - 1/2 cup
  • Powdered jaggery - 3/4 cup or 1 cup
  • Boiled milk /coconut milk - 1/4 cup
  • Cardamom seeds - 2 nos (powdered)
  • Ghee - 2 tsp
  • Water - As  required (around 2 to 2.5 cups)
  • Roasted Cashews - a few
For additional flavour roast in a tsp of ghee & add the following
  • Cloves /Krambu- 2 nos
  • Roasted Nutmeg powder/ Jathikkai - A pinch
  • Edible camphor / Pachai karpooram - a pinch

HOW TO MAKE AVAL PAYASAM - METHOD

  • Heat a kadai with a tbsp of ghee and roast the cashews. Set aside. Clean the aval & remove the drbris if any. 
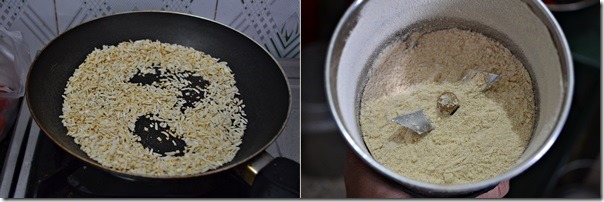
  • In the same kadai,  roast the cleaned aval and cardamom together for 3-4 mins. Aval becomes crispy and turns little brown. Allow it to cool. Powder it nicely. If you don't want to powder the aval, wash the roasted aval and cook it.  AVAL PAYASAM TILE1
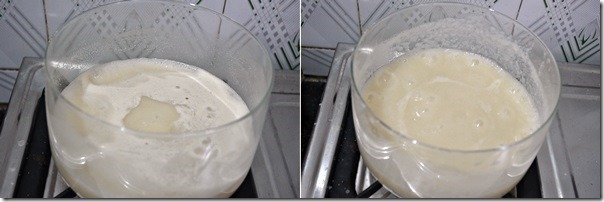
  • Now take the water in a bowl and add the powdered aval. Mix well, there should be no lumps. Cover and cook for 5 mins. Stir in between and check the water level. Add more water if needed. It thickens after few minutes.
AVAL PAYASAM TILE2
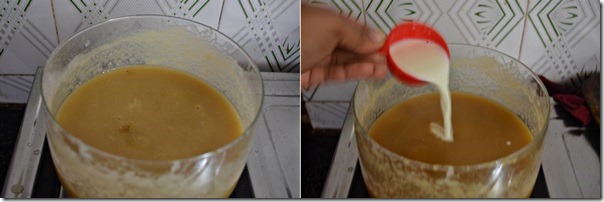
  • Now add the powdered jaggery and mix well. Allow it to boil for 5-10 mins. Finally add the roasted cashews. Add the items given under "flavour" if necessary. Switch off the flame and add 1/4 cup of boiled milk or coconut milk. Serve hot or cold !!
AVAL PAYASAM TILE3

NOTE
    1. U can add coconut milk for richness. But it should be added at the end before switching off the flame.
    2. If you feel sweetness is more, add little boiled milk.
    3. When you add milk along with jaggery , payasam gives a curdled look. To avoid this, add milk only after switching off the flame.
    4. If you want, you can replace jaggery with sugar.
    5. Here i've powdered the aval. If you wish, you can roast the aval, wash and cook as it is. It will take little more time to cook. So you can use a presssure cooker for quick cooking. 

Continue Reading...


November 22, 2011

Green Gram Rice Upma - Paasi Payaru Recipe

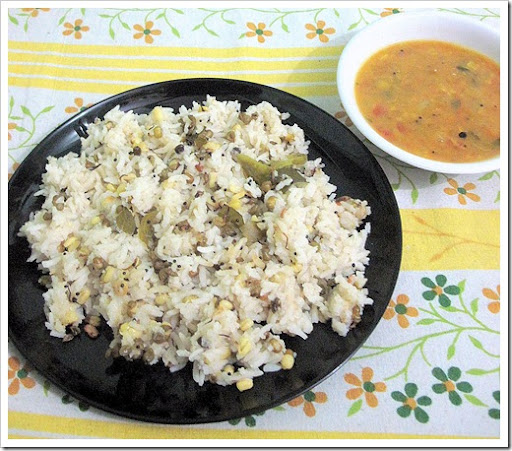
I made this upma for dinner yesterday. Its a simple one pot meal. It tastes best with sambar.I add equal amount of rice and green gram dal ( Pacha Payaru/Paasi pauaru in Tamil) in this upma. So its very filling and rich in protein. We wanted little mushy. So I added more water.But if u add the quantity of water given below, u'll get the rice grains separate and fluffy. Please use the water according to your choice.
green gram upma

INGREDIENTS
1 cup - 200ml
  • Steamed rice or Raw rice - 1/2 cup
  • Green gram / Pacha payaru - 1/2 cup
  • Water - 1- 1.25 cups
  • Salt - As needed
To temper
  • Cooking oil - 1 tbsp
  • Mustard seeds - 1/2 tsp
  • Urad dal - 1/2 tsp
  • Channa dal - 1/2tsp
  • Green chilly - 2 no (slit into two)
  • Curry leaves - A few
  • Ginger- 1 inch (cut into pieces)
  • Hing / Asafetida - 3-4 generous pinches

METHOD
  • Heat a kadai and dry roast the rice till it slightly puffs up.
  • In the same kadai add a tsp of oil and roast the green gram until nice aroma arises.It may take 5-8 mins.
  • Now heat 1 tbsp of oil and temper the items given above in the same order.
  • Then add the roasted rice and dal. Add the required water and salt .Transfer everything into a pressure cooker.
  • Add a drop of oil and a pinch of hing .Pressure cook for one whistle.
Delicious upma is ready to serve. I served with AAB sambhar.

Continue Reading...


November 15, 2011

Pidi Karunai Kizhangu Chops / Yam Fry Recipe

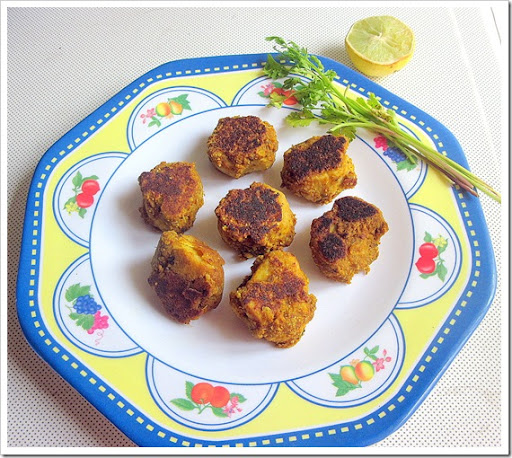
I love chops made with vazhakkai and senaikizhangu ( Elephant yam ).Recently I bought small sized black colored pidi karunai kizhangu from my native.I heard its a good remedy for piles. We usually make vatral kulambu by adding this kizhangu. This time i tried chops by searching the recipe.I got from a discussion forum hub. It was very nice and aromatic with the perfect blend of spices. The original recipe was named as "Karunai kizhangu kola urundai" and it was told to deep fry. But I followed the same recipe and made in dosa tawa instead of deep frying. I would say this recipe is apt for making with elephant yam and raw banana. My doter loved it very much.We enjoyed with sambhar  and curd rice !!
yam fry

INGREDIENTS
  • Pidi karunai - 4 nos
TO GRIND:
  • Pottukadalai/ Fried gram dal/ Dalia - 3 tbsp
  • Tamarind paste - 1/2 tbsp
  • Turmeric powder - A pinch
  • Cloves - 2 nos
  • Cinnamon - 1 inch piece
  • Fennel seeds/ Soambu - 1 tsp
  • Garlic cloves - 4 nos
  • Red chillies - 5 - 7 nos
  • Shredded coconut - 1 tbsp
  • Ginger - 1 small piece
  • Salt & water - As needed.
  • Lime juice - Optional
  • Coriander leaves - To  garnish.

METHOD
  1. Wash & soak the kizhangu in abundant water for sometime to remove all the mud.
  2. Pressure cook in high flame for 1 whistle.It should be half done.(Skin should be hard to touch)
  3. Now grind all the items given above adding required salt & water to make a smooth paste.
  4. Remove the skin of the kizhangu and chop it round.
  5. Now mix the paste ans marinate for sometime. The  kizhangu should be fully coated with the paste.
  6. Now heat the dosa tawa and sprinkle some oil. Cover Cook the marinated pieces for sometime.Keep the flame low for even cooking. flip the pieces to cook the other side and do the same.
  7. I Wanted a brown layer to be formed so i kept for a longer time.
  8. Finally garnish with coriander leaves and add lime juice if necessary.
  9. Karunai kizhangu Chops is ready !!

NOTE
  • If u want to try kolas , just cook the kizhangu well till it mashes.Mash it with ur hands and add the paste.Mix well. Add finely chopped onions and coriander leaves . Make small balls and deep fry them in batches.
  • If u wish to try the same with senai / elephant yam , add little more tamarind paste by avoid the irritation in tongue.Add less tamarind paste to make the same with raw banana.

Elephant Foot Yam 300x200 Know about Karunai Kilangu (Elephant Foot Yam)
Continue Reading...


November 9, 2011

Vazhaithandu Juice / Banana Stem Juice Recipe - Sweet And Salt Version

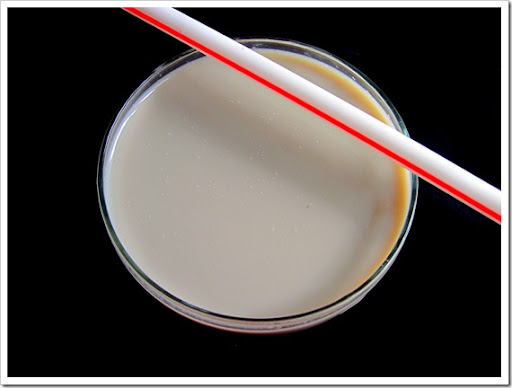
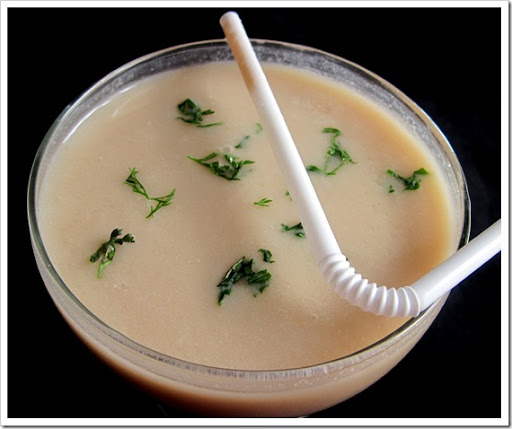
I really got bored of making thogayal, pachadi and poriyal with vazhaithandu.My husband hates to eat vazhaithandu just becoz it takes so much time to chew n eat ;). I heard drinking vazhaithandu juice in empty stomach is one of the healthiest way to include in our diet. Its a hassle free job too.Last month when i went to my native ,we tasted this juice in Salem, Lakshmi hotel. We loved it.It was mild in sweet and they served it chilled. We couldn't find out its the juice of vazhaithandu .I wanted to try the same at home.I tried sweet and salt versions. Both were excellent. I dint serve it cold, I made at room temperature.Finally its your choice  !!

vazhaithandu juice sweet
SWEET JUICE

INGREDIENTS
  • Plantain stem /Vazhaithandu - 1 /2 no (medium size)
  • Boiled Milk - 1/2 cup (adjust)
  • Sugar - 2 tbsp
  • Water- If necessary

METHOD
  • Remove the outer layer of vazhaithandu till core ( At this point u dont have layers to remove).
  • Cut into rings while removing the fibre simultaneously that comes between the rings .
  • Chop into small pieces .Grind with sugar and milk.Add more milk & sugar if necessary.
  • Strain in a double cloth filter.Pour in a serving glass.
  • Serve it chilled or at room temperature !!

SALT VERSION
INGREDIENTS
  • Vazhaithandu - 1/2 no (medium size)
  • Sour curd - 2tbsp
  • Salt & water - As needed
  • Pepper powder - 2 pinches (optional)
Coriander leaves - To garnish
METHOD
  • Repeat steps 1 and 2 given in the above version and cut the stem into pieces and immerse in buttermilk to avoid color change.
  • Grind the pieces along with curd and salt.
  • Add more water , whisk and strain in a double cloth filter.
  • Pour in a serving glass and  garnish with little coriander leaves
  • serve chill!! 

Vazhaithandu juice salt

NOTE
  1. Drinking vazhathandu juice alone doesnot help u to shed ur weight. U have to carry on the other things like diet .excercise etc.
  2. U can prepare the juice in another way .Grind the Banana stem with salt , pepper powder and lime juice. Filter and enjoy !! Hope this method sounds easier.
Technorati Tags: ,,,,
Continue Reading...


November 1, 2011

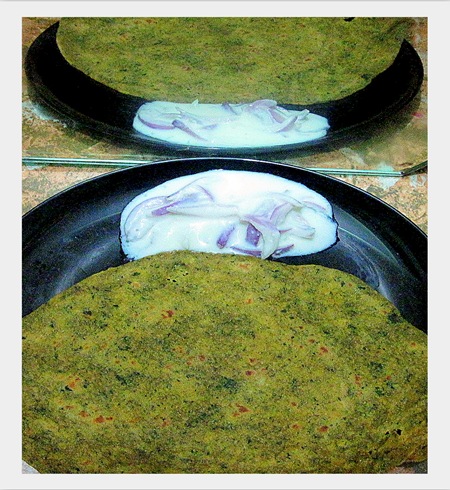
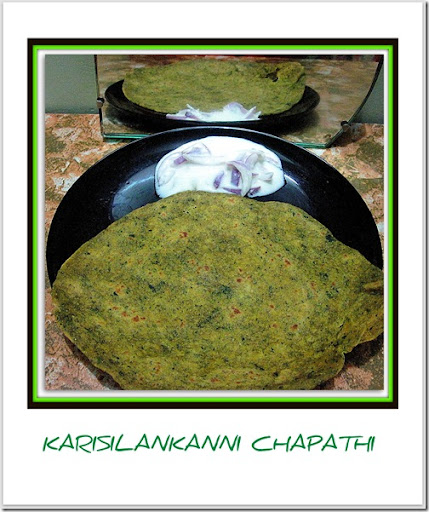
Karisalankanni Keerai Chapathi - Keerai Paratha

Nowadays i am using karisilankanni keerai in my cooking twice a week for health reasons. I make kootu and this chapathi.But i would say,we love this chapathi more than kootu ;) It is very easy to prepare.I make this for my hubby's lunch box. It stays softfor hours and onion raita is the best side dish. I use the same method to prepare palak and other keerai chapathis.

keerai chapath

INGREDIENTS
1 cup - 200ml
  • Karisalankanni leaves- 1 bunch
  • Wheat flour - 1 cup
  • Besan flour  - 1 tbsp
  • Sambar powder - 1 tsp
  • Garam masala powder - 1/2 tsp
  • Curd - 1/5 cup ( adjust)
  • Olive oil - 1 tsp
  • Salt -as needed
  • water - As needed
METHOD
  • Wash the leaves .Heat the kadai with a tsp of oil  and saute the leaves till it reduces to half in quantity.
  • Grind to make a smooth paste by adding little curd . Now in a bowl , take the wheat flour,besan flour , sambhar & garam masala powder,salt and water.Knead well to make a soft , pliable dough.
  • Roll to make thin chapathi and toast on a dosa tawa.
  • Serve hot with onion raita and pickle.

keerai chapath 1      

Technorati Tags: ,,
Continue Reading...


October 20, 2011

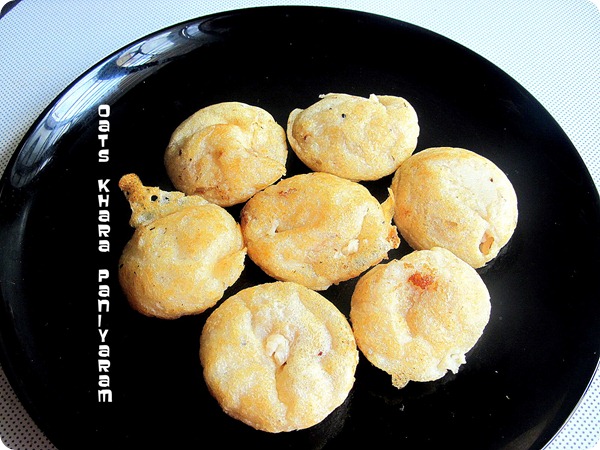
Oats Kara Paniyaram Using Leftover Idli/Dosa Batter

                                      oats paniyaram

Nowadays i am making oats buttermilk porridge and oats- wheat rava idly for my hubby very often. I wanted to try some other simple and yummy dish with oats. Last weekend i tried this for our breakfast . I got this recipe from aval vikatan supplementary. It was very nice. The actual recipe called for grinding , fermenting and all. But i made an instant paniyaram with little left over idli/dosa batter. The taste was awesome. It was like the usual one we make with idli batter.We loved it. Try this and let me know.I’ve also written the actual recipe at the end of the post.Please have a look at it.
INGREDIENTS
  • Quaker quick oats – 1/4 cup
  • Idly / dosa batter – 1/4 cup
  • Salt & water – As needed
To temper
  • Olive oil/ Cooking oil – 1 tsp
  • Mustard seeds – 1/4 tsp
  • Urad dal – 1/2 tsp
  • Channa dal – 1/2 tsp
  • Big onion – 1 no (chopped finely)
  • Green chilly – 1 no (-do-)
  • Ginger – 1 small piece
  • Curry leaves – a few
SOUR CURD – 1.5 TSP (OPTIONAL)

METHOD
  • Dry roast oats for few minutes and grind to make a fine powder.
  • Mix  idly batter and powdered oats with the required salt and water. The batter should not be too thick.
  • Temper all the items given above and mix in the batter.
  • Take a non-stick paniyaram pan and pour the batter. Drizzle little oil if necessary.
  • Cover and cook for sometime. Flip and cook the other side for few mins.
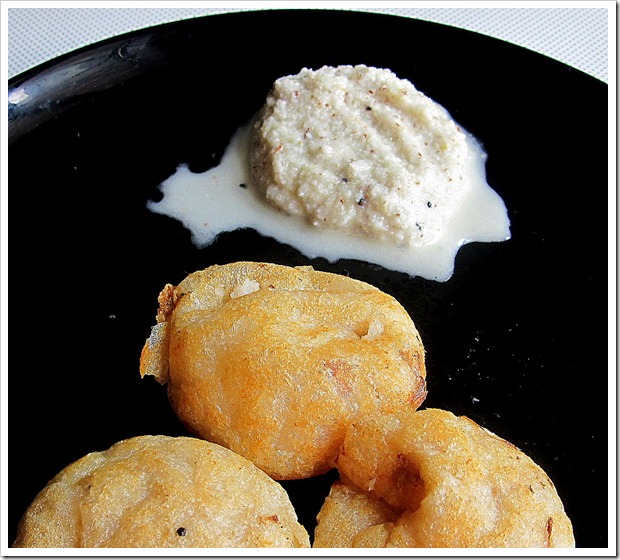
Delicious oats paniyaram is ready to savour with coconut chutney or any other chutney of ur choice !!

NOTE
  1. This paniyaram would be very soft inside . So dont think its uncooked. It cooks very fast just like our normal paniyaram . Just cover and cook in sim fire for sometime. Its enough.
  2. I dont like the smell of oats to be dominant here . So i’ve added equal quantity of oats and idly batter. U can lesser the amount of idli batter and try.
  3. Sometimes the sourness of batter may reduce if u add oats. Add little sour curd if needed.

ACTUAL RECIPE GIVEN IN THE BOOK
  • Quaker quick Oats– 1 cup
  • Urad dal – 1/2 cup
  • Salt & water – as needed
To temper :
The same ingredients as mentioned above.
METHOD
  • Soak the urad dal for 30 mins and grind with oats in a mixie .
  • Leave it for 4 –5 hrs for fermentation. If u feel the batter is not sour , add little curd to it. Now make the paniyaram with seasoning as mentioned above


oats paniyaram 1


Continue Reading...


100 DIWALI SWEET RECIPES FROM INDUS LADIES- MOST AWAITED E-BOOK IS PUBLISHED

                                                             diwali-banner-300x250 (1)

I think i am the last one to write about this most eagerly awaited e-book from Indus ladies .U can download this e-book here . There are so many wonderful , unique recipes being published.I am elated that my BOONDHI LADOO recipe is also featured in this book :) Thanks a lot INDUS LADIES !!
Continue Reading...


October 16, 2011

Ulundhu Kali / Urad Dal Kali Recipe - Tirunelveli Style

ulundhu kali recipe

I hope many of you (ladies) would have tasted this ulundhu kali at the time of puberty. Today I have shared this ulundhu kali recipe learning from my aachi in Tirunelveli / Nellai.  People usually make this ulundu kali using black urad dal with skin and palm jaggery(Karupatti in Tamil) as it is supposed to be more healthy. In Tamil nadu , our grand mothers used to give this for the teen aged girls to make the bones strong especially hip bones. When my Tiruenlveli aachi gave this for me, I have literally cried a lot to eat this. But now I know its importance. Nowadays at this early age (30+), we get pains in joints and back very often. We are not able to bend continuously for sometime. We get pain in spine. This shows the weakness of our bones. Urad dal helps to strengthen the bones. 

Apart from this, urad dal has lots of other health benefits too. So its better to have urad dal in our regular diet to avoid all these problems. Apart from eating idli/dosa and vada, I feel this is also a good choice of including urad dal in our daily diet..So lets see how to make this ulundu kali/Urad dal kali at home.

INGREDIENTS
  • URAD DAL – 1/2 cup
  • JAGGERY or PALM JAGGERY – 1/2 cup
  • GINGELY OIL – 1/4 cup
  • CARDAMOM SEEDS – 2 NOS (optional)
  • WATER – 2 cups

METHOD
  • In a kadai, dry roast the urad dal till you get a nice flavor. Powder it in a mixie adding cardamom seeds. Store it in an air tight container.
  • Now take 4 tbsp of urad dal powder in a bowl and mix 2 cups of water.
  • Cook the urad dal for 7-8 mins. It thickens. Stir well for sometime and make sure there are no lumps formed. 
  • Now add the powdered jaggery and mix well. Keep the fire in low flame. Allow it to boil till the raw smell of jaggery emanates. (You can also melt the jaggery, strain the syrup and add to urad dal). 
  • Add the gingely oil  in 1 tbsp at regular intervals and stir well. Kali absorbs all the oil. Keep mixing in low to medium flame. At one stage, it thickens and leaves the pan completely. It starts to leave little oil in the corners. 
  • U’ll get a glossy, sliding non sticky kali is ready to enjoy .
Delicious , healthy uluthankali is ready to eat !!

NOTE
  • If you use palm jaggery instead of jaggery , dissolve in water and make a syrup. Strain and use.
Continue Reading...


October 3, 2011

MIXED FRUITS AND VEGETABLE SALAD WITH SPROUTS

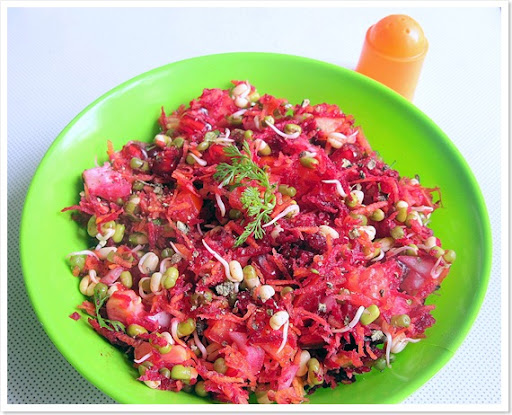
I wanted to make a simple , healthy salad with sprouts, mixed vegetables and fruits for a long time. I googled so many basic salad recipes and came out with my version.Here i used grated beetroot .So the color of beetroot dominates here. Otherwise it would be a colorful salad to attract ur kids. Make ur choice of adding or omitting the veggies and fruits given in this recipe.
SPROUTS SALAD

INGREDIENTS
For 1 person
    • Sprouted green gram - 1 handful
    • Carrot - 1 no(grated)
    • Beetroot - 1/2 no ( grated) (optional)
    • Big onion - 1/2 no (chop finely)
    • Cabbage - Few leaves ( chop finely)
    • Pomegranate - 1 handful
    • Guava - 1/2 no ( Chop into squares)
    • Coriander leaves - A few
    • Lime juice  - Few drops
    • Pepper powder - 1/2 tsp
    • Salt - As needed
METHOD
  • Take a wide bowl and mix all the ingredients given above. Squeeze a few drops of lime juice. Mix well and serve !!

Variations
  1. Add two pinches of chat masala to the above recipe to give a nice flavor. But adjust the salt as chat masala contains salt.
  2. U can also add chopped tomato pieces and cucumber pieces when u want to serve instantly otherwise the salad may become watery. 
  3. I usually pack the above salad for my hubby's lunch box without tomato and cucumber.
Continue Reading...