Search Chitra's Food Book

December 4, 2013

Tomato Rice Using Rice Cooker

Tomato rice/thakkali sadam
I usually make tomato rice using pressure cooker. Recently my friend Shalini told me to try in electric rice cooker without using a kadai and she shared her recipe too. I love tomato rice only when it is fully packed with garam masalas. For Sendhil, it should be with least spices. So I tried Shalini’s recipe which has very less spices with a south Indian touch. He loved it a lot. I have made it many times so far.

It comes out very well. Thank you Shalini. This recipe will be helpful for working women and bachelors. Do try this method and let me know your feedback. If you like without garam masala, try this recipe else follow this way. Nowadays I use my rice cooker for making pongal, pulao & biryani.The best thing I love in rice cooker is the aroma of the food it renders while boiling.:) It smells awesome while it cooks. Friends , Do try this one shot tomato rice recipe and make yourself free :)

Tomato rice using rice cooker

Tomato rice


Tomato rice 
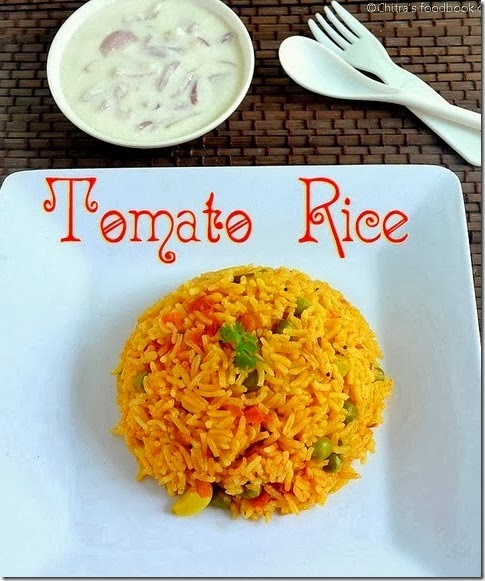
How to make tomato rice recipe directly in electric rice cooker without using a kadai.
Cuisine: Indian Category: Lunch Yields: Serves 3
Prep Time: 10 Minutes Cook Time: 20 Minutes Total Time: 30 Minutes


INGREDIENTS
1 cup - 250ml

  • Basmati rice - 1 cup
  • Ripe tomatoes - 5 nos
  • Big onion- 2 nos
  • Fresh Green peas - 1/4cup (optional)
  • Green chillies - 2 nos
  • Garlic cloves - 10 nos
  • Red chilli powder –1- 1.5 tsp
  • Turmeric powder - 1/4 tsp
  • Curry leaves - few
  • Salt - as needed
  • Water – 2.5-3 cups
To temper
  • Cooking oil+ghee - 3 tbsp + 1 tbsp
  • Mustard seeds - 1/2 tsp
  • Urad dal - 1 tsp
  • Channa dal - 2 tsp
  • Cumin seeds –1/2 tsp
  • Coriander leaves – 2 tbsp (to garnish )
METHOD

  • Switch on the rice cooker and keep it in “cooking mode”. Let the plate get heated for few minutes. Then add oil and ghee together in the centre of the slotted plate. Oil & ghee will spread and moves all over the plate as it gets heated.
tomato rice ricecooker tile2
  • Wash the basmati rice and set aside.I din’t soak it. U can soak for 20 minutes. Slice the onions and finely chop the tomatoes. Slit the chillies and peel the garlic.
  • Now add all the items given under “to temper” in the same order. Mustard seeds won’t splutter. But it will sizzle. Roast the dals and jeera for few seconds.
tomato rice ricecooker tile1
  • Then add the onions, green chillies, curry leaves and garlic cloves. Saute well. Add powdered salt for quick sautéing. Then add green peas and saute for few minutes.
tomato rice ricecooker tile3
  • Lastly add the finely chopped tomatoes, turmeric powder, red chilli powder and saute for 2 minutes till tomato turns mushy. Make sure the cooker is in cooking mode. If it goes to warm mode, switch to cooking mode. Finally add 3 cups of water, cover with the lid and allow it to roll boil.
tomato rice ricecooker tile4
  • After the water starts to roll boil, add the rice without water. Check for salt and cover cook for sometime. Cooker will automatically switch to “Keep warm” mode. Open the lid and check whether rice is cooked well. If not add 1/2 cup of water, mix well and again switch it to “cooking” mode.
tomato rice ricecooker tile5
  • After the rice is done, let it be in “Keep warm” mode for 30 minutes because rice will cook well and soft in warm mode. Garnish with coriander leaves.
tomato rice ricecooker tile6

Serve with raita and Enjoy !

Note
  • I used 3.5 cups of water as my husband wants it slightly overcooked. U can use 3 cups and try.Keep this water quantity as reference and adjust as per ur liking. 
  • If you soak rice for more than a hour, you can use even lesser water, say 2.5 cups.
  • For variations, U can add all the spices like cinnamon, cloves, bay leaf and elachi along with tempering ingredients.
  • Adding green peas is optional. If you use dried peas, soak over night and add them.
  • Check the mode of rice cooker every now and then. It may go to warm mode very soon. Switch the nob to “cook” mode whenever needed. Sometimes, it may not go to cooking mode when you try to change. At that time, switch off the rice cooker for a minute and again try changing the mode, it will work.
Continue Reading...


December 2, 2013

Pudalangai Poriyal | Snake Gourd Poriyal - Side Dish For Rice


Pudalangai poriyal
Pudalangai poriyal recipe makes a rare appearance in my kitchen because Sendhil is not fond of this.Also I don’t get lengthy snake gourd like we get in Tamil nadu instead it looks short & stout here. My MIL calls this as”Panni podalangai" Tongue outand she had told me not to buy those varieties. So,whenever I find a lengthy one, I buy it and make kootu or poriyal. This is my MIL’s version. Its very simple to make and comes out tasty too. We can make it with or without coconut. It tastes great for sambar and paruppu urundai kuzhabmu.
Podalangai poriyal

Snake gourd poriyal


Snake gourd poriyal Snake gourd curry/Podalangai poriyal recipe - Simple n delicious side dish for rice
Cuisine: Indian Category: Side dish Yields: Serves 2
Prep Time: 10 Minutes Cook Time: 15 Minutes Total Time: 25 Minutes


INGREDIENTS

  • Snake gourd - 1 no
  • Moong dal - 2 tbsp
  • Grated coconut – 3 tbsp(optional)
  • Sugar – 1/4 tsp
  • Salt & water - as needed
To season
  • Cooking oil - 2 tbsp
  • Mustard seeds - 1 tsp
  • Urad dal - 2 tsp
  • Red chilli - 2 nos
  • Green chillies - 2 nos (Slit into two)
  • Curry leaves - few
  • Big onion - 1 no

METHOD

  • Wash and cut the snake gourd’s head & tail part.Then into two pieces vertically.Remove the soft middle part using ur hands.Cut it vertically into two.Then cut it into small stripes.
Pudalangai poriyal step by step
  • Add moong dal and salt.Mix well and leave it aside for 10–15 minutes.It may leave little water.Do not squeeze it.If u squeeze,it will leave more water and loses all its nutrition.So its better to collect the water it leaves & use it while cooking.
Pudalangai poriyal step by step
  • In a kadai,heat oil.Temper all the ingredients as given above.Saute finely chopped big onions&chillies till onion turns transparent.Then add the snake gourd pieces and little sugar.Sprinkle the reserved water. Mix well & press it lightly.
Pudalangai poriyal step by step
  • Cover the kadai with a lid and simmer the flame completely.Sprinkle water every now and then and stir it.In 10-15 minutes,snake gourd will be completely cooked.
  • Add grated coconut at the end,mix well and switch off the flame.
Pudalangai poriyal step by step


Note

  • U can avoid onions while sauteing to make a no onion no garlic version.But add more grated coconut at the end to give a nice taste.
  • Sometimes I use only red chillies to saute.

Podalangai poriyal plate

Continue Reading...


November 29, 2013

Beach Style Kara Pori / Masala Kara Pori Recipe - Snacks Recipes


Beach style Kara Pori/Spicy puffed rice is one of the yummiest beach side snacks recipes like thenga manga pattani sundal, Milagai bajji, Roasted peanuts, Sutta solam etc etc that one should never miss tasting in beaches.Recently when my parents visited me, I bought a big raw mango to make my dad's favorite instant mango pickle. I had some left over puffed rice which I bought for making karthigai pori urundai. When I saw both in my kitchen, I was tempted to try this beach style masala kara Pori with onion. 

As I had bookmarked my SIL’s recipe, I quickly referred it,also went through this recipe and got few suggestions from Sendhil. I modified it slightly as per our taste and tried it. I din’t add cucumber and I used very less tomato (as told by Sendhil) as it makes the puffed rice soggy very quickly. It came out very well & was so so nice. We enjoyed eating kara pori as well as cut raw mango coated with chilli powder & salt like we get in beach. It was heavenly!!


Beach style kara pori


Beach style kara pori Yummy, a must try beach style snack !
Cuisine: Indian Category: Snacks Yields: 2
Prep Time: 10 Minutes Cook Time: 2 Minutes Total Time: 12 Minutes


Kara pori ingredients (2)


INGREDIENTS
1 cup - 250ml

  • Fresh puffed rice/Pori - 2 cups
  • Boiled peanuts - 1/2 cup
  • Grated carrot - 3 tbsp
  • Raw mango – 4 tbsp(finely chopped)
  • Big onion - 2 nos( Use 1 if too big, finely chopped)
  • Tomato - 1 no ( I used a very small one, finely chopped)
  • Turmeric powder - 1/8 tsp
  • Red chilli powder - 1- 1.5 tsp
  • Salt - as needed
  • Lemon juice – 2 tbsp ( juice of 1 big lemon)
  • Coriander leaves - 2 tbsp (finely chopped)
HOW TO MAKAE BEACH STYLE KARA PORI - METHOD

  • Pressure cook the fresh peanuts adding salt for two whistles. If you use dried peanuts,soak in hot water for 2 hours & proceed as above. Chop & grate the veggies mentioned above. Keep everything ready.
  • In a wide bowl, mix all the ingredients except puffed rice & lemon juice.
  • Just before serving, add the puffed rice & squeeze the lemon juice. Check for taste and balance it. Add more lemon juice as tanginess should be more. Serve immediately.
kara pori step by step

Enjoy !


Note
  • Skip raw mangoes if you don’t get it. But it tastes great when combined with all these ingredients.
  • U have to soak the peanuts for a minimum of one hour in hot water & keep in a hot casserole if you want to cook it quickly else soak for 3-4 hours in normal water. Add salt while cooking.
  • U can also add finely chopped cucumber pieces & grated beetroots as done in some beaches.
  • Adjust red chilli powder according to your taste. As tangy taste is more dominant than spicy taste, I used more lemon juice. Adjust as per your liking.

Enjoy beach style kara pori as an evening snack ! You'll love it :)
2

Continue Reading...


November 27, 2013

Poori Recipe / How To Make Puffy Poori – South Indian Puri Recipe

poori recipe
Poori/Puri is an yummy Indian breakfast recipe that is loved by all irrespective of their ages. I usually make poori recipe for guests and in weekends. Raksha loves to eat this more than chapati. As we all know making puffy, crispy as well as soft poori is a bit tricky. It has to be puffy at the same time it should be soft. So I have used rava(suji) and ghee along with wheat flour. Rava/semolina helps to give crispy, puffy poori and ghee makes it soft. 

Apart from the ingredients, consistency of the dough, rolling thickness of puri, oil temperature everything matters here. So I have shared the South Indian style poori recipe with tips and tricks based on my observation & from the cookbooks I read. I have also shared a full video recipe for better understanding. Hope it will be useful for beginners.Lets see how to make puffy poori at home with a video !
Over to the recipe with a full video :)


poori recipe

Poori recipe


Poori Recipe Poori/Puri recipe- South Indian deep fried flat bread,kids favourite recipe!
Cuisine: Indian Category: Breakfast Yields: 8-9nos
Prep Time: 10 Minutes Cook Time: 5 Minutes Total Time: 15 Minutes


INGREDIENTS
1 cup =250ml
For dough
  • Wheat flour/atta - 1 cup
  • Melted ghee - 1/2 tsp
  • Sooji/rava /Semolina - 1/2 tsp
  • Sugar – A pinch (optional)
  • salt - as needed
  • Water - as needed ( I used around 1/3 cup)
  • Cooking oil - to deep fry
HOW TO MAKE POORI - METHOD
  • To make perfect poori, wheat flour and water is enough. But here I have given a fool proof recipe to make soft poori for beginners with the above given ingredients. In a wide bowl,take the flour. Add salt, a pinch of sugar, rava, ghee and mix well to make a crumbly mixture. Add water little by little and make the dough. Dough should not be sticky, wet or too soft like chapati dough. It should be smooth and stiff but not hard.
Puffy poori step by step
  • I used around 1/3 cup plus 1- 2 tbsp of water.It may vary based on the flour you use. Keep this as reference. Initially you may feel the dough little bit hard.knead well in between ur palms for few minutes. It will become smooth and soft. Do not allow the dough to sit for long time. Start rolling.
  • Make small lemon sized balls. Dust the balls in flour and make small sized poori of palm size. Use less flour for dusting. The thickness should be medium, not too thin like chapati. If you make it thin, puris won’t puff up. Arrange the pooris in a paper or a greased plate without overlapping each other.
poori step by step
  • Heat oil to deep fry. To check the right temperature of oil,put a small piece of dough. It will rise immediately at the same time it should not be browned. This is the perfect heating of oil. Immediately slide the poori and after a second, press it with a slotted ladle. It will puff up well. Flip it carefully and allow it to cook for few seconds till  the bubbles cease. Remove and lower the flame till you drop the next poori .Drain in a tissue paper. Keep the flame high and repeat the same for remaining pooris.
Puffy poori step by step
POINTS TO NOTE
  • Addition of ghee keeps the poori soft and gives a nice flavour. But do not add more than the mentioned quantity.
  • Adding sooji/rava is to maintain crispness. The puffed poori won’t break till u break it with your hands.Some people soak the rava in little water before adding. If you add more quantity of rava, it would be good. But here it is not necessary as we are adding negligible quantity. U can also omit rava and try. It is completely optional.
  • Adding a pinch of sugar gives a nice golden color to the poori. But it is optional to use.
  • Dough consistency is more important. If you make it too hard or sticky, poori will be too  hard. If the dough is too soft, poori will become very soft.
  • If you feel, you have added very less water and the dough is too tight,beat the dough well for few minutes. It will become soft.Then make pooris. It will come out well.
  • Do not rest the dough. Make puris immediately else it will drink more oil.
  • Always use less flour for dusting else the dusted flour will spoil the oil and will be settled as sediments. So dust only once. U can apply oil on the rolling board and make pooris.
  • Thickness should be medium ie slightly thicker than chapati and it should be even. Else poori will puff only in some places where it is thick. Make sure there are no holes while you roll. Pooris won’t puff up if there is a hole.
  • Right temperature of oil is more important. Never allow it to fume or smoke. Poori will turn dark brown in color. Check the oil as mentioned above and proceed.
  • After you make 2 –3 puris, adjust the flame,check the oil temperature again & fry the pooris. If the oil is too hot, switch off the flame for few minutes to reduce the heat. Else add some more fresh oil to reduce the heat. By doing this way, you can make pooris of even color till the end.

Puffy poori

Check out the side dishes for poori :)
Enjoy puffy pooris with potato masala or kurma. 
puri recipe

 
Continue Reading...


November 25, 2013

Easy Rasam Recipe With Easy Rasam Powder

rasam recipe
As I mentioned in my post, my appa makes rasam very well. When my father was in mumbai, he used to do this rasam with an easy homemade rasam powder. For this recipe, store bought rasam powder  is not needed. We love this rasam more than my mom’s version. So we (me & my sis) used to tell our dad to make rasam in weekends and we enjoy with mom’s potato poriyal.

This is a very simple rasam recipe using freshly ground rasam powder with just 2 ingredients. U can replace this rasam powder with store bought or your own rasam powder too. It comes out well. It can be made in few minutes. We call this as bachelor’s rasam. U can even drink this rasam. I love to mix with buttermilk & drink. 
The flavour of pepper and jeera waft around your house when you make this rasam. Try this easy rasam during busy mornings. Tastes great with simple potato curry and papad !

Easy rasam powder

Rasam recipe


Rasam recipe Easy rasam recipe with freshly ground easy rasam powder
Cuisine: Indian Category: side dish Yields: 3
Prep Time: 10 Minutes Cook Time: 10 Minutes Total Time: 20 Minutes


INGREDIENTS
For rasam powder
  • Pepper corns - 1 tbsp
  • Cumin seeds - 2 tbsp
For rasam
  • Tamarind - Medium gooseberry size
  • Tomato - 1 no
  • Turmeric powder - 1/4 tsp
  • Rasam powder - 3 tsp (mentioned above)
  • Crushed garlic cloves - 5 nos
  • Sugar - A pinch
  • Salt - as needed
  • Water - 3 cups
To temper
  • Oil or ghee - 2 tsp
  • Mustard seeds - 1/2 tsp
  • Jeera/cumins seeds - 1/2 tsp
  • Red chillies – 1 or 2 nos
  • Curry leaves - few
  • Coriander leaves - 2 tbsp (to garnish)
HOW TO MAKE RASAM - METHOD

  • In a bowl, soak tamarind in half cup of hot water for 5 minutes. In the mean time, prepare rasam powder by grinding the pepper corns and cumin seeds together. Store in a box.Set aside.
Rasam powder step by step
  • Extract tamarind juice using 2.5cups of water. Totally it should come to 3 cups. Add salt, sugar, turmeric powder & rasam powder. Mix well. Check for taste. U’ll feel the rasam tasteAdd more salt & rasam powder if necessary. Now crush the tomatoes well using your hands and add to this tamarind water.
Rasam recipe step by step
  • In a kadai, heat oil or ghee and temper the mustard seeds, jeera/cumin seeds, pinched red chillies, curry leaves. Add the tamarind mixture. Let it boil for a minute. Then add 1/4 cup water and add the crushed garlic pods. Give a full roll boil only once and it becomes frothy. (alternately you can just boil the rasam and add the tempering at the end. It gives a nice flavor). 
Rasam recipe step by step
  • When it becomes frothy, add chopped coriander leaves and switch off the flame. Transfer to a bowl. Close it with a lid immediately.
Rasam recipe step by step
Rasam is ready to enjoy with plain rice !

Note
  • The quantity I have given for rasam powder can be used for making rasam thrice. Store it in an air tight box and use a clean, dry spoon.
  • U can also use sakthi, priya, aachi rasam powder. Use 1 tsp for 1 cup of water. Check for taste. Add more or less based on your need.
  • Dal water can be added for more taste. For variations, you can saute the tomato while tempering instead of adding it raw..
  • Adding Sugar gives a clear rasam.
  • Garlic cloves and coriander leaves is a must for this recipe.
  • Tempering can be done at the end too. It will give a different flavour. Using ghee is optional but it smells good while you eat.

 Easy rasam powder
Yummy , flavourful rasam is ready to eat with plain rice!
Easy rasam recipe

Continue Reading...


November 22, 2013

FOOD PANDA - Order delicious food online | Review

unnamed (1)foodpanda_large_web
Dear all,
Today I have come up with the review about FOOD PANDA, an ONLINE SITE FOR ORDERING FOOD from favourite restaurants in your Location.We can order the food in 4 easy steps. Login, Select the city/location,find ur favourite restaurant,order ur food.Food will be at ur doorstep in some minutes at discounted rates !
food-panda

They are offering attractive discounts  as well as cash back on selected cards.I was surprised to find an advertisement showing “ Buy One Briyani and get One free” Winking smile..
foodpanda
Some of the features of this Online Site which I admired are given below
1.Food panda started in March-12 just completed one and half years but marked a significant strides in the online food market internationally.
2. Where ever u are, in which part of the world u are, u can order your favourite dish from your favourite hotel nearby u.
3.It can be useful for the techies who cant afford to cook or have time to go to a restaurant of their choice.
4.It can be helpful for the retired and old persons who find cooking little difficult due to  unforeseen health problems.
5.Tourists also can use this site for ordering their favourite dish at places where they are new.
6.We housewives, can use this site for ordering food when we need a change from the routine work of cookingWinking smile.
7. During this monsoon, it will be difficult to travel to our favourite restaurants.We can use this site to order our favourite dishes.
All u have to do is just login/register into this site.Choose your favourite cuisine from your favourite restaurant in your location.Order the food and enjoy !
Here are some more screen shots of this site for ur information.

x3P8b4zG

They do have their own app for mobiles and iPhones.Download it for free and use it as needed.They provide Live chat facility apart from phone helpline.
AP
So to sum up, i can say Food Panda helps you to find restaurants. They provide the service of ordering food online and avail home delivery services.
Disclaimer : Friends,Please share your experience with Food panda if any.As i have not personally experienced their service,the above mentioned points are just my opinion. So friends, do try your own and share below.
unnamed
Thanks for visiting. Have a happy weekend.Catch u all with my recipe post on monday Smile

Technorati Tags: ,
Continue Reading...