Search Chitra's Food Book

May 24, 2014

BABY CORN FRY(BABY CORN GOLDEN FRY RECIPE)-BABY CORN 65 RECIPE

Baby corn fry
I tasted this baby corn fry/baby corn 65 in a banquet. From then, I wanted to try it at home. Its a great starter recipe for lunch as well as dinner. Yesterday Raksha’s friends came home for lunch. So I prepared this fry along with veg fried rice, fruit custard and choco chip cookies.

 All the kids relished this fry with tomato sauce and there was not even a single piece left for us. It was very crispy, mildly spiced and the smell of masala was awesome. Everyone loved it. Do try this for your kids. U can make it as an evening snack too ! But one thing , you should eat it hot to enjoy its crispness and flavour!.
Baby corn fry

Crispy baby corn golden fry recipe


Cripsy baby corn golden fry recipe Crispy baby corn golden fries / baby corn 65 - Easy starter recipe
Cuisine: Indian
Category: Starter
Serves: 4
Prep time: 60 Minutes
Cook time: 10 Minutes
Total time: 70 Minutes


INGREDIENTS
To pressure cook
  • Baby corn - 6 nos
  • Salt & water - as needed
For the batter
  • All purpose flour - 2 tbsp
  • Corn flour - 2 tbsp
  • Rice flour - 1 tbsp
  • Red chilli powder - 1/2-1 tsp
  • Garam masala powder - 1/2 tsp
  • Fennel seeds powder – 1/4 tsp(optional)
  • Ginger-Garlic paste - 1 tsp
  • Kasuri methi - a pinch
  • Fresh Curd – 1 tbsp
  • Salt - as needed
To coat
  • Bread crumbs - 1/2 cup
HOW TO MAKE BABY CORN 65 - METHOD

  • Peel the baby corn and pressure cook it adding required water and salt.cook in high flame for 3-4 whistles. Remove chop into roundels and set aside.
baby corn fry step1
  • In a bowl, take the chopped baby corn and add all the powders given above. Lastly add a tbsp of curd. Mix well. Add little water to coat the baby corn with masala like bajji batter. Make sure the coating is not too thin or thick. Let it marinate for an hour.
baby corn fry step2
  • After one hour, take the baby corn pieces, dip in bread crumbs well and deep fry in hot oil. While deep frying, do in medium flame and make sure you do not flip the baby corn as soon as you put in oil. Let it be in oil for a minute. Then flip the other side and cook for one more minute. After it turns golden brown, remove and drain in a tissue.
baby corn fry step3
Serve hot with tomato sauce !


Note

Instead of deep frying, you can shallow fry the pieces in dosa pan drizzling with oil. It will become a yummy low calorie snack.
U can use lemon juice instead of curd.
Bread crumbs are optional but it gives a crispy outer layer.

Enjoy this crispy baby corn golden fry dipping in tomato sauce. Tastes great !
Baby corn fry
Do check out my baby corn stir fry recipe with health benefits


Continue Reading...


May 22, 2014

CURRY LEAVES CHUTNEY RECIPE (WITHOUT COCONUT)/ KARUVEPPILAI CHUTNEY FOR IDLI,DOSA

Karuveppilai chutney
As u all know, curry leaves(Kadi patta in Hindi,karuveppilai in Tamil) has lots of health benefits.Most importantly it helps to avoid premature greying of hair and promotes hair growth.I used to like curry leaves from my young age.I love to have a lengthy hair.So I used to eat all the curry leaves which is used for seasoning & never throw away. When I was young, my mom makes hair oil using curry leaves by grinding the leaves to a paste,pat it to small thattu vadai,spread in a polythene sheet and dry under shade for one week. .After it is completely dry,mom breaks them into small pieces and adds it to pure coconut oil.Heat it for a minute and stores in a clean bottle.After few days,the color of oil turns dark green.I used to help her in all these procedures which was a good time pass for me. We keep this oil for 6 months and apply it twice daily.Now after marriage,my MIL makes even more special hair oil by adding karisalankanni,gooseberry,curry leaves,methi & henna which helps to promote hair growth and prevents premature greying etc. Other than this well known benefits,curry leaves has much more.So it is better not to waste them when u eat.I try to include it in my cooking more often either as a gravy or as chutney,podi apart from seasoning.I usually make curry leaves chutney with coconut for my mom's adai recipe.But I wanted to try curry leaves chutney without using coconut for long time.So i browsed for it and got this recipe from 7aum suvai.I tried this morning as a side dish for idli.It was very nice.I slightly modified the recipe as per the ingredients i had in hand.It came out very well.Sendhil usually don't like curry leaves chutney but he liked this chutney a lot. This chutney tastes good only for tiffin varieties and not with rice.Do check out my curry leaves thogayal for rice if interested.Lets see how to prepare this yummy karuveppilai chutney :)
Curry leaves chutney recipe

Curry leaves chutney recipe


Thumbnail Url 
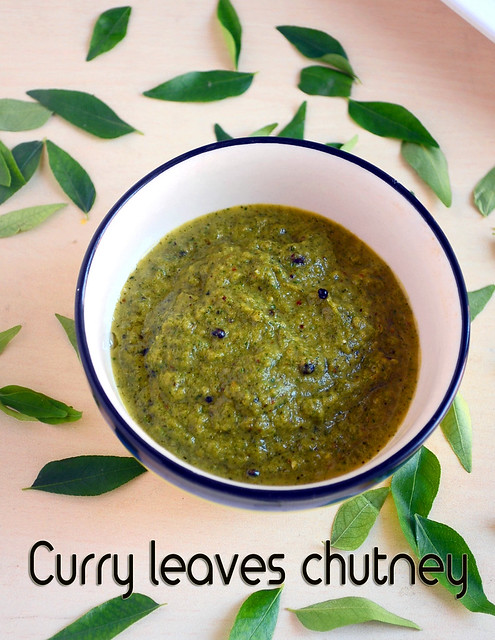
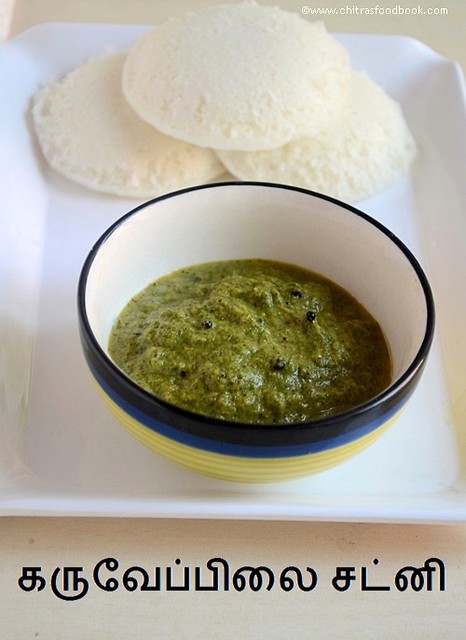
Curry leaves chutney recipe for idli,dosa without using coconut
Cuisine: Indian Category: Chutney Yields: 1 cup
Prep Time: Cook Time: Total Time:


Ingredients
  • Curry leaves - 1 cup
  • Big onion - 2 nos.
  • Garlic cloves - 20 nos. ( small)
  • Red chillies - 2 to 3 nos.
  • Tamarind - 1 seed(small berry size)
  • Turmeric powder - 2 pinches
  • Cooking oil - 1 tbsp
  • Salt and water - as needed
To temper
  • Cooking oil - 1 tsp
  • Mustard seeds - 1/2 tsp
  • Urad dal - 1/2 tsp
 
Instructions
  1. Wash and keep the curry leaves aside.In a pan,heat oil and saute the onions,chillies and garlic cloves till onions turn transparent. 
  2. Then add curry leaves,turmeric powder,salt and tamarind.Saute till curry leaves shrink and leaves a nice aroma.Switch off the flame.Let it cool.Then grind it to a smooth paste adding required water.
  3. Temper all the ingredients given under "to temper" and add to chutney.curry leaves chutney
Mix well and serve with idli,dosa.Enjoy !

NOTE
U can replace big onions by 15 small onions as given in the original recipe.
Increase the number of red chillies if u want more spicy.
Serve with idli,dosa drizzled with a tsp of gingely oil.It tastes yummy.

Curry leaves chutney recipe


Continue Reading...


May 20, 2014

CUSTARD POWDER ICE CREAM RECIPE–CUSTARD POWDER RECIPES

Custard powder ice cream without ice cream machine was in my try list for long time. Last week when I posted mango ice cream, Raksha told me to prepare vanilla ice cream for her. When I was thinking about it, I reminded about this ice cream recipe which i had bookmarked from jeyashri’s kitchen long back. First time I halved her recipe and tried. But I din’t get it right. There were ice crystals and the ice cream was not soft as I expected. I couldn’t find out the proper reason too. Then I e-mailed jey and asked her for improvements. 

She is very sweet that she replied immediately and suggested me to add more custard powder as its quality may differ as per the brand. So this time I added little more custard powder & tried adding more fresh cream too. It came out very well. I was very happy with the result. We all loved it. More than us Raksha thoroughly enjoyed this ice cream and finished half the quantity. Do try this recipe for your kids. I am sure they will enjoy this summer. This recipe makes a good base for any ice cream. Just run ur imaginations, add nuts or chocolate powder, make different flavours with it. Enjoy !

Custard powder ice cream recipe


Custard powder ice cream recipe Custard powder ice cream recipe - Basic ice cream recipe with vanilla flavour.
Cuisine: Indian
Category: Ice cream
Serves: 4
Prep time: 6h
Cook time: 6h
Total time: 12hrs


INGREDIENTS
 1 cup = 250 ml

  • Milk - 2 cups
  • Sugar - 5 tbsp
  • Vanilla essence - 1/2 tsp
  • Custard powder - 2 tbsp (I used pillsburry, golden vanilla flavor)
  • Fresh cream - 4 tbsp ( I used Amul)
HOW TO MAKE CUSTARD POWDER ICE CREAM - METHOD

  • Reserve 4 tbsp from 2 cups of milk. Mix custard powder without lumps and set aside.
Custard powder ice cream step1

  • Boil milk adding sugar and add the custard powder mixture. Boil for sometime till the milk thickens like dosa batter.
Custard powder ice cream step2

  • Switch off the flame and cool it completely. Now add fresh cream and mix well.
Custard powder ice cream step3

  • Whip it using a hand blender or mixie for few seconds till it becomes frothy.
Custard powder ice cream step4

  • Transfer it to an air tight box and freeze it for one hour.
  • After an hour, beat the mixture in mixie or blender for a minute. Again freeze it for 1 hour.
  • Repeat this procedure for 5 times. Totally you have to beat this ice cream for 5 times. This helps to avoid ice crystal formation.( Add chopped nuts at this stage if you are using)
  • Finally freeze it over night by covering the top of ice cream with a butter paper. You can also freeze it for 6 hours. Remove and keep outside for few minutes. Then scoop it.
Custard powder ice cream step5

Custard powder ice cream is ready.

Enjoy !


Note

  • U can add more fresh cream to get a creamier, rich ice cream.
  • Do not add more custard powder as it may harden the ice cream.
  • I used low fat milk. U can use full fat milk too.
  • Adjust sugar and vanilla essence as per your need.

Make this creamy,delicious ice cream and enjoy this season .Here is a picture of melting ice cream!!

Continue Reading...


May 19, 2014

ONION SAMBAR/VENGAYA SAMBAR RECIPE - SOUTH INDIAN STYLE SAMBAR FOR RICE

Onion-sambar-for-rice-South-Indian-style
This is my basic South Indian style sambar recipe for rice. Chinna vengaya sambar/Small Onion sambar is one of the most aromatic sambar recipes next to drumstick sambar.  Last year I posted brahmin(iyer)style arachuvitta sambar recipe with onions and drumstick adding freshly roasted and ground paste. But this sambar is very simple and easy to prepare which needs no grinding and no coconut. It can be made within 10 minutes if you have cooked toor dal ready in hand. Even bachelor’s can try this sambar.

This is my MIL’s basic sambar recipe with onions. Mostly I make this sambar when I run short of vegetables. As shallots are very costly in Bangalore compared to Salem, my in-laws buy one or two kgs for me whenever they visit my place. So I keep making onion recipes like sambar, chutney or pickle at least twice in a week. This vengaya sambar is our family favourite. 

Raksha loves to have this sambar for idli, dosa too. So I dilute this sambar slightly and serve it with mini idli drizzling with ghee. Ok, Lets see how to prepare this south indian onion sambar recipe.
 
Onion sambar recipe

Onion sambar recipe/Vengaya sambar


Onion sambar recipe/Vengaya sambar Small onion sambar recipe - South indian style sambar recipe with step by step pictures.
Cuisine: Indian
Category: Lunch
Serves: 3
Prep time: 15 Minutes
Cook time: 10 Minutes
Total time: 25 Minutes


INGREDIENTS
1 cup - 250ml
To pressure cook
  • Toor dal - 1/3 cup
  • Turmeric powder - 1/8 tsp
  • Red chilli - 1 no (pinched)
  • Curry leaves - few
  • Cooking oil - 2 drops
  • Water - as needed
To temper & saute
  • Cooking oil + Ghee - 1 tbsp + 1 tsp
  • Mustard seeds – 1/2 tsp
  • Methi seeds - 1/3 tsp
  • Red chilli - 1 no ( pinch into 2)
  • Green chillies – 3 – 4 nos
  • Small onions/Shallots - 20 nos OR Sliced Big onion - 2 nos
  • Tomato – 1 no ( cut into small pieces)
  • Curry leaves - few
  • Hing/Asafetida - 2 generous pinches
For sambar
  • Tamarind - Big gooseberry size
  • Turmeric powder – 1/4 tsp
  • Sugar or jaggery – 1/4 tsp
  • Sambar powder - 1 to 1.5 tsp (homemade or any brand powder)
  • Salt & water - as needed
Coriander leaves - few
HOW TO MAKE ONION SAMBAR - METHOD

  • Pressure cook toor dal adding all the ingredients mentioned under “to pressure cook “.  Pressure cook in low flame for one whistle adding enough water. Open the lid and mash the dal well with a ladle. Set aside.
  • Soak tamarind in 1/2 cup of water. Wash and peel the small onions, slit green chillies and set aside.
  • Take the tamarind extract adding 1-1.5 cups of water. Extract should be 1.5-2 cups in total. Add sambar powder, turmeric powder, salt, hing and pinched raw curry leaves to it.
  • In a kadai, heat oil+ghee and splutter mustard seeds. When it starts to crackle, add methi seeds, pinched red chillies, green chillies, small onions, tomato pieces  & curry leaves. Saute until onion turns transparent.
vengaya sambar step1
  • Now add the tamarind extract mixture, sambar powder and boil well till onions gets cooked well yet firm without losing its shape.
  • After the mixture is reduced in quantity, add cooked toor dal and sugar or jaggery. Add little water if necessary. Boil for 2 minutes. Adjust the consistency. Check for taste.
vengaya sambar step2
vengaya sambar step3
  • Garnish with coriander leaves, boil for few seconds and switch off the flame ! Transfer it to a vessel. Add a tsp of ghee. Cover it with a lid. Give a standing time of 30 minutes and then serve.


Note


  • Adding ghee while tempering gives a nice smell to the sambar like in restaurants.
  • Use sliced big onions in place of shallots if you don’t have in hand but small onions gives a nice flavor than big ones.
  • Adjust the quantity of tamarind if you add tomato else sambar will become tangy.
  • If you feel the sambar is tangy, add some plain red chilli powder & allow it to boil for sometime. It helps to balance the taste.
Enjoy vengaya sambar with vathal/vadam or appalam & poriyal. I had with simple tindora curry.
Onion sambar lunch menu
Do check out my other sambar recipes if interested
Continue Reading...


May 17, 2014

RAW MANGO CHUTNEY RECIPE WITH COCONUT - MANGAI CHUTNEY RECIPE

Raw mango chutney
I tried this South Indian style raw mango chutney recipe / Mangai chutney after watching “Arokiya samayal” program in Jaya tv. She made thinai idli and this chutney as a side dish for it. I tried both.Thinai idli din’t come well as i expected but this chutney was good .It is a nice side dish for idli,dosa. I am not sure of how it tastes with plain rice or curd rice.It tastes tangy and spicy. With the flavour of raw mango,coriander leaves & ginger,it was yummy. Do adjust the quantity of chillies based on the sourness of mango.Soon i’ll share a mango thogayal for rice. Now lets see how to prepare mango chutney with coconut in easy steps.

Raw mango chutney recipe with coconut


Raw mango chutney recipe Mango chutney recipe with coconut for idli,dosa
Cuisine: Indian
Category: Side dishes
Serves: Serves 4
Prep time: 5 Minutes
Cook time: 3 Minutes
Total time: 8 Minutes


INGREDIENTS
1 cup - 250ml
To grind
  • Raw mango pieces - 1/2 cup ( use half of one small mango)
  • Grated coconut - 1 cup
  • Turmeric powder – a pinch
  • Red chillies or green chillies – 4-6 nos
  • Tamarind- a small piece(optional)
  • Coriander leaves - a handful
  • Ginger – 1 inch piece
  • Salt & water - as needed
To temper
  • Coconut oil - 1tbsp
  • Mustard seeds - 1/2 tsp
  • Urad dal - 1 tsp
  • curry leaves - few
  • Hing - a pinch
METHOD

  • In a mixie jar,take all the ingredients given under “ to grind”.Grind it to a smooth paste adding required water.
Raw mango chutney step1
  • Temper the chutney using coconut oil.Pour on top of the chutney.mix well and serve with idli,dosa.
NB : Adjust the quantity of chillies & coconut as per the sourness of mango.


Note


  • Color of this chutney may slightly vary based on the chillies u use.
  • For variations,peel the skin of mango and then grind.
  • Use green chillies in place of red chillies.Add a pinch of tamarind.We call it as “ethir puli” to balance the sourness of mango.
  • U can also use 4-5 cloves of garlic instead of ginger.
  • Make it thin or thick as per ur taste.

Enjoy this tangy,spicy chutney with dosa or idli !
Mango-chutney with coconut

Continue Reading...


May 15, 2014

SUNDAKKAI VATHAL KUZHAMBU RECIPE( DRIED TURKEY BERRY GRAVY)

Sundakkai vathal kuzhambu recipe
Recently a reader mailed me to post basic Sundakkai vathal kulambu recipe and manathakkali vathal kuzhambu (dried turkey berry). As I had already posted Tamil brahmin style no onion no garlic manathakkali vathal kuzhambu, I thought of sharing my MIL’s style sundakkai vathal kuzhambu recipe  (dried turkey berry gravy). 

We usually make this basic kuzhambu recipe and replace sundakkai with brinjal, drumstick or just garlic & onion. As we don’t get green sundakkai easily, we include it in dried form in our gravies or just as an accompaniment for curd rice. I usually roast this once in a week for Sendhil and Raksha to get rid of stomach worms.

Other than this, sundakkai has lots of health benefits. U can find them in my raw sundakkai kootu post. This kuzhambu can be prepared within 15 minutes. No grinding job too. So bachelor’s & working women can prepare this easily in busy mornings and pack it for their lunch box. It tastes great when mixed with plain rice adding gingely oil. Kootu and roasted papad is the best side dish for this gravy. Usually I make keerai kootu or chow chow kootu. I have updated this recipe with a full video. Please check it below.


Sundakkai vatha kuzhambu recipe

Sundakkai vathal kuzhambu recipe


Sundakkai vathal kuzhambu recipe Easy vatha kuzhambu recipe with turkey berries
Cuisine: Indian
Category: Gravies
Serves:3
Prep time: 5 Minutes
Cook time: 10 Minutes
Total time: 15 Minutes


INGREDIENTS

  • Tamarind – Big gooseberry size
  • Sambar powder - 1 tbsp ( OR use aachi kuzhambu milagai thool)
  • Turmeric powder - 1/4 tsp
  • Grated jaggery - 1 tsp
  • Salt- as needed
  • Water - 2 cups
To temper & saute
  • Gingely oil or cooking oil – 2.5 tbsp
  • Sundakkai vathal /Turkey berry – 15-20 nos
  • Mustard seeds -1/2 tsp
  • Methi seeds - 1/2 tsp
  • Urad dal - 1 tsp
  • Cumin seeds/Jeera- 1.5 tsp
  • Toor dal - 2 tsp
  • Small onions - 10 nos (finely chopped)
  • Garlic - 10 cloves (finely chopped)
  • Curry leaves - few (finely chopped)
HOW TO MAKE SUNDAKKAI VATHA KUZHMBU - METHOD

  • To make sundakkai vathal kuzhambu, wash and chop the onions finely. Chop garlic cloves and curry leaves finely.Set aside
  • Soak tamarind in 1/2 cup of warm water and take the extract using 1.5 cups of water. To this add sambar powder, turmeric powder, salt and keep aside.
  • In a kadai,heat oil and roast the turkey berries till it turns brown. To that add mustard seeds. After it starts to splutter, add methi seeds, urad dal, toor dal and cumin seeds. Saute till golden. Now add the finley chopped onions, garlic & curry leaves. Saute till it emits a nice aroma.
sundakkai-vathal-kuzhambu-recipe-step1
sundakkai-vathal-kuzhambu-recipe-step2
  • Now add the tamarind mixture and boil well for 4-5 minutes. Check for taste and add more sambar powder if gravy tastes tangy and adjust salt if needed. Lastly add jaggery and boil till oil separates & gravy becomes thick. Add little more water if you the gravy to thin down or switch off the flame and remove.
sundakkai-vathal-kuzhambu-recipe-step3
  • Transfer to a vessel. Add few pinched curry leaves and cover the vessel with a lid. Give a standing time of 30 minutes and serve with rice.


Note

  • For variations,u can use manathakkali vathal in place of sundakkai.
  • Using gingely oil in this gravy gives a nice flavour and it helps to suppress the tamarind heat.
  • Sometimes, I roast the sambar powder for few seconds before adding the tamarind mixture. It also gives  a nice taste.
  • If you don’t have homemade sambar powder, you can use aachi kuzhambu milagai thool or any store bought sambar powder too.
Sundakkai vatha kuzhambu recipe
Enjoy vatha kuzhambu mixed with rice topped with gingely oil.Tastes great with sutta appalam & kootu.
Sundakkai vatha kuzhambu recipe

Continue Reading...


May 13, 2014

RAGI PORRIDGE(SWEET,SPICY VERSION)/RAGI KANJI-RAGI RECIPES


Ragi kanji recipe
Ragi malt aka ragi kanji recipe is a very popular & healthy breakfast recipe in Tamil nadu as well as in Karnataka.In Tamil,we call it as keppai kanji.As my MIL is mildly diabetic,she makes it very often for her breakfast.She also tells us to consume this kanji as it keeps the body cool during summer & it has high calcium content which is much needed for ladies nowadays.Its a very healthy drink to have during fasting  & which keeps us energetic and active the whole day.When Raksha was a baby,i used to give this porridge to her twice a day.I have shared in “Notes” section on how to make this porridge for babies.Here in Bangalore,most of the people consume ragi in the form of porridge or Ragi mudde.So whatever may be the dish,it would be better to include ragi regularly in our diet to stay healthy and fit.In this post,i have shared sweet and spicy porridge which i learnt from my MIL.She makes in two ways.One using ragi flour and the other one with ragi grains by soaking it overnight.I felt porridge made out of ragi grains is more flavourful than the one with flour.Sendhil loves spicy version more than sweet porridge. But my vote is for sweet versionSmile.Sweet version can be made with or without milk too.Friends,Do try this healthy porridge recipe and mail me which one u liked itSmile with tongue out .
Ragi sweet porridge recipe


Spicy ragi porridge

Ragi porridge recipe


Ragi porridge recipe Ragi kanji/Finger millet porridge recipe - Sweet and spicy versions
Cuisine: Indian
Category: Breakfast
Serves: Serves 2
Prep time: 10 Minutes
Cook time: 20 Minutes
Total time: 30 Minutes


INGREDIENTS
For porridge
  • Ragi flour - 1/4 cup
  • Water - 2 cups
For sweet version
  • Ragi Porridge - 1 cup
  • Grated jaggery -1.5-2 tbsp
  • Cardamom - 1 seed(crushed)
  • Water - little
  • Salt- a pinch
  • Boiled Milk - as needed(optional)
  • Chopped nuts(optional)
For spicy version
  • Ragi Porridge - 1 cup
  • Salt - as needed
  • Curd – 2 tbsp
  • Water – 1/4 cup
To temper
  • Oil - 1 tsp
  • Mustard seeds - 1/4 tsp
  • Urad dal -1/4 tsp
  • Curry leaves - few
  • Red chilli – 1/2 no(pinched)
  • Coriander leaves - few(optional)
METHOD

  • In a wide bowl,mix the ragi flour in the mentioned quantity of water.Mix without lumps using a whisk and boil for few minutes till it becomes thick (porridge consistency).Stir whenever needed.
Ragi-porridge-recipe
  • Switch off the flame and divide the porridge in two bowls.
  • For sweet version,add grated jaggery to one bowl and boil for few minutes till jaggery melts and raw smell emanates.Switch off the flame and add cardamom powder,milk.Stir well and serve hot or warm(Remember, this porridge thickens after it cools down.So add more milk or water to adjust the consistency before serving).Add chopped nuts( if using) and serve.Generally ragi takes less jaggery.So use carefully.Do not add more jaggery.If you feel sweetness is more,add more milk or water to adjust it.
Ragi-sweet-porridge-recipe
  • For spicy version,temper all the ingredients given above and add to the porridge.
  • Whisk curd & water.Make thick buttermilk and add to porridge.To this add salt,hing Mix well and serve.Add fresh curry leaves,coriander leaves & serve.Ragi porridge needs lesser salt than usual.So add accordingly.
Spicy-ragi-porridge

Note

  • Color of this porridge may vary based on the quantity of milk & buttermilk u add.
  • To make this porridge more flavourful,soak ragi grains overnight and grind it smooth the next morning adding required water.Dilute it and make porridge as given above.It tastes fresh and more flavourful too.
  • Use fresh curd for spicy version.If using sour curd,use very less quantity else porridge will turn too sour.Generally ragi needs less jaggery & less curd.So adjust as per ur taste buds.
  • For variations,u can add sugar or palm jaggery in sweet version.U can also omit milk and add water to adjust the consistency.
  • Add finely chopped nuts if making for kids.
For babies of 6 months old:
If giving for the first time,take 2-3 tsp of ragi in a bowl,Add 1 cup of water,mix without lumps.Boil till it thickens and becomes shiny.Make sure u stir well else it would be burnt in the bottom.After it thickens,add sugar & cardamom powder OR salt & thick curd.Mix well & serve in spoonable consistency.
If u want to feed in bottle,add some milk & sugar OR  little salt and buttermilk,make it runny and adjust sugar and feed.

Enjoy this healthy porridge for ur breakfast.It tastes yummy and filling too Smile.
Ragi porridge recipe

Continue Reading...