Search Chitra's Food Book

April 20, 2015

Anjappar Biryani Recipe In Rice Cooker-Sunday Lunch Recipes Series-14

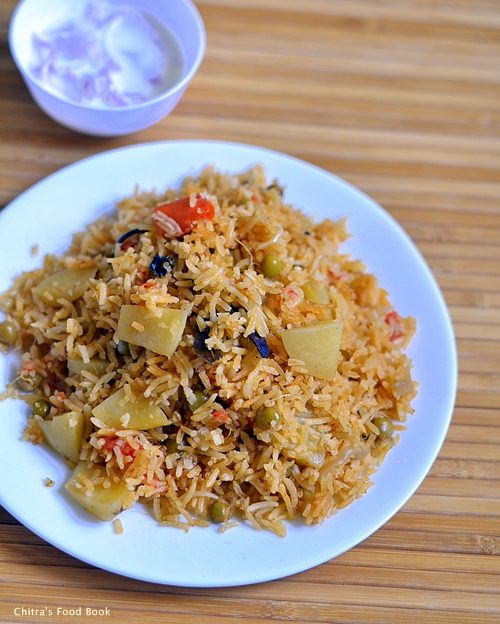
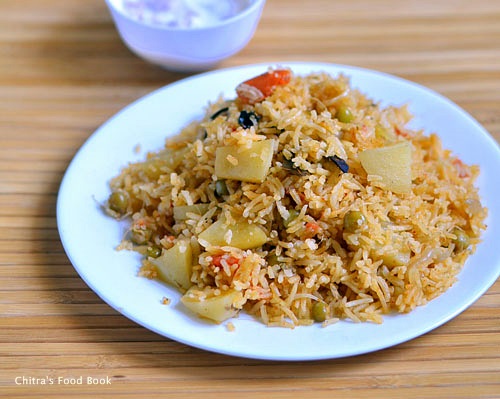
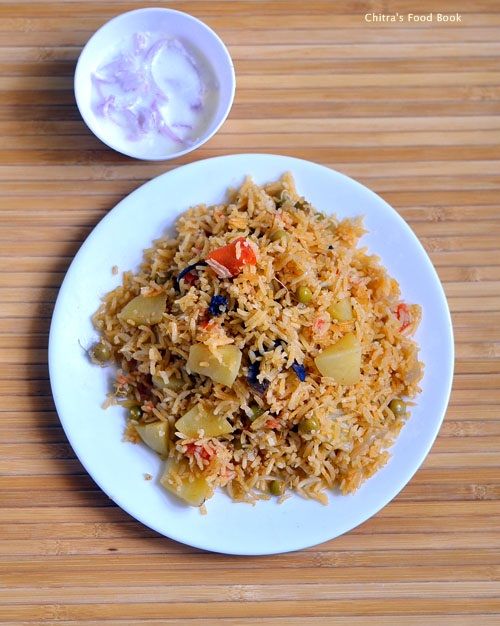
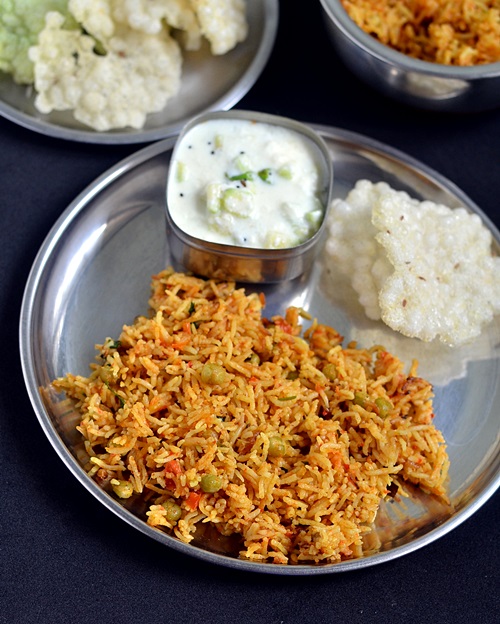
Anjappar biryani recipe
“Evalavo Pannitom Itha Panna MatomaWinking “ haha,This is how i thought when my friend Megha suggested me to try “Anjappar style biryani recipe” using vegetables.I browsed through few Anjappar style chicken biryani recipes and got it from here & here.I mixed up both the recipes and tried it using potato & peas.I usually make biryani using pressure cooker.This time i tried using rice cooker and made it little more spicy as it belongs to Chettinad.The result was yummy and we loved it.After i made this biryani successfully i became very happy & contented that i had tried and shared almost all the popular Tamil nadu biryani recipes like Ambur star biryani, Dindigul Thalappakatti biryani, Coimbatore Angannan biryani, Muslim wedding biryani, Kuska in vegetarian version which was my long time dream.In the line of those yummy biryani recipes,here is yet another interesting and the most popular Anjappar biryani recipe.Friends,do suggest me if u know any other popular biryani recipe across Tamil Nadu.I am eager to try that too.Lets see how to make this flavourful and easy to make Anjappar Biryani Recipe in detail.
Before going to the recipe,I would like to tell something.As I am bit tied up with some personal work, i will try to make a post whenever i find time.Please bear with my irregular postings just for a week.Thanks for understanding.
Check out my other popular Tamil Nadu Biryani recipes

Ambur star biryani

Dindigul Thalappakatti biryani

Coimbatore Angannan biryani

Muslim wedding biryani

Kuska

Anjappar biryani recipe

Anjappar biryani recipe using vegetables


Anjappar biryani recipe using vegetables Anjappar biryani recipe with potato & peas - Sunday special lunch menu series - 14
Cuisine: Indian
Category: Lunch
Serves: Serves 2
Prep time: 20 Minutes
Cook time: 15 Minutes
Total time: 35 Minutes


INGREDIENTS

  • Basmati rice - 1 cup ( India Gate)
  • Potato - 3 nos
  • Green peas - a fistful
  • Green chillies - 2 nos
  • Red chilli powder - 1/2 tsp
  • Salt - as needed
  • Water - 2 cups
To roast rice
  • Ghee – 2 tsp
To saute
  • Cooking oil - 2 tbsp
  • Ghee - 1 tbsp
  • Cinnamon - 1 inch piece
  • Cloves - 2 nos
  • Cardamom - 1 no
  • Biryani leaf - 1 no
  • Big onion -1 no ( sliced)
  • Tomato - 1 no
To grind (optional)
  • Big onion - 1/2 no or Small onions - 8 nos
  • Green chillies - 2 no
  • Ginger - 1 inch piece
  • Garlic - 5 cloves
  • Fennel seeds – 1/4 tsp
To Garnish
Mint + coriander leaves – 3 tbsp ( finely chopped)
METHOD

  • Wash and soak the basmati rice for 20 minutes.In the mean time,peel the potatoes and chop into cubes.Slices the onions,cut the tomatoes into small pieces.Slit the green chillies.Grind the ingredients given under”to grind” to a smooth paste adding enough water.(If u don’t want to grind them add 1.5 tsp of g&g paste along with crushed fennel seeds in oil while sauting onions and whole spices)
Anjappar biryani recipe
  • Now drain all the water in soaked rice.Heat ghee in a kadai and roast the rice for 2 minutes without breaking them.
Anjappar biryani recipe
  • Now heat the rice cooker in cooking mode and add oil + ghee in the center of serrated plate.Add cinnamon,cloves,cardamom and biryani leaf.Saute for a second.Now add the sliced onions and slitted green chillies.Saute till transparent.Now add the ground paste and saute until raw smell goes off.Add red chilli powder and mix well.The rice cooker mode may switched into warm mode.No problem,just keep sauting in the heat of plate.Now add the tomatoes and salt.Mix until tomato turns pulpy.Turn the rice cooker to cooking mode and add water.
Anjappar biryani recipe
  • Add finely chopped mint+coriander leaves in water.When the water comes to a boil,add rice.Cook it till done.
    Anjappar biryani recipe
    Enjoy with raita !


Note

  • You can make this biryani using pressure cooker too but change the quantity of water to 1.5 cups.
  • Adjust the quantity of chillies based on your need.
  • You should not add mint+coriander leaves while sauting.Add them only in the water before adding rice.
  • Roasting rice helps to give firm and long grain rice.

Try this yummy Anjappar style biryani recipe in a weekend and Enjoy with your familyHappy
anjappar style biryani
Continue Reading...


April 17, 2015

EGGLESS VANILLA MUG CAKE RECIPE-MICROWAVE RECIPES

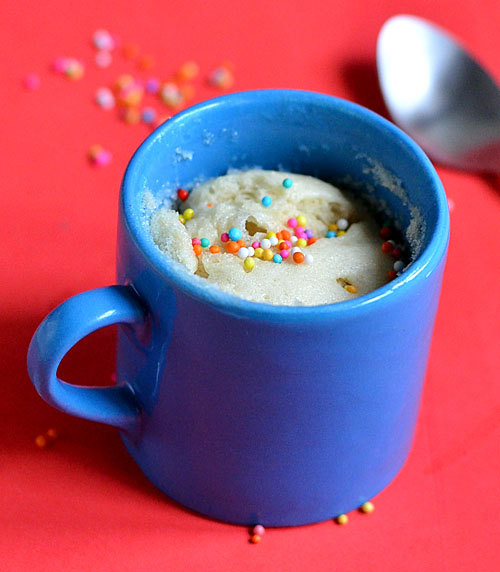
Vanilla mug cake recipe

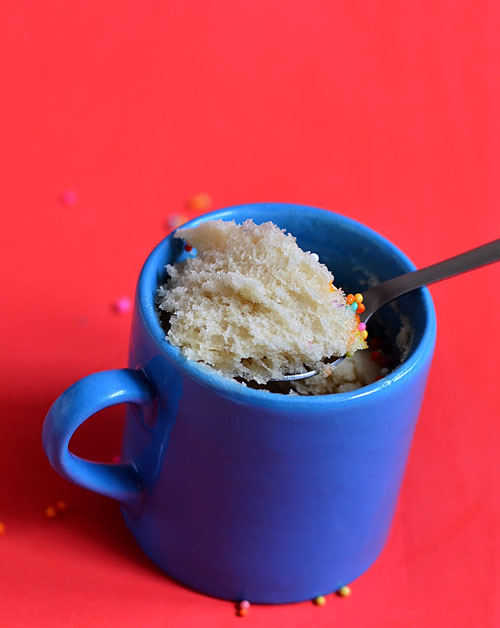
Its been a long time I shared an eggless mug cake recipe in microwave. After trying some one minute & 5 minute cake successfully, Iam much more comfortable & confident in trying out recipes like this. Its my long time wish to try out one minute vanilla cake as it is my most favourite flavour. I have been searching for the same and I finally found it here. It came out super soft and spongy with a lovely vanilla flavor. Try this easy cake recipe for your kids during this summer vacation. It is going to be an instant hit in your family. Let me know your feedback ! 

Note: You should consume the cake immediately after baking because the bottom of cake may turn slightly chewy due to the heat of the bowl. So please keep this in mind.
Eggless vanilla mug cake recipe

1 Minute Vanilla Mug Cake Recipe


1 Minute Vanilla Mug Cake Recipe 1 Minute Vanilla Mug Cake Recipe - Easy,Instant & tastes delish !
Cuisine: Indian
Category: Cakes
Serves: Serves 1
Prep time: 5 Minutes
Cook time: 1 Minute
Total time: 6 Minutes


INGREDIENTS

  • All purpose flour/Maida - 2 tbsp
  • Sugar - 1.5 tbsp
  • Cooking oil - 3/4 tbsp  (any odourless oil, I used sunflower oil)
  • Milk - 2 tbsp
  • Baking powder-1/4 tsp
  • Vanilla essence- 1/4 tsp ( Increase based on your taste)
  • Salt – a small pinch
METHOD

  • In a bowl,take maida,sugar,baking powder and salt. Mix well. To this add the wet ingredients like Milk, oil and vanilla essence. Mix well without lumps and make sure sugar is melted. The batter will fall like a ribbon. It is the right consistency of batter.
Vanilla mug cake
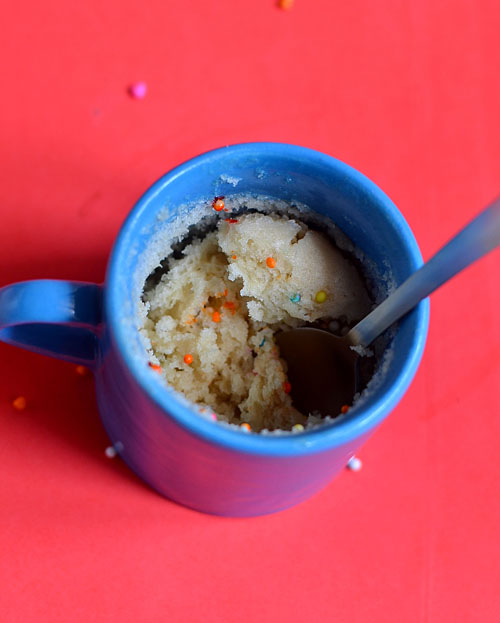
  • Now pour the batter into a microwave safe bowl. I used a porcelain/ceramic mug. The size of mug should be at least double the size of batter. Microwave it in high power ( 800w) for 1 minute. Adjust the timings based on the power of your microwave.The batter will rise till the brim and again goes in. So don’t scare. It won’t spill.
Vanilla mug cake
  • Check with a tooth pick. If it comes out clean or with little crumbs, cake is done. If you find wet batter in the tooth pick, bake it for 10-15 seconds more. 
  • Serve it warm and enjoy !
Note : You should consume the cake immediately after baking else the bottom of cake may turn slightly chewy due to the heat of the mug. If you don’t want to consume immediately, transfer the cake to another bowl and use it later.


Note

  • Make sure sugar is melted completely before you bake. So mix well for 2-3 minutes.
  • U can use powdered sugar but I am not sure with measurements.
  • U should consume the cake immediately to enjoy its best taste.


Eggless vanilla mug cake recipe

Try this instant, one minute vanilla mug cake. Treat your kids and loved ones. 
Eggless vanilla mug cake

Continue Reading...


April 15, 2015

French Fries Recipe | Crispy Homemade French Fries

 French fries recipe
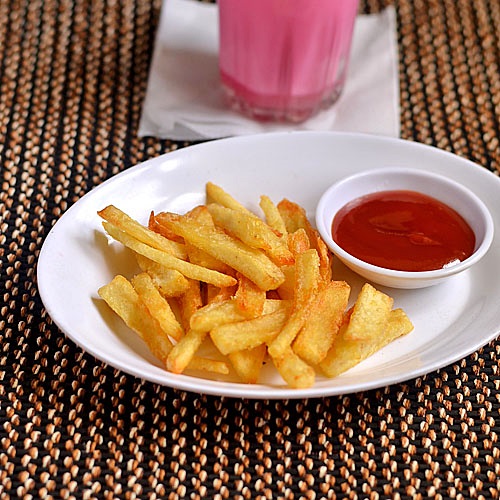
Recently I saw my friend buying a packet of frozen french fries to fry it using her newly bought air fryer. It tempted me to try french fries at home. The success of my McDonalds Veg Burger recipe & KFC style veg strips recipes made me confident enough to try this most popular, kids favourite french fries recipe too. I googled so many recipes & videos to make a perfect homemade french fries. As I mentioned in my homemade potato chips post, you need to use the right potatoes to get crispy McDonalds style french fries. People in abroad can use Russets or baking potatoes. 

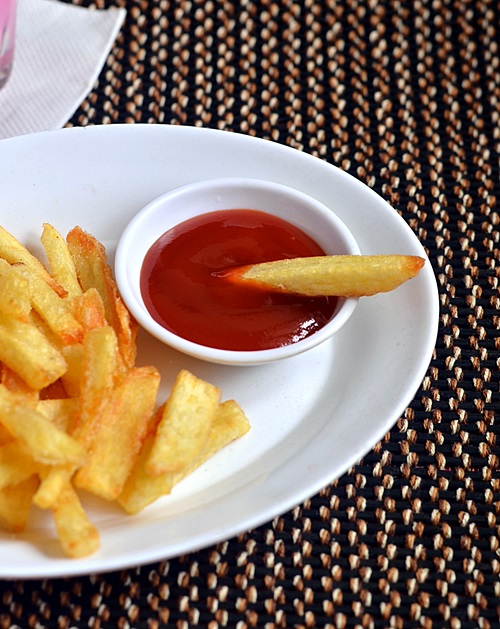
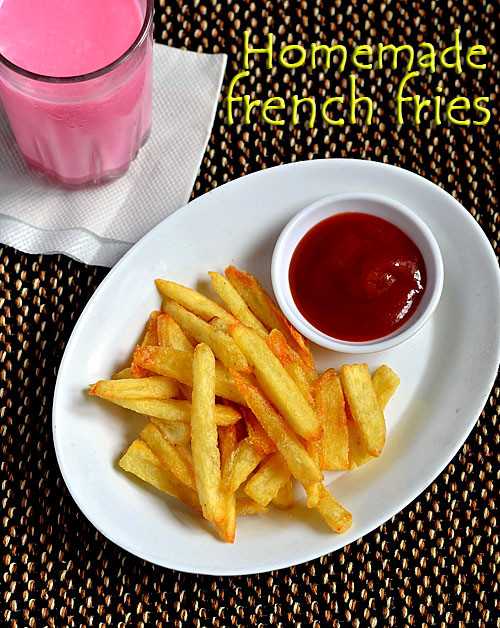
In India, we get red colored potato covered with mud. It is called as chips potato. U have to use that variety for best results. If you have these potatoes in hand,just carry on with this recipe. You can make it perfect as shown in the picture. Here I have just sprinkled salt like in restaurants. U can also season them with organic spices if you wish. And if you are health conscious, you can opt for baked version too. I have given the temperature settings in the method section. 

When I tasted these fries, I reminded my daughter Raksha. She is in Salem for vacation. She loves these fries a lot and today I missed her very badly. I should make it again as soon as she come here. Ok, Lets see how to make crispy,homemade french fries recipe with the picture of potato I used.

Russet potatoes

French fries

Homemade french fries recipe


Homemade french fries recipe How to make crispy french fries at home easily using 3 methods.
Cuisine: Indian
Category: Snacks
Serves: Serves 3
Prep time: 10 Minutes
Cook time: 10 Minutes
Total time: 20 Minutes


INGREDIENTS

  • Red colored potatoes - 2 nos (Big oblong shaped)
  • Salt - as needed
  • Ice cold water or water at room temperature – as needed
  • Cooking oil - to deep fry
HOW TO  MAKE FRENCH FRIES - METHOD

  • Wash and peel the skin of potatoes.Cut them into 1/2 inch thick slices and then into thin strips of uniform size.
French fries recipe
  • Wash the strips in plain water or ice water for 2 –3 times to remove the excess starch content. Boil 2 cups of water in a pan. Switch off the flame and soak the potato strips in it for 5 minutes. No need to cover the bowl. Drain the water completely. Pat it dry in a clean kitchen towel. Leave it open for 5 minutes. Make sure there is no water in the strips and it should be completely dry.
French fries recipe
French fries recipe
  • Heat oil till medium hot and deep fry the potato strips for 2 minutes in medium flame. It would be oily and soft. Make sure the colour of potatoes are white.Remove & drain them in a tissue paper. Let it cool down completely. Store in zip lock bags and freeze them for later use. If making immediately, follow the next step.
French fries recipe
French fries recipe
  • Again heat oil till its well heated but not smoky. Now deep fry the potato strips for the second time till it becomes crispy and golden. Keep tossing them for uniform cooking. Remove in a tissue and sprinkle some salt. Serve with tomato sauce.
French fries recipe

  • NOTE : If  you want to make them in bulk and store it for later use, after frying for the first time, remove and cool down completely. Store them in a zip lock cover and freeze it till use.Whenever you want to make it, heat oil well and deep fry them. Oil may sizzle & splutter as the potatoes are frozen and coated with ice. So fry them carefully till golden and crispy and serve hot.
  • Baked version : Follow the same steps till  you pat dry the potato strips in kitchen towel. Preheat the oven in convection mode at 200c. No need to cook the potatoes. Arrange the strips in a baking plate and drizzle some oil all over them. Sprinkle some salt or organic seasoning. Bake them at 200c for 25-30 minutes OR till they become crispy. Remove and serve hot.Soon I will try to make a separate post for this baked version.
    Enjoy !


Note
  • Follow any of the above discussed methods based on your liking.You will get crispy french fries.
  • To make these fries more flavourful, you can sprinkle garlic powder, thyme, basil etc.
  • Use Red colored mud coated potatoes for best results. Other potatoes may turn brown quickly while roasting.
  • Washing the potatoes twice is to remove the extra starch content in the potatoes. It helps you get nice color to the fries.


Homemade french fries
Try these yummy, crispy french fries at home for your kids. They will love it for sure.!!
French fries
Continue Reading...


April 13, 2015

Tomato Biryani Recipe/Thakkali Biryani-Sunday Lunch Recipes Series-13

Tomato biryani recipe
I am a big big fan of tomato recipes but Sendhil is just opposite to me.He likes to take only a limited quantity of tomatoes.So i make tomato rice,tomato pulao and other tomato rice varieties for myself & my daughter whenever Sendhil have his lunch in restaurants with his colleagues.Last year i had shared a tomato rice recipe using rice cooker for bachelors.I usually make that way as it is so easy.Today,for a change,i tried tomato biryani/Thakkali biryani for the first time adding coconut milk and loved it a lot.It was so good in taste and super flavourful too.This is my 13th post in Sunday biryani series and i thought of ending this series with 2 more posts as i couldn’t find interesting biryani recipes anymoreConfused.But God had helped me with a 100 biryani varieties cookbook by Deepa Shekar( You might have seen her in Podhigai”Asathal samayal” cookery shows) which i bought recently in a departmental stores in Salem.Now i can confidently take this series at least up to 25 episodes after which i am planning to start simple daily lunch menu series for beginners & office goers.So stay tuned for super tasty,authentic and interesting biryani recipes with my own touch in the upcoming weeks.To begin with,here is an yummy tomato biryani recipe from that book.I am sure there must be many tomato lovers like me.I am presenting this recipe for you all.Lets see how to make this mouth watering thakkali biryani using coconut milkHappy
Tomato biryani recipe

Tomato biryani recipe


Tomato biryani recipe Tomato biryani recipe -Thakkali biryani for Sunday lunch & lunch box
Cuisine: Indian
Category: Lunch
Serves: Serves 2
Prep time: 20 Minutes
Cook time: 20 Minutes
Total time: 40 Minutes


INGREDIENTS

  • Basmati rice - 1 cup ( I used India gate)
  • Green peas - a handful
  • Chopped Bangalore tomato - 1 no (big)
  • Chopped Tamil Nadu tomato - 2 nos ( sour)
  • Big onion - 1 no
  • Coconut milk - 3/4 cup
  • Water – 3/4 cup 
  • Salt - as needed
  • Ghee - 1 tsp
To grind
  • Red chillies( soak in hot water)- 3 nos
  • Green chillies - 2-3 nos
  • Ginger - 1 inch
  • Garlic cloves-5 nos
  • Fennel seeds/soambu - 1/2 tsp
  • Big onion – 1/2 no
To temper
  • Cooking oil - 1.5 tbsp
  • Cinnamon - 1 piece
  • Cloves - 2 nos
  • Cardamom - 1 no
  • Biryani leaf – 1
  • Kalpasi/black stone flower-1 no
Mint & coriander leaves – a handful (finely chopped)
METHOD

  • Wash and soak the basmati ride for 20 minutes and drain the wate completelyr.Heat 1 tsp of ghee in a kadai and roast the rice for 5 minutes.Remove and keep aside.
Tomato biryani recipe
  • Wash and chop the onions,tomatoes and set aside.Soak red chillies in hot water and grind it with other ingredients given under”to grind” to a smooth paste adding enough water.
Tomato biryani recipe
  • In a cooker base,heat oil and saute cinnamon,cloves,cardamom,kalpasi and biryani leaf.Now add the chopped onions & ground paste.Saute till raw smell goes off.Add tomatoes & saute till its mushy.Add the required salt to ease the sauting process.
Tomato biryani recipe
  • Lastly add the green peas,roasted rice,water,coconut milk along with finely chopped mint & coriander leaves.Mix well and pressure cook in low flame for one whistle.Open the cooker & fluff the rice.
    Tomato biryani recipe
    Serve it hot with raita.Enjoy !


Note


  • For variations,u can use either coconut milk or water alone.
  • As tomatoes leave water,we have used rice & water in the ratio of 1:1.5
  • If u don’t want to roast the rice,soak the rice for 1 hour and use 1.5-1.75 cups of water.Add ghee in the water before pressure cooking.
  • You can also use tomato puree instead of chopped tomatoes.In that case,add 1/2 cup.

Check out my Tomato rice,Tomato pulao,Tomato rice using rice cooker .

Thakkali biryani recipe
Try this delicious Tomato biryani and have a yummy lunch with your familyHappy
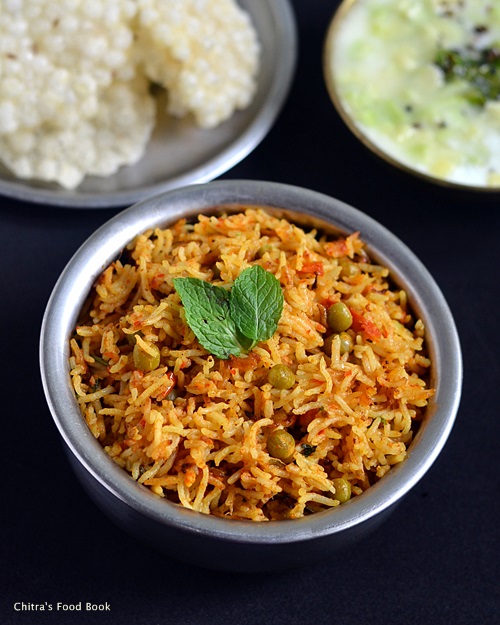
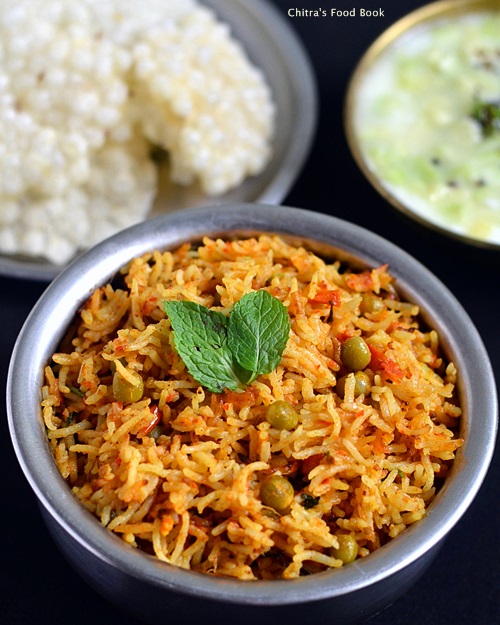
I served with Sago Vadagam and Cucumber Raita.
Thakkali biryani recipe

Continue Reading...


April 11, 2015

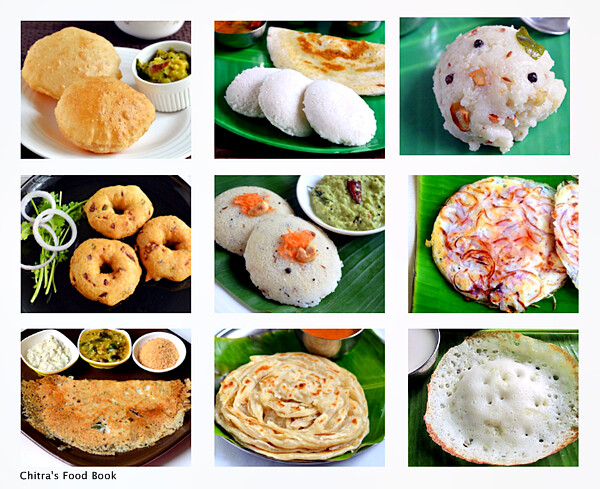
South Indian Breakfast Recipes - Top 15 Tiffin Items List Of Tamilnadu

South Indian breakfast recipes
South Indian Breakfast Recipes
Here is the list of South Indian breakfast recipes / Top 15 Tamilnadu tiffin recipes that is commonly prepared in every household. Not only in houses, but also in the breakfast menus of hotels/restaurants of Tamil nadu , Kerala and Karnataka. In this collection, some of them are authentic ones for which you need pre preparation and some of them are instant and easy to make tiffin recipes. Soon I will try to compile a list of Instant South Indian breakfast recipes and make a separate post for that too. Here you can find the links for Idli recipe (along with 15 varieties of idli recipes), Onion uttapam, Ven pongal recipe, Rava Kichdi recipe, Puffy poori, Crispy urad dal vada/Medhu vada, Parotta (quick version), Dosa, Crispy restaurant style rava dosa and Soft n spongy aapam recipe (without yeast n soda), Adai recipe, Rava idli(without soda), Karnataka special mysore masala dosa, Kerala puttu and last but not the least super soft spring hoppers/Idiyappam. You will find all these recipes with step by step images. I hope this list will help beginners. Please check out the links for

15 Idli varieties

50 Chutney recipes

30 Idli sambar recipes

Poori varieties

20 side dish for poori

If you are in Abroad/Cold countries and looking for Idli batter fermentation tips, check out this post 

Continue Reading...


April 10, 2015

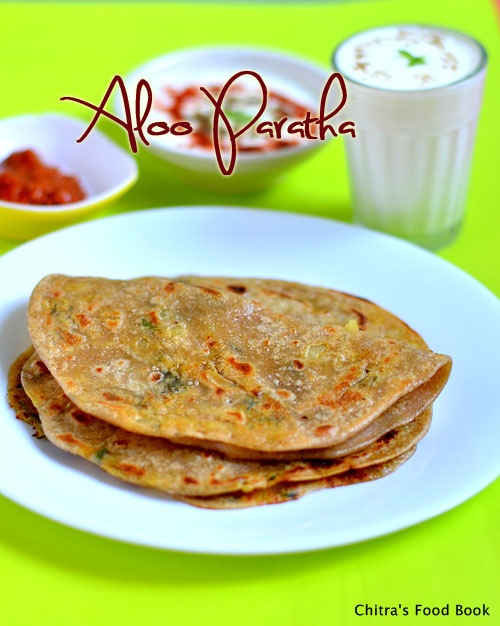
Punjabi Aloo Paratha Recipe - Stuffed Potato Paratha Recipe

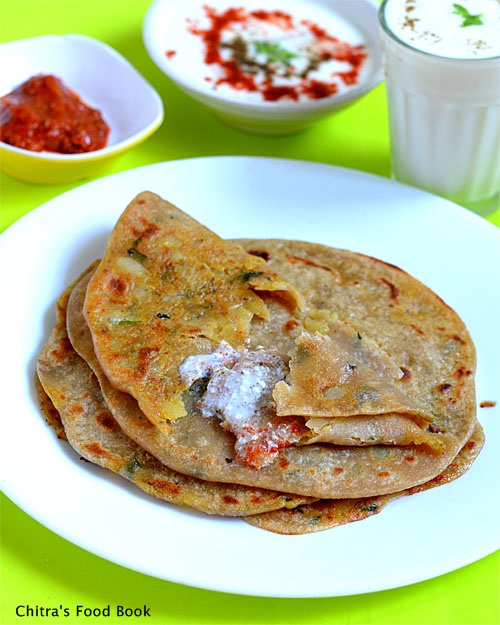
Aloo paratha recipe
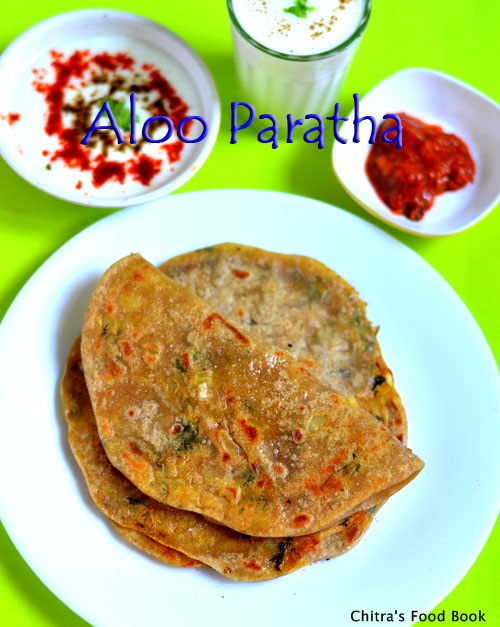
Long back I had shared an aloo ka paratha recipe learning from my friend. Today I tried Punjabi style aloo paratha for a change. I never thought its so easy to make and tastes like the one we get in paratha joints here. Its a no onion, no garlic jain recipe apt for fasting days. I loved the simplicity of this recipe and of course its delectable taste with the combination of masala dahi raita. Yes masala dahi is one of the best side dish for aloo paratha. I came up with this recipe after googling so many punjabi paratha recipes and videos. 

For rolling these parathas, I followed my friend’s method of rolling obbattu using two polythene sheets. It was very easy to roll and the potato stuffing din’t ooze out at all.I have shared the procedures with step by step pictures along with tips & tricks to make a perfect paratha for beginners sake. I hope and I am sure it will come out well for you.

Try it and let me know how you liked it. I always make the parathas thin as my man likes it that way. Please make it thick or thin as you wish. This morning I packed few parathas for his lunch box and I am waiting for his feedback. Ok, lets see how to roll and make these yummy, soft Punjabi aloo ka paratha recipe with step by step photos.

Aloo paratha recipe

Punjabi style aloo paratha recipe


Punjabi style aloo paratha recipe Punjabi style aloo paratha recipe -Easy to make,soft n flavorful !!
Cuisine: Indian
Category: Dinner
Yields: 8 
Prep time: 15 Minutes
Cook time: 3 Minutes
Total time: 18 Minutes


INGREDIENTS
For the dough
  • Atta/Wheat flour - 2 cups ( i used aashirvaad)
  • Water - as needed ( I used 1 cup + 1/2 tbsp)
  • Oil - 1/2 tbsp
  • Salt - as needed
For the stuffing
  • Potato - 4 nos (medium sized)
  • Ajwain/Omam - 1/2 tsp
  • Ginger - 1/2 inch piece ( grated or finely chopped)
  • Green chilli - 1 no ( finely chopped)
  • Red chilli powder - 1 tsp ( I used 3/4 tsp)
  • Garam masala powder - 3/4 tsp
  • Chat masala powder - 1/2 tsp
  • Anardana powder/Pomegranate seeds powder OR Amchoor powder - 1/4 tsp(optional)
  • Cumin powder/Jeera powder - 1/2 tsp
  • Finely chopped coriander leaves - few tbsp
  • Salt - as needed
HOW TO MAKE PUNJABI ALOO PARATHA - METHOD 


  • In a wide bowl,take the flour and add salt. Mix well. Make a dent in the center and add water little by little. Gather the flour and make a soft and smooth dough. Lastly add 1/2 tbsp of oil and cover the dough. Spread well and set aside for sometime till you make the stuffing.
Aloo paratha recipe
  • In a pressure cooker base,wash and add the potatoes along with required water. Cook for 3-4 whistles. Take the cooked potatoes, peel the skin and mash them very well without any lumps. (This is the first most important point to make the stuffing prevent oozing out). 
Aloo paratha recipe
  • To the mashed potatoes, add all spice powders, ajwain, finely chopped green chillies, grated ginger and coriander leaves. Mix them well adding the required salt. Check for taste and add more spice powders if needed. Make golf sized balls out of the stuffing and set aside.
  • Now take the dough & knead it really well by greasing your hands with oil. Make balls from the dough equal to the size of the stuffing ball.
Aloo paratha recipe
  • Take an obbattu sheet greased with oil & place the dough ball & stuffing ball. Press the dough ball into a small circle. Make sure the sides of ball is thinner than the center .Now place the stuffing ball in the center.Bring the edges of the dough and cover the stuffing ball. Press it and put few drops of oil on the stuffed dough ball. Place another polythene sheet over the stuffed dough and pat it well to make a round thick or thin paratha as you wish. In this method, you don’t need to dust the paratha in flour. Just few drops of oil would do.
Aloo paratha recipe
  • If u don’t want to follow this method, just stuff the filling in the dough as mentioned above. Dust the balls in wheat flour and roll it using a rolling pin. For this method, you don’t need oil but you have dust the paratha with wheat flour. Excessive dusting may result in dry paratha.So take care.
  • Now heat the dosa tawa and drizzle some oil. If using obbattu sheet for rolling, transfer the entire sheet with paratha over the dosa pan and remove the sheet. Cook the paratha only in medium flame on both sides by drizzling some oil around  & all over the paratha. Remove & serve hot with raita !Enjoy !
Aloo paratha recipe


Note

  • Make sure the potato is mashed really well else the stuffing will ooze out while rolling.
  • The consistency of dough should be soft and non-sticky. U can add more oil if needed.
  • The size of the stuffing ball should be bigger than or equal to dough ball.This helps to spread the stuffing evenly all over the paratha.
  • You can roll it thin or thick as you wish.
  • Adjust the quantity of masala powders as per your taste.
  • You can use obbattu sheet for rolling the parathas or simply dust the paratha in wheat flour and proceed like making chapathi.
  
Enjoy this yummy punjabi style aloo paratha recipe for your breakfast/dinner. 


Continue Reading...