Search Chitra's Food Book

November 7, 2016

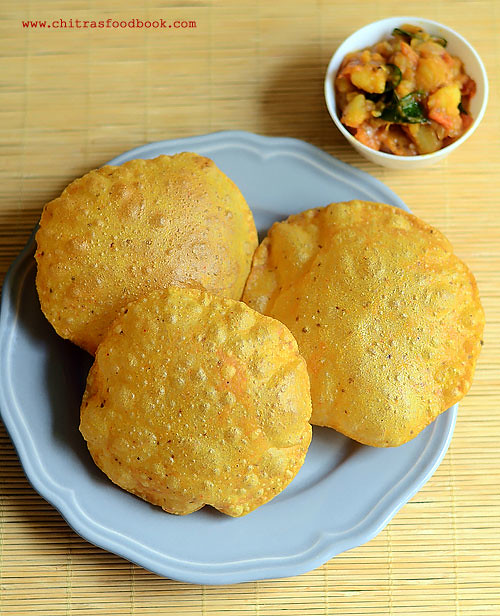
Masala Poori Recipe – Gujarati Masala Puri - Poori Varieties

masala puri recipe
Recently I tasted a spicy masala poori in a restaurant lunch buffet. It was very tasty. We all loved it. I wanted to try this yummy poori recipe at home.When I browsed for the recipe, I found masala puri is a popular Gujarati snack recipe. I watched a YouTube video and tried it for our Sunday breakfast along with aloo bhaji / Potato masala as side dish. Actual recipe called for amchoor powder. I din’t use it as I had no stock.I have used garam masala powder to make it more flavorful. But its not used in the authentic version. So this recipe has a slight variation from the original recipe. But it came out very well and we loved the combination of masala poori with Bhaji. Gujarati people carry this masala puri for travel to have it as breakfast or teatime snack. As it tastes spicy, you don’t need any specific side dish for this poori. But if you wish to have it for breakfast, you can try it with aloo bhaji, Batata nu shaak, Aamras or even with pickles. When I tried this recipe, I reminded about the famous roadside masala puri chat recipe. Of course, both are completely different recipes but the name masala poori tempted me to try that chat recipe as well. I should make it very soon and share in my space. Today we will see how to make this yummy Gujarati special masala puri recipe with step by step photos and a video !
Do check out my other poori recipes
Continue Reading...


November 6, 2016

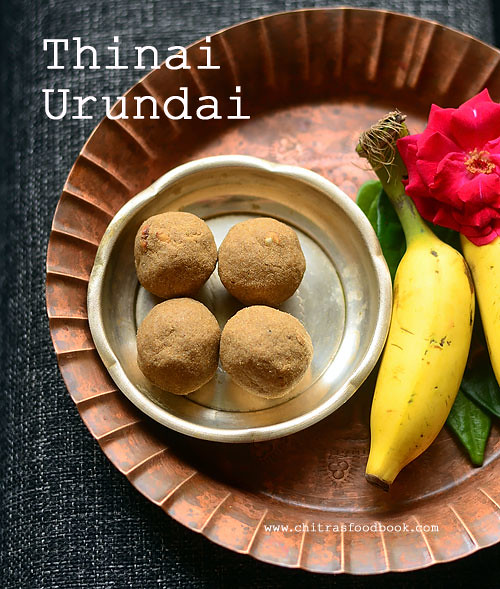
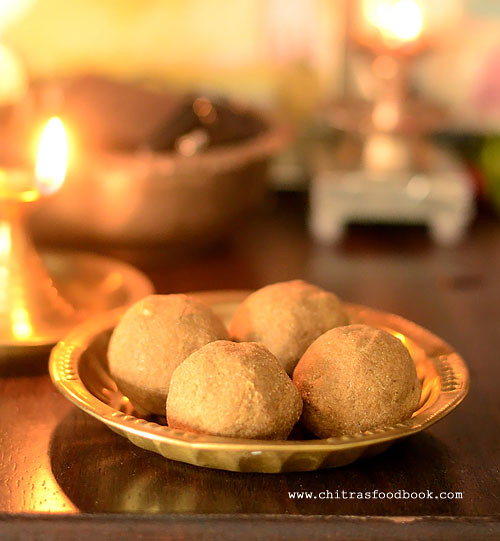
Thinai Urundai–Foxtail Millet Honey Balls –Thenum Thinai Maavum

Thinai urundai
Thenum Thinai Maavum is one of the most popular neivedyam recipes offered to Lord Muruga in Tamil nadu. Yesterday I made Thinai maavu urundai ( Foxtail millet flour laddu in English)for the first time on account of Skanda shasti. You can offer this for Karthigai deepam festival too.  I should thank my neighbor for suggesting me to try this. 

Traditionally speaking, foxtail millet (Thinai arisi) is dehusked, roasted, ground to a fine powder and then mixed with honey. But nowadays we get readymade foxtail millet flour( Thinai maavu) in all the organic & popular departmental stores. As I had a pack of flour in hand, I made these balls/ urundai very quickly and easily.I referred Viji’s blog for the idea. 

For variations, thinai urundai can be made with jaggery instead of honey.It is called as thinai maavu laddu. Honey or jaggery, both make this dish more healthy when combined with Thinai flour. Do try this healthy Thinai urundai/ Foxtail millet balls with honey for a change. You will like it !

Check out my detailed post on Health benefits of millets and my other millet recipes too !

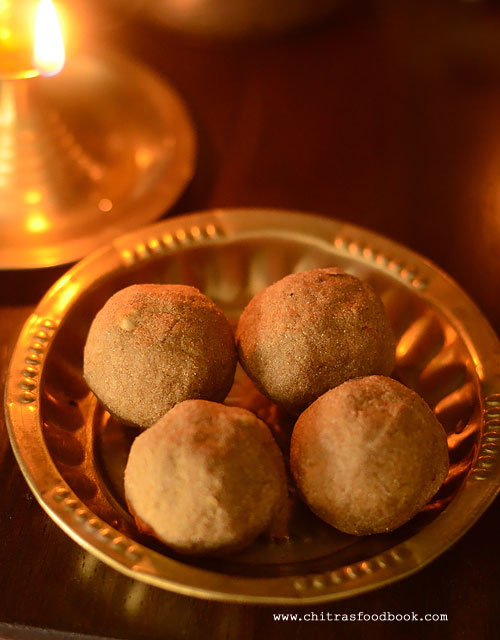
Foxtail millet honey balls

Thinai urundai recipe


Thinai urundai recipe How to make Foxtail millet honey balls / Thenum thinai maavum - Neivedyam recipe for Lord Murugan!
Cuisine: South Indian
Category: Sweet
Serves:
Prep time: 5 Minutes
Cook time: 5 Minutes
Total time: 10 Minutes


INGREDIENTS
1 cup - 250ml
  • Thinai maavu/ Foxtail millet flour - 1/2 cup
  • Ghee - 1 tbsp
  • Cashews - few
  • Honey - 1.5 - 2 tbsp
  • Cardamom powder - 1/4 tsp
METHOD

  • In a kadai, melt ghee and roast the cashew pieces. When it starts to turn golden brown, add the measured 1/2 cup of thinai maavu /Foxtail millet flour and roast in medium flame for few minutes. Let it cool down completely. ( If you don't have foxtail millet flour,  you can dry roast whole foxtail millet till aromatic. Powder , sieve and use it).

  • Do not add honey when the flour is hot. The balls will become chewy to taste. After the flour is completely cooled down, add honey to the roasted flour. Mix well and make balls.
    Thinai urundai
  • Arrange in a plate and offer to Lord Murugan. Get his blessings!
    Thinai urundai
Enjoy !

Note
  • Do not add honey when the roasted flour is hot. It should be cooled down completely.
  • Add more honey based on your liking.
  • In place of honey, you can use powdered jaggery.
  • If you don’t want to make as balls, you can just mix the flour with honey and eat as it is.
Healthy, Thinai urundai with honey. You can make this at least once in a while to reap its health benefits !
Thenum thinai maavum
Continue Reading...


November 4, 2016

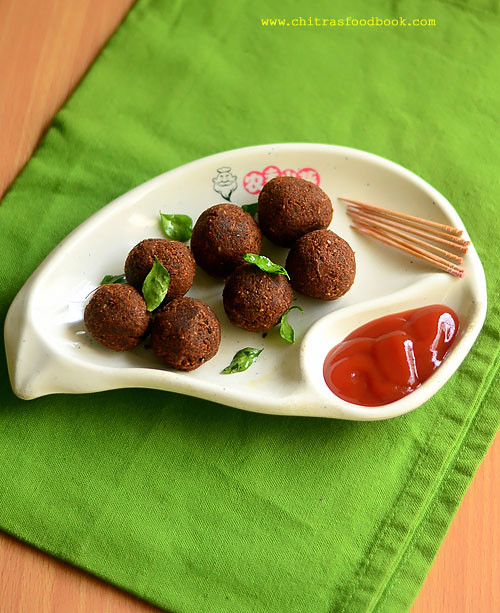
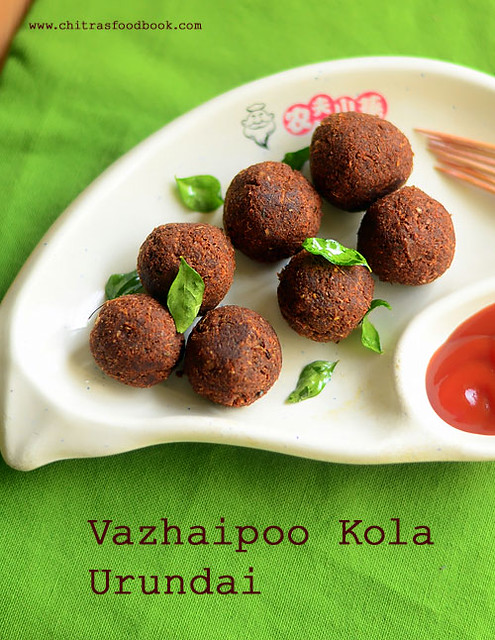
Vazhaipoo Kola Urundai Recipe – Banana Flower Recipes

Vazhaipoo kola urundai
Recent days I have been exploring varieties of vazhaipoo recipes ( Plantain flower/Banana flower in English) in my kitchen. Most of the South Indians especially Tamil people make Vazhaipoo vadai and Vazhaipoo paruppu usili using this vegetable and it would be their favorites as well. Me too not an exception. But apart from these usual recipes, I wanted to try some interesting and unique recipes with vazhaipoo. As a result of which I have tried and posted Vazhaipoo Kuzhambu / Banana flower gravy and Vazhaipoo dosa recipes in my blog. Here comes yet another yummy, kids friendly snack with banana flower. 

Yes, Its Vazhaipoo Kola urundai i.e Spicy fried plantain balls. I found this recipe in Nalini’s blog and I have tried it thrice so far. Once I made these balls for preparing Vazhaipoo kola Urundai kuzhambu ( Will post the recipe soon) for our lunch and made the same twice for my daughter’s evening teatime snack. 

This vazhaipoo kola urundai is sure a welcome change from vazhaipoo vadai. It can be made instantly without soaking dals. But it tastes crispy and the best only when hot. My daughter Raksha likes to relish these balls with her favorite tomato ketchup. Friends, do try this healthy snack with banana flower for your kids when they come back from school. I am sure they will love it a lot. 

Ok, Now lets check how to make Vazhaipoo kola urundai with step by step photos !
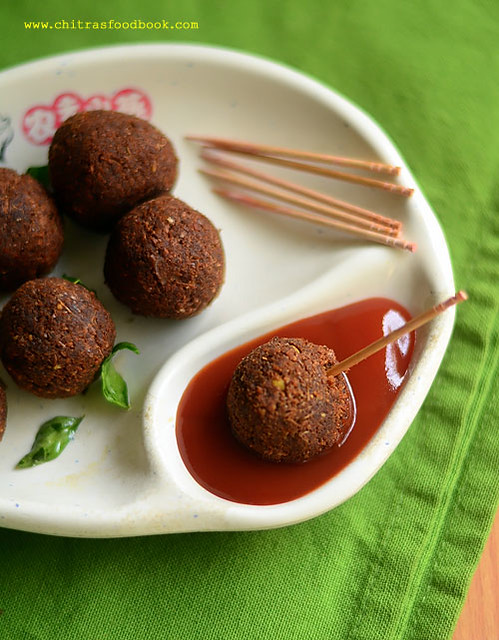
Vazhaipoo kola urundai recipe

Vazhaipoo Kola Urundai recipe


Vazhaipoo Kola Urundai recipe Spicy fried plantain balls/ Banana flower balls - Vazhaipoo kola urundai - Instant version
Cuisine: Indian
Category: Snacks
Serves: 15
Prep time: 15 Minutes
Cook time: 5 Minutes
Total time: 20 Minutes


INGREDIENTS
1 cup - 250ml
  • Vazhaipoo/ Banana flower - 1/2 no ( 40 - 50 florets)
  • Grated coconut – 1/4 cup
  • Big onion – 1/2 no
  • Red chilli powder - 1 tsp
  • Fennel seeds/ Soambu - 1 tsp
  • Ginger & Garlic paste - 1 tsp
  • Curry leaves – 1 sprig
  • Fried Gram Dal/ Pottukadalai - 1/2 cup
  • Salt - as needed
  • Rice flour - 1 tbsp
  • Water - 1 tbsp ( only if needed)
  • Cooking oil - to deep fry
METHOD

  • Remove the florets from the banana flower and set aside. Remove the Kalan(black colored stamen) from the florets and soak the florets in water or buttermilk till use.
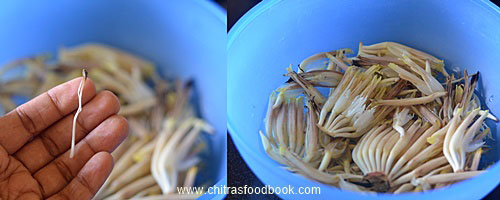
    Vazhaipoo kola urundai recipe
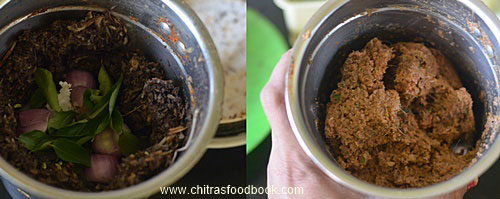
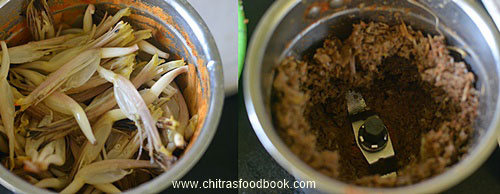
  • Pressure cook the banana flower adding little water in high flame for one whistle. Drain the excess water, squeeze it and remove from the cooker.Grind them in batches in a dry mixie jar. You should wipe the sides of jar every time for proper grinding. (I din’t cook the banana flower. I ground them directly as raw florets) Once the florets are coarsely ground, add the red chilli powder, grated coconut, fennel seeds, salt, g&g paste and big onion. Grind everything nicely to a smooth paste. Add 1 tbsp of water if necessary while grinding. 
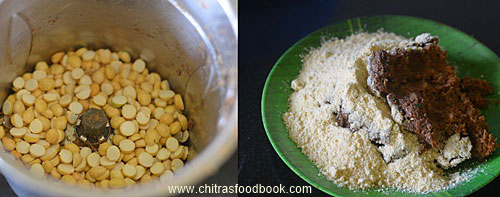
  • In another mixie jar, powder the fried gram dal and set aside.
    Vazhaipoo kola urundai recipe
    Vazhaipoo kola urundai recipe
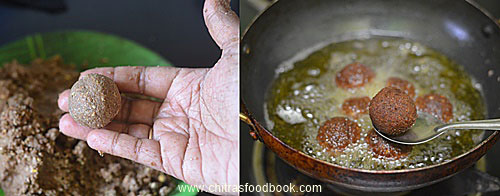
  • Take the ground batter in a wide plate.Add the powdered fried gram dal and rice flour. Mix well without adding water. Fried gram flour and rice flour absorbs the moisture content in the banana flower mixture and becomes dry. Make small balls out of the dough and arrange it.
    Vazhaipoo kola urundai recipe
  • Heat oil in a kadai and when it gets heated ,drop a pinch of dough. If it comes up immediately, heat of the oil is perfect. Now put the balls ( 3-4 at a time) and deep fry in medium flame for few minutes. Keep turning both the sides for even cooking. Remove when the balls turn golden brown in color. Serve them hot to enjoy its best taste. serve with tomato ketchup. ( you can prepare the dough in advance, refrigerate it and make balls whenever needed)
    Vazhaipoo kola urundai recipe
Enjoy your teatime!

Note
  • Add more chilli powder based on your taste.
  • Check for salt & spice and adjust them while mixing the dough.
  • Try to grind the vazhaipoo mixture to a smooth paste without adding water. At worst case, you can add 1-2 tbsp.
  • If the dough is sticky and too wet, add more fried gram dal flour and little rice flour to adjust the consistency.
Try this snack with banana flower for a change and enjoy !
Vazhaipoo kola urundai - Banana flower recipes
Continue Reading...


November 2, 2016

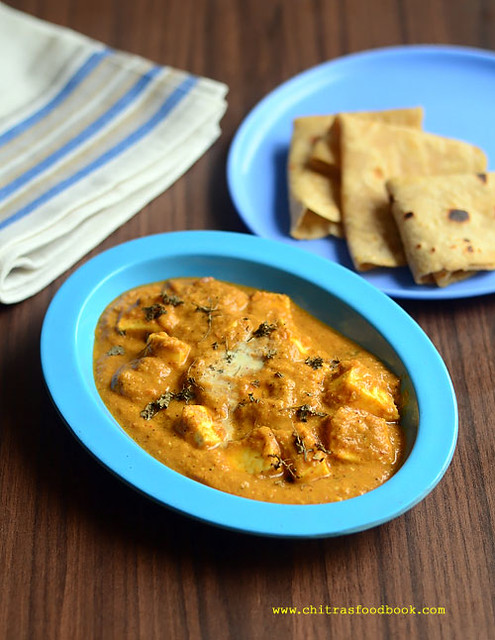
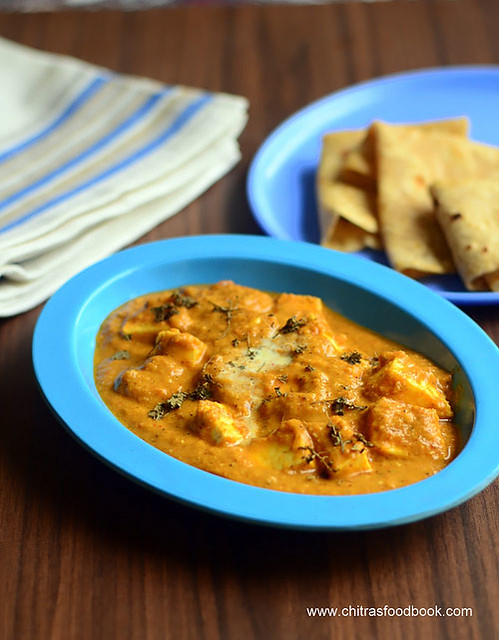
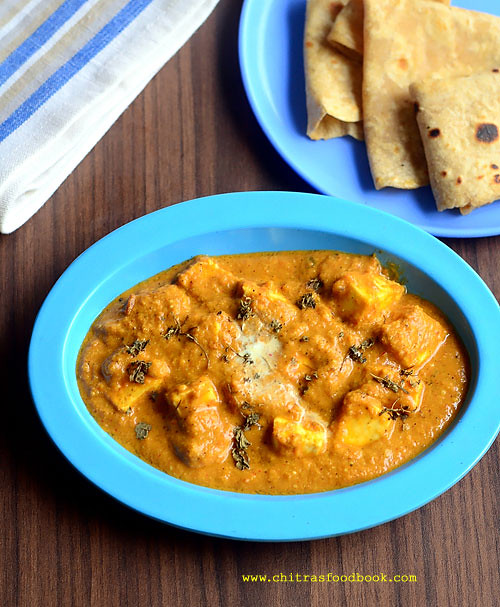
Paneer Butter Masala Recipe - Restaurant Style

Paneer butter masala recipe
Restaurant style Paneer Butter masala recipe with step by step picture- In this post, you can learn how to make North Indian, restaurant style Paneer butter masala at home. I tried this recipe from Nags Space. I made slight changes in the original recipe by simplifying its cooking procedure & the list of ingredients.It came out excellent in taste .Thanks a lot Nags. Its a quick and easy to make recipe.So I make it very often for Raksha’s lunch box. She loves the combination of soft chapathi with paneer butter masala more than other gravies.The addition of cashew paste, milk and fresh cream makes it so rich. You can make this gravy without onion and garlic too. I am sure it tastes great. I want to treasure this recipe in my blog for future reference.So here comes the yummy restaurant style Paneer Butter Masala recipe. Do try this recipe at home and let me know your feedback ladies Happy.

Paneer butter masala recipe

Paneer Butter masala - Restaurant style


Paneer Butter masala - Restaurant style How to make restaurant style paneer butter masala at home
Cuisine: Indian
Category: Side dish for roti
Serves: Serves 2-3
Prep time: 5 Minutes
Cook time: 15 Minutes
Total time: 20 Minutes


INGREDIENTS
1 cup - 250ml
  • Paneer – 50 gms (cubed ) ( Soak in hot water till use)
  • Big onion – 1 no (chopped roughly)
  • Tomatoes – 2 nos (medium sized)
  • Cooking oil or butter - 1 + 1 tbsp
  • Ginger , Garlic paste – 1 tsp ( Or grind 1 inch ginger & 5 cloves of garlic)
  • Coriander powder/Dhania powder – 1.5 tsp
  • Red chilli powder – 1 tsp
  • Garam masala powder – 1/2 tsp
  • Tomato ketchup - 2 tsp
  • Salt- As required.
  • Boiled Milk – 1/2 cup to 1 cup ( use as required)
  • Fresh cream - 1 tbsp ( I dint have fresh cream .So I removed a tsp of skin from the boiled milk and added it.)(Paalaadai)
  • Cashew – 5 nos ( to grind to a smooth paste)
  • Crushed Kasoori methi - 1 tsp
METHOD

  • Peel and chop the big onion roughly. Chop the paneer into cubes. Boil 1 cup of water and add 2 tomato. Let it boil till the skin of tomato cracks. Switch off the flame and remove the tomatoes, set aside. ( You can peel the skin of tomatoes if you wish) Add the cubed paneer pieces to the remaining hot water. Let it be in hot water till use. It helps to keep the paneer soft.No need to fry the paneer pieces. ( For variations, you can skip blanching the tomato and grind with onion mixture as shown in the next step)
    Paneer butter masala recipe
  • In a kadai, heat oil( use butter for rich taste) and saute the onion till transparent.Add Ginger&garlic paste,saute till its raw smell goes off.Now add the red chilli powder, dhania powder , garam masala powder. Saute in low flame. Make sure you don’t burn them. Let the mixture cool down completely.
    Paneer butter masala recipe
  • To the mixture, add the blanched tomato and raw cashews. Grind everything to a smooth paste adding required water. Heat oil ( or butter) in a kadai and saute the ground paste till thick.
    Paneer butter masala recipe
  • Add tomato ketchup, sugar and salt. Mix well and boil the gravy till oil starts to float on top. Add the boiled milk. Mix well and check the taste. Let the gravy boil for few minutes. Gravy gets a nice orange shade. Lastly add the crushed kasoori methi, paneer cubes.If the gravy is too thick, add more milk. Mix well. Add  fresh cream at the end and switch off the flame.Check for spice & salt. If its too spicy add some more milk and vice versa. Serve with roti !!
    Paneer butter masala recipe
Enjoy !


Note
  • Use butter instead of cooking oil for rich taste & flavor.
  • Instead of grinding cashews along with tomato, onion mixture, you can grind it separately and add it along with milk.
  • You can also use almonds/badam in place of cashews. But cashews are the best !
  • You can peel the skin of blanched tomato, grind it to a puree and add to the gravy. But I ground it with onion masala.
  • Adjust the quantity of chilli powder and dhania powder as per your taste.
  • Adding kasoori methi gives the perfect restaurant style taste.So please don’t skip it.

Yummy Paneer Butter Masala is ready to be served hot with Chapathi , Naan.

Paneer butter masala recipe Restaurant style
Continue Reading...


November 1, 2016

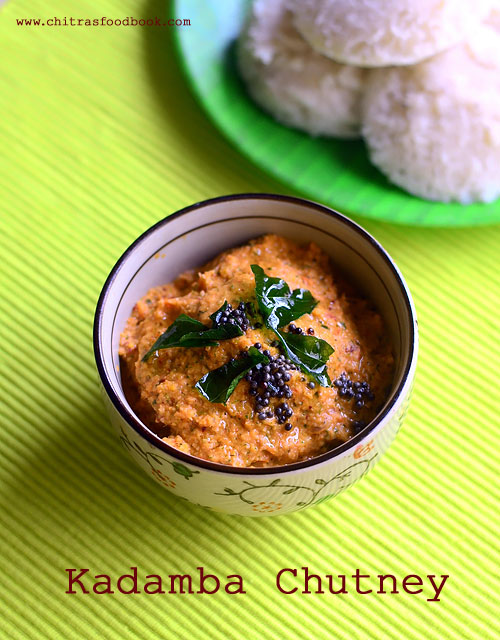
Kadamba Chutney Recipe – Chutney Varieties

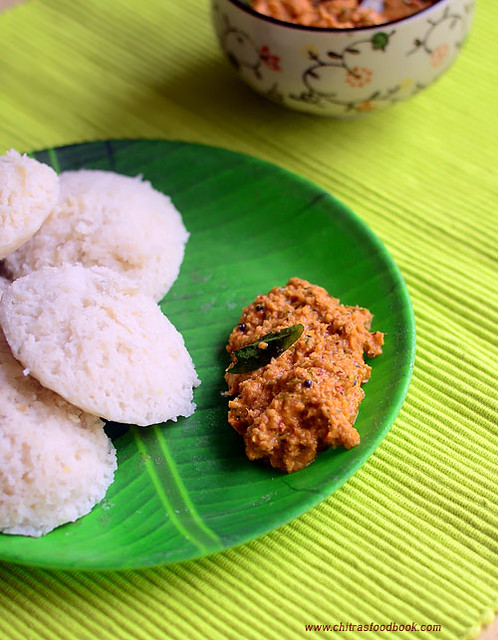
kadamba chutney recipe
I came to know about this Kadamba chutney recipe from a reader’s request. I thought kadamba chutney and mixed vegetable chutney are one and the same. But then I realized Kadamba chutney is made with the combination of onion, tomato, coconut, ginger, garlic, chilli, urad dal, chana dal, mint+coriander+curry leaves. Its made without carrot, chow chow or any other vegetable. 

This morning, I prepared this chutney for our breakfast as a side dish for idli. I followed the recipe from Sangeetha’s blog. It was very nice and tasty. We all loved it very much. I felt this chutney recipe goes well with dosa, rava idli and even for mixed lentil dosa/ Adai. 

Do try this easy and yummy side dish recipe for your breakfast/dinner and let me know your views. Now lets see how to prepare this yummy South Indian style Kadamba chutney recipe for idli, dosa with step by step photo.

Check out my collection of 48 Chutney Recipes !

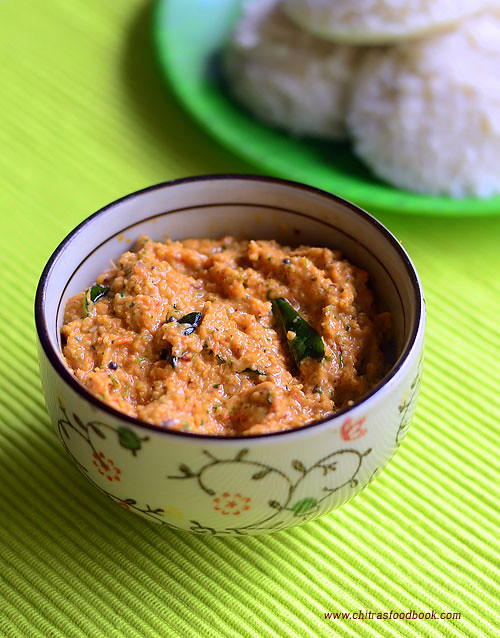
kadamba chutney

Kadamba Chutney Recipe


Kadamba Chutney Recipe Kadamba chutney - Side dish for idli, dosa and adai !
Cuisine: Indian
Category: Chutney Recipes
Serves: Serves 2-3
Prep time: 5 Minutes
Cook time: 10 Minutes
Total time: 15 Minutes


INGREDIENTS

  • Cooking oil – 1.5 tbsp
  • Ripe tomato - 1 no
  • Big onion - 1 no
  • Grated coconut - 2 tbsp
  • Red chilli - 2 nos
  • Green chilli - 1-2 no
  • Ginger – 1/2 inch piece
  • Garlic cloves – 3 nos
  • Tamarind - Very small piece
  • Urad dal - 1 tbsp
  • Chana dal - 1 tbsp
  • Mint leaves - 1 sprig
  • Coriander leaves - 1 sprig
  • Curry leaves - 5 nos
  • Salt & water - as needed
To temper
  • Cooking oil - 1 tsp
  • Mustard seeds - 1/2 tsp
  • Curry leaves - few
HOW TO MAKE KADAMBA CHUTNEY - METHOD

  • Wash and chop tomato, onion, green chilli. Peel ginger and garlic. Grate or finely chop the coconut. Set aside. In a kadai, heat oil and saute the urad dal + chana dal. When the dals start to turn golden, add the pinched red chilli and chopped green chilli. Saute for few seconds. Then add the chopped ginger, garlic, onion and saute for a minute. Lastly add the tomato and grated coconut along with the required salt and a small piece of tamarind. Saute until tomato turns mushy.
    kadamba chutney
  • Switch off the flame and add the mint+coriander+curry leaves. Saute quickly. They shrink and mixes well with the mixture. Let everything cool down completely. First grind them to a coarse paste without adding water. Then add water and grind to a thick paste. Remove the chutney to a serving bowl. Temper mustard seeds and curry leaves. Add to the chutney bowl and mix well. Serve with hot idli , dosa or adai !
    kadamba chutney
  • Enjoy !
Note
  • Adjust the quantity of chilli as per your taste buds.
  • Adding tamarind is optional but it gives a mild tangy taste to the chutney.
  • Do not add more ginger. It will dominate the chutney flavor.
  • No need to use more coconut. Its just for binding. You can skip it if you don’t want to use it.

Yummy Kadamba chutney is ready to serve with Idli, dosa !!
kadamba chutney
Continue Reading...


October 31, 2016

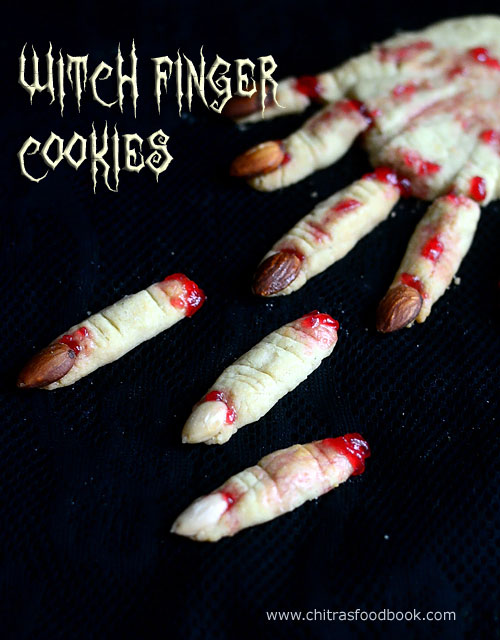
Eggless Witch Finger Cookies Recipe-Halloween Recipes

Witch finger cookies recipe
Eggless Witch Finger Cookies with step by step. For the first time I am sharing a recipe for Halloween day. I have heard about Halloween day and the most popular Halloween Sugar cookies from my friends in US. So this year I wanted to try some interesting and scary recipe on this day. When I was browsing for it, I found this easy Halloween spooky witch finger cookies in Priya’s blog. Its very similar to butter cookies recipe. When I showed the witch finger cookies images to my daughter Raksha, she was very much excited and asked me to bake them immediately. She took part in all the activities like mixing the cookie dough, baking, shaping cookies until decoration with jam Happy. Friends, Do engage your kids and try this easy Halloween butter cookies, share your feedback with me. Now lets see how to make this eggless spooky witch finger cookies for Halloween day !
Witch finger cookies recipe

Eggless Halloween Witch Finger Cookies Recipe


Eggless Halloween Witch Finger Cookies Recipe Eggless Halloween Witch Finger Cookies Recipe - Butter cookies recipe
Cuisine: Indian
Category: Cookies Recipes
Serves: 15 nos
Prep time: 40 Minutes
Cook time: 15 Minutes
Total time: 55 Minutes


INGREDIENTS
1 cup - 250ml
  • All purpose flour / maida - 1.25 cups
  • Powdered sugar - 1/3 cup
  • Softened butter - 1/2 cup
  • Baking powder - 1/8 tsp
  • Salt - a very small pinch
  • Vanilla extract - 1/4 tsp
  • Whole Almonds - few
METHOD

  • In a wide mixing bowl, combine butter, sugar and vanilla extract. Beat it well with a whisk until creamy, soft and fluffy.
    Witch finger cookies recipe
  • Sieve Maida/ all purpose flour and baking powder.Add this to the butter mixture and make a dough. If the dough is very crumbly and dry, add few tsp of butter or cooking oil. Do not use milk. Mix well and make a soft dough. Wrap the dough in a butter paper or cling wrap and refrigerate it for 30 minutes.
    Witch finger cookies recipe
  • After 30 minutes, take out the dough and let it come to room temperature.It would become soft. Now take a big gooseberry sized dough and make finger shapes by rolling it. Stud in blanched almond for nails. Draw lines using a knife. Grease a baking tray with butter & maida or line with a butter paper. Arrange the cookies in a baking tray. My daughter wanted to make witch hand with palm & fingers. So we shaped like a hand. Please refer picture for the idea.
    eggless witch finger cookies recipe
    eggless witch finger cookies recipe
  • Preheat the oven in convection mode at 180 c. Place the cookies tray and bake the cookies for 15 minutes. After 15 minutes, check if the sides of cookies turn golden brown in sides & bottom. Remove the tray and let the cookies cool down completely.Do not try to remove the cookies, it may break. Cookies would be soft when hot. It turns super crispy & hard after cooled down.So be patient till it cools down.

    eggless witch finger cookies recipe
Mix some hot water with the jam and dilute it. Apply them on the cookies and give a blood like appearance. Enjoy these scary cookies !

Note
  • You can use with wheat flour or maida & wheat flour in 1:1 ratio.
  • Do not use milk for making dough. Cookies may turn chewy & its shelf life would be reduced.
  • This cookies stayed good for a week when stored in an air tight box.

Try this easy, tasty, scary witch finger cookies and enjoy with your kids !!
eggless witch finger cookies
Continue Reading...


October 27, 2016

Gulab Jamun Recipe With Instant Mix – How To Make Gulab Jamun With MTR Mix

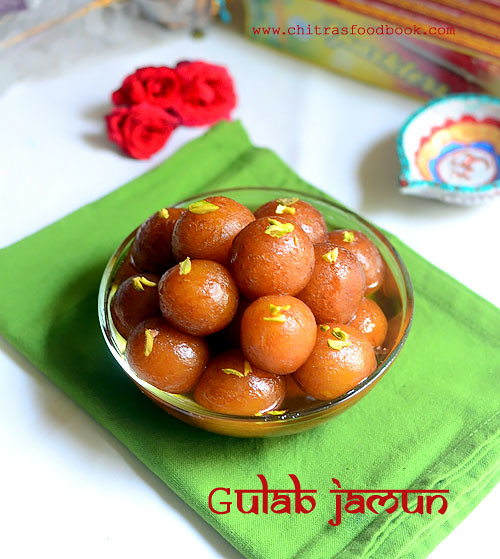
Gulab jamun with instant mix
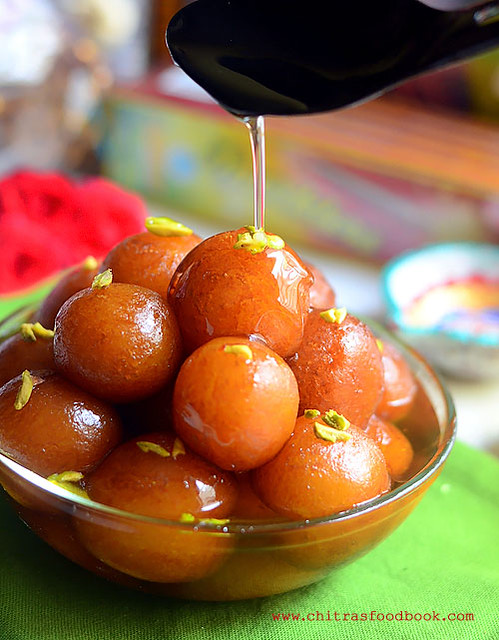
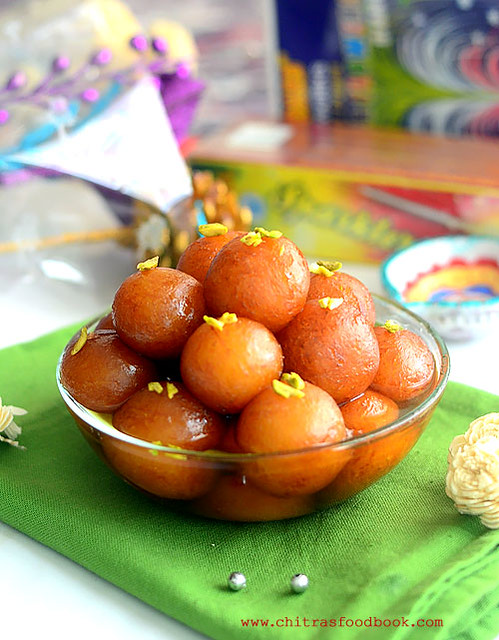
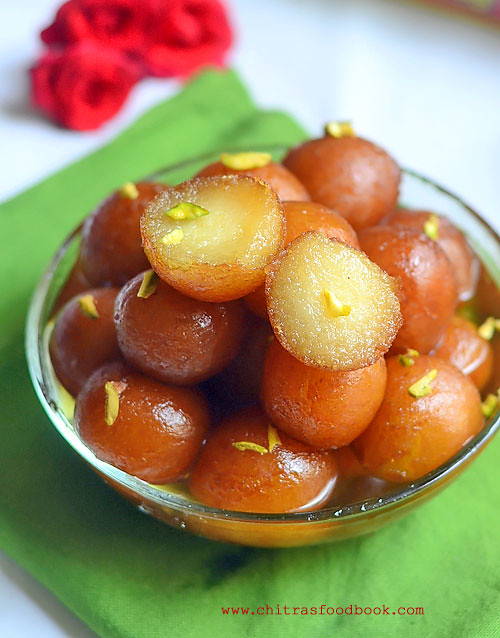
Gulab jamun using instant MTR readymade mix - step by step recipe and video. Diwali celebration is incomplete without these yummy Gulab jamun. Its an universally loved Indian dessert recipe. In most of the Indian households, Gulab jamun recipe will be in the Diwali sweets menu for sure. Many people make it as the last minute sweet for Diwali and other special occasions like birthday, anniversary, New year celebration and even for Valentine’s day.

Most of us opt for Gulab jamun recipe using readymade, store bought Instant mix as its easy and quick to make, cheap in price compared to other sweets in shops. Even though the ingredients used in the gulab jamun mix are the same, there are many brands available in the market with their own variations & style. Some of the most popular ones are MTR, GITS, Aachi, Bambino and Orkay. Recently my reader friend Harini requested me to share Gulab jamun recipe using MTR jamun mix.

So I bought a pack of jamun mix in buy one get one offer and tried it yesterday by getting some inputs from my friends Tara, Megha and Swarna. They make Gulab jamun using readymade mix very often. So they shared some useful tips to make soft, smooth gulab jamun without breaking and cracks. I watched this YouTube video tutorial as well. I followed the steps carefully and the result was awesome, perfect !! I was elated to see my soft, Gundu Gundu gulab jamun and jumped out of joy.

Raksha and Sendhil relished this yummy dessert recipe with ice cream. Most of you may think, making gulab jamun using instant mix is not a big deal or rocket science. Yes, its true. But beginners may face some difficulties to prepare a perfect Gulab jamun. So this post is explicitly for them. Even bachelors can also give a try. Experts, please excuse me and do share your  favorite jamun mix along with some tips if any. Lets see how to make Gulab jamun recipe with MTR instant mix at home with step by step photos and a video tutorial !

Gulab jamun recipe with mtr mix

Gulab jamun recipe with instant mix


Gulab jamun recipe with instant mix How to make Gulab jamun using readymade, Instant, store bought mix
Cuisine: Indian
Category: Sweet
Serves: 20 nos
Prep time: 45 Minutes
Cook time: 15 Minutes
Total time: 60 Minutes


INGREDIENTS
1 cup - 250ml
  • Gulab jamun mix - 150gms/ 1.5 cups
  • Boiled Milk at room temperature - 1/4 cup + 2 tbsp ( + 1 tsp)
  • Cooking oil - to deep fry
For sugar syrup
  • Sugar - 3 cups
  • Water - 3 cups
  • Cardamom powder or rose essence - 1 tsp
  • Saffron threads – few
  • Chopped nuts – to garnish

Please watch this video for clear understanding !

METHOD

  • Read the instructions given on the pack. In MTR mix, its mentioned to add 1 part of water for 4 parts of mix. 400gms of sugar for 150 gms mix packet. So i followed the recipe accordingly.
  •  Take sugar and water in a wide bowl and mix well. Keep aside, let it dissolve. In the mean time, take the gulab jamun mix in a wide plate. I used my thambalam/ big round plate. Usually I make chapati dough and other dough in my thambalam as its spacious and convenient to mix well. If the mix has more lumps, sieve it once.  Break the lumps with your fingers while sieving. Do not discard the residue. Add it to the mix again. I got around 1.5 cups of  powder.
  • If you are using ORKAY mix, do not sieve the mix. Just break the lumps using your hands.
    Gulab jamun recipe with mix
  • Now add the milk little by little and gather all the flour with your fingers. The mixture will become wet and very sticky. Do not worry. Gulab jamun will come out soft if the dough is sticky. I used 1/4 cup + 2 tbsp + 1 tsp milk. So add milk carefully at the end. If you add more milk, jamun will flatten and break. Do not knead the dough using your palm. Mixing should be done only with your fingers. Cover the dough with a plate or invert a bowl. Let it rest for 15 minutes to 1 hour.

  • In the mean time, heat sugar + water and melt it. Add saffron threads, cardamom or rose essence. Boil the syrup for 10 minutes in medium flame till the syrup turns slightly sticky to touch, glossy & resembles oil in consistency. Keep aside. Let the syrup becomes warm.
    Gulab jamun recipe with mtr mix
  • After 30 minutes, take the dough.It will be soft to touch.Do not knead it. Grease your palm with ghee. Make a big gooseberry sized ball by rolling the dough between your palm. Give gentle pressure and roll it continuously for 30 seconds to make it smooth and crack free. As the dough is sticky, jamun balls will not get cracks. If you feel there are cracks, just roll it tight. Cracks will disappear. I made around 20 balls.
    Gulab jamun recipe with mix
  • Heat oil in a kadai and when it gets heated , put a pinch of dough in the oil. If it rises to the top slowly, oil heat is perfect. Now stir the oil with a ladle in the corners. When the oil starts to rotate, drop the jamun balls. I cooked 4 per batch. Stir the oil continuously without touching the gulab jamun. You will find jamun rotate with oil and turns bigger in size. The color of jamun balls change slowly and it cooks uniformly. 
  • Once it turns golden brown, remove it in a tissue paper. Do not fry for long time. Jamun will become hard and it will not absorb the syrup. After frying, open & check if its cooked well. Leave the cooked jamun for 2-3 minutes in tissue paper and then drop in the sugar syrup. ( If you feel difficult to stir the oil, just keep the flame low, add the balls, flip every now and then till jamun turns golden. Then remove it)
    Gulab jamun recipe with mix
  • If the sugar syrup becomes cold, heat till it becomes medium hot. i.e vapor should start to come from the syrup slightly. Deep fry all the balls in batches, drain in the tissue and drop in the syrup. Let the balls soak in syrup for minimum 3-4 hours. It will soak well and double in size. Remove and serve in a bowl. Transfer the gulab jamun to a tight box and store it for days.No need to refrigerate.
    Gulab jamun recipe with mix
Enjoy !
Tips
  • Adding milk for making the dough helps to give soft jamun. You can use water as well. My friend Swarna adds just a tsp of milk in the beginning and add then water to make the dough. You can try this too. 
  • Dough should be really sticky to get soft Gulab jamun. If you have added more milk by mistake, don’t panic. Just cover the dough with a lid and let it rest for an hour.Grease your hands and make smooth balls. If it comes out without cracks, then proceed and deep fry only one ball for a trial. If it disperses in oil, then add a tsp of maida, mix well and make another ball. Test it and proceed further.  But adding more milk flatten the jamun. So please be careful while adding milk.
  • Jamun balls should be crack free. Roll it for 30 seconds continuously. This helps to seal the cracks while rolling. Do not press it too hard while rolling, but give gentle pressure.
  • Deep fry the balls only at low temperature else balls will get browned quickly without cooking inside.
  • Gulab jamun balls will disperse in oil  or cracks more if the oil temperature is too low. So Check the temperature before you drop the balls.
  • Similarly cracks will form if the jamun balls become dry. So keep it covered all the time till you finish the procedure.
  • Sugar syrup should not be too hot while you drop the jamun. It should be medium hot or warm. Similarly Gulab jamun should not be too cold. 
  • Gulab jamun will flatten if you add more milk. It will also flatten if the sugar syrup is less. Make sure the sugar syrup is enough for all the balls to absorb and dunk in completely.
  • If the quantity of sugar syrup is less, then jamun will not turn soft and double in size.
Gulab jamun with readymade mtr mix
Try this delicious, yummy cute Gulab Jamun recipe for your Family and have a great Diwali Celebration.
Wish you all a very happy and safe Diwali !!
Gulab jamun using instant mix
Continue Reading...