Search Chitra's Food Book

December 5, 2017

Pumpkin Soup In WonderChef Soup Maker – Indian Style Pumpkin Soup, Poosanikai soup

wonderchef automatic soup maker
I tried this Indian style Pumpkin soup recipe ( manjal poosanikai soup in Tamil, Kaddu ka soup in Hindi)  using Wonderchef soup maker. Recently I got Wonderchef Automatic Soup Maker to review the product. As wonderchef is a renowned brand, I agreed without any second thought. Wonderchef Kitchenware offers one of the best cookware and kitchenware appliances curated by our Chef Sanjeev Kapoor and Ravi Saxena. It offers a wide range of ultra stylish cook ’n’ serve casseroles, designer non-stick pans with health-friendly 5 layer coating, cold press juicers and super tandoors, mixers and much more for a modern kitchen. When I received their recently launched soup maker for the review, I was very happy to see the product and packaging. It was so good and easy to use with 5 different modes for making smooth soup, chunky soup, making compote, juice and blend mode.

This evening I tried making pumpkin soup in the automatic soup maker. I loved the smoothy, creamy end result. All it takes is just 20 minutes to cook, blend and make a delicious soup. This automatic soup maker does the job of a pressure cooker and mixie. Yes it cooks the vegetables to smooth or chunky pieces as per the selection of the mode and grinds well to make it creamy and thick. Ok, lets see about this product in detail below.

As pumpkin tastes bland, I used bayleaf, onion and garlic sauteed in butter to lend some flavor. We liked it very much. So this is purely an Indian style recipe without using fresh cream. Hope you will like this easy pumpkin soup recipe.
wonderchef automatic soup maker
About Wonderchef Automatic Soup Maker – Specifications and Features.
  • It resembles a bigger sized kettle with a minimum and maximum capacity of 1.3 to 1.6 liters.
  • It has a stainless steel body and a not so sharp blades for blending the soup.
  • It just occupies the space of an Indian mixer as its size is not so big.
  • It has 5 different operating modes with touch control and programme indicator lights.
  • It can make smooth soup, chunky soup, compotes for babies, juices/smoothie/ milkshakes and blends without heating. One can select the mode as per the need.
  • Each mode is built in with Intelligent control systems with timer options to prevent dry burning.
  • This product comes with a 2 year warranty from the date of purchase.
  • Tech Specs: 220V~50Hz Motor: 140W, Heater: 800W, Copper motor.
  • It comes with a clear instruction/operation manual with all the do’s & don’ts.
Pros & Cons Of Wonderchef Automatic Soup Maker
Pros :
  • The look of this product is good. It looks modern and not so big for this capacity.
  • It does the job of a pressure cooker and blender which is very much comfortable.
  • This product gives a beep sound once the process is over. So you can relax.
  • You can easily make the soup or juice for a family of 4 to 5.
  • Operating time is lesser for this quantity.
  • It has a hassle free operation.
  • There is no need to strain the soup. So the fiber is retained in the dish.
  • It has an option to make compote for babies without touching the food.
  • Its more hygienic too.
  • We can make homemade soup with our own combinations. You can make it more healthy without any preservatives unlike store bought readymade soup packets !
Cons :
  • The first thing that strike my mind is the quantity/capacity of this product. We should make minimum 1.3 liters of soup which I felt too much for a 3 member family like us. It would be ideal for 6 to 10 people. For us, it comes to 2 servings each. I felt it would be better If Wonderchef can bring a smaller size in this product.
  • There is no reheat or warm mode in this product.
  • There is no indicator/led light to show the machine is ON. We should identify its under operation only with the sound.
  • There is no Saute option.So if a soup recipe calls for sauting the spices and vegetables, we should do it separately in a kadai and transfer to the soup maker.
  • Costwise it is slightly lesser than Philips and Morphy richards.
For more details and to buy this product, visit Wonderchef Automatic Soup Maker. They also have a facebook page WonderchefLife. Wonderchef products are available on Flipkart and Amazon as well.

DISCLOSURE : I have reviewed this product after using it on my own. All the points shared here are my own views.

wonderchef soup maker
Lets see how I prepared Indian style pumpkin soup using this soup maker in detail. 
Pumpkin soup

Pumpkin soup using Wonderchef Automatic Soup Maker


Pumpkin soup using Wonderchef Automatic Soup Maker

How to make pumpkin soup using Wondechef Automatic soup maker


Cuisine: Indian
Category: Soup Recipes
Serves: Serves 4
Prep time: 10 Minutes
Cook time: 20 Minutes
Total time: 30 Minutes


INGREDIENTS

1 cup - 250ml
  • Yellow Pumpkin pieces - 2 cups
  • Water - 4 cups
  • Butter - 1 tbsp
  • Bayleaf - 1 no
  • Big onion - 2 nos
  • Garlic cloves - 6 nos
  • Salt - as needed
  • Pepper powder - as you like
  • Fresh cream – 1 tbsp ( to garnish, optional)

METHOD

  1. Wash and peel the skin of pumpkin. Chop into small pieces and set aside.
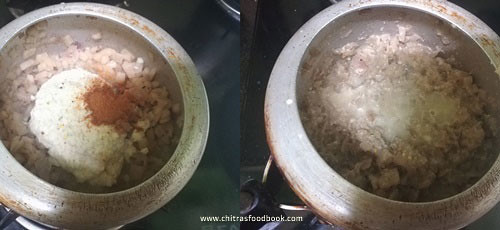
  2. In a kadai, heat butter and saute bayleaf, onion and garlic cloves.
  3. Add pumpkin pieces to it. Saute well till raw smell goes off.
  4. Add water, salt and transfer to the Wonderchef Automatic soup maker.Cover with a lid.
  5. Switch on the machine. Press mode button and select Smooth soup option.
  6. It beeps and starts processing. It gets switched off after 20 minutes with a beep.
  7. Open carefully and transfer to a bowl. Add pepper powder, fresh cream and serve hot !

METHOD - STEP BY STEP PICTURES

  • Read the instruction manual before you start with. Wash and slice the skin of pumpkin.Discard it. Now chop the pumpkin into small pieces. Chop onion and garlic cloves finely.
    Pumpkin soup
  • Heat butter in a kadai. Saute bayleaf. Add onion and garlic cloves. Saute till transparent. Add Pumpkin pieces and saute till its raw smell goes off. Saute for 5 minutes.
    Pumpkin soup
  • Now add water, salt and transfer everything to the Wonderchef Automatic soup maker. If you don’t have the soup maker, you can make everything in the base of pressure cooker and cook it for 2 whistles in low flame, grind to a smooth paste, add pepper powder and serve hot !
    Pumpkin soup
  • For soup maker : After you transfer the pumpkin to the soup maker, cover with the lid.Switch on and press the MODE button. When you press repeatedly, you can see the selection of different options. Press till SMOOTH button flashes. If you like chunky soup, you can select CHUNKY option.
  • Press START BUTTON. Process starts and finishes automatically. Steam releases from the mouth of the jug. You can just sit and relax till it beeps. While it blends the soup, you will hear the sound of a mixie. Do not panic like me , hehe. Approx. it took 20 minutes for the process to complete.
  • After the process gets over, you will hear a BEEP sound. Open the lid carefully because steam comes out vigorously. Do not show your face while opening the lid.Transfer the soup to the bowl. Add pepper powder, fresh cream if you like. Serve hot with any bread, grilled veg sandwich !
    Pumpkin soup
    Enjoy !


Enjoy this easy, healthy, creamy pumpkin soup during this winter !
Pumpkin soup - Indian style
Continue Reading...


December 1, 2017

Karthigai Adai Recipe – Milagu Jeeraga Adai For Karthigai Deepam

Karthigai adai recipe
I was not aware of Karthigai deepam adai until my MIL told me. She was telling about a milagu jeeraga adai recipe / Pepper adai using raw rice and urad dal she heard from one of her brahmin friends. Actually milagu jeeraga adai/Pepper cumin adai is not new to me. We usually make it with idli rice or steamed rice. But adai using raw rice and black urad dal is something new and interesting to me. After that, when I browsed for Karthigai adai recipe, I found many versions with raw rice, chana dal, toor dal and urad dal just like our orappu adai

Finally I found one authentic recipe from Kaveri’s blog-Palakkad Chamayal. Her recipe was very close to what my MIL told me. So I tried it without any second thought. With the flavor of black urad dal and pepper, cumin, it came out very well with a crispy texture. Sendhil loves pepper based dishes. So he liked this milagu jeeraga adai very much. He told its flavor and taste is very much similar to Anjaneyar Kovil Milagu vadai recipe. 

One thing you should remember is that this adai has to be served hot immediately to enjoy its best taste else it will turn hard and chewy when cooled down. While one person cook the adai, the other has to eat it. Grated jaggery and butter is the best side dish for this adai. For variations, you can make it small in size. Friends, do try this brahmin special Karthigai adai recipe for this Karthigai deepam festival and enjoy !

Karthigai milagu adai

Karthigai adai recipe - Milagu Jeeraga Adai


Karthigai adai recipe - Milagu Jeeraga Adai

Karthigai adai recipe - Milagu jeeraga adai / Pepper Jeera Adai for Karthigai deepam recipe.


Cuisine: South Indian
Category: Karthigai Deepam Recipes
Serves: 10 
Prep time: 120 Minutes
Cook time: 5 Minutes
Total time: 125 Minutes


INGREDIENTS

1 cup - 250ml
  • Raw rice / pacharisi - 2 cups ( I used dosa rice/ maavu pacharisi)
  • Black Split Urad dal - 3/4 cup
  • Pepper corns - 1.5 tbsp
  • Cumin seeds / Jeera - 1 tbsp
  • Coconut pieces - 1/2 cup
  • Chopped curry leaves – 2 tbsp
  • Cooking oil or ghee - to cook adai
  • Salt & water - as needed

HOW TO MAKE KARTHIGAI ADAI - METHOD

  1. Wash and soak raw rice for 2 to 4 hours. No need to soak urad dal
  2. In a mixie jar, take the black urad dal, pepper corns, cumin seeds and half of the soaked rice.
  3. Grind to a coarse paste like rava adding enough water. Collect in a bowl.
  4. Grind the remaining rice to a coarse paste collect in the same bowl.
  5. Add coconut pieces, chopped curry leaves. Mix well.
  6. Heat dosa pan. Spread the adai batter to make it slightly thick. Drizzle oil or ghee.
  7. Cover and cook till golden in medium flame. Flip and cook the other side.
  8. Remove and serve hot with jaggery and butter as side dish.

METHOD - STEP BY STEP PICTURES

  • Wash and soak raw rice (I used dosa rice/ maavu arisi) for 2 to 4 hours. After soaking, drain the water and keep aside. (For variations, you can use regular raw rice used for lunch). 
  • In a big sized mixie jar, add black split urad dal, pepper corns, cumin seeds, salt and half of the soaked rice. Grind to a coarse paste like rava adding enough water. Collect the batter in a bowl.   (You can also use white urad dal for variations but authentic recipe uses black urad dal only). 

  • Grind the remaining rice to a coarse paste adding water. Add to the same bowl and mix well. Add chopped curry leaves and coconut pieces.

  • Heat a dosa pan. Pour 1.5 ladles of batter and spread it thin or thick as you like. Make a hole in the center. Drizzle 1 tsp oil around it. Cover and cook for sometime.

  • When the bottom turns golden, flip the adai and cook in medium flame till it becomes golden. Remove and serve hot with jaggery and butter ! This adai tastes the best only when served hot. It will become hard after cooling down.

  • Enjoy !

Note

  • This adai tastes the best only when served hot. So serve immediately after making the adai. It turns hard when warm.
  • For variations, you can add boiled rice/Puzhungal arisi(Saapaatu arisi) instead of raw rice. But you should not use this rice for occasions and festivals for offering God. 
  • You can also use sapatu pacharisi (Sona masoori rice) instead of dosa rice. 
  • Adjust the quantity of pepper as per your taste.
Try this authentic Karthigai milagu adai recipe and enjoy with jaggery and butter !
Karthigai milagu adai
Continue Reading...


November 29, 2017

Pudalangai Kootu – Snake Gourd Masala Kootu Recipe

Pudalangai kootu
I learnt this pudalangai kadalai paruppu masala kootu / snake gourd kootu for rice from my friend Megha. This is not like the usual version of kootu. This kootu has a mild masala flavor with ginger garlic paste. I have already shared a brinjal masala kuzhambu learning from my friend Megha. This is also a very similar recipe but I have used soaked chana dal/ kadalai paruppu. In some hotels, they serve this kind of kootu. I make this kootu  directly in a pressure cooker to ease my job. I also make it slightly thin like a gravy and mix with rice & ghee. If you make it thick, you can have it as side dish for rice or chapathi. It tastes more like kurma kulambu. Whenever I make this pudalangai kootu, I make some spicy rasam to go with it. It would be a simple but comforting meal for us. Ok,  Lets see how to make snake gourd kootu with chana dal for rice.

Do check out my Arai Keerai/ Amaranthus kootu, Manathakkali keerai kootu, Palak Keerai kootu, Carrot kootu, Cabbage kootu, cluster beans kootu, Beetroot kootu and mixed vegetable kootu recipes too.

Snake gourd kootu

Snake gourd kootu / Pudalangai kootu


Snake gourd kootu / Pudalangai kootu

Snake gourd kootu with chana dal & masala - Pudalangai kadalai paruppu kootu


Cuisine: South Indian
Category: Kootu Recipes
Serves: Serves 3
Prep time: 10 Minutes
Cook time: 20 Minutes
Total time: 30 Minutes


INGREDIENTS

1 cup - 250ml
  • Snake gourd / Pudalangai - 1 medium sized
  • Chana dal / Kadalai paruppu - 3 tbsp
  • Big onion - 1 no
  • Ripe tomato - 1 no
To grind
  • Grated coconut - 2 tbsp
  • Cinnamon – 1 small piece
  • Cloves – 1 no
  • Big onion - 1 no
  • Coriander leaves - 1 sprig
  • Red chilli powder - 1 tsp
  • Coriander seeds powder / Dhania powder - 1 tsp
  • Ginger Garlic paste - 1 tsp
  • Turmeric powder – 1/4 tsp
To Temper
  • Coconut oil or cooking oil - 2 tsp
  • Mustard seeds - 1/2 tsp
  • Urad dal - 1/2 tsp
  • Curry leaves - Few

METHOD

  1. Wash and chop Snake gourd into small pieces.
  2. Soak chana dal in enough water for 15 minutes.
  3. Grind the items given under “To grind” to a smooth paste.
  4. Heat oil in a cooker base and temper mustard, urad dal and curry leaves.
  5. Saute chopped onion, tomato until mushy. Add snake gourd pieces, chana dal and ground masala paste.
  6. Saute till raw smell goes off. Add enough water and salt. Mix well and pressure cook in very low flame for 2 whistles. Serve with rice or chapathi.

METHOD - STEP BY STEP PICTURES

  • Wash and soak chana dal in enough water for 15 minutes. In the mean time, wash and chop snake gourd into small pieces. Chop onion and tomato into small pieces and set aside.
    Pudalangai kootu

  • Grind all the ingredients given under “ To grind” to a smooth paste adding water. Set aside.
    Pudalangai kootu

  • Heat oil in a pressure cooker. Splutter mustard seeds, urad dal and curry leaves. Saute onion and tomato pieces. When tomato becomes mushy, add chopped snake gourd and soaked chana dal.Mix well.
    Pudalangai kootu

  • Now keep the flame medium and add the ground masala paste. Saute till raw smell goes off. Add water and required salt.
    Pudalangai kootu

  • Mix well and pressure cook in very low flame for 2 whistles.Remove the lid after the steam is released. If the kootu is watery, boil for sometime to make it thick. If its too thick, add little water, mix well and boil for few seconds.
    Pudalangai kootu

  • Enjoy mixing with hot rice adding ghee Or as a side dish for vatha kuzhambu sadam & chapathi / roti. Enjoy !

Note

  • Soaking chana dal is very important else it won’t cook properly. You should soak at least for 15 minutes,
  • You can use ridge gourd, bottle gourd or chow chow  instead of  snake gourd and make the same.
  • You can also use 1/2 tsp of garam masala powder if making for chapathi.
  • Grinding onions and gg paste gives a nice flavor.So do not avoid them.
  • You can skip coriander leaves if you don’t have in hand.
Try this yummy snake gourd masala kootu easily in a pressure cooker and enjoy !
Snake gourd kootu recipe
Continue Reading...


November 26, 2017

Mushroom Peas Pulao Recipe In Pressure Cooker – Indian Style Mushroom Rice Recipe

Mushroom peas pulao recipe
Last Sunday I prepared this Indian style mushroom peas pulao with some leftover mushrooms and fresh green peas in a pressure cooker. Its a very simple and easy pulao recipe just like my vegetable pulao. It can be prepared directly in an Indian pressure cooker. So it gets ready under 15 minutes. No grinding or big chopping works needed. You can prepare it for your lunch box easily and quickly. Since its a mild pulao recipe without much of garam masala powders, you can enjoy it with any spicy kurma as side dish. But my family liked it with simple onion raita. Usually people add coconut milk instead of water. But I used only water to cook the rice. Still it was good with nice flavor. Lets see how to make this simple and quick mushroom peas pulao with step by step pictures.

Check out my crispy mushroom 65


mushroom pulao

Mushroom Peas Pulao Recipe


Mushroom Peas Pulao Recipe

Mushroom Peas Pulao - Easy Pulao Recipe using a pressure cooker


Cuisine: Indian
Category: Mushroom Recipes
Serves: 3
Prep time: 10 Minutes
Cook time: 20 Minutes
Total time: 30 Minutes


INGREDIENTS

1 cup - 250ml
  • Mushroom - 10 nos
  • Green peas or dried peas - 1/4 cup
  • Basmati Rice - 1 cup
  • Water or coconut milk - 1.75 cups
  • Cooking oil+ Ghee - 2 tbsp + 1 tbsp
  • Cinnamon - 1 inch
  • Cloves - 2 nos
  • Cardamom - 1 no
  • Black stone flower/ Kalpasi - 2 small
  • Fennel seeds - 1/4 tsp
  • Bay leaf – 1 no
  • Big onion - 1 no
  • Ginger Garlic Paste - 1.5 tsp
  • Green chilli - 3 nos ( Use 2 for less spice)
  • Mint leaves - a handful
  • Salt - as needed
  • Lemon juice – Few drops

HOW TO MAKE MUSHROOM PULAO

  1. Wash and clean mushroom. Slice it and set aside.
  2. Heat oil + ghee in a cooker. Saute whole garam masala.
  3. Add onion, gg paste, green chilli, mint leaves and saute till transparent.
  4. Add mushroom, peas and saute for a minute. Add rice, saute for a minute.
  5. Lastly add water or coconut milk and mix well.
  6. Pressure cook in low flame for one whistle.

METHOD - STEP BY STEP PICTURES

  • Wash and clean mushroom with a cloth. Remove the stem and slice it. Keep aside.Finely chop onion and slit the green chilli. Wash the basmati rice and set aside. No need to soak it.
    Mushroom peas pulao
  • Heat oil + ghee in a pressure cooker base. Saute cinnamon, cloves, bay leaf, cardamom and black stone flower. Add fennel seeds, big onion, gg paste and green chillies. Saute in medium flame till onion turns transparent.
    Mushroom peas pulao
  • Add mint leaves, mushroom and peas. Mix well. Lastly add the washed rice and saute for a minute.
    Mushroom peas pulao
  • Then add 1.75 cups of water or thin coconut milk. Sprinkle few drops of lemon juice. Mix well and pressure cook in very low flame for one whistle. Remove the lid after the steam is released.
    Mushroom peas pulao
  • Mix gently, fluff the rice and serve hot with any spicy kurma or raita !
    Enjoy !

Note

  • Adjust the quantity of green chilli as per your taste.
  • You can use thin coconut milk instead of water.
  • I used lemon juice. You can saute one finely chopped tomato along with onion.

Try this easy, yummy, healthy mushroom pulao and enjoy ! I served with raita and Paneer 65.
Mushroom pulao recipe in pressure cooker
Continue Reading...


November 23, 2017

Chow Chow Poriyal – Spicy Chayote Curry Recipe

Chow chow poriyal
Chow Chow Vegetable( Chayote in English, Ishkus in Hindi, Seemai Kathirikai in Tamil, Seeme Badanekayi in Kannada, Seema vankaya in Telugu) makes its appearance in my kitchen at least twice a week. I make sambar, poricha kuzhambu and kootu with it. Chow chow poriyal was in my try list for long time as I have never seen my mom & MIL making poriyal with it. Here in Bangalore, most of the hotels serve this chow chow curry in their lunch thali. So I wanted to try that way. Its a very simple dry curry recipe but spicy in taste. People call it as Seeme Badanekayi Palya in Kannada. As chow chow vegetable is bland in taste, I have used spice powders to bring the masala flavor. I prepared this chow chow curry directly in a pressure cooker to ease my job. Yes it was done under 10 minutes. This recipe is ideal for bachelors and working women to whip up a quick side dish for sambar rice and curd rice. Do try this spicy chow chow curry for rice and enjoy. If you like, you can have it with roti a well.

Check out my other PORIYAL RECIPES too !

chayote curry

Chow Chow Poriyal / Chayote Curry Recipe


Chow Chow Poriyal / Chayote Curry Recipe

Chow chow poriyal for rice,roti - Chayote dry curry recipe, spicy in taste !


Cuisine: Indian
Category: Poriyal Recipes
Serves: Serves 2
Prep time: 10 Minutes
Cook time: 10 Minutes
Total time: 20 Minutes


INGREDIENTS


  • Chow Chow / Chayote - 1 no (Big)
  • Big onion - 1 no
  • Garlic cloves - 5 nos
  • Turmeric powder - 1/4 tsp
  • Red chilli powder - 3/4 tsp
  • Dhania powder - 1 tsp
  • Garam masala powder - 1/2 tsp
  • Grated coconut - 1/4 cup
  • Salt & water - as needed
To Temper
  • Coconut oil or cooking oil - 1.5 tbsp
  • Mustard seeds - 1/2 tsp
  • Urad dal - 1 tsp
  • Chana dal - 1 tsp
  • Curry leaves - Few

HOW TO MAKE CHOW CHOW PORIYAL

  1. Wash and peel the skin of chow chow/chayote. Slice the head and tail portion.
  2. Chop into small cubes.Chop onion and garlic finely.
  3. Heat oil in a pressure cooker base. Splutter mustard seeds, urad & chana dal.
  4. Saute onion, garlic and chayote. Add salt and spice powders. Mix well.
  5. Add very little water and pressure cook in high flame for 2 whistles.
  6. Boil if there is excess water. Let it become dry. Lastly add grated coconut, mix well and serve !

METHOD - STEP BY STEP PICTURES

  • Wash and slice the head and tail part of chow chow. Peel the skin completely and chop into cubes. Chop onion and garlic cloves finely and set aside.
    Chow chow poriyal
  • Heat oil in a pressure cooker base. Splutter mustard seeds, urad dal, chana dal and curry leaves. When dals turn golden, add chopped onion, garlic and chow chow cubes. Saute for a minute.
  • Add turmeric powder, red chilli powder, dhania powder, garam masala powder and salt. Mix well.
    Chow chow poriyal
  • Add little water say 3 tbsp and mix well. Less water is needed because chow chow will release some water while cooking. Pressure cook in high flame for 2 whistles.
    Chow chow poriyal
  • Open the lid after steam is released. Mix gently and check for excess water. If its there, boil in high flame for a minute to drain all the water.Do not mix often because poriyal may become mushy. Toss gently. Poriyal should be dry. Lastly add grated coconut, mix well and serve with rice or roti !
    Chow chow poriyal
    Chow chow poriyal
Enjoy !

Note

  • Chow chow needs less water and less time to cook. So do not add more water while pressure cooking.
  • Chow chow becomes mushy if you cook for more time in pressure cooker. So its better to cook in high flame for 2 whistles. It cooks in the steam itself.
  • Adjust the quantity of chilli powder to make it more spicy.
  • You can also skip garam masala powder but it adds a nice flavor to the curry.
  • You can follow the same recipe and use bottle gourd / sorakkai instead of chow chow.

Try this easy, yummy chow chow poriyal at home and enjoy with sambar rice, rasam rice & curd rice.
Chow chow curry

Continue Reading...


November 21, 2017

Vazhaithandu Masala Dosa Recipe – Banana Stem Dosa - Dosa Varieties

Vazhaithandu masala dosa
Vazhaithandu masala dosa – When we saw this dosa recipe in Salem Saravana Bhavan Hotel menu, Sendhil ordered it immediately. Salem Saravana bhavan restaurant has become our must visit place during Salem trip. Raksha loves their Ghee roast very much. We too like their varieties of dinner recipes with millets. So every time we visit there, we try to order some new and interesting dish. I too have a habit of trying the same at home. I had already tried and shared their Vazhaipoo dosa/ Banana flower dosa recipe recently. This morning I tried valaithandu masala dosa for our breakfast. This masala recipe is very similar to our South Indian style kurma but thick in consistency. I won’t say this banana stem stuffing tasted exactly like hotel recipe but it was close to it. Sendhil liked it a lot. We felt this dosa is one of the best way to consume banana stem for people who doesn’t like to eat vazhaithandu or vazhaipoo in the form of poriyal or kootu. Ladies, do try it for your husband even if he is a hater of banana stem. I am sure he will like the uniqueness and taste of this recipe. Ok, lets see how to make Vazhaithandu masala dosa / Banana stem dosa at home with step by step pictures.

Do check out my Vazhaipoo Dosai Recipe too.

Banana stem masala dosa

Vazhaithandu Masala Dosa - Banana stem dosa recipe


Vazhaithandu Masala Dosa - Banana stem dosa recipe

Vazhaithandu masala dosa recipe - Banana stem masala stuffed dosa for breakfast / dinner


Cuisine: South Indian
Category: Dosa Recipe
Serves: Serves 2
Prep time: 10 Minutes
Cook time: 20 Minutes
Total time: 30 Minutes


INGREDIENTS

1 cup - 250ml
  • Banana stem / Vazhaithandu - 1 no (Medium size), Finely chopped
  • Big onion - 1 no (Finely chopped)
  • Curry leaves - Few
  • Garam masala powder - 1/2 tsp
  • Cooking oil - 2 tbsp
  • Salt & water - as needed
To grind
  • Grated coconut - 1/4 cup
  • Green chilli - 2 nos
  • Fennel seeds - 1/2 tsp
  • Ginger - 1/2 inch piece
  • Garlic - 6 cloves
  • Cashew nuts - 3 nos
For Dosa
  • Dosa batter - 2 cups ( I used my idli rava idli batter)
  • Gingely oil or cooking oil or ghee - to drizzle dosa

HOW TO MAKE VAZHAITHANDU MASALA DOSA

  1. Wash and chop banana stem into fine pieces.Keep in buttermilk or water.
  2. Grind the masala and keep aside. Heat oil in cooker base.
  3. Saute onion and banana stem pieces. When it turns soft, add the ground masala, garam masala powder.
  4. Saute till raw smell goes off. Add very little water and pressure cook in high flame for 2 whistles.
  5. Remove the lid after steam is released. Mix well and boil if there is any excess water.
  6. Make the masala thick and spreadable. Keep aside.
  7. Now make thin dosa. After its cooked 3/4th on one side, spread the masala and drizzle oil / ghee around the dosa. Cook for a minute till dosa turns golden in the bottom. Fold the dosa and serve hot with coconut chutney or tomato chutney !

METHOD - STEP BY STEP PICTURES

  • Wash and slice the banana stem into thin rings.Discard the thread like portion that comes while slicing the banana stem. Chop the rings finely and keep them immersed in buttermilk( to avoid discoloration) or water. Chop the onion finely and set aside.

  • Heat oil in a cooker base.Saute finely chopped onion and finely chopped banana stem till it turns soft. You can add some salt to quicken the process. Saute for 2 to 3 minutes.

  • Grind coconut,green chilli, fennel, ginger and garlic to a smooth paste. Add this paste to the banana stem mixture. Add garam masala powder. Mix till raw smell goes off.

  • Add very little water say 3 tbsp and mix well. Pressure cook in high flame for 2 whistles. Remove after the steam is released. Mix well and boil if there is excess water. Make thick masala. You can sprinkle some lemon juice if you like. Garnish with finely chopped coriander leaves. Mix well and keep the masala ready.

  • Take 2 cups of dosa batter. Dilute it slightly if the batter is too thick. Heat dosa pan. Spread the dosa batter and make it thin. When the top of dosa is 3/4th cooked, spread 2 tbsp of masala in the center of dosa.

  • Drizzle two tsp of oil around the dosa. Cook till the bottom of dosa turns golden. Fold the dosa and remove. Serve hot with coconut chutney or tomato chutney. Enjoy !

Note

  • Adjust the quantity of green chilli as per your taste.
  • You can also use red chilli powder instead of green chillies.
  • You should chop the banana stem very fine else it would be difficult to eat. Actually I couldn’t chop it fine like hotel.
  • You can use any dosa batter. I used my idli rava idli batter and made dosa with it.

Try this different dosa variety with banana stem and enjoy !
valaithandu masala dosa
Continue Reading...