Search Chitra's Food Book

Showing posts with label FESTIVAL RECIPES. Show all posts

January 9, 2017

How To Celebrate Thiruvathirai At Home | Arudhra Darshan Celebration

How to celebrate thiruvathirai at home

Significance of Arudra darshan

Soure:wiki and google

Thiruvathirai /Arudhra darshan is a popular Hindu festival celebrated in Tamil Nadu and Kerala.
Arudhra Darshan or Arudara Darshan is observed in the Tamil month of Margazhi (December – January) on Thiruvathirai Nakshathram day. In this year 2023, it falls on 27th December, Wednesday. Thiruvathirai(Arudhra) in Tamil means "sacred big wave". It is essentially a Shaivite festival and celebrates the cosmic dance of Lord Shiva, which is represented by the Nataraja form. Arudra festival is celebrated with fervor in Lord Shiva temples in Tamil Nadu, Sri Lanka, Singapore, Malaysia, South Africa, Australia and in other parts of the world by Tamil speaking population. In Kerala, this festival is primarily celebrated by women. 

The most important Arudhra Darisanam festival takes place at the Chidambaram Lord Nataraja Temple in Tamil Nadu. In Thillai Chidambaram temple, 10 day Festival is held during Thiruvathirai. Arudhra signifies the golden red flame and Lord Shiva performs in the form of this red-flamed light. The cosmic dance of Lord Shiva represents five activities – Creation, Protection, Destruction, Embodiment and Release. In essence, it represents the continuous cycle of creation and destruction. Arudra Darshan celebrates this ecstatic dance of Lord Shiva.

It takes place on the full moon night in the month of Margazhi and this is also the longest night in a year. The festival is mainly observed in the Tamil speaking world. Many people observe fasting / Nombu vratham on this day. Women will fast during the day time. They will take food before sunrise and start their fasting. They will break the fast after witnessing the moon rise. 

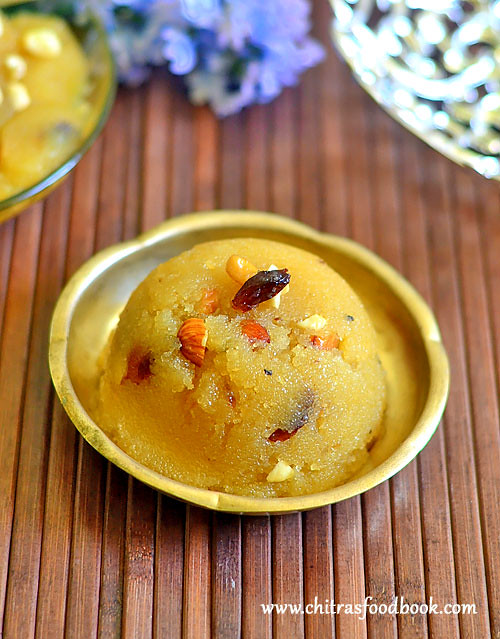
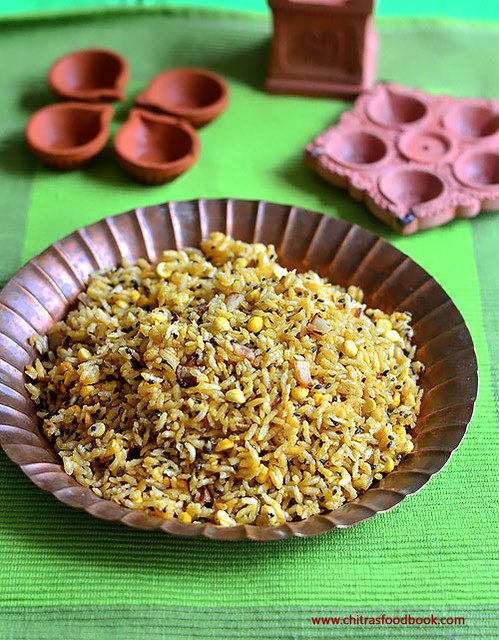
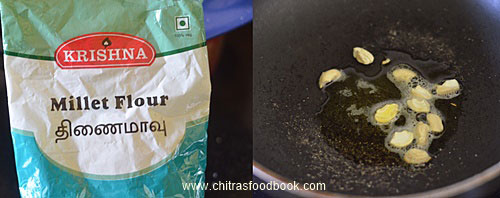
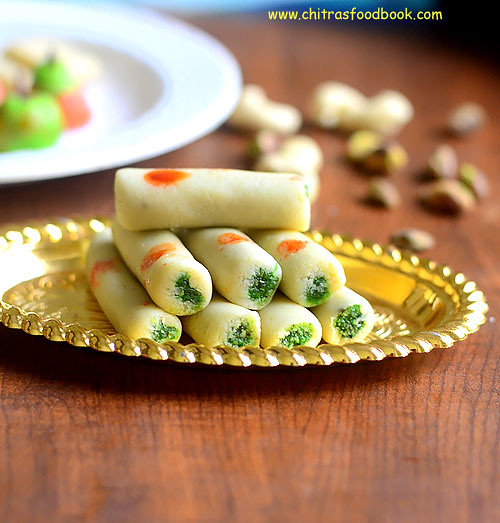
Some people observe fasting for 10 days. So Nonbu (fasting) starts nine days before and ends on Thiruvathirai day. So totally they fast for ten days. There is special food called Thiruvadhirai kali made of Rice, Jaggery, Moong dhal, Coconut, Cardamom and Ghee with Thiruvathirai ezhu curry kootu which is made out of seven vegetables, that is cooked and served on this day.  (Source: wikipedia). We also make Thiruvathirai adai using rice flour and jaggery in addition to Kali and kootu. 

As per the Puranaas, on this day Lord Shiva has shown this blissful dance that energizes this world to two of his devotees - Vyagrapadha and Adisesha (on whom Lord Vishnu Reside). Hence this day is celebrated, in appreciation of the cosmic dance of Lord Shiva, by offering Prayers to the Nataraja aspect of the Lord.

Special prayers are held on the day at all Shiva temples. Milk, honey, water, sandal paste and other cooling liquids are offered to Lord Shiva on this day. This is to cool a burning and turbulent Shiva who is performing the Tandava – the cosmic dance of Nataraja. Special abhishekam, rituals and celebrations are held on the night of Thiruvathirai.

Thiruvathirai nombu
Thiruvathirai Celebration in my house :)

Our Celebration

In our house, we celebrate this festival in a grand manner by offering thiruvathirai kali, ezhu kai kootu and thiruvathirai adai made of rice flour and jaggery to Lord Nataraja. We also draw maakolam all over our house. My MIL draws a procession car(Thaer) with Shiva lingam in the wall of pooja room and consider it as idol. We tie a yellow rope in our hands after the pooja. I have shared our pooja procedures in detail. Please check it. You can follow/alter this method based on your tradition.

How to celebrate thiruvathirai
Celebration in my MIL's house :)

How to celebrate thiruvathirai


Visit my in-laws blog LEARN KOLAM for Thiruvathirai Kolam

Ingredients Required
  • Raw rice
  • Moong dal
  • Jaggery
  • Rice flour
  • Cardamom powder
  • Grated coconut
  • Ghee
  • Butter
  • Any 7 vegetables ( Raw banana, sweet potato, yam, yellow pumpkin, broad beans, arbi, field beans, mochai, brinjal, chow chow, cluster beans, ladies finger)
  • Green chilli
  • Cumin seeds
  • Coconut oil
  • Tempering ingredients for kootu
For Pooja
  • Coconut
  • Betel leaves and nuts ( 7 each)
  • Fruits ( 7 banana)
  • Banana leaves ( 7 leaves)
  • Turmeric pieces ( 7 nos)
  • Yellow rope ( to tie around wrist or neck)
  • Lamp, wick
  • Incense stick, camphor
Thiruvathirai celebration

Pre Preparatory activities

The previous day, clean the house. Wash the lamps, put the wick. Keep turmeric, kumkum dots & make it ready for the next day neivedyam. We have the practice of drawing procession car ( thear) in the wall of pooja room as shown in the first picture and in the entrance of house. We draw maa kolam in the house entrance and in pooja room.

 As mine is a wooden pooja room shelf, I draw in a paper & keep it as GOD and I draw maakolam at the house entrance alone.We keep 7 dots using viboodhi, manjal, kumkum, sandal, kajal( Kanmai), red saandhu , rice flour in the middle of thear picture for this nonbu. We keep 7 betel leaves, 7 nuts, 7 banana, 7 turmeric pieces, 2 yellow ropes (for me & my daughter) in a plate & keep in front of God. All these things are time consuming jobs. So we do it the previous day night & keep them ready. If you don’t have this practice at home, just do the pooja by keeping a Lord Nataraja or Lord Shiva photo in the auspicious time.

We make kali, 7 kai kootu, adai, cooked rice, thayir pachadi, dal/paruppu and sambar for neivedyam. So we do some pre-preparatory works for cooking as well. We roast rice + dal, powder & keep it for kali. We chop the vegetables for kootu & sambar and refrigerate it in a box.

Thiruvathirai day 

On Festival day, we should do the pooja in the early morning in auspicious time. This year as it falls on Wednesday, we should do the pooja before 7.30am ( Avoid rahu kalam, yama kandam). So start the cooking activities by 6 am. Prepare thirivathirai kali, adai & kootu ( Rice, dal, sambar, thayir pachadi). Decorate the pooja room with flowers and light the lamp. 

Arrange all the neivedyam dishes in the banana leaf. Keep a plate with banana, coconut, betel leaf and nut, turmeric pieces along with yellow rope. Do the pooja by showing dhoop, dheep and mangala harathi. After doing the pooja, tie the yellow rope around your wrist or neck.
Enjoy kali, kootu and adai !!

DISCLAIMER : The pooja procedures I have shared above is as per my family’s practice. Many people don’t have the habit of drawing thear, maakolam, offering adai. Even my mom makes kali and kootu for thiruvathirai and offers them in front of Lord Nataraja picture for pooja. So take this post as a guidance and change it according to your custom.

Continue Reading...


January 2, 2017

Sooji Halwa | Suji Ka Halwa Recipe | Rava Sheera Recipe

Suji ka halwa
Most of the time I make South Indian style Rava kesari  ( Rava = semolina in English) for functions, pooja and celebrations at home as it is our family favorite and the most comfortable sweet for me. I have already shared varieties of rava kesari recipes like rava kesari with milk/ Paal kesari, microwave rava kesari, semiya kesari, pineapple kesari, mango kesari etc. 

Its been my long time wish to try North Indian style Sooji ka halwa/ Rava sheera. So I tried it for New year celebration yesterday. In North India, Suji ka halwa is one of the most popular and easy halwa recipes that is made in all houses for all the festivals & occasions and is served in most of the temples as Prasad. This halwa is served along with Poori and Chole for breakfast. Halwa poori chole is one of the most popular breakfast combo in North India and Pakistan. 

In Karnataka, people call this sooji halwa as Kesari bath. Rava/sooji, Sugar and ghee forms the basic ingredients for this sweet recipe. But Rava kesari, suji ka halwa and kesari bath has its own variations in the quantity of ingredients, method of preparation, taste, color and texture. I watched few You tube videos and followed Food viva for the recipe. 

Though it tastes mildly sweeter than the South Indian rava kesari, it was dripping with ghee and finger licking good. We loved it very much. Its taste reminded me of the banana sheera I had in my friend’s house Satya Narayana pooja. Its very easy to prepare for special occasions and to treat your surprise guests. For variations, you can use milk instead of water. Lets see how to make North Indian special suji ka halwa/ Sooji halwa/Rava sheera recipe with step by step photos and a detailed video !!


Suji ka halwa recipe

Suji Ka Halwa Recipe


Suji Ka Halwa Recipe Suji Ka Halwa - North Indian version of Rava kesari
Cuisine: North Indian
Category: Sweet
Serves: 3
Prep time: 10 Minutes
Cook time: 10 Minutes
Total time: 20 Minutes


INGREDIENTS
1 cup - 200ml or 250ml
  • Bombay Rava/ Sooji /semolina - 1/2 cup ( Do not use chiroti rava)
  • Ghee - 1/3 cup + 1 tbsp
  • Sugar - 1/2 cup
  • Water - 1.5 cups
  • Cardamom powder - 1/2 tsp or 2 pods crushed
  • Saffron threads - few
  • Milk - 1 tbsp ( to soak saffron thread)
  • Chopped cashews, badam and few raisins/dry grapes
METHOD - HOW TO MAKE SOOJI HALWA

  • Soak saffron threads in 1 tbsp hot milk.I din’t use saffron in this recipe. I used cardamom powder alone.
  • Heat 1/3 cup of ghee in a kadai.Roast the dry grapes, cashews and almonds till dry grapes bloat and nuts turns golden. Add rava and roast well for 4-5 minutes in medium flame. Rava turns light golden brown in color.
    Suji ka halwa recipe
  • Add 1.5 cups of water to the rava and mix well till 3/4 th of the water is absorbed by the rava and becomes semi thick.Keep the flame low and cover the kadai with a lid. Cook the rava for 2-3 minutes.
    Suji ka halwa recipe
    Suji ka halwa recipe
  • Open the lid and add sugar, cardamom powder and saffron milk ( if using). Mix well without lumps.Sugar melts and the mixture will become watery. Keep the flame medium and mix well. 
    Suji ka halwa recipe
  • Halwa turns thick and starts to leave the sides of pan. Immediately add 1tbsp of ghee, mix well quickly and transfer the halwa to a bowl. Do not wait for the halwa to thicken completely. Remove it as soon as it becomes semi thick because this suji ka halwa becomes dry and hard when it cools down. So remove it at the right time. Garnish with few nuts and serve warm.
    Suji ka halwa recipe
Enjoy !

Note
  • Add more sugar ( Say 3/4 cup of sugar) if you need more sweetness.
  • You can use milk instead of water but cook the rava for more time if using milk.
  • Do not reduce the quantity of ghee. It helps to keep the halwa soft.
  • If you don’t want to add more ghee, use half the quantity of oil.

Sooji halwa recipe

Try this easy, yummy Suji Ka halwa/Rava sheera at home and enjoy !!

Sooji halwa
Continue Reading...


December 8, 2016

Karthigai Pori Recipe – Karthigai Vella Aval Pori–Karthigai Deepam Recipes

Karthigai Pori Recipe
Karthigai deepam festival 2020 is nearing. It falls on 29th November, Sunday. Every year on Karthigai Deepam festival day, we make pori urundai, appam, payasam and maa vilakku and offer God. Both MOM & MIL has the same practice.In Tamil nadu, during Karthigai deepam festival, we get a special mixture of aval pori ( Puffed Poha), pottukadalai( fried gram dal), Ellu ( roasted sesame seeds) in small packets. 

When I was young, I used to buy them from a small Chettiyar shop nearby my house. My mom used to roast them in ghee and add it to the boiled jaggery syrup. It tastes crispy and stays good for weeks together.  But in my MIL’s place, getting readymade aval pori is difficult. So she used to roast the thick poha until puffy and follows the same. Both of them do not make balls with aval pori (aval pori urundai )instead they just mix the roasted aval pori in jaggery syrup and keep it as such.

 Today, I have followed my MIL’s method and prepared this Karthigai pori using thick poha. In Bangalore, puffed rice( arisi pori in Tamil, Mandakki In Kannada) is mostly available in all the shops whereas puffed poha ( Aval pori) is not easy to get. For people like me, this recipe would be useful. 

Generally, beginners may feel difficult to make balls from the hot aval pori mixture. Do not worry, this post is specially for you. Here you do not have to shape balls. Its just a mix and serve method. But the only difficulty in this recipe is poha should be roasted patiently in batches. It takes nearly 15 –20 minutes for roasting. 

But this Karthigai aval pori tastes super crispy than the ready made aval pori you buy from the market. So the time you put in this recipe is worthwhile. Do try this method of making Karthigai pori, I am sure you will be very happy with the results. So lets see how to make Karthigai pori recipe with step by step pictures and a video !

Please check out my other Karthigai Deepam Recipes HERE


Aval pori recipe

Karthigai Pori Recipe


Karthigai Pori Recipe How to make Karthigai pori without making balls
Cuisine: South Indian
Category: Sweet
Serves: 3
Prep time: 5 Minutes
Cook time: 20 Minutes
Total time: 25 Minutes


INGREDIENTS
1 cup - 250ml
  • Thick Poha - 1 cup
  • Grated jaggery - 1/2 cup
  • Water - 1/4 cup
  • Cardamom powder - 1/4 tsp
  • Ghee - 4 tsp
  • Coconut bits - 2 tbsp
  • Fried gram dal/Pottukadalai - 2 tbsp
  • Black Sesame seeds / Ellu - 1/2 tbsp
  • Dry ginger powder – 1/4 tsp ( optional)
HOW TO MAKE KARTHIGAI PORI - METHOD

  • Take a kadai and heat 1 tsp of ghee. Add 1/3 cup of poha ( Poha should be roasted only in batches). Roast in medium flame till it becomes puffy and slightly turns golden in color.it takes nearly 5 minutes to finish roasting one batch of poha. Remove in a plate. Repeat the same for the remaining poha and collect everything in a plate. Let it cool down. You have roast 1 cup of poha in 3 batches ( 1/3 cup per batch). Stay nearby and roast them patiently.
    Aval pori recipe
    Aval pori recipe
  • In the same kadai, dry roast the black sesame seeds till it crackles. It takes nearly 2-3 minutes. Remove them to the poha plate. In the hot kadai, put the fried gram dal and switch off the flame. It will become crispy in the heat of kadai. If your gram dal is fresh and crispy, you do not have to roast it, You can directly it mix with the roasted poha.
    Aval pori recipe
    Karthigai pori recipe
  • Chop coconut into small pieces.Heat 1 tsp of ghee and roast the coconut bits till golden in color. Stay nearby and roast till done. Remove in a separate bowl.
    Karthigai pori recipe
  • In a kadai, take 1/2 cup of jaggery and add 1/4 cup of water. Boil till the jaggery melts. Switch off the flame and strain the jaggery syrup using a metal strainer. Wash the kadai and add the strained syrup to it. Boil again till frothy and thick. Add cardamom powder( I used cardamom essence) and dry ginger powder( if using).
Karthigai pori recipe
  • Keep the flame low to medium when the syrup starts to thicken. Now take little water in a small plate. Put few drops of jaggery syrup and try to gather them with your fingers. Syrup should not dissolve in water and you should be able to collect them and make a small ball with it. This is called soft ball consistency. Refer Video for clear understanding.
Karthigai pori recipe
  • NOTE : You cannot shape balls/urundai in this consistency. For making balls, you should boil jaggery syrup till it reaches hard ball consistency.
     
  • Once the consistency is reached, switch off the flame and add the roasted poha mixture, roasted coconut. Mix well and set aside. Initially the mixture may look sticky. But when it cools down, it will look separate and tastes crunchy. Offer God & Enjoy !
Karthigai pori recipe
  • You can store this in an air tight box and enjoy for weeks. 

Note
  • For me, 1/2 cup of jaggery was enough for 1 cup of aval/ Poha. If you need more sweetness, you can add 3/4 cup of jaggery,
  • The consistency of jaggery syrup is very important else the pori will stick to each other and becomes soggy after few hours.
  • Hard ball consistency is needed to shape balls. For soft ball, balls cannot be made.
  • Black sesame seeds gives nice flavor. You can use white sesame seeds as well but flavor must be missing.
  • If you like, you can add 1/4 tsp of dry ginger powder/Sukku podi.
Try this easy method of Karthigai pori for this festival and enjoy !
Continue Reading...


November 6, 2016

Thinai Urundai–Foxtail Millet Honey Balls –Thenum Thinai Maavum

Thinai urundai
Thenum Thinai Maavum is one of the most popular neivedyam recipes offered to Lord Muruga in Tamil nadu. Yesterday I made Thinai maavu urundai ( Foxtail millet flour laddu in English)for the first time on account of Skanda shasti. You can offer this for Karthigai deepam festival too.  I should thank my neighbor for suggesting me to try this. 

Traditionally speaking, foxtail millet (Thinai arisi) is dehusked, roasted, ground to a fine powder and then mixed with honey. But nowadays we get readymade foxtail millet flour( Thinai maavu) in all the organic & popular departmental stores. As I had a pack of flour in hand, I made these balls/ urundai very quickly and easily.I referred Viji’s blog for the idea. 

For variations, thinai urundai can be made with jaggery instead of honey.It is called as thinai maavu laddu. Honey or jaggery, both make this dish more healthy when combined with Thinai flour. Do try this healthy Thinai urundai/ Foxtail millet balls with honey for a change. You will like it !

Check out my detailed post on Health benefits of millets and my other millet recipes too !

Foxtail millet honey balls

Thinai urundai recipe


Thinai urundai recipe How to make Foxtail millet honey balls / Thenum thinai maavum - Neivedyam recipe for Lord Murugan!
Cuisine: South Indian
Category: Sweet
Serves:
Prep time: 5 Minutes
Cook time: 5 Minutes
Total time: 10 Minutes


INGREDIENTS
1 cup - 250ml
  • Thinai maavu/ Foxtail millet flour - 1/2 cup
  • Ghee - 1 tbsp
  • Cashews - few
  • Honey - 1.5 - 2 tbsp
  • Cardamom powder - 1/4 tsp
METHOD

  • In a kadai, melt ghee and roast the cashew pieces. When it starts to turn golden brown, add the measured 1/2 cup of thinai maavu /Foxtail millet flour and roast in medium flame for few minutes. Let it cool down completely. ( If you don't have foxtail millet flour,  you can dry roast whole foxtail millet till aromatic. Powder , sieve and use it).

  • Do not add honey when the flour is hot. The balls will become chewy to taste. After the flour is completely cooled down, add honey to the roasted flour. Mix well and make balls.
    Thinai urundai
  • Arrange in a plate and offer to Lord Murugan. Get his blessings!
    Thinai urundai
Enjoy !

Note
  • Do not add honey when the roasted flour is hot. It should be cooled down completely.
  • Add more honey based on your liking.
  • In place of honey, you can use powdered jaggery.
  • If you don’t want to make as balls, you can just mix the flour with honey and eat as it is.
Healthy, Thinai urundai with honey. You can make this at least once in a while to reap its health benefits !
Thenum thinai maavum
Continue Reading...


October 27, 2016

Gulab Jamun Recipe With Instant Mix – How To Make Gulab Jamun With MTR Mix

Gulab jamun with instant mix
Gulab jamun using instant MTR readymade mix - step by step recipe and video. Diwali celebration is incomplete without these yummy Gulab jamun. Its an universally loved Indian dessert recipe. In most of the Indian households, Gulab jamun recipe will be in the Diwali sweets menu for sure. Many people make it as the last minute sweet for Diwali and other special occasions like birthday, anniversary, New year celebration and even for Valentine’s day.

Most of us opt for Gulab jamun recipe using readymade, store bought Instant mix as its easy and quick to make, cheap in price compared to other sweets in shops. Even though the ingredients used in the gulab jamun mix are the same, there are many brands available in the market with their own variations & style. Some of the most popular ones are MTR, GITS, Aachi, Bambino and Orkay. Recently my reader friend Harini requested me to share Gulab jamun recipe using MTR jamun mix.

So I bought a pack of jamun mix in buy one get one offer and tried it yesterday by getting some inputs from my friends Tara, Megha and Swarna. They make Gulab jamun using readymade mix very often. So they shared some useful tips to make soft, smooth gulab jamun without breaking and cracks. I watched this YouTube video tutorial as well. I followed the steps carefully and the result was awesome, perfect !! I was elated to see my soft, Gundu Gundu gulab jamun and jumped out of joy.

Raksha and Sendhil relished this yummy dessert recipe with ice cream. Most of you may think, making gulab jamun using instant mix is not a big deal or rocket science. Yes, its true. But beginners may face some difficulties to prepare a perfect Gulab jamun. So this post is explicitly for them. Even bachelors can also give a try. Experts, please excuse me and do share your  favorite jamun mix along with some tips if any. Lets see how to make Gulab jamun recipe with MTR instant mix at home with step by step photos and a video tutorial !

Gulab jamun recipe with mtr mix

Gulab jamun recipe with instant mix


Gulab jamun recipe with instant mix How to make Gulab jamun using readymade, Instant, store bought mix
Cuisine: Indian
Category: Sweet
Serves: 20 nos
Prep time: 45 Minutes
Cook time: 15 Minutes
Total time: 60 Minutes


INGREDIENTS
1 cup - 250ml
  • Gulab jamun mix - 150gms/ 1.5 cups
  • Boiled Milk at room temperature - 1/4 cup + 2 tbsp ( + 1 tsp)
  • Cooking oil - to deep fry
For sugar syrup
  • Sugar - 3 cups
  • Water - 3 cups
  • Cardamom powder or rose essence - 1 tsp
  • Saffron threads – few
  • Chopped nuts – to garnish

Please watch this video for clear understanding !

METHOD

  • Read the instructions given on the pack. In MTR mix, its mentioned to add 1 part of water for 4 parts of mix. 400gms of sugar for 150 gms mix packet. So i followed the recipe accordingly.
  •  Take sugar and water in a wide bowl and mix well. Keep aside, let it dissolve. In the mean time, take the gulab jamun mix in a wide plate. I used my thambalam/ big round plate. Usually I make chapati dough and other dough in my thambalam as its spacious and convenient to mix well. If the mix has more lumps, sieve it once.  Break the lumps with your fingers while sieving. Do not discard the residue. Add it to the mix again. I got around 1.5 cups of  powder.
  • If you are using ORKAY mix, do not sieve the mix. Just break the lumps using your hands.
    Gulab jamun recipe with mix
  • Now add the milk little by little and gather all the flour with your fingers. The mixture will become wet and very sticky. Do not worry. Gulab jamun will come out soft if the dough is sticky. I used 1/4 cup + 2 tbsp + 1 tsp milk. So add milk carefully at the end. If you add more milk, jamun will flatten and break. Do not knead the dough using your palm. Mixing should be done only with your fingers. Cover the dough with a plate or invert a bowl. Let it rest for 15 minutes to 1 hour.

  • In the mean time, heat sugar + water and melt it. Add saffron threads, cardamom or rose essence. Boil the syrup for 10 minutes in medium flame till the syrup turns slightly sticky to touch, glossy & resembles oil in consistency. Keep aside. Let the syrup becomes warm.
    Gulab jamun recipe with mtr mix
  • After 30 minutes, take the dough.It will be soft to touch.Do not knead it. Grease your palm with ghee. Make a big gooseberry sized ball by rolling the dough between your palm. Give gentle pressure and roll it continuously for 30 seconds to make it smooth and crack free. As the dough is sticky, jamun balls will not get cracks. If you feel there are cracks, just roll it tight. Cracks will disappear. I made around 20 balls.
    Gulab jamun recipe with mix
  • Heat oil in a kadai and when it gets heated , put a pinch of dough in the oil. If it rises to the top slowly, oil heat is perfect. Now stir the oil with a ladle in the corners. When the oil starts to rotate, drop the jamun balls. I cooked 4 per batch. Stir the oil continuously without touching the gulab jamun. You will find jamun rotate with oil and turns bigger in size. The color of jamun balls change slowly and it cooks uniformly. 
  • Once it turns golden brown, remove it in a tissue paper. Do not fry for long time. Jamun will become hard and it will not absorb the syrup. After frying, open & check if its cooked well. Leave the cooked jamun for 2-3 minutes in tissue paper and then drop in the sugar syrup. ( If you feel difficult to stir the oil, just keep the flame low, add the balls, flip every now and then till jamun turns golden. Then remove it)
    Gulab jamun recipe with mix
  • If the sugar syrup becomes cold, heat till it becomes medium hot. i.e vapor should start to come from the syrup slightly. Deep fry all the balls in batches, drain in the tissue and drop in the syrup. Let the balls soak in syrup for minimum 3-4 hours. It will soak well and double in size. Remove and serve in a bowl. Transfer the gulab jamun to a tight box and store it for days.No need to refrigerate.
    Gulab jamun recipe with mix
Enjoy !
Tips
  • Adding milk for making the dough helps to give soft jamun. You can use water as well. My friend Swarna adds just a tsp of milk in the beginning and add then water to make the dough. You can try this too. 
  • Dough should be really sticky to get soft Gulab jamun. If you have added more milk by mistake, don’t panic. Just cover the dough with a lid and let it rest for an hour.Grease your hands and make smooth balls. If it comes out without cracks, then proceed and deep fry only one ball for a trial. If it disperses in oil, then add a tsp of maida, mix well and make another ball. Test it and proceed further.  But adding more milk flatten the jamun. So please be careful while adding milk.
  • Jamun balls should be crack free. Roll it for 30 seconds continuously. This helps to seal the cracks while rolling. Do not press it too hard while rolling, but give gentle pressure.
  • Deep fry the balls only at low temperature else balls will get browned quickly without cooking inside.
  • Gulab jamun balls will disperse in oil  or cracks more if the oil temperature is too low. So Check the temperature before you drop the balls.
  • Similarly cracks will form if the jamun balls become dry. So keep it covered all the time till you finish the procedure.
  • Sugar syrup should not be too hot while you drop the jamun. It should be medium hot or warm. Similarly Gulab jamun should not be too cold. 
  • Gulab jamun will flatten if you add more milk. It will also flatten if the sugar syrup is less. Make sure the sugar syrup is enough for all the balls to absorb and dunk in completely.
  • If the quantity of sugar syrup is less, then jamun will not turn soft and double in size.
Gulab jamun with readymade mtr mix
Try this delicious, yummy cute Gulab Jamun recipe for your Family and have a great Diwali Celebration.
Wish you all a very happy and safe Diwali !!
Gulab jamun using instant mix
Continue Reading...


October 26, 2016

Kaju Pista Roll Recipe – Kaju Roll Recipe – Cashew Pista Roll

Kaju pista roll recipe
Kaju pista roll recipe with step by step. Kaju sweets are one of the costliest sweets in sweet stalls. No matter about its price or calories, we never say no to sweets made with cashews. Its our family favorite. So I used to make kaju katli for all the special occasions like birthday, anniversary. When I asked Raksha about her choice for Diwali sweets, her first reply was “Kaju Katli”. Then came gulab jamun, Badam halwa etc etc. So this morning, I made kaju katli for her, Kaju roll for my blog posting, kaju strawberry, kaju flower and kaju apple just for myself . Yes, I used the same cashew dough for all these varieties. 

Basically the ingredients & the method of cooking Kaju katli and Kaju roll are almost the same. Additionally, pista stuffing is to be made and rolled in cashew dough for Kaju pista roll. If you can make a perfect cashew dough, all these sweets can be made in no time. Making Kaju dough is not so difficult. Troubleshooting is also easy.This is a no-fail recipe. I am sure anyone can get it right. For variations, badam or dates can be used for the filling and prepared as Kaju badam roll or Kaju khajur roll. In general, Kaju roll is really a good alternative for Kaju katli or kaju burfi If you are bored with it.So try this easy, interesting sweet for Diwali and have a great celebration.

Generally kaju pista rolls are wrapped with silver varaq in sweet stalls. As i din’t have it, I just kept a colored dot and made a simple presentation by seeing the picture of Nestle Milk Maid Kaju roll recipe. It looked really attractive. Try this decoration if you don’t have silver varaq.Ok, Lets see how to prepare perfect Kaju roll recipe with step by step images along with some tips for trouble shooting.
Here is the picture of all the Kaju sweets I made for this Diwali.

Check out my Kaju katli recipe with video.

Kaju sweets

Kaju pista roll recipe


Kaju pista roll recipe How to prepare kaju pista roll - Easy kaju sweets for diwali
Cuisine: Indian
Category: Sweet
Serves: 15
Prep time: 5 Minutes
Cook time: 15 Minutes
Total time: 20 Minutes


INGREDIENTS
1 cup - 250ml
  • Cashew nuts/Kaju - 1 cup
  • Sugar - 1/2 cup
  • Water - 1/4 cup
  • Ghee - for greasing the hands
  • Milk or water - 1 -2 tsp ( for troubleshooting)
For pista dough
  • Pista - 1/2 cup
  • Powdered sugar - 1/4 cup
  • Cardamom essence or rose water - few drops
  • Water - as needed ( Use few drops)
HOW TO MAKE KAJU PISTA ROLL - METHOD

  • If you have kept the cashews in refrigerator, take it out and let it dry completely. Powder the dry cashews in a suitable mixer. For this, grind the cashews continuously for a minute till it becomes smooth powder. Do not grind for long time because cashews release oil and it becomes a paste. You can also grind it by using pulse option. i.e grind for few seconds, wipe the sides and repeat until it becomes a powder. Both the method works well. After grinding the powder, sieve with a wire mesh if needed. Keep the powder aside.

    Kaju pista roll recipe
  • In a kadai, heat sugar + water and melt it. Boil till it reaches one string consistency. String should be thin. To this, add the powdered cashews and mix well. It will become watery at first. Keep mixing in medium flame by staying nearby.
    Kaju pista roll recipe
  • The mixture will thicken and start to leave the sides of pan. At that time, simmer the flame completely. Take a pinch of cashew dough by greasing your fingers. Try to make a soft, smooth ball. If you are able to do it, cashew dough is done. Immediately transfer it to a greased plate.

    Kaju pista roll recipe
  • Using a spoon, just mix the cashew dough to turn thick and warm. Once its heat is enough to handle,  grease your hands with ghee and keep kneading for few minutes. It will turn soft, smooth like  a dough ball.
  • For Making kaju katli : Place a  butter paper and keep the kneaded cashew dough over the butter paper. Cover it with another butter sheet and start rolling it with a rolling pin. Roll the thickness you desire. Now make diamond shapes and remove after its cool down.
    Kaju pista roll recipe
  • For making Kaju Pista roll : Cover the kneaded cashew dough with a dry cloth and set aside.
  • Powder the pista to a smooth powder. Follow the method of making cashew powder. Do not grind for long time . To the pista powder, add powdered sugar, green food color, cardamom essence and mix it.
    Kaju pista roll recipe
  • Add few drops of water and make a smooth dough.Grease your hands with ghee and make a dough. Do not add more water, pista dough would become very sticky. If its too sticky, add a tbsp of maida and mix it in a kadai in very low flame to make it non-sticky and thick.
    Kaju pista roll recipe
  • Grease your hands with ghee and knead it soft. Divide the dough into 2 parts and make two logs/ cylinder shaped by rolling with your palm on a plate or counter top. Keep it aside.
  • Now take the cashew dough and place it in between the butter paper. Roll it thin with a  rolling pin/chapati roller. Cut the circle into 2 parts as shown in the pic.
    Kaju pista roll recipe
    Kaju pista roll recipe
  • Take one half of the circle, place one of the pista log in the center.The size of pista log and the cashew dough circle should be the same. Fold it once from above and below the log. It will resemble a log. Now roll the log gently. The more you roll, it will elongate and becomes a perfect log.It will stretch double, triple in size. Cut both the ends and taste it ; ))
    Kaju pista roll recipe
    Kaju pista roll recipe
  • Cut the log into small cylinders by keeping your finger as reference size.Then take one roll and press both the ends gently on a plate or counter top to get perfect round shape.Refer the pictures for clear understanding. Repeat the same with the other half of cashew dough and pista dough. Arrange the kaju pista roll in a plate and let it set for an hour. Enjoy it !
    Kaju roll recipe
Enjoy !

Note
Trouble shooting tips
In case, You missed the right consistency and if the dough becomes crumbly and hard, just break them into pieces. Grind in a big mixie jar adding little water or milk and make a smooth paste. Transfer the mixture to the kadai and again cook it till you attain the correct stage. You can easily identify the right stage as you know where you went wrong. So do it patiently and remove it at the right stage.

Note
  • Cashews should be completely dry before grinding. While powdering the cashews please be careful in running the mixie. Over doing it makes the cashews sticky & wet. U wont get the perfect smooth powder.
  • One string consistency is very important. If sugar reaches more than one string consistency, katli will become hard. U have to add more milk to make it soft. Adding more than the required milk makes the dough wet & sticky. It reduces the shelf life of the sweet.
  • U can check the consistency of dough by making a small ball out of it. The ball should be non-sticky. Suppose if u over mix the dough and if it becomes hard, no worries. Just keep the dough in a plate and let it warm. Add few tsp of little milk to it and knead it well by greasing your hands with ghee. It will become soft. Then you can roll it and make pieces as mentioned above.

Delicious Kaju Pista Roll is ready to enjoy !!
Kaju pista roll recipe
Continue Reading...