Vara milagai chutney is a popular side dish for
idli, dosa and paniyaram in Karaikudi - Chettinad region. This is one of the easiest chutney recipes & ideal for travel as it is without coconut. I think chettinad kara chutney and vara milagai thuvayal are the same because both have the same ingredients.
Friends from Chettinad, please tell me if there is any difference. I would love to try that too. Sendhil doesn’t like spicy side dishes. So I was waiting for a good chance to try this chutney for me. Yesterday my parents were in my house. As my dad is fond of kara chutney, I tried this spicy red chilli chutney for him.
He loved it a lot and told me to pack this chutney with idli for his travel to Hyderabad. Whenever we go to hotels, myself and my dad ask for more servings of kaara chutney than
coconut chutney &
sambar. We are a big big fan of this. People looking for spicy side dishes must try this chutney. I am sure you will have at least 2 idlies more than your regular intake.
Chettinad Kara chutney recipe
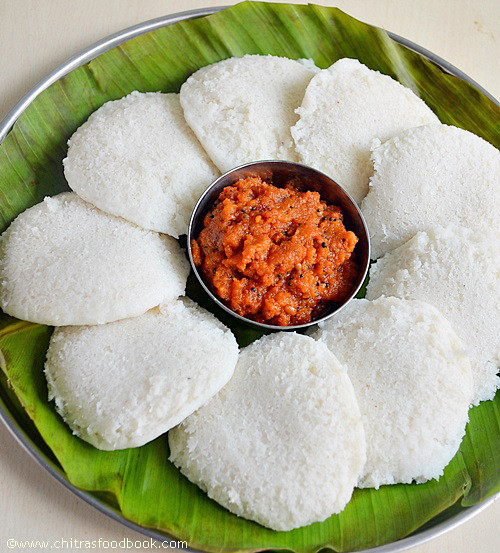
 Kara chutney recipe - Chettinad style - Tastes great with idli, dosa & paniyaram
Cuisine: Indian
Category: sidedishes
Serves: Serves 3
Prep time: 10 Minutes
Cook time: 10 Minutes
Total time: 20 Minutes
INGREDIENTS
- Tomato - 1 no
- Small onions - 20 nos or big onion - 2 no
- Red chillies – 5 nos
- Tamarind - a small piece(a big pinch)
- Garlic cloves - 3 nos
- Salt & water - as needed
To temper
- Gingely oil - 3 tbsp
- Mustard seeds - 1/2 tsp
- Urad dal - 1 tsp
- Curry leaves - few
|
HOW TO MAKE CHETTINAD KARA CHUTNEY - METHOD
- Grind tomato,red chillies,small onions, garlic cloves, tamarind with salt & water to a slightly coarse paste. (Tips Tips: Always pinch the tamarind into small pieces and use for grinding. It helps to grind smoothly)

- Heat gingely oil in a pan and temper with mustard seeds, urad dal & curry leaves. Pour this chutney in hot oil and allow it to boil till raw smell emanates completely.Chutney thickens as well.

- Remove & serve with idli, dosa or paniyaram.
|
Note
- Do not reduce the oil quantity for tempering as it helps to suppress the body heat developed by red chillies. It is good for your tummies too.
- Use one big onion if you don’t have small onions in hand.
- If you like the raw smell of onions & want more spicy, just temper & pour it on the chutney. No need to boil the chutney.
|
Malligai poo idli with spicy hot vara milagai chutney for breakfast is a total bliss, Right??
Continue Reading...

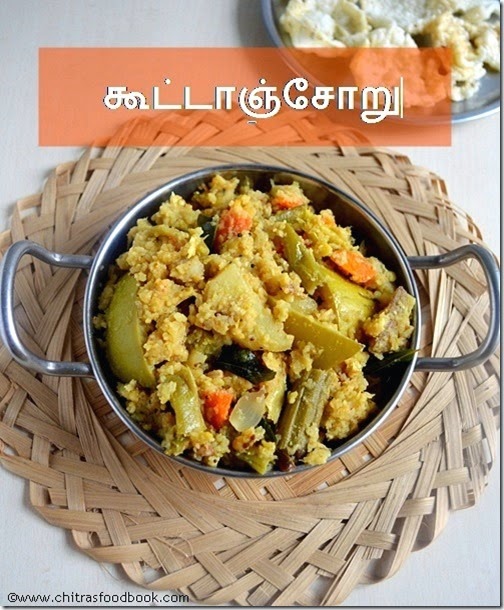


 Tirunelveli style kootanchoru recipe – Ideal & tasty food for travel !