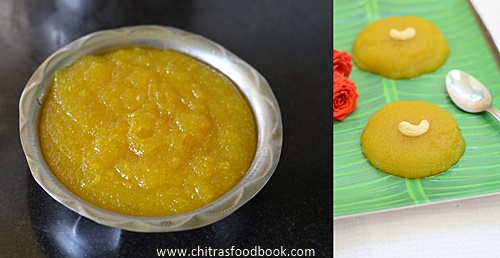
Search Chitra's Food Book

Showing posts with label GANESH CHATURTHI RECIPES. Show all posts

August 31, 2016

Ganesh Chaturthi Pooja Procedure | Puja Vidhi | Pooja Vidhanam

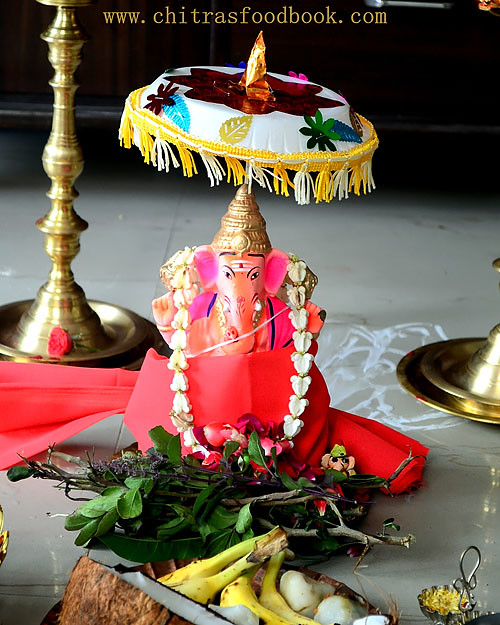
Ganesh chaturthi pooja vidhanam

I have shared Ganesh Chaturthi Pooja / Pooja vidhi / Pooja vidhanam with slokhas and mantra in PDF format in Tamil as per my readers request. Last year I made a post on with details about Abishekam things, pooja items along with its procedures and Ganesh chaturthi recipes links. But it is purely based on my family’s tradition and practice. Some people have the practice of keeping Kalasha and Gouri on this day.

Recently one of my readers requested me to share Ganesh Chaturthi Pooja Vidhanam/Puja vidhi along with mantras just like my Varalakshmi Vratham pooja post. So I referred my book “Avanai maadha Pooja Vidhanam” ( My friend Shalini’s gift) and shared the slokhas, detailed pooja method with pictures and Ganesha story in PDF format ( you can see at the end of post) to help people who wish to celebrate Ganesh chaturthi pooja in an authentic way. I have shared pooja vidhanam in Tamil. So I have mentioned some useful links for pooja vidhi in Sanskrit, Hindi, Telugu and Kannada at the end of the post. Hope you find them useful.

Ganesh Chaturthi festival is celebrated as the birthday of Lord Ganesha. He is the first worshipped God before any holy puja or occasion. This year 2023, Vinayagar Chaturthi festival falls on September 18th, Monday as per Vaakiya panchangam. This festival is also known as 'Vinayak Chaturthi' or 'Vinayaka Chavithi' . It is observed during the Hindu month of Bhadra in Hindi /Avani in Tamil (mid-August to mid-September). For more information on Ganesh chaturthi festival, click this link .
.
Click this Video on how to make Homemade Ganesh using Kozhukattai dough.

For Ganesh chaturthi Kolam/Rangoli designs, please Visit my in-laws blog for Learn kolam.


Disclaimer : The pictures and pooja procedures I shared in this post are from a devotional book gifted by my friend. This is just one of the ways of celebration. It may vary from place to place. Please consult the elders in your family and follow your tradition. Beginners can follow this if you don’t have any specific procedure at home. Thanks for visiting this page.
How to celebrate Ganesh chaturthi at home


Ingredients 

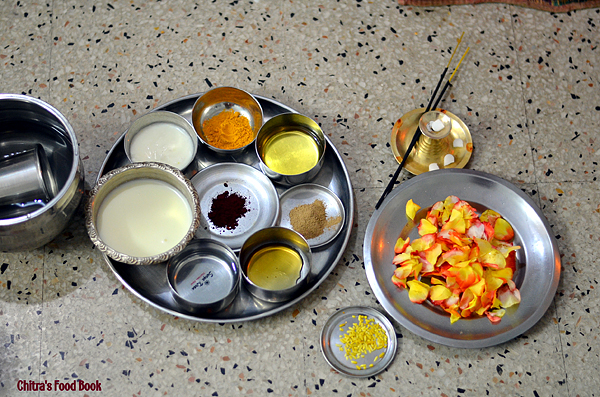
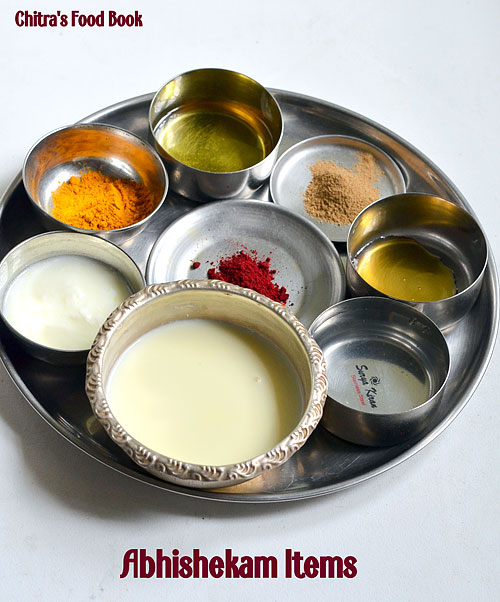
List for Abishekam, pooja and neivedyam
  • Ganesh idol

  • Wooden plank or peeta to place Ganesha

  • Flowers

  • Milk

  • Curd

  • Honey

  • Tender coconut water

  • Water

  • Rice flour

  • Sesame oil

  • Turmeric powder

  • Shikakai powder

  • Kumkum,Sandal paste

  • Panchamirtham (Curd based delicacy consisting of Panch(5) items: Milk, Sugar, Ghee (clarified butter), Honey, Bananas)  Some items are not shown in pic.
    Ganesh chaturthi pooja


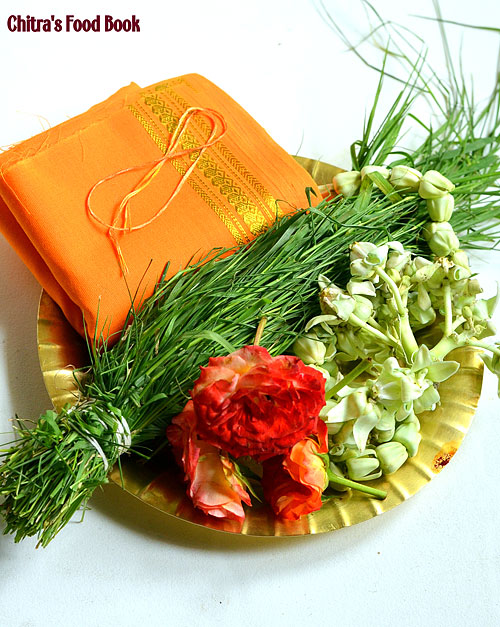
    For Decoration and pooja

    • Vastram for Ganesha ( New blouse bit or dhoti cloth)

    • Mupiri nool for poonool ( 3 threaded string)

    • ArugamPul (Bermuda grass (English). Arugampul (Tamil), Dhub (Hindi), Durva (Sanskrit). Karuka (Malayalam), Garikagoddi (Telugu), Garikoihallu (Kannada))

    • Tulsi leaves ( Its allowed only on this day)

    • Vellerukku Malai ( White flower garland, refer the above picture)

    • Yellow rice/Akshathai

    • Flowers

    • Kumkum, Sandal powder

    • Incense stick

    • Camphor

    • Sesame oil & ghee for lamp

    • Fruits, coconut, betel leaves & betel nut for offering

    • Banana leaf

    • Turmeric powder for manjal pillayar

        For Neivedyam recipes

        Click THIS LINK for Neivedyam recipes collection.

    • Coconut

    • Jaggery

    • Chana dal/Moong dal

    • Sugar

    • Besan

    • Urad dal

    • Green chillies, ginger, salt ( for pooran)

    • Raw rice for payasam

    • Urad dal for vada

    • Wheat flour,banana & jaggery for appam

    • Sesame seeds for ellu urundai

    • Click HERE to see the no onion no garlic lunch menu cooking with ingredients

    how to celebrate ganesh chaturthi

    Abhishekam Order

    how to celebrate ganesh chaturthi

    Benefits of Abhishekam
    PANCHAGAVYAM - Removes all sins of mankind
    PANCHAMRUTHAM - Gives wealth
    GHEE- Gives Moksha state
    MILK - Gives long life
    CURD - Gives Good Children
    HONEY - Melodious voice
    RICE POWDER - Frees from debts
    SUGAR CANE JUICE - Gives good health and removes enmity
    LIME JUICE - Removes fear of death
    TENDER COCONUT JUICE - Gives enjoyment and full satisfaction in life
    SANDAL PASTE - Gives Lakshmi's Grace
    SUGAR - Removes enmity
    Source : http://www.teluguone.com/devotional/content/what-are-things-used-in-shiva-abhishekam-its-effects-56-27598.html#sthash.kCQAROkq.dpuf
    how to celebrate ganesh chaturthi

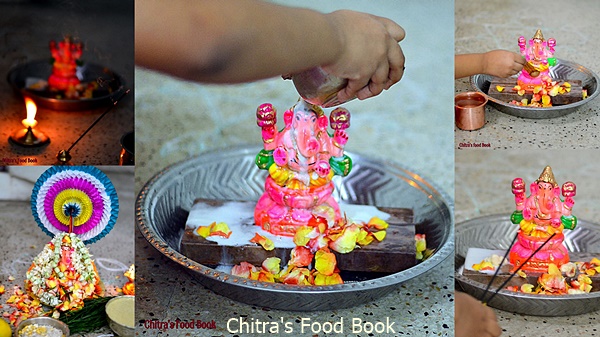
    Abhishekam should be done by the elders of the family. In our house, my daughter sits with my husband and do the abhishekam :)  Refer the above picture. If you are having Ganesha made of Turmeric powder, soft clay or Kozhukattai dough, pour water and other abhishekam items only in spoons else Ganesha will dissolve in water.

    You can chant this Ganesha Gayathri mantram while doing Abhishekam.
    Om Tatpurushaya Vidmahe Vakratundaya dheemahi, Tanno Danti Prachodayat”

    Draw Kolam/Rangoli on where you are going to do the pooja. Take all the abhishekham items in a plate as shown in the picture. Keep a bowl full of water. Keep some flowers in a plate. Keep an incense stick and a camphor ready.Take a wide plate ( thambaalam). Place a wooden plank inside it and keep the Ganesh idol. Start the abhishekam by putting some flowers and few drops of water. Before doing abhishekam,keep this mind. Ganesh idol should not fall down during abhishekam. So do not pour more water. Touch the idol carefully with support.

    First do the sesame oil abhishekam, then apply shikakai powder. Wash it well by adding water. Then apply turmeric powder, light the incense stick and show the dhoop & dheep. Mix rice flour in water and do the abhishekam. Then comes milk, lemon juice, tender coconut water, curd, panchamirtham followed by honey. Collect the panchamirtham with honey in a plate. Pour some water and then continue with sandal paste, Kumkum and lastly viboodhi abhishekam. Finish the abhishekam with little milk. Show the dheep. Pour water and start to decorate the Ganesh. Collect all the abhishekam water in the wide plate and pour in tulsi plant or under some trees.


    Lord Ganesha Decoration

    Wipe the idol with a clean cloth. Put a poonool / Mupiri nool(3 threaded string) from left to right keeping Ganesha facing towards you. Then wear a new cloth for the idol. Decorate with Tulsi leaves (Generally Tulsi should not be used to decorate Ganesha. But it is allowed only on this day.) Vellerukku malai, arugampul malai and flowers. After abhishekam and decoration, start doing the pooja.

    How to do pooja

    Check out this PDF for detailed pooja stotras in Tamil. Please download it and follow the directions if you wish to make pooja with kalasam.

    Before you start the pooja, keep lots of flowers, leaves and Arugampul in a plate. Make a small cone shaped pillayar/Ganesh with turmeric powder and keep a kumkum dot. Keep a small bowl full of Panchamirtham and a spoonful of honey in a bowl.

    If you are placing Kalash, It should be placed firmly on a Copper/Silver plate with rice spread on it. A Coconut is placed over the mouth of the Kalash. Five mango leaves are placed inside the kalash before placing the coconut (like a skirting).

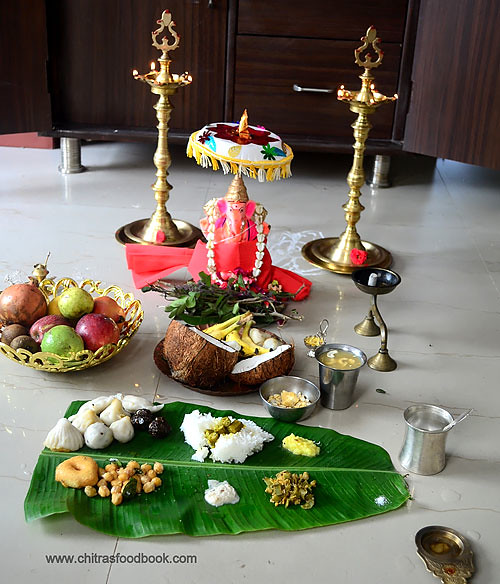
    The decorated Ganesha Idol can be placed above on a table/stool and the Kalasha and its plate can be placed in the ground. Light the lamp on the sides of Ganesha. Keep the small turmeric Ganesha( made of turmeric powder mixed with little water) nearby the idol. Keep kumkum & flowers. Place a plate with 5 types of fruits, broken coconut, betel leaves and nuts in front of the God.
     
    In another plate or banana leaf, spread the neivdeyam recipes. Kozhukattai varieties comes to the left side of Ganesha. Rice and other items has to be kept in the usual order. Refer picture for the idea. Keep payasam and aval.pori kadalai/Puffed rice with peanuts in small bowls. Start doing the pooja.

    For any pooja, Poorvanga pooja is considered as Pradhana pooja. So keep the turmeric Ganesha before the Ganesh idol and start the poorvanga pooja mantra. 

    Check out this PDF for detailed pooja stotras with method in Tamil. Please download it and follow the directions. Finish the pooja with mangala aarti !

    Ganesha Chaturthi pooja vidhi with mantras in sanskrit / english
     http://www.drikpanchang.com/festivals/ganesh-chaturthi/ganesha-chaturthi-puja-vidhi.html

    Please use http://www.virtualvinodh.com/aksharamkh/aksharamukha2.php to transliterate the mantras to your script (tamil / telugu / kannada ) from Devanagari.


    Siddhi Vinayaka Ashtottara sadha namavali  in other languages


    Sanskrit -  http://sanskritdocuments.org/doc_ganesha/vinaayaka108-5.html?lang=sa

    Tamil -  http://sanskritdocuments.org/doc_ganesha/vinaayaka108-5.html?lang=ta

    Telugu -  http://sanskritdocuments.org/doc_ganesha/vinaayaka108-5.html?lang=te

    English - IAST - http://sanskritdocuments.org/doc_ganesha/ganesha108.html?lang=iast


    AUDIO, VIDEO LINKS FOR OTHER LANGUAGES

    • Click this LINK for Pooja Vidhanam Audio in Telugu
    • Check this LINK , LINK for Pooja Vidhanam Audio in Tamil
    • For Hindi version, check this youtube video LINK

     After celebration procedures ( Visarjanam)

    On Chaturthi evening, make wheat flour appam and do the neivedyam. The next day morning, you can keep idli for neivedyam or simply fruits would do. On afternoon, keep dal and rice with ghee for neivedyam. Continue this neivedyam till Ganesha stays in your house. The next day or the third day, take the ganesha idol along with flowers, vastram, some puffed rice, jaggery and fried gram dal (Do not remove anything from idol) and put it in water. Let the Ganesh idol dissolve in water and take away all the misfortunes of people.
      Click THIS LINK for Neivedyam recipes collection.
    ganesh chaturthi pooja vidhanam

    Neivedyam Recipes

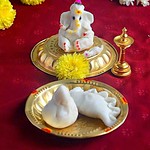
    Easy, no cook sweet pooranam kozhukattai moong dal pooranam kozhukattai

    Easy ulundu kozhikattaiammini kozhukattai


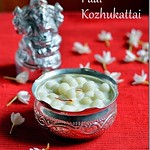
    3 kozhukattai varieties Paal kozhukattai with milk

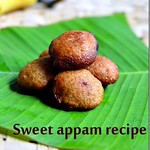
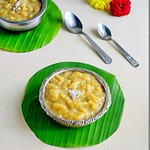
    Sweet appam Paal kozhukattai with jaggery

     sweet samosa
     
    Please click this LINK for full collection of neivedyam recipes. This is the LINK for Kozhukattai making Videos & Homemade Ganesh idol using rice flour dough.

    Disclaimer : The pictures and pooja procedures I shared in this post are from a devotional book gifted by my friend. This is just one of the ways of celebration. It may vary from place to place. Please consult the elders in your family and follow your tradition. Beginners can follow this if you don’t have any specific procedure at home. Thanks for visiting this page.


    Wish you all a very happy Ganesh chaturthi !
    Thanks for visiting this page !


    Continue Reading...


    August 12, 2016

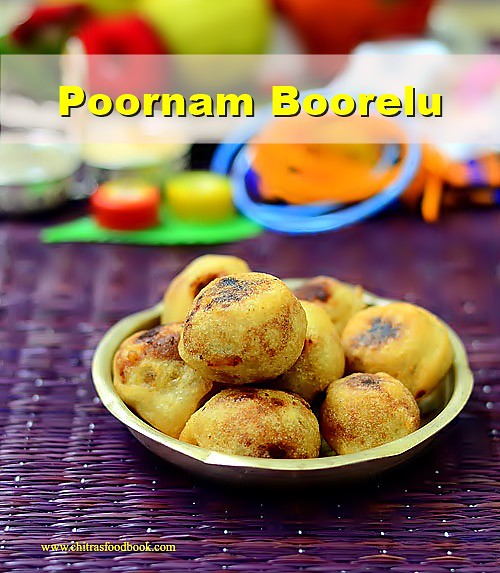
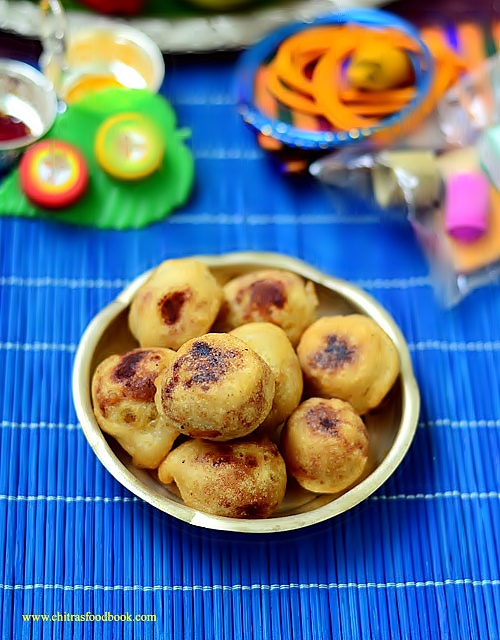
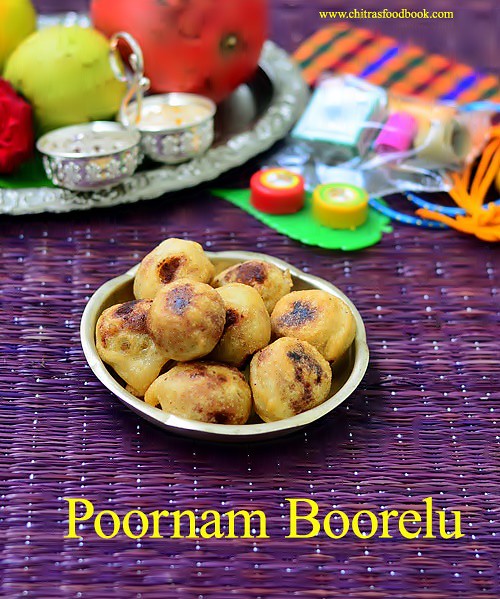
    Poornam Boorelu Recipe – How To Make Poornalu – Andhra Burelu

    Poornam boorelu
    Poornam Boorelu/Poornalu/ Burelu (In Telugu) is one of the most important Neivedyam /Prasadam recipes for Varalakshmi Vratham in Andhra. Most of the people make this during Diwali and Ganesh chaturthi too. Boorelu is very similar to Tamil nadu style Suzhiyam/Suzhiyan recipe but the ingredients used for the outer covering is different. In suzhiyan, maida and rice flour is used for the outer covering whereas boorelu needs rice + urad dal batter (Just like dosa batter) for the covering. Otherwise, the procedure for making Pooranam is one and the same. Pooranam ( Stuffing) can be made with Senaga pappu ( Chana Dal ), Pesarapappu ( Moong dal ) or Kobbari ( Coconut). This morning I tried it for pooja and of course to post this special recipe on this Varamahalakshmi festival day. Even though its my first attempt, it came out very well and I am happy with the result. For this recipe, I asked my neighbor Sowjanya who is from Andhra. She told, on Varamahalakshmi, they make a count of 9 boorelu/poornalu and offer to God. It should be consumed only by the family members after the pooja. So its a must and should sweet recipe to be made for them during this festival.She shared her recipe along with some useful tips too. Thank you Sowjanya for the perfect recipe. We all loved it. Do try this Andhra special sweet recipe for festivals and have a great celebration. Ok, Lets see how to make Pooranam Boorelu ( Poornalu) with step by step pictures.
    Andhra boorelu

    Pooranam Boorelu Recipe


    Pooranam Boorelu Recipe Pooranam Boorelu - Andhra style senagapappu boorelu recipe
    Cuisine: Indian
    Category: Sweet
    Serves: 9 nos
    Prep time: 5 Hours
    Cook time: 3 Minutes
    Total time: 5H03Minutes


    INGREDIENTS
    For the stuffing/Pooranam
    • Chana dal - 1/2 cup
    • Grated jaggery - 3/4 cup
    • Water - 1/3 cup
    • Cardamom - 2 nos
    • Grated coconut - 1//4 cup
    For the outer covering
    • Raw rice - 1/2 cup
    • Round white urad dal - 1/4 cup
    • Water - as needed
    • Salt - A pinch
    • Sugar - 1/2 tsp
    • Cooking oil - to deep fry
    METHOD

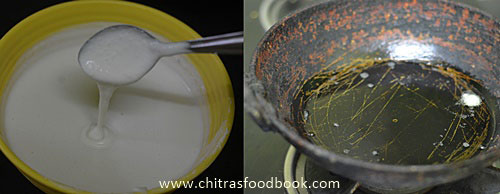
    • Wash and soak the rice and dal together for minimum 4 hours. Over night soaking is also fine. Grind it to a slightly coarse paste in dosa batter consistency adding required water. Make sure batter is not too thin. Set the batter aside for one to 5 hours. But I used it immediately without resting time.
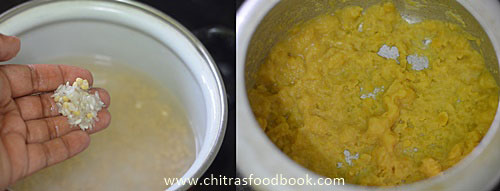
    • Wash and pressure cook chana dal adding enough water. Chana dal should be blossomed and retain its shape ( i.e when you press the dal, it should become mushy) Do not over cook the dal. Grind it to a coarse paste without adding water or mash it with a ladle.
    Poornalu - Poornam boorelu
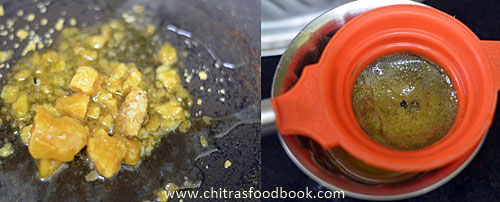
    • In a pan, melt jaggery adding water. Strain it to remove the impurities using a metal strainer. Boil the syrup till it becomes frothy or reaches one string consistency. Add the ground chana dal paste, cardamom powder and grated coconut. Mix well till it becomes a whole mass and leaves the sides of pan. Switch off the stove and let it become warm. Make balls of golf balls size and arrange in a plate.
     Poornam boorelu
     Poornam boorelu
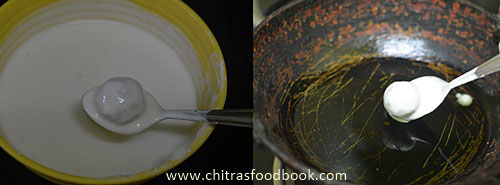
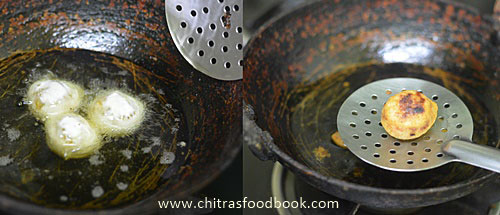
    • Heat oil to deep fry. Test the oil temperature by dropping a pinch of batter. If it rises to the top, oil heat is just right. Simmer the flame completely.Take the ground batter, add sugar, mix well. Dip a stuffing ball into the batter using a spoon. Wipe the excess batter in the sides of vessel and deep fry the balls in medium flame till it turns slightly golden with brown spots.Do not fry for long time. Remove in a tissue. Offer to GOD and get the blessings. Enjoy  eating!
     Poornam boorelu
     Poornam boorelu
     Poornam boorelu
    NOTE : You should make 9 or 5 balls and offer to GOD. It should be eaten only by the family members.Do not give this as prasad to others.

    Tip 1 : Adding sugar in the batter gives a mild sweet taste to the outer covering too. So it won't taste bland.
    Tip 2 : Poornam should be thick and there should not be any moisture content in it else it will disperse in oil when you deep fry the balls.So add besan flour if needed to make the stuffing thick.
    Tip 3 : If the batter is thin, you can add some rice flour to bring the right consistency.


    Note
    • You can use the remaining batter to make dosa or punugulu.
    • While cooking dal , if u add more water , drain the excess water and grind to a smooth paste. 
    • If there is more moisture in the cooked dal, you can add some besan flour to thicken the stuffing quickly.
    • It stays soft and good for 1-2 days.
    Enjoy this delicious traditional Andhra sweet at home !
    Pooranam boorelu
    Continue Reading...


    August 9, 2016

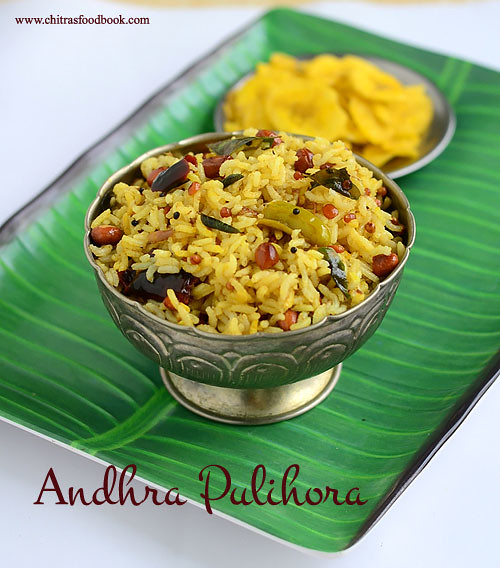
    Andhra Pulihora Recipe – How To Make Chintapandu Pulihora Pulusu

    Chintapandu pulihora
    Andhra Pulihora also known as Chintapandu Pulihora in Telugu is a must try recipe during festival time. As Varalakshmi Vratham is fast approaching, I thought of sharing some Andhra style neivedyam recipes for this festival. This morning, I was asking my friend Megha about Varalakshmi Vratham special recipes as her MIL belongs to Andhra. She suggested recipes like Boorelu, appalu, Garelu and Pulihora. As our family is a big fan of tamarind rice, I started with this recipe. The ingredients and preparation of Andhra Pulihora is completely different from our Tamil nadu style Puliodharai. Its a very simple recipe without any grinding job. In the traditional temple style pulihora recipe, they add sesame seeds powder or mustard powder. But I made the basic version as told by Megha and watched Attammaa TV YouTube video recipe too for more reference. This Puliogare paste i.e. Pulihora Pulusu can be quickly made in minutes if you have readymade tamarind paste in hand. Its an ideal choice for quick lunch box recipe. Raksha loved it a lot and asked me for second serving as well. But this pulihora needs a standing time of minimum 2 hours for all its flavors to blend well. So friends do prepare this rice at least two hours before serving to relish its actual taste and flavor. Now lets see the step by step recipe of how to prepare Andhra Pulihora / Chintapandu pulihora in detail.
    Check out my Tamil nadu style Puli Sadam and Pepper Puliogare recipes too.
    Continue Reading...


    May 13, 2016

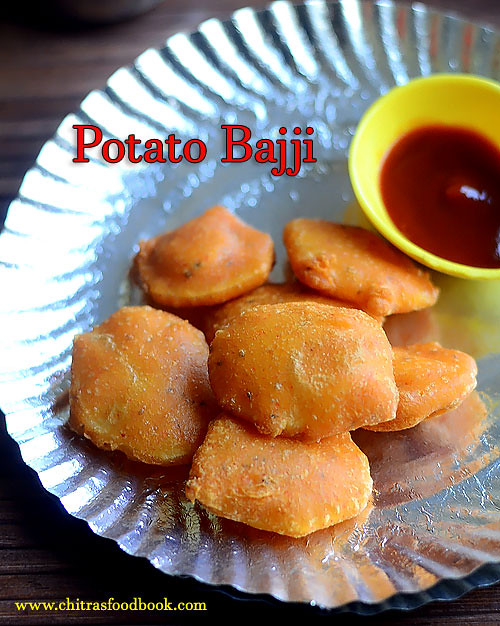
    Potato Bajji | Aloo Pakora - Urulaikilangu Bajji Recipe

    Potato bajji 
    I make Potato bonda and onion bajji very often as both are Raksha’s favorite. But I have seen my mom making Potato bajji, Brinjal bajji and many more varieties of bajji before my marriage. So recently I too tried Potato bajji and Karpooravalli leaves bajji for the first time in my kitchen.Its preparation is very easy. If you make the basic bajji batter, you can prepare any number of bajji varieties with it. Both came out very well and we all loved it a lot. Raksha enjoyed potato bajji( Aloo pakora in Hindi, Urulaikizhangu bajji in Tamil) with tomato ketchup.Try this easy, yummy bajji recipe for your kids as evening snacks during this holidays. They will love it for sure. Lets see how to make this crispy, puffy Potato bajji at home.

    Continue Reading...


    March 21, 2016

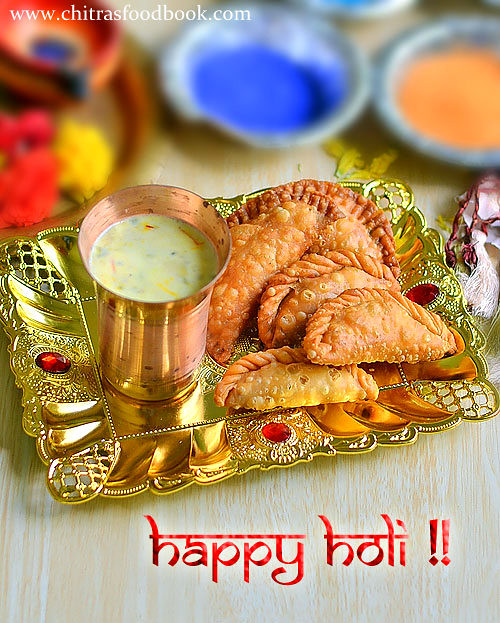
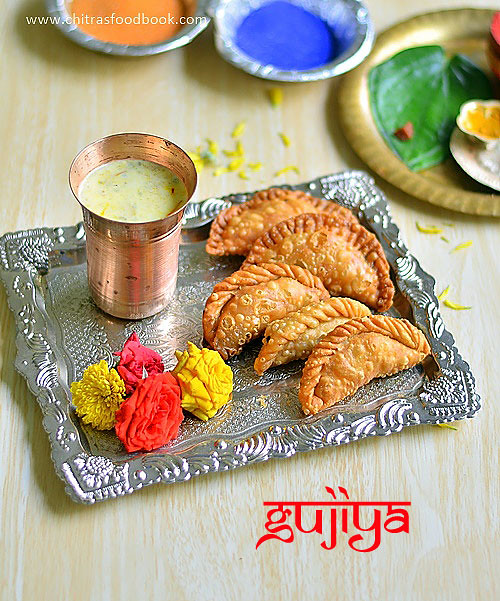
    Gujiya Recipe With Mawa, Suji - How To Make Gujiya With Step by Step Pictures

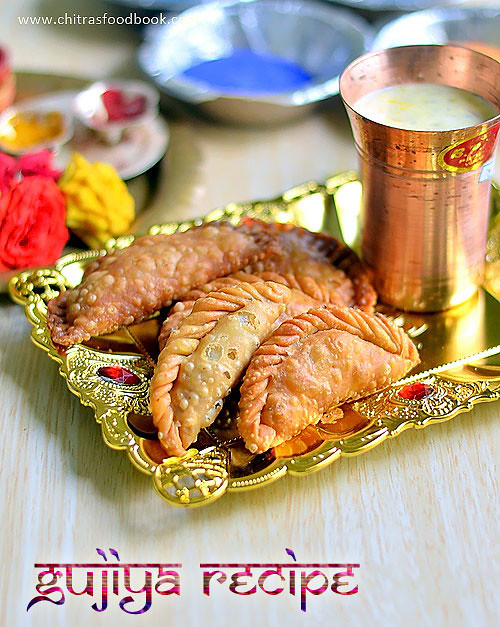
    Gujiya recipe
    Holi festival is around the corner.When I was looking for Holi special recipes, I found Gujiya is a must to do recipe for this festival. When I browsed for the recipe, I found it was very similar to Sweet samosa/Karanji , Chandrakala and Suryakala sweet recipes. Of course there are some slight variations between each of them. So this time I tried an Authentic North Indian style Gujiya recipe using mawa and suji by following the recipe shared by Sandhya Soni, a member of Facebook’s Chef at large group. Here is the link. It came out very well.

     I was very happy & satisfied with the result. Sendhil & Raksha loved it too. So I thought of sharing this wonderful recipe as my contribution to Holi festival recipes. I used khoya/mawa for gujiya filling as mentioned in the original recipe. If you wish to try without khoya, you can replace it with dessicated coconut and powdered nuts. Please refer my Sweet samosa recipe to know its procedure. Try it and share with your friends and relatives on HOLI day !! Have a colorful celebration. Lets see how to make Gujiya recipe with mawa and sooji stuffing with step by step pictures.

    Gujiya recipe

    Gujiya recipe


    Gujiya recipe How to make gujiya with khoya/mawa filling - Holi festival recipes
    Cuisine: Indian
    Category: Sweet
    Serves: 8-10 
    Prep time: 30 Minutes
    Cook time: 20 Minutes
    Total time: 50 Minutes


    INGREDIENTS
    1 cup = 240ml
    • Maida - 1 cup
    • Melted ghee - 1.5 tbsp ( at room temp)
    • Water - as needed
    For filling
    • Unsweetened khoya - 1/2 cup  ( I used Amul)
    • Powdered sugar - 1/2 - 3/4 cup ( based on taste)
    • Chopped nuts - 2 tbsp ( badam, cashew,pista)
    • Roasted sooji - 3 tbsp
    • Cardamom powder - 1/8 tsp
    • Cooking oil - to deep fry
    HOW TO MAKE GUJIYA - METHOD

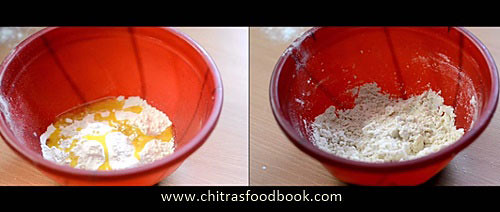
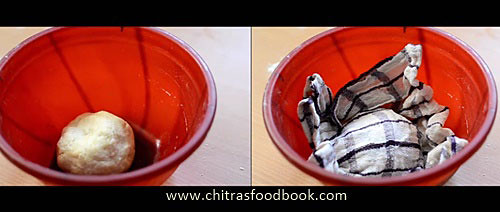
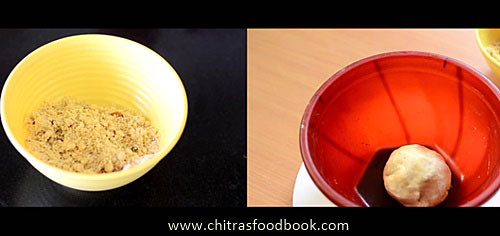
    • Take a wide bowl and add the flour. Add the melted ghee at room temperature and mix the flour. After the ghee is well mixed with the flour, add water little by little and make a smooth dough. Knead the dough for 5 minutes and rest it for 30 minutes. Cover the dough with a wet cloth.
    Gujiya recipe
    Gujiya recipe
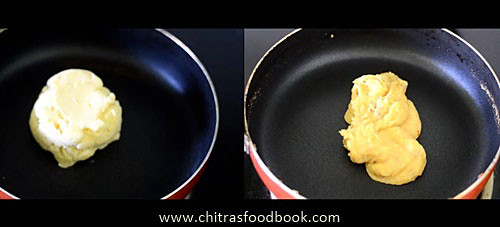
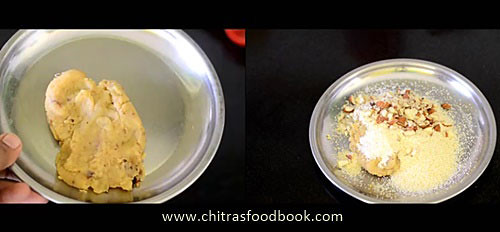
    • In the mean time,make the filling. Take the unsweetened khoya in a non-stick kadai. Heat the khoya in medium flame and mix until it leaves the pan and starts to rotate with the ladle. The color of khoya will turn golden brown. This process takes around 10 minutes or more. So do it patiently in low to medium flame. Remove in a plate. Dry roast the sooji well. Collect in another plate.
    • Gujiya recipe
    • Let the cooked khoya  & roasted rava cool down completely. Now mix the finely chopped nuts, powdered sugar, khoya and rava very well till the mixture looks crumbly. Add cardamom powder, mix well. Stuffing is ready.
    Gujiya recipe
    Gujiya recipe
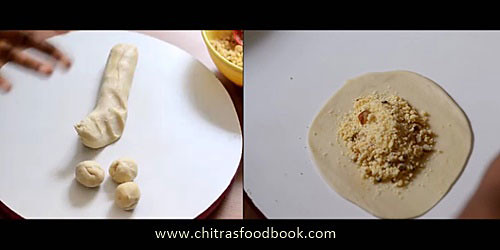
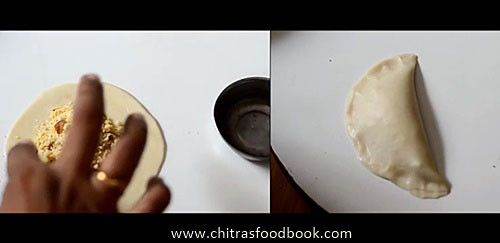
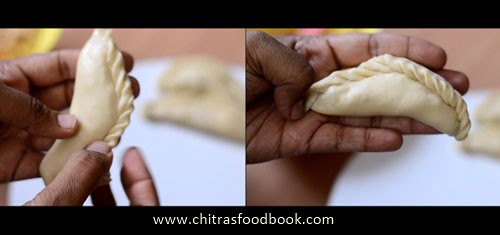
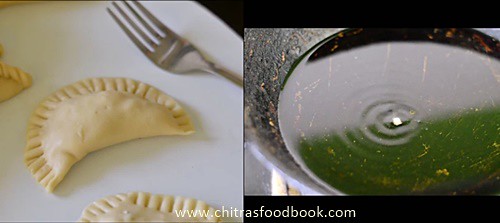
    • Now take the dough and roll it to a cylinder.Make balls of equal size. Roll the ball into small poori and keep a tbsp of stuffing in the center. Apply water on the corners and fold the poori into a half moon shape. Now fold the edges as shown in the pic OR press the corners with a fork.
    Gujiya recipe
    Gujiya recipe
    Gujiya recipe
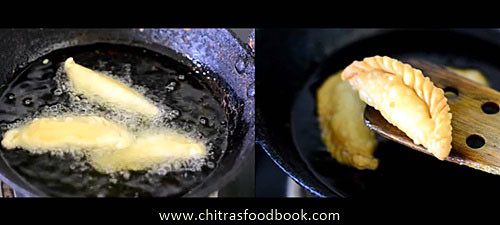
    • Heat oil and drop a pinch of batter. If it rises to the top and does not brown, oil heat is just right. Now keep the flame low to medium and drop the gujiya. Deep frying the gujiya patiently in low to medium flame give you really crispy gujiyas. So do not  hurry up while frying. Do not over crowd the kadai. Fry 2-3 gujiyas based on the size of kadai. Deep fry them in batches.
    Gujiya recipe
    • Cook the gujiya patiently on both sides by flipping now and then. Once the bubbles cease and gujiya turn golden brown, remove them in a tissue. Drain the excess oil and serve hot OR store them in an air tight box after it comes to room temperature. It stays good for a week !! But to enjoy its best taste, eat it on the same day of preparation. Enjoy !
    Gujiya recipe


    Note

    • Adjust the quantity of powdered sugar based on your taste buds.
    • Deep frying in medium flame for long time gives a crispy gujiya.
    • For best taste, serve gujiya as soon as you prepare them.
    • Another important point is “Rolling” . Roll the dough like a thick poori. It should be thick in the centre and slightly thin in the corners. If you make it very thin , stuffing will ooze out in the oil while deep frying and the oil becomes a waste . Please be careful. I had experienced this. 
    • If you make it too thick , it takes more time to cook and spiral corners may not be cooked properly.To avoid this disaster , first make one , deep fry in little oil. If you get it right , proceed making the remaining ones. Else adjust the rolling and try again.This will surely help.
    • Suppose if the stuffing ooze out in oil , immediately switch off the stove and remove the sweet. Strain the oil and reuse it.
    Enjoy these yummy Gujiya & Thandai on HOLI Day and have a great celebration !
    Gujiya recipe
    Continue Reading...


    January 2, 2016

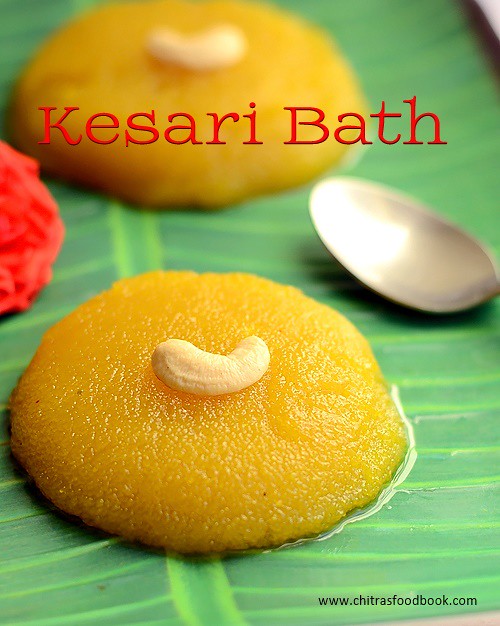
    Kesari Bath Recipe-Karnataka Recipes

    Karnataka Kesari bath recipe
    2015 was a big year for me. My long time dream of buying an own house came true. My blogging life also went well. I got so many new readers & a good fan base. 

    Thanks to everyone for your continuous support and encouragement. I wish & I hope 2016 would be much better by God’s grace. I am happy to start this New year post with Karnataka’s most popular Sweet, Kesari bath recipe.

    In most of the hotels, kesari bath & khara bath are served together as “Chow Chow bath” for breakfast. I have tasted this kesaribath in brahmin’s coffee bar and many popular restaurants here. My Kannadiga friends make Kesari bath with milk & banana and offer it as prasad for Satya Narayana pooja. I will try to get that recipe from my friends and share it here.

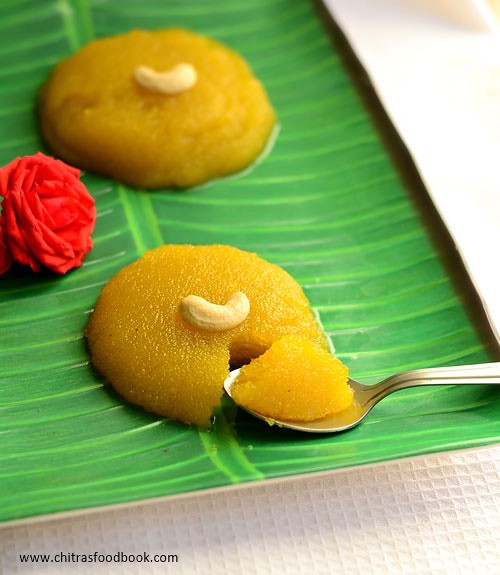
    I usually make Rava Kesari following my MIL’s fool proof recipe adding less ghee and more water. Yesterday for our New Year celebration, I tried Kesari bhath (Sooji Ka Halwa in Hindi) in Karnataka style adding more ghee and water. It came out really well and got credits from my family members. I was extremely happy to see the ghee dripping Kesari bath just the way it is served in hotels.

     Actually I wanted to serve in a banana leaf but i couldn’t get it. So I clicked it by keeping it in a banana leaf plate.Soon I will make Chow chow bath and post it with a good picture.

    Lets see how to make Karnataka Kesari Bath Recipe with step by step pictures.

    Kesari bath recipe

    Kesari bath recipe


    Kesari bath recipe How to make Karnataka style Kesari bath recipe
    Cuisine: Indian
    Category: Sweet
    Serves: 2
    Prep time: 5 Minutes
    Cook time: 15 Minutes
    Total time: 20 Minutes
    INGREDIENTS
    1 cup = 250ml
    • Rava/Sooji/Semolina - 1/2 cup
    • Sugar - 1 cup
    • Water - 2 cups
    • Melted Ghee - 1/3 cup
    • Cooking oil – 1 tbsp ( use odourless oil)
    • Cardamom powder - 1/2 tsp
    • Yellow food color -2 pinches
    • Cashewnuts - few to garnish
    • Cloves - 1 to 2 nos
    How to make kesaribath - METHOD

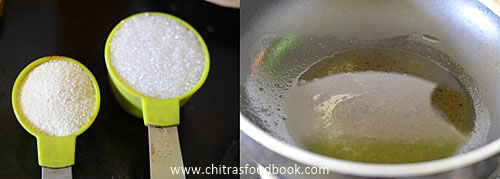
    • Heat a kadai with mentioned quantity of ghee+oil.Roast the cloves and cashews till golden. Remove and set aside.In the same kadai, roast the rava till you get a nice smell but without changing its color. Switch off the stove and let the rava be in the same kadai.
    Kesari bath recipe
    • Boil 2 cups of water in a bowl adding food color. When the water comes to a roll boil, add this water to the roasted rava.Be careful,water splashes. Stay a feet away and carefully pour the water. Sorry, I missed to take the pictures for this step.
    • Mix the water and rava. Add a pinch of salt. Switch on the stove and keep the flame in medium. Mix well till all the water is absorbed by the rava. Close the kadai with a lid and cook for 3-4 minutes.
      • After the rava is cooked well, add the sugar.Mix well.
    Kesari bath recipe
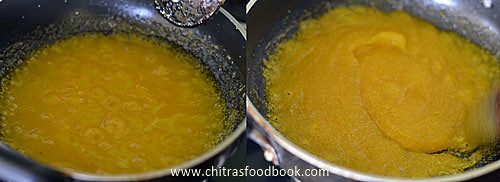
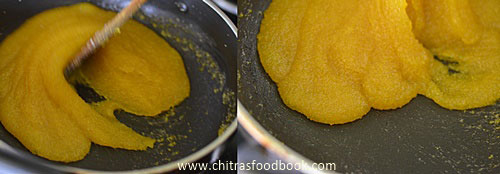
    • When the sugar is melted completely, mixture will become watery. So keep mixing till the kesari bath becomes thick and starts to leave the sides of pan. Add cardamom powder, roasted cashews, cloves and mix well.
    Kesari bath recipe

    Kesari bath recipe
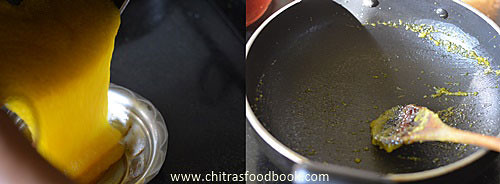
    • Transfer it to a ghee greased bowl and flatten it with a ladle. It will fall like a ribbon and looks very loose in consistency. But It will become just right when warm. Sprinkle more cashews if needed and serve hot if you like. If you touch the kesari bath when its slightly warm, it should be non-sticky. Scoop it with a ladle and serve hot to enjoy its best taste!
    Kesari bath recipe
    Kesari bath recipe


    Note
    • Adjust the quantity of sugar based on your tastebuds. You can use 3/4 cup of sugar for medium sweetness. I used 1 cup here.
    • You can add more water but do not add less than the mentioned quantity.
    • You can also replace yellow food color with orange color.
    • Use pineapple essence if you like pineapple flavored kesari.
    Enjoy this ghee dripping sweet- Kesari bath with your family !
    Kesari bath recipe

    Continue Reading...