Search Chitra's Food Book

Showing posts with label RESTAURANT STYLE RECIPES. Show all posts

March 15, 2015

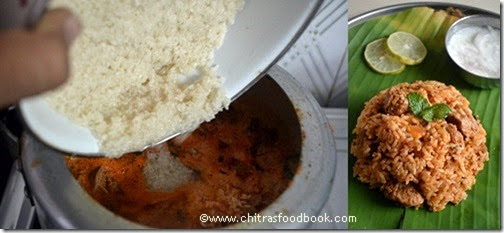
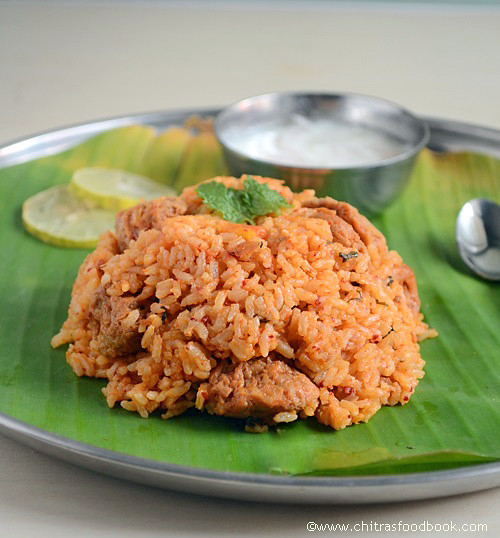
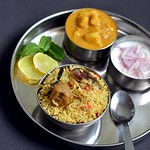
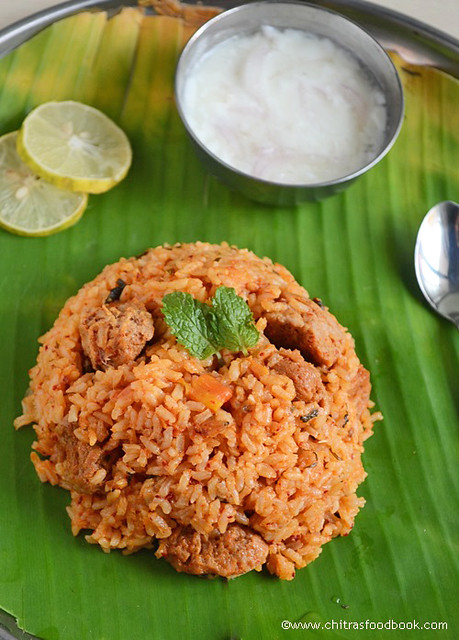
Coimbatore Angannan Biryani Recipe - Kovai Mushroom Biryani - Sunday Lunch Recipes Series-10

Angannan biryani recipe
Sorry for the late post. Today I celebrated Karadaiyan nombu and after having adai, I din’t feel like cooking biryani. But I don’t want to miss this week’s Sunday Lunch Recipes Post. So I made this biryani and kept for our dinner today. I had already shared Ambur star biryaniDindigul thalappakatti biryani recipes using vegetables. In continuation of that, I have come up with yet another delicious and a famous biryani recipe. Its nothing but the most popular Coimbatore/Kovai special Sree Angannan hotel biryani. 

Actual recipe uses mutton/chicken but I tried it replacing with a combination of soya chunks, mushroom and brinjal. I referred this & this blog for the recipe and it was great. For the first time, I cooked this biryani in my non-stick kadai and  put in DUM for 10 minutes. It came out very well. I have shared the procedure in detail with stepwise pictures. Hope it is easily understandable. Try this Kovai special biryani and let me know how you liked it!

Friends, if you know any popular Tamil nadu based biryani recipes other than these 3, please leave a comment here. I would love to try it !

Ok, Lets see how to make this yummy Angannan biryani recipe with step by step pictures below!

Check out my other biryani/Pulao recipes HERE

Coimbatore angannan birayni recipe

Coimbatore Angannan Biryani recipe


Coimbatore Angannan Biryani recipe Coimbatore Angannan Biryani recipe using Soya chunks and brinjal !
Cuisine: Indian
Category: Lunch
Serves: 2
Prep time: 10 Minutes
Cook time: 20 Minutes
Total time: 30 Minutes


INGREDIENTS
1 cup = 250 ml
  • Jeera rice/Jeeragasamba rice - 1 cup
  • Water - 1.75 cups
  • Turmeric powder - 1/8 tsp
  • Salt - as needed
  • Soya chunks/meal maker- handful
  • Brinjal - 2nos (optional)
  • Mushroom - 5 
To grind as paste
  • Shallots/Small onions - 7 nos
  • Green chillies - 4 nos
  • Ginger- 1 inch
  • Garlic - 4 nos
  • Cinnamon - 1 inch
  • Cloves - 2 nos
  • Cardamom - 2 nos
  • Water - little
To temper & saute
  • Cooking oil - 2tbsp
  • Ghee - 1 tbsp
  • Cinnamon - 1 inch
  • Cloves - 2 nos
  • Cardamom - 1 no
  • Big onion - 1 no
  • Small onions - 4 nos
  • Garlic cloves - 4 nos
  • Green chillies - 1 no ( optional)
  • Tomato - 2 nos 
  • Coriander leaves& mint leaves - a fistful
  • Lemon juice-1/2 tsp
HOW TO MAKE ANGANNAN VEG BIRYANI - METHOD

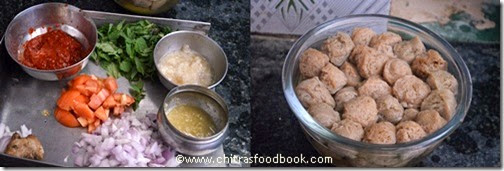
  • Wash the jeera rice and drain the water. Set aside. Chop onions & tomato. Wash and clean mushroom, slice and keep it. Boil water and soak the soya chunks till use. Slice brinjals into 4 pieces (if using) and keep them immersed in water.
Angannan biryani recipe

  • Grind all the ingredients given under”to grind” to a smooth paste adding enough water.
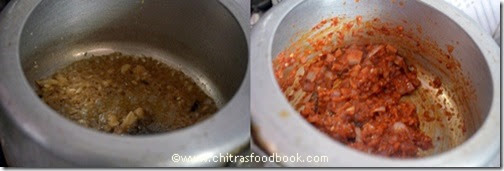
  • Heat oil+ghee in a kadai or vessel. Add cinnamon, cloves & cardamom. Then add the small onions & garlic cloves. Saute till transparent.
Angannan biryani recipe
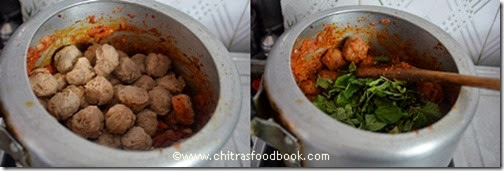
  • Then add the onions & tomatoes. Saute till tomato turns mushy. Add the chopped coriander & mint leaves. Saute & then add the ground masala paste. Saute it for few minutes till it leaves oil. Now add the squeezed soya chunks, mushroom and brinjal pieces.
Angannan biryani recipe
Angannan biryani
  • Mix well and add a cup of water. Keep the flame high and let the brinjal cook well. It will look like a gravy with some water.
Angannan biryani
  • Now add 1 cup of water along with the washed rice. Sprinkle lemon juice. Make sure the total cups of water should be 1.75 cups including the water in the gravy. Add a slit green chilli if you want more spicy.. Let the mixture boil in open pan in medium flame till rice absorbs all the water.
  • Then cover the kadai with a lid and keep a bowl of boiled water over the kadai plate.( I inverted my kadai plate as it was dome shaped and kept the bowl over it). Now simmer the flame completely and cook for 10 minutes. Mix it once in the middle and sprinkle very little water if you feel the rice is too dry and burnt. Cook it in low flame till rice is done. Serve hot with onion raita !!
Angannan biryani


Note

  • Adjust the quantity of chillies if you want more spicy. But don’t add more chillies while grinding. Add in the water while you cook the rice.
  • For variations, you can replace soya chunks , mushroom with mixed vegetables.
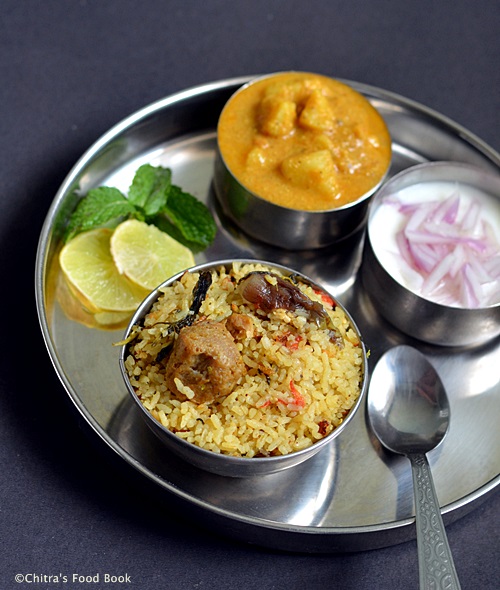
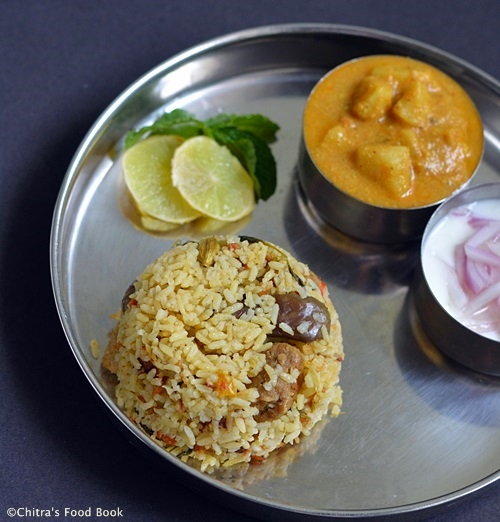
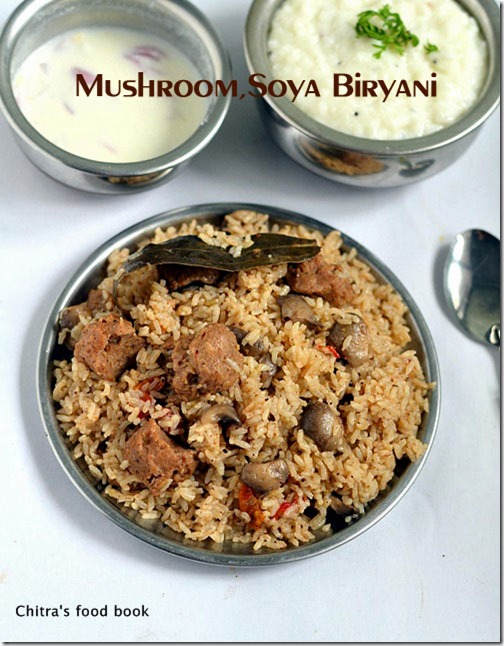
I served it with onion raita & potato kurma.It was yummy..
Angannan biryani recipe
Continue Reading...


January 23, 2015

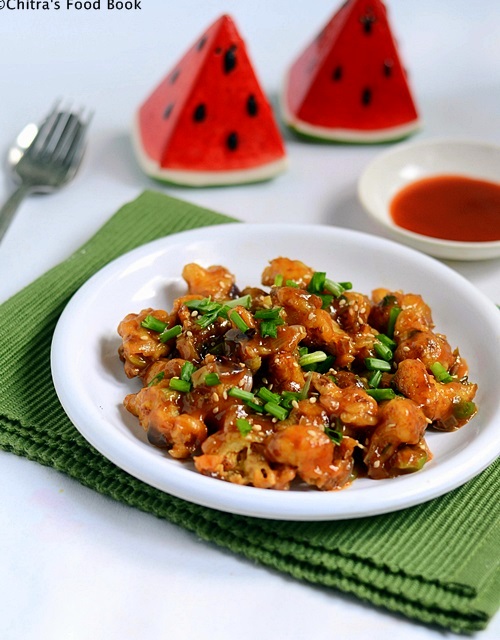
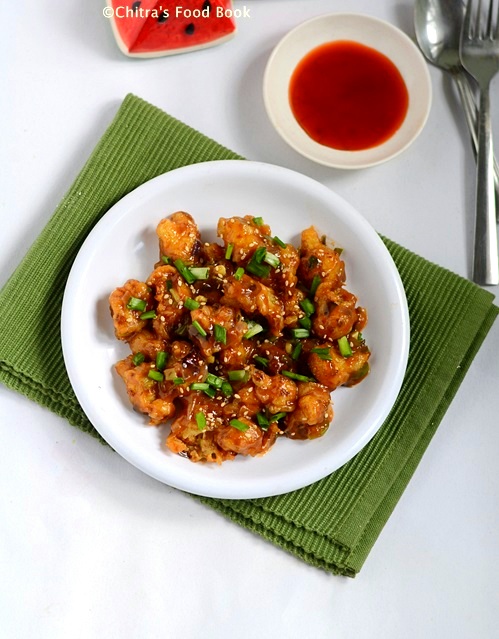
Gobi Manchurian Recipe-How To Make Crispy Gobi Manchurian

Gobi manchurian

I usually make Gobi Manchurian following my baby corn manchurian recipe. This time, for a change I tried crispy gobi manchurian recipe from Bharatz kitchen after getting tempted by the title. He had mentioned as “Crispiest Gobi Manchurian” with a clear video recipe. Usually in manchurian, Gobi turns soggy & soft immediately after mixing with gravy/sauce. But as he mentioned, this one stayed crispy for 30 minutes i.e till my photo session was over. This recipe really works well and tastes similar to the restaurant ones.

Some pre preparation work is needed for this recipe but its all worthy. If you don’t want to make gravy , simply skip the corn flour in sauce part and make it as gobi Manchurian dry version. It tastes even more crispy like street style ones. Soon I will post that recipe too. As Bharat explained, the secret of making crispy Manchurian lies in 2 things. 

One, you have to use small sized florets for deep frying. Do not use bigger size florets. This makes a great difference in the texture. The second thing is, you have to deep fry the florets twice. Anything when deep fried twice gives you the best crispiness. My MIL usually tell this to me and I have experimented the same with my masala vada & urad dal vada too. Deep frying twice helps to maintain the crispiness for long time. The same formula is applied here. But one thing, I should warn you here. Oil absorption will be slightly more than the usual deep frying as we are doing it twice. So use oil absorbent/Tissue paper & keep changing it whenever needed. Also work out more to burn the additional calories ;).

Friends, do try this recipe confidently even if you are a beginner. Try this for your family and kids as an evening snack or as a starter for dinner. I am sure everyone will appreciate you. Lets see how to make gobi manchurian at home easily !

Gobi manchurian recipe

Gobi manchurian recipe


Gobi manchurian recipe Gobi manchurian - An yummy starter recipe !
Cuisine: Indian
Category: Starter
Serves: 2
Prep time: 35 Minutes
Cook time: 15 Minutes
Total time: 50 Minutes


INGREDIENTS

  • Cauliflower florets/Gobi pieces – 25-30 nos ( small sized)
  • Corn flour - 2 tbsp
  • Ginger-garlic paste - 1 tsp
  • Pepper powder - 1 tsp
  • Salt - little
  • Water, turmeric powder & salt - as needed to boil gobi
  • Cooking oil - to deep fry
For the batter
  • Maida/All purpose flour - 1/2 cup
  • Corn flour – 1/4 cup
  • Red food color – a pinch ( optional, I dint use)
  • Salt & water -as needed ( I used 1/2 cup water)
For the sauce/Gravy
  • Cooking oil - 1 tbsp
  • Finely chopped garlic cloves - 5 nos
  • Ginger - 1/2 inch piece ( finely chopped)
  • Big onion - 1 nos (-do-)
  • Spring onion - 2 sprigs (-do-)
  • Capsicum - 1/4 no (-do-)
  • Red chilli powder - 1/2 tsp ( use 1 tsp to make it very spicy)
  • Pepper powder – 1/2 tsp
  • Sugar – 1/4 tsp
  • Salt - as needed
  • Sauce mix ( Recipe follows)
Sauce mix ingredients
  • Corn flour - 1.5 tsp
  • Water - 1/2 cup
  • Tomato sauce - 1 tbsp
  • Soya sauce - 1 tsp
  • Chilli sauce - 1/2 tsp
HOW TO MAKE GOBI MANCHURIAN - METHOD

  • Remove small sized florets from the cauliflower. Suppose, if you have removed them big,just cut them into small sized florets ( not too small). This is very important to get crispy gobi manchurian. Now boil the gobi in water mixed with turmeric powder & salt for 3 minutes. Remove and drain all the water immediately using a colander. Show it under running water to stop the gobi being cooked. It should stay firm.
Gobi-manchurian-recipe-1
  • Now add pepper powder, corn flour, G&G paste and little salt to the washed cauliflower florets. Mix it well & refrigerate it for 30 minutes. In the mean time, finely chop all the ingredients needed for sauce & keep the sauce mix ready by mixing corn flour & other mentioned ingredients in water & keep it lumps free.
Gobi manchurian recipe-2Gobi manchurian recipe-3
  • Take a wide bowl and add maida, corn flour, salt and mix well. Add water to make a slightly thin batter like dosa batter. Now remove the florets from fridge & mix it with batter. Make sure all the florets are well coated with the batter.

Gobi manchurian recipe-4

  • Heat oil in a kadai and when it gets heated, put the florets one by one and deep fry them in medium flame for 2 minutes till they are 3/4 th cooked. Do not toss for one minute. Then stir well and cook till its 3/4th cooked. Do not wait for the bubbles to cease or the cauliflower turns golden brown because we are going to deep fry again. So remove the florets when they are still white in color. Drain in a tissue.
  • Again heat the oil for some more time but not smoky and add the florets now. Deep fry them till they turn golden brown & crispy. Bubbles will cease now. Now remove & drain in another tissue. You will find the gobi to be super crispy now. Have a bite n see, hehe (if you don't want to deep fry twice, just fry it till it becomes golden brown and crispy & proceed). 
Gobi-manchurian-recipe-5
Gobi-manchurian-recipe-6
  • In another pan, heat 1 tbsp of oil & saute all the finely chopped veggies. Mix well adding some salt & sugar. Now add the sauce mix, red chilli powder & pepper powder and let it boil till the gravy reduces to half. Lastly add the deep fried gobi pieces, saute quickly and coat it well. Switch off the flame. Garnish with finely chopped spring onions & remove.
Gobi-manchurian-recipe-7
Gobi-manchurian-recipe-8

Serve hot & Enjoy !

Note
  • Deep frying twice is very important to get crispy manchurian. But it absorb more oil . So use tissue/absorbent paper.
  • If you don’t want to feep fry twice, you can just fry it once but you should do it till gobi turns golden brown & bubbles in the oil ceases.
  • If you want to try this as gobi machurian dry version, omit the sauce mix and add a tbsp of tomato sauce, 1/2 tsp of soya sauce & 1 tsp of red chilli powder after sauteing the onions & capsicum. Mix well & add the gobi pieces, mix well & serve immediately. Do not use corn flour paste here.


Try this yummy gobi manchurian recipe for your family. Have it along with veg fried rice. Tastes yummmm !!
Gobi manchurian recipe
Continue Reading...


January 20, 2015

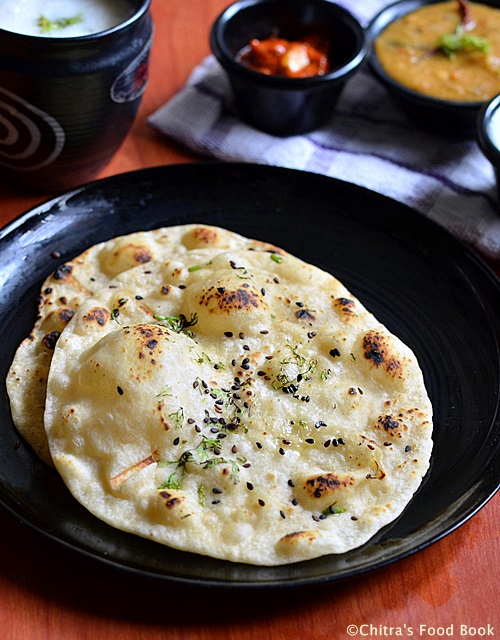
Kulcha Recipe , Plain Butter Kulcha Recipe Without Yeast

Plain kulcha recipe

I have tried kulcha without yeast at home only once when I prepared Punjabi lunch menu and that too it was stuffed Amritsari aloo kulcha, not the plain one. I have forgotten the taste of all the other recipes I tried for that Punjabi platter but I still remember the softness of the kulcha. At that time I had followed the recipe from “The Hindu-Food Safari” Section which was an excellent, fool proof, easy kulcha recipe without yeast. So I made this butter kulcha following the same recipe for our Sunday breakfast. Kulchas are meant to be too thick & round but I made it thin as per my family’s likings. It came out really awesome. I couldn’t believe when Raksha had 3 kulchas and asked for more !!. Not just Raksha, even Sendhil & myself loved its softness very much, though we felt bad about the maida used in it. Sendhil was asking me the difference between Naan & kulcha. So I browsed & found some points which I have shared them below. He told me to try the same recipe with wheat flour too. I must give it a try. I made Restaurant style dal fry as side dish for Kulcha. It was a lovely combo. Friends do try this plain kulcha recipe without yeast. I am sure u won’t regret it. Just grease the kulchas with butter or ghee & relish it with the most popular side dish Punjabi Chole or paneer butter masalaIt will taste heaven I say !
Here is difference between kulcha & naan for your reference

Naan Vs Kulcha - What is the difference between naan and kulcha ?
  1. Naan and Kulcha are flatbreads that have Indian origin. While Naan is the more celebrated type of bread, Kulcha is a typical Punjabi bread that has old Punjabi traditions.
  2. Naan is made in oven or earthen ware made of clay using charcoal to provide heat to cook the bread whereas Kulcha can be made on stove top too.
  3. Naan is made with yeast and sometimes with milk and yogurt to make it soft and also to give it a bounce. But Kulchas are made using baking powder, baking soda, milk & yogurt to give softness.
  4. Although Kulcha is similar to naan in looks and flavor, it is typically thicker and fluffier than naan.
  5. Naans are usually oblong in shape while Kulchas are round.
Source : http://www.differencebetween.com/difference-between-naan-and-vs-kulcha/

Ok, Lets see how to make this soft kulcha recipe with stepwise pictures.
Continue Reading...


January 4, 2015

Dindigul Thalappakatti Veg Biryani-Mushroom,Soya Chunks Biryani Recipe--Sunday Lunch Recipes -1

Dindigul-thalapakatti-biryani

In this New year, with all your support and blessings, I have planned to start biryani series from this week. I guess most of you make ( Both vegetarian & Non-vegetarian) make biryani in weekend especially on Sunday. Even I too make biryani mostly on Sundays, make myself free and enjoy my time with my family. To me, Biryani is an easy to make yet very rich & delicious one pot meal that make everyone drool over its smell & color. I love to try varieties of biryani recipes by watching TV shows, by referring blogs or cookbooks. I thought of blogging the same here as it might be useful to vegetarians who look for varieties of biriyani recipes. So every Sunday, you can expect some yummy biryani & pulao recipes in my blog. Actually I wanted to start this series with “How to cook Basmati rice” post. But I still have some work pending to bring that post here. As I am in Salem, I couldn’t do it. So I thought of starting this series with this most popular Dindigul thalappakatti biryani recipe in which I used jeera rice. Generally vegetarians have less options for biryani varieties. So I used to refer non-veg biryani recipe too & try it  by replacing chicken or mutton with vegetables like mushroom, Gobi/cauliflower and soya chunks. You can find one such example here.  Even today I have shared Dindigul thalapakatti biryani which is the most popular mutton biryani of Dindigul district. For this recipe, I referred so many sites and read readers comments to get some idea about its color, the rice used in it etc. Finally I landed upon here & tried this biryani by making small changes in the actual recipe to achieve its brown color. I used mushroom & soya chunks/meal maker in place of mutton ;). The taste was awesome. It came out super flavourful with minimum masala. Raksha & Sendhil loved it a lot. Raksha told me to make the same biryani next day too for her lunch box . So I made a minimum quantity for her using rice cooker. Now I can confidently try this biryani for my guests too. I served this biryani with simple onion raita as a side dish. I made fruit custard for dessert & curd rice as well. So last week we had this biryani, raita, fruit custard and curd rice for our lunch. It was simple yet divine ! I have updated this recipe with a full video. Do watch it !

I will try my level best to collect the best biryani recipes, try them in my kitchen and share it here.Wish me Good Luck. Leave your feedback or share the picture if you try any biryani recipes from this series. It will motivate me to try n post more. Check out my other biryani & pulao recipes that are popular in my blog.

I have updated this recipe with a video. Please check it !


Continue Reading...


November 14, 2014

KFC STYLE VEG STRIPS RECIPE-KIDS SNACKS RECIPES


KFC-Veg-strips-recipe

KFC’s Veg strips with Veg Rice Bowlz & Potato burgers/Krisper is my daughter Raksha’s favourite restaurant food now.Yeah,we have become a regular customer of (Bangalore) Kathriguppe KFC in weekendsDrooling.Thanks to my friend Megha for telling me about the veggie options in KFC.Earlier we were thinking it is only for non-vegetarians.So we have never gone inside it and i was throwing out all the KFC discount coupons i was getting along with sodexo meal passNot talking.Once Megha told me about Veg Rice Bowlz and Veggie burger varieties of KFC and suggested me try once.We went in the same weekend and now we have become an ardent fans of those dishes.More than me Sendhil & Raksha have become crazy for its taste and they are ready to go there anytime of the day.U won’t believe if i say that we have visited KFC nearly 6-7 times in past two monthsWinking.And nowadays Raksha started demanding me to try KFC’s recipes at home too.When i was browsing for the same,i got some ideas from facebook’s Chef at large group posted by some members.I collected all those recipes & googled few more too.Inspired by all the pictures and recipes,i tried veg strips for the first time last week and i was  very happy with the results.It was sooo crispy and Raksha loved it a lot with tomato ketchup.I won’t say its the exact replica of KFC’s original recipe(hope u know its a secret recipe) but i am sure it tastes pretty close and your family will enjoy it for sure.
Today being children’s day,i wanted to treat my daughter with her favourite finger food.So I made this again along with one minute brownie & kept it for her surprisingly.After coming from the school,when i gave this snacks to her,she showed a big smile and hugged me tightlyBig Hug.She tasted and said “Wow,mummy its awesome” and she had 5 of themLaughing.
The procedure may seem lengthy as i made bread crumbs & chilli flakes at home.If u have store bought bread crumbs & chilli flakes in hand, u can finish the entire process within 30 minutes,Also u can make everything well advanced and just deep fry during serving time.So just try this for your kids birthday party & get together or simply as evening snack.They will enjoy this dish thoroughly.But one thing,serve it hot to enjoy its full flavor,taste & crispness.So don’t forget to serve & eat hot !!
Here is the picture of KFC Veg Rice bowlz with veg strips i tried on last weekend.Here i used coarsely ground corn flakes to give KFC chicken lookWinking.But today i used finely powdered corn flakes.So make it as per your wish.It tastes Sooo Good in either ways Smile.Soon i will post Veg rice bowlz with curry recipe.

NOTE: KFC's veg strips tastes less spicy with very mild masala flavour.So i too followed the same here.Please add garam masala powder,aamchur powder or chat masala powder if u want strong masala smell.


Continue Reading...


July 24, 2014

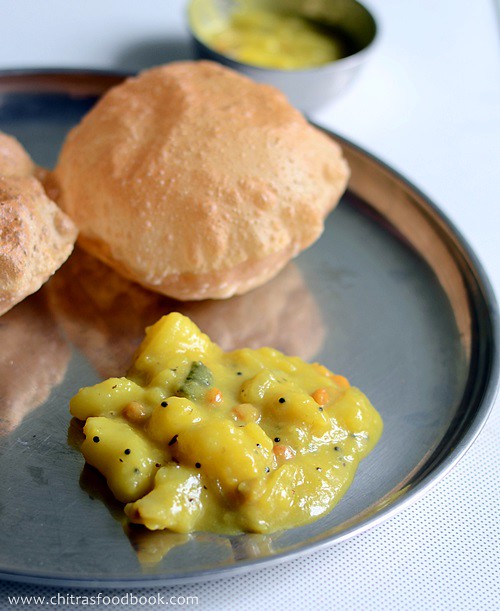
POORI MASALA RECIPE - HOTEL STYLE POTATO MASALA FOR PURI - POORI KIZHANGU

Poori masala
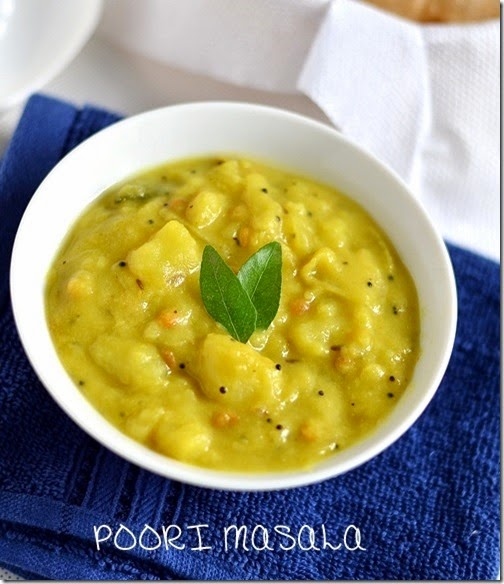
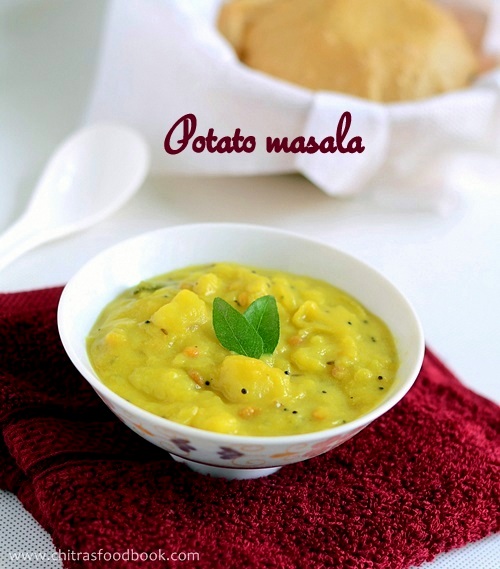
Poori masala with potato/ Aloo masala in Hindi / Urulaikizhangu masala in Tamil is the best side dish for poori. Last year I posted onion masala without potato which is my mom’s special recipe. But poori tastes the best only with potato masala or potato kurma as served in restaurants / Hotels. In Tamil we say this as “Poori Kizhangu” and in Hindi it is called as bhaji. In Tamilnadu, Saravana bhavan hotel poori masala is very popular. Iam yet to taste it. But the one I have shared here is also hotel style poori masala that is served in most of the restaurants in Tamilnadu. Yes, addition of besan flour is the secret for hotel style recipe. I made puri and this south Indian hotel style potato masala for our breakfast yesterday as my birthday special recipe. Some people use this potato masala for stuffing masala dosa too. But I make that masala slightly different. Soon I will post it here. You can do so many variations in this recipe by adding tomato, carrot, peas and making it without onion, besan flour etc. I have listed them in “Note” section.It tastes good in all the ways. Here is our method of making this yummy side dish for poori. Lets see how to make hotel style poori masala @ potato masala for poori with step by step photos.

Do check out my potato kurma recipe for poori , Karnataka style veg sagu , Saravana bhavan veg kurma

Poori masala recipe


Poori masala recipe


Rava payasam recipe Poori masala / Poori kizhangu masala - Tamil nadu hotel style recipe, Best side dish for poori using potato
Cuisine: Indian
Category: Sidedish
Serves: Serves 3
Prep time: 15 Minutes
Cook time: 15 Minutes
Total time: 25Minutes


INGREDIENTS
To Pressure cook
  • Potato - 3 nos
  • Big onion - 2 nos
  • Green chillies - 3 nos
  • Ginger – 1 inch piece
  • Hing - 1/8 tsp
  • Turmeric powder - 1/4 tsp
  • Besan flour – 2 tsp
  • Salt & water - as needed
To temper
  • Cooking oil - 1 tbsp
  • Mustard seeds - 1/2 tsp
  • Urad dal - 1 tsp
  • Chana dal - 1 tbsp
  • Curry leaves - few
METHOD

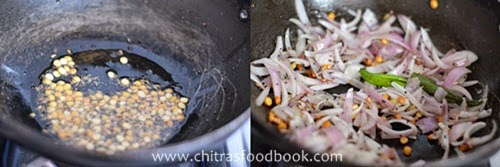
  • Wash and cut the potatoes into 3-4 pieces.Pressure cook them adding a pinch of turmeric powder for 4-5 whistles in high flame.Remove and peel the skin.Mash it roughly into big pieces.Dilute the besan flour adding 1/4 cup of water and set aside.
Poori masala recipe step
  • Slice onions,chop ginger,Green chillies and curry leaves.Set aside.
  • In a wide kadai,heat oil and do the seasoning part as given above.Then add onions,finely chopped green chillies ,ginger bits & curry leaves.
Poori masala recipe step1
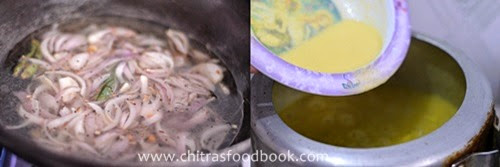
  • Saute till onion turns transparent.Now add 1 cup of water,turmeric powder,salt and hing.Allow it to boil.Meanwhile add the roughly chopped potatoes and diluted besan flour.(I transferred everything to a small cooker and cooked for one whistle in high flame for quick cooking of onions.Its optional.U can do it in kadai too.)
Poori masala recipe step2
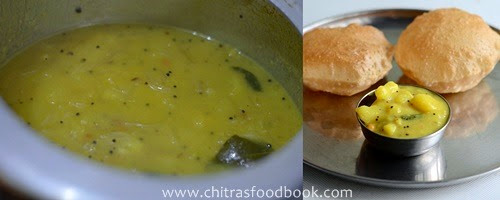
  • Boil well for few minutes till onion gets cooked well & masala reaches semi solid consistency.Switch off the flame.Add some coriander leaves if necessary.
Poori masala recipe step3
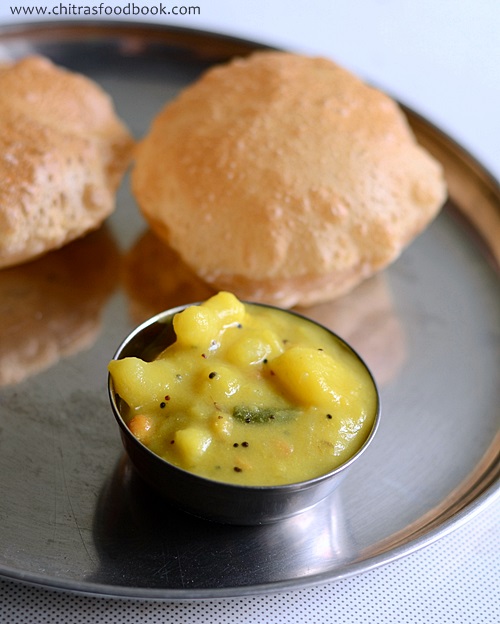
Potato masala is ready to serve with hot puffy puri !
NOTE
  • For variations,u can add finely chopped carrots and a handful of peas while sauting onions.U can also add half of a finely chopped tomato.
  • U can add besan flour or skip it if u don’t like tat flavour.But i add it to give the restaurant touch as well as to give a creamy texture.
  • This masala thickens when it cools.So make it slightly watery before switching off the flame.
  • Adjust the quantity of chillies as per ur taste.I don’t chop the chillies finely for my daughter’s sake.So i slit and add.But in hotels they do add them finely chopped.
  • To make this as kurma,add some finely chopped garlic cloves and 1/2 tsp of garam masala powder.


Poori kizhangu masala


Puffy poori with this potato masala tastes like heaven for morning breakfast.Do try & feel it !!

Don't forget to check out my puffy poori/Puri recipe with tips n tricks !

Potato masala for poori


Continue Reading...


May 26, 2014

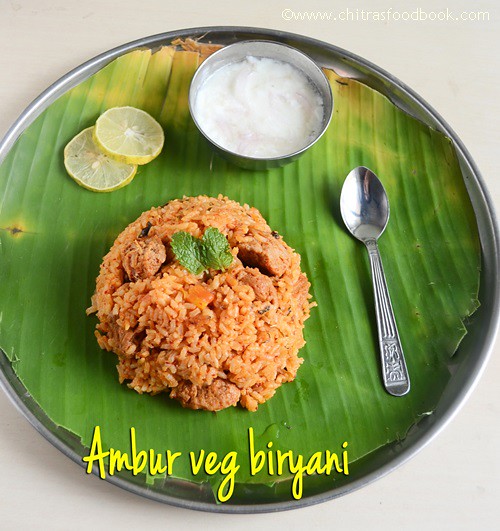
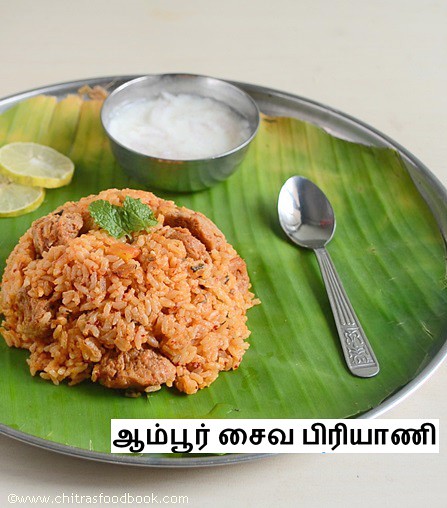
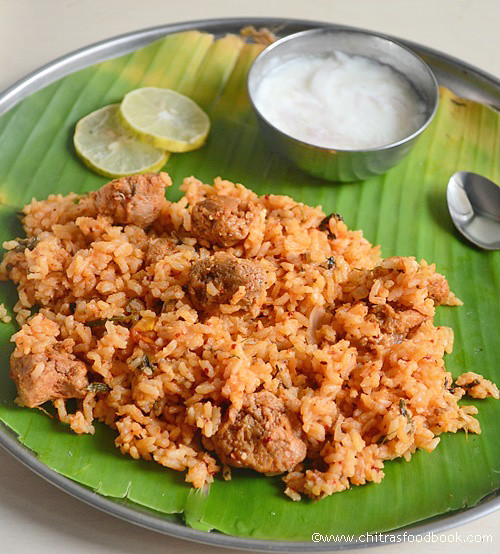
AMBUR VEG BIRYANI RECIPE WITH SOYA CHUNKS

Ambur veg biryani recipe
As you all know, the world famous Ambur biryani is a non-veg biryani prepared with mutton or chicken. But you may think how come I post Ambur biryani in my vegetarian blog ?. U are right. Being a vegetarian, I can’t try the actual biryani recipe. But somehow I wanted to try this in my kitchen after knowing its popularity.

When I asked my non-veg friends, they suggested me to use soya chunks/meal maker instead of mutton. Meal maker very much resembles mutton right, eppuuudddi ?. So I just replaced mutton with soya chunks and tried this biryani by referring The Hindu “Food safari” section & Aval vikatan magazine where “Star biryani “ Muneer ahmed has shared the recipe for how to make in small quantities at home. I also watched you tube video by “Puthiya thalaimurai” channel for more details.

It came out very well & I started making this regularly. This would be our sunday biryani at least once in a month. I used jeera rice/ seeraga samba arisi as mentioned in the actual recipe. Without using ghee  & coconut milk, the flavour of just masala & jeera rice while cooking is awesome. Try it, you will come to know. Next I have planned to try Dindigul thalapakatti biryani too. 


Ambur veg biryani recipe

In the “Notes” section I have shared some of the health benefits of soya nuggets/meal maker. Do read it. As there is no grinding or chopping works, you can do this quickly. Bachelor's can try this too..
Check out my soya chunks gravy if interested!

Ambur veg biryani recipe

Ambur Biryani recipe with soya chunks


Ambur Biryani recipe with soya chunks Ambur style Soya chunks biryani recipe – Sunday special biryani !!
Cuisine: Indian
Category: Lunch
Serves: 3
Prep time: 10 Minutes
Cook time: 20 Minutes
Total time: 30 Minutes


INGREDIENTS
1 cup - 200ml
  • Jeera rice/Seeraga samba arisi - 1 cup
  • Big onions - 2 nos
  • Tomato - 1 no
  • Soya chunks - 2 handful
  • Red chilli paste - 1 tbsp (I used 5-6  byadgi chillies & make a paste)
  • Garlic paste - 1.5 tbsp ( grind 20 cloves)
  • Ginger paste -1.5 tbsp ( Grind thumb finger size piece)
  • Mint & coriander leaves - a handful
  • Salt - as needed
  • Water - 1.5 cups( I used 1.75 cups to make it well cooked)
  • Curd - 3 tbsp
  • Lemon juice - as needed
To temper
  • Cooking oil - 4 tbsp
  • Cinnamon – 1 big piece
  • Cloves - 2 nos
  • Cardamom - 2 nos
HOW TO MAKE AMBUR VEG BIRYANI - METHOD

  • Pinch & soak 6 chillies in little hot water and grind into a smooth paste. Use Kashmiri variety chilli (Byadgi) to get this bright color. Grind ginger to smooth paste adding required water. Similarly grind garlic and make the paste.Keep all the paste separately.
  • Boil water in a pan. Once it starts to roll boil, add the soya chunks and switch off the flame. Let the chunks soak and gets doubled in size.
  • Chop onions, tomato, mint & coriander leaves and keep it ready.
ambur biryani step1
  • In a cooker base, heat oil. Sprinkle a tsp of curd to check whether the oil is heated. Now add cinnamon, cloves, cardamom. Saute for a second and add the garlic paste. Saute for a minute till raw goes off. Now add ginger paste. Saute well for a minute. Mix well. Then add chilli paste & mix well.
ambur biryani step2
  • Now add onions & saute till transparent.Then add tomato pieces. Saute till it turns mushy. Squeeze and add soya chunks. Mix well.
  • Lastly add mint & coriander leaves & salt. Toss well.
ambur biryani step3
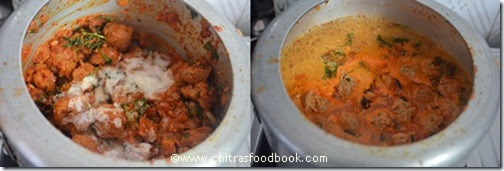
  • Add the curd & mentioned quantity of water, lemon juice. Let it boil nicely. Wash the jeera rice and add it to the boiling water. Close the cooker with the lid. Pressure cook in low flame for one whistle(approx 10 mins).
ambur biryani step4
ambur biryani step5
  • After the steam is released, check whether rice is cooked well. U can put **DUM** for 5 minutes if necessary else check for taste and serve hot with raita ! Prepare this rice 30 minutes in advance because all the masala will infuse well & tastes good.
HOW TO PUT DUM
You can put the dum in two ways. 
1. Heat an old dosa tawa till very hot. Place the cooker over the dosa tawa. Keep the flame very low and cook for 5 - 10 minutes. 
2.Transfer the rice from cooker to a flat base vessel. Keep the vessel over the low flame and cover it tightly with a lid. Boil water in a bowl and keep this bowl over the rice vessel as a weight. Put the Dum for 5-7 minutes. Keep the flame very low. Remove and serve hot! 


Ambur veg biryani

Note


  • As Muneer ahmed says, the secret & color of this biryani lies in red chilli paste. So I used byadgi red chilli to give the natural red color and it is mildly spiced too. I have not used food color here. If you use other chilli varieties, add less based on its spice level.
  • As per the original recipe, you should cook the gravy & rice separately upto 80%, mix & put under DUM. But cooking in pressure cooker suited my family’s taste. So I follow this way.
  • No need to use ghee or coconut milk in this recipe,
  • Use the paste as mentioned above to get the actual taste. Never add G&G paste. It will give a different taste & flavor. I have tried in that way too.
Health benefits of soya nuggets
  1. Soya is rich in protein, minerals & vitamins. Hence it is a good choice for vegetarians.
  2. It is high in fiber and aids in weight loss.
  3. It is one of the best sources of omega-3 fatty acid. So it is good for heart.
  4. It is beneficial for women during post menopausal days.
Enjoy Ambur style soya chunks biryani with simple onion raita. Tastes great !
Soya chunks biryani

Continue Reading...