“ haha,This is how i thought when my friend Megha suggested me to try “Anjappar style biryani recipe” using vegetables.I browsed through few Anjappar style chicken biryani recipes and got it from here & here.I mixed up both the recipes and tried it using potato & peas.I usually make biryani using pressure cooker.This time i tried using rice cooker and made it little more spicy as it belongs to Chettinad.The result was yummy and we loved it.After i made this biryani successfully i became very happy & contented that i had tried and shared almost all the popular Tamil nadu biryani recipes like Ambur star biryani, Dindigul Thalappakatti biryani, Coimbatore Angannan biryani, Muslim wedding biryani, Kuska in vegetarian version which was my long time dream.In the line of those yummy biryani recipes,here is yet another interesting and the most popular Anjappar biryani recipe.Friends,do suggest me if u know any other popular biryani recipe across Tamil Nadu.I am eager to try that too.Lets see how to make this flavourful and easy to make Anjappar Biryani Recipe in detail.
Before going to the recipe,I would like to tell something.As I am bit tied up with some personal work, i will try to make a post whenever i find time.Please bear with my irregular postings just for a week.Thanks for understanding.
Check out my other popular Tamil Nadu Biryani recipes
Ambur star biryani
Dindigul Thalappakatti biryani
Coimbatore Angannan biryani
Muslim wedding biryani
Kuska

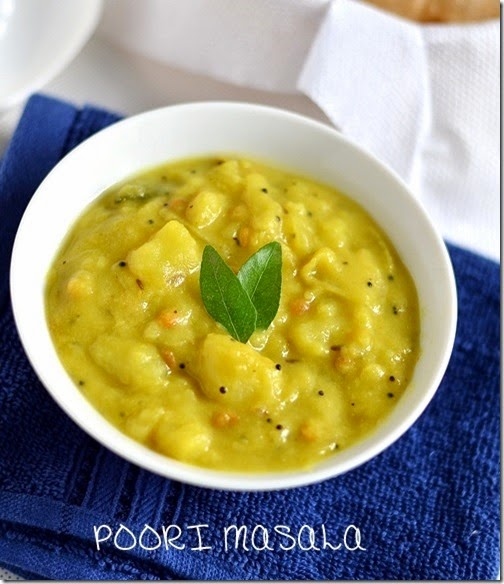
Anjappar biryani recipe using vegetables
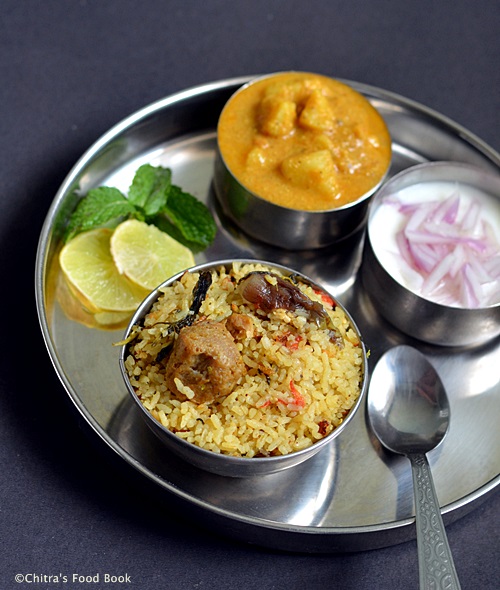
 Anjappar biryani recipe with potato & peas - Sunday special lunch menu series - 14
Cuisine: Indian
Category: Lunch
Serves: Serves 2
Prep time: 20 Minutes
Cook time: 15 Minutes
Total time: 35 Minutes
INGREDIENTS
To Garnish
Mint + coriander leaves – 3 tbsp ( finely chopped)
|
METHOD


|

Note
|
Try this yummy Anjappar style biryani recipe in a weekend and Enjoy with your family


 .Thanks to my friend
  .Once Megha told me about Veg Rice Bowlz and Veggie burger varieties of KFC and suggested me try once.We went in the same weekend and now we have become an ardent fans of those dishes.More than me Sendhil & Raksha have become crazy for its taste and they are ready to go there anytime of the day.U won’t believe if i say that we have visited KFC nearly 6-7 times in past two months
 .She tasted and said “Wow,mummy its awesome” and she had 5 of them
 .
.