Search Chitra's Food Book

Showing posts with label TIFFIN BOX RECIPES. Show all posts

June 23, 2014

CHITRANNA RECIPE/NIMBEHANNU CHITRANNA-KARNATAKA RECIPES

Karnataka chitranna recipe

This is my first post on Karnataka recipes. As you all know, Chitrannam/Chitranna is a very popular breakfast/lunch recipe in Karnataka houses. Here people make this for all occasions and poojas. Not just in houses, this would be the breakfast recipe you can find in most of the small roadside hotels apart from thatte idli. I have tasted this chitranna with avalakki(poha) and Mandakki (puffed rice) in Davangere benne dosa stall.

Chitranna is nothing but our South indian variety rice with slight variations. They call it as Nimbe hannu chitranna for lemon rice. It can be made very quickly and its a tasty lunch box recipe too. Most of the kids in school bring this rice for their lunch box. I am really happy to share this most popular Chitranna recipe (recipe with my name) as my first Karnataka recipes post. The recipe I have shared here tastes close to the ones that is served in restaurants here. I have also shared a coconut chutney recipe in the “Notes” section which is the side dish served in road side hotels for Chitranna. In small hotels, I have seen people having this chitranna with coriander leaves chutney and Besan Bonda for breakfast. So I too served in the same way. It was awesome. Sendhil loved it a lot.
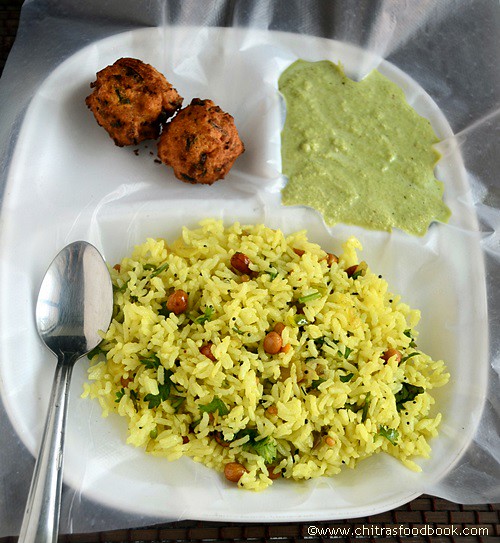
Nimbehannu chitranna recipe
Before going to this recipe, I would like to mention about my Kannadiga friends, without them this post wouldn’t have come up.

I have been in Bangalore for 8 years but I have not even blogged a single Karnataka recipe. I feel so bad for this. The reason behind this is I have not tasted typical Karnataka food in hotels or in friend’s places and I did not get a good source to teach me all their recipes too. We had tried several times to visit MTR & Vidyarthi bhavan which are very famous restaurants here. But by seeing the crowd, we step out each time.

Last year I got some 6 good kannadiga friends. We met & became friends in Raksha’s school. As all of them are mom’s of Raksha’s class mates, we used to discuss about school, studies, food, movies etc and we have a group named “School moms” in Watsapp too. They all cook authentic Karnataka recipes like ragi mudde, bisibelebath, Thatte idli etc very well .They know about my food blog & suggest me some good recipes to try. I am really lucky and proud to get those friends.

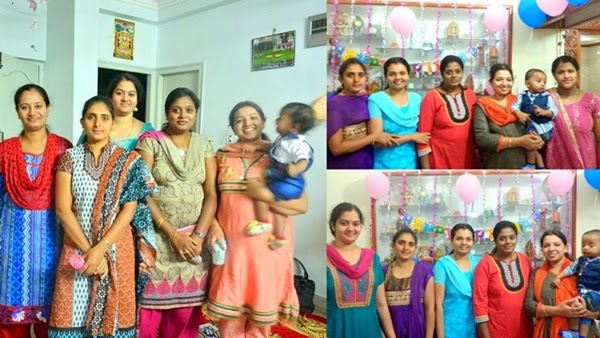
Earlier I used to speak butler kannada and now my language has much improved just because of them. Not just the language, I explored Bangalore only becoz of my friends. We used to go to famous hotels, malls, chaat shops etc during vacations and weekends. Now I thoroughly enjoy my life in Bangalore because of these sweet souls. I wanted to write about them in one of my blog post for a long time but I feel this post would be apt to mention about these wonderful people. Here is the picture of my friends.

My friends
From left- Nagalakshmi, Priya, Padmini, Archana, Megha(with baby) and Thara(right side corner) in the second picture.

I have already told much about Megha in my peanut chutney & aloo paratha posts who is very close to my heart. This Chitranna recipe is also from Megha. Thanks a lot dearie.

I will mention about my other friends in my upcoming Karnataka recipes post. With all these great resources, I had started venturing Karnataka recipes & I have planned to post them once in a week. Wish me good luck  friends. Ok,without much blah blahss, let me proceed how to make this yummy, easy chitranna recipe..

Chitranna recipe
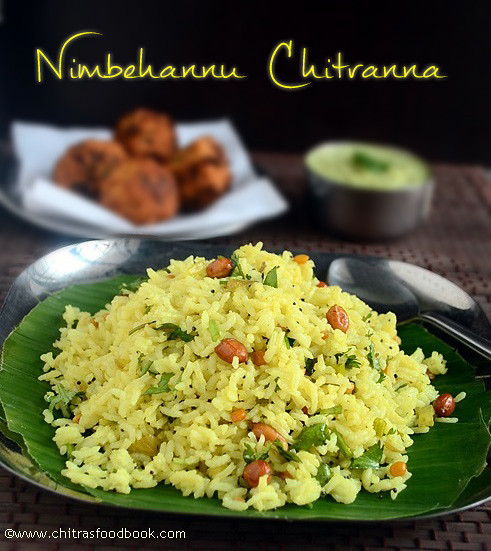

Chitranna recipe How to make Karnataka style nimbehannu chitranna /Lemon rice recipe
Cuisine: Indian
Category: Lunch
Serves: 3
Prep time: 5 Minutes
Cook time: 15 Minutes
Total time: 20 Minutes


INGREDIENTS
1 cup - 250ml

  • Raw rice- 1/2 cup(Sona masoori rice)
  • Big onion - 1 no(small sized, skip onions if making for pooja)
  • Garlic cloves – 3 nos(finely chopped)
  • Green chillies - 4 nos
  • Turmeric powder - 1/4 tsp
  • Lemon juice - 2 tbsp
  • Grated coconut- 2 tbsp(optional)
  • Salt- as needed
  • Water - 2.5 cups
To temper
  • Cooking oil - 1 tbsp
  • Mustard seeds - 1/2 tsp
  • Urad dal - 1 tsp
  • Chana dal - 2 tsp
  • Roasted peanuts - 2 tbsp
  • Curry leaves - few
  • Coriander leaves - to garnish
HOW TO MAKE CHITRANNA - METHOD

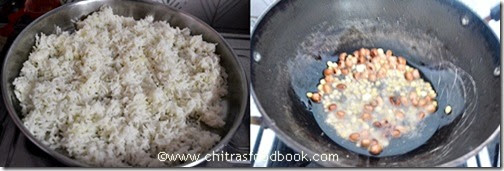
  • Wash and pressure cook the rice adding required water and a drop of oil in low flame for one whistle. Open the lid and spread the rice in a plate.. Allow it to cool. Rice should be separate.
  • Finley chop onions, green chillies, curry leaves and coriander leaves. Set aside .
  • In a kadai, heat oil and temper all the ingredients given above.
Chitranna step1
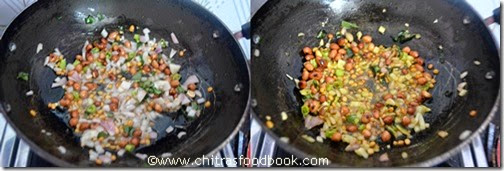
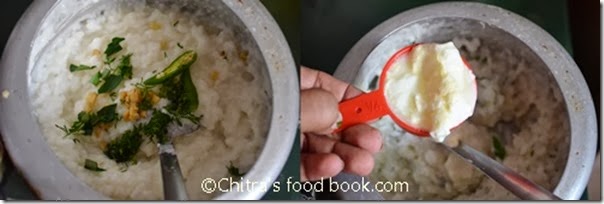
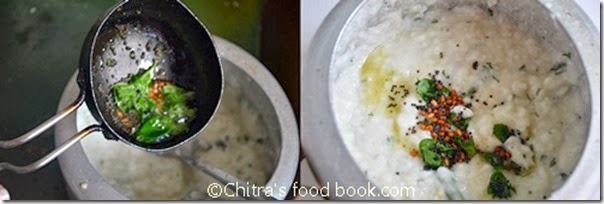
  • Now add onions, garlic, green chillies and saute till transparent. Add grated coconut (if using) & mix well. Add turmeric powder, salt, mix well and switch off the flame
Chitranna step2
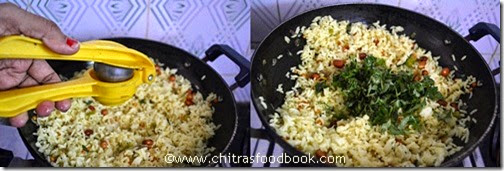
  • Add this to the cooked rice and mix well. Add the required lemon juice and check for taste. Add more salt or lime juice if necessary.
Chitranna step3
  • Finally garnish with lots of coriander leaves and enjoy serving hot.


Note

  • U can try this recipe with leftover rice too.
  • U can make this as a no onion, no garlic version by omitting these two ingredients. In that case, you must add grated coconut and serve. U can prepare this way for occasions and festivals.
  • For chutney: Grind 1/2 cup of grated coconut, 3 tbsp of fried gram dal, 3-4 green chillies, salt, little turmeric powder, a pinch of tamarind, 3 garlic cloves adding water. Adjust consistency as per your need. Usually it is served in watery consistency in hotels.

Enjoy this chitranna with green chutney and bonda !
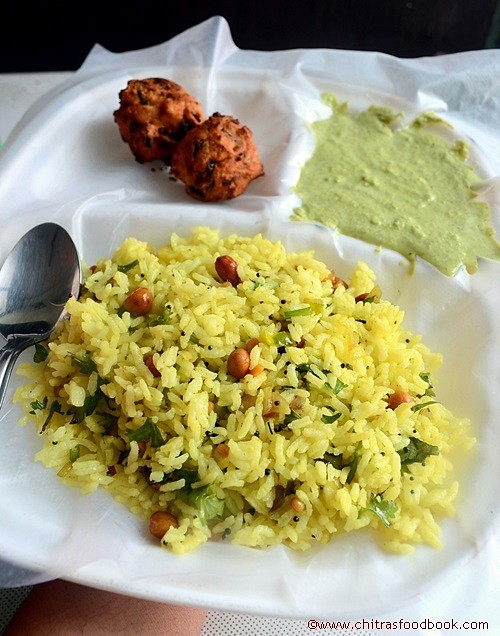
Chitranna recipe

Continue Reading...


May 15, 2014

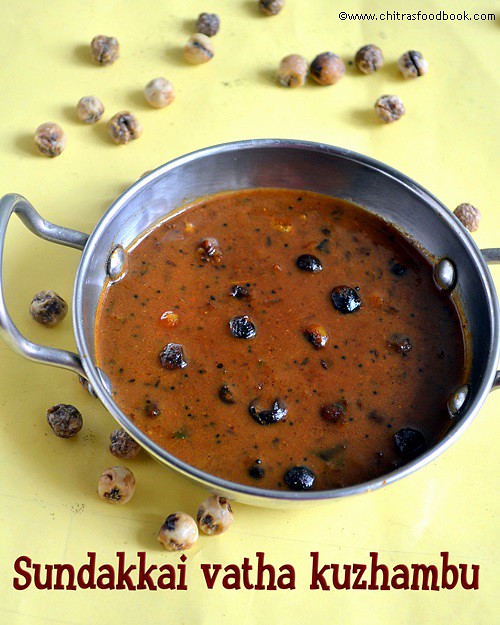
SUNDAKKAI VATHAL KUZHAMBU RECIPE( DRIED TURKEY BERRY GRAVY)

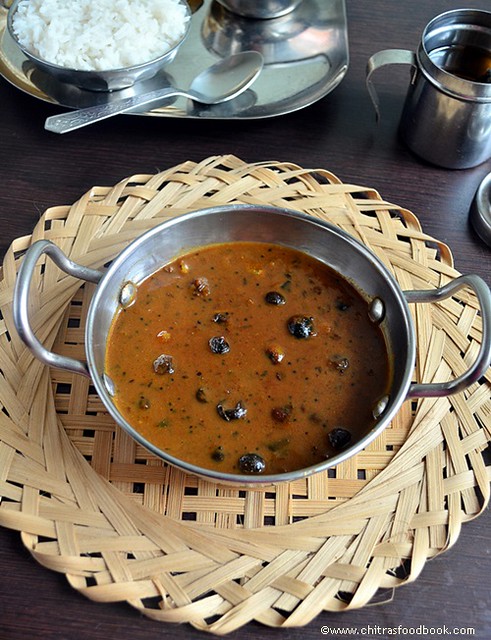
Sundakkai vathal kuzhambu recipe
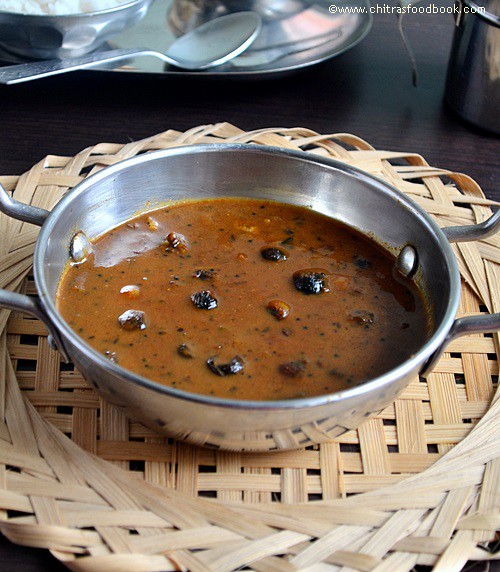
Recently a reader mailed me to post basic Sundakkai vathal kulambu recipe and manathakkali vathal kuzhambu (dried turkey berry). As I had already posted Tamil brahmin style no onion no garlic manathakkali vathal kuzhambu, I thought of sharing my MIL’s style sundakkai vathal kuzhambu recipe  (dried turkey berry gravy). 

We usually make this basic kuzhambu recipe and replace sundakkai with brinjal, drumstick or just garlic & onion. As we don’t get green sundakkai easily, we include it in dried form in our gravies or just as an accompaniment for curd rice. I usually roast this once in a week for Sendhil and Raksha to get rid of stomach worms.

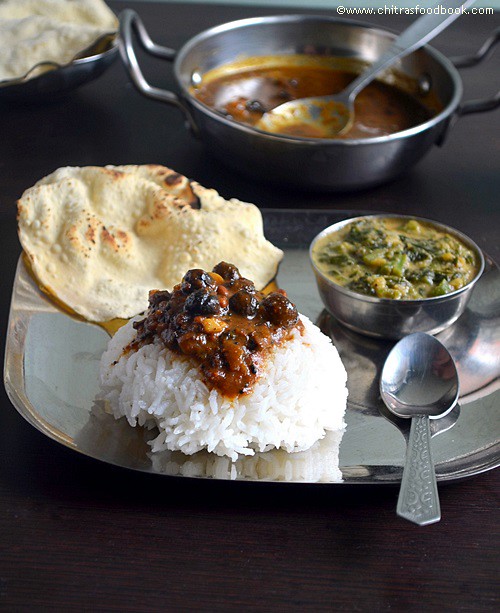
Other than this, sundakkai has lots of health benefits. U can find them in my raw sundakkai kootu post. This kuzhambu can be prepared within 15 minutes. No grinding job too. So bachelor’s & working women can prepare this easily in busy mornings and pack it for their lunch box. It tastes great when mixed with plain rice adding gingely oil. Kootu and roasted papad is the best side dish for this gravy. Usually I make keerai kootu or chow chow kootu. I have updated this recipe with a full video. Please check it below.


Sundakkai vatha kuzhambu recipe

Sundakkai vathal kuzhambu recipe


Sundakkai vathal kuzhambu recipe Easy vatha kuzhambu recipe with turkey berries
Cuisine: Indian
Category: Gravies
Serves:3
Prep time: 5 Minutes
Cook time: 10 Minutes
Total time: 15 Minutes


INGREDIENTS

  • Tamarind – Big gooseberry size
  • Sambar powder - 1 tbsp ( OR use aachi kuzhambu milagai thool)
  • Turmeric powder - 1/4 tsp
  • Grated jaggery - 1 tsp
  • Salt- as needed
  • Water - 2 cups
To temper & saute
  • Gingely oil or cooking oil – 2.5 tbsp
  • Sundakkai vathal /Turkey berry – 15-20 nos
  • Mustard seeds -1/2 tsp
  • Methi seeds - 1/2 tsp
  • Urad dal - 1 tsp
  • Cumin seeds/Jeera- 1.5 tsp
  • Toor dal - 2 tsp
  • Small onions - 10 nos (finely chopped)
  • Garlic - 10 cloves (finely chopped)
  • Curry leaves - few (finely chopped)
HOW TO MAKE SUNDAKKAI VATHA KUZHMBU - METHOD

  • To make sundakkai vathal kuzhambu, wash and chop the onions finely. Chop garlic cloves and curry leaves finely.Set aside
  • Soak tamarind in 1/2 cup of warm water and take the extract using 1.5 cups of water. To this add sambar powder, turmeric powder, salt and keep aside.
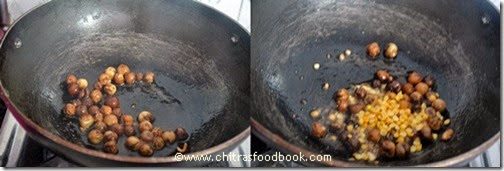
  • In a kadai,heat oil and roast the turkey berries till it turns brown. To that add mustard seeds. After it starts to splutter, add methi seeds, urad dal, toor dal and cumin seeds. Saute till golden. Now add the finley chopped onions, garlic & curry leaves. Saute till it emits a nice aroma.
sundakkai-vathal-kuzhambu-recipe-step1
sundakkai-vathal-kuzhambu-recipe-step2
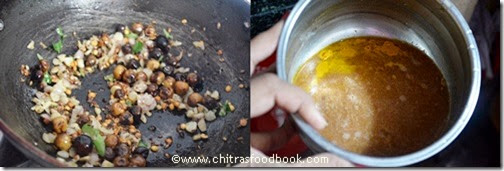
  • Now add the tamarind mixture and boil well for 4-5 minutes. Check for taste and add more sambar powder if gravy tastes tangy and adjust salt if needed. Lastly add jaggery and boil till oil separates & gravy becomes thick. Add little more water if you the gravy to thin down or switch off the flame and remove.
sundakkai-vathal-kuzhambu-recipe-step3
  • Transfer to a vessel. Add few pinched curry leaves and cover the vessel with a lid. Give a standing time of 30 minutes and serve with rice.


Note

  • For variations,u can use manathakkali vathal in place of sundakkai.
  • Using gingely oil in this gravy gives a nice flavour and it helps to suppress the tamarind heat.
  • Sometimes, I roast the sambar powder for few seconds before adding the tamarind mixture. It also gives  a nice taste.
  • If you don’t have homemade sambar powder, you can use aachi kuzhambu milagai thool or any store bought sambar powder too.
Sundakkai vatha kuzhambu recipe
Enjoy vatha kuzhambu mixed with rice topped with gingely oil.Tastes great with sutta appalam & kootu.
Sundakkai vatha kuzhambu recipe

Continue Reading...


April 8, 2014

CURRY LEAVES THUVAIYAL|KARUVEPPILAI THOGAYAL RECIPE

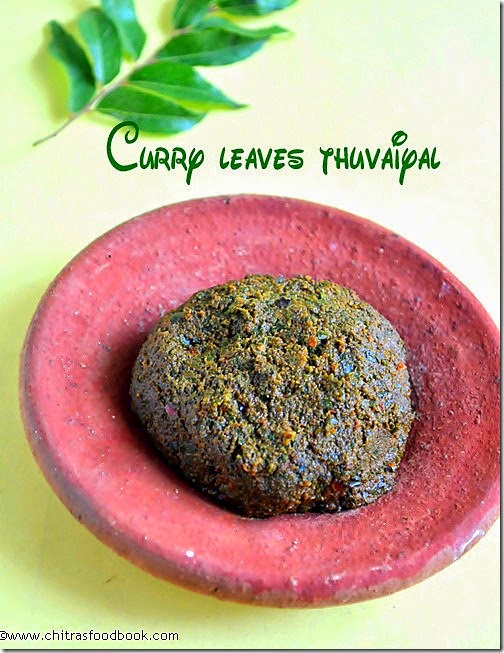
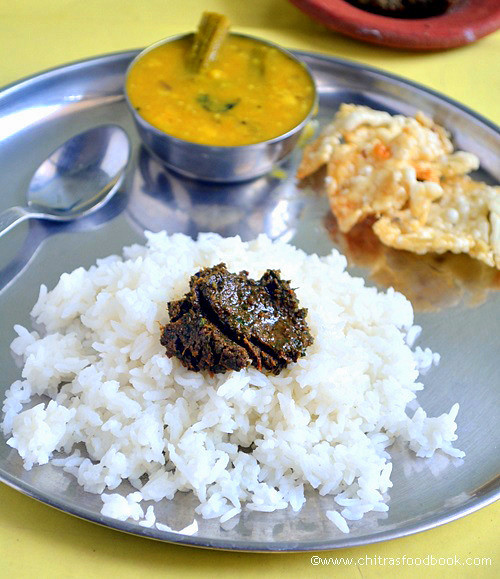
karuveppilai thogayal-recipe
As I mention in all my thogayal posts, my MIL is an expert in making thuvaiyal recipes. Thogayal is nothing but deeply spiced, tangy chutney for rice. My MIL used to make thogayal with almost all the greens and vegetables. Check this link for our varieties of thogayal recipes. All are very easy to make and tastes delicious. I am very much thankful to her for teaching me these yummy varieties. We usually mix this chutney with plain rice topped with gingely oil. It also goes well with curd rice. Sendhil loves thogayals like anything. Mostly I pack 3 varieties of thogayal rice for his lunch box along with papad & buttermilk. He can happily have it for all the seven days too. My MIL usually says, for any thuvaiyal to be tasty, the secret lies in the quantity of red chillies & tamarind. Both should be balanced else thogayal may become either tangy or spicy sometimes bitter too. Usually urad dal is added for yield. It is completely optional. Do try this healthy karuveppilai thogayal recipe and let me know your feedback. Ok, let me move on to the recipe..

Check out my curry leaves gravy and curry leaves podi with the health benefits of curry leaves if interested !

Curry leaves thuvaiyal/Karuveppilai thogayal


Curry leaves thuvaiyal/Karuveppilai thogayal Curry leaves thogayal recipe to mix with plain rice - simple n yummy dish !
Cuisine: Indian
Category: Thogayals
Serves: Serves 2
Prep time: 5 Minutes
Cook time: 5 Minutes
Total time: 10 Minutes


INGREDIENTS
To roast
  • Cooking oil - 1 tbsp
  • Red chillies - 2 - 4 nos ( 2 if big and spicy chilli)
  • Urad dal - 1 tbsp
  • Curry leaves - 1 cup
  • Tamarind – Small gooseberry size
  • Jaggery – a small piece
  • Salt & water - as needed
METHOD

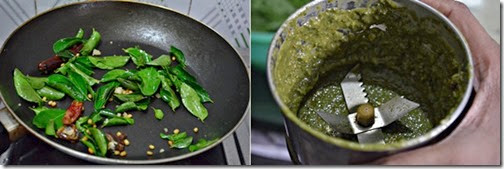
  • In a kadai,heat oil and roast the urad dal & red chillies.When dal turns golden brown, remove and set aside OR add curry leaves, simmer the flame completely and saute well till leaves shrink.curry leaves thogayal tile1
  • Add tamarind, give a toss and switch off the flame. Grind it to a smooth paste adding jaggery &required water. Add less water while grinding to get a thick paste.( sometimes I use mixie and sometimes with ammi kal / grinding stone based on powercut ) The main picture is the one ground using ammikal.curry leaves thogayal tile2
Enjoy with plain rice or curd rice !!


Note


  • Roasting curry leaves is a must otherwise it gives a raw smell.
  • Adjust the quantity of chillies based on the spice level you need.
  • Consistency of thogayal varies for grinding in mixie or ammi kal. U can make a very thick paste if you use ammi kal.
Mix with plain rice topped with sesame oil and enjoy with vadagam !!
Curry leaves thogayal

Other curry leaves recipes
Continue Reading...


February 19, 2014

Vermicelli Upma Recipe - Semiya Upma Recipe With Vegetables


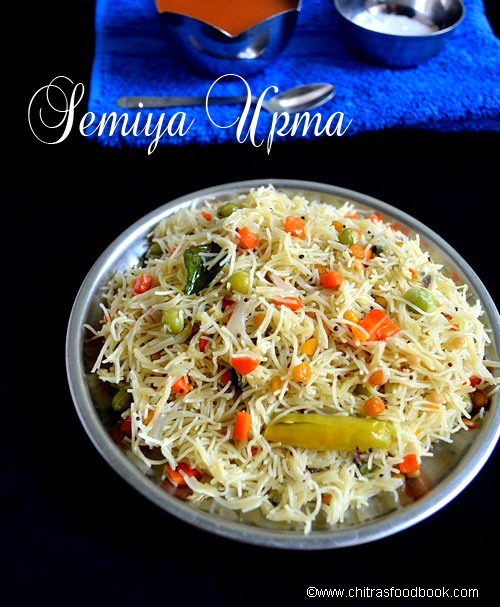
semiya upma recipe
Semiya upma recipe

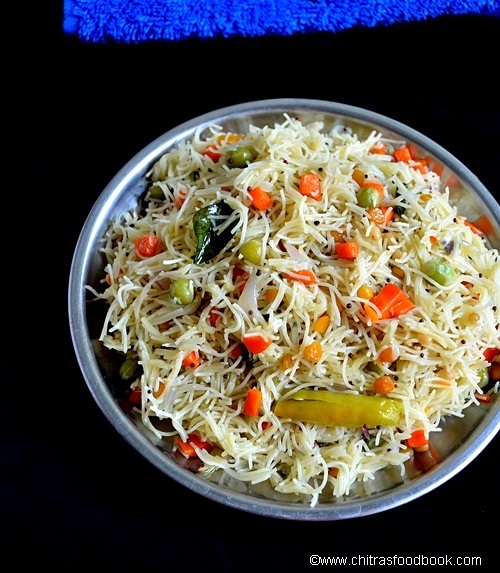
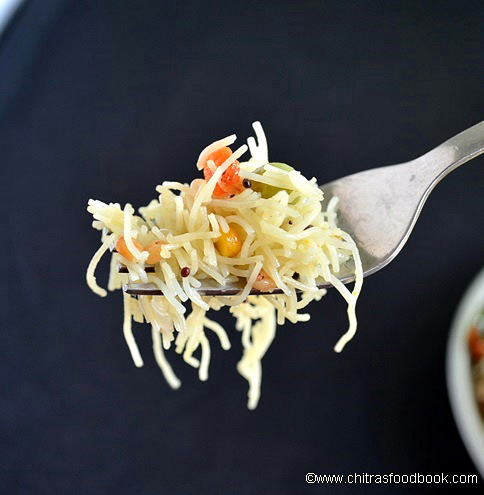
Semiya upma recipe (Vermicelli upma) is one of the easy and instant South Indian breakfast recipes. Tamil people make this upma and rava upma at least once in a week ;). I usually make this vermicelli upma adding vegetables and sometimes without vegetables adding tomato, onions alone for guests along with idli or poori.

Cooking semiya / vermicelli perfectly is the trick here. Its cooking time and preparation time is very less. So its ideal to make quick breakfast and not high in calories too. Mostly I use Anil semiya(fine variety) and very rarely I go for MTR or Bambino as they are thick. I feel thick vermicelli would go well for Semiya biryani/Pulao more than upma. Usually the ratio of semiya and water would be 1: 1 for fine vermicelli and 1:2 for  thick variety. Always add the correct water quantity to get soft and non-sticky vermicelli strands. It doesn’t need more oil or salt like rava upma. Yet it tastes great.

Sometimes I pack this for Raksha’s lunch box too. She loves it very much. I don't make any side dish for semiya upma. If you wish, you can make coconut chutney which tastes the best. Bachelors can also try this recipe for breakfast. Your job will become much easier in busy mornings. Ok, Lets see how to prepare semiya upma recipe at home perfectly with step by step pictures and video.

Check out my Rava Upma,  Rava Kichadi,  Rice upma, Fine Vermicelli upma, Wheat rava upma,  Instant upma mix recipes too.

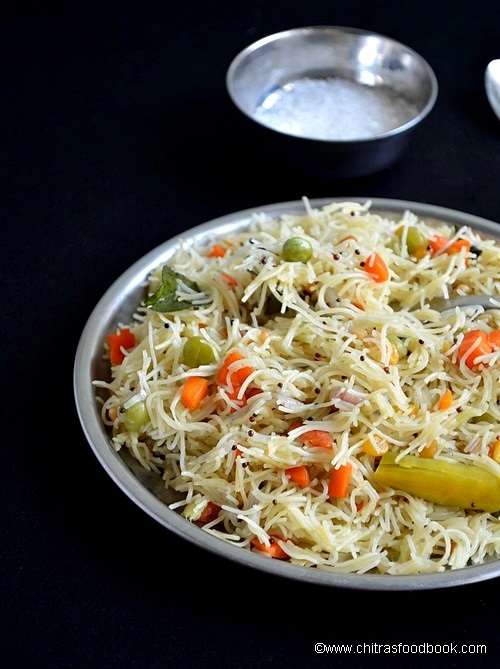
Semiya upma with vegetables 

Vermicelli upma recipe
Semiya upma with vegetables

Semiya upma recipe - Vermicelli upma recipe


Semiya upma/Vermicelli upma

Semiya upma |Vermicelli upma recipe with vegetables - Easy, instant breakfast recipe


Cuisine: Indian
Category: Breakfast
Serves: Serves 2 to 3
Prep time: 10 Minutes
Cook time: 10 Minutes
Total time: 20 Minutes


INGREDIENTS

1 cup - 250ml
To temper
  • Cooking oil - 2 tbsp
  • Mustard seeds - 1 tsp
  • Urad dal - 2 tsp
  • Chana dal - 1 tbsp
  • Big onions - 1 no
  • Green chillies - 2 nos ( use 4 for spicy upma)
  • Ginger – 1 inch piece
  • Curry leaves - few
  • Carrot - 1 no ( medium, finely chopped)
  • Green peas - a handful
For upma

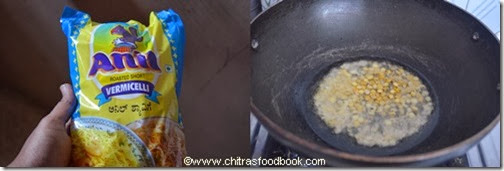
  • Roasted vermicelli - 2 cups ( I used Anil roasted short vermicelli)
  • Water - 2 cups ( use 1.5 cups water without using vegetables)
  • Salt - as needed
  • Lemon juice - few drops
  • Coconut oil – 2 tbsp

How to make semiya upma with vegetables - METHOD


  • Slice onions. Finely chop ginger and vegetables. Slit green chillies or finely chop it and set aside.
  • In a kadai, heat oil and temper all the ingredients given above.
Semiya-upma step 1
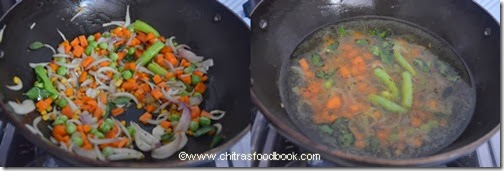
  • Saute onions, carrots and peas till vegatables are half cooked. After onions turn transparent, add 2 cups of water and salt. Cover the kadai with a lid.
Semiya-upma step 2
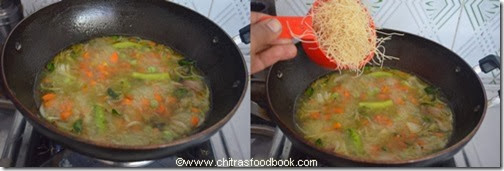
  • When the water starts to roll boil, check for taste.  If Cover cook till carrots and peas get cooked.  It takes 3 minutes maximum in high flame.
  • Now reduce the flame completely and add the vermicelli. Stir well with a fork like ladle.
Semiya-upma step 3
  • Make sure the level of water and vermicelli are equal. Water should not be excess. Mix well, press it and cover cook for 4-5 minutes in very low flame.
  • By now all the water will be absorbed by the vermicelli. Stir it once in the middle and check if it is cooked by tasting some. If you feel it is very stiff, hard and needs more water, add little more water ( few tbsp or 1/4 cup). Mix well and again cover cook in low flame for 2-3 minutes.
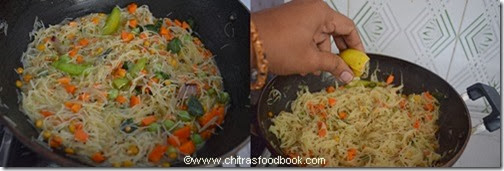
  • Now it will be done. Take a strand of vermicelli and press it. If it becomes mushy, it is cooked well. Lastly add 1 tbsp of coconut oil (if you like) and drizzle few drops of lemon juice. Mix gently and serve hot.
Semiya-upma step 4

How to make vegetable semiya upma
How to make semiya upma

Note

  • Always add 1:1 cup of water initially for Anil vermicelli. Add more water only if needed.
  • For other thick varieties, 1:2 or 1:2.5 ratio of vermicelli and water would be needed.
  • Addition of vegetables is completely optional. Sometimes I make it plain like rava upma.
  • You can replace lemon juice by one tomato. It would be more colorful too.
Serve hot with coconut chutney or sugar. Enjoy !
Vermicelli upma recipe


Continue Reading...


January 22, 2014

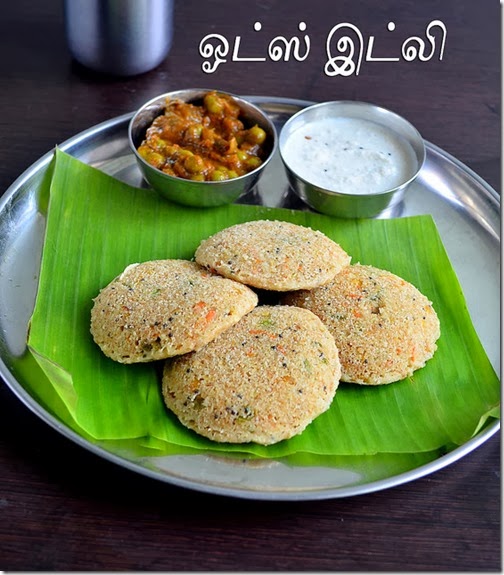
Instant Oats Idli Recipe - ஓட்ஸ் இட்லி – Indian Oats Breakfast Recipes

12071555266_d0eca58c89_z

Oats idli with wheat rava and vegetables is one of the healthy breakfast recipes for people who look for weight loss. I have been making this idli for years and somehow I have not posted this in my blog. Oats pongal and Oats idli are the recipes I make very often in my kitchen whenever myself and Sendhil opt for diet recipes.

Usually I nake this Instant idli along with tomato mint chutney for his lunch. It stays soft for hours and it is his favourite lunch box recipe too. I must thank Sharmilee from whom I got this idea of using wheat rava. Earlier I used to make it using white rava like rava idli. I have used Quaker brand Indian Oats here. Ok, Lets see how to make healthy Oats Idli recipe..

Oats idli recipe

Instant Oats idli


Instant Oats idli Instant oats idli with wheat rava and vegetables
Cuisine: Indian
Category: Breakfast
Serves: 8-9 nos
Prep time: 10 Minutes
Cook time: 20 Minutes
Total time: 30 Minutes


INGREDIENTS

1 cup = 200ml
To roast and grind
  • Quaker Oats - 1 cup
To make batter
  • Wheat rava - 1/2 cup
  • Curd - 1/2 cup
  • Grated carrots - 3 tbsp
  • Grated cabbage – 1.5 tbsp
  • Green peas - 2 tbsp
  • Salt - as needed
  • Water - 3/4 - 1 cup (adjust)
  • Ginger - 1 inch piece
  • Green chillies - 1-2 nos (finely chopped)
  • Pepper corns - 1/2 tsp
  • Lemon juice - few drops
  • Eno fruit salt –3/4 tsp
  • Coriander leaves - 2 tbsp (finely chopped)
To temper
  • Cooking oil - 2 tsp
  • Mustard seeds - 1/2 tsp
  • Urad dal - 1 tsp
  • Chana dal - 1 tsp
  • Curry leaves - few
  • Hing - a pinch
METHOD

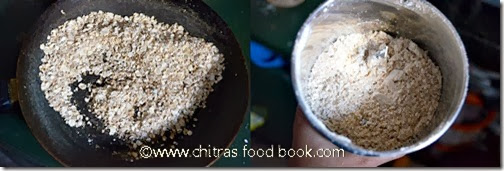
  • Dry roast oats in a kadai for 2-3 minutes in medium flame.Powder it nicely.
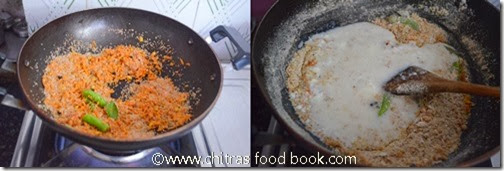
oats idli step by step picture
  • In a kadai,heat oil and temper all the ingredients given above in the same order.Add the grated carrots,cabbage and peas.Saute for a minute.Now add the wheat rava & powdered oats flour.Roast for 2 minutes.Add salt and remove.Let it cool for 10 minutes.
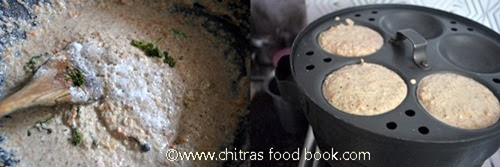
oats idli step by step
  • Then add curd,water and make a thick batter like idli batter.
  • Add Eno fruit salt,coriander leaves and lemon juice.Mix well.Grease the idli plate and pour the batter.
  • Steam in a idli pot for 15 minutes.Check for doneness by inserting a knife or spoon.
oats -idli step by step
  • Remove and enjoy eating hot.
Enjoy eating hot !!
Instant Oats Idli
Continue Reading...


December 19, 2013

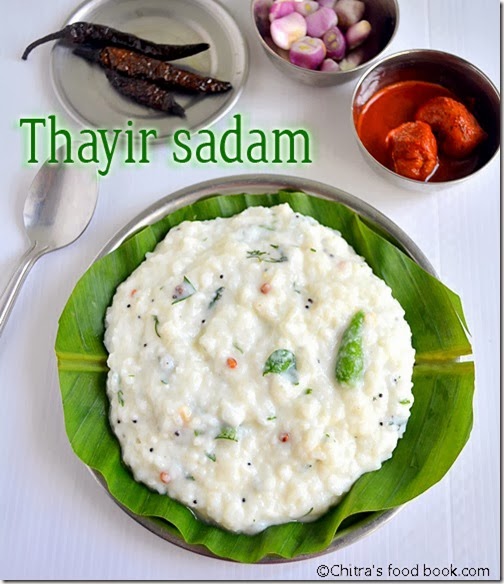
Curd Rice Recipe - Thayir Sadam - Bagala Bath Recipe


Curd rice recipe
Curd rice / Thayir sadam /  bagala bath is loved by all irrespective of ages. As curd rice is an usual post, I thought of sharing some tips on “How to pack curd rice for lunch box”and “How to make creamy curd rice for parties/potluck” in the “Notes” section. Basically I love to eat plain curd rice more than the seasoned one decorated with fruits and vegetables like carrot. Having lots of fresh curd mixed in hot rice is the divine lunch for me. So I always make curd rice in a very simple way without adding veggies,fruits and nuts. Whenever Sendhil have his lunch outside with his friends, I make easy rasam & potato curry for Raksha and my lunch would be mostly curd rice and pickle ( preferrably vadu manga oorgai) alone.
Curd has innumerable health benefits.People who don’t like curds have to consume at least a cup of buttermilk  to aid digestion.My MIL usually says buttermilk is much healthier than curd.Thanks to my MIL and my dear friend Shalini for sharing these tips with me. Hope it would be useful for beginners too.Curd rice experts,please share your method of making for lunch box and parties.It would be more helpful for for all of us :)
Click here for baby mango pickle/Maavadu and Mor milagai recipe
.
Thayir sadam

Curd rice/Thayir sadam


Curd rice/Thayir sadam How to make creamy curd rice/thayir sadam
Cuisine: Indian Category: Lunch Yields: Serves 2
Prep Time: 15 Minutes Cook Time: 5 Minutes Total Time: 20 Minutes


INGREDIENTS
1 cup - 200ml
  • Boiled rice or raw rice - 1/2 cup
  • Water - 2 cups
  • Milk - 3/4 cup
  • Fresh cream(2 tbsp) or butter (1 tbsp)
  • Fresh curd - 1/2 cup ( for immediate consumption.)
  • Salt - as needed
To temper
  • Cooking oil - 1.5 tsp
  • Mustard seeds - 1 tsp
  • Urad dal - 2 tsp
  • Hing -  a pinch
  • Curry leaves – few
  • Coriander leaves – 1/2 tsp
To mix with rice
  • Curry leaves - few
  • Coriander leaves - 1 tbsp
  • Finely chopped mango - 1 tbsp
  • Finely chopped ginger – 2 tsp
  • Grated carrot - 2 tbsp (optional) 
  • Dry grapes and pomegranate - A handful(optional)
Sour cream& butter milk – As needed (for parties)
METHOD

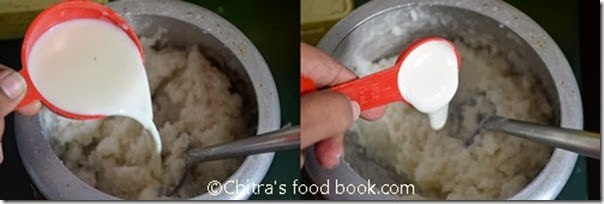
  • Wash and pressure cook the rice in low flame for 1whistle.If high flame,give 6-7 whistles.Rice should be completely mushy.Open the lid and mash the rice very well with the back of a  ladle.Add the required salt immediately.. Add warm milk to the rice and mix well.Add fresh cream or butter at this stage and mix well till it becomes creamy. This avoids the rice forming lumps when cooled down. Suppose if you feel, there are lumps in rice, use your hands and break it.
curd rice recipe
  • Add the finely chopped ginger,curry leaves,slit green chillies and coriander leaves.Now add the fresh curd.Mix well.(Never add curd to hot rice)
curd rice  recipe
  • Add little more milk till u get the desired consistency.Now add the chopped fruits,veggies(if using) and tempered ingredients.Add some curry leaves and coriander leaves before switching off the flame while tempering..
curd rice recipe
  • Mix well and serve hot  with a pickle.Consume within an hour or two.
**Add more curd,if u like more tangy.For the mentioned quantity,the taste would be mildly sour.

FOR LUNCH BOX AND PARTIES WITH DO’S AND DONT’S

  • For lunch box,to prepare 6-7 hours in advance,add 1.25 cups of milk for 1/2 cup of rice.Add 1 tsp of curd during summer season and 1-2 tbsp of curd during winter and other seasons .Make sure the rice is not so hard after mixing.ie,Milk should be 1/2 inch above the rice.Bring it to little loose consistency.Add slit green chillies,ginger, curry leaves and coriander leaves.Green chillies help to avoid the rice becoming too tangy.Ginger and greens is for flavour.Do the tempering.Allow the rice to cool down before packing in the box.
  • For parties to prepare in advance( 6-8 hours before) : For 1/2 cup of rice,add 1.25 cups of milk and 2 tsp of curd with the required salt.Mix well and allow it to set for 4-6 hours.Make the consistency little loose.One hour before serving,check the curd rice.It would have been set and little hard too.At this time add the seasoning,mixed fruits, grated carrot and cashews(unroasted).Lastly add 1/4-1/2 cup of thick buttermilk and 2 tbsp of sour cream( for people in abroad).Mix well.Check for taste.Add little milk if too sour.Adjust the buttermilk and cream as per the taste & texture u require.U can also add evaporated milk.
  • For people in India,we may not get sour cream here.So use fresh cream or butter as much as u need.It will help to balance the sourness, makes the rice look creamy and also gives a mild sweetness.
  • For travel,add more milk as the rice tends to ferment very soon because of heat and becomes sour.Always take some thin buttermilk in hand to mix with the rice if rice becomes too hard
DO ‘s & DONT’s
  • Never use ur hand for mixing if u make the curd rice in advance.It will become too sour.Use ur hands for mixing only if u consume within two hours.
  • Add hot or warm milk to the rice immediately after mashing the rice.
  • Never add curd to the hot rice.It will leave water.Lunch box will leak and when u open the box,u’ll see the rice and curd separate.
  • Never add the fruits,veggies and nuts in advance because the color of curd rice may change.
  • U can also add mor milagai while tempering for more flavour and taste.
  • Here i slitted the green chillies.U can slice it finely and add them.Some people add chopped small onions too.
Thanks to my friend Shalini for sharing these party tips.She said she had followed all these tips for family get togethers and potlucks when she was in US.She also mentioned that curd rice can be prepared and refrigerated in an air tight box if u make one day in advance.The next day,bring it to room temperature and follow the above mentioned steps.
Hope these tips are useful to u all.Do share if u have any special tip.Thanks for spending time to read this lengthy post :)

Enjoy the curd rice with mor milagai and a pickle.It would be heavenly !
Curd rice recipe

Continue Reading...


July 31, 2013

LEMON RICE RECIPE / ELUMICHAI SADAM WITH SIDE DISH, POTTUKADALAI CHUTNEY

Lemon-rice-recipe

Lemon rice (elumichai sadam in Tamil) is my most favourite among all the variety rice recipes for lunch. Its a very simple and a healthy rice recipe that can be prepared quickly for lunch box. I can have a plateful of lemon rice without any side dish like thogayal or pickle. But my mom makes a thick chutney with coconut and fried gram dal ( pottukadalai) as a side dish for lemon rice. My dad never eats lemon rice without this chutney and a pickle. Once I tried this combo for my husband and he too liked it. Recently we went to Meenakshi amman temple in Bannergatta. We had lemon rice as prasadam and it tasted out of the world. I would say it is the best lemon rice I have ever tasted. It was mild yellow in color & I found they had used raw rice & added some coriander leaves along with dals & chillies.. Usually I use steamed rice for making lemon rice. But after tasting that prasadam , I too started using raw rice and added some coriander leaves.

As aadi 18 festival is nearing , I thought of posting this lemon rice recipe. This is one among the 5 rice varieties ( lemon rice , puliyodharai , coconut rice , sakkarai pongal and curd rice) we offer to God on aadi perukku along with  pepper vada and payasam.. Do try this chutney & lemon rice combo , u will love it..

Lemon-rice-recipe

INGREDIENTS
1 cup - 250ml
  • Raw rice – 1/2 cup (Good quality sona masoori) OR (steamed rice , basmati rice)
  • Big sized Lemon –  1   ( adjust based on the size & tanginess of lemon)
  • Salt – as needed
  • Hing / asafetida – 1/4 tsp
  • Turmeric powder – 1/4 tsp
To temper
  • Cooking oil – 1 tbsp
  • Mustard seeds – 1 tsp
  • Urad dal – 1 tbsp
  • Chana dal – 1/2 tbsp
  • Peanuts – 1 tbsp (optional)
  • Red chillies – 2 nos
  • Green chillies – 2 nos
  • Curry leaves – few
Coriander leaves – 1 tbsp ( to garnish)
Gingely oil – 1 tbsp ( to add while mixing)

METHOD
  • Pressure cook raw rice adding 1: 2.5 cups of  rice and water ratio. Add a drop of oil before cooking. Cook it separate & fluffy. Spread them in a plate & let it cool down.
  • In a bowl, squeeze the lemon juice by removing the seeds. Add salt , turmeric powder & hing. set aside.
  • In a kadai , heat oil and temper the mustard seeds. After it splutters completely , add the dals & peanuts. Fry till they turn golden brown. Then add the pinched red chillies & slitted green chillies, curry leaves and a pinch of hing.
lemon rice tile1
  • Saute well , add the lemon juice , switch off the flame immediately & transfer to a bowl. Add 2 tsp of water in the kadai, give a swirl and add to the lemon juice mixture..
  • Add this mixture & gingely oil to the rice , mix well. Check for salt. Garnish with coriander leaves..Initially it tastes more tangy..But all the taste blends well when its rested for 30 mins to 1 hour before serving.
lemon rice tile2

NOTE
  • The water quantity may differ based on the quality of rice..If u use basmati rice, use 1:2 cups of water..
  • u can add also add the lemon juice directly in the rice instead of adding to the tadka..
  • Addition of peanuts is optional. I dint use here.  I dint add coriander leaves as it was out of stock. But addition of coriander leaves gives a nice taste..
  • Add gingely oil while mixing the rice.

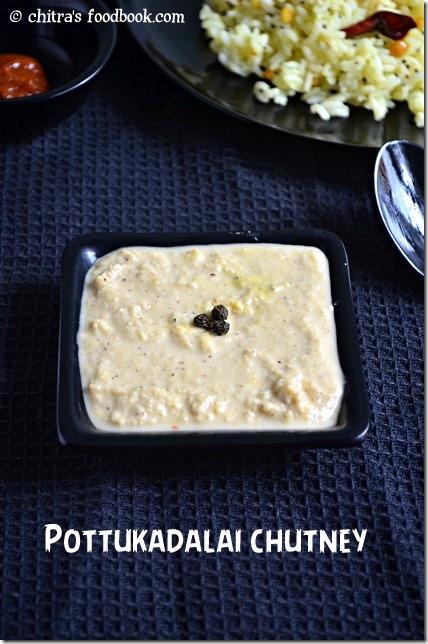
POTTUKADALAI CHUTNEY / FRIED GRAM DAL CHUTNEY - SIDE DISH FOR LEMON RICE

dalia - chutney


INGREDIENTS
1 cup - 250ml
  • Dalia/fried gram – 1/4 cup
  • Grated coconut – 1 tbsp
  • Green chillies – 2 nos
  • Salt – As needed
  • Garlic cloves – 2-3 nos

METHOD
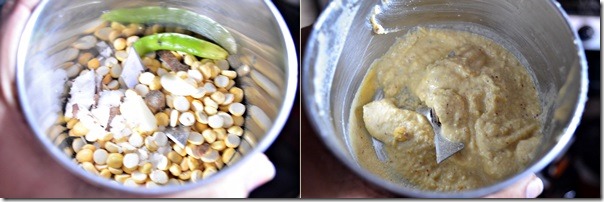
  • Grind all the above ingredients to a thick paste adding less water..Serve !
dalia chutney tile

lemon rice - plate

Continue Reading...