Tomato rava upma recipe / Rava upma with tomatowith step by step pictures - Tomato rava upma is an yummy, instant, South Indian breakfast recipe with a nice variation from our regular rava upma. Usually I add tomato and vegetables only for rava kichadi but this morning I prepared rava upma with tomato just for a change. Basically I am a big fan of tomato based recipes. Even though I don’t like rava upma, I loved this tomato rava upma a lot. It tastes tangy and spicy as well just like rava kichadi. If you wish you can add green peas in this upma to make it look colorful.
I had some leftover upma for my dinner too. It was good and stayed soft. So you can pack it for lunch box as well. Friends, If you are bored of making rava upma, do try this tomato upma for your breakfast or dinner. It tastes good with coconut chutney as side dish. Try and let me know your feedback . My School moms friends make Karnataka style tomato rava bath. I will ask them and share that recipe later. Now lets see how to make this Tamil nadu style tomato upma recipe with step by step photos.
Heat oil, Temper mustard, dals.Saute the vegetables adding salt.
After tomato becomes mushy, add spice powders.
Mix well and add water. After water comes to boil, add rava.
Mix well, cover cook for 5 minutes.
Add coconut oil / ghee.Garnish with coriander leaves and serve with coconut chutney.
Tomato Rava Upma Recipe - Step by step photos
Wash and chop the tomato, onion, chilli.Set aside.Dry roast rava for 7 minutes in medium flame without burning it.Keep in a plate.
Heat oil in a kadai.Splutter mustard seeds, urad dal, chana dal and curry leaves. After it turns golden, add finely chopped onion and slit green chilli.
After onion becomes transparent, add finely chopped tomato.Saute till tomato becomes mushy. Add salt to cook tomato quickly.
Add red chilli powder or sambar powder and turmeric powder. Mix well till raw smell goes off.Add water and let it roll boil.
Lower the flame completely.Add the roasted rava in a sprinkled way using one hand while stirring constantly with other hand. It helps to avoid lumps.Once all the rava is added, it absorbs the water and becomes thick. Cover it with a lid and cook for 5 minutes in low flame.Mix once in the middle.
Switch off the flame after rava is cooked soft. Add coconut oil or ghee. Garnish with coriander leaves.Mix well and serve hot with coconut chutney!
Notes
Adjust the quantity of chillies as per your taste.
For variations, you can add 1/2 tsp garam masala powder for masala flavor.
Remember to add rava in a sprinkled way to avoid lumps.
No need to add more water. Adding more water makes it like kichadi.
You can use wheat rava instead of semolina and make the same. But add 3 cups of water.
Color of this upma varies as per the chilli powder you use. Use Kashmiri chilli powder for bright red color.
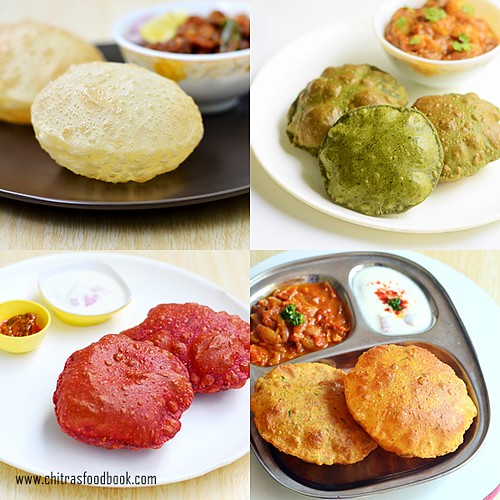
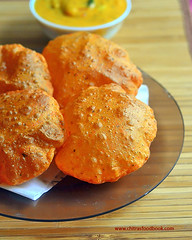
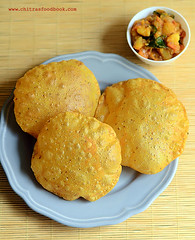
Collection of 10 different puri recipes / poori varieties – Indian deep fried bread. I make Poori recipe / Puri recipe for breakfast regularly during weekends. When I was a beginner in cooking, making a puffy poori just like hotel ones was my dream. Slowly my dream came true by practice. After making several attempts, I got to know the technique, tips and tricks for making puffy and soft puri.
In this post, I have shared all the possible tips & tricks to make perfect poori based on my observation. Hope these points would be useful for beginners. Once I started making it perfect, I got tempted to try different types of puri recipes. So I prepared varieties of poori along with different side dish recipes for our Sunday breakfast and blogged the same. This is how I got a collection of these 10 poori varieties in my website.
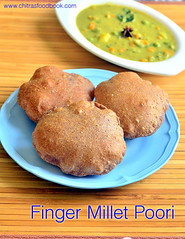
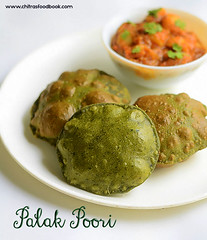
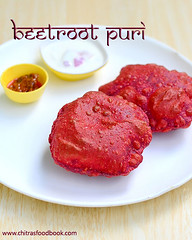
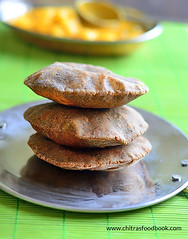
You can find basic poori/puri recipe with wheat flour(atta in Hindi), Chola poori/Maida puri, Tomato poori, Paneer stuffed puri, Spinach/ Palak poori, Beetroot poori, Potato poori, Kutta atta puri, Spicy masala puri, Finger millet/Ragi poori in this collection. I have given step by step pictures for all these recipes and few video recipes as well.
I am yet to try North Indian stuffed puri recipes like urad dal puri, peas stuffed puri, dal poori, bharva puri, bhatura and the most popular Pani puri recipe and puri recipes for vrat/fasting like rajgira puri and Shingare ki puri. I will try to add them in this list soon.
Generally Kids love to eat poori more than roti. So you can try these varieties at home for their breakfast or evening snacks and make it healthy with some stuffing. Ok, lets see the collection of 10 poori recipes / Puri recipes / Indian flat bread varieties to make at home for weekend breakfast & special occasions. Please click on the images to view the recipe.
TIPS FOR MAKING PERFECT POORI
Addition of rava/sooji/semolina in the wheat flour helps to make puffy poori.
Adding a dash of ghee helps to keep the puri soft.
Unlike chapathi dough, poori dough has to be tight and thick.
Dough should be kneaded well to make it smooth and crack free.
Resting time is not necessary for the dough.
Rolling should be thicker than roti to get puffed poori.
Do not dust too much in flour. Oil will get more sediments.
Always dust off the excess flour coated in the rolled poori by patting between your hands.
Oil temperature should be checked before dropping the poori.
If oil temperature is less, puri will sank in oil and doesn't puff up.
Oil should not be smoky hot too. Color of poori will become dark.
Poori should not be stacked one over the other.
POORI RECIPES / PURI VARIETIES
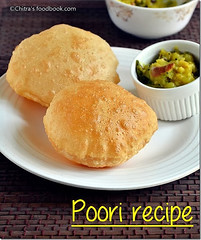
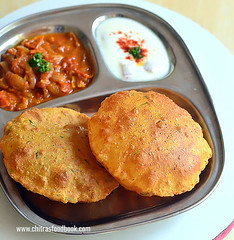
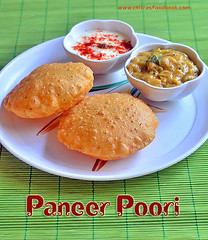
Basic poori recipe/Puffy Puri recipe with videoChola Poori RecipePotato Recipe/Aloo Puri with videoPaneer Puri Recipe With VideoRagi Poori Recipe Palak Poori RecipeBeetroot Poori RecipeKuttu atta Poori RecipeTomato Poori RecipeMasala Poori Recipe With Video
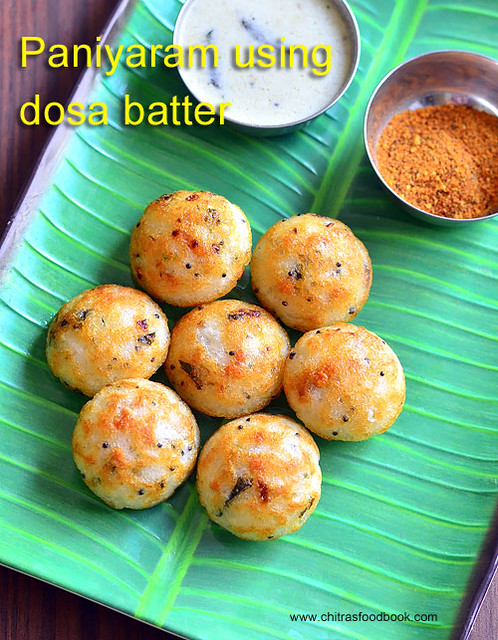
Paniyaram recipe with leftover idli, dosa batter is my most favorite South Indian breakfast and dinner recipes. I can have it 24x7. My mom calls it as idli dosa maavu paniyaram. In Tamil nadu, people make kuzhi paniyaram at least once in a week. Not only in Tamil nadu, this paniyaram recipe is very popular in Karnataka and Andhra as well.
In Kannada, it is called as Paddu or Guliyappa. In Telugu, it is Gunta ponganalu. In Kerala, it is kuzhi appam in malayalam. There may be slight variations in the paniyaram batter recipe but the taste and preparation is almost the same. Generally people say kara chutney ie. Red chutney is the best side dish for paniyaram but I love my mom’s watery coconut-fried gram dal chutney( Pottukadalai chutney)that tastes like road side hotel chutney. You can find the same in the pictures.
Before marriage, my mom reserves some leftover sour dosa batter and make ghee paniyaram especially for me. Yes, Kuzhi paniyaram tastes the best when prepared with sour dosa batter more than fresh idli,dosa batter. It would be crispy outside and soft inside. The flavor of ghee and smell of sour batter takes this dish to next level.
Sometimes my mom adds a pinch of cooking soda if the batter is too sour. I love to have this paniyaram as evening snack too. So my amma makes it after I come from college. After marriage, I follow my mom and make ghee paniyaram for Raksha and rarely for myself and Sendhil.
Long back, I made a post on Paniyaram varieties in which I had shared my MIL’s style sweet paniyaram, Kara paniyaram and masala paniyaram recipes. At that time, many readers asked me whether it can be prepared without paniyaram pan. I don’t think so. Deep frying in oil is the only alternative. But the shape and texture will change. Moreover it absorbs more oil and make the dish high in calories.
If you want to taste this delicious paniyaram in a healthy way with low calorie, you need to buy a non-stick paniyaram pan. Just a few drops of oil or ghee would be enough to make this yummy delicacy.
In South India, you can find this pan commonly in all the vessel shops. If you are in abroad, you can buy it online as well. Ok, lets see how to make this most popular Paniyaram recipe with step by step photo.
Paniyaram recipe / Kuzhi paniyaram recipe with idli, dosa batter
How to make Kuzhi paniyaram recipe using leftover idli, dosa batter
Take the leftover dosa batter in a wide bowl. Add little water, say 1/4 cup if the batter is too thick.
Heat oil in a kadai.Temper mustard, urad dal, chana dal and hing. After dals turn golden, saute the finely chopped onion, green chilli, ginger, curry leaves, coriander leaves and little salt. Saute till onion becomes transparent.
Add to the dosa batter. Mix well. Paniyaram batter is ready. Check for taste, add salt only if needed. If the batter is too sour, you can add a pinch of cooking soda. Mix well and rest the batter for 10 minutes.
Heat paniyaram pan adding 1 tsp oil or ghee in each hole. Pour the batter and keep the flame medium high. Cover the pan and cook for sometime.
Use a stick like pointed tool or spoon to flip the paniyaram. Cook the other side. Remove in a plate. Serve with your favorite chutney !
Notes
To make it more healthy, you can add grated carrot, cooked peas to the paniyaram batter.
You can add finely chopped chilli to make the paniyaram taste spicy.
Adjust the flame from medium to high to cook the paniyaram with golden tint on top as shown in the picture.
Adding coriander leaves is optional but it adds a nice flavor.
Add ghee instead of oil if you are making for kids. I make this way and pack for Raksha's lunch box
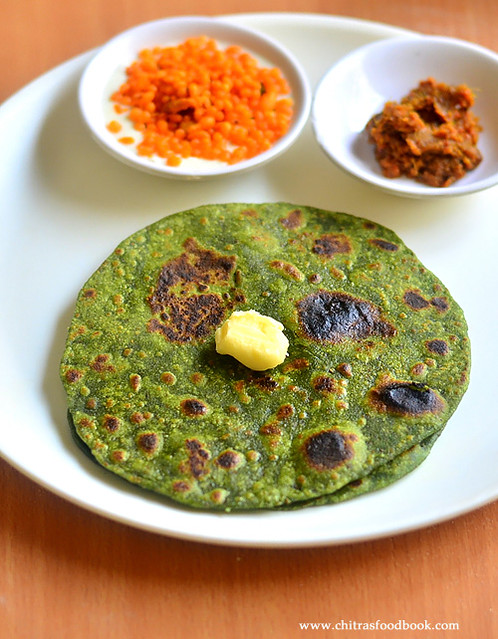
Palak chapathi (Spinach chapati, Pasalai keerai chapathi in Tamil) is an easy, healthy paratha recipe that can be served with onion raitha or boondi raita and pickle as the side dish.
I make this easy palak chapathi for our dinner usually. I followed my soft chapati recipe and added masala powders to make this spinach chapathi flavorful and soft. Curd & oil is the major ingredient that helps to make it soft. You can roll it thin or thick and pack it for lunch box if you like. You should eat it hot to enjoy its best taste. For variations, you can add finely chopped palak leaves and add it to make the job easier. Lets see how to make easy palak chapati with step by step photos !
Palak Chapati / spinach chapathi recipe
Easy , healthy palak chapathi / Spinach chapathi recipe with step by step photos - Easy, instant dinner recipes
Wash and clean the palak leaves. Grind the leaves, green chilli and ginger to a smooth paste adding required water. Set aside.
In a wide plate or bowl, take the whole wheat flour, ajwain, ground palak, curd, cooking oil, salt, garam masala powder and mix well.
Add little water only if needed. Make a smooth dough.Knead for 5 minutes. Grease with oil. Cover & rest for 30 minutes.
After 30 minutes, make ball sized dough and dust in wheat flour.Roll it thin or thick as you like. I rolled it medium thick.
Heat a dosa pan. Put the chapati and cook in low to medium flame. When bubbles start to appear, flip the chapati and cook the other side. Apply oil on both the sides by flipping the chapathi.
Remove and serve hot with onion raita or boondi raita. Enjoy !
Note
Adjust the quantity of masala powder as per your taste.
For variations, you can add finely chopped palak leaves, grated ginger & green chilli instead of grinding them.
You can use cumin seeds instead of ajwain.
Easy, healthy palak chapathi is ready to relish with boondi raita & pickle.
Rava Pongal is one of the easy to make South Indian breakfast recipes. It is very popular in Tamil nadu. Rava khara pongal recipe ( sooji pongal) is prepared with roasted semolina ( Sooji in Hindi) and pressure cooked yellow moong dal as major ingredients. Its cooking method is very similar to our Ven pongalrecipe/Ghee pongal but semolina is used instead of rava.
Even though rava pongal is not widely available in Tamil nadu hotels, this must be a favorite breakfast recipe to many of us. In my home, Sendhil loves rava recipes a lot more than me & Raksha. So I try to makerava upma,rava dosa or this rava pongal at least once in a week. I started making this recipe after watching a cookery show by our beloved Chef Damu. After making it several times, I started preparing in my own comfortable way. I have shared the same in this post. Quantity of water, little oil and more ghee is the key for soft pongal. If you have cooked moong dal in hand, rava pongal can be prepared quickly and easily. Bachelors and working women can try this for breakfast. Ok, lets see how to make sooji pongal/ Tamil nadu style rava pongal with step by step photos and a video ( Video is under editing). I will try to share it soon.
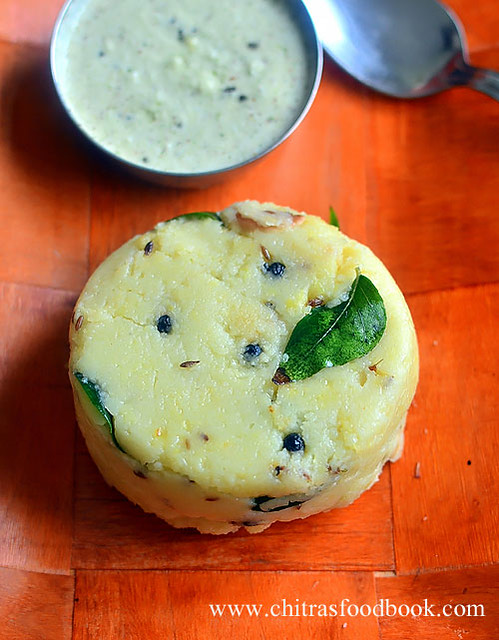
Rava Pongal Recipe - Sooji Pongal
How to make rava pongal recipe - Easy, yummy South Indian breakfast recipe
Water - 1.5 cups ( for dal) + 2.5 cups ( for rava)
Salt - As needed
To temper
Ghee + cooking oil - 3 tbsp + 1 tbsp
Pepper corns - 1 tsp
Cumin seeds - 1 tsp
Cashew nuts - 5 nos ( break into two)
Ginger - 1 inch piece ( chopped finely)
Curry leaves - Few
Asafetida/ Hing - A pinch
METHOD
In a pressure cooker base, heat 2 tsp of ghee and roast the moong dal till nice aroma comes out. Add 1.5 cups of water and pressure cook in very low flame for 2 whistles. Open the cooker once its done and mash the dal.
Heat a kadai and dry roast the rava in medium flame for 5 minutes. Take care, Rava should not burn. Transfer it to a plate.
In the same kadai, heat 2 tbsp ghee + 1 tbsp oil and add pepper corns.When the pepper corns starts to splutter, add finely chopped ginger, cashews and curry leaves. When the cashews start to turn golden, add cumin seeds and hing.
Mix well and add water 2.5 cups of water immediately ( I used 1:3 ratio of rava & water). Add the required salt, cooked moong dal in the water.
When the water starts to roll boil, simmer the flame completely or switch off the flame if you are a beginner. Add the roasted rava slowly in one hand while mixing the water in other hand. This is most important to avoid lump formation.
After the rava is mixed well with water, it becomes thick. Cover & cook for 5 minutes in low flame. Open the lid and mix it once. Again cover cook for 2 minutes till rava becomes soft and well cooked.
Add 1tbsp of ghee at the end, mix well and switch off the stove. Initially, when the pongal is hot, it looks mushy. But it will become non-sticky and stay soft when it becomes warm. Serve with your favorite side dish like coconut chutney or gosthu.
Enjoy !
Note
Do not reduce the quantity of ghee mentioned in the recipe. U can always add more if you want. Oil helps to keep the pongal non-sticky.
You can add more water for cooking rava. 1:4 ratio of rava & water is also fine.
Use upma rava/coarse sooji not chiroti/fine rava.
Enjoy this easy, yummy South Indian breakfast Rava pongal at home !
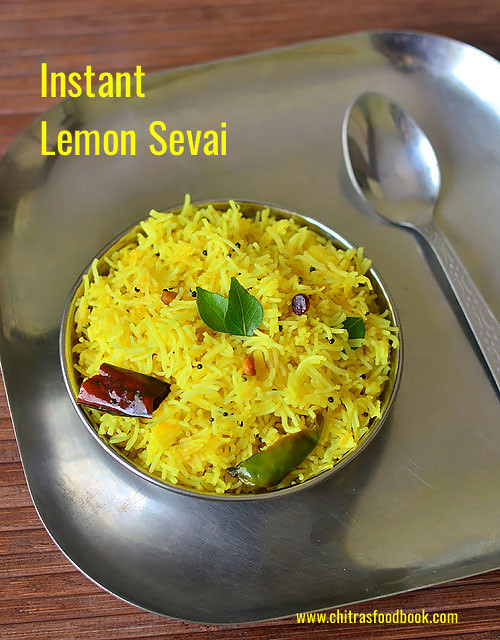
Lemon sevai is our family favorite breakfast recipe. Sevai also known as Idiyappam sevai is one of the popular South Indian breakfast. Making soft idiyappam at home needs some practice and expertise. So to ease our job, readymade rice vermicelli ( Rice sevai or rice idiyappam in Tamil, Rice vermicelli in English) is available in the market.Though there are many brands, I have tried Anil rice vermicelli and Concord rice sevai. Basically rice sevai is cooked by soaking in hot water for 15 minutes and made instantly just like noodles. Once we know how to cook the rice sevai properly, we can make varieties of sevai recipes by adding different flavors and prepare lemon sevai, tamarind sevai, tomato sevai, coconut sevai, masala vegetable sevai and even sweet sevai by adding sugar or jaggery. Usually I make lemon sevai and sweet sevai as both are our family favorite. I make this dish mostly for breakfast during busy weekday mornings as it saves lot of time when compared to our traditional idiyappam. So today I have shared this post on how to cook the instant rice sevai and make this flavorful, yummy lemon sevai with it. Lets move on with step by step photos !
Do check my homemade basic idiyappam recipe, lemon idiyappam recipes, side dish for idiyappam.
Lemon sevai recipe - Instant lemon sevai using rice vermicelli
How to make lemon sevai using instant rice vermicelli/rice noodles for easy breakfast or dinner
Rice vermicelli - 200gms packet ( I used Anil rice vermicelli)
Water - approx. 4 cups
Salt - as needed
Cooking oil - Few drops
To prepare lemon sevai
Cooking oil or gingely oil - 2 tbsp
Mustard seeds - 1/2 tsp
Urad dal - 1 tsp
Chana dal - 1/2 tbsp
Peanuts - 2 tbsp ( optional)
Curry leaves - few
Red chilli - 1 no ( Pinched )
Green chilli - 2 nos ( slit)
Hing - a pinch
Turmeric powder - 1/4 tsp
Lemon juice - 2 tbsp or as needed
Salt - as needed
Water - 1 tbsp to add in lemon juice
Coriander leaves - to garnish ( optional )
HOW TO MAKE LEMON SEVAI
Roll boil 4 cups of water adding few drops of cooking oil. In the mean time, squeeze two small lemon and take the juice.Discard the seeds. Add 1 to 2 tbsp water to it. Mix well and keep aside.
Take the vermicelli in a wide bowl and add the boiled water. Level of water should be 1 inch above the vermicelli. Cover & soak it for 20 minutes.
After soaking, drain the excess water completely using a colander and keep the cooked rice vermicelli ready. Make sure there is no trace of water. It should be fluffy and separate.
Spread the vermicelli in a greased idli plate. Boil water in an idli pot. Place the idli plate and steam it for 5 to 10 minutes. Remove and fluff the cooked sevai in a plate. (This step is optional). You can proceed without steaming too.
Heat oil in a kadai,splutter mustard, urad dal, chana dal, peanuts, red chilli, green chilli and curry leaves.Saute till dals become golden. Add the turmeric powder, required salt, lemon juice.Mix well and switch off the flame.
Add the cooked rice vermicelli to it. Mix gently using a fork like ladle. Check for taste and add more lemon juice if needed. Cook in very low flame for 2 minutes till all the moisture goes off. Garnish with coriander leaves and serve hot for best taste !
Enjoy !
Note
The quantity of lemon juice and chilli varies as per the sourness of lemon.
If you want, you can use a part of cooked vermicelli to make sweet sevai adding sugar or jaggery syrup, grated coconut and cardamom powder.
Do not add more water to soak the vermicelli because it may become mushy.
Make sure, you drain all the excess water completely without even a single drop left out. It helps to keep the vermicelli soft and looks fluffy too.
Steaming the soaked vermicelli makes it soft like homemade idiyappam. You can try this way for variations.
Enjoy this easy, instant lemon sevai using rice vermicelli for your breakfast or dinner.

 I had some leftover upma for my dinner too. It was good and stayed soft. So you can pack it for lunch box as well. Friends, If you are bored of making rava upma, do try this tomato upma for your breakfast or dinner. It tastes good with coconut chutney as side dish. Try and let me know your feedback . My School moms friends make Karnataka style tomato rava bath. I will ask them and share that recipe later. Now lets see how to make this Tamil nadu style tomato upma recipe with step by step photos.