Search Chitra's Food Book

Showing posts with label TRAVEL RECIPE. Show all posts

April 17, 2014

Chettinad Vara Milagai Thuvayal(Red chilli Chutney Recipe)- Chutney For Paniyaram

Vara milagai chutney is a popular side dish for idli, dosa and paniyaram in Karaikudi - Chettinad region. This is one of the easiest chutney recipes & ideal for travel as it is without coconut. I think chettinad kara chutney and vara milagai thuvayal are the same because both have the same ingredients.

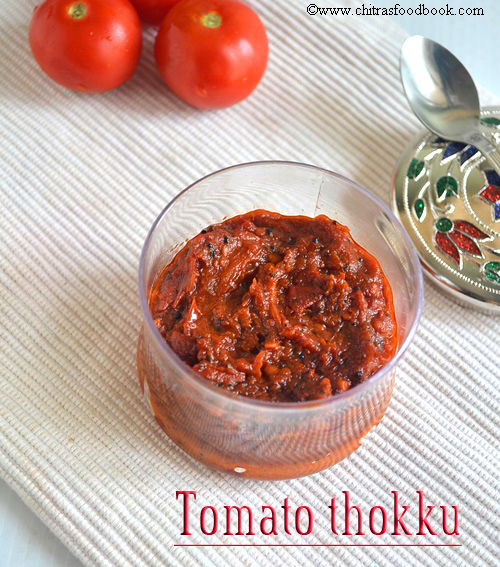
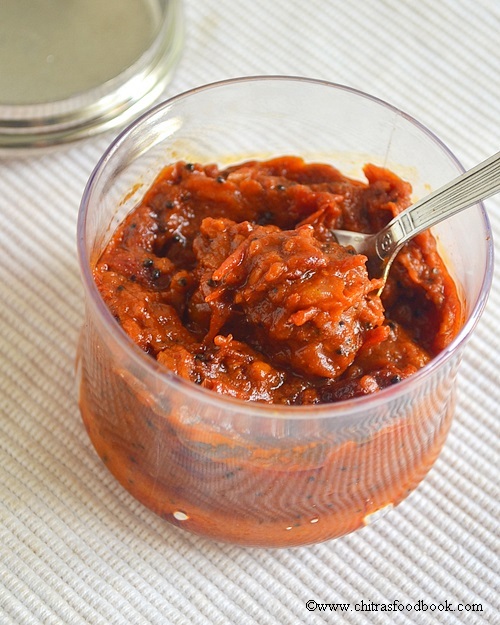
Friends from Chettinad, please tell me if there is any difference. I would love to try that too. Sendhil doesn’t like spicy side dishes. So I was waiting for a good chance to try this chutney for me. Yesterday my parents were in my house. As my dad is fond of kara chutney, I tried this spicy red chilli chutney for him. 

He loved it a lot and told me to pack this chutney with idli for his travel to Hyderabad. Whenever we go to hotels, myself and my dad ask for more servings of kaara chutney than coconut chutney & sambar. We are a big big fan of this. People looking for spicy side dishes must try this chutney. I am sure you will have at least 2 idlies more than your regular intake.


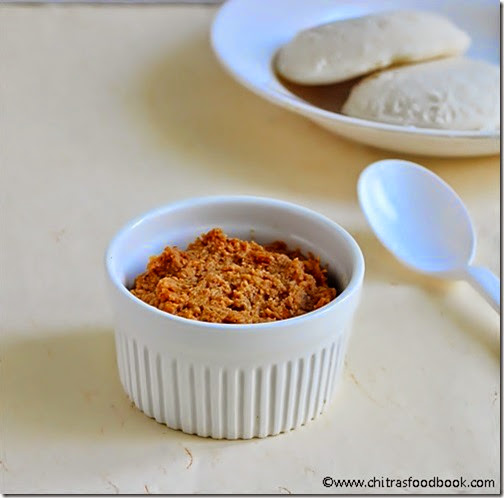
Chettinad Kara chutney recipe


Kara chutney recipe 
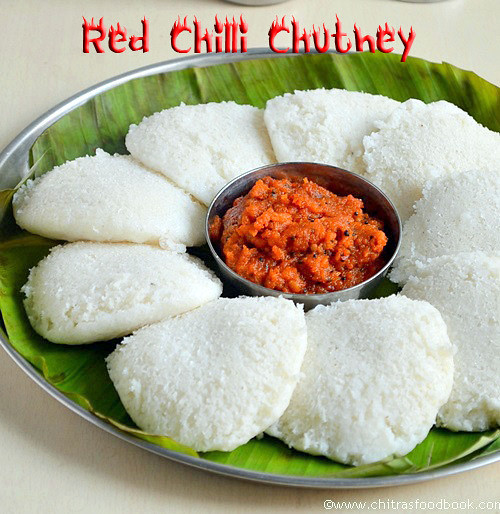
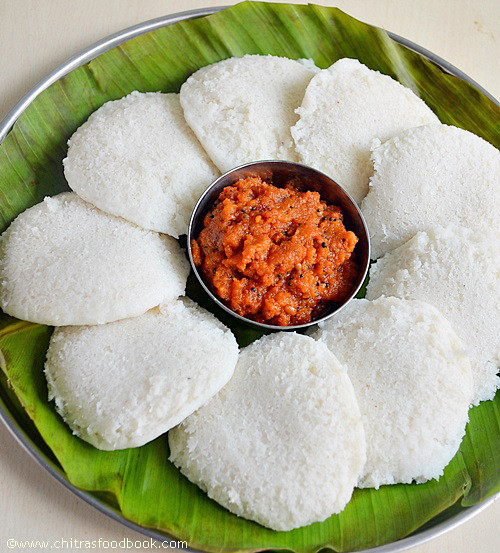
Kara chutney recipe - Chettinad style - Tastes great with idli, dosa & paniyaram
Cuisine: Indian
Category: sidedishes
Serves: Serves 3
Prep time: 10 Minutes
Cook time: 10 Minutes
Total time: 20 Minutes


INGREDIENTS

  • Tomato - 1 no
  • Small onions - 20 nos or big onion - 2 no
  • Red chillies – 5 nos
  • Tamarind - a small piece(a big pinch)
  • Garlic cloves - 3 nos
  • Salt & water - as needed
To temper
  • Gingely oil - 3 tbsp
  • Mustard seeds - 1/2 tsp
  • Urad dal - 1 tsp
  • Curry leaves - few
HOW TO MAKE CHETTINAD KARA CHUTNEY - METHOD

  • Grind tomato,red chillies,small onions, garlic cloves, tamarind with salt & water to a slightly coarse paste. (Tips Tips: Always pinch the tamarind into small pieces and use for grinding. It helps to grind smoothly)
Vara milagai chutney step1
  • Heat gingely oil in a pan and temper with mustard seeds, urad dal & curry leaves. Pour this chutney in hot oil and allow it to boil till raw smell emanates completely.Chutney thickens as well.
Vara milagai chutney step2
  • Remove & serve with idli, dosa or paniyaram.


Note

  • Do not reduce the oil quantity for tempering as it helps to suppress the body heat developed by red chillies. It is good for your tummies too.
  • Use one big onion if you don’t have small onions in hand. 
  • If you like the raw smell of onions & want more spicy, just temper & pour it on the chutney. No need to boil the chutney.
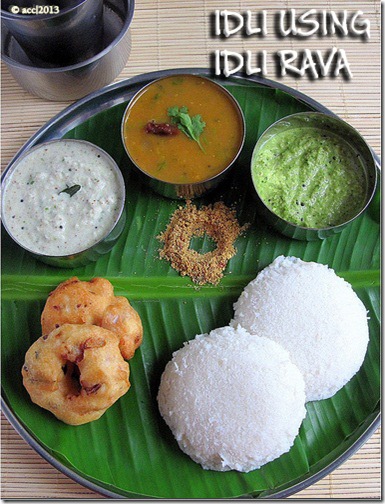
 Malligai poo idli with spicy hot vara milagai chutney for breakfast is a total bliss, Right?? 
Continue Reading...


February 7, 2014

EASY TOMATO THOKKU RECIPE/THAKKALI THOKKU WITHOUT ONION, GARLIC

Tomato thokku is my favourite side dish for idli,dosa. Usually my mom makes thokku with onions.My MIL makes it like tomato pickle adding roasted methi seeds powder.I’ll soon post that version here.But this recipe is very simple one without onion, garlic. Last month, my sister was telling about her sis-in-law’s tomato thokku recipe. She told it tastes very good and it can be used as tomato rice paste ,side dish for idli,dosa and chapati. It is ideal for travel too. So I wanted to try it badly. Immediately I called her SIL Mrs.Thangam and tried it.Yes,as she said it tasted great with everything. I had as an accompaniment for curd rice too. This is a very simple recipe with three major ingredients.I am very thankful to her for teaching me this yummy recipeSmile.To make it easier,u can also grind the tomatoes and proceed as mentioned..

Easy tomato thokku


Easy tomato thokku Easy tomato thokku recipe - Yummy side dish for idli,dosa and chapati.Tastes great when mixed with rice too !!
Cuisine: Indian
Category: Side dish
Serves: 1/2 cup
Prep time: 5 Minutes
Cook time: 20 Minutes
Total time: 25 Minutes


INGREDIENTS
To saute
  • Gingely oil - 3 tbsp
  • Mustard seeds-1/2 tsp
  • Ripe tomatoes - 5 nos(medium)
  • Red chilli powder – 2-3 tsp
  • Turmeric powder - 1/8 tsp
  • Salt& water - as needed
METHOD

  • Wash and chop tomatoes finely.
Tomato-thokku-tile1
  • In a kadai,heat 1 tbsp of gingely oil.Splutter mustard seeds.Add tomatoes and salt.Saute till all the water content evaporates.
Tomato-thokku-images-2
  • When it becomes thick,add red chilli powder,turmeric powder.Add 2 tbsp of oil again.Saute for few minutes till raw smell leaves it.Check for taste.No problem if spicy taste is more because,it gets balanced the next day.
  • Stir now and then so that it won’t get burnt.
Tomato-thokku-images-3
  • Add little water(say 3 tbsp) and allow it to boil for few minutes.After all the moisture is absorbed,it starts to ooze out oil in the sides. After it becomes a shining thick paste,remove from the flame. The total process takes 15-20 mins in medium low flame. 
Tomato-thokku-images-4
  • Let it cool and then store in an air tight container.Use a clean spoon every time.It stays good for one month too if refrigerated.
NOTE
  • Nalla ennai/Gingely oil is mandatory for this recipe.Please do not replace it.
  • The method i have shared here is the original recipe given by my relative.For variations,u can replace red chilli powder by sambar powder+red chilli powder combination.Also u can add a pinch of jaggery.
  • This recipe gives u mildly spiced thokku.U can add 2 tsp more for super spicy thokku.
  • Stays good for one month when refrigerated.Use a dry,clean spoon always.

Serve with idli,dosa,chapathi,curd rice ! Stays good for a month!

Very good recipes Tags: , , , ,
Continue Reading...


July 31, 2013

LEMON RICE RECIPE / ELUMICHAI SADAM WITH SIDE DISH, POTTUKADALAI CHUTNEY

Lemon-rice-recipe

Lemon rice (elumichai sadam in Tamil) is my most favourite among all the variety rice recipes for lunch. Its a very simple and a healthy rice recipe that can be prepared quickly for lunch box. I can have a plateful of lemon rice without any side dish like thogayal or pickle. But my mom makes a thick chutney with coconut and fried gram dal ( pottukadalai) as a side dish for lemon rice. My dad never eats lemon rice without this chutney and a pickle. Once I tried this combo for my husband and he too liked it. Recently we went to Meenakshi amman temple in Bannergatta. We had lemon rice as prasadam and it tasted out of the world. I would say it is the best lemon rice I have ever tasted. It was mild yellow in color & I found they had used raw rice & added some coriander leaves along with dals & chillies.. Usually I use steamed rice for making lemon rice. But after tasting that prasadam , I too started using raw rice and added some coriander leaves.

As aadi 18 festival is nearing , I thought of posting this lemon rice recipe. This is one among the 5 rice varieties ( lemon rice , puliyodharai , coconut rice , sakkarai pongal and curd rice) we offer to God on aadi perukku along with  pepper vada and payasam.. Do try this chutney & lemon rice combo , u will love it..

Lemon-rice-recipe

INGREDIENTS
1 cup - 250ml
  • Raw rice – 1/2 cup (Good quality sona masoori) OR (steamed rice , basmati rice)
  • Big sized Lemon –  1   ( adjust based on the size & tanginess of lemon)
  • Salt – as needed
  • Hing / asafetida – 1/4 tsp
  • Turmeric powder – 1/4 tsp
To temper
  • Cooking oil – 1 tbsp
  • Mustard seeds – 1 tsp
  • Urad dal – 1 tbsp
  • Chana dal – 1/2 tbsp
  • Peanuts – 1 tbsp (optional)
  • Red chillies – 2 nos
  • Green chillies – 2 nos
  • Curry leaves – few
Coriander leaves – 1 tbsp ( to garnish)
Gingely oil – 1 tbsp ( to add while mixing)

METHOD
  • Pressure cook raw rice adding 1: 2.5 cups of  rice and water ratio. Add a drop of oil before cooking. Cook it separate & fluffy. Spread them in a plate & let it cool down.
  • In a bowl, squeeze the lemon juice by removing the seeds. Add salt , turmeric powder & hing. set aside.
  • In a kadai , heat oil and temper the mustard seeds. After it splutters completely , add the dals & peanuts. Fry till they turn golden brown. Then add the pinched red chillies & slitted green chillies, curry leaves and a pinch of hing.
lemon rice tile1
  • Saute well , add the lemon juice , switch off the flame immediately & transfer to a bowl. Add 2 tsp of water in the kadai, give a swirl and add to the lemon juice mixture..
  • Add this mixture & gingely oil to the rice , mix well. Check for salt. Garnish with coriander leaves..Initially it tastes more tangy..But all the taste blends well when its rested for 30 mins to 1 hour before serving.
lemon rice tile2

NOTE
  • The water quantity may differ based on the quality of rice..If u use basmati rice, use 1:2 cups of water..
  • u can add also add the lemon juice directly in the rice instead of adding to the tadka..
  • Addition of peanuts is optional. I dint use here.  I dint add coriander leaves as it was out of stock. But addition of coriander leaves gives a nice taste..
  • Add gingely oil while mixing the rice.

POTTUKADALAI CHUTNEY / FRIED GRAM DAL CHUTNEY - SIDE DISH FOR LEMON RICE

dalia - chutney


INGREDIENTS
1 cup - 250ml
  • Dalia/fried gram – 1/4 cup
  • Grated coconut – 1 tbsp
  • Green chillies – 2 nos
  • Salt – As needed
  • Garlic cloves – 2-3 nos

METHOD
  • Grind all the above ingredients to a thick paste adding less water..Serve !
dalia chutney tile

lemon rice - plate

Continue Reading...


January 30, 2013

Idli Using Idli Rava | Idli, dosa batter with Idli rava

idli rava idli

In this post, lets see how to make soft idli and crispy dosa batter using idli rava in mixie with step by step pictures and video. I must thank my neigbour for introducing idli rava to me. I din't know that there is something called idli rava until she told me. She used to tell me to try idli, dosa using idli rava but I was hesitant because idli is our staple food. I dint want to take risk using idli rava. Then she gave me some to taste and after that I started making it in my kitchen. Now I am very much comfortable with this idli rava idli. Not only soft idli, we can make crispy dosas too. U could have tasted this type of idli in Karnataka hotels/ restaurant. But in this method, idli wont be crumbly or coarse like in hotel. 

First thing I liked in this method is very less soaking time , just 45 mins is sufficient. It takes the soaking time of urad dal. Total process (soaking + grinding) takes 1 hour. But it needs 8 - 15 hrs of fermentation time depending on the weather in your place. I grind the batter in the afternoon ( around 2 pm) & make idlies the next day morning (7 am).The batter will be fermented well.Second good thing is I grind the batter in mixie ( NO grinder cleaning). I have shared a Full video recipe on how to make these idlis. Please have a look.

People usually don’t grind this idli rava and they add it as it is(after soaking) to the ground urad dal batter. I too tried the same way initially but i felt the idli was very crumbly like rava idli and we dint like that taste. I wanted to bring the same taste as of our normal idli. So I grind the idli rava along with urad dal batter at the end till it becomes slightly coarse. Even then I felt the idli was slightly sticky while eating. I changed the ratio of dal & idli rava, I soaked it together and grind in mixie adding ice cold water. Now Iam getting the best idli out of it. I am very happy with the result. 

Earlier my husband used to scold me whenever I prepare idli with idli rava. Nowadays he couldn’t find any difference in the texture and he is eating silently. There is no much difference in the cost of idli rava & idly rice. Friends, try this idli for a change and you’ll start making it often like me.. Lets see how to make soft idli and crispy dosa using Idli Rava.
 Idli using Idli Rava - Video Recipe !

idli rava images

Idli using Idli Rava


Idli using Idli Rava How to make Idli using Idli rava easily at home. Not just soft idli, you can make crispy dosa too. 
Cuisine: Indian
Category: Breakfast recipes
Serves: -
Prep time: 15Min+8Hrs
Cook time: 10 Minutes
Total time: 8hrs25Min
INGREDIENTS
1 cup - 250ml
  • Idli rava – 2 cups
  • White round urad dal – 1/2 cup ( If you follow the video recipe, please use 1/3 cup)
  • Water – 1-1.25 cups ( Use Ice cold water)
  • Salt – As needed
METHOD
  • Wash and soak the Idli rava and urad dal together in a bowl for 45 minutes. Drain the soaked water completely before grinding. ( In the video I have mentioned to soak them & grind separately. Add 1/3 cup of urad dal in that case. This method needs less urad dal. )
  • Grind half of its amount in mixie adding 1/2 cup of ice cold water & the required salt for 3-5 minutes.After 2 mins , open the lid , wipe the sides & grind again. Add little more water if its necessary.
idli rava idli step1
  • Again grind the remaining mixture adding 1/2 cup of water. ( Note : Batter will be slightly coarse even if you grind for long time , no need to worry)  Mix both the batter using your hand. (Mixing by hand helps for fermentation). Keep the bowl closed & allow the batter to ferment for 8- 15 hrs based on the weather in your place.
idli rava idli step2
  • The next morning, batter would have raised well . Mix it well before making idlies. Pour the batter in idli plate , steam it for 6-8 mins & enjoy with ur favourite chutney !!
idli using idli rava step 3
Enjoy !

Note
  • The maximum amount of water it consumes while grinding is 1.25 –1.5 cups. Adjust as per your mixer. I used ice cold water to avoid the mixer getting heated. Plain water can also be used.
  • Fermentation is very important to get soft, non-sticky idlies.
  • People suggest idli rava & dal ratio as 3:1. But 4:1 is enough for soft idlies.
  • If you want,  you can add a tsp of soaked fenugreek seeds too to make it healthy.
  • U can also make crispy dosa using the same batter.

Enjoy this easy Idli recipe for your breakfast !
idli with idli rava

Here is a picture of Crispy dosa made using the same batter.

dosa using idli rava
Continue Reading...


January 18, 2013

IDLI MILAGAI PODI WITH GARLIC | IDLI PODI RECIPE WITH GARLIC


IDLI MILGAI PODI
This is my mom's idli milagai podi recipe with garlic. I love this idli podi. I like the one with sesame seeds as well. But my husband & my daughter likes idli podi with garlic. I learnt this recipe from my mom.When I was in school and college, I used to carry mostly idli or dosa with this podi for lunch . I love to eat this more than rice varieties. My doter is also the same like me Winking smile. I’ll soon post my favourite sesame seeds/ Ellu version with dal Smile. Please refer notes section for variations..

INGREDIENTS
1 cup - 250ml
  • White round urad dal – 1/2 cup
  • Chana dal – 1/4 cup
  • Red chillies – 15-20 nos
  • Hing/Asafetida – 1/4 tsp
  • Garlic cloves – 12 nos (Peel the skin & chop into small pieces)
  • Curry leaves - few
  • Salt – As needed
  • Cooking oil – 2 tsp

METHOD
  • Heat a kadai with 2 tsp of oil and roast the dals adding hing till u get a nice golden color & aroma.Add few curry leaves at the end and saute well.
  • Remove the dals in a plate. In the same kadai , roast the red chillies. in medium flame till it becomes crispy. Make sure you don’t burn them.
  • Once everything cools down, grind it to a coarse powder running twice. Then add the salt & peeled ,chopped garlic pieces.Grind it again to make a slightly coarse or fine powder as you like.
  • Store in an air-tight box and enjoy with idli/dosa ! It stays good for 2 weeks with nice garlic flavor.

Garlic flavoured idli podi is ready !! Add sesame oil while serving.
IDLI PODI PLATE

NOTE
  • Adjust the amount of red chillies based on ur taste.
  • Garlic pieces will be ground well even when u add at the end. If u want, u can add it along with dals & red chillies.
  • My mil makes the same podi adding hing alone. It also tastes good. Try for variation.Add more hing when u try this version.
  • Sometimes I add few curry leaves while frying the dals which gives a nice flavour.


Continue Reading...


March 8, 2012

PULI SADAM / TAMARIND RICE RECIPE / PULIYOGARE / PULIYODHARAI


tamarind rice

Puli sadam/Tamarind rice/Puliyodharai is loved by all. Its one of the best lunch box recipes.Ideal for travel. You can prepare this pulikachal ( Tamarind rice paste) in advance and store it for weeks in fridge. With papad or vadam as side dish, it tastes divine!!
                 I would say my MIL makes the best puliodharai which I’ve tasted so far. Its taste would be equivalent to temple puliogare (Kovil puliyodharai) but I would say its our home style version ;). We are a big fan of her tamarind rice recipe. Yesterday we made this for our trip to Tirupathi. It was very flavorful and tasty. Though there are many varieties of pulikachal recipes in this blogosphere, I wanted to share my version. I’ve tried to give the step by step pictures for beginners & bachelors.Thanks a to ton to my MIL for teaching me this wonderful keeper recipe.Please have a look at the “Points to remember “ section before proceeding.I have shared some useful tips on how to make perfect tamarind rice learning from my MIL :) Lets see how to make Pulikachal & Puli sadam/ Tamarind rice at home following these simple steps and video.


INGREDIENTS FOR PULIYOGARE PASTE


  • Tamarind – Lemon size
  • Turmeric powder – 1/2 tsp
  • Curry leaves – 2 sprigs
  • Hing / Asafetida – 1/4 tsp
  • Salt – As needed
  • Powdered Jaggery – 1 tsp
  • Water – 3 cups
To temper:
  • Cooking oil – 3 tbsp
  • Mustard seeds – 1/2 tsp
  • Urad dal –1 tsp
  • Channa dal – 2 tbsp
  • Red chillies – 10 nos (pinched..refer the picture)
  • Hing – 2 pinches.
  • Curry leaves –  1 sprig
To roast and grind:
  • Methi seeds – 1/2 tsp 
  • Chana dal – 1 tbsp
  • Red chilly – 1 no
ingredients

METHOD


  • Soak tamarind in 2 cups of hot water for 20 mins . Extract the tamarind juice using 2 cups of water. Set aside. Pinch red chillies and keep it ready for tempering. In the video, I have used 5 red chillies for roasting and 5 for tempering. 
tampinched chillies
  • Add the turmeric powder , salt , curry leaves and hing as given above. (everything should be raw)
hing & cury
  • In a kadai , heat oil and roast the methi seeds till it crackles. Keep aside.
roasted methi
  • In the same kadai , roast channa dal and red chilly till golden brown.
roasted channa
  • Now powder the roasted methi seeds ,channa dal and red chilly to a coarse powder. Set aside. (just run the mixie twice or thrice quickly)
  • Heat the kadai with 2 tbsp of cooking oil or gingely oil and temper all the items in the same order.
tempering
  • Then add the tamarind extract and allow it to boil for 10-15 mins or till the mixture reduces to half. It depends on the flame you keep.
boil
  • After it reduced to half add the powdered jaggery , ground powder and allow it to boil..
IMG_4069
  • As soon as u add the powder , gravy starts to thicken and bubbles arise with a gala gala sound. Please watch the video below if you are interested. I hope most of you know this sound. This is for beginners & bachelors..My MIL says this is the important step to know the final stage of tamarind paste getting ready. So I thought of inserting a video here..
  • We call it salangai satham in tamil..Boil it for few seconds and switch off the flame..(Make sure the gravy is in semi solid consistency.Don’t allow it to boil much after adding the powder because the gravy would thicken and there would not be enough paste to mix in rice.. )
IMG_4070
  • Allow it to cool down. Store in air tight container.

HOME MADE PULIKACHAL / PULIYOGARE PASTE IS READY..For the above measurements u can make 2-3 cups of tamarind rice for 5 people.

  PULI SADHAM COLLAGE


HOW TO MAKE TAMARIND RICE

INGREDIENTS

  • Cooked rice – 2 cups
  • Tamarind paste – As needed
  • Sesame oil – 3 tbsp ( use as needed)

METHOD
  • Pressure cook the rice in the ratio of 1:2 if u use basmati rice, We always use steamed rice or raw rice. So I add 2.5-3 cups of water. Add a tsp of oil in the rice before cooking to get the rice separate and fluffy.
  • Take the cooked plain rice in a wide plate or bowl and add sesame oil.Allow it to cool a little.
  • Add the puliogare paste little by little and mix well using a fork like ladle. Check for taste.Add more salt & oil if needed.
  • Enjoy with papad !!


  • POINTS TO REMEMBER


    1. Raw curry leaves, hing and roasted methi seeds gives the flavor to puli sadham .So do not compromise in adding those ingredients. Please don’t forget to add raw curry leaves and hing in the tamarind extract as well as while tempering.That’s the important step.
    2. My MIL sometimes reserve a tsp of the roasted powder and adds at the end on the plain rice before mixing the paste.She says this gives an additional flavour. But this step is purely optional.
    3. Always make the paste minimum one day in advance because it takes time to get all the taste blends into it.
    4. The shelf life of the paste is 1 week without refrigeration. U can keep it for two weeks provided you reheat it every 3 days by adding little water. If refrigerated it stays good for a month too..
    5. The taste of tamarind paste increases day by day.
    6. U can try adding coriander seeds while roasting the channa dal and red chilly. It gives an additional flavour.But some people may not like this.
    7. Also add the roasted peanuts in the end before switching off the flame if u wish to use it. We don’t like peanuts in tamarind rice,so i’ve not added it..
    8. After mixing the paste and rice check for salt , add more if necessary.Add more sesame oil if it looks dry.
    9. If u feel its too spicy for u , add more sesame oil and little salt to reduce the spiciness. Here i’ve given measurements for mild spiciness.That would be enough..
    10. If u love to have more spicy rice , then add 2 more red chillies while roasting and powder it along with methi seeds and channa dal. .
    11. Also to reduce the tanginess in tamarind paste, just pinch and roast more red chillies and add it to the paste , mix well and add it to the rice after some time.
    12. Please prepare the tamarind rice at least one hour before serving. We should give some setting time for the rice to absorb all the taste in the paste.
    13. When you make it for lunch box or travel , use ladle to mix the rice and paste . Please don’t use your hands to mix it. Rice will spoil quickly.
    14. Vadagam or vathal would be the best accompaniment for puli sadham. My mom makes a thogayal with fried gram dal /pottukadalai. I’ll post it soon. It goes well for tamarind & lemon rice.


Continue Reading...


March 26, 2009

CHUTNEYS FOR TRAVEL | COCONUT URAD DAL CHUTNEY, ONION CHUTNEY RECIPE

Chutney for travel
I have shared Coconut urad dal chutney & onion urad dal chutney recipes in this post. They are ideal for travel. This chutney stays good for 2 days and its an excellent side dish for idli dosa.I learnt both the chutneys from my mom.


Chutneys for travel


Chutneys for travel Chutney for travel - Coconut-urad dal chutney/ Ulutham paruppu chutney that stays good for one day without refrigeration.
Cuisine: Indian
Category: Chutney
Serves: Serves 4
Prep time: 10 Minutes
Cook time: 10 Minutes
Total time: 20 Minutes


INGREDIENTS
1 cup - 250ml

  • Grated coconut –1 cup
  • Urad dal – 2 tbsp
  • Red chillies – 5-7 nos
  • Tamarind - Small gooseberry size
  • Salt & water – as needed
  • Asafetida / hing – 1/4 tsp
  • Sesame oil – 1 tbsp
  • Cooking oil – 1 tbsp
METHOD

    • Grate one-half of medium sized coconut and keep aside.Soak tamarind in little water..
    • Heat a kadai with cooking oil and add the red chillies , urad dal and fry till urad dal turns golden brown.
    • Now add the hing/asafetida and switch off the flame.
    • Transfer it to a plate and let it cool.
    • Now run the roasted mixture with salt & tamarind in a mixie once and add the grated coconut and run once .
    • Now add the water and grind it to a smooth paste.Travel chutney

      • Heat the kadai with 1 tbsp of sesame oil and add the chutney to it. Saute it well. The water in the chutney gets absorbed and becomes thick .
      • Now transfer it to a bowl with spoon and pack it in a separate box for travel.
      It tastes great with idli!!.
Serve with idli,dosa adding a tsp of gingely oil.Tastes yummy !

coconut urad dal chutney

ONION – URAD DAL CHUTNEY

Chutneys for travel


Chutneys for travel Chutneys for travel with onion & urad dal - Stays good for 2 days without refrigeration.
Cuisine: Indian
Category: Chutneys
Serves: Serves 4
Prep time: 5 Minutes
Cook time: 10 Minutes
Total time: 15 Minutes


INGREDIENTS

  • Big onion – 1  ( chopped )
  • Small onion – 5-10 nos (peeled n chopped)
  • Tamarind – small berry size
  • Urad dal – 1 tbsp
  • Red chilli – 4 nos (adjust to ur taste)
  • Salt & water – as needed.
  • Cooking and gingely oil – 1 tbsp each
METHOD

  • Heat a kadai with 1 tbsp of cooking oil and roast the urad dal and red chilli till light golden brown.Set aside.
  • In the same kadai with the remaining oil , saute the chopped big and small onions together till transparent.
  • Grind all the above with tamarind,reqd salt and water to a smooth paste.
  • Now heat the kadai and add the sesame/gingely oil .No need to temper.Its optional.
  • Once it is hot add the chutney to it and saute well till it becomes thick in a medium flame. There should be no moisture in chutney. 
  • Now pack it separately in a banana leaf/plastic container/zip lock bags with a spoon for travel.
Tastes excellent with dosa/idli!!

Note

  • Both the chutneys are ideal for travel.They stay good for 2 days without refrigeration but you should saute well in oil after grinding to remove the moisture in it else it will be spoiled.
  • Pack in an air tight box.Use a clean spoon always.Do not use your hands at any cost.

 ONION CHUTNEY FOR TRAVEL

Pack these chutneys for idli,dosa and enjoy ur travel food !!
coconut chutney for travel
Continue Reading...