Search Chitra's Food Book

March 1, 2010

Kashmiri Pulav - Kashmiri Pulao Recipe With Fruits And Nuts

I tried this Kashmiri pulao recipe with fruits and nuts from Mrs.Mallika badrinath’s “Rice delights” cook book. I wanted to try this pulao after tasting in a restaurant . I wont say this one tasted exactly as I had in restaurant. But it was good and tasted unique with a mild sweet taste. We all liked it.
kashmiri pulao
A note to weight watchers :  Though this pulao is healthy with all fruits,veggies and nuts , its highly calorific!!! U can try this by avoiding paneer , butter & fresh cream. Replace fresh cream with condensed milk. This would be suitable for kids and slim people like me ;)).


Ingredients : ( 1 cup = 250ml)
  • Basmati rice – 1 cup
  • Water – 2 cups
  • Cooked Carrot – 2 nos (diced)
  • Cooked Peas – 1/4 cup
  • Pine apple  , Apple – 1 cup (diced )
  • Capsicum –1 no (diced )
  • Paneer cubes – a few
  • Saffron threads – a few (soak in 1 tbsp of warm milk )
  • Big onions – 2 nos (sliced )
  • Fresh cream – 2 tbsp
  • Butter – 1.5 tbsp
  • Sugar – 2 tsp ( if u want u can reduce the sugar by half)
  • Salt – as required
  • Rose water – 2 tsp
  • Cumin seeds – 1/4 tsp
  • Cloves & cardamom powder – 1/4 tsp (to get 1/4 tsp grind 3 cardamom seeds & 4 cloves together to make a powder )
  • Bay leaf – 1 no
  • Cashews, Almond and pista – 1 handful.
  • Dry grapes – 1 fistful
Method :
  • Cook the diced carrot and peas in a cooker and set aside.Take care they dont get over cooked.
  • Wash and soak  the rice in 2 cups of water for 30 mins.(if u want u can fry the rice in ghee before soaking ). Pressure cook the rice by adding a tsp of ghee and salt. Rice should be separate and grainy.
  • In a wide mouthed kadai , fry the onions till brown & crisp.Keep it aside.
  • Also deep fry the paneer cubes and keep it in hot water .
  • In a broad kadai take a tbsp of oil and add the bay leaf and cumin seeds.
  • Then add capsicum pieces and saute till it becomes soft.
  • Add the cooked peas , carrot , boiled rice , fresh cream , dry fruits , nuts ,sugar , saffron milk and required salt .
  • Toss it well..Before  switching off the flame add the rose water , fruit pieces , paneer cubes , cardamom & clove powder and butter.
  • Mix well and switch off the flame.
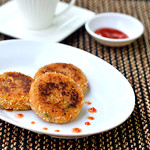
Serve hot with raita or any kurma of your choice.

Continue Reading...


February 19, 2010

Vegetable Cutlet Recipe - How To Make Veg Cutlet - Indian Snacks Recipes

Vegetable cutlet recipe

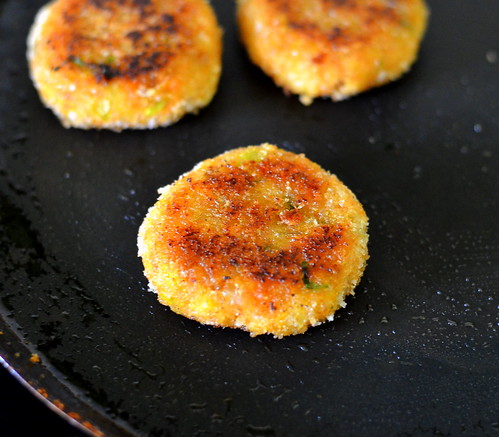
Vegetable cutlet, Veg Cutlet recipe with step by step photos - Today I made an easy to make and yummy mixed vegetable cutlet recipe for our tea time snack. I love veg cutlets in bakery and chat shops. I took this recipe from Mrs.Mallika Badrinath’s cookbook and modified slightly as per the ones I tasted. Cutlet can be made with many variations as per your wish. If you like to make Kerala style Vegetable Cutlet recipe, add some cooked beetroot, use coconut oil for sautéing the vegetables and eggs for dipping the cutlet. Basically cutlet looks and tastes the best only when it is deep fried. But being a calorie conscious girl, I always shallow fry them using little oil in a dosa pan and had 3-4 of them heartily. Ok, lets see how to make this yummy vegetable cutlet recipe for tea time snack.

Do check out my Paneer Cutlet using Mother's Recipe Instant Poha Mix if u are interested !

how to make veg cutlet

Vegetable cutlet recipe


Vegetable cutlet recipe Vegetable cutlet recipe for tea time snack
Cuisine: Indian
Category: Snack
Serves: 8-10 nos
Prep time: 10 Minutes
Cook time: 20 Minutes
Total time: 30 Minutes


INGREDIENTS
To pressure cook
  • Potato - 2 nos ( Medium sized)
  • Carrot - 1 no (medium)
  • Green peas - 1/4 cup
  • Water - as needed
To saute
  • Cooking oil - 1 tbsp
  • Cumin seeds/Jeera - 1/2 tsp
  • Big onion - 1 no ( finely chopped)
  • G&G paste - 1 tsp
  • Red chilli powder - 3/4 - 1 tsp
  • Turmeric powder - 1/8 tsp
  • Garam masala powder - 1 tsp
  • All purpose flour/Maida - 2-3 tbsp
  • Tomato ketchup - 1 tsp
  • Salt - as needed
  • Coriander leaves - to garnish
To coat the cutlet
  • Corn flour - 2 tbsp
  • Water - 3-4 tbsp
  • Bread crumbs - 1/2 cup
  • Cooking oil - as needed to fry the cutlets
METHOD

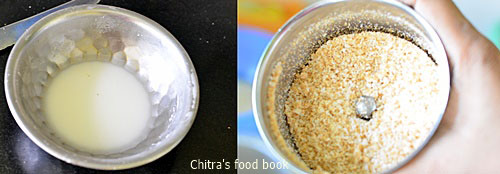
  • Wash and pressure cook the potato,carrot and green peas together in the required water.After the steam is released,peel the skin of potato and mash it well.Grate the whole cooked carrot and mash the peas.Mix all the vegetables and set aside.Grind the bread to a fine powder and keep the bread crumbs ready in a plate.
How to make veg cutlet step by step

  • Chop the onions and coriander leaves finely. Heat oil and splutter cumin seeds. Add finely chopped big onions and saute till it turns transparent. Now add the g&g paste and saute till its raw smell vanish.Now add the salt, turmeric powder, red chilli powder, tomato ketchup and garam masala powder. Mix well for a minute.
  • Lastly add the mashed vegetables and mix well. Add maida and make a dough like whole mass. There should not be any moisture in the cutlet dough. Switch off the flame. Garnish with coriander leaves. Cutlet dough is ready.( Add little more maida or bread crumbs if you feel the dough is watery and too sticky)
How to make veg cutlet step by step
  • Take a ball sized dough and pat it thick to make the cutlet shape. Arrange all the cutlets in a plate. Mix the corn flour,water and make a smooth paste. Make sure the paste is not too thin or thick. Keep the bread crumbs ready in a plate.
How to make veg cutlet step by step
  • Now take a cutlet and dip in the corn flour batter. Dip in the bread crumbs. Repeat this again if you want super crispy exterior for the cutlet. Arrange them in a plate. Heat a dosa pan or a tawa. Drizzle few tsp of oil and drop 2-3 cutlets. Cook in medium flame by flipping them once or twice in the middle carefully using a dosa flipper. Cook till both the sides turn golden brown. Cook all the corners by holding in a tong. Remove in a plate and enjoy with tomato ketchup ! It tastes crispy outside and soft inside.
How to make veg cutlet step by step


Note
  • You can make these cutlets using potato alone.
  • For variations and to make this cutlet more healthy add grated beetroot too.
  • Adjust the quantity of spice powders as per your taste buds.
  • If you are making cutlets for kids, deep fry them to enjoy the best taste.
  • You can also replace garam masala powder with chat masala powder.
Here is the old picture of cutlets :)
Vegetable cutlet recipe

Easy, yummy cutlets are ready to enjoy with tea/coffee !
How to make veg cutlet


Continue Reading...


February 4, 2010

VEG MOMOS RECIPE WITH GARLIC CHUTNEY/DIP

Veg momos
(Pics updated)

I had this Veg momos with garlic chutney in my friend’s house. She prepared both steamed & deep fried Momos. Both were tasting excellent. We liked it very much.Generally Momos are prepared only with Maida/All purpose flour.I have posted two versions , one with maida & another one with maida & wheat flour in 2 :1 ratio.But the color of wheat ones don't look good ;). After tasting these momos , my MIL started making it with  wheat flour.She said it tastes good when eaten hot..More than the color , its healthy , she said :) I prepared a dip /chutney as an accompaniment. It was  a nice combination.As i prepared idli along with momos , we had this chutney for both idly & momos. I’ve given the recipe for momo sauce/dip at the end of this post. As I prepared the dough & filling in very less quantity , i made less number of deep fried momos..

I wanted to update the pictures of momo as it the most popular post in my blog :) ..Before updating the old pictures , I wanted to see the shape of momos served here in restaurants. Last week my hubby took me to a chinese restaurant and there I tasted momos in different shapes.They looked very cute and small in size.. I wanted to try those shapes and I finally got the idea after watching an you tube video of veenas kitchen where she had posted the recipe from the chef’s hands. He had very well explained the different shapes..Thanks a lot to veena’s kitchen and the chef . I have tried to give the step by step pictures for different shapes. Hope I can make it perfect in future ..Last but not the least , momos has to be served really hot to enjoy its original flavour & taste.

Check out my another version of momos chutney HERE

MOMO STUFFING

Ingredients
 1 cup = 200ml
  • Maida – 1 cup
  • Cooking oil - 1 tsp ( to make dough) +1 tsp ( to add in water while steaming)
  • Salt & water – as required.
For stuffing :
  • Carrot – 2 nos (Finely chopped )
  • Cabbage – 1 cup ( finely shredded / chopped )
  • Big onion – 2 nos (-d0-)
  • Garlic – 5-8 flakes (-do-)
  • White Pepper powder - 1 tsp (adjust)
  • Soya sauce – 1/2 tsp
  • Ajinomoto – 2 pinches (optional)
  • Salt – As required
  • Oil – 2 tbsp
Method
  • Mix Maida with salt,water and a tsp of oil to make a soft pliable dough.Keep it covered for 30 minutes.
momo tile2
  • Chop all the vegetables very finely..Take a wide mouthed kadai with 2tbsp of oil and add the onions & garlic pieces.Saute for sometime.Then add vegetables.
  • Saute well in high flame, keep tossing for 3 minutes.Add salt , soya sauce ,White pepper powder and Ajinomoto (optional ).Toss it well and switch off the flame.
Momo tile
  • Now take the dough and make very small sized balls ( 20 gms weight) of even size.
  • Roll it to make a thin small poori of 4-5 inches. Then take a tsp of stuffing and keep it in the center of the poori.
momo tile3
  • I made three different shapes of momos .. Here they are
Momo tile6
momo tile7
momo tile8  -
Please refer here for the last shape..
  • Arrange the momos in a greased plate. When the water in the idli pot starts to roll boil, keep the plate inside. Steam in an idli pot for 7-8 mins. Add a tsp of oil in idli pot water while steaming !!
  • You can also deep fry the momo in oil till it tunrs golden !
Serve hot with tomato sauce or Garlic chutney Smile

momo fried

GARLIC CHUTNEY/MOMO SAUCE/DIP
  • Garlic flakes – 10 nos
  • Red chilly – 4  nos ( adjust)
  • Tomato - 1 no
  • Vinegar – 1 tsp (adjust based on the no of red chillies used)
  • Salt & water – as required.
Method:
  • Grind all the ingredients given above with little water.(Since the quantity is very less, i used little water to grind)
momo sauce

Transfer to a serving bowl and Enjoy with Momos / Idly / Dosa.

Here is a picture of momo with wheat & maida combination …Here i used 3/4 cup of maida & 1/4 cup of wheat flour..
MOMO WITH WHEAT & MAIDA


Technorati Tags: ,,,,,,,,
Continue Reading...


January 29, 2010

SCHEZWAN NOODLES

I tried this one after watching a cookery show.I prepared this for my hubby’s lunch box.It was very tasty.
Schezwan noodles 1

Ingredients :
  • VEGETABLES (CARROT , CAPSICUM , POTATO AND BEANS) – Cut  into thin strips of 1 inch length.
  • Plain white noodles – 1/2 packet or 1 cup ( if its a big one)( adjust the amount of noodles based on the quantity of veggies)
  • Big onion -  1 no (chop into thin strips of 1 inch length)
  • Ajinomotto – 1/2 tsp
  • Soya sauce – 1 tsp
  • Tomato sauce – 1 tsp
  • Salt – as needed.
For Schezwan sauce :
  • Red chillies – 4 nos
  • Garlic – 4 flakes
  • Ginger – 1 inch piece (Replace ginger & garlic with G&G paste of 1 tsp)
  • Tomato sauce – 1tsp
  • Chilli sauce – 1 tsp
  • Vinegar – 2 tsp ( Add according to ur taste buds )
Spring onions /coriander leaves – to garnish
Method :
  • Refer here for “ Basic noodles preparation “.Keep the prepared noodles aside.
  • For sauce , grind all the items given under “ sauce ingredients “ to make a smooth paste by adding vinegar.Set apart.
  • In a wide mouthed kadai , add the onions and fry for a minute.Then add the veggies.Fry till they become soft.
  • Cover cook for sometime.Add 2-3  tsp of schezwan sauce and fry till its raw smell goes off.
  • Then add the plain noodles , tomato sauce , soya sauce , Ajinomotto & required salt .
  • Toss it well.Garnish & serve hot !!

Schezwan noodles

Continue Reading...


January 18, 2010

Adhirasam Recipe With tips and tricks - How To Make Adhirasam

adhirasam- picture
Adhirasam recipe with step by step pictures and tips, tricks for troubleshooting if Adhirasam breaks or becomes hard or crispy. Adirasam (Ariselu in Telugu) is a deep fried Indian sweet made with rice flour and jaggery. 

My MIL is an expert in making Adhirasam.In my apartment , all my neighbours used to call her for guidance during Diwali. I learnt this recipe from her and posting for you all. For making soft adhirasam rice flour, jaggery syrup consistency is very important. My MIL always uses home made rice flour for making this sweet. Recently I found a recipe with store bought rice flour. I will try and post it soon. Do refer the”Notes”section for tips and tricks! 

I am happily sharing this post to celebrate my blog anniversary. I thank you all for your encouragement and support ! 

adhirasam recipe

Adhirasam recipe


Adhirasam recipe How to adhirasam sweet recipe with step by step pictures
Cuisine: Indian
Category: Sweet
Serves: 10
Prep time: 20 Minutes
Cook time: 20 Minutes
Total time: 40 Minutes


INGREDIENTS

  • Raw rice - 1 cup or Homemade rice flour – 2 cups
  • Grated jaggery - 3/4 cup
  • Water - 1/3 cup
  • Cardamom powder - 1/4 tsp
  • Black/white sesame seeds - 1/2 tsp
  • Dry ginger powder - 1/4 tsp ( optional)
  • Cooking oil - to deep fry
HOW TO MAKE ADHIRASAM - METHOD

  • For homemade rice flour,wash and soak the raw rice for 2 hours. Spread in a paper and let it dry for 10 minutes. Grind the rice little coarsely (It should look fine in texture but when you touch it, it should be slightly coarse. By making this way,adhirasam will get a good texture like in shops) in batches. Sieve and set aside.Rice flour is ready.
  • For syrup, powder the jaggery and add little water just to cover it (Beginners add 1:2 ratio of water and jaggery). Keep it on the flame and melt it. Drain the impurities using a metal strainer. Keep the syrup on the medium flame. Let it boil for sometime.
adhirasam tile1
  • Take little water in a plate and pour a drop of syrup. The syrup should not dissolve. U’ll be able to gather the syrup and make a soft ball out of the syrup. This is called rollover (uruttu padham in tamil ) consistency. Add the cardamom powder. Switch off the flame .
jaggery syrup tile3
  • Take the rice flour in a wide mouthed bowl.Add sesame seeds(if using). Make a dent in the center and set aside. Pour the syrup into the rice flour. Add little by little and mix the flour to make a smooth dough, soft, pliable and goey. It will harden as time proceeds. Some syrup may remain unused. All the syrup may not be necessary. If you add more syrup, adhirasam breaks in oil. So be careful while adding the syrup. Dough should be slightly semi solid in consistency. Do not make it hard. Adhirasam will become chewy.
adhirasam tile2
  • Transfer the dough to an air tight container after it cools down. Let it ferment for one or two days. Do not refrigerate the dough. Keep in room temperature. The next day or third day take the dough and make small lemon sized balls.Take a thick polythene sheet /Banana leaf and grease with oil/ghee. Pat it with your fingers to make a small poori. Thickness should be like poori. Some people make a hole in the middle just like medu vada. It helps for uniform cooking. But My MIL doesn't do it. So I too follow her. 
adhirasam tile3
adhirasam tile4
  • In the mean time heat oil in a kadai to deep fry. Put a pinch of dough and check it rises to the top immediately. Drop one adhirasam. As soon as you put the adhirasam in hot oil, it will bulge and becomes golden brown in the bottom. You should flip it over immediately. Let the other side cook for 1 or 2 seconds till the bubbles cease and then take it out by draining the excess oil. Its cooking is similar to deep frying poori. If you fry for long time, adhirasam will become crispy and break like murukku.  
  •  Keep the flame in medium high /Medium for even cooking. Do not deep fry more than one at a time.After taking out from the oil keep the adhirasam in between two round shaped ladles and press it well on all the sides. The excess oil gets drained out. Keep in a tissue paper. Remove once it becomes warm and stack it one over the other. This helps to keep the adhirasam soft the next day. 
adhirasam tile5
  • Stack the adhirasams and store in an air tight container.


Note
  • Always use processed rice flour to make adhirasam. /store bought flour makes the adhirasam hard & chewy. The processed flour should be slightly wet. Should not be dry.
    • To make processed rice flour, soak raw rice in water for 2 hrs. Drain the water & spread the rice in a paper or cloth for 5 minutes.Now grind the rice to make a slightly coarse powder. Sieve & repeat the same process & use this rice flour to make adhirasam.
    • Based on the texture of rice flour, it absorbs jaggery syrup. The more fine, the less it takes.
    • To get the texture of adhirasam like we get in shops, make the rice flour slightly coarse. i.e It should look like a fine powder but when you touch it will be very slightly coarse.
  • The consistency of syrup is very important. It should be a loose, soft ball. It wont dissolve in water at the same time it should not be tight as a hard ball. U will able to gather the syrup and when you take the syrup in your fingers, it will slide. The total time to reach the consistency will be within 5-7 minutes in high flame.
  • The color of adhirasam depends upon the color of jaggery you use. Some jaggery may be light yellow in color. So its better if you buy Paagu vellam which would be in golden yellow to get a nice color .
  • The quantity of syrup may vary based on the quality of rice flour. So add carefully. If you add excess syrup, adhirasam will break or disperse in oil. If you add less syrup, it may turn hard n chewy. 
  • If adhirasam breaks in oil, either the quantity of jaggery is more or the dough is too slimy. In that case, add little wheat flour, mix it well and try again OR if you have reserved homemade rice flour,  you can add very little to it. Adding more makes the adhirasam hard. 
  • Adhirasam dough can be preserved for 10 days. No need to even refrigerate if you make it perfect.
  • If you feel you’ve added excess syrup to the dough and if its too sticky, you can add little Maida or wheat flour to bring non sticky consistency. Maximum 1 tbsp can be added and not more than that.
  • Suppose if the dough is very hard, you can sprinkle little milk and if necessary add little jaggery syrup to make a soft pliable dough .
  • If the adhirasam becomes crispy or hard, you can steam in idli plate for few minutes to soften it. 
  • If you wish to serve it hot, keep the adhirasam in an idli plate and steam for few seconds to make it soft and hot. Please do not fry again.
  • Last but not the least, don’t deep fry the adhirasams for longer time because it may become a murukku ;)
          Once again I thank all my blogger friends & readers for taking my blog all this way. I need all your encouragement and support for all my future endeavours :) . I thank you all with this virtual treat of adhirasam. 

adhirasam recipe


Continue Reading...


December 18, 2009

A SHORT BREAK !!

Hello friends ,

I am going to my native place tomorrow for 15 days..Will catch u all in 2010.

Wish u all a very happy & prosperous new year Smile..I’ll surely comment on all ur yummy preparations whenever i get a chance to browse..

Thanku friends , Take care..ByeWave

new-year-3

Continue Reading...


December 15, 2009

BITTERGOURD PODI - KAKARAKAYA PODI KURA

I always prepare pitlai with bitter gourd. For a change i wanted to try some varieties like bittergourd podi ,curry etc. At last I got the recipe for podi from a blog. Sorry friends ,i dont remember the blog name exactly.The dish was named as “Malathi chandur’s kakarakaya podi “..I did some changes according to our taste buds and tried. My hubby who hates Bittergourd likes to have this podi with plain rice.It doesn’t taste much bitter .Thanks to Mrs .Malathi chandur, a cookery expert & writer of many telugu novels for this yummy recipe.
Bitter gourd powder !!
Here comes the recipe :

Ingredients :
  • Bitter gourd – 1 no
  • Tamarind –a gooseberry size
  • Red chilly – 5-7 nos
  • Coriander seeds – 1 tsp
  • Urad dal – 1 tbsp
  • Chana dal – 1 tbsp
  • Grated Coconut – 1 tsp
  • Big onion – 1 no ( small sized, finely chopped )
  • Asafetida /Hing – a pinch.
  • Salt – As needed
  • Cooking oil – 2 tbsp
Method :
  • Chop the bitter gourd into very small pieces ( chop as small as possible ).
  • Add the required salt and mix well.Keep aside  for 30 mins and squeeze the water that comes out from the bitter gourd.(this helps to remove its bitterness. ). For people who like its bitter taste can keep it for just 10 mins and proceed further.
  • Take the tamarind and pinch into very small pieces.In a kadai, dry roast the tamarind pieces till it becomes dry.  Remove in a plate.
  • Heat 1/2 tbsp oil in the same kadai and saute the chopped onion till transparent. Add grated coconut, mix well and switch off the flame. Grind to a dry coarse powder adding roasted tamarind without adding water. Remove in a plate. 
  • In the same kadai ( no need to add oil), roast urad dal , channa dal , coriander seeds along with red chillies and hing. Cool and powder it fine or coarsely. Keep it seperately. 
  • Add 1.5 tbsp of oil in the kadai and saute the finely chopped bitter gourd pieces till it gets cooked.
  • Once its cooked add the coarse ground powder and the coconut mixture to it. Mix well and check for salt.
Yummy podi is ready to be mixed with plain rice topped by sesame oil.
Bittergourd podi
Note :
Here i have coarse ground everything.If u wish u can grind it to a fine powder.


Continue Reading...


December 9, 2009

Kanchipuram Idli Recipe - Kancheepuram Kovil Idli Recipe

Kanchipuram idli
Kanchipuram Idli is one of the most popular South Indian Idli recipe that is originated from Tamilnadu - Kanchipuram Varadaraja Perumal temple's madapalli. This idli is served as temple prasadam. Its a world famous idli. Recently I tried this Iyengar style idli recipe from " The Hindu" food safari section. 3 different recipes were given there from the temple and hotels of Kancheepuram. Every time I used to follow my cook book recipe for making Kancheepuram Idli which I have mentioned below as recipe 2. This time I tried Kanjeevaram Varadaraja perumal temple recipe ( Koil idli). It came out really well. 
We loved its taste.

The specialty of this idli lies in steaming it using “Mandharai leaves” . But I used banana leaves here. I steamed the idli in a big tumbler lined with banana leaf. Normally the cooking time of idli takes 2 hours as they make in kudalai ( a hollow bamboo rod). So Its also known as kudalai idli and Kovil idli. But I used pressure cooker to steam idli. Also the consistency of batter should be slightly coarse and thick to get the above texture in the picture. 

Remember one thing, you should eat it hot. Otherwise idli will become slightly hard when warm. If  you grind it too smooth, it will resemble our usual idli but it comes out very soft even after it cools down. This idli tastes the best with coconut chutney and idli podi. I’ve had this with sambar too. But I feel coconut chutney is the best side dish. My husband loves this idli a lot. With the pleasant aroma of steamed banana leaves, it tastes delicious & very soft .

Try it and let me know how it tasted. Lets see how to prepare Kanchipuram idli using two different recipes.
kancheepuarm idli copy

Kanchipuram Idli Recipe


Kanchipuram Idli Recipe How to make Kanchipuram idli - 2 recipes shared here
Cuisine: Indian
Category: Breakfast
Serves:4
Prep time: 16H(with fermentation)
Cook time: 20 Min
Total time: 16H20Min


INGREDIENTS
1 cup - 250ml
Recipe 1 – Temple version
  • Raw rice / Pacharisi – 2 cups
  • Urad dal – 1 cup
  • Methi seeds – 1/2 tsp
  • Ghee – 1/4 cup
  • Cumin seeds – 2 tsp
  • Pepper corns – 1.5 tsp
  • Dry ginger powder – 1/2 tsp
  • Curry leaves - few
  • Asafetida/Hing – 1/2 tsp
  • Salt & water – As needed
Recipe 2 – Cookbook version
  • Par Boiled rice / idli rice – 1/2 cup
  • Raw rice – 1/2 cup
  • Urad dal – 1/2 cup
  • Pepper corns – 1/2 tsp
  • Jeera – 1/2 tsp
  • Ghee – 2 tbsp
  • Sesame / Gingely oil – 2 tbsp
  • Hing / Asafetida – 1/2 tsp
  • Curry leaves – a few
  • Dry ginger / Sukku – 1/2 inch piece (crushed) (optional ) (you can use powder too)
  • Salt – as required.
HOW TO MAKE KANCHIPURAM IDLI - METHOD

RECIPE – 1 (TEMPLE VERSION FROM THE HINDU)
  • Soak rice , dal and methi seeds together for 4-5 hours. Grind them to a slightly coarse paste adding salt & required water. The batter should be thick.
  • Allow it to ferment for 12 hrs or overnight. The next day morning add jeera, pepper corns, ghee, hing and curry leaves. Mix well.
    kanchi idli tile1
  • Grease a tumbler with oil and line it with banana leaf . Pour the batter, fill it. Add water till half of the pressure cooker base and keep the tumbler inside it. Close it with a lid.
    Kanchi idli tile2

  • Steam it for 30 minutes to 1 hour. check it with the back of a spoon. If it comes out clean, idli is done..
    kanchi idli tile3

    Enjoy hot idli with coconut chutney !!

    RECIPE – 2 ( from cookbook)
  • Soak the dal and rice together for 2-3 hours. Wash , drain the water and grind .
  • Please don't add more water to grind.The batter should be thick and little coarse.
  • After grinding the batter add salt , hing and mix well. Allow the batter to ferment overnight. The next day morning add crushed pepper , jeera , dry ginger powder , curry leaves , Ghee and sesame oil to the batter and mix well.
  • If u feel the batter is too thick, add a ladleful of water to it. Do not  disturb the batter for 30 mins- 1 hour. After 1 hour , place the banana leaf on the idly plate and pour the batter.      
  •         BEFORE STEAMING
  • Steam it for 15 to 30 mins.Once its done ,prick the idly with the backside of spoon and see whether the idlI is non sticky . At this stage the idli is cooked well.      
  •         AFTER STEAMING
  • Remove and serve hot with coconut chutney !


Note
  • As per the original recipe, the batter should be ground till coarse(rava consistency). But most of the time I grind the batter smooth. U 'll get a really soft idli !! My family likes that way. 
kancheepuram idly 1
Continue Reading...


November 25, 2009

CHAYOTE CHUTNEY/CHOW CHOW THOGAYAL-THOGAYAL RECIPES

I tried this chow chow thogayal recipe from a cookbook. A very tasty thogayal that goes well with plain rice topped with sesame oil.
chow chow thogayal


Ingredients 
  • Chayote / Chow chow – 1 no( medium size)
  • Tamarind – Small gooseberry size
  • Red chilly – 3-4 nos
  • Urad dal – 1 tsp
  • Chana dal – 1 tsp
  • Hing / Asafetida – 1 pinch.
  • Oil – 1 tbsp
  • Salt & water – As needed.
Method :
  • Heat a kadai with a tbsp of oil and add red chilli, urad dal, chana dal and hing.
  • Roast till the dals turn golden brown. Set aside.
  • Peel off the skin of chayote and chop finely. Saute and cook till soft.
  • Let it cool down and then grind everything with tamarind, salt and water.
  • Serve with plain rice & sesame oil.
 chow chow thogayal 1


Continue Reading...