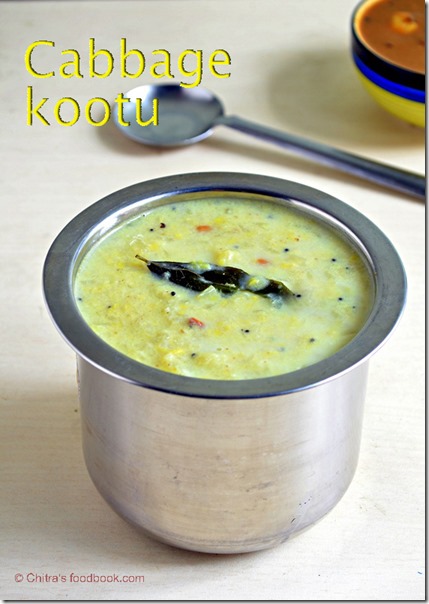
Search Chitra's Food Book

June 21, 2013

CABBAGE KOOTU | MUTTAIKOSE KOOTU RECIPE


cabbage kootu recipe
Cabbage Kootu
Cabbage kootu ( muttaikose kootu in Tamil) is one of the best side dish for puli kulambu Vathakuzhambu kara kuzambu.My mom makes either this kootu or chow chow kootu most of the time. I have used finely chopped ginger pieces to supress the cabbage smell. Addition of coconut oil gives a nice flavour to this kootu.Even people who hate cabbage loves this kootu recipe.  My mil also makes the same way but the only difference is mom adds milk before serving.For variations and to bring a hotel taste, you can use soaked chana dal ( kadalai paruppu) and finely chopped tomato along with dal.Try this simple kootu recipe.U’ll love it for sure.
Do check out my easy cabbage stir fry recipe – Bachelor’s recipe if interested !

cabbage kootu

INGREDIENTS
1 cup - 200ml
  • Grated cabbage – 2 cups
  • Moong dal – 2.5 tbsp
  • Finely chopped ginger – 1/2 inch piece ( optional)
  • Turmeric powder – 1/4 tsp (optional)
  • Salt & water – As needed
To grind
  • Grated coconut – 3-4 tbsp
  • Green chilli – 2 nos
  • Small onion – 2 nos
  • Jeera – 1/4 tsp
  • Rice flour – 1 tsp
To temper
  • Coconut oil – 1 tbsp
  • Mustard seeds – 1/2 tsp
  • Urad dal – 1/2 tsp
  • Curry leaves – few
Milk – 3 tbsp ( adjust)
METHOD
  • In a cooker base take the grated cabbage , moong dal , ginger bits, salt and water.Pressure cook for 2 whistles. Remove the lid and mash well.Set aside.
  • Grind all the ingredients given under ”to grind” to make a paste.First grind coconut & green chillies coarsely. Then add the jeera , rice flour and small onions. Run the mixie twice or thrice to make a paste.Set aside.
cabbage kootu tile2
  • Add the ground paste to the cooked cabbage and boil for few minutes. Temper all the above said ingredients using coconut oil and mix well.Switch off the flame.
cabbage kootu tile1
  • Remove & let it cool down. Add milk when the kootu becomes warm. Mix well and serve with rice & kulambu..

Continue Reading...


June 12, 2013

PULI KULAMBU | TIRUNELVELI GARLIC PULI KULAMBU

puli - kulambu copy

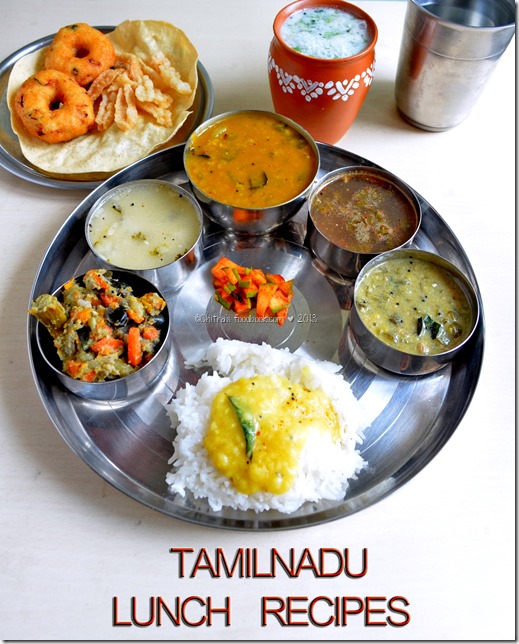
Hello friends , sorry for disappearing these days from blogging. My sis & mom were with me So I was bit busy..We had a good time together. Time went on by chatting ,roaming n shopping. We enjoyed our mom’s Tirunelveli recipes after a long time. I learnt all my mom’s special recipes and clicked them. So next few recipes will be from my mom’s hand. Coming to this post,

This is my mom’s Tiruneliveli style puli kulambu recipe she learnt from her mom ( my aachi). This kulambu is made with freshly ground masala. So it smells great. U can also use vegetables like brinjal, drumstick, dried mango (manga vathal) and small onions. I used garlic here. We love to have it with kootu and papad as accompaniment. Its a very nice combo. For curd rice, we mix dal/paruppuand this kulambu and have it as a side dish. It tastes yummy. We also make sunda curry with this left over kuzhambu by mixing it with keerai kadayal. It’s one of the best side dishes for curd rice. This kulambu stays good for a week when refrigerated. This version is very different from our usual kara kuzhambu and vathakulambu. Try this Nellai puli kulambu recipe, you’ll love for its fresh masala flavour.


Tirunelveli puli kulambu

INGREDIENTS
  • Tamarind – A big gooseberry size
  • Salt and water - as needed
To roast and grind
  • Cooking oil – 1 tsp
  • Dhania/coriander seeds – 1/2 tsp
  • Urad dal – 1/2 tsp
  • Chana dal – 1/2 tsp
  • Red chilli – 6 nos ( add 4 if you want less spicy taste)
  • Pepper corns – 1/2 tsp
  • Jeera – 1/4 tsp
Small onions – 3 nos
Curry leaves – few (5 nos)

To temper & saute
  • Cooking oil - 2 tsp
  • Mustard seeds – 1/2 tsp
  • Methi seeds – 1/2 tsp
  • Urad dal – 1 tsp
  • Garlic – 20 cloves
  • Curry leaves – few

HOW TO MAKE PULI KULAMBU - METHOD
  • Soak tamarind in warm water and take the extract using 1.5 cups of water. Set aside. Peel the garlic cloves and crush it slightly using the bottom of tumbler or rolling pin ( crushing the garlic slightly helps in getting a nice flavour of garlic while u saute).. Keep it aside.  Roast all the above said ingredients using a tsp of oil ..
puli kulambu tile3
puli kulambu tile1
  • Grind to make a smooth paste. Then add small onions and curry leaves and grind them again to make a very nice paste. Make sure the paste is very smooth , add water accordingly..
puli kulambu tile2
  • In a kadai , heat a tbsp of oil and temper mustard , urad dal , methi seeds. Let it splutter. Now add the crushed garlic and saute till you get a nice smell.
puli kulambu tile4
  • Finally add 1.5 cups of tamarind extract , turmeric powder , salt and the ground masala paste. Let it boil very well for 10mins. It thickens. This kulambu will be slightly watery and not very thick like vatha kuzhambu. Boil for some more time to make it thick if you like. 
puli kulambu tile5
  • Switch off the flame & transfer to a vessel. Enjoy mixing with plain rice topped with gingely oil (optional) !
puli kulambu tile6

garlic puli kulambu recipe

Continue Reading...


June 6, 2013

KARISALANKANNI KEERAI THOGAYAL | THOGAYAL RECIPES


karisilankanni thogayal
Most of u would have heard about karisalankanni keerai. This keerai is easily available in Tamilnadu..It acts as a liver tonic and it is specially recommended in the treatment of Constipation, Eye defects, Jaundice, Enlargement of liver, Spleen disorders, Skin diseases, Hair fall and Premature graying of hair.Most of us would have used this herb for hair oil ( Bhringraj hair oil)
I got this recipe from my MIL.As we got bored of karisalankanni kootu / poriyal , we make either thogayal or stuffed chapathi and have it once in a month just because of its health benefits.. This thogayal tastes great when mixed with plain rice and ghee. I pack this for my husband’s lunch box usually. Don’t forget to check the end of post to know its names in other languages & amazing health benefits..

karisilankanni thogayal 1

INGREDIENTS
1 cup - 200ml
  • Karisalankanni /   - 1 cup
  • Red chilli –1  no
  • Pepper corns – 8-10 nos
  • Tamarind – Berry size
  • Garlic cloves – 3-4 nos
  • Salt & water – as needed

METHOD
  • Remove the karisalankanni leaves from the stem , wash & set aside.
  • In a kadai heat a tbsp of cooking oil and saute the leaves along with a red chilli..
  • Saute till the leaves shrink. Add salt for quick sautéing.Grind the sauteed keerai & red chilli along with tamarind and water to make a smooth paste.
karisilankanni thogayal tile
  • In a mortar & pestle (ding chick) take the pepper corns and garlic cloves . Crush it coarsely and then add to the mixie jar. Use inch/pulse button, press once or twice and mix well. Remove & mix with plain rice adding ghee..

Serve with plain rice topped with ghee !
karisilankanni thogayal plate

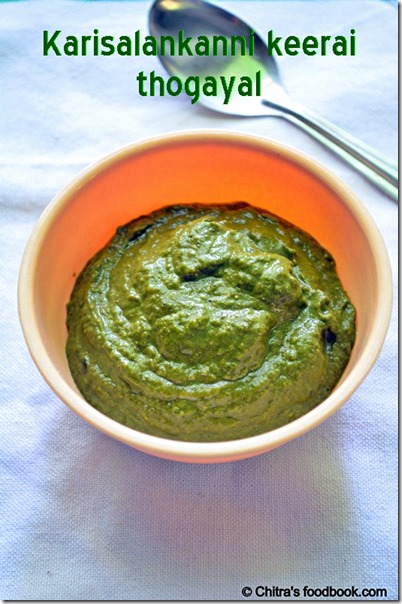
Karisalankanni (Eclipta prostrata) is the herb of choice in treating liver diseases. This herb grows in marshy areas throughout the year. It grows abundantly during the rainy season. There are two varieties of karisalankanni, one has yellow flowers and the other white. The yellow one is more potent.Here are the names in various languages…

The Botanical name : Eclipta alba
Tamil name : karisalankanni
Telungu : guntagalijaeru
Malayalam : kanjunni/kayyoni
Kanada : kadige garage
Sanskrit : bhringaraja/kesaranja
Arab : radium-el-blint
Hindi : bungrah/mochkand
Duk : bhangra
Other lang : kesatti/kesari
Medicinal properties
karisalankanni is also a specific remedy for jaundice. It has a great medicinal value in the treatment of hair. Karisalankanni is said to protect against night blindness and other eye diseases probably because of its high carotene content.
Uses1. It is good for teeth, skin and hair.
2. It induces appetite.
3. It aids digestion and helps expel fecal matter from the large intestines.
4. It heals ulcers.
5. It cleans the liver and encourages secretion of bile.
6. It cures inflamed liver also called fatty liver.
7. It expels intestinal worms, cures coughs and asthma, and tones the body.
8. The yellow variety is said to be particularly good for the skin and eyes.
source: http://a1tamilnadu.com/karisalankanni-false-daisy/
Continue Reading...


June 3, 2013

EASY KARA KUZHAMBU | KATHIRIKAI KARA KULAMBU - BACHELOR RECIPES

kara kuzhambu

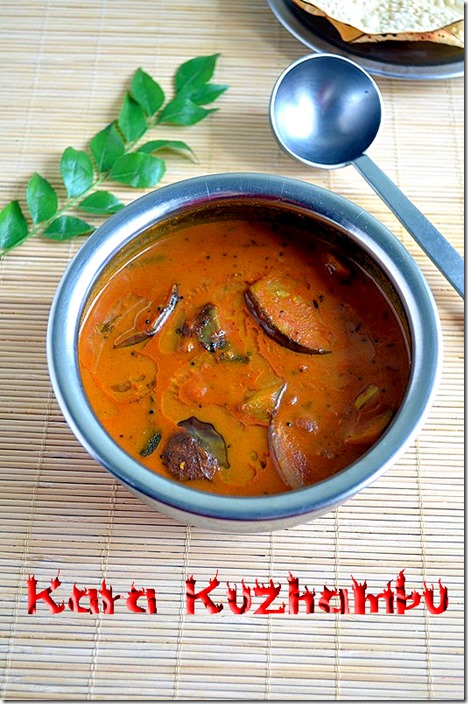
This is my father's Kathirikai kara kuzhambu recipe without coconut in Bachelors style. When I was young, my father was in Mumbai for two years. He stayed in a bachelor’s room. He learnt some simple recipes from his friends and started cooking. Whenever he comes for vacation, he used to cook for us. We(me and my sis) loved our appa’s cooking more than my mom’s as we got bored of her routine food.

But now after marriage, I crave for my mom’s recipes like anything. My appa makes rasam and kara kuzhambu very well. Both are very simple recipes but tastes great. So I thought of sharing Kara kuzhambu/Puli kuzhambu recipe today. It can be done very quickly during busy mornings. It has no grinding part. So I have mentioned this as Bachelor’s recipe. It tastes spicy and hot. I followed my father’s recipe as such.

Don’t feel exhausted by seeing the ingredients list. It looks big but this recipe takes hardly 20 minutes to prepare. I used brinjal / kathirikai and whole garlic flakes. Its a simple kathirikai kara kulambu recipe. U can also try adding drumstick OR dried berries (sundakkai, manathakkali vathal) for more flavour. 

I had this kuzhambu for 3 days by refrigerating it. The taste got improved day by day. This kuzhambu stays good for 3-5 days as it has no coconut. The addition of sambar powder, red chilli powder and coriander powder makes this gravy very thick. So adjust the consistency as per your liking by adding more water. Use gingely oil for nice flavour and also it helps to reduce the body heat developed by tamarind..

A tip from my father : My appa always tells me to taste the tamarind extract after adding masala powders (chilli powder , sambar powder , dhania powder ) & salt. If it tastes good, kuzhambu comes out really well. We can adjust the quantity of tamarind or chilli powder/sambar powder based on the taste. But every time I forget to do this. This time I reminded my father’s tip and followed it. May be that’s the reason , this kuzhambu tasted great.


kara - kulambu


INGREDIENTS
  • Tamarind – Big gooseberry size/ Medium lemon size (Based on the tanginess of tamarind you have)
  • Brinjal – 4 nos (medium sized)
  • Sambar powder – 1.5 tbsp ( any brand or home made)
  • Red chilli powder – 1/2 tsp
  • Coriander seeds / Dhania powder – 1 tsp
  • Turmeric powder – 1/4 tsp
  • Jaggery – 1 tsp
  • Salt and water – As needed
To temper & saute
  • Gingely oil / Nalla ennai – 4 tbsp
  • Mustard seeds – 1 tsp
  • Methi seeds – 1/2 tsp
  • Urad dal – 1 tsp
  • Jeera/cumin seeds – 1 tsp
  • Channa dal – 2 tsp
  • Hing – A big pinch
  • Red chillies – 2 nos (pinched)
  • Curry leaves – few (chopped)
  • Big onion/ small onion – 1 no / 10 nos (finely chopped)
  • Whole garlic cloves – 10 nos
  • Tomato – 2 nos (finely chopped)

HOW TO MAKE KARA KUZHAMBU - METHOD
  • Soak tamarind in warm water for 10 minutes & take the extract using 1.5 cups of water. Add all the spice powders given above and salt..Taste it and adjust as per your need. Cut brinjal lengthwise into 4 pieces and keep them immersed in water to avoid color change. Chop onions and peel garlic. Set aside.
Kara kuzhambu tile3
  • Now in a kadai , heat oil and temper all the ingredients given above in the same order..Make sure to add all the ingredients after the mustard seeds splutter ..Saute everything in medium flame.Then add onions , whole garlic cloves & curry leaves..Saute till it turns golden brown.
kara kuzhambu tile1
  • Add the brinjal pieces , saute for sometime & then add the tomato pieces.Saute till musy.Now add the tamarind extract which we kept ready .Add jaggery ,1/2 cup of water ,cover the kadai with a lid till brinjal gets cooked. Usually it takes 8-10 minutes. Keep the flame medium.
kara kuzhambu tile2
  • Then open the lid and check whether brinjal is completely cooked. Check for water. Add more water if necessary. Allow the gravy to boil for 10 minutes to get thicken. Switch off the flame and transfer to a serving bowl.Add a tbsp of gingely oil & raw curry leaves. Cover it with a lid..
kara luzhambu tile4
  • Serve it after 30 minutes.Mix with plain rice ..Enjoy with papad & any kootu as accompaniment..

kathirikai kara kuzhambu

NOTE :This Gravy/ kuzhambu should be boiled well for minimum 10 minutes in medium flame to get a good taste. Otherwise you’ll get the raw smell of powders.. Kuzhambu will thicken by itself as time passes. So add little more water , reheat and serve. Using gingely oil is a must. If you dont have gingely oil , use any cooking oil. But gingely oil gives the actual taste.

Continue Reading...


May 30, 2013

Aloo Stuffed Paratha Recipe - Stuffed Potato Paratha Recipe - Urulaikilangu paratha

Aloo paratha

I must thank my friend Megha for teaching me this yummy Punjabi style aloo paratha recipe. It was excellent and we loved it a lot. I don’t make stuffed paratha very often in my kitchen. So I have posted very less paratha recipes. Yesterday I tried this aloo paratha at home for our dinner. We had it with plain curd & pickle. My hubby loved it and praised me a lot. 

Usually most of us make alu ka paratha in a simple way by adding red chilli powder, dhania and garam masala powder. Even I too used to do this way. But this recipe is completely different which attracted me & made me try it. It has very less spices yet flavourful. I used ghee while cooking the paratha as my friend suggested. Parathas were very soft with a nice flavour of ghee. I dint add ghee for last 3 parathas for myself due to weight concern and I used oil ;). But still the parathas were soft n tasty. Adding ghee gives a nice taste and helps the paratha stay soft for long time. So I have planned to prepare this for my husband’s lunch box too. I have rolled it thin as my husband loves thin parathas. 

Please adjust the thickness as you wish . I served it with pickle and raita which is considered to be the best side dish for this aloo paratha. Do try this friends and let me know how you liked it.


Aloo paratha3

INGREDIENTS
1 cup - 250ml

  • Wheat flour – 2 cups ( I used Pillsburry atta)
  • Water – 3/4 cup ( adjust)
  • Salt – as needed
  • Cooking oil – 2 tsp
For stuffing
  • Boiled & mashed aloo/ potato – 4 nos  (medium sized)
  • Dhania / coriander seeds – 1.5 tsp
  • Ginger & Garlic paste – 1.5 tsp
  • Big onion – 1 no ( Very finely chopped)
  • Green chillies –2  nos  (-do-)
  • Coriander leaves – 1/4 cup (finely chopped)
  • Mint leaves – 1/4 cup (-do-)
  • Turmeric powder – 1/4 tsp
  • Salt – As needed
  • Cooking oil – 1 tbsp
Ghee – for greasing


HOW TO MAKE ALOO PARATHA - METHOD

  • Pressure cook aloo/ potato, remove the skin , mash it very well. Set aside.
  • Mix the atta/ wheat flour, salt and oil well.Then add water little by little and make a tight, non-sticky yet soft dough. Do not make it too soft as we make for phulka / roti. Mix the flour adding salt & water and make a tight dough. Finally apply oil and knead it well. Leave it covered for 30 minutes. In the mean time, start making the stuffing.After 30 minutes knead the dough well , dough turns little soft . Make lemon sized balls. Keep it ready & cover it.
  • In a kadai , heat oil. Crush dhania seeds coarsely & add to oil. Saute for a second.
aloo paratha tile1
  • Now add the G&G paste. Mix well. Then add the finely chopped onions , green chillies, coriander & mint leaves. Add the required salt & mix well till u get a nice aroma. Lastly add the boiled & mashed potatoes, turmeric powder. Mix well and make the stuffing. Check for taste. If the mixture is too dry , sprinkle little water for togetherness. But adding water is completely optional. Mix well and let it cool down completely. Make lemon sized ball out of stuffing.. Dough & stuffing should be of equal size..
aloo paratha tile2
aloo paratha tile3
  • Now take a lemon sized ball of dough & roll it to 3 inch diameter circle. Keep the stuffing ball. Pull all the corners of the dough & cover the stuffing. Pat it to make a circle & dust them well..
aloo paratha tile4
aloo paratha tile5
  • Make a ball , flatten it with your palm , dust it in the flour and roll the paratha gently to 8 inch diameter circle. Make it thick or thin as per your wish. Heat a dosa tawa & cook the paratha both the sides adding few drops of ghee. Cook till golden brown spots appear.
aloo paratha tile6
  • Remove & serve immediately.. Enjoy eating hot with curd & pickle !

NOTE
  • Most of us face the problem of stuffing oozes out while rolling the paratha. To avoid this we should mash the aloo very well without any lumps. If you wish, you can grind them in mixie & make a smooth paste. Second thing is we should chop the onions , chillies & leaves very finely so that when we saute they get mixed with aloo very well and the stuffing will be a whole mass. Make sure the stuffing is cold completely. 
  • Also the size of dough & aloo ball should be more or less equal. This helps in even spreading of stuffing all over the paratha. Dough should not be too loose or too tight. Stuffing should not be watery.
  • Beginners can practice by keeping more dough & less stuffing in the beginning. By practice u can improve.. Dusting can be done as many times as u want. But use oil  or ghee while cooking the paratha. Otherwise paratha will become hard & dry..Remember to serve n eat parathas hot.
  • For variations , you can try adding ajwain/omam.

aloo paratha4 copy
Technorati Tags: ,,,,,,,,,,
Continue Reading...


May 29, 2013

NSTANT RAW MANGO PICKLE | MANGO RECIPES – PICKLES RECIPES


mango pickle -1
This is my mom’s recipe. I like this pickle more than the instant version.. My mom calls this as “Vathakina manga oorgai” means “Sauteed mango pickle” .This tastes in between a thokku & oorgai.. It can be done very quickly and it tastes great for curd rice ...Do try this pickle & let me know ur feedback Smile..
Do visit my MIL’s version of Mango thokku, Neer mangai ,Ripe mango gravy , Raw mango kuzhambu if interested ..

curd rice pickle

INGREDIENTS
1 cup - 200ml
  • Raw mango – 1 cup ( Chop into small pieces)
  • Red chilli powder – 1 tsp (adjust)
  • Hing – A big pinch
  • Salt – As needed
To temper
  • Oil – 2 tbsp
  • Mustard seeds – 1/2 tsp
  • Urad dal – 1 tsp
METHOD
  • Chop the mango into small pieces..In a kadai , heat oil & temper mustard seeds . After it splutters completely , add the urad dal . Saute till dal turns golden brown.
Mango pickle tile1
  • Now add the mango pieces & saute in low flame by adding the required salt. Saute till it turns soft & shrinks a bit..Make sure u don’t burn them.
mango pickle tile2
  • Switch off the flame. Transfer to a bowl and add red chilli powder, hing & mix well.Leave it for 30 minutes and serve ..

NOTE: Red chilli powder should be added after switching off the flame. If u add while sauting , the mango pieces & chilli powder get burnt & taste may differ. Also saute the mangoes in low flame..Stir every now & then..Adding salt helps quick sauteing..


Continue Reading...


May 27, 2013

TAMILNADU LUNCH MENU 2 - SOUTH INDIAN LUNCH MENU IDEAS

Tamilnadu lunch menu

In my attempt in posting other state recipes, I have successfully tried & posted Andhra , kerala and punjabi , Kongu lunch recipes. It will be unfair if I don’t post my own state lunch recipes.. So here is a platter of Tamilnadu lunch recipes I made for my parents and bro. Everything came out really well & tasty. Like you all , we tamilians prepare varieties of recipes either for occasions or for guests. Serving in banana leaf is a must for us which is considered as a way of showing our respect and gratitude to our guests. But here I dint present them in banana leaf as I couldn’t get it . 

Very soon i’ll post another set of Tamilnadu lunch recipes served in banana leaf with authentic serving order.In the above plate u can see ( Left to right) Rice , Dal , Avial , Morkuzhambu , Mullangi Sambar , Rasam , Vendakkai mangai kathrikai pachadi , Instant mango pickle along with papad , Urad dal vada , Rice vadam, Spiced buttermilk ( Neer mor) & water. I have posted all the above recipes except dal and Pachadi. So I have shared them in this post. Sorry I couldn’t post step by step pictures as I was hurry in making recipes on time.

Do check out my Tamilnadu lunch recipes post which I made some years ago if  you are interested !

lunch - plates


DAL FOR RICE / PARUPPU

INGREDIENTS
1 cup - 200ml
  • Toor dal OR moong dal – 1/2 cup
  • Turmeric powder – 1/4 tsp
  • Water & salt – As needed
  • Cooking oil – Few drops
To temper
  • Mustard seeds – 1/2 tsp
  • Urad dal – 1 tsp
  • Hing – 1/4 tsp
  • Curry leaves - few
Ghee – to add while serving

METHOD
  • Pressure cook dal adding turmeric powder & required water and a drop of oil in low flame for 1-2 whistles.
  • Now open the cooker & mash the dal nicely with a ladle.Temper all the ingredients given under”to temper” and add to the dal. Mix well , add salt and serve with hot rice adding a tsp of ghee.. It tastes great with a papad , pachadi and potato poriyal.

VENDAKKAI MANGAI KATHRIKAI PACHADI / OKRA RAW MANGO BRINJAL PACHADI
This is my mom’s recipe.This pachadi will surely make its appearance in our home during mango season.It’s a sweet pachadi variety . So we add less salt..Our guests love this pachadi a lot..It tastes great with paruppu sadam /Dal rice. 
INGREDIENTS
1 cup - 200ml
  • Cooked toor dal – 1/4 cup
  • Ladies finger / okra - 10 nos
  • Brinjal – 5 nos (small)
  • Raw mango – 1 no (Small, cut into cubes)
  • Grated Jaggery - 1/8 – 1/4 cup
  • Hing – 1/4 tsp
  • Salt & water  - as needed
To grind
  • Grated coconut - 1/4 cup
  • Green chilli -  2-3 nos
  • Small onion - 4 nos
  • Jeera / cumin seeds - 1/4 tsp
To temper
  • Mustard seeds - 1/4 tsp
  • Urad dal - 1/2 tsp
  • Curry leaves - few

METHOD
  • Pressure cook toor dal, mash & set aside.
  • Cut okra into tiny pieces , peel the mango skin and cut into small slices . Cut brinjal into very small pieces and keep immersed in water to avoid discoloration.
  • Grind all the ingredients given under”to grind” and make a smooth paste.
  • In a kadai , heat oil and saute the okra pieces for few minutes.
  • Pressure cook mango , brinjal and okra pieces together adding required water & salt.
  • After the steam is released add the cooked & mashed toor dal , ground coconut paste and hing. Mix well and allow it to boil for few minutes. Finally add the grated jaggery. Give a boil and check for salt & sweetness. Add more jaggery if u want more sweet.
  • Finally temper all the ingredients given under “to temper” and add to the pachadi. Tastes best with dal rice and rasam rice.
Continue Reading...


May 24, 2013

MULLANGI SAMBAR | RADISH SAMBAR - SAMBAR RECIPE FOR LUNCH

This is my MIL's basic sambar recipe for rice. I make this sambar adding one of these vegetables like radish/ mullangi, drumstick,  ladies finger, brinjal , broad beans and cluster beans. I adjust the quantity of tamarind & chilli based on the vegetables you use. But the other ingredients are same. For radish , we should use little less tamarind than the usual quantity because radish has a tendency to absorb the tanginess of tamarind and it spoils the taste of sambar.
 
Usually I pressure cook radish with toor dal and make sambar. One of my aunties suggested me to saute radish in little oil because it helps to suppress the raw smell of radish and also adds a nice smell to sambar. So I started preparing that way. If you like the smell of radish  you don't have to saute it. Lets see how to prepare Mullangi sambar !

Mullangi sambar / Radish sambar recipe


Mullangi sambar / Radish sambar recipe

Mullangi sambar / Radish sambar recipe for rice


Cuisine: Tamil nadu
Category: Side dish
Serves: 4
Prep time: 10 Minutes
Cook time: 20 Minutes
Total time: 30 Minutes


INGREDIENTS
1 cup = 250ml
  • Tamarind – Big gooseberry size
  • Sambar powder – 1 tsp
  • Big onion or sambar onion – 1 no/ 10 nos
  • Tomato – 1 no (optional)
  • Green chilli – 3 nos
  • Red chilli – 2 nos
  • Hing / Asafetida – 2-3 generous pinches
  • Jaggery – a pinch
To pressure cook
  • Toor dal – 1/2 cup
  • Radish – 1 no (big - 250 gms)
  • Turmeric powder – 1/4 tsp
To temper
  • Cooking oil – 1 tbsp
  • Mustard seeds – 1 tsp
  • Methi seeds – 1/4 tsp
  • Curry leaves- few
  • Red chilli -1 no ( pinched into 2)
  • Coriander leaves – to garnish
  • Ghee – 2 tsp (for flavour)
HOW TO MAKE RADISH SAMBAR
  1. Wash and peel radish and cut into roundels. Saute in a tbsp of oil.
  2. Pressure cook toor dal adding radish. Mash dal and set aside.
  3. Heat oil in a kadai. Splutter mustard, methi seeds and red chilli.
  4. Saute onion, curry leaves and green chilli. Saute till transparent.
  5. Add tamarind extract, sambar powder, turmeric and salt.
  6. Boil for few minutes. Lastly add mashed dal along with radish.
  7. Adjust water and boil sambar for few minutes. Garnish with coriander leaves.
  8. Serve with plain rice adding ghee.
HOW TO MAKE MULLANGI SAMBAR - METHOD
  • Peel the skin of radish and cut into 1/2 inch round slices. Saute them in a tbsp of oil. Peel and roughly chop the onions, slit the green chilli , pinch the red chilli and set aside. Soak tamarind in water and take the extract.
  • Pressure cook the toor dal and sautéed radish adding turmeric powder and the required water. Cook for 1-2 whistle in low flame. Open the cooker and mash the dal well along with radish. Radish won’t dissolve.
Mullangi sambar
 
mullangi sambar
  • In a pan, heat oil and splutter mustard seeds & methi seeds. Methi seeds should not be burnt, take care..Then add the onions , curry leaves , green chilli , red chilli and saute well till onion turns transparent. If you are using tomato, chop and add it now. Saute till mushy.
  • Then add the tamarind extract , sambar powder , turmeric powder ,salt. Allow it to boil. When it starts to roll boil, add pinched raw curry leaves , 2-3 generous pinches of hing & jaggery. Let it boil for few minutes.
mullangi sambar
  • Now add the mashed dal with mullangi and some water if necessary. Check for salt and let it boil for 2-3 minutes. Finally add the coriander leaves, give a boil and switch off the flame. Transfer the sambar to a bowl and add 2 tsp of ghee. Cover it with a lid.
Mullangi sambar
 
Enjoy this yummy Radish sambar with rice adding few drops of ghee !
 
Continue Reading...


May 21, 2013

RAW ONION CHUTNEY RECIPE | CHUTNEY RECIPES


I love raw onion chutney / Pacha vengaya chutney. I have already posted my MIL’s and Mom’s onion chutney recipes . I got this recipe from Yummytummy.Thank u Aarthi for this yummy side dish :).Its a very simple & delicious chutney recipe that goes well with idli and dosa. As Sendhil is not fond of raw onion chutney , I usually make it only for me. I love onion chutney with uttapam a lot .. Its my favourite combo :)

INGREDIENTS

  • Big onion (or)  Small onion – 2 nos / 15 nos
  • Red chillies – 5 nos
  • Tamarind – A small berry size
  • Garlic – 5 cloves
  • Salt & water – as needed
To temper
  • Gingely oil – 1 tbsp
  • Mustard seeds – 1/2 tsp
  • Urad dal – 1/2 tsp
  • Curry leaves – few

METHOD

  • Grind onions , chillies , garlic , tamarind , salt & water to a smooth paste.
  • Temper all the ingredients given under “to temper” .. Serve with idli , dosa.

NOTE

  • Use small onions for best taste..Add more red chillies if u want more spicy..Adjust tamarind accordingly..U can also use cooking oil or olive oil to temper.

Continue Reading...