Search Chitra's Food Book

August 24, 2013

VELLA SEEDAI | SWEET SEEDAI RECIPE | VELLA CHEEDAI - GOKULASHTAMI RECIPES

Vella seedai
 
Vella Seedai / Sweet Seedai recipe with jaggery ( updated with video and step by step photo) is a must and should neivedyam recipe for Gokulashtami in Tamil nadu houses. I never knew about vella seedai till my marriage and now this has become my favourite. Every year I follow my MIL’s traditional and authentic recipe for vella cheedai and uppu cheedai using homemade rice flour. It comes out very well without bursting.

  Please refer the “Note” section for tips to avoid bursting. Usually we make the size of this sweet seedai bigger than uppu seedai. We also make 2 “Seepaankuzhal “ (small rod shaped) in each variety which is specially meant for baby Krishna. I give this to my daughter every year. Every year I make seedai with homemade processed rice flour . This year , for a change I tried with store bought rice flour which I use for making idiyappam. I followed same recipe for both and I didn't find any big difference in taste and color. Deep frying part is important to get a nice color and uniform browning. I have given in detail under “Method”. But cracks are unavoidable.

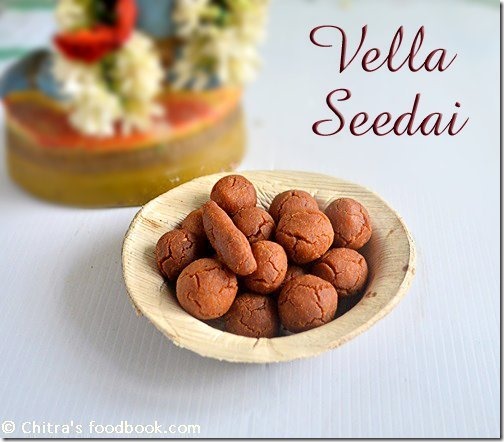
  First picture is with home made rice flour and the second one with store bought rice flour . I have made a full video on how to make vella cheedai just for beginners. Please watch it before you start doing. Hope you find it useful :)

Do check out my traditional uppu seedai recipe too !

If you want to make seedai using store bought rice flour, please check THIS POST !


Sweet seedai recipe with rice flour

Vella seedai recipe / Sweet seedai with jaggery


Vella seedai recipe / Sweet seedai with jaggery

Vella seedai recipe / Sweet seedai with jaggery for Gokulashtami / Krishna jayanthi festival


Cuisine: Indian
Category: Sweet
Serves: 30
Prep time: 10 Minutes
Cook time: 20 Minutes
Total time: 30 Minutes


INGREDIENTS
1 cup - 250ml
  • Processed rice flour OR Store bought rice flour – 1 cup
  • Roasted urad dal flour – 2 tsp
  • Soft butter at room temperature - 1/2 tbsp (optional)
  • Grated jaggery –1/2 cup
  • Grated coconut – 1 tbsp
  • Sesame seeds – 1 tsp
  • Salt – a pinch
  • Cardamom – 2
  • Water – just to cover jaggery ( around 3-4 tbsp)
HOW TO MAKE VELLA SEEDAI
  1. Dry roast the processed rice flour for few minutes. Cool down and add urad dal flour. Sieve twice to avoid bursting.
  2. Add cardamom powder, sesame seeds, powdered coconut and soft butter. Mix well.
  3. Boil and melt jaggery adding little water. Strain the syrup. Add to rice flour gradually.
  4. Make thick dough. Make small balls roughly. Dry in a cloth for 10 minutes.
  5. Heat oil to deep fry in batches. Drop 5 seedai and cook in low to medium flame till golden in color.
  6. Seedai turns crispy after it cools down. Store in a box and enjoy!


HOW TO MAKE VELLA SEEDAI – STEP BY STEP PICTURES
Click this LINK for processed rice flour
  • In a pan dry roast the flour till vapor comes out lightly. Do it in low to medium flame. Do not over roast the flour. Sieve and set aside.
  • In a bowl , take 1 cup of  roasted rice flour and 2 tsp of urad dal flour. Sieve them once or twice. (This step is very important to avoid bursting) . Grind the grated coconut finely to a coarse powder.
  • In a pan take the grated jaggery & add little water to cover it. Heat & melt it to make a thin syrup. No need to boil it. Remove & filter the syrup to discard the impurities.

vella seedai tile1

  • Strain & add this syrup to the flour , cardamom powder, sesame seeds & grated coconut, softened butter. Mix well to make a dough. Make sure the dough should be not be sticky. It should not have cracks. It should be thick. Add syrup accordingly. Sometimes syrup itself would be sufficient to make the dough OR you may have to add little extra water to make the dough.

vella seedai tile2


  • Make small balls out of the dough. Prick the balls with a needle or toothpick to avoid bursting. This is for additional safety. Allow the balls to dry in a cotton cloth or paper for 15-20 mins before frying.
  • Before deep frying check the heat of oil by dropping a pinch of dough. If it rises immediately, oil temperature is just right. Lower the flame to low & drop the seedai 4 to 5 at a time.
  • After you drop the seedai , do not disturb it for few seconds.( stand 2 feet away from the kadai for safety, luckily it didn’t burst for me so far). If you start to stir immediately, seedai may break and dissolve in oil. After few seconds, turn it once to prevent sticking. (For beginners, try to fry one or two seedai with little oil in a mini tadka kadai to check if it disperse or burst. Then you make in large batches.
  • vella seedai tile3
  • Always deep fry in low to medium flame to get a nice color. Keeping the flame high turns the seedai black & inside portion will not be cooked properly. U don’t have to wait till all the bubbles cease. Once the seedai turns golden brown, remove & drain in a tissue paper. Cracks are normal in vella seedai. Don’t worry.
  • Initially sweet seedai tends to be soft, but it hardens & becomes crispy when it cools down.
  • vella seedai tile4


Crunchy Sweet seedai is ready !
 
seedai raksha


NOTE
  • First important thing to avoid bursting is to “SIEVE” the flour once or twice. U should sieve all the flour ( urad dal flour , rice flour & gram flour if u use). Sieving the flour properly reduces 90% of bursting..
  • U must roast the flour slightly for few minutes in low flame if you are using homemade rice flour.
  • Secondly u should not roll the seedai very tightly. U should roll it to a loose ball using three fingers.No problem if its not a proper round. 
  • One more tip is to prick the seedai with a small needle or toothpick to avoid bursting. Dry the seedai in a paper or towel for 20 mins before frying..
  • Beginners can try deep frying few seedai in “small tempering kadai” . If it comes out well, proceed in a big kadai. Color variations may be there slightly. But you can check whether it bursts or disperses in oil.
  • If sweet seedai breaks or dissolves in oil, it means jaggery may be more or oil temperature is too high or too low.
  • If Seedai bubbles too much after you drop into oil, it shows the fat ( ghee or butter or oil) content is more. So add more rice flour to the dough & make again.
  • The color of seedai depends on the color of urad dal flour. If you roast the dal to golden brown, seedai will also turn brown.
  • Uniform heating is also important. In my observation, I feel low to medium flame is enough to get a nice color and crispy seedai.
Do check out my uppu seedai recipe too !
sweet-seedai-recipe copy

Continue Reading...


August 23, 2013

Instant Nei Appam Recipe - Sweet Appam Recipe Without Banana

Instant nei appam
 This is an instant version of Nei appam recipe (ghee appam). Traditionally nei appam is prepared using raw rice and jaggery. Usually I make sweet appam using wheat flour & banana in paniyaram pan. My MIL also makes an sweet paniyaram using raw rice which is our family favourite. But I wanted to try a quick sweet appam recipe without soaking rice and without banana. Yes this sweet appam is prepared without banana but still it comes out soft and spongy. 

This recipe uses rice flour, wheat flour, jaggery and rava/sooji. When I was going through my cook books, I got this recipe given by Mrs. Mallika badrinath. I tried the recipe as such but I was not happy with the result. It came out crispy  & tasty but it looked dry & a bit hard. So I just added little cooking soda & it made a great change to the recipe. It came out super soft n fluffy with crispy outer layer. I was very happy & thought of blogging it for gokulashtami and Karthigai deepam festival.

With superb flavor of ghee, it was awesome. If you are ghee conscious like me, use cooking oil or gingely oil for frying. It tasted good for both. I used paniyaram pan for shallow frying. U can also try deep frying it looks like chettinad vellai paniyaram with flower edges. U can see that picture in step by step pictures. Friends, do try this easy, instant nei appam recipe for krishna jayanthi & Karthigai deepam and let me know your feedback.

Do check out my traditional nei appam recipe with raw rice , sweet appam with banana & wheat flour.
Nei appam without banana

Instant nei appam


Easy nei appam Instant nei appam recipe using rice flour and rava for Gokulashtami and Karthigai deepam
Cuisine: Indian Category: Sweet Yields: 10
Prep Time: 5 Minutes Cook Time: 10 Minutes Total Time: 15 Minutes


INGREDIENTS
1 cup-250ml
For batter
  • Store bought rice flour – 1/3 cup
  • Fine Rava or Upma Rava/ sooji – 1/2 cup ( use fine rava for nice texture)
  • Wheat flour OR Maida – 1/3 cup
  • Grated jaggery – 3/4 cup
  • Grated coconut – 3 tbsp
  • Cardamom powder – 1/4 tsp
  • Cooking soda / Baking soda – 1/4 tsp
  • Salt – a pinch
  • Cooking oil or ghee – As needed
  • Water –As needed ( I used 1 cup water)
HOW TO MAKE INSTANT NEI APPAM

  • In a wide bowl , take all the ingredients mentioned above except cooking soda & mix well adding required water.The consistency of batter should be semi thick & pourable. (If the jaggery has impurities, you should boil and melt it adding 1:2 ratio of water and jaggery. Then strain it through a metal filter and add that water to the mixture.)
  • Add cooking soda 10 minutes before making appam. Mix well and let it sit. 
appam tile1
  • In a paniyaram pan , add 1 tsp of ghee in each hole & pour the batter. Cover cook for few minutes in low to medium flame. Flip it using a spoon or a small stick like thing. Cook again for few minutes till you get a nice golden brown color.
appam tile2
  • If u want to deep fry , heat a pan with little oil & pour the batter using a small ladle. Deep fry one by one to get a nice shape.Splash the oil over the appam while it cooks to get a nice flower shape with frills in the sides.
appam tile3
Remove & serve hot or cold.
Note
  • Consistency of batter is important. It should not be too thick or thin.
  • U can also use cooking oil instead of ghee. I used ghee for my daughter & oil for ourselves. But add it generously.
  • Always cook in medium flame else it will be burnt. I felt the color of appam turned darker for ghee than oil. 
  • This appam stays soft for long time. It tastes crispy when hot & soft when cold..
  • If you want to skip baking soda, you have to add 1 ripen mashed banana OR you should mix the batter in the morning and make appam in the evening so that batter gets fermented. 
  • If you want the appam to be crispy, cook in low flame for long time. You can also try skipping soda. But you should eat the appam really hot otherwise it will look dry. 

Continue Reading...


August 20, 2013

SWEET BEEDA RECIPE


beeda picture

I am a big fan of sweet beeda.My lunch in restaurants never completes without a beeda.In some hotels , beeda is not served in thali .So we used to roam(me & my father) around in search of beeda shops..Now after marriage,Sendhil buys beeda specially for me though he don’t like it much..Recently my MIL gave me a box of gulkand.Though there are many yummy gulkand recipes , beeda flashed in my mind ;)..But never thought i could make beeda at home until i saw this video. Thank u so much vidya lakshmi.From now on I can have yummy home made beedas happily Smile 
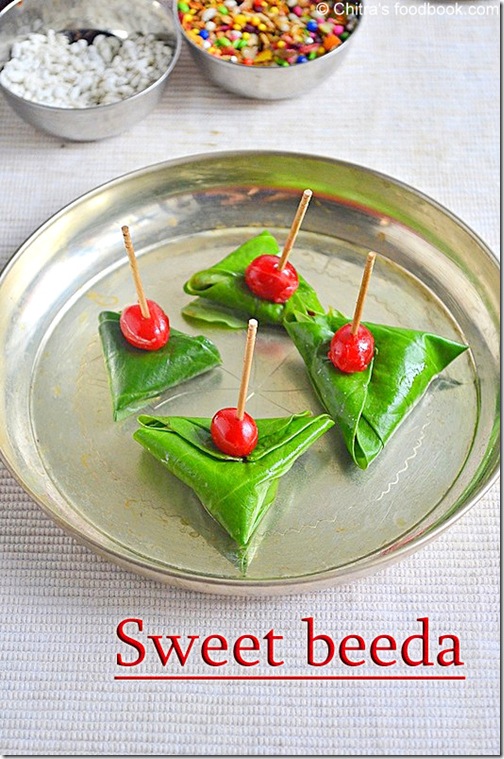
.This beeda is not only tasty,but also helps to digest food easily. Edible calcium paste is helpful for daily dose of calcium needs..So friends , if u have betel leaves in hand ,try this beeda recipe & let me know ur feedback. I hope step by step pictures gives u a clear idea.Surprise ur guests & elders at home with this beeda after a heavy lunch menu.For a simple beeda recipe , please refer “Notes” section..

beeda ingredients


INGREDIENTS
To make one beeda
  • Beetal leaves/ vettrilai /paan leaf – 1 no
  • Sunnaambu /Edible calcium paste – a trace
  • Supari / paakku – 1/4 tsp
  • Paan masala – 1/4 tsp (optional)
  • Sweetened dry ginger or amla – 1 small piece (optional)
  • Colored dessicated coconut strands – few
  • Gulkand – 1/2 tsp
  • Sweet saunf – 1/4 tsp
  • Cloves – 1 no (optional)
  • Cherries – few
  • Plum – 1 no
  • Tooth pick – 1 no

METHOD
  • Wash the beetle leaf , pat dry with a cloth. Fold the leaf & cut it half way through the stalk part(kaambu) ..
beeda tile1
beeda tile2
  • Apply less than a pinch of sunnambu/lime on the back side of leaf. pinch. Adding more burns the tongue , take care..
beeda tile3
  • Now roll one edge of the leaf to cone shape..Roll the other edge similarly & make a cone (pouch shape)to keep all the ingredients inside.
beeda tile4
  • First add the supari , then keep the dessicated coconut ,pan masala , sweet saunf , gulkand. At last keep a clove & cherries . U can also add a pinch of cardamom powder..Close it.
 beeda tile5
beeda tile6
  • Place a plum on top of beeda & insert a tooth pick OR use a clove to seal it..Serve &enjoy !!
beeda tile7

beeda closeup open - beeda


NOTE
  • To make a simple beeda recipe , wash the betel leaf & apply sunnambu on both the sides.Use supari , saunf , sugar , cardamom powder ,little honey and make beeda as mentioned above..Seal the beeda with a clove..

Finish ur lunch with a banana & homemade beeda ! It tastes delicious :)

beeda--plate final copy

Continue Reading...


August 19, 2013

KADAI PANEER – PANEER RECIPES

kadaipaneer
Kadai paneer was in my try list for long time. I never knew it’s so easy to make & a very tasty recipe. It tastes great with roti/phulka & mild rice varieties like jeera rice and veg pulav.. I had bookmarked sia’s recipe long time back. 

When I went through my bookmarked recipes, I got this link under restaurant style recipes. I made some changes for my convenience & to suit my family’s taste buds. Kadai paneer should be semi-dry in consistency like a stir fry. Crushed coriander seeds & kasuri methi are the star ingredients. 

Other than this, there can be many variations to this recipe. Some people use tomato puree & whole spices like cinnamon, cloves etc. I used chopped tomatoes, little tomato sauce & garam masala powder instead. It came out very well. My family loved its taste & flavour. Soft paneer & crunchy capsicum blended with masala gives a great taste to this recipe :) Do try & let me know how you liked it..

kadai paneer--plate


INGREDIENTS
For 2 persons
  • Cooking oil + ghee – 2 tsp + 1 tsp
  • Crushed dhania – 1 tsp
  • Jeera – 1/2 tsp
  • Red chilli – 1 no
  • Green chilli – 1 no
  • Big onion – 2 nos
  • Ginger garlic paste – 1 tsp
  • Tomato – 3 – 4 nos (based on size)
  • Turmeric powder – 1/4 tsp
  • Red chilli powder –  1 tsp
  • Garam masala powder – 1/2 tsp
  • Kasuri methi – 1.5 tsp
  • Tomato sauce – 2 tsp ( i used maggi rich tomato sauce)
  • Small Green capsicum – 1/2 no
  • Salt & water – as needed
To soak in  hot water till use
  • Paneer 1 cup ( 10 - 12 cubes)
Coriander leaves – 2 tbsp ( to garnish)

METHOD
    • Chop tomatoes, onions into very small pieces. Cube cut capsicum & set aside. Slit green chilli. Cut paneer into small cubes & soak them in hot water till use. It makes the paneer soft. No need to fry it.
kadai paneer tile1
  • In  a kadai, heat oil + ghee & add the coarsely crushed dhania seeds. Then add jeera , pinched red chilli. saute for a second.
  • Then add the onions, green chilli, Ginger garlic paste & saute till  raw smell emanates. Next add the tomatoes, turmeric powder, salt, red chilli powder & garam masala powder . Saute till tomato turns pulpy.. Add crushed kasuri methi & tomato sauce. Stir well.
kadai paneer tile2
kadai paneer tile3
  • Now add the capsicum pieces & mix well. Sprinkle little water to make it wet if the mixture is too dry. But make sure capsicum should be crunchy.
kadai paneer tile4
  • Lastly add the paneer pieces, mix well, add little water & simmer the flame completely . Allow it to cook for 5-7 minutes for all the flavour to get infused. Mix well, Switch off the flame, garnish with coriander leaves. It will be semi-dry to look. If you want it like a gravy, add little more water to make a paste, boil & serve..
kadai paneer tile5
Let it rest for 30 minutes before serving. 
Serve with roti/phulka !

Technorati Tags: ,,,,,,
Continue Reading...


August 14, 2013

SAMBAR SADAM | SAMBAR RICE RECIPE – LUNCH RECIPES

sambar--sadam bowl

I wanted to post one pot sambar sadam recipe ( Sambar rice in a pressure cooker) after tasting in hotels. Saravana bhavan sambar sadam is very popular in Tamil nadu. I usually make rice and sambar separately and mix them. Every week I used to watch Podhigai channel’s Asathal suvai if it is hosted by “ Mrs.Revathy shanmugam”. Last week she gave the recipe for sambar rice. I tried it the next day.It was a huge success at home.We loved its flavor and taste. I have not used any garam masala here. So It tastes like our Tamil nadu hotel style sambar sadam. It has a goey texture when hot and thickens after it cools down. It tasted great when hot as well as cold. Addition of ghee is a must here. It gives a nice aroma. :) I have updated this recipe with a full video. Please watch it below.

Do check out my Karnataka style Bisi bele bath recipe using homemade bisi bele bath powder.
Here is my Curd rice recipe.


sambar sadam bowl

Sambar sadam/ Sambar rice recipe


Sambar sadam/ Sambar rice recipe How to make sambar sadam - Tamil nadu style sambar rice in one pot
Cuisine:  South Indian
Category: Lunch Recipes
Serves: 4
Prep time: 10 Minutes
Cook time: 20 Minutes
Total time: 30 Minutes


INGREDIENTS
1 cup - 250ml
To pressure cook
  • Raw rice – 1 cup OR steamed rice - 1 cup
  • Toor dal – 1/2 cup
  • Water – 6 –7 cups
  • Carrot – 2 nos
  • Peas – 1/4 cup
  • Beans - 5 nos
  • Drumstick – 2 nos (chop into finger size)
  • Turmeric powder – 1/4 tsp
  • Hing /Asafetida – 1/4 tsp
  • Salt – As needed
To soak in water
  • Tamarind – Lemon size ball
To roast & grind
  • Cooking oil – 1 tsp
  • Red chillies – 8 nos ( use 6 if spicy chilli)
  • Chana dal – 2.5 tbsp
  • Dhania – 2 tbsp
  • Cumin seeds – 1 tsp
  • Methi seeds – 1/2 tsp
  • Grated coconut – 2 tsp (optional)
  • Hing – 2 pinches
To saute
  • Cooking oil + ghee – 1tbsp + 2 tsp
  • Small onion /sambar onion – 15 nos
  • Tomato – 3 nos
  • Sambar powder -1/2 tsp
  • Curry leaves – few
To temper
  • Oil + ghee – 2 tsp
  • Mustard seeds – 1 tsp
Coriander leaves – 2 tbsp (to garnish)
Ghee – 2 tbsp
HOW TO MAKE SAMBAR RICE - METHOD

  • Pressure cook drumstick separately. Remove the flesh & keep aside
  • Wash and pressure cook rice. Wash & pressure cook rice n dal along with chopped carrots ,beans , peas ,turmeric powder , salt & hing. Add 6 cups of water & Cook for 2-3 whistles till rice n dal turns mushy. Open the cooker & mash it well. Set aside.
sambar sadam tile1
  • In a pan , add a tsp of oil and roast all the ingredients given under “to roast & grind” . Powder them nicely and set aside.
    sambar sadam tile2
  • In the same pan, heat oil + ghee and saute the onions, chopped tomatoes & curry leaves. Saute till tomato turns mushy. Then add 1 cup of tamarind extract, sambar powder, turmeric powder , hing & salt if required. Let it boil for sometime till onion gets cooked. If you want , you can directly add the tamarind extract, sauteed onion, tomato mixture to the cooked rice and dal & proceed.
sambar sadam tile3
  • Now add this mixture to the cooked rice . Add the masala powder, drumstick flesh and mix well.Simmer the flame and allow it to boil well for 10 minutes . All the flavour gets into the rice.Stir once or twice in the middle. Add ghee to avoid rice sticking to the bottom of pan. Mix well. Lastly temper the mustard seeds & add. Garnish with coriander leaves..
    sambar sadam tile4
    Serve hot  drizzled with little ghee & papad !! !


Note
  • For variations , u can use steamed rice instead of raw rice. Add water according to the quality of rice.
  • I used byadge chillies in this recipe. It gave a nice color to the rice and less spicy too. If you use spicy chillies, use 5-6 as per your taste buds.
  • Adding coconut is purely optional. If you add it, add more chillies to compensate.
Delicious sambar sadam, creamy curd rice, crispy fryums and spicy pickle, mor milagai is ready to enjoy !
sambar sadam-plate
Continue Reading...


August 12, 2013

Rava Kichadi Recipe( Sooji Kichadi ) - South Indian Rava Kichadi

Rava kichadi recipe
Rava kichadi ( Sooji Kichadi in Hindi) is my husband’s favorite Indian breakfast recipe. Its one of the most popular South Indian breakfast recipes especially in Tamil nadu and Karnataka hotels. In Karnataka, people call this as “ Kharabath”. I am not a big fan of Rava recipes. To me, rava based dishes are an easy to make, tummy filling food to make in busy mornings. Ideal for Bachelors & working women. So I make it at least once in a week either in busy weekdays or during weekends when we plan for outing. Sometimes I make it directly in a pressure cooker too. 

Usually I make Rava upma or rava idli recipe but whenever I have fresh peas and vegetables in hand,I opt for this Rava kichadi or my masala rava kichadi recipe. To get the texture & taste of kichadi close to restaurant, we must add the required quantity of water, oil and ghee, otherwise it will be a flop. 

After so many trials & errors, I am hooked to this recipe. Coconut chutney is the simple and the best side dish for kichadi. If you make it for your guests along with idli, you can serve it with sambar as well. You could find so many variations for this recipe. Here is my version of how to make Rava kichadi at home.

Do check out my masala rava kichadi,  Rava Kesari,  Microwave Rava Kesari,  Milk Kesari,  Rava Dosa ,  Karnataka Kesaribath recipes if interested.


Rava kichadi

Rava Kichadi Recipe


Rava Kichadi Recipe How to make hotel style Rava kichadi at home - A popular South Indian breakfast recipe
Cuisine: South Indian
Category: Breakfast
Serves: 2
Prep time: 10 Minutes
Cook time: 20 Minutes
Total time: 30 Minutes
INGREDIENTS
1 cup = 250ml
  • Rava / Sooji / Semolina – 1 cup
  • Water –  3 to 3.5 cups
  • Salt – As needed
  • Turmeric powder – 1/4 tsp
To temper & saute
  • Cooking oil –  3 tbsp
  • Mustard seeds – 1 tsp
  • Urad dal – 2 tsp
  • Chana dal – 2 tsp
  • Big onion – 1 no
  • Tomato – 1 no
  • Ginger – 1 inch piece
  • Curry leaves – 1 sprig
  • Green chillies – 3 - 4 nos
  • Carrot – 1-2 nos
  • Green Peas – a handful ( cooked peas)
  • Coriander leaves – 1 tbsp
  • Ghee – 1 tbsp
METHOD

  • Chop the onion, carrot & tomato finely. Chop the green chillies finely.
  • In a kadai , heat the oil. Temper mustard seeds, urad & chana dal. Saute till golden brown. Now add the chopped onions, ginger, curry leaves, green chillies & saute till onion turns transparent.
  • Lastly add the tomato pieces & finely chopped vegetables. Saute everything till tomato mushes completely.
rava kichidi tile1
  • Now add the rava & roast for 3-4 mins in medium flame. In the mean time, boil 3 cups ( add 3.5 cups for more moist and soft kichadi) of water.When the water starts to roll boil, add it to the rava mixture. Take care, water splashes. Stand a feet away.
rava kichidi tile2
  • Add salt, ghee & turmeric powder. Stir well till all the water is absorbed by the rava. Mix well. Close the kadai with a lid & cook it for 6-8 mins. Stir it once in the middle.
rava kichidi tile3
  • Kichadi will be cooked completely & becomes non-sticky. Add finely chopped coriander leaves, mix well & switch off the flame.
    rava kichidi tile4
    Serve hot with sambar, chutney! Enjoy !

Note
  • Addition of above mentioned quantity of water , ghee & oil is a must to get the texture & taste. The more oil & ghee , the more tasty it would be. Here I have given the minimum quantity required . So you should add it.
  • You can also add vegetables like potato & beans. If you add beans , pressure cook the beans & then add to rava . Else it wont be cooked.
  • Adding tomato is a must. If you don’t have tomatoes in hand , add little lemon juice at the end.
  • You can also add the water after sauting vegetables, allow it to boil for sometime & then add the rava like we make for rava upma.

Enjoy this delicious Rava Kichadi with your favorite chutney & sambar !!
Continue Reading...


August 9, 2013

Instant Wheat Flour Appam - Sweet Appam With Wheat Flour

appam-sweet version

I wanted to post instant sweet appam with wheat flour (Godhumai maavu appam) in my blog for long time. I learnt this from my MIL. We make this wheat flour appam with jaggery for Gokulashtami and Ganesh Chaturthi. My MIL makes this for occasions / festivals and for guest as evening tiffin along with filter coffee. We can make this appam in two ways. It can be deep fried or shallow fried in paniyaram pan.

 Today, for Friday pooja, I made this appam using wheat flour and I made it in paniyaram pan. It was very soft , spongy and delicious.  My MIL makes a savoury version too. I’ll post it soon. Mostly my MIL makes this appam with maida and very rarely with wheat flour.  Enjoy this guilt-free appam as evening tiffin along with bonda/bajji and coffee !

INGREDIENTS
1 cup - 250ml
  • Wheat flour – 1 cup
  • Ripe banana – 1 no
  • Rice flour -  1.5 tbsp
  • Grated jaggery – 1/2 – 3/4 cup
  • Cooking soda – 1/8 tsp
  • Salt – A pinch
  • Elachi – 2 nos ( crush to powder)
Oil – to drizzle

HOW TO MAKE WHEAT FLOUR APPAM - METHOD

  • In a bowl , take the banana & mash well. Add the wheat flour, rice flour, salt, baking soda , jaggery & cardamom powder.
wheat flour appam
  • Add the required water to make a smooth paste. Use a whisk for mixing without lumps. The consistency of batter should fall like a ribbon.
wheat flour appam
  • Heat a paniyaram pan and add 1/2 tsp of oil in each hole. Pour a small ladleful of batter, cover & cook for sometime in medium flame.
  • Flip it after few seconds and again add 1/2 tsp oil. Cook for a minute & remove.
wheat flour appam
  • Serve hot !!
NOTE
  • For variations, you can use maida instead of wheat flour.
  • Sometimes my MIL adds sugar instead of jaggery.
  • For kids, you an deep fry & give. To get a proper shape while deep frying, keep little oil and pour the batter & fry on both sides till golden brown. U’ll get a nice shape.

aapam sweet

Continue Reading...