நீராகாரம், பழைய சாதம்
When I was thinking to post a traditional, healthy and easy coolant recipe for summer, pazhayathu aka pazhaya sadam with neeragarm recipe striked my mind. All you need is just a cup of leftover rice to make this healthy dish. I am a big fan of this recipe. My MIL makes it super tasty and flavourful adding curry leaves, small onions, more milagai, pickle and vathakuzhambu. This combination made me taste this.
Before marriage, my mom had tried several times to make me eat but I never touched it and scolded my mom like anything. But after knowing its health benefits & taste, now I feel very bad about my behaviour towards my mom.
My mom used to tell me when she was pregnant, she used to drink a big sombu full of neeragam for breakfast and told this is the best coolant to supress body heat compared to buttermilk and tender coconut. Yes, I do agree.
As soon as you drink this, you feel your tummy chilled and it keeps you cool the whole day. Usually farmers and ladies who work in fields used to have this for breakfast to keep them active and energetic to work under the sun. I heard neeragaram has vitamin b12 which is not found in fruits and vegetables.
So lets make use of this simple and effective body coolant for this summer. Do try it friends..
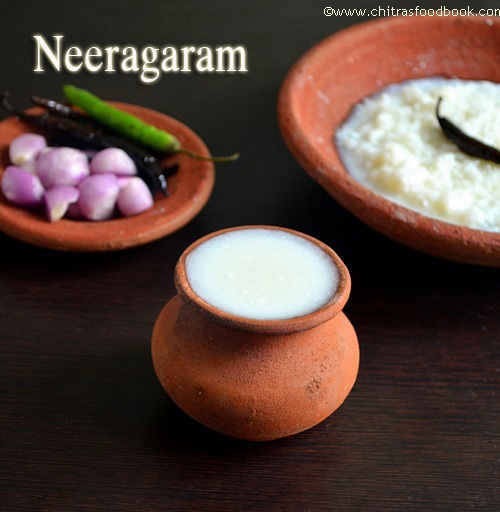
Neeragaram with pazhaya sadam recipe
 Pazhaya sadam & Neeragaram recipe for summer !
Cuisine: Indian
Category: Breakfast
Serves: 1
Prep time: 8 HOURS
Cook time: 10 Minutes
Total time: 8 hours 10 minutes
INGREDIENTS
- Leftover rice - 1 cup
- Water - as needed
- Curd or thick buttermilk- 1/2 cup
- Salt - as required
- Small onions - few
- Mor milagai - to taste
- Green chillies - 1 no
- Curry leaves - few
- Pickle or vathakuzhambu - to taste
- Raw mango pieces - to taste (optional)
|
HOW TO MAKE PAZHAYA SADAM RECIPE - METHOD
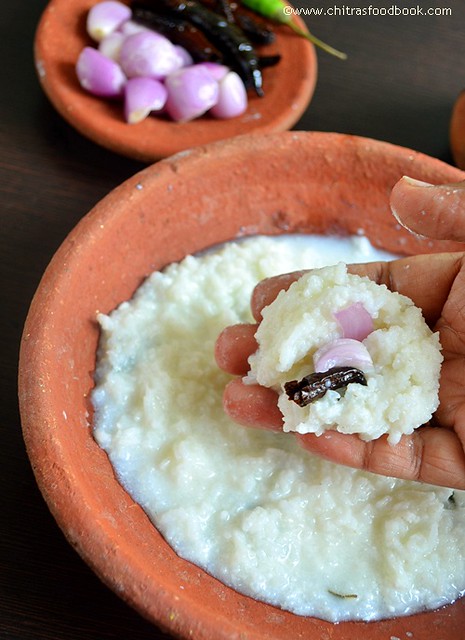
Take the leftover rice in a bowl or mudpot. I kept in the cooker itself. Add sufficient water to immerse the rice. Add few pinched curry leaves (optional). Mix well, crush the rice and keep it closed over night.
The next morning, before breakfast, take the cooker, add the required curd or thick buttermilk, salt and mix it well. Strain the water and drink separately.
Enjoy the rice with mor milagai or green chillies and small onions.
My MIL mixes pickle, raw mango pieces and left over sambar or vathakuzhambu. It enhances the taste very well.

|
Note
- During summer season, we add raw mango pieces while eating the rice. It gives a nice tangy taste.
- Adding curry leaves and little curd gives a nice flavour. But add little curd. Too much curd spoils the rice.
- Don't forget to add salt.
|
Tastes yummy with small onions and chillies !
Continue Reading...