Search Chitra's Food Book

February 11, 2015

Easy Brinjal Gothsu/Kathirikai Gothsu Recipe For Idli, Pongal

Brinjal gothsu recipe
I am a big big fan of brinjal recipes (Kathirikkai in Tamil). But Sendhil & Raksha are just opposite to me. So I make brinjal dishes only when my in-laws visit my place. This morning, I made this easy brinjal gothsu recipe in a pressure cooker learning from my MIL. Its a very easy, one pot brinjal gosthu recipe. In this method, you don’t need to roast & powder the spices as we do for Chidamabaram kathirikai gosthu. The procedure of this brinjal gravy is very similar to my MIL’s Thanjavur style tomato gosthu

We usually make this as a side dish for Idli. But recently I had tasted this with pongal too. It was yummy. Its a great recipe for bachelors & working women who look for easy side dish recipes. All you have to do is just chopping, sauting & pressure cooking, Tada! This gravy would be ready under 15 minutes. Just try once, you will come to know. My MIL makes it watery as we like it that way. Here I have made it slightly thick to suit pongal. Finally, the consistency is your choice. Lets see how to make this yummy kathirikai/Brinjal gosthu recipe for idli and pongal.

Brinjal gothsu

Easy brinjal gosthu/Kathirikai gotsu recipe


Easy brinjal gosthu/Kathirikai gotsu recipe Easy brinjal gosthu recipe-Side dish for idli and pongal
Cuisine: South Indian
Category: Side dish
Serves: 2
Prep time: 5 Minutes
Cook time: 10 Minutes
Total time: 15 Minutes


INGREDIENTS

  • Brinjal / Kathirikai - 3 nos ( medium)
  • Small onions or big onion - 20 nos/1 no
  • Green chillies - 4 nos
  • Tomato - 1 no
  • Tamarind - small berry size (Sundakkai alavu)
  • Sambar powder - 1/2 tsp 
  • Moong dal - 1.5 tbsp
  • Turmeric powder – 1/8 tsp
  • Salt and water - as needed
To temper
  • Cooking oil - 2 tbsp
  • Mustard seeds - 1 tsp
  • Urad dal - 1 tsp
  • Chana dal - 1 tsp
  • Curry leaves - few
  • Hing/asafetida - a big pinch
  • Idli/Dosa batter OR Rice flour - 1/2 tbsp/1.5 tsp
Coriander leaves – to garnish
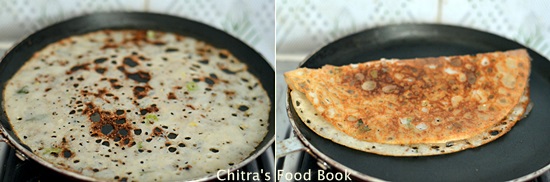
HOW TO MAKE BRINJAL GOSTHU - METHOD

  • Wash and chop the brinjal into small squares. Soak in water till use to prevent discoloration. Similarly chop the onions,green chillies finely.

  • Heat oil in a cooker base. Splutter mustard seeds, urad dal & chana dal. Then add the finely chopped onions, green chillies, curry leaves & hing. Saute till onion turns transparent.
Brinjal gothsu recipe
  • Now add the finely chopped tomato pieces & brinjal. Add some salt and saute till tomato turns mushy. Lastly add the tamarind extract and moong dal. Mix well. Add little turmeric powder, sambar powder(optional) , required salt and water.
Brinjal Gothsu
Kathirikai gothsu
  • Pressure cook in low flame for one whistle. After the steam is released, mash everything well. No problem if some dals are visible. Its enough if its just cooked & blossomed. Then add the idli/dosa batter or rice flour diluted in 1/4 cup of water. Mix well & allow the gravy to boil till it thickens lightly. Make it slightly thin if using for idli & thick for pongal. Garnish with lots of coriander leaves. Serve hot with idli or pongal.
Brinjal gothsu recipe

Enjoy !

NOTE
  • If  you are serving for idli,add sesame oil/gingely oil while eating.It tastes great.
  • Add more chillies based on your taste.
  • Tamarind should be very less. Its used just to remove the mild bitterness of brinjals ( we call it as “Kaaral” taste in Tamil)
  • This recipe is completely different from chidambaram gosthu.So it tastes mildy spicy and tangy.
  • Adding idli/dosa batter helps to thicken the gravy. U can also replace it with rice flour.
  • Garnishing with coriander leaves gives a nice smell.


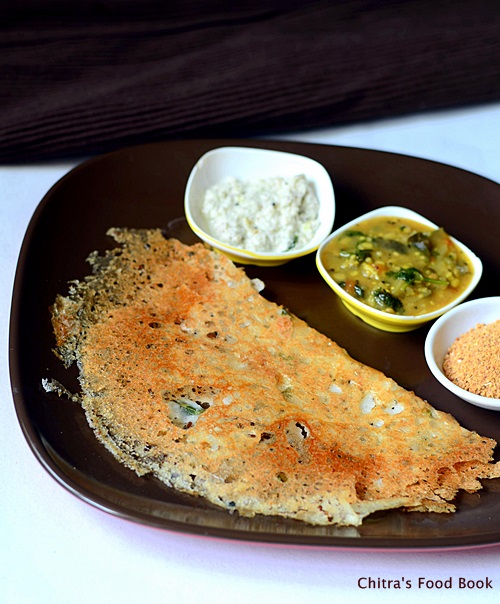
Enjoy this yummy, easy brinjal gosthu with idli or pongal !
Kathirikai gothsu recipe

Continue Reading...


February 9, 2015

Rava Dosa Recipe(Instant Version) - Crispy Rava Dosa Recipe

Instant Rava dosa recipe
Rava Dosa is one of the most popular South Indian breakfast recipes . Crispy, hotel style Rava dosa recipe is Sendhil’s most favourite dosa varieties. This dosa is very popular in Karnataka and Tamil nadu. Whenever we go to restaurant, I order plain uttapam for myself & his choice would be mostly rava dosa or onion rava dosa .As it is my man’s favourite, I have tried making this dosa many times in my kitchen to impress him. But most of my attempts were flop shows. It may be due to the wrong proportions of rava, rice flour, maida or the consistency of  rava dosa batter might not be right. 

 When I told this to my friend Shalini, she suggested her fail proof, instant rava dosa recipe which she has been successfully making it for years. I tried it yesterday for our Sunday breakfast.It came out unbelievably great! It looked and tasted like restaurant style rava dosa. Sendhil loved it a lot and had more dosa. I became very happy, excited and I immediately called my dear Shalu to thank her. I must also thank Vahchef for some additional tips I learnt by watching his video.Friends, do try this recipe. I am sure you won’t be disappointed with the results even if you are beginner. 

Also don’t forget to follow the tips I have shared in this post which helps you to make perfect crispy rava dosa. I always feel coconut chutney is the best side dish for rava dosa. Some people love to have it with tomato chutney and sambar. Serve it with your choice :) Some of my readers are asking me to post rava dosa recipe without rice flour and maida. I am working on it. Once I make it right, I will post it here.  Ok, lets see how to make crispy rava dosa recipe with step by step photos. 

Check out my other Rava Recipes : Rava Kesari,  Rava idli,  Rava Kichadi,  Rava Upma,  Masala rava kichadi,  Rava Payasam,  Rava Ladoo,  Rava roti,  Microwave rava kesari,  Milk kesari recipes.
Crispy Rava Dosa Recipe

Rava dosa recipe-Instant Version


Rava dosa recipe Crispy, hotel style Instant rava dosa recipe for breakfast
Cuisine: Indian
Category: Breakfast
Serves: 12 
Prep time: 15 Minutes
Cook time: 3 Minutes
Total time: 18 Minutes


INGREDIENTS

 1 cup = 250 ml

  • Rice flour – 1 cup
  • Unroasted Rava – 1/2 cup
  • Maida / all purpose flour – 1/4 cup
  • Water – 3 cups + 1/4 cup( add 2 tbsp more in the middle)
  • Curd – 1/4 cup ( semi solid)
  • Salt – as needed
  • Cumin seeds/Jeera – 1/2 tsp
  • Pepper – 1 tsp (crushed)
  • Green chilli – 1no ( finely chopped)
  • Coriander leaves  & curry leaves – Few ( finely chopped)
  • Asafetida/Hing – as needed
  • Ghee or cooking oil - as needed to drizzle dosas

HOW TO MAKE RAVA DOSA - METHOD

  • In a wide bowl, take the curd and rava. To this add rice flour, maida & salt. Add 3 cups of water & mix well with a whisk. Now add the cumin seeds, crushed pepper, finely chopped green chillies, coriander leaves, hing & curry leaves. Mix well without lumps. Check for batter consistency. Leave it for 10 to 15 minutes.
  • In the mean time, you can grind coconut chutney for side dish. After 10 minutes, check the batter, it would be thick slightly. So add 1/4 cup of water. Mix well & check whether the batter is right. I have given the water quantity I used for this recipe.Take it as a reference & adjust the quantity. The consistency of batter may not be correct in the first attempt.You will come to know the right consistency only after making the first dosa.( The first dosa may not come out perfectly crispy. 
  • Based on the texture of dosa,add little more water & make the second dosa. So it comes by trial & error only. You should get the perfect one at least for 3 rd dosa if you are a beginner.)
  • Heat a dosa pan.I used iron pan here. Non-stick also works fine. Dosa pan should be well heated but not smoky. Grease the pan with oil. 
  • Hold the ladle 15cms away from the pan & pour a ladleful of batter around the corner of dosa pan. Make a circle. Again take some little batter & fill the inner portions.i.e. you should pour the batter in a circular motion from outer to inner portion of pan.Do not fill the holes. Instead drizzle some ghee in the holes.
Instant Rava Dosa Recipe
  • Keep the flame medium to medium high. Drizzle a tsp of ghee all over the dosa. Cover the pan with a lid & cook for sometime till you see the dosa turning crispy & golden brown. I covered the pan with my idli pot lid. 
Instant Rava Dosa Recipe
  • Do not flip the dosa. Just fold it & serve immediately with coconut chutney & sambar. Before making the next dosa, mix the batter very well because Rava may settle down in the bottom of bowl. If you feel the batter is thickened, add 2 tbsp of water. Mix well & make dosa. Keep the flame high till you pour the batter & as soon as you pour the batter, reduce the flame to medium & cover cook as mentioned above. Repeat the same procedure for all dosas.
Instant rava dosa
  • Here is a rava dosa picture I made using non-stick dosa pan.

Enjoy !


Note

  • For variations & for health reasons, you can follow the same recipe without maida. It comes out well.
  • The consistency of rava dosa batter is very important to make crispy, lacy dosas. So add water as needed.
  • Cooking in medium flame for more time gives you crispy dosa. Cooking in high flame makes the dosa brown & uncooked in the middle.
  • Covering the pan while cooking helps to cook the dosa quick & gives you nice uniform golden color.
  • you should mix the batter really well every time before making dosa. The batter may thicken after you make 3-4 dosas. So add 2 tbsp water & thin down the batter.
  • Adding ghee while making dosas gives nice flavor & restaurant touch. So use it as per your wish.
  • For making onion rava dosa,sprinkle finely chopped onions in greased tawa. Then pour the batter. Onions will be cooked well.
  • To make fruit and nut rava dosa, sprinkle finely chopped cashews, badam & tutti frutti over the pan and pour the batter. Cook in medium flame.

Check out my other Rava Recipes :  Rava Kesari,  Rava idliRava Kichadi,  Rava Upma,  Masala rava kichadi,  Rava Payasam,  Rava Ladoo,  Rava roti,  Microwave rava kesari,  Milk kesari recipes.

Rava Dosa Using Non-stick Pan.
Instant Rava Dosa recipe

Enjoy this crispy,lacy rava dosa with your favourite chutney & sambar!!
Rava Dosa Recipe


Continue Reading...


February 8, 2015

Kerala Veg Biryani Recipe-Malabar Veg Dum Biryani-Sunday Lunch Recipes 5

Vegetable Layered Biryani
Sorry friends.I was not able to post this recipe last Sunday as I travelled to Palani, Tamil nadu. It was an unexpected trip. So I am posting this yummy Kerala style Vegetable layered biryani recipe for this week’s Sunday Lunch Recipes series-5.

Generally Kerala biryani / Malabar biryani is mostly done with chicken or mutton. But when I saw this Kerala style veg biryani recipe in this and this blogs, I became very happy and bookmarked them immediately. I was expecting coconut in the recipe but to my surprise the recipe and making is very similar to Hyderabad DUM biryani sans saffron. I just combined both the blog recipes and it came out awesome. I was happy with this Kerala style Veg DUM biryani recipe. Everyone loved its taste & flavor. 

If you don’t want to follow DUM method, you can make it simple by just sauting everything in cooker base as we do for our normal biryani. I had tried this in either ways. It tastes good. So try this biryani for your family, friends & relatives and take the credits!!  Lets see how to make this Kerala Vegetable biryani recipe !
Kerala Vegetable Biryani recipe

Kerala vegetable biryani - Malabar style


Kerala vegetable biryani - Malabar style Malabar style vegetable biryani - Kerala Veg biryani recipe
Cuisine: Indian
Category: Lunch
Serves: 3
Prep time: 60 Minutes
Cook time: 20 Minutes
Total time: 80 Minutes


INGREDIENTS

  • Basmati rice - 1 Cup (I used India gate)
  • Cloves – 3 nos
  • Cinnamon – 1 inch piece
  • Cardamom – 2 nos
  • Water – 1.5 cups
  • Ghee – 1 tsp
For Gravy
  • Ghee – 3 tbsp  (OR use oil + ghee in equal measure)
  • Bayleaf – 1 no
  • Kalpasi/Black stone flower – 2 nos
  • Big onion - 2 nos
  • Ginger & Garlic Paste – 2tsp
  • Green chilli paste – 1 tsp( grind 3-4 nos)
  • Tomato – 1 no ( finely chopped)
  • Garam masala powder or Biryani masala powder - 1/2 tbsp
  • Chilli powder/Pepper powder – 1/2 tsp ( optional)
  • Yogurt - 2 tbsp
  • Mixed vegetables - 1/2 cup ( 1 carrot, 5 beans, handful of peas, 1 big potato)
To  roast & garnish
  • Ghee- 1 tbsp
  • Big onion - 1 no
  • Cashews - few
Coriander & mint leaves – few
Lemon juice – as needed

HOW TO MAKE KERALA VEG BIRYANI - METHOD

  • Wash and soak the basmati rice for 30 minutes to 1 hour. Cook the rice in a pot or kadai adding 1.5 cups of water by adding cinnamon, cardamom, cloves. Cover cook in medium flame till rice is cooked 3/4th. Remove the rice once all the water is absorbed by it. Spread it in a plate and fluff it with a fork. Set aside.
Kerala Veg Biryani
  • Wash and chop all the vegetables.
  • In a pressure cooker base, heat ghee, saute bayleaf and kalpasi. Add  the gg paste and green chilli paste. Saute till raw smell emanates completely. Now add the onion slices.
Kerala Veg biryani
  • Now add the finely chopped tomato pieces. Saute till it turns mushy. Now add the garam masala or biryani masala powder. Mix well. Check for taste and add chilli powder or pepper powder if needed. Lastly add the vegetables, salt and curd. Mix well. Add little water(say 1/2 cup) & pressure cook in high flame for one whistle.( Do not over cook the veggies.One whistle in high flame would do).
Kerala vegetable biryani
  • After the steam is released, open the cooker & mix the masala. Make sure the masala is not too dry. If it looks dry, add 1/4 cup of water, give a boil & make it wet with some moisture content.
  • Heat 1 tbsp of ghee in a kadai & roast onions & cashews till golden brown. Set aside.
Kerala Veg biryani
  • HOW TO LAYER THE RICE FOR BIRYANI : Now take a kadai or a pot with flat bottom. Spread one layer of rice & sprinkle few drops of lemon juice. Now spread a layer of cooked vegetable masala over the rice. Sprinkle some finely chopped mint and coriander leaves. Again spread the rice, then masala and mint leaves. Repeat the same until all the rice and masala are over. Lastly add the fried onions, cashews. Cover the kadai with a suitable tight flat lid.
Vegetable Layered biryani
Kerala Vegetable biryani
  • HOW TO PUT IN DUM : Heat a dosa pan in high flame for 3 minutes & after the pan is heated well, simmer the flame completely. Keep the biryani pot/Kadai. Boil water in a bowl and keep the boiled water above the biryani pot/kadai. Let it sit for 10 minutes in very low flame. 
  • If you feel, vapour comes out of the kadai, wrap the mouth of kadai/Pot with thermal foil before you put in dum. If you have a tight lid, then you don’t have to wrap the pan. After 10 minutes, remove the pan and fluff the rice with a fork. Serve hot with raita.

Vegetable Dum biryani
Enjoy !


Note

  • Adjust the quantity of spices as per your taste.
  • U can also add saffron soaked milk while layering.
  • U can put the dum using pressure cooker but keep the cooker directly over very low flame for 5-10 minutes.


Have this yummy Kerala Malabar Vegetable biryani recipe. I served it with onion raita and made Gulab Jamun for dessert !
Kerala Malabar biryani recipe

Continue Reading...


February 5, 2015

Eggless Pancakes Recipe With Wheat Flour

Eggless pancakes recipe with wheat flour

Its been years since i shared an international recipe in my blog.I badly wanted to post a recipe this week.After searching so many recipes,i settled down with this eggless pancakes.I have never thought making pancakes at home is so easy and simple.As i have not tasted pancakes so far,i din’t have any idea about its softness & texture.My friends in abroad had told me,its like our South Indian thick dosa/Uttapam.But after i made this eggless pancakes on my own following this recipe,i was amazed to see my golden,fluffy & soft pancakes.I was very happy and proud that i made a popular(American) international breakfast recipe at home perfectly and that too in my first attempt.Basically pancakes are done using plain flour/Maida.Here i have used our regular chapathi atta/wheat flour and made small changes in the actual recipe to suit our taste.And I am completely happy with the results.Actually I halved the original recipe & tried it.So this quantity serves only one person.Just follow this recipe & once u get it right,u can double the same.
Friends,do try this not so sweet,soft,fluffy n healthy eggless pancakes recipe with wheat flour for your breakfast.Enjoy topping it with any pancake syrup like maple syrup,caramel sauce,honey or just choco chips.Tastes yummmm..!! Very soon i will share my favourite savoury pancakes recipeWinking.
Note:Please adjust the quantity of sugar if u like your pancakes to be sweet.Never skip baking powder which is the magic ingredient here.Just follow this recipe with my tips to achieve the best results.All the very best for beginners Happy.

eggless wheat flour pancakes recipe

Eggless wheat flour pancakes recipe


Eggless wheat flour pancakes recipe Eggless pancake recipe using wheat flour - Easy,simply,fluffy and soft !
Cuisine: International
Category: Breakfast
Yields: 3 nos
Prep time: 12 Minutes
Cook time: 3 Minutes
Total time: 15 Minutes


INGREDIENTS

  • Wheat flour/Atta - 1/2 cup ( I used aashirvaad)
  • Baking powder -1 tsp ( use fresh powders for best result)
  • Cinnamon powder - 1/2 tsp
  • Salt - a pinch
  • Sugar - 1/2 tbsp
  • Water - 1 tbsp
  • Milk - 1/2 cup ( boiled, at room temp)
  • Cooking oil - 1/2 tbsp ( use odourless oil)
  • Melted Butter - 1 tbsp
  • Vanilla essence - 1/2 tsp
METHOD

  • Take a bowl and mix all the dry ingredients( wheat flour,cinnamon powder,baking powder,salt & sugar)Now add the wet ingredients namely oil,water,melted butter,vanilla essence and milk.
Eggless pancakes recipe
  • Mix with a whisk gently.Do not over beat it.The consistency of batter would be thick at the same time it should be pourable as shown in the picture.Adjust the quantity of milk based on the flour u use.But add 1-2 tbsp extra and definitely not more than that.
  • After mixing the batter,rest it for 10 minutes which is very important. The baking powder will react with other ingredients and gives you a fluffy pancake.
Eggless pancakes recipe
  • Heat a dosa pan. I used non-stick pan here.Iron griddle works the best.Make sure the pan is not over heated.To check the right temperature of the pan,just sprinkle few drops of water & if the water sizzles slightly,pan is just right.
    • Never let the pan smoke.Heat of the pan is very very important to get nice colored,uniformly cooked pancakes.If your pan is over heated,u will not be able to make round pancakes.Shape won’t be proper.Also the color of pancakes turn dark brown. 
    • In case if the pan is over heated,switch off the flame for sometime & then make pancakes.It will come out well.Also u should cook the pancakes only in low to medium flame.
  • Grease the pan with butter and simmer the flame completely.Then pour the batter.Spread the batter lightly with a back of ladle but the pancake should be thick enough.So do it carefully.
  • Keep the flame low & cook one side till u see bubbles all over the pancake.Now flip it.U will see the golden colored top.Cook the other side for few seconds and remove in a plate.
  • Serve it with butter & syrup/Honey !
Eggless pancakes recipe

Enjoy !


Note

  • Adjust the quantity of milk based on the atta u use.I used aashirvaad here.
  • You can replace atta with maida/all purpose flour.But i guess u won’t do,hehe..
  • Do not use baking powder more than the mentioned quantity.If u use more baking powder,pancake may taste bitter.
  • Do not get confused with baking powder & baking soda.Use only baking powder.
  • If u have frozen butter,first melt it in a pan and then add to the batter.
  • Do not make the batter thin or spread it well.Pancakes are supposed to be thick.So spread the batter lightly and cook in low flame for best results.
  • Adding cinnamon powder & vanilla essence is for flavor.So don’t avoid it.Add more sugar for sweet tasting pancakes.


Eggless wheat flour pancake

Try this American breakfast at home.Kids would love it !
Eggless pancakes recipe

Continue Reading...


February 3, 2015

Garlic Rasam without dal | Poondu Rasam Recipe-Rasam Varieties

Poondu rasam recipe

I learnt this garlic rasam recipe / poondu rasam from my MIL. We usually make this as pepper rasam/ milagu rasam for sore throat & cough problem by adding more pepper. Its a good remedy for cold. I follow the same recipe and make it as garlic rasam by adding more garlic cloves and red chillies instead of pepper. As this recipe is without tomato & dal, it can be done in few minutes. Try this rasam recipe, you will love it. Its my favourite rasam recipe & I can have a plateful of rice mixed with this hot rasam & papad as side. It tastes delish !

Garlic rasam recipe

Garlic rasam/Poondu rasam recipe


Garlic rasam/Poondu rasam Garlic rasam recipe - Poondu rasam for rice !
Cuisine: Indian
Category: Lunch
Serves: Serves 3
Prep time: 5 Minutes
Cook time: 5 Minutes
Total time: 10 Minutes


INGREDIENTS

  • Tamarind - Small gooseberry size
  • Salt & water - as needed
  • Turmeric powder - a pinch
To grind
  • Pepper corns - 1/2 tsp
  • Red chillies - 2 nos ( use 1 for less spice)
  • Garlic - 8 cloves ( with skin)
To temper
  • Ghee - 2 tsp
  • Mustard seeds - 1/2 tsp
  • Cumin seeds - 1/2 tsp
  • Curry leaves - few
  • Coriander leaves - to garnish
HOW TO MAKE GARLIC RASAM - METHOD

  • Soak tamarind in 1/2 cup HOT water for 10 minutes. Take all the ingredients given under “ to grind”. First grind the pepper corns along with red chilli. Lastly add the garlic cloves with skin and grind them coarsely. Remove it.
Poondu rasam recipe
  • In a kadai, heat ghee, splutter mustard seeds & jeera. Add curry leaves. Add one pinched red chilli and add the tamarind extract using 1.5 cups of water, turmeric powder and salt. Allow it to boil till raw smell of  tamarind goes off.

  • Add the ground powder and 1/4 cup of water.  As soon as the water comes to a roll boil, switch off the flame & add coriander leaves.
Garlic rasam recipe
  • Serve it with hot rice and ghee.

    Enjoy !


Note

  • You can make this rasam as pepper rasam by adding more pepper corns. For this recipe, you can add 1 tbsp of pepper.
  • You should just crush the garlic coarsely and not a fine paste.
  • For variations, you can do the tempering in ghee at the end and switch off the flame. 


Enjoy this flavourful rasam with hot rice and papad !
Garlic rasam recipe

Continue Reading...


January 31, 2015

Paneer Cutlet Recipe - Paneer Cutlet Without Potato

Paneer Cutlet Recipe
Paneer cutlet without potato using Instant Poha mix from Mother's recipe is my second entry for Mother’s Recipe Innovative Cooking Challenge Contest. I used their Instant Poha Mix/Aval upma mix for making this cutlet recipe and it turned out awesome. Actually speaking, I wanted to try Paneer cutlet Recipe without Aloo/Potato for a long time.I am so happy i was able to achieve it with the help of this poha mix. Like potato, poha (rice flakes) is also one of the best binding agents for cutlet. As I have followed this in my Mc Donald’s burger recipe, I tried this cutlet recipe using Instant Poha mix very confidently. As I expected, the result was great! My daughter and My better half loved it to the core.With crispy exterior and soft interior, it was just perfect. As the poha mix had all the seasoning ingredients, it made my job simple. I just cooked the mix adding spice powders, mashed paneer and made these cutlets quickly and easily. Its an yummy evening snack recipe for kids and that too without potatoes. Thanks to Mother’s Recipe for giving this opportunity to Indian Food Bloggers and make us think different and innovative through this Challenge. Here I have deep fried the cutlets.You can go for shallow frying in a pan and make it as a low calorie snack.You can also opt for baking and make it even more healthy without oil. I have discussed baking method too. For variations, you can add boiled corn kernels and mixed vegetables too.Ok, lets see how to make this paneer cutlet recipe using Instant Poha Mix.
Check out my first entry for this contest : Eggless Milk Powder Cake recipe using Instant Payasam Mix.

Click on this links to know more about Mother’s Recipe products.

http://mothersrecipe.com/

https://www.facebook.com/imissmymothersrecipe?fref=ts

Paneer Cutlet Recipe without potato

Paneer Cutlet Recipe


Paneer Cutlet Recipe Paneer Cutlet Recipe without using Potato
Cuisine: Indian
Category: Snack
Serves: 10 nos
Prep time: 10 Minutes
Cook time: 20 Minutes
Total time: 30 Minutes


INGREDIENTS
1 cup - 200ml
  • Mother's Recipe Instant Poha Mix - 200 gms( 1 packet - Poha- rice flakes ) Or Plain Poha 
  • Water - 400 ml
  • Grated paneer – 3/4 cup ( Cottage cheese, around 100gms)
  • Big onion - 1 no
  • Ginger-Garlic Paste-1 tsp
  • Red chilli powder - 1 tsp
  • Dhania powder - 1/2 tsp
  • Garam masala powder -1/2 tsp
  • Aamchoor powder –1/4 tsp
  • Turmeric powder - 1/8 tsp
  • Maida-1 tbsp
  • Salt - as needed
  • Mint & coriander leaves - 2 tbsp ( each,finely chopped)
  • Cooking oil - to fry
To coat the cutlets
  • Corn flour - 1/4 cup
  • Water - as needed to make thick batter
  • Bread crumbs & Powdered corn flakes( only for baking ) - 1 cup or as needed
METHOD

  • Take the paneer & grate it using a fine grater or mash/crumble it well using your hands.Set aside.
  • Heat oil in a kadai and saute the finely chopped onions.Add the g&g paste and saute till its raw smell leaves completely.
Poha cutlet recipe
  • Now add 2 cups( 400 ml) of water with little salt( the mix had salt in it.So use less) and allow it to boil.When it comes to boil,add the poha mix ( Rice flakes mix).Mix well & cover cook it for 8-10 minutes in medium flame.Mix it once in the middle.Poha will be cooked well & becomes mushy.All the water will be absorbed. If you are not using poha mix, you can add plain poha soaked in water for 20 minutes.
Poha cutlet recipe
  • Now add the grated paneer & mix well.Add turmeric powder,red chilli pwd,dhania pwd,garam masala powder & amchoor powder.Mix well,add maida,mix well.Let the mixture become a whole mass like dough.Switch off the flame.Lastly add the finely chopped coriander and mint leaves.Mix well.Check for salt.Squeeze in little lemon juice and allow the cutlet mixture to cool down.
Paneer cutlet recipe
  • In the mean time,take the corn flour,add water and make a slightly thin like dosa batter.Take the bread crumbs in a plate.( For homemade bread crumbs,just powder the brown part of bread and use as such.I did this way)
Homemade bread crumbs
  • Take a medium orange sized ball from the cutlet mixture and pat it.Dip it in corn flour batter & then in bread crumbs.Do this twice to get a super crispy exterior.
  • Heat oil to deep fry or shallow fry and drop the cutlets.Fry them till golden brown by flipping it whenever needed.Remove & drain it in a tissue.Serve with ketchup/tomato sauce.
  • For baking,make the cutlet mixture as mentioned above.Dip it in corn flour batter,then in powdered corn flakes & finally in bread crumbs.Repeat it twice.Now preheat the oven in 200c and bake the cutlets in 200c,convection mode for 10-15 minutes in one side.Flip it and again bake them for another 10-15 minutes.Remove & serve hot.
    Enjoy !
To use plain poha/Aval/Rice flakes, take 1 cup of poha ( thick rice flakes),wash & soak it for 20 minutes till it turns soft.Add cumin seeds while sauting onions & proceed as mentioned above.


Enjoy this yummy paneer cutlets with Tea !
Paneer-cutlet-recipe


Continue Reading...