In this post, lets see how to celebrate Karthigai deepam pooja at home. Karthigai Deepam is a festival of lights, celebrated in the Tamil month of Karthigai. It is celebrated on the full moon day of the Karthigai month (November-December) which coincides with Karthika star.
This year 2023, Thirukarthigai deepam falls on Sunday November 26th. Pooja should be done in the evening around 5.30 to 6pm (After 6pm if Sunday). Actually One must light deepam every evening near the entrance door and do the pooja on all the 30 days of this month. On the Thirukarthigai day, the entire house is decorated with the oil lamps. This festival of lights indicates the removal of darkness (Ignorance) and enhancing of light (Intelligence). Karthika Month is the only month in which both Lord Shiva and Lord Vishnu are worshipped.
Karthika Pouranmi or Karthika Purnima is also one of the days when the temples of Lord Shiva and Lord Vishnu are full with the devotees wanting a darshan of their deities.
The other names of Karthika Pournami are Deva Diwali or Tripurari Purnima. Generally people observe vratham/fasting during 30 days of Karthigai month. On those days, people avoid eating Non-veg foods. They take head bath daily and read one chapter in Kanda puranam book. They must take meal only once per day either it can be a lunch or dinner. Most of the people observe this kind of Vratham on auspicious days like Karthika poornima/ pournami, Karthigai somavaram etc. In this month, Karthigai Deepam is the most important festival for Hindus.
Story behind this festival
This festival is celebrated in a special manner in Thiruvannamalai. Lord Shiva asks Lord Brahma and Lord Vishnu to find out the exact location of his head and his feet. Since Lord Shiva takes a gigantic form, they are not able to find out anywhere. Then Lord Shiva takes the form of a jyothi (light of fire) on the hill of Thiruvannamalai. Therefore, this festival is also known as Annamalai Deepam. Here, a special torch / jothi is lighted on the zenith of the hill and it is believed that Lord Shiva's jothi will be visible on this day.
Lord Muruga took the form of six babies in a lake called "Saravana Poigai". On this day, all his six forms were united by Parvathi (his mother) and this way, he had six faces. Special poojas are performed to Lord Muruga.
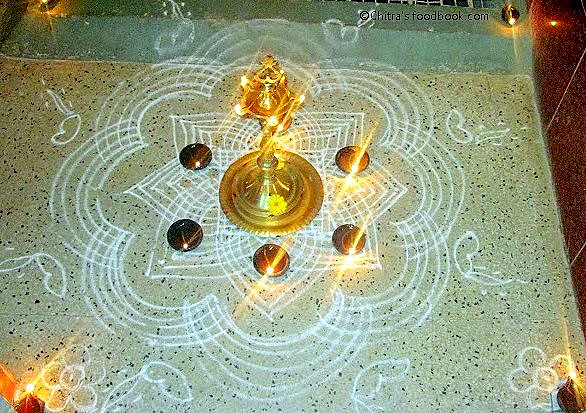
On this day, people clean the houses. In the evening, they draw kolams (Rangoli, Please visit my in-laws kolam blog
"Learn Kolam" for Rangoli ideas.) in the front of the house and also place some lamps on it. The lamps(Agal vilakku) are placed in the pooja and lighted. Then the naivedyam & deeparadhanai is done after which the lamps are moved to different places in the house. The lamps are arranged near the doors and windows and also in the balconies. A lamp should be kept in Rice containers & Salt box too. In this way, people of Tamil Nadu celebrate Karthigai Deepam for three days.
Source:
http://klavanya.wordpress.com

Significance of Karthigai Deepam
Karthigai Deepam is an auspicious time to experience the light & power of divine. The auspicious combination of the Full Moon in the month of Karthigai (November – December in English) and the dazzling star Krithika allows the light of divine consciousness to enter into the world.
On this day, Arunachala deepam in Thiruvannamalai, the Mountain of Light (fire) is said to represent the divine, Shiva in his form as the element of Fire. He comes alive and radiates a unique energy that enables you to move from human intelligence to divine intelligence.
Furthermore, Krithika (Karthigai) is the birth star associated with Muruga. So Karthigai Deepam is one of the blessed times of the year where the divine energies can burn your karmic sufferings and help you experience inner transformation.
Source :
http://www.astroved.com/us/specials/karthigai-deepam
Ingredients for Pooja & Neivedyam
For Pooja
-
Lamps/Agal vilakku – as needed ( Click HERE for homemade lamps using rice flour)
-
Wicks/threads
-
Oil & ghee
-
Betel leaves/Betel nut ( Vetrilai,paaku)
-
Banana/Vazhai pazham
-
Flowers
-
Incense stick,Dhoop & camphor
-
Coconut
For neivedyam
-
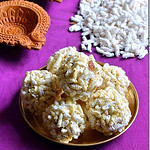
Aval pori (or) Nel Pori (or) Arisi pori/Puffed rice
-
Dark colored jaggery ( pagu vellam, for making paagu)
-
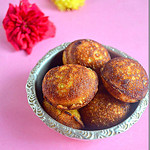
Raw rice Or Wheat flour Or maida for making appam
-
Sugar ( If using for appam)
-
Coconut
-
Raw rice & moong dal for making payasam
-
Raw rice or store bought rice flour for making Maavilakku
Please visit my in-laws kolam blog "Learn Kolam" for Rangoli ideas.
How to perform Karthigai Deepam Pooja
Prepreparatory works
-
Two days before the karthigai deepam, you should finish all the shopping and keep all the ingredients ready. Every year we used to buy one new lamp/Agal vilakku. If you have this practice, buy one. While buying the lamps, make sure there are no cracks on it.
-
One day prior to the festival, clean the house & wash all the lamps, pooja vessels at home & agal vilakku you used in the previous years. For washing agal vilakku, take water in a big bowl adding soap powder/Detergent. Soak the lamps for 15 minutes and then wash it. This helps to remove the oil greased in the lamps. If you are using new lamps, you don’t need to soap wash them. Just wash it in plain water. Spread the lamps in a wide plate and let it dry till afternoon. After its dried, keep turmeric and kumkum on three sides of lamp.
-
On that day evening,take 5 or 7 lamps, put oil & wicks. Draw some rangoli in the entrance & light the lamps after doing naivedyam preparations. You can make any payasam with jaggery. While lighting the agal vilakku, you should not light the lamp inside the house and take it outside. Instead you should light the lamps only after keeping them outside. It’s a sentiment we follow. You can also do it if you like.

On Karthigai deepam day
-
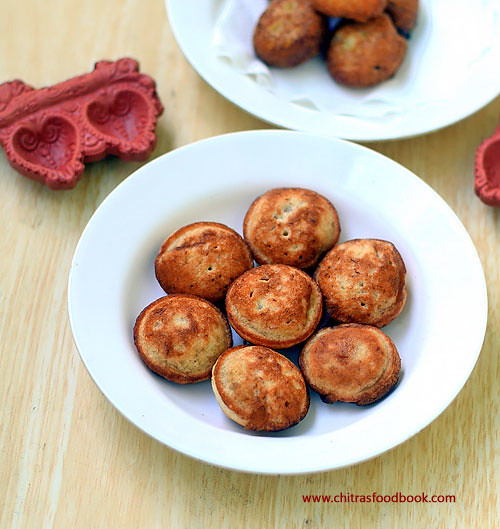
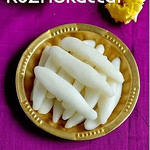
The next day i.e on Karthigai deepam day morning, observe fasting and prepare all the neivedyam recipes. Soak the rice for making Maavilakku & appam. Make pori urundai and store in a box. Grind the batter and keep it ready for appam. Mix jaggery and homemade rice flour for maavilakku. Make a ball, put a dent. Keep turmeric & kumkum dots. Set aside. No need to add ghee now. You can roast rice n dal for making payasam and keep aside. Apart from these recipes, I also make salt less kozhukattai & rice flour lamps following my mom. I do this every year for the well being of my family members. In the below picture, you can find the homemade lamps and kozhukattai. If you wish you can try them too. Please check
this link for the recipe & procedure.
-
Prepare the lunch and have it. After having lunch, at around 4 pm, prepare the payasam. Make appam. Put the wicks for all the washed lamps and pour oil. Pour ghee for maavilakku and put the wick.Wash the entrance and draw Rangoli/Kolam. Please visit my in-laws kolam Youtube channel
"Learn Kolam" for Rangoli ideas. At around 5 pm, decorate the pooja room by keeping flowers.Take a plate and keep betel leaf, nut, banana and broken coconut. Arrange all the neivedyam recipes in another plate. Keep the maavilakku in front of the God.
-
First light the maavilakku & the lamps/Vilakku in pooja room. Do not light the agal vilakku now. By 5.30 pm you can start the pooja and by 6 pm you can light the lamps outside. Most of you must be watching Thiruvannamalai Karthigai Deepam thiruvizha in TV channels. You can also light the lamps around your house by the time they lit the jothi in temple.
While lighting the lamps, you can chant the slokhas given below in the next section. Do the neivedyam, dhoopam and dheeparadhanai. After doing the pooja, first light two lamps. Keep one inside the rice container and the other one inside the salt container. Keep one near Thulasi plant if you have.
Keep the containers open. Remember all the vilakku should face only
EAST.

-
Now take the remaining lamps and arrange them in the entrance as you wish. Light them using a match stick. You should not light the lamp inside the house and take it outside. Instead you should light the lamps only after keeping them outside. It’s a sentiment we follow. Please remember this point and follow if you wish. (Actually I asked my MIL on why to follow this. She replied that if we light the lamps and take it outside, sometimes it may blow off due to wind. We may feel bad on this auspicious day. To avoid this, we are keeping the lamps outside and then we light them. My husband's paati i.e my MIL's mother in-law followed this :))
- Now light the remaining lamps and keep them in entrance of each room. Please be careful after you keep the lamps inside the house. Warn your kids about them. Let the lamps glow all around your house. Decorate your house with lamps as you like. Once they turn off automatically, you can remove them after 9 pm. Arrange them in the plate.
- Repeat the same on the next day evening too. Some people make batchanams like adhirasam & milagu jeeraga adai for next day neivedyam. But we just keep some fruits or dry grapes or sugar candy/kalkandu and do the neivedyam. Keep some lamps in odd number the next day. No need to keep lamps inside the house for every room. So totally it’s a three days celebration.
Karthigai Deepam Slokas
“Shubham Karoti Kalyaannam-Aarogyam Dhana-Sampadaa
Shatru-Buddhi-Vinaashaaya Deepa-Jyotir-Namostute”
“Deepa-Jyotih Para-Brahma Deepa-Jyotir-Janaardanah
Deepo Haratu Me Paapam Deepa-Jyotir-Namostute”
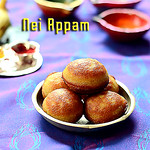
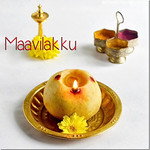
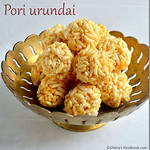
Karthigai deepam recipes

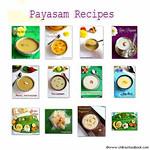
Below you can find the collection of Karthigai Deepam recipes like appam, pori urundai, maavilakku and payasam recipes from my blog. Please click on the images to see the respective recipe. I have also a shared a video on how to make pori urundai. I hope you will find these recipes easy to make & useful.
Please check THIS LINK to view my full collection of Karthigai recipes :)
Friends, the procedure I have shared here is completely based on my family’s tradition. This may differ for from place to place. So please take the advice from an elderly woman who is regularly performing the puja and change it. Thanks for visiting this page. Please write a few words in the comment section if you find this post useful.
Have a happy Karthigai Deepam Celebration !! See you all in my next post. Bye for now.
Continue Reading...


 . I have tried brinjal gravy as a side dish for biryani but never thought of making a biryani adding whole brinjals.When Valarmathi shared this Kathirikai biryani,I was so excited & bookmarked it immediately to try this one.In Andhra,people call this as Vankaya biryani but its method & ingredients are slightly different. I made few additions to the original recipe and tried it yesterday.It came out very well.Being a big brinjal fan,I loved this rice to the core
 .I am so happy to add this biryani recipe in my Sunday Lunch Recipes Series and this is my 35th recipe in this series!Lets see how ro make this yummy & delicious Brinjal Biryani/Kathirikai Sadam recipe.I am dedicating this post to all brinjal lovers like me
  .
.
 How to make birnjal biryani / Kathirikai sadam


