Search Chitra's Food Book

April 25, 2016

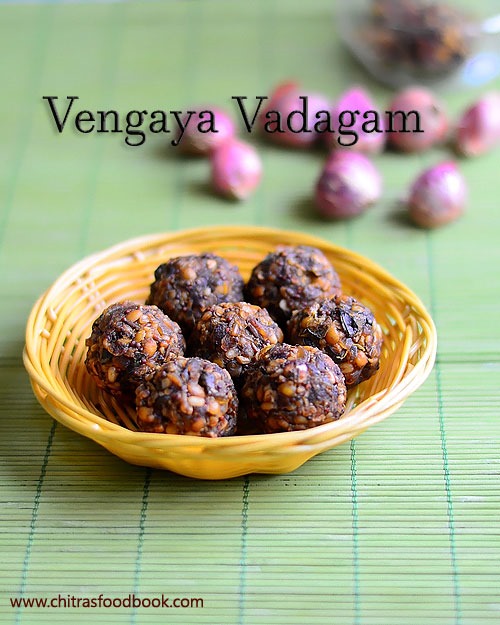
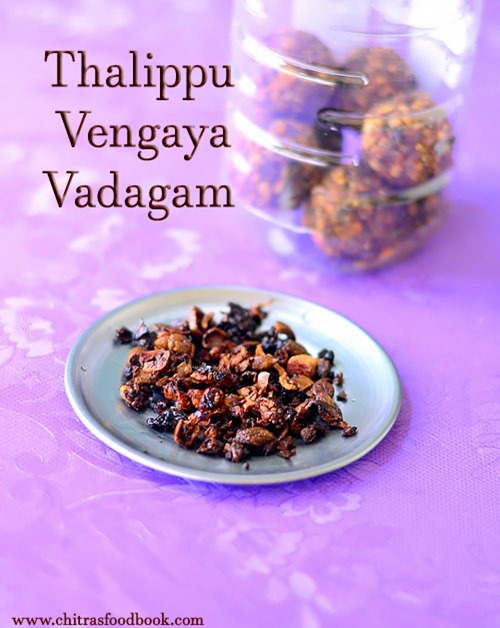
Thalippu Vengaya Vadagam Recipe – Kari Vadagam

Vengaya-vadagam
I am a big fan of Vengaya Vadagam/ Small onion vadagam since my childhood.This younger generation people may not be aware of this traditional recipe and slowly its forgotton by our people :( When I was young, my dad used to buy a packet of thalippu vengaya vadagam from an Iyer mess every year during summer. My mom adds it in Thuvaram paruppu sadam, Kootan choru and we love to have it as a side dish for curd rice too. . After marriage, I was amazed to see my MIL making Kari vadagam/Vengaya vadam on her own. She says its a very simple recipe preparation and can be easily made at home. Our job is to just mix and make balls. Sun will do the remaining part, she says funnily. Since Sendhil is not fond of vadagam, she stopped making it for some years. This year, I requested her to make this yummy onion vadagam for me. Last week we prepared it in Bangalore. I felt the chopping part and sun drying part takes more time. But the end result will be worth the wait. It came out great with wonderful aroma while frying. Iam enjoying it by making vadagam chutney/thogayal and use it for tempering Vatha kuzhambu and Kootu varieties. Nowadays my lunch smells divine because of this vadagam. You too give a try and feel proud to make your own homemade vengaya vadagam recipe. Lets see how to make this easy and yummy Thalippu Vadagam/ Kari vadam at home.
Check out my Koozh Vadam, Killu vadam and Javvarisi vadam too.

Vengaya-vadagam-recipe

Vengaya vadagam recipe


Vengaya vadagam recipe How to make thalippu vengaya vadagam recipe
Cuisine: South Indian
Category: Homemade
Serves: 15 balls
Prep time: 30 Minutes
Cook time: 10 days
Total time: 10days30Minutes


INGREDIENTS
1 cup - 200ml
  • Small onion/Shallots - 1.5 cups ( chopped)
  • Garlic cloves - 1/2 cup ( Chopped)
  • Chopped curry leaves - 2 tbsp
  • White urad dal - 1/4 cup ( soak in water for 30 minutes)
  • Mustard seeds - 1 tbsp
  • Toor dal - 1 tbsp
  • Cumin seeds - 1.5 tbsp
  • Methi seeds -3/4 tbsp
  • Red chilli powder - 1 tbsp
  • Turmeric powder - 1 tsp
  • Salt - as needed
  • Castor oil - 2 tsp
  • Cooking oil - to deep fry vadam after drying
METHOD

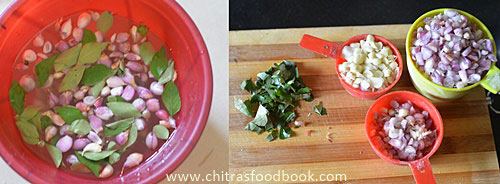
  • Wash and soak the white urad dal for 30 minutes.Wash and peel the small onion and curry leaves.Chop it finely. Peel and chop garlic cloves. Measure them in a cup. Take everything in a wide bowl. Mix well.
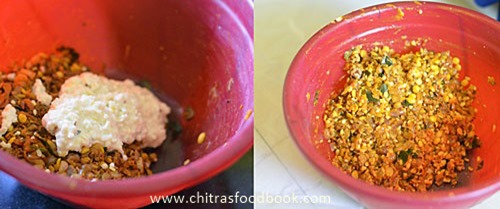
  • To this add, mustard seeds, methi seeds, toor dal, cumin seeds, salt, red chilli powder. Mix well using your hands. Drain the water from the soaked urad dal and grind it coarsely without adding water. Dal should be coarse.
Thalippu-vengaya-vadagam-2
Thalippu-vengaya-vadagam-5
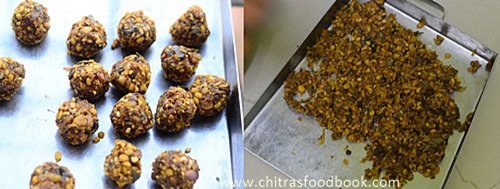
  • Now mix the dal with onion mixture tightly and make balls of small lemon size. Let it dry under the Sun for a day.Coarse Urad dal paste acts as a binding agent here. So do not skip this step, If you wish, you can spread the mixture as it is without making balls and sun dry them. In that case, take the required amount of dried vadagam, keep in a separate bottle and use it. Reserve the remaining vadagam without touching often because there are chances of getting worms quickly. 
Thalippu-vengaya-vadagam-6
Thalippu-vengaya-vadagam-8
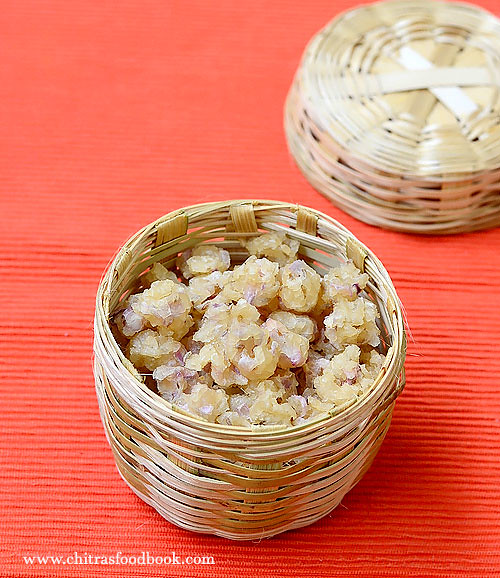
  • On the same day night, take the partially dried balls. Break into crumbs and add castor oil to it. Mix well and make tight balls again. Let it dry over night under the fan. The next day, sun dry the balls.As the balls dry, it will loosen. So roll it tight everyday. Repeat the same process until the balls dry completely and becomes black in color.
Thalippu-vengaya-vadagam-10
Thalippu-vengaya-vadagam-11
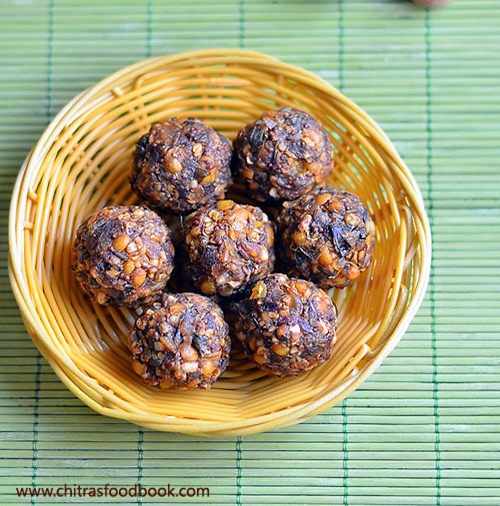
  • It will take nearly one week to 10 days to for the balls to dry depending on the weather/heat. For me, it took nearly 10 days. My MIL says it takes a week in Salem. After the balls are dried well, store in an air tight box.
Thalippu-vengaya-vadagam-12
  • For adding this gravy, take one ball, break into small pieces and fry in oil until it emits a nice aroma. Add to vatha kuzhambu, Kootu and poricha kuzhambu recipes.
Thalippu-Vengaya-vadagam-13
Enjoy !

Try these yummy, flavorful vadagam at home and enjoy your lunch !
thalippu-vengaya-vadagam
Continue Reading...


April 22, 2016

Veg Hakka Noodles Recipe

Veg Hakka Noodles Recipe 
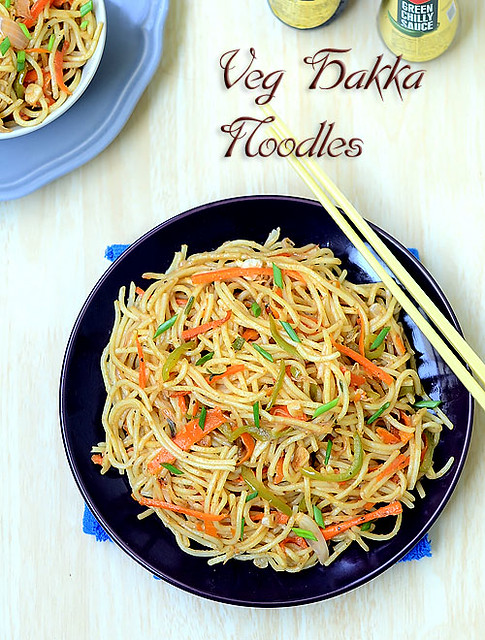
Hakka noodles, or Hakka mee, is a type of noodles - It is yellow in color, normally served in soup and with meat such as pork or chicken fillet, with vegetables and egg ( Source: Wiki).Usually I make Veg noodles with store bought plain noodles.For the first time, I bought Ching’s Hakka noodles and made Vegetable noodles for our breakfast combining Indian & Chinese style.I never thought its so easy and quick to make. I followed the instruction given in the pack on how to cook hakka noodles and cooked it perfectly. Noodles was firm yet soft. It came out well and tasty. Sendhil & Raksha loved it so much. Rice Vinegar & Soy sauce are the star ingredients for this recipe. But I used White vinegar and little tomato ketchup too. I am happy that I tried hakka noodles at home.For a no onion, no garlic version, just skip those ingredients from the list and follow the recipe. Soon I am planning to try Schezwan and more varieties with hakka noodles.Now lets see how to make this Kids friendly, quick and easy Veg Hakka noodles.

Continue Reading...


April 20, 2016

Samosa Recipe – How To Make Punjabi Samosa

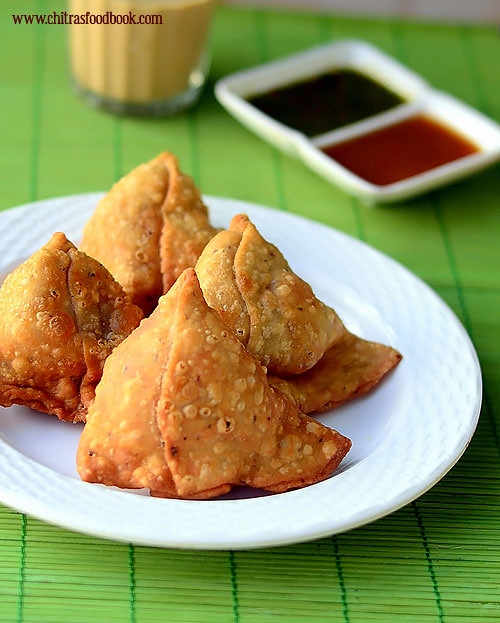
Punjabi samosa recipe
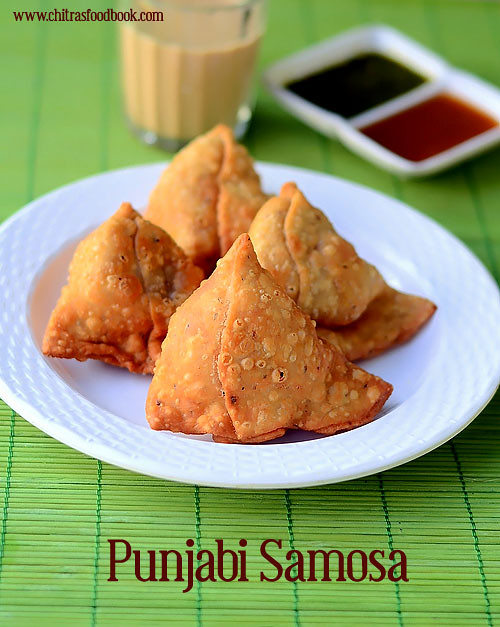
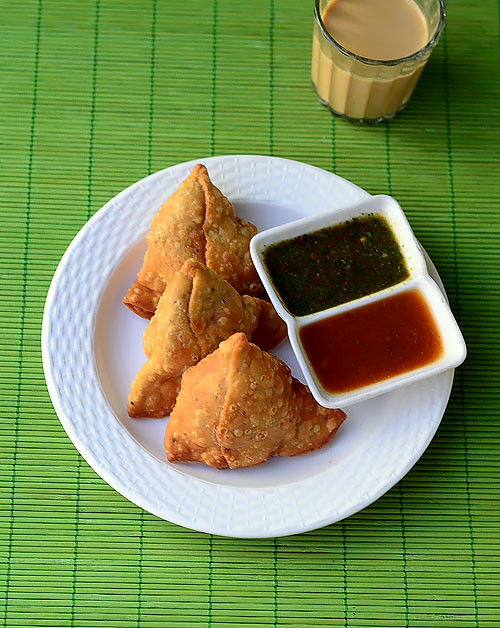
Long back I have shared a samosa recipe with potato stuffing. This version is purely a Bakery style Punjabi Samosa recipe. I learnt this recipe by watching an Youtube Video by chef Harpal singh and from this blog. Chef had explained the folding part very well. Even though the folding technique looked simple, it needs some practice to make it perfect.

After 2 attempts I got it right but not so perfect. I have given stepwise pictures for folding.Hope it is easily understandable. For variations, you can make the stuffing with mixed vegetables instead of potato. It stayed crispy for half an hour, but its better to eat it hot to enjoy its actual taste. Lets see how to make this most popular Punjabi Samosa recipe with step by step pictures to make at home.

Samosa recipe

Samosa Recipe - How to make Punjabi samosa


Samosa Recipes - How to make Punjabi samosa How to make Bakery style Veg samosa at home
Cuisine: Indian
Category: Snacks
Serves: 8
Prep time: 30 Minutes
Cook time: 20 Minutes
Total time: 50 Minutes


INGREDIENTS
For Samosa cover
  • All purpose flour/Maida - 1 cup heaped ( 1 cup=250ml)
  • Melted ghee or cooking oil - 1 tbsp ( at room temperature)
  • Salt & water - as needed
  • Ajwain/Omam - 1/2 tsp
For Stuffing
  • Potato - 3 nos ( big)
  • Green peas - 1/4 cup
  • Chopped ginger - 1 tsp
  • Cumin seeds - 1/2 tsp
  • Chopped green chilli - 1 no
  • Fennel/Saunf powder - 1/2 tsp
  • Red chilli powder - 1/2 tsp
  • Dhania powder - 1 tsp
  • Aamchur powder - 1/2 tsp
  • Garam masala powder - 1/2 tsp
  • Chopped mint leaves + coriander leaves - 1 tbsp ( optional)
  • Salt & water - as needed
  • Lemon juice - few drops
HOW TO MAKE SAMOSA - METHOD

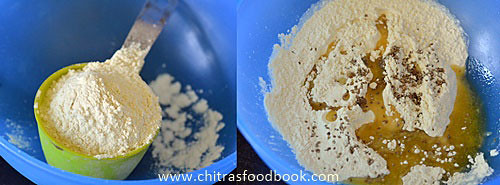
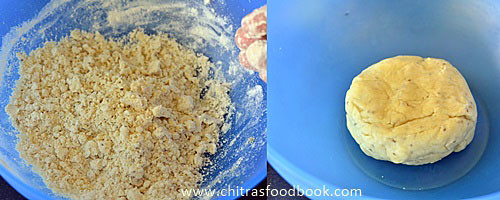
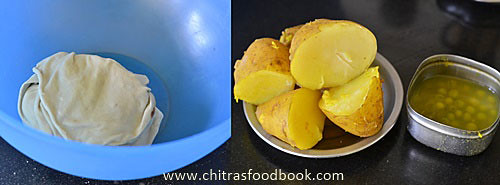
  • Take maida in a bowl.Add salt, ajwain and melted ghee or oil at room temperature (Not hot). Mix well with your fingers. It will look crumbly. Now add water little by little and make a tight dough. You may need to use nearly 1/4 cup +/- 1 tbsp of water. So make the dough properly. It should not become soft or sticky. It should be tight but not dry. Cover the dough with a wet cloth. Let it rest for 30 minutes.
Samosa recipe
Samosa recipe
  • In the mean time, Cut the potato into two and pressure cook it.Add enough water and 1/4 tsp of turmeric powder. In a small box, put the green peas and keep it inside the cooker. No need to add water. Green peas would cook well with the help of steam inside the cooker. Pressure cook them in very low flame for 2 whistle. Remove after the steam is released. Drain the excess water and drop the potatoes in cold water so that you can peel the skin quickly. 
Samosa recipe
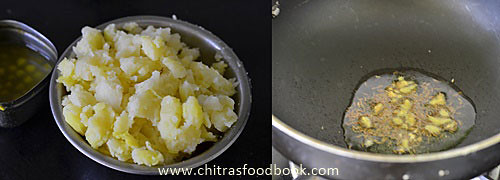
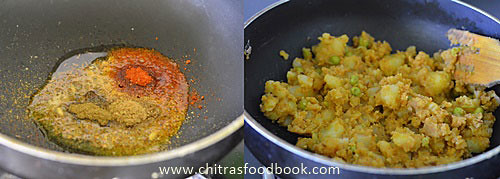
  • Peel the potatoes and mash it roughly like chunks. Do not mash it completely. Make sure there are some pieces here and there. Heat oil in a kadai. Splutter jeera.Saute ginger pieces. Add the masala powders like fennel seeds powder, red chilli powder, dhania powder, garam masala powder and  aamchur powder. 
  • Mix well without burning them. Keep the flame low. Now add the mashed potato and cooked peas. Add salt, mix well. Add chopped mint+coriander leaves and sprinkle some lemon juice. Mix well and switch off the flame. Stuffing is ready.
Samosa recipe
Samosa recipe
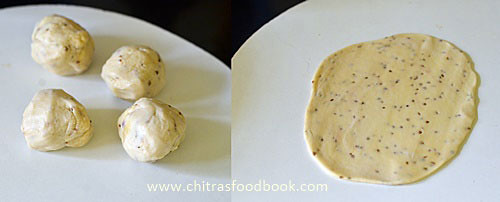
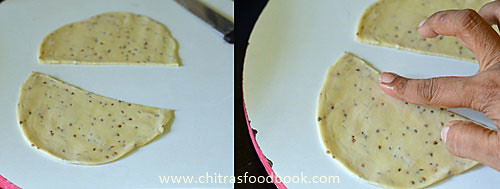
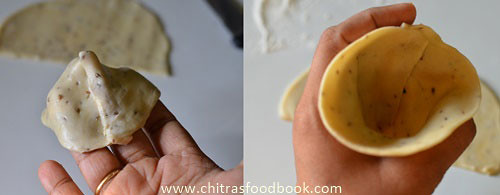
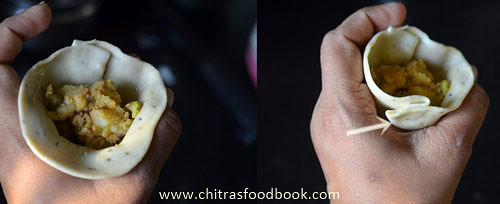
  • Now take the samosa dough.Divide into 4 equal sized big balls. Dust a ball in maida and roll it to a slightly oblong shape. Cut into two semi circles. Apply water on the straight side. Now join the edges and make a cone shape. Press it well. Hold the cone between your thumb finger and pointer finger. Stuff 2 tbsp of potato masala till its 3/4th filled. Cover the remaining dough balls with a wet cloth.
Samosa recipe
Samosa recipe
Samosa recipe
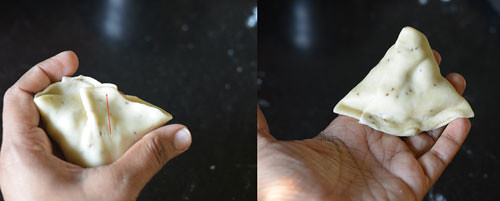
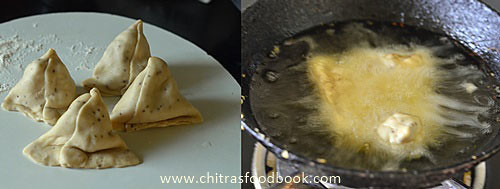
  • Make a single pleat by folding the middle part. It should come just opposite to the sealed part. Apply water all over the edges completely. Now pull the pleated part and seal the samosa. It make a flat base to the samosa and forms a back bone to the samosa. Now your samosa can stand beautifully ; )) Make all the samosa and arrange in a plate.
Samosa recipe
Samosa recipe
  • Heat oil and check its temperature by dropping a pinch of batter. It should rise but not so quickly. Oil should be medium hot. Now drop the samosa. 2 or 3 at a time based on the quantity of oil. Deep fry the samosa in low to medium for long time.It takes nearly 8-10 minutes for one batch. Cook both the sides till it becomes golden.
Samosa recipe
  • Cooking for long time helps to make the samosa become crispy and stay crispy longer. This is one of the most important point for crispy samosa. Remove in a tissue and serve hot with sweet chutney or ketchup.
Samosa recipe
Enjoy !
Note
  • Do not add too much oil or ghee than the mentioned quantity. Adding more gives soft samosa instead of crispy ones. Adding oil gives the bakery kind of samosa than adding ghee. I have tried with both. The smell & flavor of samosa was good with oil than ghee. So its your choice.
  • Add more spice powders based on your taste. Adding lemon juice is optional. I used it to balance the spiciness.
  • You can use mixed vegetables instead of potato.

Enjoy this crispy, yummy samosa with sweet chutney & green chutney in your teatime !
Samosa recipe

Continue Reading...


April 18, 2016

Thayir Vadai Recipe – South Indian Dahi Vada / Curd Vada

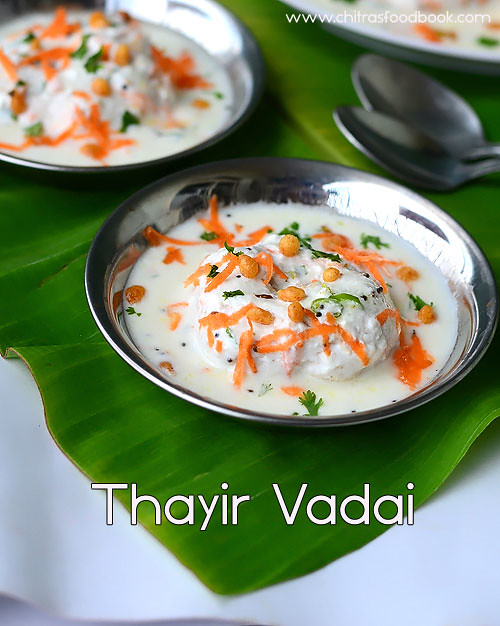
Thayir vadai recipe 
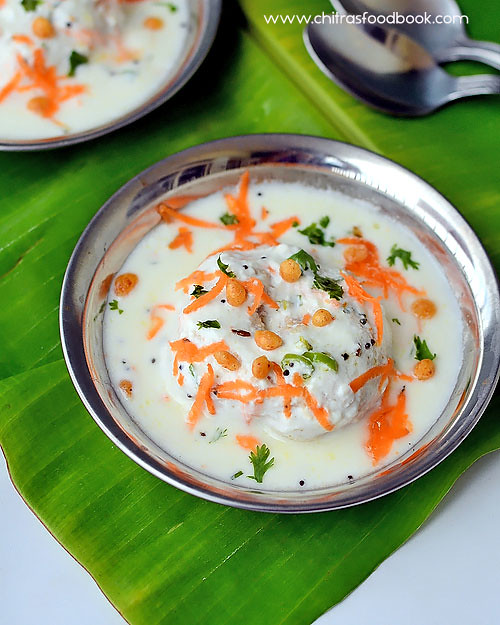
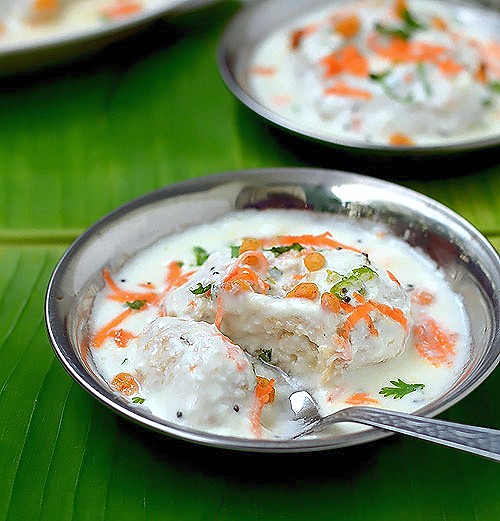
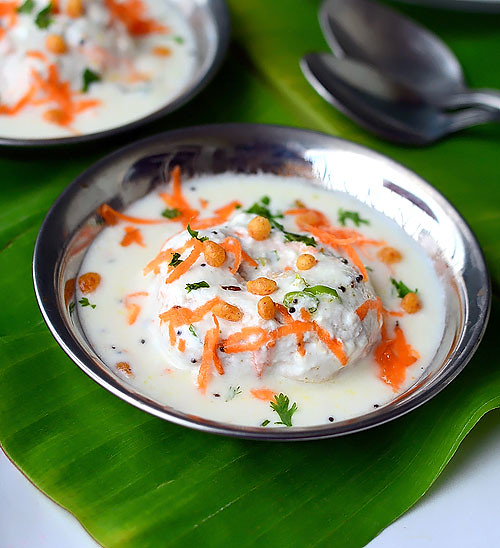
I am a big big fan of Tamil nadu style thayir vadai. I love this South Indian style dahi vada more than sambar vadai & rasa vadai. My FIL used to buy thayir vadai/Curd vada ( Perugu vada in Telugu) from hotel Saravana bhavan and Guptha sweets whenever we visit Salem. Vada tastes soft and spongy soaked up in curd with a nice flavor. On Tamil new year day, I made no onion urad dal Vada/Ulundhu vadai for Pooja. Then I prepared this Thairu vadai using the leftover vada. It came out very well. I served it by garnishing with grated carrot & kara boondhi just like the way served in restaurants. We loved it very much. Long back I have shared my daughter’s favorite North Indian Dahi vada recipe. And now I am happy to share my most favorite South Indian dahi vada which is our thayir vadai recipe with you all. Try it during this Summer Vacation and enjoy with your family. Lets see how to make South Indian Thayir vadai/Curd Vada Recipe.

Thayir vadai

Thayir Vadai Recipe - Curd Vada


Thayir Vadai Recipe - Curd Vada Thayir Vadai - South Indian Dahi vada/ Curd Vada Recipe
Cuisine: South Indian
Category: Snacks
Serves: Serves 5
Prep time: 30 Minutes
Cook time: 20 Minutes
Total time: 50 Minutes


INGREDIENTS
For making vada
  • White round Urad dal - 1/2 cup
  • Green chillies - 2nos
  • Ginger - 1 inch piece
  • Curry leaves - few
  • Asafetida/Hing - 2 pinches
  • Salt & water - as needed
For Curd Vada
  • Fresh thick curd - 1 cup
  • Water - 2 tbsp
  • Salt - as needed
To temper
  • Cooking oil - 2 tsp
  • Mustard seeds - 1/2 tsp
  • Urad dal - 1/2 tsp
  • Cumin seeds/Jeera – 1/4 tsp
  • Curry leaves - few
  • Cashew nuts - few
  • Hing - a pinch
To garnish
  • Grated carrot - 2-3 tbsp
  • Finely chopped coriander leaves - 2 tbsp
  • Kara boondhi - as needed
METHOD

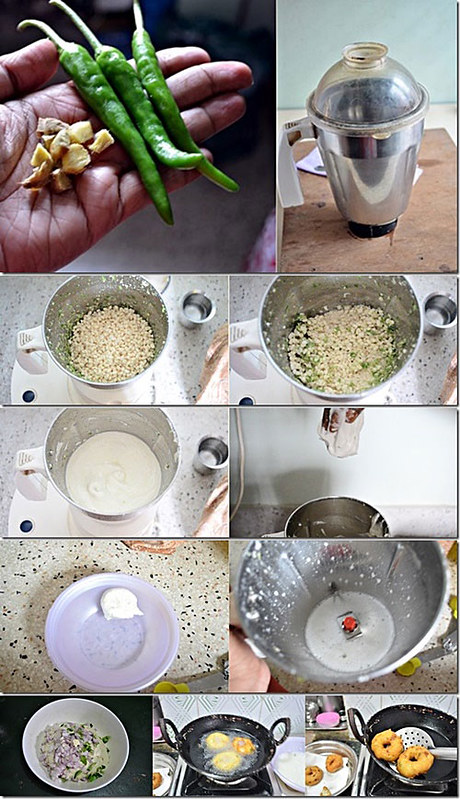
  • Wash and soak the urad dal for an hour or two. Drain the excess water completely. In a big mixie jar, grind green chillies, ginger and hing without adding water. Add the drained urad dal and grind it without water. It would grind coarsely.Wipe the sides of mixie jar. Now add 2 tbsp of water.Grind again. Add water in only a tsp or tbsp at regular intervals and grind a smooth & soft batter. Batter should not be watery or too thick. It should be airy & weightless. So add less water and grind the batter patiently. You can use ice cold water too. Do not add salt while grinding the batter. Remove the batter and check its consistency. For this,drop a pinch of batter in a bowl of water. If it floats on top, batter is just right. Remove the creamy batter in a bowl. Beat it well using your hands or an egg beater to make the batter airy( Updated tip from Sujata).Add finely chopped curry leaves, Pepper powder if you wish and required salt if you are going to make vada immediately. Else keep the batter in the refrigerator till use without adding salt.
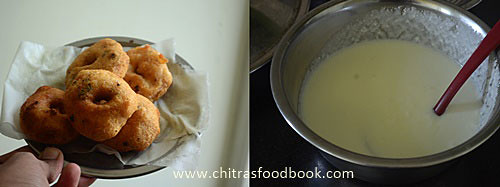
  • Heat oil to deep fry and check its temperature by dropping a pinch of batter. If it rises immediately, oil temperature is right. Simmer the flame and drop the vada into the oil.Fry in batches,3-4 at a time in medium flame. Remove in a tissue once it turns golden on both the sides. Make 5 vada and keep it ready.
Check out my Medhu vada recipe using MIXIE for more details !
Thayir vadai recipe
  • Take 1 cup of thick curd in a wide bowl. Add 2 tbsp of water or little more and whisk it. Add salt and check for taste.Make sure curd is not too thick or too watery.
Thayir vadai
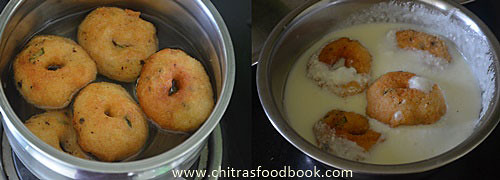
  • Now boil water in a wide bowl till it starts to bubble. Drop the vada in the water. Let it be inside hot water for just a minute. Then remove the vada and put it in the curd mixture.
Thayir vadai
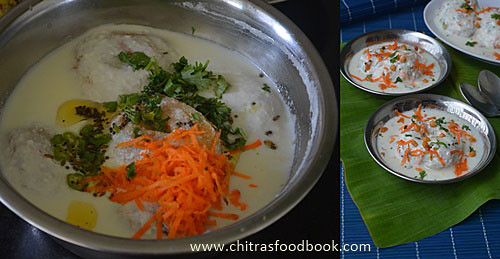
  • Let the vada soak in curd mixture for 30 minutes to 4 hours. Make sure vada is well immersed in curd mixture.Temper mustard seeds, urad dal, hing, curry leaves, cashews and add to the curd. You can also add a finely chopped green chilli and add while tempering.
  • Just before serving, add finely chopped coriander leaves, grated carrot and Kara boondhi. Serve immediately and enjoy !!
Thayir vadai
  • Yummy Tamil nadu style thayir vadai is ready !! Enjoy !

Note
  • Grinding vada batter properly is more important. If the vada turns out hard, it won’t absorb the curd mixture properly. In that case, you can dip the vada in hot water for 30 minutes before putting in curd mixture.
  • For variations, you can grind green chillies+ginger to a paste and mix with curd instead of grinding with urad dal. But add less green chillies ( 1 or 2) because curd mixture will become too spicy.
  • Dipping in hot water helps the vada to become soft and absorb the curd mixture.
  • If the curd is too thick, vada won't absorb it.So add little water & whisk it & dilute before you drop the vada.
  • Don’t worry even if the vada is too cold or at room temperature. Dipping in hot water makes it warm and helps to absorb the curd.So you can make thayir vadai with leftover vadai easily as I did.
  • Do not forget to garnish with coriander leaves, grated carrot and kara boondhi.
Curd vada recipe
Enjoy this yummy, creamy, spongy, juicy thayir vadai !! Tastes absolutely yum !!
South Indian curd vada
Continue Reading...


April 17, 2016

Killu Vadam Recipe – How To Make Killu Vathal–2 Versions

Killu vadam recipe
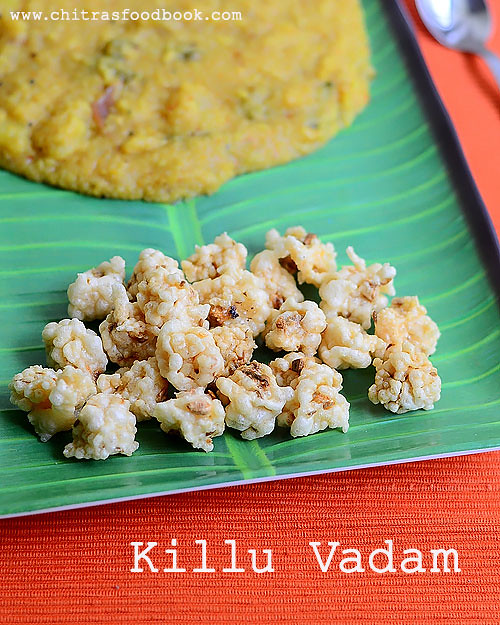
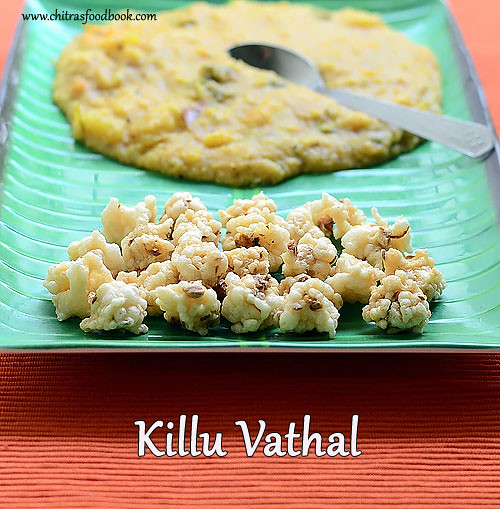
I have never thought I would make koozh Vadam/Vathal in Bangalore. This year Bangalore’s weather is equally hot to Salem. So I told my MIL to make Vengaya Vadagam and killu vadam for me. Last year when I posted Arisi Koozh Vathal recipe, I had mentioned about my mom’s Killu vadam recipe using leftover rice. Before marriage, I have helped my aachi & mom to make this killu vadam. She makes in lots and store for months together. Its a very simple recipe that is made with pazhaya sadam. After marriage, I learnt another version of killu vadam from my MIL. In this version, boiled rice is soaked in water for two hours, ground smooth adding spices and cooked to make it thick like a koozh. Then it is pinched into small pieces and spread on a paper or cloth. This one tastes so crunchy with melt in mouth texture. But this is a time consuming job when compared with leftover rice killu vathal. Leftover rice vathal tastes hard when compared with rice vathal. Both the versions has its own advantages and disadvantages. So I have shared both the version of making killu vadam. Choose any as per your liking and try it. But however you make, it would be loved by all. The flavor of onion reminds you onion pakoda while eating. You can enjoy this vadam with sambar sadam, tamarind rice and lemon rice. Ideal for travel. Try it and share your feedback here. Lets see how to make Killu vadam at home.

Check out my other SUMMER RECIPES too.
Killu vadam

Killu Vadam Recipe


Killu Vadam Recipe How to make killu vadam recipe - 2 versions
Cuisine: Indian
Category: Vadam/Vathal
Serves: 2 cups
Prep time: 120 Minutes
Cook time: 20 Minutes
Total time: 140 Minutes


INGREDIENTS
1 cup - 250ml
Version - 1
  • Leftover Rice - 2 cups (Its cooked parboiled rice/ Saapatu Puzhungal arisi)
  • Green chilli - 3 nos
  • Cumin seeds/Jeera - 2 tsp
  • Small onion - 15 nos
  • Lemon juice – 1/2 lemon (small size)
  • Salt - as needed
  • Water - very little
Version - 2
  • Steamed rice/ Boiled rice - 1 cup ( Lunch rice, saapadu arisi)
  • Green chilli - 3 nos
  • Cumin seeds/Jeera - 2 tsp
  • Small onion - 15 nos
  • Lemon juice – 1/2 no ( small size)
  • Salt - as needed'
  • Water - 5 cups ( as needed)
METHOD

    METHOD –1
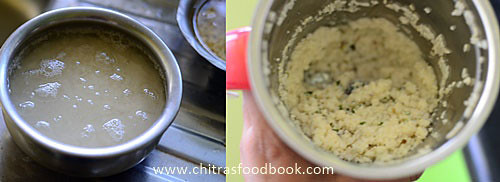
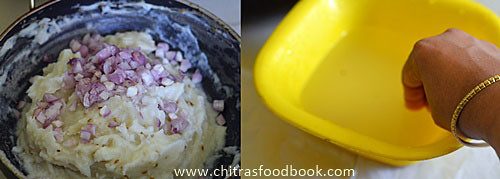
  • Add water to the leftover rice till it immerses and leave it overnight. The next day morning, take the rice and drain the excess water. Take the rice in a big mixie jar. Add green chillies, hing and salt. Grind to a smooth paste adding very little water if necessary. Add water in a tbsp only if needed. It should come like a thick paste. So do not make it watery. Its the most important point to keep in mind. 
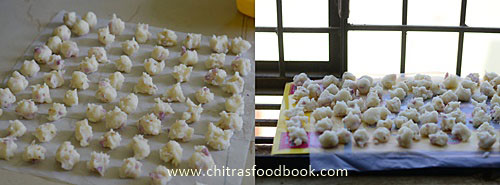
  • After grinding the paste,transfer it to a vessel. Chop the onions into small cubes and add to the rice paste. Add cumin seeds.Sprinkle few drops of lemon juice. Mix well and check for salt. Take a cotton cloth or plastic sheet/Polythene sheet. Pinch the rice dough and arrange it in the cloth as shown below. Let it dry under the sun for 3-4 days till it shrinks and change in color. Keep it under the fan during night.
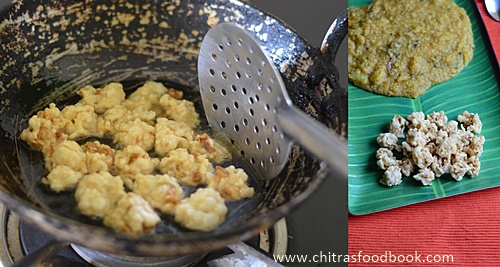
  • Heat oil to deep fry and fry the vadam till it becomes crispy. Deep fry one or two to check whether its dried up completely. If its not chewy and soft inside, vadam is dried. Else sun dry it for another day or two.Fry the vadam till onions turn slightly golden brown. This vadam browns faster as we use cooked rice and onion. This vadam tastes slightly hard that method - 2. So fry in medium flame carefully. Do not burn them. Remove and serve with rice varieties !!
  • Remove and serve as an accompaniment for rice.
METHOD –2
  • Wash and soak the rice for 2 hours. Grind it to a smooth paste adding green chillies, hing , salt & enough water. I added 2 cups of water to grind it.
  • ( Actually this batter has to be fermented over night.But I skipped this step and made the batter instantly by adding lemon juice for sourness).
Killu vadam recipe
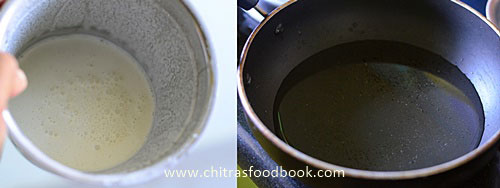
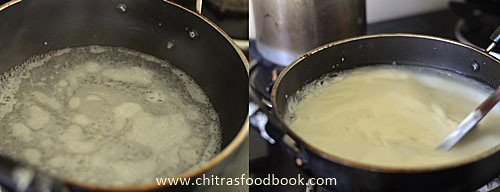
  • Add 3 cups of water in a kadai. Let it roll boil.Add the rice paste and mix well.
Killu vadam recipe
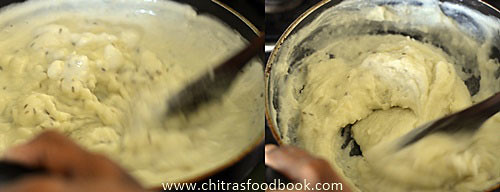
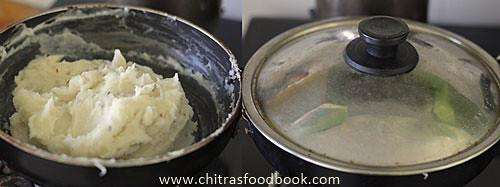
  • Add cumin seeds & required salt. Mix well and boil the mixture till it becomes a thick paste. After it becomes a thick paste and leave the sides of pan, add water around the paste and cover the kadai with a lid. Adding water in the sides help to prevent the burnt bottom. Keep the flame low and cover cook the mixture till it changes its color to pale white.
Killu vadam recipe
Killu vadam recipe
Killu vadam recipe
  • After the mixture is cooled down, add lemon juice and chopped onions.Check for taste.Pinch into small pieces by dipping your hands in water.Spread them on a white cloth or polythene sheet.
Killu vadam recipe
  • Let it dry for 3-4 days till it shrinks and changes in color. Keep it under the fan during night.
Killu vadam
  • Heat oil and deep fry one or two to check whether its dried up completely. If its not chewy and soft inside, vadam is dried. Else sun dry it for another day or two.Remove after the vadam is fried well. Onions should turn slightly golden brown. Do not burn them.Remove and serve with rice varieties !!
Killu vadam
Enjoy !


Note

  • As I told, method 1 is easy compared with method 2. Its ideal for beginners and leftover rice can be used effectively in this summer. 
  • In method 2, you can add more water while grinding & cooking the batter. If the batter is too thick, vadam may taste hard. So make the batter slightly thin.
I love to have Killu vadam with Sambar Sadam more than other rice varieties. What’s your choice ??
Killu vadam

Continue Reading...