Search Chitra's Food Book

September 14, 2022

Kerala rice payasam with jaggery – Ari Payasam | Sharkara Payasam recipe

Sharkara payasam

During Onam festival, people make different types of payasam for Onam sadya. I have already shared Payasam varieties of Kerala in my Onam sadya posts. Here is yet another traditional Payasam recipe of Kerala that is prepared using raw rice and jaggery. It is called as Sharkara payasam/ Ari payasam/ Unakalari payasam / Nei payasam / Ney payasam/ rice payasam with jaggery/ Kerala rice kheer.

Its consistency and taste is more like Sweet pongal / Sakkarai pongal. This payasam is more popular in Kerala temples. This payasam is prepared using Kerala raw rice that looks light pink in color. It is called as Unakalari in Malayalam.

Traditionally Ari payasam is prepared in a big uruli but I used a pressure cooker to finish the job quickly. So you cannot achieve the authentic taste but its equally good. In Kerala, people make this payasam adding thin and thick coconut milk. But there is another version that uses ground coconut paste instead of coconut milk. I followed that recipe. Soon I will try to share the temple style authentic Sharkara payasam.

Now lets see this easy version of making Kerala style rice payasam with jaggery in a pressure cooker with step by step pictures.

Please check out my other KERALA RECIPES too !

Kerala rice payasam

Kerala rice payasam with jaggery / Ari payasam - Nei payasam


Kerala rice payasam with jaggery / Ari payasam - Nei payasam

Kerala style rice payasam with jaggery. It is called as Ari payasam / Sharkara payasam / Nei payasam in Malayalam.


Cuisine: Kerala
Category: Sweet
Serves: Serves 4
Prep time: 10 Minutes
Cook time: 20 Minutes
Total time: 30 Minutes


INGREDIENTS

  • Kerala raw rice / Unakalari - 1/2 cup
  • Powdered dark jaggery - 1 cup
  • Water - 2 cups
  • Ghee - 1/4 cup
  • Grated coconut – 1/4 cup
  • Cardamom - 2 (crushed)
  • Dry ginger powder - 1/2 tsp
  • Edible camphor / Pachai karpooram - a dash
  • Salt – a pinch
HOW TO MAKE KERALA RICE PAYASAM WITH JAGGERY
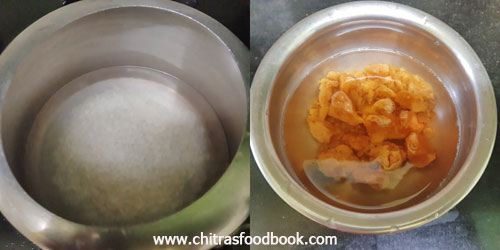
  1. Wash and take the rice in a pressure cooker. Add water and a pinch of salt.
  2. Pressure cook in low flame for one whistle. Make sure rice is not over cooked and mushy. It should retain its shape.
  3. In the mean time, melt jaggery in little water to make a syrup. No need of any consistency.
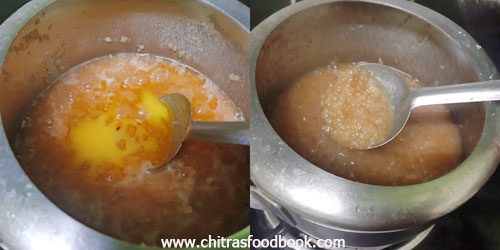
  4. Filter the syrup and add to the cooked rice. Mix well and boil for few minutes.
  5. Add grated coconut or thick coconut milk and boil for a minute. Add ghee at regular intervals and mix till thick. 
  6. switch off the flame once it becomes thick, creamy and glossy. Roast the cashews and add to it. Add cardamom powder and a pinch of edible camphor.
  7. Mix well and serve !  
METHOD - STEP BY STEP PICTURES
  • Wash and take the rice in a pressure cooker. Add water, a pinch of salt and cook in low flame for one whistle. Alternately you can cook the rice in open pot too.
Kerala rice payasam with jaggery
  • Pressure cook in low flame for one whistle. Make sure rice is not over cooked and mushy. Rice should be cooked but its should retain its shape.
Kerala rice payasam with jaggery
  • Open the cooker after the steam is released. Mash it gently. Melt jaggery adding water and strain the syrup. Add to the cooked rice.
Kerala rice payasam with jaggery
  • Add grated coconut, mix well. Boil for few minutes. When it starts to thicken, add ghee at regular intervals till the payasam becomes creamy and saucy. Switch off the flame and let it rest. 
Kerala rice payasam with jaggery
  • In the mean time, roast cashews, coconut pieces till golden and add to payasam. Add cardamom powder, dry ginger powder and mix well.
  •  Kerala rice payasam with jaggery
  • Serve hot or warm as you like. Enjoy ! This payasam looks like sweet Pongal once its cold. So you can serve as such or add little coconut milk or warm milk to adjust the consistency.

Note

  • Adjust the quantity of jaggery as per your taste buds. Traditionally 1:2 of rice and jaggery is used.
  • You can add thin coconut milk instead of grated coconut, let it boil and finally add thick coconut milk before switching off the flame.

  
  Enjoy this delicious, Kerala style Sharkara payasam @ nei payasam with pazham and papadam !


Kerala Nei payasam


Continue Reading...


September 5, 2022

Murungai keerai podi–Drumstick Leaves Chutney Powder For Rice, Idli , Dosa

moringa powder recipe

Recent days I am trying to include drumstick leaves /Moringa leaves in my cooking at least once in a week as its a super food. Drumstick leaves tree is a miracle tree. It has amazing health benefits. It is one of the richest plant sources of Vitamin A, B, C, D, E, K, Anti-oxidants and vital minerals like Calcium, Copper, Iron, Potassium, Magnesium, Manganese and Zinc. The leaves, pods, seeds, gums, bark and flowers of Moringa are useful to treat mineral and vitamin deficiencies, support  a healthy cardiovascular system, promotes normal blood-glucose levels, neutralise free radicals, provide excellent support of the body's anti-inflammatory  mechanisms, enrich anaemic blood and support the immune system. It is also known to improve eyesight, mental alertness and bone strength. It has potential benefit in malnutrition, general weakness, lactating mothers, menopause, depression and osteoporosis.  
Source : https://www.healthaid.co.uk/blogs/news/wonders-moringa

Usually I make drumstick leaves soup or poriyal with it. For a change, I tried Murungai keerai podi for rice, idli and dosa so that I can pack it for Raksha’s lunch box as well. I asked my MIL for the recipe and tried it for the first time. It came out so well. This drumstick leaves chutney powder tastes yummy when mixed with plain rice adding few drops of ghee.

Friends, do try this Murungai keerai podi / Drumstick leaves powder for rice, Idli, dosa and enjoy. This podi stays good without refrigeration for a month. Lets see how to make Murungai keerai podi with step by step pictures.

How to use this powder :  Take a tsp of this powder, mix with plain rice adding a tsp of ghee and enjoy it. You can also add a tsp of this powder in rice varieties like tomato rice, lemon rice, curry leaves rice or any vegetable rice.  You can also have this powder as side dish for idli, dosa like our usual chutney powder. But use in moderation. Mix with ghee or sesame oil and enjoy with idli, dosa. Alternatively, you can sprinkle this powder over the dosa and enjoy it like podi uthappam. You can add this powder while making sambar or vathakulambu and enjoy its benefits. Tastes different and flavorful too. 

 Murungai keerai podi

Murungai keerai podi / Drumstick leaves powder recipe for rice


Murungai keerai podi / Drumstick leaves powder recipe for rice

Murungai keerai podi / Drumstick leaves powder recipe for rice, idli, dosa


Cuisine: Indian
Category: Side dish
Serves: 1 cup
Prep time: 10 Minutes
Cook time: 20 Minutes
Total time: 30 Minutes


INGREDIENTS

  • Drumstick leaves / Murungai keerai - 1 bunch / 3 cups Or Readymade moringa powder - 2 tbsp
  • Black gram dal / Black Urad dal - 1/4 cup
  • Chana dal – 2 tbsp
  • Red chilli - 5 
  • Pepper corns - 1/2 tsp
  • Cumin seeds - 1 tsp
  • Coriander seeds – 1 tbsp
  • Curry leaves - Few
  • Asafoetida / Hing - 1/4 tsp
  • Black or White sesame seeds – 1 tbsp
  • Turmeric powder – 1/4 tsp ( to get bright green color)
  • Salt - as needed
  • Cooking oil - 2 tsp
HOW TO MAKE MURUNGAI KEERAI PODI
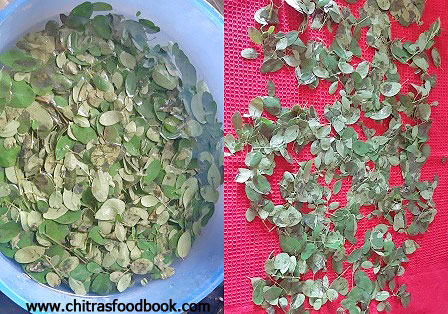
  1. Take out the leaves from the stem and discard the yellow and wilted ones.
  2. Remove the small stalks and stems from the leaves and discard them.
  3. Wash them and spread the leaves in a cotton towel. Let the leaves dry in shade for 2 days.
  4. Heat 1/2 tsp oil in a kadai. Roast urad dal till golden in color. Transfer to a plate.
  5. Add 1/2 tsp oil in the kadai and roast chana dal till golden in color. Transfer to the plate.
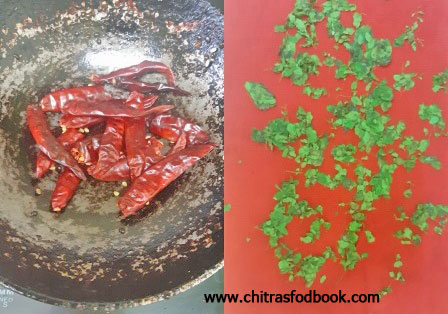
  6. Again add oil and roast the red chilli, curry leaves, pepper corns, cumin seeds till crispy. Do everything in low to medium flame patiently.
  7. Add the roasted chillies to the plate. Lastly add the black sesame seeds and dry roast till it splutters. Add the coriander seeds and roast for a minute.
  8. Switch off the flame and add the hing. For variations, you can roast all the above ingredients together in low to medium flame patiently and grind it.
  9. Firstly grind the chillies and salt till coarse powder. Then add the roasted dals, pepper and cumin seeds. Grind to a smooth powder.
  10. Lastly add the dried moringa leaves along with turmeric powder, salt and grind to a smooth powder.
  11. Transfer to a box and store it. It stays good up to a month.
  12. Enjoy mixing with plain rice adding ghee. Tastes great with idli, dosa too.
METHOD - STEP BY STEP PICTURES
  • Take the drumstick leaves bunch and seperate the leaves from the stalk.
  • Discard the yellow and wilted leaves. Remove the small stalks as well.
  • murungai keerai podi for rice
  • Now wash the leaves and drain the water completely. Spread the leaves in a cotton cloth and leave it dry under the shade for 2 days. For instant version, dry it for 2 hours and then dry roast in hot kadai for few minutes till it turns crispy. Switch off the flame and let the leaves be in hot kadai for sometime.

  • Heat 1/2 tsp oil in a kadai. Roast urad dal till golden with nice flavour. Transfer to a plate. Similarly roast the chana dal till nice and crispy. Transfer to the dal plate. 
    • murungai keerai podi for rice
  • Now add 1/2 tsp oil and roast the red chilli till crispy. Remove and transfer to the plate.
  • murungai keerai podi for rice
  • Dry roast sesame seeds and coriander seeds till sesame seeds splutters. Add to the plate. Let everything cool down. 
  • murungai keerai podi for ricemurungai keerai podi for rice
  • Firstly grind the red chilli, salt to a coarse powder and then grind the dals and seeds. It gives a nice color to the podi. Lastly add the moringa leaves and turmeric powder, grind it smooth. Transfer to a box and store it. Use up to a month.
  • murungai keerai podi
    Enjoy !

Note

  • Adjust the quantity of moringa leaves as per your taste.
  • Alter the quantity of red chilli as per your taste.
  • For variations, you can roast all the above ingredients together in low to medium flame patiently and grind it. But do it patiently without burning any. 

  
  Enjoy this healthy Moringa podi with rice, idli and dosa.

Murungai keerai podi


Continue Reading...


August 18, 2022

Aval Kesari Recipe | Poha Sheera | Avalakki Kesaribath

Aval Kesari

Aval Kesari / Poha Sheera in Hindi / Avalakki Kesaribath in Kannada, Atukula Kesari in Telugu is an easy sweet recipe that is served as prasadam for festivals like Gokulashtami, Ganesh Chaturthi, Varalakshmi Viratham, Friday Lakshmi Pooja and Thursday Guru pooja.

Aval Kesari is so easy to prepare under 15 minutes. Its a beginners sweet recipe. All you need is Poha/ Rice flakes, Sugar, Ghee and cardamom powder. Unlike our regular rava kesari, this poha kesari thickens quickly and chances of hardening is very less. So its easy to identify the end consistency. I have shared 2 videos in different languages and step by step pictures. I have added a video of Aval Kesari seimurai in Tami. Please watch it for better understanding. 

 Soon I will try to make an Aval kesari with jaggery. Friends, do try this easy Aval Kesari for this Gokulashtami / Krishna Jayanthi and enjoy.


Aval kesari in Tamil video ꜛ

aval kesari recipe

Aval Kesari / Poha sheera / Avalakki Kesaribath / Atukula Kesari


Aval Kesari / Poha sheera / Avalakki Kesaribath / Atukula Kesari

Aval Kesari / Poha sheera / Avalakki Kesaribath / Atukula Kesari for festival Prasadam/ Neivedaym.


Cuisine: South Indian
Category: Dessert
Serves: 3
Prep time: 10 Minutes
Cook time: 20 Minutes
Total time: 30 Minutes


INGREDIENTS
1 cup = 250ml
  • Poha / Thick Aval / Rice flakes - 1/2 cup
  • Sugar - 1/2 cup
  • Water - 1 to 1.5 cups
  • Ghee - 3 tbsp
  • Cardamom powder - 1/4 tsp
  • Cashew nuts – 5
  • Cloves – 1
  • Orange food color / Kesari color – a pinch
HOW TO MAKE AVAL KESARI
  1. Heat 2 tsp of ghee in a kadai. Add the Aval and roast till crispy.
  2. Take the roasted Aval and break it to check if crispy. Transfer to a mixer.
  3. Grind coarsely and set aside. Boil water in the same kadai adding a pinch of food color.
  4. When the water roll boils, lower the flame completely. Add the roasted poha powder.
  5. Mix without lumps till thick. Cover cook in low flame for 5 minutes.
  6. Then add sugar, cardamom powder and ghee. Mix without lumps in low flame.
  7. Mix till kesari leaves the sides of pan completely. Switch off the flame.
  8. Roast Cashews in 1 tbsp ghee and add to Kesari. Mix well and transfer to a plate. Serve warm and enjoy !
METHOD - STEP BY STEP PICTURES
  • Heat 2 tsp of ghee in a kadai. Add the aval and roast till crispy. Let it cool. Grind to a coarse powder. Set aside.
  • Aval kesari
  • Add 1.5 cups of water in a kadai. Add a pinch of Kesari color. Let it roll boil. Lower the flame and add the roasted poha powder. Mix well without lumps.
  • Aval kesari
  • Mix in low flame till the mixture becomes thick. Cover cook in low flame for few minutes.Aval kesari
  • Add sugar, cardamom powder, clove and a tbsp of ghee. Mix in low flame till the sugar melts completely.
  • Aval kesari
  • Keep mixing till kesari becomes thick and leaves the sides of pan. Lastly roast cashews in a tbsp of ghee and add to the Kesari. Serve hot and enjoy.

Note

                
  • Adjust the quantity of sugar based on your taste.
  • Adding cloves is optional.
  • You can also use lesser ghee than mentioned but taste won’t be rich.


Try this easy, yummy Aval kesari for Gokulashtami and enjoy !

how to make aval kesari


Continue Reading...


July 27, 2022

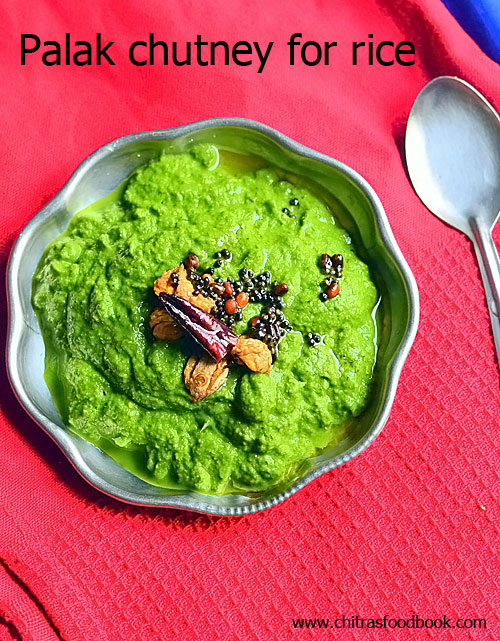
Palak Chutney For Rice, Dosa, Roti – Pasalai keerai thogayal - Spinach Chutney

Palak chutney

Usually I make Palak paneer, Palak chapathi or Dal palak using Palak leaves( Pasalai Keerai in Tamil) / Spinach chutney. This time I tried a chutney recipe with Palak leaves. I never thought Palak chutney would taste so good with rice and dosa. I loved it very much. Its so easy to make and tastes delicious.

During busy morning hours, if you are looking to make something easy and healthy to pack for kids and husband’s lunch box, this is the one. Tastes the best when mixed with plain rice adding ghee. I tried this recipe after watching few YouTube videos. Its similar to Andhra style Palakura Pachadi/ Palak chutney recipe.

Please check my Instant Palak dosa recipe too. 

Ok friends, lets see how to make Palak chutney with step by step pictures and video.


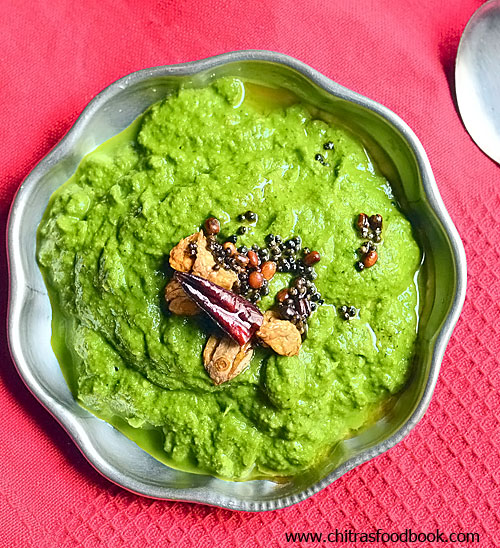
 Palak chutney for rice

Palak chutney / Pasalai keerai chutney recipe


Palak chutney / Pasalai keerai chutney recipe

Palak chutney / Pasalai keerai chutney recipe for rice, roti and dosa.


Cuisine: South Indian
Category: Side dish
Serves: Serves 3
Prep time: 10 Minutes
Cook time: 20 Minutes
Total time: 30 Minutes


INGREDIENTS

  • Palak leaves / Pasalai keerai - 1 bunch
  • Cooking oil - 2 tbsp
  • Urad dal - 1 tsp
  • Chana dal - 1 tsp
  • Cumin seeds - 1/2 tsp
  • Black or White sesame seeds - 1 tsp
  • Coriander seeds / Dhania - 1 tsp
  • Green chilli - 1 or 2
  • Tamarind - 1 small piece
  • Hing / Asafoetida – 1/4 tsp
To temper
  • Ghee or cooking oil - 2 tsp
  • Mustard seeds - 1/2 tsp
  • Urad dal - 1 tsp
  • Crushed garlic - 5
  • Red chilli - 1

HOW TO MAKE PALAK CHUTNEY
  1. Wash and chop Palak leaves roughly.
  2. Dry roast sesame seeds in a kadai and add oil to it.
  3. Saute urad dal, chana dal, hing, methi, dhania and cumin seeds.
  4. Remove in a plate. Add some oil and add in green chilli, palak leaves.
  5. Add turmeric powder, sugar and salt. Saute well till palak leaves shrink.
  6. Switch off the flame. Grind everything together to a smooth paste.
  7. Heat oil in a kadai. Temper mustard seeds, urad dal, crushed garlic and red chilli.
  8. Add to the Palak chutney and mix well. Serve with plain rice adding ghee.

METHOD - STEP BY STEP PICTURES

  • Wash and chop Palak leaves roughly and set aside.

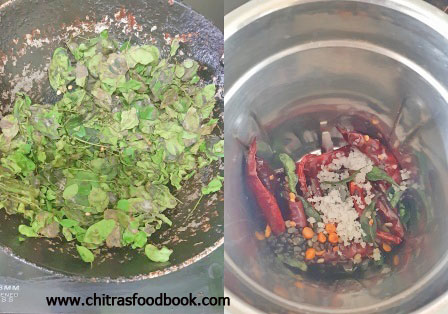
  • Dry roast sesame seeds in a hot kadai. Add little oil in the kadai and add urad dal, chana dal, methi seeds,  dhania, hing and cumin seeds. Roast till dals turn golden. Remove in a plate.
  • Palak chutney
  • In the same hot kadai, add little oil and put the green chilli, chopped palak leaves, turmeric powder and salt.
  • Palak chutney
  • Saute till palak leaves shrink in quantity. Switch off the flame and cool down.
  • Palak chutney
  • Grind the roasted dals, sesame seeds mixture and sauteed palak leaves together adding little water. Grind to a thick and smooth paste.
  • Palak chutney
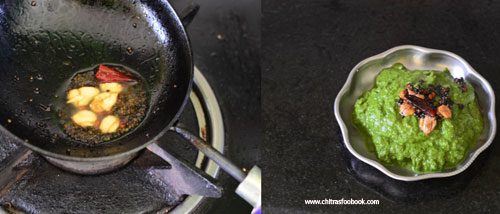
  • Heat oil in a small kadai. Temper mustard seeds, urad dal and add to the palak chutney. Mix well and enjoy !

Note

  • For variations, you can use red chilli instead of green chilli.
  • You can also saute one onion before adding palak leaves. It gives a unique taste and more yield of this chutney.


Try this easy, healthy Palak chutney for rice, dosa. Enjoy !

palak chutney for rice

Technorati Tags: ,,,,,,

Continue Reading...


July 15, 2022

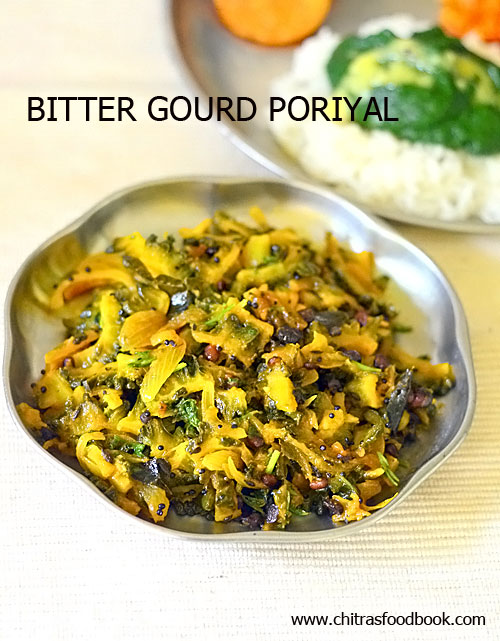
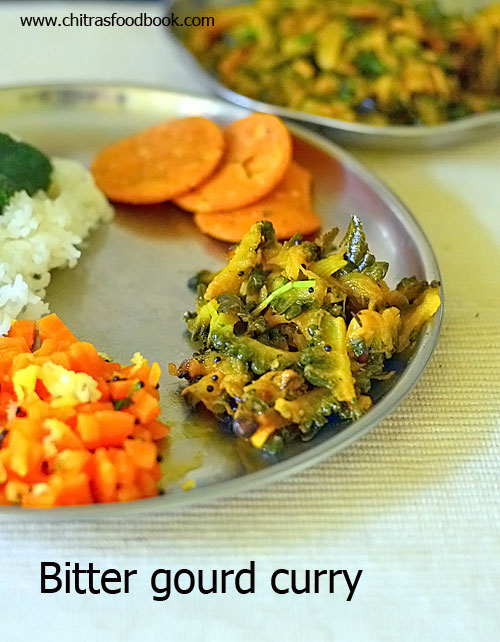
Pavakkai Poriyal – Bitter Gourd Curry Recipe

Bitter gourd curry

I love to try varieties of recipes with bitter gourd. Iam trying to include Pavakkai in my cooking at least once or twice in a week considering its health benefits. My daughter Raksha likes to eat bitter gourd only if its bitterness is less or it should be in deep fried form like bitter gourd chips with wheat flour. But I want to avoid making deep fried stuffs often. So I started exploring many side dishes using bitter gourd.

Recently I came across an easy pavakkai poriyal in pressure cooker in a You tube channel. As mentioned, my poriyal had a very mild bitter taste. We all loved it. The addition of sugar / jaggery made it more tasty. So Raksha too ate it without any complaints.

Actually this poriyal can be prepared by just sauting in a kadai with generous oil but I did everything in a pressure cooker with less oil and made it soft. It tastes good in either ways. Finally its our choice.

Lets see how to make Pavakkai poriyal without coconut in a pressure cooker.

Pavakkai poriyal


Pavakkai poriyal recipe / Bitter gourd curry


Pavakkai poriyal recipe / Bitter gourd curry

Pavakkai poriyal recipe / Bitter gourd curry for rice


Cuisine: Tamilnadu
Category: Side dish
Serves: Serves 3
Prep time: 10 Minutes
Cook time: 20 Minutes
Total time: 30 Minutes


INGREDIENTS
1 cup = 250ml
  • Pavakkai / Bitter gourd - 1 ( medium sized)
  • Big onion - 1
  • Garlic cloves – 10
  • Tamarind extract – 1 tsp
  • Turmeric powder - 1/4 tsp
  • Sambar powder -1 tsp
  • Jaggery or sugar - 1 tsp
  • Salt & water - as needed
To temper
  • Cooking oil -2 tbsp
  • Mustard seeds - 1/2 tsp
  • Urad dal - 1 tsp
  • Chana dal - 2 tsp
  • Hing / Asafoetida - a pinch
  • Curry leaves - few
HOW TO MAKE BITTER GOURD CURRY IN PRESSURE COOKER
  1. Wash and chop bitter gourd into thin slices. Chop onion and garlic thinly.
  2. Heat oil in a cooker. Splutter mustard seeds, urad dal, chana dal and hing.
  3. Add curry leaves, onion and crushed garlic cloves. Saute well.
  4. Add chopped bitter gourd and saute for few minutes till it shrinks in size.
  5. Lower the flame and add sambar powder, turmeric powder, jaggery and salt.
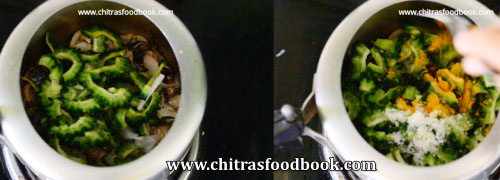
  6. Mix well and add required water. Pressure cook in low flame for one whistle.
  7. Open the cooker after the steam is released. If there is excess water, boil in high flame till water evaporates. Mix gently and transfer to a plate.
  8. Serve with sambar, rasam rice and curd rice.
METHOD - STEP BY STEP PICTURES
  • Wash and chop Bitter gourd into thin slices. Chopping thinly helps to remove bitterness. Wash and chop onion. Crush garlic cloves. Set aside.
  • Heat oil in a pressure cooker. Splutter mustard seeds, urad dal, chana dal, cumin seeds, curry leaves, crushed garlic and sliced onion. Saute till onion becomes transparent.
  • Pavakkai poriyal
  • Now add the thinly sliced bitter gourd and saute for a minute. Add turmeric powder, salt and sugar/ jaggery. Mix well. Adding turmeric powder helps to retain bright green color of bitter gourd.
  • Pavakkai poriyal
  • Add 1/4 cup of tamarind extract, sambar powder and mix well. Lastly add little water ( say 2 tbsp) and close the pressure cooker with its lid. Let the flame be high.
  • Pavakkai poriyal
  • Once the steam starts to come out, lower the flame completely and put the weight valve. Let it cook in low flame for one whistle. Switch off the flame and let the pressure release naturally.
  • Pavakkai poriyal
  • Open the cooker and add finely chopped coriander leaves. Mix gently. Boil for few minutes if there is excess water. If there is no water, you can just mix and serve with rice. Tastes good with sambar, vatha kuzhambu, kara kulambu and curd rice.

Note

  • Slice the bitter gourd thinly to avoid bitter taste.
  • Adjust the quantity of sambar powder as per your taste.

Technorati Tags: ,,,,,

Continue Reading...


July 9, 2022

Pesarattu Recipe – Andhra style Pesarattu | Green Gram Dosa

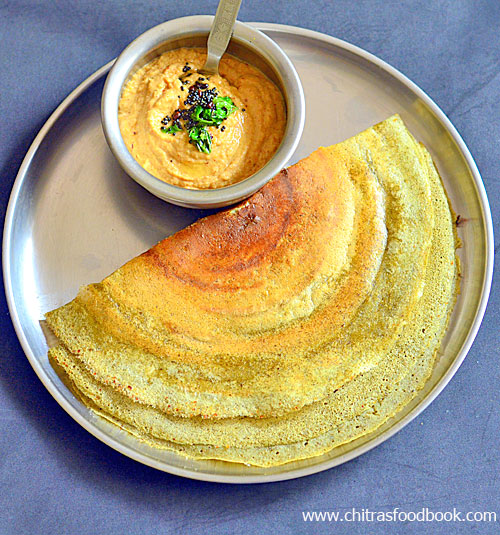
Pesarattu recipe

Andhra’s most popular and healthy breakfast recipe, Pesarattu along with Allam pachadi i.e Ginger chutney is one of my favourite recipes with Green gram/ Mung beans. I try to make it at least once in two weeks. In Tamil, we call it as Pacha payaru dosai. Though I make it regularly at home, I have never shared the recipe in my blog.

People fondly call this Pesarattu as MLA Pesarattu as it is popular in the MLA head quarters in Hyderabad. Usually this Pesarattu is stuffed with plain rava upma and served with spicy and tangy Ginger chutney. Some people also spread onion, carrot and green chilli mixture over the dosa instead of stuffing upma in it.

Today I have shared a very simple recipe without any stuffing or topping as we like it that way. We simply need a tangy Allam pachadi to go with it. Basically Green gram is high in fibre and low in calories. So this Pesarattu dosa recipe would be ideal for people looking for weight loss. It also makes less bloating and gas when compared with other legumes. So anyone can easily consume it without any worries.

Ok, lets see how to make this Andhra special Pesarattu recipe with step by step pictures.

Andhra pesarattu

Pesarattu recipe - Andhra style Pesarattu recipe with rice


Pesarattu recipe - Andhra style pesarattu recipe with rice

Pesarattu recipe - Andhra style pesarattu recipe with rice


Cuisine: Andhra
Category: Breakfast
Serves: 10
Prep time: 10 Minutes
Cook time: 20 Minutes
Total time: 30 Minutes


INGREDIENTS
1 cup = 250ml
  • Whole moong / Green gram - 1 cup
  • Raw rice - 2 tbsp
  • Green chilli - 2
  • Ginger - 1/2 inch
  • Cumin seeds - 1/2 tsp
  • Salt & water - as needed
  • Ghee or cooking oil - to drizzle over Pesarattu
  • Chopped onion, green chilli and carrot - for topping
HOW TO MAKE ANDHRA STYLE PESARATTU RECIPE
  1. Wash and soak green gram along with rice for 4 to 6 hours.
  2. Grind to a smooth or slightly coarse paste adding cumin seeds, green chilli and ginger.
  3. Transfer to a bowl. Add salt and mix well.
  4. Heat a dosa tawa. Spread the dosa thin or thick.
  5. Drizzle oil or ghee. Cook the dosa till its crispy and well cooked.
  6. No need to flip it. Flip the dosa and cook if you make it thick.
  7. Serve with Allam pachadi / Ginger chutney.
METHOD - STEP BY STEP PICTURES
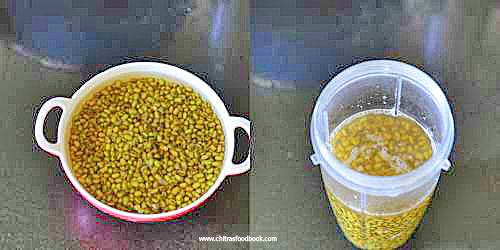
  • Wash and soak green gram for 4 to 6 hours. Grind it adding green chilli, ginger and cumin seeds to a smooth paste.
  • Pesarattu
  • Transfer to a vessel. Add required salt and mix well. Check for batter consistency. Add water if needed.
  • Pesarattu
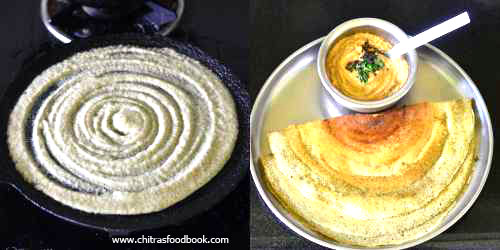
  • Heat dosa tawa. Spread a ladleful of batter. Make it thin or thick as you like. Cook the dosa in low to medium flame till its cooked well. Drizzle oil or ghee around the Pesarattu.
  • Pesarattu
  • Cook till the bottom turns light golden brown. No need to flip the other side if you want crispy dosa else you can flip and cook for few more minutes.

  • For variations, you can spread finely chopped onion and carrot all over the Pesarattu, flip and cook the other side.
  • Serve hot with Ginger chutney / Allam pachadi.

  • Enjoy !

Note

  • I grind the batter smooth. If you like, you can grind it slightly coarse.
  • Adjust the quantity of green chilli as per your taste.

  
  Make this healthy and tasty Green gram dosa / Pesarattu and enjoy with Allam pachadi / Ginger chutney !

Pesarattu recipe


Continue Reading...


June 24, 2022

Murungakkai Kuzhambu – Drumstick Masala Kulambu For Rice

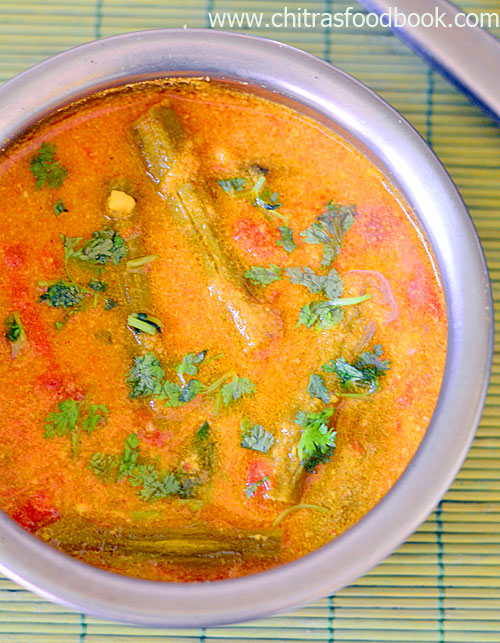
Murungakkai kuzhambu

My parents were with me in Bangalore for the past one month. My father like kurma based kuzhambu varieties for rice. So I tried this Murungakkai masala kuzhambu for our lunch. We all loved it. Its a very simple recipe with tomato base.  I made it directly in a pressure cooker. So it took less time to prepare.

Friends, if you are looking for some easy Drumstick kuzhambu recipe with mild masala flavor, this is for you. Do try it and share your feedback with me.

Murungakkai kuzhambu recipe


Murungakkai kuzhambu recipe / Drumstick kulambu


Murungakkai kuzhambu recipe / Drumstick kulambu

Murungakkai kuzhambu recipe / Drumstick kulambu for rice


Cuisine: South Indian
Category: side dish
Serves: Serves 3
Prep time: 10 Minutes
Cook time: 20 Minutes
Total time: 30 Minutes


INGREDIENTS
1 cup = 250ml
  • Drumstick - 2
  • Ripe Tomato - 2
  • Small onion - 15 OR big onion - 2 (finely chopped)
  • Garlic - 10 cloves
  • Curry leaves - few
  • Turmeric powder - 1/4 tsp
  • Sambar powder - 1/2 to 1 tsp
  • Salt - as needed

To temper
  • Cooking oil - 1 tbsp
  • Mustard seeds - 1/2 tsp
  • Urad dal - 1/2 tsp
  • Cinnamon – 1 inch piece
  • Cloves - 2

To grind
  • Grated coconut - 1/4 cup
  • Fennel seeds - 1/2 tsp
HOW TO MAKE MURUNGAKKAI KUZHAMBU
  1. Wash and chop drumstick, onion, tomato, garlic.
  2. Heat oil in a pressure cooker. Splutter mustard seeds, urad dal, Cinnamon and cloves.
  3. Saute onion, garlic, curry leaves till transparent. Add tomato and saute till mushy.
  4. Add turmeric powder, sambar powder and salt. Saute for a minute.
  5. Grind coconut and fennel seeds to a smooth paste. Add to the cooker.
  6. Add required water and mix well. Keep the chopped drumstick in a box and place it inside the cooker without adding water.
  7. Pressure cook in low flame for one whistle. Open the cooker after the steam is released.
  8. Take the drumstick bowl and add to the kuzhambu. Mix well and serve with rice.
METHOD - STEP BY STEP PICTURES
  • Wash and chop Drumstick into finger size pieces. Chop onion, tomato and garlic finely. Keep the chopped drumtsick in  a bowl. 
  • Murungakkai kuzhambu
  • Heat oil in a pressure cooker base. Splutter mustard seeds, urad dal, Cinnamon and cloves. Saute onion, garlic and curry leaves till transparent. 
  • Murungakkai kuzhambu
  • Add tomato and saute till mushy. Add turmeric powder, salt, sambar powder and mix well.

  • Grind coconut and fennel seeds to a smooth paste. Add to tomato mixture. Mix well. Add required water. Take chopped drumstick pieces in a bowl and keep it inside the cooker. No need to add water to drumstick pieces.
  • Murungakkai kuzhambuMurungakkai kuzhambu
  • Close the pressure cooker and cook in low flame for one whistle. Switch off the flame and open the cooker after the steam is released. Remove the drumstick bowl and add to the cooker. Mix well and check for consistency. Boil for few minutes if its watery OR add little water if its too thick. Garnish with coriander leaves and serve hot with rice.Murungakkai kuzhambuMurungakkai kuzhambu

Note

  • Adjust the quantity of spice powders as per your taste.
  • For variations, you can grind cinnamon and cloves along with coconut instead of sauting in oil.


Try this easy and tasty Murungakkai kuzhambu for rice and enjoy !

Murungakkai kuzhambu

Continue Reading...