 Actually I had to share a biryani recipe in my Sunday lunch series today. Sorry for disappointing you all with this post. Last 3 days I was in Rameswaram for temple visit. We had good darshan but unfortunately we all got stomach problems due to some food allergy. By God’ grace, our trip was successful and reached Bangalore yesterday.
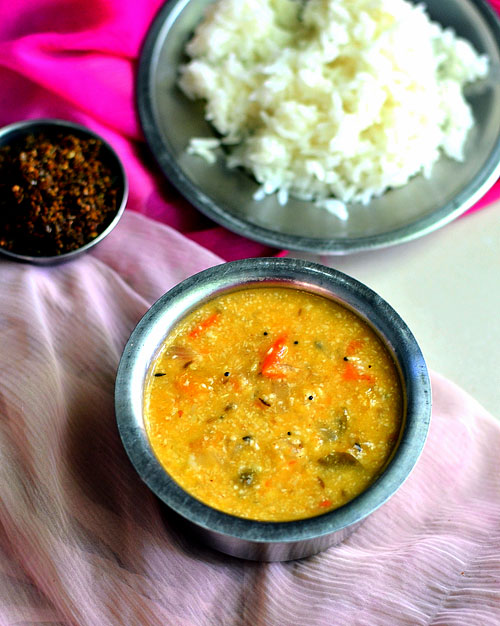
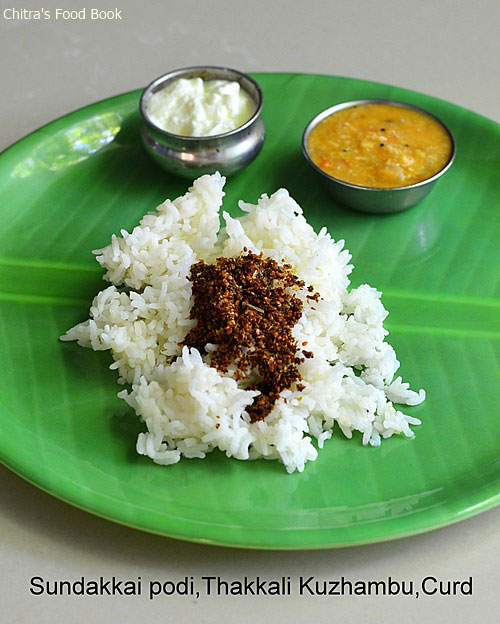
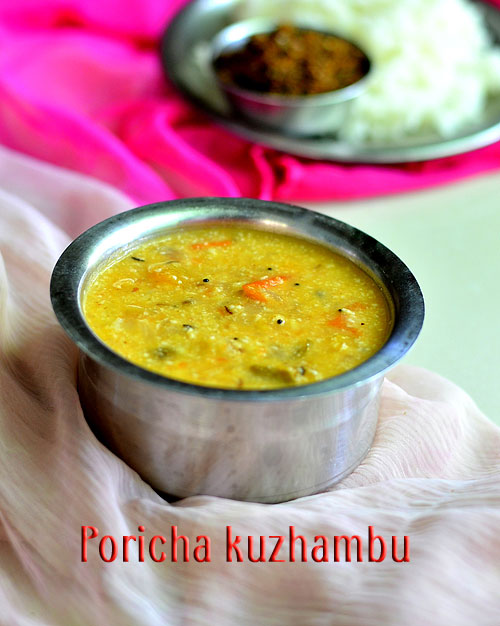
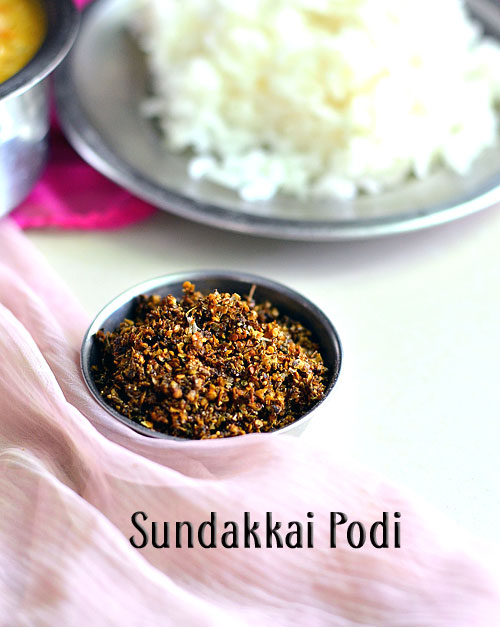
As our stomach is completely upset, we wanted to avoid spicy foods for some days. So this afternoon I made Sundakkai Vathal podi (Dried Turkey berry powder) & Spice less, no tamarind thakkali poricha kuzhambu (tomato gravy without tamarind) along with Paruppu sadam (moong dal tadka) & thayir sadam for our lunch. I guess most of you just make dal & rasam during sick days but this is our standard lunch menu whenever we recover from any health ailments.
Sundakkai/Turkey berry is a good antibiotic to kill the ameoba in stomach. Pepper & cumin seeds used in this powder helps to improve appetite and aids digestion. Tomato is an energy booster basically. Coconut, cumin seeds/jeera and onions acts as a coolant for the upset stomach and helps for digestion.
Moong dal and curd/buttermilk helps to cure stomach inflammations. To sum up, this South Indian Lunch menu would be soothing and tasty for an upset stomach & bitter tasting tongue. Do try this menu for a change. U may like it. Not just sick days, you can consume Sundakkai podi at least once in a week to keep your stomach clean if you eat hotel food regularly. Lets check out the recipes of sundakkai podi and thakkali poricha kuzhambu below. Last but not the least, I will surely share my biryani post sometime in this week.
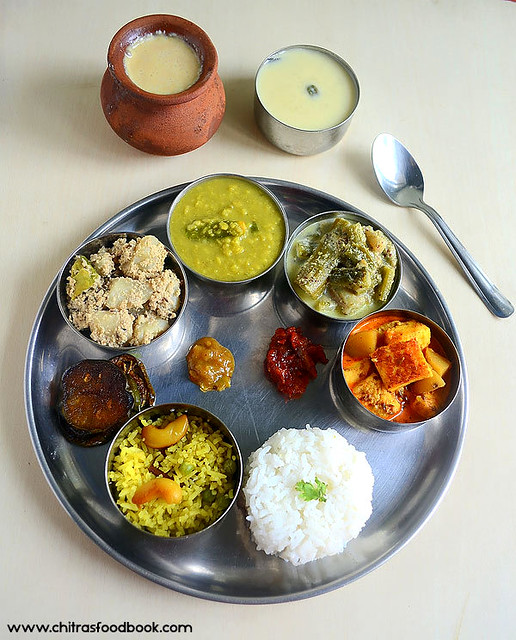
South Indian Lunch Menu For Stomach Upset
 South Indian Lunch Menu idea for persons with stomach problems
Cuisine: South Indian
Category: Lunch Menu
Serves: Serves 3
Prep time: 10 Minutes
Cook time: 20 Minutes
Total time: 30 Minutes
INGREDIENTS
SUNDAKKAI PODI/TURKEY BERRY POWDER
- Turkey berry-20 nos
- Pepper corns – 10 nos
- Cumin seeds/Jeera – 1/2 tsp
- Garlic cloves – 2 nos
- Salt – as needed
- Cooking oil – 2 tsp
NO TAMARIND TOMATO GRAVY
- Cooking oil - 1 tbsp
- Mustard seeds - 1/2 tsp
- Urad dal - 1 tsp
- Chana dal - 1 tsp
- Cumin seeds - 1/4 tsp
- Green chilli – 2-3 nos (slit)
- Tomato - 3 nos( finely chopped)
- Small onion/Big onion – 15 nos/1 no
- Moong dal – 1 tbsp
- Curry leaves – few
- Turmeric powder – a pinch
- Hing/Asafetida – a pinch
- Coriander leaves - to garnish
- Salt & water – as needed
To grind
- Grated coconut- 1/4 cup
- Cumin seeds/jeera – 1/2 tsp
|
METHOD
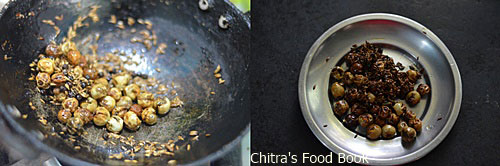
- Sundakkai podi : Heat oil in a kadai & saute the turkey berries/sundakkai. Add cumin seeds, pepper corns and roast everything well till you get a nice smell of roasted turkey berries. Powder everything together adding salt & finely chopped garlic. Mix with plain rice adding ghee.
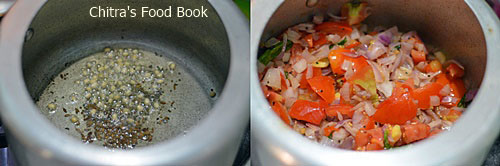
- Thakkali poricha kuzhambu : Heat oil in a pressure cooker base. Splutter mustard seeds, urad dal, chana dal, cumin seeds. Saute onions, curry leaves, green chillies and tomato till it turns mushy.
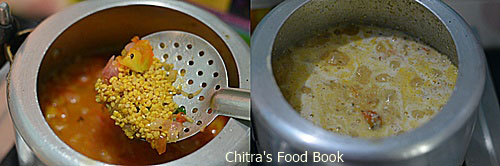
- Add water,moong dal,turmeric powder,salt and pressure cook for 2 whistles in low flame. In the mean time, grind the coconut+jeera to a smooth paste adding little water. After the steam is released from the cooker, add this paste and boil well. Gravy will thicken. So add water and salt accordingly. Serve with plain rice adding few drops of ghee.
For paruppu, pressure cook dal adding a pinch of hing, turmeric powder and mash it. Do the seasoning at the end and serve with rice & ghee.
Start your lunch with paruppu sadam continue with podi, poricha kuzhambu and finish with curd rice or drink buttermilk. Enjoy this healthy and spice less lunch menu. |
Try this simple lunch menu during sick days. U can recover quickly !
Continue Reading...


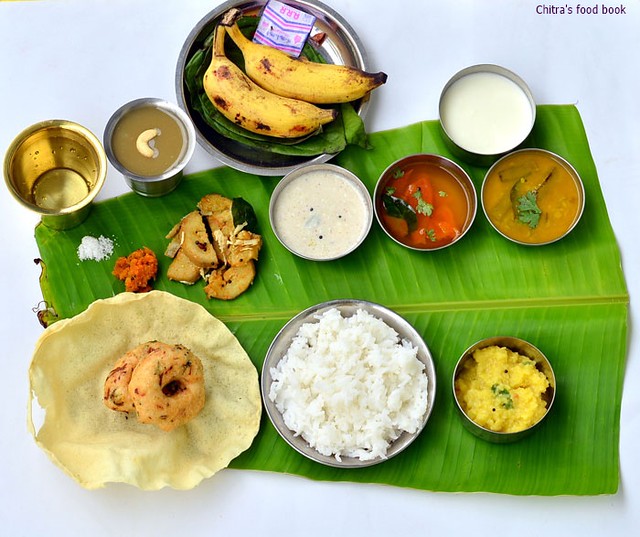
 . Lets see how we prepared this simple and yummy travel lunch menu.

 South Indian lunch menu for travel
 Prepare & Enjoy it !!