Elephant Yam ( Also known as Elephant foot yam in English, Senai kizhangu in Tamil, Chena in Malayalam, Suran/ Jimikand in Hindi) is a tuberous vegetable which has lots of amazing health benefits. It helps to reduce bad cholesterol, reduces hypertension, good for piles, controls diabetes, balances hormones, rich in anti oxidants etc. I am a big fan of yam chops/ Senai kizhangu roast that is made in dosa tawa. I have tried so many recipes but nothing was like the one I had in a marriage feast. I will share that recipe once I get it perfect. Today’s recipe is a very simple South Indian style Yam fry/ Poriyal recipe for rice that is usually made in my house. I learnt this recipe from my MIL. Generally Yam creates an itchiness in the tongue after eating. To avoid this, my MIL adds tamarind while cooking yam. It helps to reduce the itchy feeling to some extent.Last month I made this yam fry as a side dish for Instant more kuzhambu. It was a nice combo and tasted good. Do try this easy senai kizhangu fry at home and share your feedback with me. I am planning to try more yam recipes like varuval, masiyal, kuzhambu , roast etc.Stay tuned ! Now lets see how to make Elephant Yam Fry recipe with step by step pictures !
Yam fry recipe - Senai Kizhangu poriyal
How to make Yam Fry - Senai kizhangu poriyal for rice
Tamarind extract – 1/4 cup ( Soak gooseberry size tamarind)
Turmeric powder - 1/4 tsp
To Temper
Cooking oil - 2 tbsp
Big onion - 1 no ( Sliced)
Curry leaves - few
Hing/asafetida - 2 pinches
Grated coconut - 1/ 4 cup
METHOD
Cut the yam into big slices. Peel its skin and discard the skin.Chop the yam into small cubes or thin 1 inch strips as I did. I chopped it like this after tasting this poriyal in a hotel.
Soak small gooseberry size tamarind and take extract using 1/4 cup water. In a pressure cooker base, take the chopped yam, turmeric powder, salt and 1/4 cup thin tamarind extract. Mix well and pressure cook in high flame for just 2 whistles. Over cooking makes the yam mushy. Adding more water while cooking also makes it mushy. So take care while cooking. You can also cook the yam in a kadai or bowl instead.
Open the cooker after the steam is released. Mix well and drain the excess water if any. Heat oil in a kadai, splutter mustard seeds, urad dal, cumin seeds and curry leaves. Saute onions till transparent.
Add the cooked yam pieces, sambar powder and mix well for few minutes. Mix well till raw smell goes off. Lastly garnish with grated coconut. Mix well and switch off the flame . Serve hot with sambar or more kuzhambu.Tastes yum !
Enjoy !
Note
For masala flavor, you can add 1/2 tsp of garam masala powder or fennel seeds powder along with sambar powder.
If you wish, you can use lemon juice after switching off the flame and skip tamarind. In that case, cook the yam pieces with plain water.
Yam cooks quickly.So pressure cook it only in high flame adding very less water for just 2 whistles else it will be mashed.
Easy, healthy Elephant Yam poriyal is ready to serve with rice !
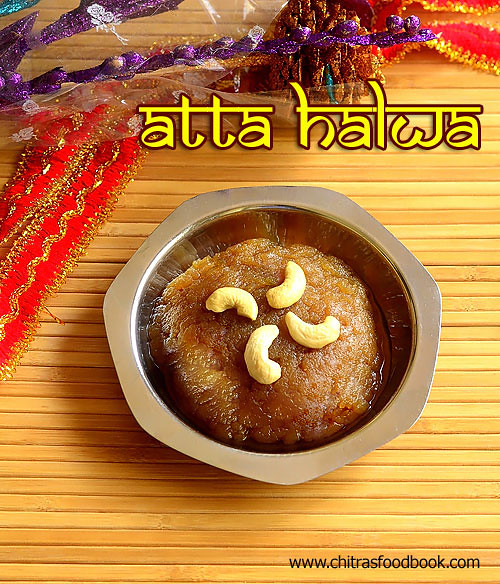
Atta halwa also known as Atta ka sheera is one of the most popular sweet/ dessert recipe in North India. This is an Instant halwa made with whole wheat flour( atta in Hindi). This atte ka halwa is served as Kadah prasad ( Karah prashad) to all the visitors of Gurudwara ( A place of worship for Sikhs ) in Punjab.
Traditionally, it is prepared with equal quantity of Whole wheat flour, Sugar and Butter/ghee to emphasize everyone are equal. Some people make this halwa adding equal quantity of wheat flour and sooji. For variations, this halwa can be made with milk or jaggery instead of sugar. I never thought making this North Indian style wheat flour halwa is so easy.
South Indian style Godhumai halwa/wheat flour halwa ( Tirunelveli halwa) is in no way related to this atta halwa in preparation and cooking procedure. Both has its own variations and taste. This sweet can be prepared easily and instantly for surprise guest and to celebrate special occasions at home. I am sure this ghee dripping halwa gets a big applause from your family members and friends. I followed the recipe from HERE and watched some You tube video recipes too.
Even though its my first attempt, making this halwa was a breeze for me. You can easily find the correct stage of removing the halwa. Its 100% a beginners recipe. This halwa tastes very soft and it slides in your mouth. I made in very less quantity just to serve 2 people as the quantity of ghee is more . Holi festival is fast approaching. Include this easy, rich atta ka halwa in your menu and enjoy the festival ! This atta halwa can also be prepared for babies but its made without ghee. I will share that recipe later.
Now lets see how to make Instant, easy wheat flour halwa/ atta halwa with step by step pictures and a video !
Whole wheat flour - 1/4 cup ( I used Aashirvad atta)
Sugar - 1/4 cup ( I used 1/4 cup heaped, add 1/2 cup for more sweetness)
Melted Ghee - 1/4 cup
Water - 1/2 cup
Cardamom powder - a pinch ( Optional, Its not used traditionally)
Cashews & sliced almonds - To garnish
HOW TO MAKE INSTANT WHEAT FLOUR HALWA - METHOD
Heat 1/4 cup of ghee in a wide, non-sticky kadai. Add wheat flour and roast till it turns golden brown in color with nice aroma. Keep the flame low to medium while roasting and keep mixing to prevent burnt bottom. It takes 3- 5 minutes to roast well based on the quantity you use.
Boil 1/2 cup of water in a bowl and add the hot water carefully to the roasted wheat flour. It splashes. Add 1/4 cup (heaped) sugar, cardamom powder ( I din’t use) and mix well without any lumps. All the water would be absorbed by the wheat flour and gets cooked.
Mix well till halwa leaves the sides completely, becomes a whole mass. Do not switch off the stove. Keep mixing till ghee starts to ooze out in the sides of kadai. It will turn glossy too. Do the whole procedure in medium flame. It takes just 3-5 minutes to release the ghee. Switch off the flame and remove in a plate or bowl. Serve warm or cold as you wish. Please watch the video for clear understanding !
For variations, you can add milk instead of water. You can also use grated jaggery in place of sugar. Enjoy !
Note
Traditionally this halwa is prepared with equal quantity of wheat flour, sugar and ghee. But I used little more sugar ( 1.25 cups) as we are sweet toothed.
If you don’t want to use equal quantity of ghee, you can use half the quantity mentioned. But texture may slightly vary.
Cardamom powder is not used in the traditional atta halwa. If you wish, u can add it along with sugar.
If you feel the sweetness is less, you can add it even at the end. Heat the halwa till the sugar melts and ghee oozes out. Serve it warm.
I read people have this halwa as a side dish for pooritoo just like suji ka halwa.
Try and enjoy this easy, yummy, rich wheat flour halwa at home !
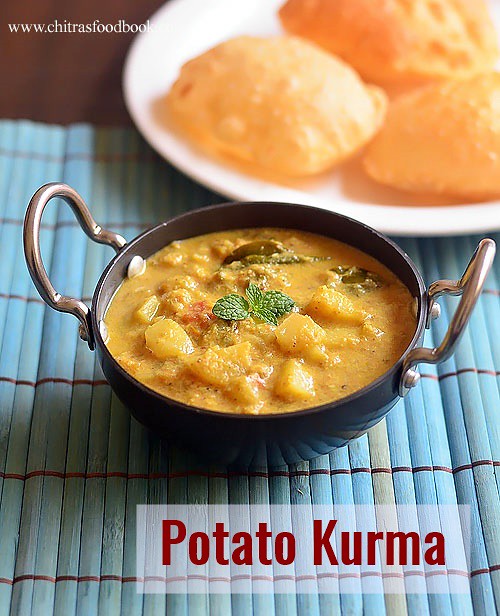
Potato kurma @ Aloo kurma is a delicious South Indian style side dish for chapathiand poori, dosa too. Many readers who had tried my Saravana bhavan style veg kurma requested me to share potato kurma recipe. Usually in Tamil nadu, Potato masala is the most common side dish for poori. Its our family favorite too. So most of the time, I make urulaikizhangu masala. But sometimes I make this potato gravy for chapathi. Last weekend I made puri along with this kurma for our breakfast just for posting this recipe in my space.Its a very simple South Indian style potato kurma that can be made easily in a pressure cooker. We all love this a lot. I personally like to have potato kurma with dosa as well. Friends, do try this easy yet yummy side dish for poori and share your feedback with me. If you are looking for a no grind potato kurma without coconut, do check out this recipe. Its a very old post.So pictures are not that good. Soon I will try to update that post with a video. Now lets see how to make this South Indian Potato kurma for poori and chapathi with step by step pictures and video !
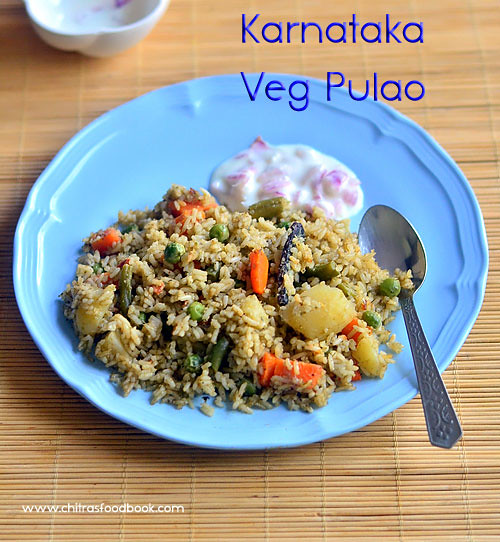
Here is a fool proof, Karnataka special Vegetable pulao recipe (vegetable palav) with step by step pictures and video. This mixed vegetable pulao is a must and should recipe in all the weddings, lunch buffet and parties in Bangalore, Karnataka. In hotels, its called as rice bath or veg palav in the menu. In our school moms group, we used to conduct kitty party once in a month in one of our houses. Mostly it would be a lunch party. I still remember Tara’s kitty party lunch menu. I had this pulao for the first time in her house and after that in few hotels, marriage functions and birthday parties. My friends call this as “Palav” in Kannada. I am a big fan of this Karnataka style pulao especially for its wonderful flavor. I don’t mind eating one full plate of it.
I got this recipe from Tara and made it for our Sunday Lunch last week. It came out very well with the awesome masala flavor which is the highlight of this pulao. Tara makes it super spicy and very tasty. The whole pot gets emptied in few minutes. Thanks a lot Tara for teaching me this wonderful, authentic Karnataka veg pulao recipe to me. Now I am confident enough to try this rice variety for my guest and parties. This pulao looks mild green in color.
In some hotels here, they serve a red colored pulao adding red chilli powder. If you are looking for that version, check out this delicious and Restaurant style SPICY VEG PULAO recipe which I learnt from my another friend Megha. Now lets see how to make this yummy, Karnataka style Vegetable pulao with step by step pictures and video !
Karnataka style vegetable pualo recipe
How to make Karnataka style veg pulao recipe at home
Green chillies - 6 nos ( use 8 for more spicy taste, 4 for less spice)
Mint leaves - a handful
Big onion - 1/2 no
Cinnamon - 2 inch piece
Cloves - 3 nos
Cardamom - 2 nos
Ginger - 1.5 inch piece
Garlic cloves - 8 nos
Water - as needed ( to grind to paste)
HOW TO MAKE KARNATAKA VEG PULAO - METHOD
Wash and soak 1 cup of rice in 2 cups of water for 15 to 30 minutes. Wash and chop the vegetables into small cubes.
Grind the ingredients given under “ To grind” to a smooth paste by adding required water. Set aside.
Heat oil in a pressure cooker base and add the whole garam masala. Saute until aromatic and then add sliced onions. Saute till transparent. Now add the tomato pieces and saute till mushy.
Add the ground masala paste. Mix well for a minute. Now add chopped vegetables, mix well for a minute. Then add the soaked rice along with water. Add dhania powder, crushed kasoori methi(optional) and required salt in the water. Mix well. Take some water and check for taste. Add more salt if required and slit green chilli for spicy taste.
Pressure cook in very low flame for two whistles. Open the lid after the steam is released completely. Fluff the rice gently with a fork. Remove in a plate and serve hot with onion raita ! This rice looks slightly mushy when hot. But rice grains become fluffy and separate as it cools down.
If you are making it for parties or functions, make this pulao one hour in advance and let it be in the cooker to stay warm. If it cools down, sprinkle very little water and reheat it for few minutes before serving. Tastes and smells yum !
Enjoy !
Note
My friend Tara adds 8 to 10 chillies for the mentioned quantity. But I used 6 as my chillies were spicy. Adjust the quantity based on your taste. You can even add slit chillies in the water if you feel spiciness is less.
If you want, you can use red chilli powder or red chillies instead of green chillies while grinding the masala.
Addition of dhania powder and kasoori methi gives a nice flavor to pulao. Kasooi methi is not added usually in Karnataka style pulao, but I followed my friend's suggestion :)
Good quality raw rice is used for Karnataka style pulao. You can replace with basmati rice of you wish. In that case, use 1:1.5 cups of rice and water ratio based on the rice you have.
For variations, you can use coriander leaves instead of mint leaves but flavor may vary.
Try this yummy, spicy Karnataka style veg pulao for your weekend lunch or lunch box, Enjoy !
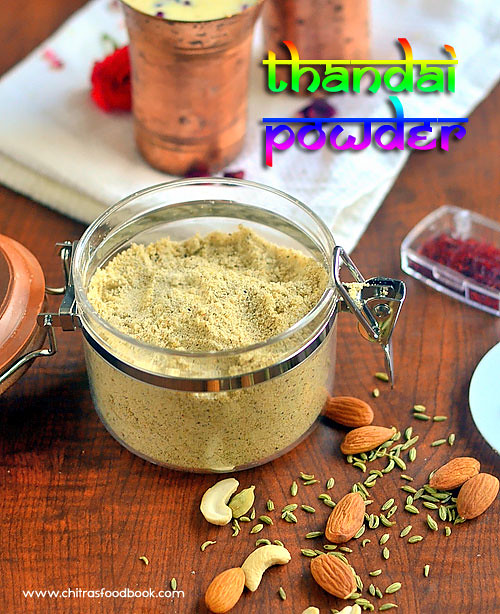
Thandai is a very popular drink in North India that is mainly served during Holi festival and Maha Shivratri. This drink is the best coolant for body with lots of health benefits as it is prepared with the combination of nuts, whole spices and milk. Yesterday my neighbor called me to enquire whether we get readymade thandai masala powder or thandai syrup at shops nearby my house. I browsed for some good brands and told her to get Patanjali or Haldirams Thandai powder as these are the well known names to me. She searched in shops but couldn’t get it. So I thought of preparing homemade thandai masala powder and share with her.
As I had already shared the recipe of thandai from scratch, I know making at home is very easy. I used to make it regularly for every Maha Shivaratri festival along with our South Indian style arisi vella puttu and offer to Lord Shiva. This year I was planning to make the same following my recipe. But now after my neighbor’s suggestion, I wanted to make and store this homemade thandai masala in advance and prepare it quickly on Shivrathri day. I watched some You tube video recipes and adapted this recipe.
I have also watched a video from BBD TV’s travel escapades in which the preparation of thandai with & without bhang from a popular shop in Ujjain was shown.I found it very useful. For this thandai powder recipe, I could see many variations across the web.Some recipes are very simple with just 4 ingredients and some recipes are with bhang as well. But in this recipe, I have not used Bhang. Basically bhang balls are made from hemp seeds and leaves which are washed, cleaned and grinded to a smooth paste. But it should be used in minimum quantity as over dosage induces psychosis, excitement, uncooperativeness and hallucinations.
This is a very simple thandai masala that can be prepared with easily available ingredients. I have used Khus Khus in this recipe. I know its banned in some of the countries. In that case, feel free to skip it.Yesterday I made thandai using this powder and it came out very well. It was refreshing and we loved it a lot. I have passed some of this powder to my neighbor. I hope her family will like it too. Ok, lets see how to make Thandai masala powder at home with step by step pictures.
Dried Rose petals - 1 tbsp or 15 nos OR rose essence - 1 tsp
Pista – 1 tbsp (Optional , I used it)
To make thandai ( For one serving)
Boiled milk – 1 cup ( At room temperature, use full fat milk)
Thandai powder – 1 tbsp ( Adjust)
Ice cubes – few ( 2 nos)
HOW TO MAKE THANDAI POWDER - METHOD
Take all the ingredients for thandai masala and keep it ready. Grind them to a fine powder using a mixie. Sieve it and again grind the coarse ones. Use the remaining leftovers for making fresh thandai or lassi. Mix the powder well with a spoon and store in a box. Thandai masala powder is ready !
This powder can be stored for 2 months in an air tight box. Use clean spoon to handle.
To make Thandai : Boil thick, full cream milk and let it cool down to room temperature. In a wide bowl, put few ice cubes, add 2 cups of milk and 1 tbsp ( i.e 5-6 tsp) thandai powder. Mix well. Check for taste and add more sugar or thandai powder if needed.
Strain it using a cloth strainer( Tea strainer) and serve it. If you want to serve later, refrigerate it till use. It tastes the best only when served chilled. The more the standing time, the more tasty it would be!
Straining is more important.Do not forget to strain the milk after adding thandai powder.
Enjoy !
Note
There is no hard and fast rule in the quantity of ingredients for masala. You can reduce or increase it as per your like.
I felt pistachios are not needed as it was not mentioned in the Ujjain video.Still I had used just 1/2 tbsp of it. Do not add more. It would dominate the other ingredients in flavor.
Do not add more pepper corns. The color of thandai is usually sandal in color if its made without bhang. It looks green when bhang is added.
Adjust the amount of cardamom and fennel as they are the flavoring ingredients for thandai.
Straining is more important. Do not forget to strain the milk after adding thandai powder.
Try this Thandai powder at home and enjoy this refreshing drink instantly at your will !
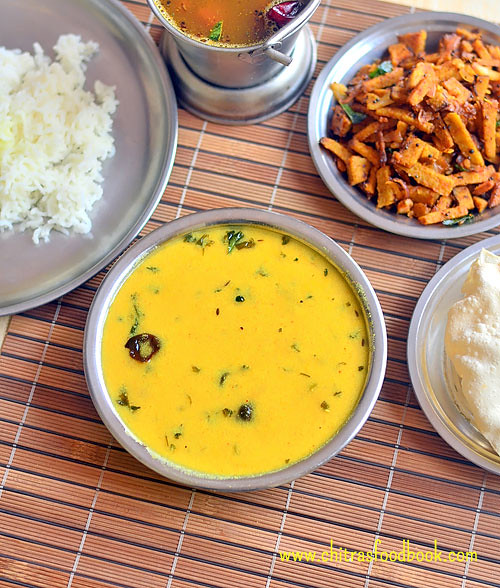
Mor kuzhambu ( Vegetarian buttermilk gravy in English) is our family favorite kuzhambu varieties for rice. Usually I follow my MIL’s or MOM’s recipe. But sometimes I make this easy mor kuzhambu recipe when I have to cook for myself and Raksha as Sendhil is not fond of this version. Its a very simple, no grind mor kuzhambu recipe without coconut. I started making this by following Revathy Shanmugam mam’s recipe from Aval vikatan supplementary issue. But then I made some changes and making it in my own way! I won’t say this one tastes so good like authentic more kuzhambu. But this recipe is surely a quick fix for bachelors & working women who wants to whip up a gravy within 10 minutes for lunch or dinner after coming back from office. It tastes great with fried papad and potato fry or brinjal roast. I served it with yam fry. The taste of this kuzhambu reminds me North Indian style Dahi kadhi slightly. This kulambu can be prepared with or without vegetables.Sometimes I add fried manathakkali or sundakkai vathal too. If you wish to add vegetables, you can add cooked lady’s finger (Vendakkai) or pumpkin( Poosanikai in Tamil). Do try this easy, Instant mor kuzhambu recipe and let me know your feedback ! Lets see how to make South Indian style Mor Kuzhambu with step by step photos.
My MIL had told me to include pulses in our regular diet at least once in a week as they are a good source of protein for vegetarians with lots of health benefits. Usually I make sundal with green gram, chana, black urad dal.
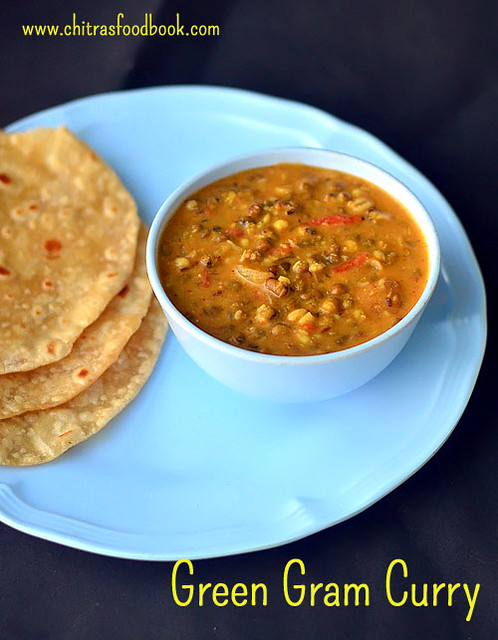
In my family, we love to eat sundal recipes but not often. So when my MIL told me to include legumes, I found making some curry, gravy for roti or kuzhambu recipes for rice by adding pulses is the best way to make my family eat it. So I started preparing varieties of curries and gravies for rice, roti and even for idli, dosa. This South Indian style green gram curry is our recent favorite. Green gram also known as Mung bean in English, Pachai payaru in Tamil, moong sabut/mung sabut in Hindi, Cheru Payru in Malayalam, Hesaru kaalu in Kannada, Pacha Pesalu pappu in Telugu is a very healthy pulse with high fiber and nutrient values.
Recent days I have been eating mung sprouts salad for weight loss.So I tried this pacha payaru curry recipe from a Kerala YouTube channel “Garam masala” with the leftover sprouts mainly for Sendhil and Raksha. I made it with slight modifications to suit our taste buds. It came out really well with a mild sweet taste of sprouted green gram. We all loved it very much. It was a good side dish for roti/ chapathi , idli, dosa and rice.
As the yield of this gravy is more, we had this gravy for dinner and the next day’s breakfast & lunch as well. For variations, this curry can be made with mixed sprouts or with soaked green gram dal, chana or cowpeas. I am happy that I have got a healthy, yummy green gram dal curry recipe to include in our regular diet. Ok Friends, lets see how to make this healthy mulai kattiya pachai payaru curry/ sprouted green gram dal gravy with step by step photos and a video !
Red chilli powder - 1.5 tsp ( use 2 tsp for spicy taste)
Garam masala powder - 1 tsp
Turmeric powder - 1/4 tsp
Salt & water - as needed
Crushed kasoori methi – 1 tsp
Cooking oil - 2 tbsp
Cumin seeds - 1 tsp
To grind
Grated coconut - 1/4 cup ( I used dessicated coconut)
Cashew nuts - 3 nos
Fennel seeds - 1 tsp
Garlic cloves - 4 nos
Big onion - 1/2 no
Water - to grind ( I used 1/4 cup)
Coriander leaves – to garnish ( optional)
HOW TO MAKE GREEN GRAM GRAVY - METHOD
For making sprouts : Take green gram in a bowl and wash it. Add enough water to immerse it well. Let it soak for 12 hours or overnight. The next day morning, drain the excess water and wrap the soaked green gram in a cloth or keep it in a closed bowl. Leave it for a day. The next day, you can see small sprouts. If you leave it for more than a day, the size of sprouts will become bigger.
For this gravy, you can use just soaked green gram instead of sprouted ones.
Grind grated coconut, cashews, garlic cloves, fennel seeds and chopped big onion to a smooth paste adding enough water. Set aside.
In a cooker base, take 1 cup of sprouted green gram and add 2 cups of water. Pressure cook in very low flame for 2 whistles. Remove the lid after steam is released and mix well. Set aside.
Heat oil in kadai and splutter cumin seeds. Add onion and saute till transparent. Add chopped tomato and saute till mushy. Add the required salt, turmeric powder, red chilli powder and garam masala powder. Saute quickly for a minute without burning.
Now add the ground coconut paste, saute for a minute and add 1/2 cup of water. Let it boil for few minutes till raw smell goes off. Now add the cooked green gram dal and mix well. Check for taste and add more salt, chilli powder or garam masala powder if needed.
Let the gravy boil for 5 minutes. Lastly add the crushed kasoori methi and mix well. Switch off the flame and serve hot with roti or rice ! Enjoy !
Note
For variations, you can replace green gram with cooked chana/chickpeas.
Adjust the quantity of chilli powder as per the taste.
You can garnish with coriander leaves at the end which is optional
If you want to omit coconut, just skip it and grind the remaining ingredients alone. In that case, add less water while boiling to get thick gravy.
Do try this healthy, flavorful green gram curry for roti and rice. Enjoy !
Easy homemade chocolate recipe using milk powder and cocoa powder with step by step photos and video !
Wish you all a very happy Valentine’s day !!. When I was looking for some interesting Valentine’s day special recipe, homemade chocolates came to my mind. Long back I have shared a Vegan version of chocolate recipe using cocoa powder,honey and coconut oil. Though it is an easy, perfect and fool proof recipe for homemade chocolate ,the flavor of coconut oil would be dominant which many people don’t like it. Many of my readers who had tried that recipe requested me to share an alternative for coconut oil. I tried it with butter and even with dalda but it didn't work.So I was looking for a chocolate recipe that uses butter and cocoa powder.
I came across this homemade chocolate recipe without oven in YouTube video . I just halved the quantity of ingredients and tried it today. It came out really well but not tasting like silky smooth Dairy milk. It was pretty good in taste like Five star chocolate with a mildly chewy, fudgy kind. But its quiet addictive to eat :) To make Dairy milk kind of chocolate, we must use cocoa butter to achieve the silky texture.
In India, cocoa butter is not easily available and its very costly to buy online too.
Another easiest option is to melt dark compound or white compound chocolate either in microwave oven or stove top ( Double boiling method) and make chocolates. It tastes really good equal to the store bought ones. Soon I will make a detailed post on that. But this chocolate recipe is made with 4 simple ingredients like milk powder, sugar, cocoa powder, vanilla essence and Butter ( clarified ghee). Cooking procedure is also easy. You don’t need to check for one string consistency sugar syrup. Its just mixing and freezing. Homemade Chocolates would be ready ! Now anyone can make chocolates at home using this recipe.
This chocolate tastes the best when served chilled. But it stays good for an hour without refrigeration. So you can make this ahead and serve kids for birthday parties. Kids would love this chocolate for sure.
Do try this easy homemade chocolate recipe for this Valentine’s day and have a great celebration. Surprise your Husband and Kids with this lovely chocolates this evening. Soon I must try Raksha’s favorite Milk chocolate/ white chocolate as well by replacing cocoa powder with milk powder. Now lets see how to make chocolate at home using cocoa powder and milk powder with step by step photos and a video for better understanding ! Hope you will try and like it.
Easy homemade chocolate recipe - How to make chocolate at home with cocoa powder
Easy homemade chocolate recipe - How to make chocolate at home with cocoa powder with step by step photos and video !
Milk powder - 2.5 tbsp ( I used Nestle Everyday milk powder )
Cocoa powder - 1.5 tbsp ( I used Kwality brand)
Icing sugar or powdered sugar - 4 tbsp
Vanilla extract - 1/2 tsp
Butter – 3 tbsp ( Soft, at room temperature)
Chopped Nuts & raisins - As needed ( optional)
Boiled milk at room temperature - 1 to 2 tbsp ( optional, use only if needed)
HOW TO MAKE CHOCOLATE WITH COCOA POWDER
In a bowl, mix milk powder and cocoa powder. Set aside.
Boil 5 cups of water in a wide bowl or kadai. Allow it to roll boil well. Switch off the flame. Take a bowl that fits in the kadai. Add 3 tbsp soft butter to it. Keep the bowl inside the hot water kadai. Mix the butter and melt it completely.
Keep the bowl inside the hot water throughout the procedure. Add icing sugar or powdered sugar to the melted butter.Mix well. It will resemble a creamy paste.
Add milk powder + cocoa powder mixture to this and mix well. It will become a thick paste by absorbing all the butter. Lastly add vanilla essence, mix well. (IF YOU FEEL THE MIXTURE IS TOO THICK, ADD 1 TO 2 TBSP MILK TO LOOSEN IT).
Take a chocolate mould ( Either plastic or silicone mould) and fill the chocolate mix. Pat it well to level the chocolate. Excess butter may ooze out. Don’t worry. Just fill the mould and freeze it for one hour. Remove the mould and rest it for 5 minutes. Remove the chocolate and enjoy !!
Enjoy this Valentine’s day with this simple homemade chocolate recipe !
Note
Butter should be soft at room temperature. So keep it outside for few hours if its hard or soften the butter in microwave for a minute.
For variations, you can add finely chopped nuts or raisins to the chocolate batter.
Water should be very hot so that butter can melt easily.
Remember to keep the bowl inside the hot water throughout the cooking procedure. It helps the chocolate to set well.
For making milk chocolate/white chocolate, just replace cocoa powder with milk powder.
I used light cocoa powder. If you use dark colored cocoa powder, chocolate tastes like dark chocolate with mild bitterness.
You can try to add equal amount of milk powder and cocoa powder i.e 2 tbsp each for more chocolaty taste.
Try this easy, simple chocolate at home and enjoy the occasion !!


 How to make Yam Fry - Senai kizhangu poriyal for rice