Search Chitra's Food Book

Showing posts with label KERALA FOOD. Show all posts

August 25, 2015

Onam Sadhya Lunch Menu Recipes - How To Make Kerala Onam Sadya At Home


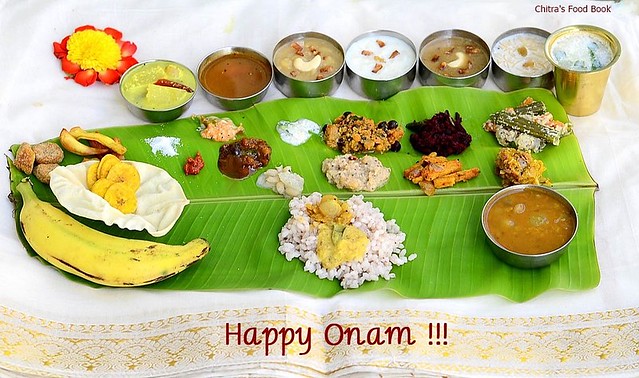
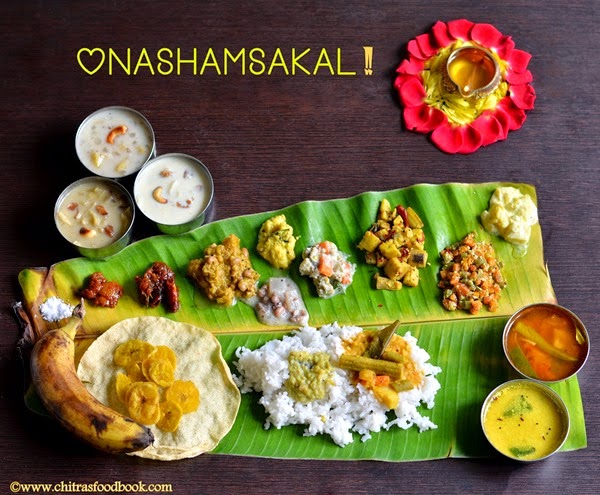
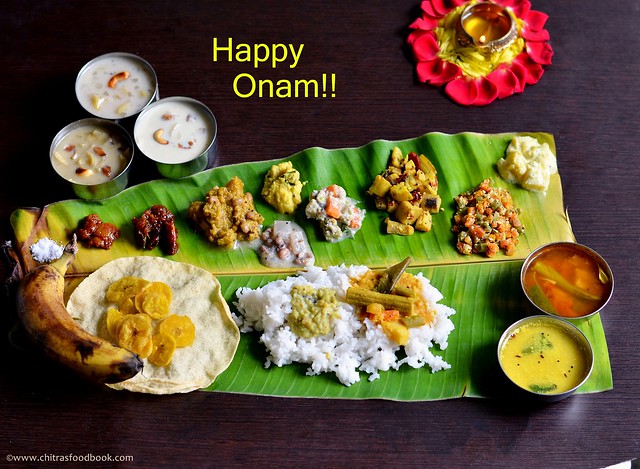
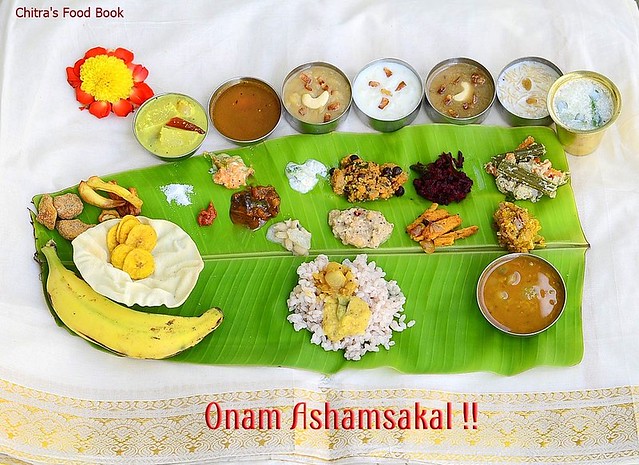
I wish all my readers and friends a very happy Onam.”ONAM ASHAMSAKAL” !! I am happy to post my 4th Onam sadya menu. This year’s Onam festival is falling on August 29 , 2023. I have been sharing Kerala Onam sadya lunch menu ideas for the past 3 years successfully. Every year I wait for Onam festival to make this feast and I always wish to make it better than my previous onam sadya lunch menu.

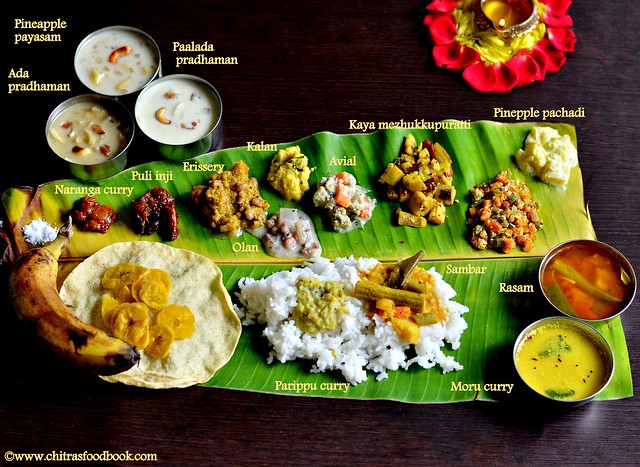
This year I prepared nearly 18 dishes, bought few from stores and served 25 dishes in Banana leaf. It took nearly 3 hours for me to make this thali. In my 5 years of cooking, this is the first time I cooked & clicked continuously for 3-4 hours and that too lots of varieties. All the dishes came out very well. Sendhil & Raksha gave a big thumbs up and had a hearty meal. 

This year I tried Ada pradhaman, Kootu curry, Carrot kichadi, Kerala Ulli sambar and Sambaram recipes for the first time by referring few blogs. I have posted most of the recipes with stepwise pictures in my Onam sadya menu 1 & 2.

So I have shared those links and the blogs from which I followed the remaining dishes. I have also discussed the method I followed to cook the sadya easily. I hope beginners would find it useful. Lets see how to make Onam sadya lunch recipes at home with some preparatory works.

Check out my Onam sadya Menu - 1 

Onam sadya Menu - 2 

Onam sadya Menu - 3
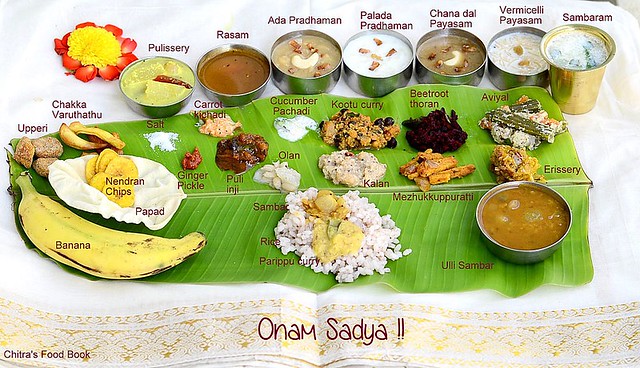
Onam sadya


Onam sadya recipes


Onam sadya recipes Kerala Onam Sadya Lunch Menu ideas
Cuisine: Kerala
Category: Lunch menu
Serves: Serves 3-4
Prep time: 60 Minutes
Cook time: 120 Minutes
Total time: 180 Minutes

INGREDIENTS
Recipes list - Main course
Side dishes
Pickles & Payasam
Other recipes u may wish to try
HOW TO MAKE ONAM SADYA - METHOD
  • Plan the menu and buy the vegetables accordingly. Soak the tamarind and pulses in over night or do it in the early morning.
  • In the morning soak the vanpayar/Cowpeas & brown chana separately in hot water for making Erissery & Kootu curry. It will take around 4 hours to soak.
  • I used 2 cookers of 3 liter capacity for making this menu.
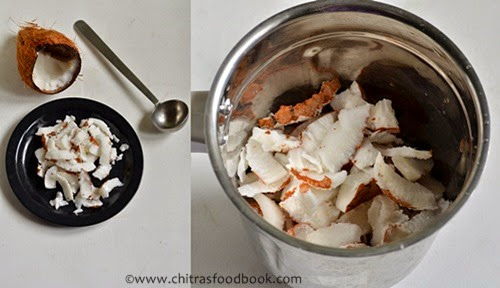
  • Grate 2 coconuts or slice the coconut with a help of ladle OR using a knife. Grind it in a big mixie jar without adding water and keep aside. Take the required amount of coconut for each dish. Most of the dishes call for grinding coconut +green chilli+ jeera to a smooth paste. So grind it by taking a portion of coconut. Keep it and use wherever needed. Use the remaining coconut for taking coconut milk. Add in payasam.
  • Soak the Ada in water for 30 minutes if it is store bought. I bought ada from stores and soaked in hot water for 30 minutes before I pressure cook it.
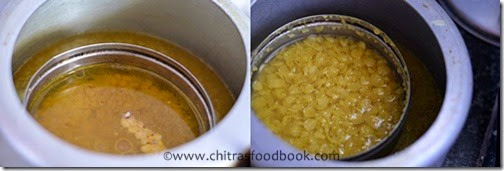
  • Dry roast the moong dal in a pressure cooker base for making parippu curry. In the same cooker, take toor dal in a closed box and keep it inside. Cook both the dals adding water, turmeric powder, a red chilli & hing. In the mean time, you can chop the vegetables for sambar, avial, olan, pulisssery, pachadi, kichadi & inji curry. By this time, steam would be released from the cooker. Remove the toor dal box and mash the dal well. Similarly mash the moong dal too. Add little ground coconut paste to moong dal and boil well.
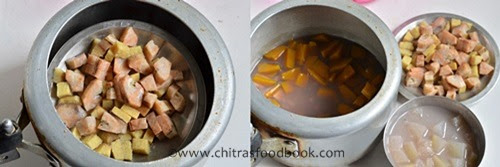
  • In another cooker base, add the soaked ada. Keep a bowl and put the cut chena/Yam pieces. Add little water, salt. Cover it with a plate and put some Pumpkin pieces/Mathanga along with chopped Ash gourd. Everything gets cooked well in one whistle under low flame. After removing this, cook the red rice adding 1:12 water and drain the excess water. Keep the rice aside.
  • Make sambar, rasam and other dishes. Make the payasam at the end !

Make this feast on Onam and enjoy !

Onam sadya recipes


Continue Reading...


February 8, 2015

Kerala Veg Biryani Recipe-Malabar Veg Dum Biryani-Sunday Lunch Recipes 5

Vegetable Layered Biryani
Sorry friends.I was not able to post this recipe last Sunday as I travelled to Palani, Tamil nadu. It was an unexpected trip. So I am posting this yummy Kerala style Vegetable layered biryani recipe for this week’s Sunday Lunch Recipes series-5.

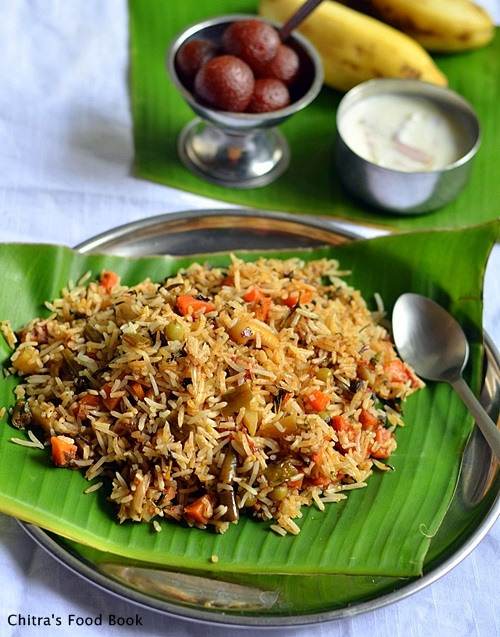
Generally Kerala biryani / Malabar biryani is mostly done with chicken or mutton. But when I saw this Kerala style veg biryani recipe in this and this blogs, I became very happy and bookmarked them immediately. I was expecting coconut in the recipe but to my surprise the recipe and making is very similar to Hyderabad DUM biryani sans saffron. I just combined both the blog recipes and it came out awesome. I was happy with this Kerala style Veg DUM biryani recipe. Everyone loved its taste & flavor. 

If you don’t want to follow DUM method, you can make it simple by just sauting everything in cooker base as we do for our normal biryani. I had tried this in either ways. It tastes good. So try this biryani for your family, friends & relatives and take the credits!!  Lets see how to make this Kerala Vegetable biryani recipe !
Kerala Vegetable Biryani recipe

Kerala vegetable biryani - Malabar style


Kerala vegetable biryani - Malabar style Malabar style vegetable biryani - Kerala Veg biryani recipe
Cuisine: Indian
Category: Lunch
Serves: 3
Prep time: 60 Minutes
Cook time: 20 Minutes
Total time: 80 Minutes


INGREDIENTS

  • Basmati rice - 1 Cup (I used India gate)
  • Cloves – 3 nos
  • Cinnamon – 1 inch piece
  • Cardamom – 2 nos
  • Water – 1.5 cups
  • Ghee – 1 tsp
For Gravy
  • Ghee – 3 tbsp  (OR use oil + ghee in equal measure)
  • Bayleaf – 1 no
  • Kalpasi/Black stone flower – 2 nos
  • Big onion - 2 nos
  • Ginger & Garlic Paste – 2tsp
  • Green chilli paste – 1 tsp( grind 3-4 nos)
  • Tomato – 1 no ( finely chopped)
  • Garam masala powder or Biryani masala powder - 1/2 tbsp
  • Chilli powder/Pepper powder – 1/2 tsp ( optional)
  • Yogurt - 2 tbsp
  • Mixed vegetables - 1/2 cup ( 1 carrot, 5 beans, handful of peas, 1 big potato)
To  roast & garnish
  • Ghee- 1 tbsp
  • Big onion - 1 no
  • Cashews - few
Coriander & mint leaves – few
Lemon juice – as needed

HOW TO MAKE KERALA VEG BIRYANI - METHOD

  • Wash and soak the basmati rice for 30 minutes to 1 hour. Cook the rice in a pot or kadai adding 1.5 cups of water by adding cinnamon, cardamom, cloves. Cover cook in medium flame till rice is cooked 3/4th. Remove the rice once all the water is absorbed by it. Spread it in a plate and fluff it with a fork. Set aside.
Kerala Veg Biryani
  • Wash and chop all the vegetables.
  • In a pressure cooker base, heat ghee, saute bayleaf and kalpasi. Add  the gg paste and green chilli paste. Saute till raw smell emanates completely. Now add the onion slices.
Kerala Veg biryani
  • Now add the finely chopped tomato pieces. Saute till it turns mushy. Now add the garam masala or biryani masala powder. Mix well. Check for taste and add chilli powder or pepper powder if needed. Lastly add the vegetables, salt and curd. Mix well. Add little water(say 1/2 cup) & pressure cook in high flame for one whistle.( Do not over cook the veggies.One whistle in high flame would do).
Kerala vegetable biryani
  • After the steam is released, open the cooker & mix the masala. Make sure the masala is not too dry. If it looks dry, add 1/4 cup of water, give a boil & make it wet with some moisture content.
  • Heat 1 tbsp of ghee in a kadai & roast onions & cashews till golden brown. Set aside.
Kerala Veg biryani
  • HOW TO LAYER THE RICE FOR BIRYANI : Now take a kadai or a pot with flat bottom. Spread one layer of rice & sprinkle few drops of lemon juice. Now spread a layer of cooked vegetable masala over the rice. Sprinkle some finely chopped mint and coriander leaves. Again spread the rice, then masala and mint leaves. Repeat the same until all the rice and masala are over. Lastly add the fried onions, cashews. Cover the kadai with a suitable tight flat lid.
Vegetable Layered biryani
Kerala Vegetable biryani
  • HOW TO PUT IN DUM : Heat a dosa pan in high flame for 3 minutes & after the pan is heated well, simmer the flame completely. Keep the biryani pot/Kadai. Boil water in a bowl and keep the boiled water above the biryani pot/kadai. Let it sit for 10 minutes in very low flame. 
  • If you feel, vapour comes out of the kadai, wrap the mouth of kadai/Pot with thermal foil before you put in dum. If you have a tight lid, then you don’t have to wrap the pan. After 10 minutes, remove the pan and fluff the rice with a fork. Serve hot with raita.

Vegetable Dum biryani
Enjoy !


Note

  • Adjust the quantity of spices as per your taste.
  • U can also add saffron soaked milk while layering.
  • U can put the dum using pressure cooker but keep the cooker directly over very low flame for 5-10 minutes.


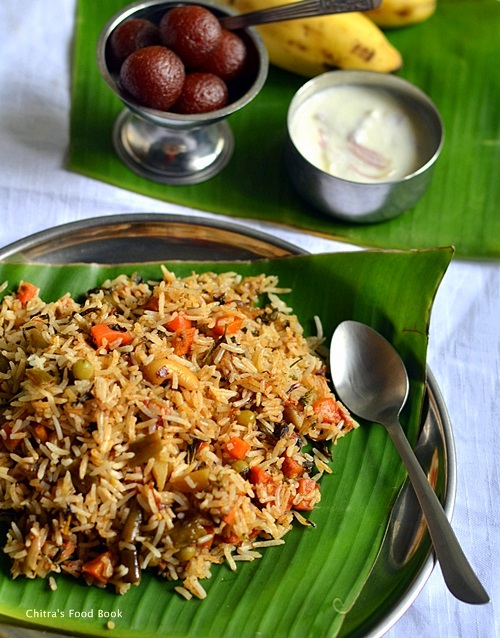
Have this yummy Kerala Malabar Vegetable biryani recipe. I served it with onion raita and made Gulab Jamun for dessert !
Kerala Malabar biryani recipe

Continue Reading...


December 23, 2014

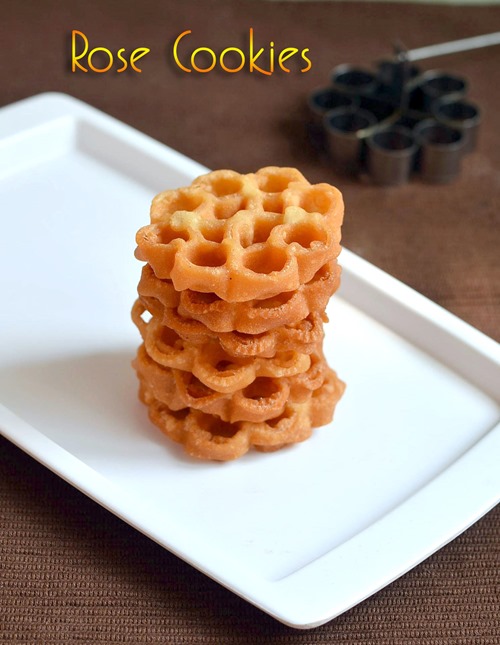
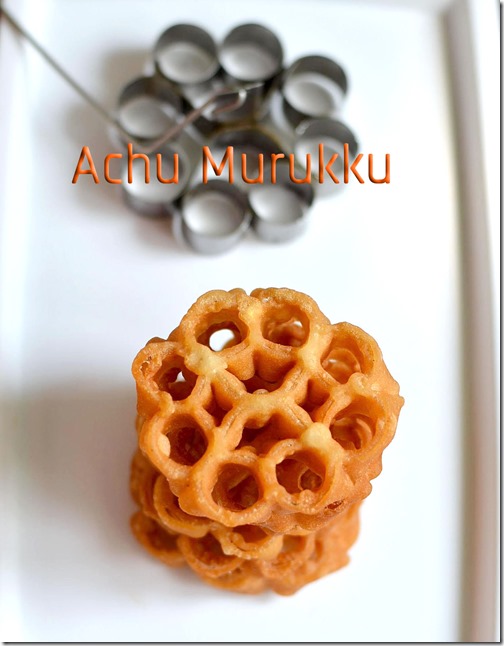
Eggless Rose Cookies/Achu Murukku Recipe - Kerala Achappam Without Egg

achu murukku recipe

As far as I know achu murukku/rosette cookies/rose cookies is very popular in Kerala and is called as achappam in Malayalam. Recently when I was browsing for some Christmas special recipes, I found achu murukku without egg is made for Christmas by people in and around Nagercoil. And this is my most favourite snack too. I just love its mild sweetness with flavour of coconut milk.

Whenever my neighbour Mrs. Prema visits her native place in Kerala, I tell her to buy a packet of achappam and coconut oil halwa especially for me. As a big fan of this achappam, I wanted to try them in my kitchen for long time and bought achu murukku mould from Salem, Tamil nadu long back. I tried once some months ago but I couldn’t make it properly. 

Yesterday I tried it again after referring this and this recipe. I made some slight changes in ingredients as per my convenience and taste. To my surprise, it came out really well and I was so happy and proud that I could make it well without eggs.

To make a perfect eggless rose cookies, the consistency of batter and heating point of oil is more important. I have explained them in Method section below. Also go through my notes before you start if you are a beginner. Ok, Lets see how to make this eggless rose cookies/Achu murukku/Kerala achappam without egg at home easily.
achu murukku


Eggless achu murukku recipe/Rose cookies recipe


Eggless achu murukku recipe/Rose cookies recipe Eggless achu murukku recipe/Rose cookies recipe for Christmas Celebration.
Cuisine: Indian
Category: Sweet
Serves: 15 nos
Prep time: 5 Minutes
Cook time: 5 Minutes
Total time: 10 Minutes


INGREDIENTS
1 cup - 250ml
  • Raw rice flour - 1/2 cup
  • Maida - 2 tbsp
  • Powdered sugar - 3 tbsp ( use 1/4 cup for more sweetness)
  • Salt - a pinch
  • Cardamom - 2 nos
  • Water + Coconut milk - 1/2 cup +1/4 cup ( 1-2 tbsp more of water)
HOW TO MAKE ACHAPPAM - METHOD

  • Powder 1/4 cup of sugar and 2 cardamom seeds together. Measure 1/4 cup from it and set aside. In a deep bowl, sieve the maida, rice flour, salt and sugar powder. Mix water + coconut milk and add it to the sieved ingredients.
achu murukku 1
  • The consistency of batter should be slightly thinner than dosa batter. Add little more water to adjust the consistency if needed. Heat oil in a kadai and dip the mould in oil till use. The mould should be hot.
achu murukku 2
  • Add a pinch of batter to check the heat of oil and as soon as it rises, keep the flame completely low and dip 3/4th of the mould in the batter. When you dip the mould in batter,u should get a ssshhh sound. Immediately keep the mould in oil. Do not touch the mould till bottom of kadai as it may stick.
achu murukku 4

  • As soon as you keep the mould inside the oil, it will become foamy and the batter starts to cook. Leave it for 30 seconds in very low flame. Do not wait for the murukku to half cook because you may not be able to release it. You can shake the mould and release the murukku OR hold the mould in one hand and release the corners of murukku from the mould using a knife in other hand. You need to do this way for 3 to 4 murukku. After that Murukku will release in oil and gets cooked. Cook for 30 seconds and flip the murukku.
  • Again cook for 30 seconds till bubbles cease n murukku turns golden brown lightly. Murukku will be soft while you remove but it turns crispy and hard as it cools down. Remove in a tissue paper and drain the oil. Store in an air tight box after it cools down. Again keep the mould in hot oil and increase the flame. Keep it for few seconds and dip in batter. Reduce the flame and cook it as mentioned above. Repeat the same process.
  • Remember to cook in low flame to get nice color. Also increase the flame as soon as you remove the murukku from the flame. By doing this way, you can adjust the heating level and murukku cooks uniformly. I would like to mention one more point here..i.e the top portion takes more time than the bottom. So cook the top portion for more time, 45 seconds and then flip, cook the other side. 
  • It stays good for weeks but I bet the box would be empty before that.
achu murukku 5


Note

  • Adding the correct quantity of water/coconut milk is more important to make perfect achu murukku. If you add less water,batter will be thick and rose cookies will be hard n chewy. If you add more water, batter will become thin and it won’t coat properly in the mould. So the consistency of batter is much more important.
  • The heating point of oil is also more important. If it is too hot, color of achu murukku turns dark brown. So you should cook in low flame at perfect heating point.
  • Some recipes have suggested to shake the mould after dropping in oil to release the murukku. But I felt the shape of murukku gets changed while shaking the mould. So I followed knife method.
  • The batter won’t coat the mould if the mould is not hot. So don’t forget to heat the mould every time before dipping in batter.

eggless rose cookies

Do try these yummy eggless rose cookies for this Christmas and have a great celebration !!
Eggless achu murukku recipe


Continue Reading...


September 6, 2014

ONAM SADYA RECIPES - KERALA LUNCH MENU LIST

onam sadya

WISH U ALL A VERY HAPPY ONAM CELEBRATION !

Onam festival is the most anticipated day for me to express my passion for Kerala food. Basically Sendhil loves coconut based recipes a lot and I am a big fan of Kerala style dishes. Not just the food, I love Kerala sarees and their traditional ornaments too. So every year during Onam, I never fail to make sadya feast at home to treat Sendhil and myself with varieties of Kerala delicacies. For the past two years, I have been posting the same different sadya menu list. And this year too, I was eagerly waiting to post this sadya menu.
Every year I love to attempt some new sadya special items for the menu and I prepared Ada pradhaman & Palada Pradhaman recipes using homemade Ada. Pineapple payasam and Pineapple pachadi as suggested by my neighbour Mrs.Prema. Mathanga erissery and kaya mezhukkupuratti out of my own wish. I referred many of our Kerala bloggers websites and I have given the links as well. Thanks to one & all for sharing these wonderful recipes with us.
For other sadya recipes like Kerala sambar, Rasam,Thoran, Puli inji, Parippu curry and avial, I referred my previous sadya recipes. All the recipes came out very well and we enjoyed this Onam feast well in advance. Here you go, my Onam sadya recipes for you all. Hope I have followed the correct serving order too.. I Wish all my readers and friends a very happy Onam.”ONAM ASHAMSAKAL” !!
Onam sadya recipes

HOW TO MAKE ONAM SADYA EASILY

I couldn’t take stepwise pictures for this sadya but I have shared some pictures of how I made this sadya quickly. Last year when I made sadya, I noticed that most of my time was spent in pre preparatory works like grating coconut, extracting coconut milk, grinding masalas, chopping vegetables and for cooking dals & vegetables.

So this year I wanted to make all these works simple and easy. Instead of grating 2 coconuts, I made small slices of it using a ladle with thick edge and blunt handle as you see in the picture below. I did not use knife as I am afraid of using it. Use knife only if you are confident of handling it and make sure your mixie blades are in good condition else it may break. Then I dry ground all the coconut slices together and divided them into 2 parts. I used one part for taking coconut milk and the other part for masala. It saved lot of time for me.
Onam sadya cooking
Also I pressure cooked dals for parippu curry and sambar together in my big pressure cooker by placing moong dal in the bottom of cooker and toor dal for sambar in a tiffin box. Please refer the picture. U can even keep a plate of mixed vegetables required for sambar over the toor dal.
Onam sadya parippu
For cooking Vanpayar and vegetables for olan, kalan and erissery, I again used my big cooker and cooked them together by keeping one above the other in small bowls and plates. As all these veggies gets cooked in one go, you just have to add them in coconut mixture and boil it. For thoran, I cooked it in my small cooker by keeping in high flame for two whistles.
Onam sadya preparation
For pradhaman, I prepared homemade ada. So I made it in the previous night and stored in refrigerator. Also I cleaned & chopped pineapple pieces and kept in a zip lock cover and refrigerated it. When you have ada & pineapple cubes ready in hand, you can make these payasam recipes very quickly.
All these pre preparatory jobs got over in 30 minutes & cooking took nearly one hour. This entire sadya took 1.5 hours totally. Do follow these techniques and make your sadya feast quickly & easily. Do share your methods of quick cooking in the comment section so that others get benefitted.

Disclaimer: I know these are not the authentic method of cooking Kerala food but to make my job easier, I followed these steps and I hope it would help beginners. Friends, please excuse me.

Onam sadya

Onam sadya menu


Onam sadya menu Sadya recipes for Onam festival !
Cuisine: Indian
Category: Lunch
Serves: Serves 2-3
Prep time: 30 Minutes
Cook time: 60 Minutes
Total time: 90 Minutes


INGREDIENTS
Please click on the recipes  
Other sadya recipes in my blog
Click on the recipes to see the blogs from which I tried these recipes. Thank u friends. Everything came out very well.

            I have made separate posts for some of the above mentioned recipes with stepwise pictures. Please click on the link for the recipe.Thanks for visiting this page. Hope you will try all these recipes and like it. Once again, I wish you all a very happy Onam. Enjoy the feast!

WISH U ALL A VERY HAPPY ONAM CELEBRATION !!

Onam sadya recipes

Continue Reading...


September 3, 2014

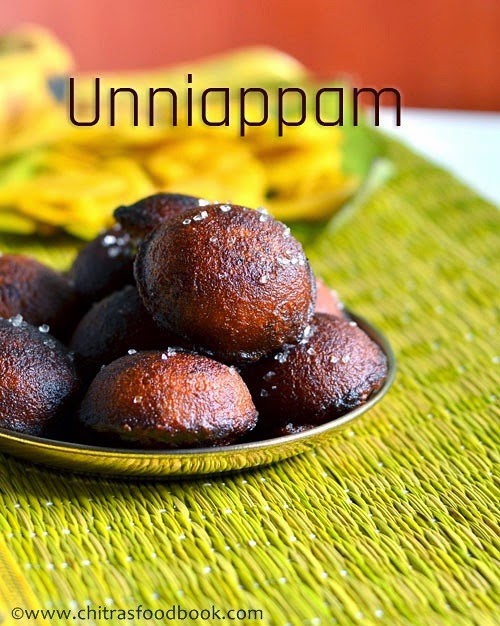
Unniappam/Unniyappam Recipe-Kerala Onam Sadya Recipes


Unniyappam-recipe
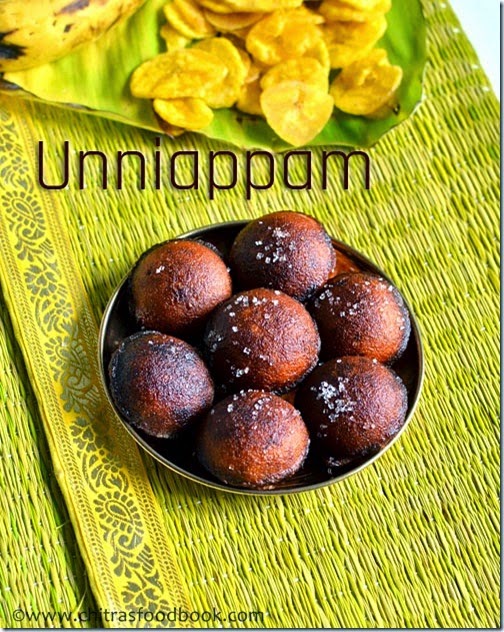
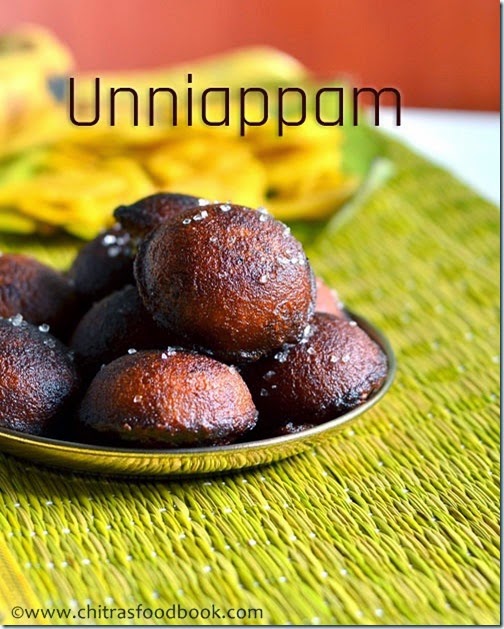
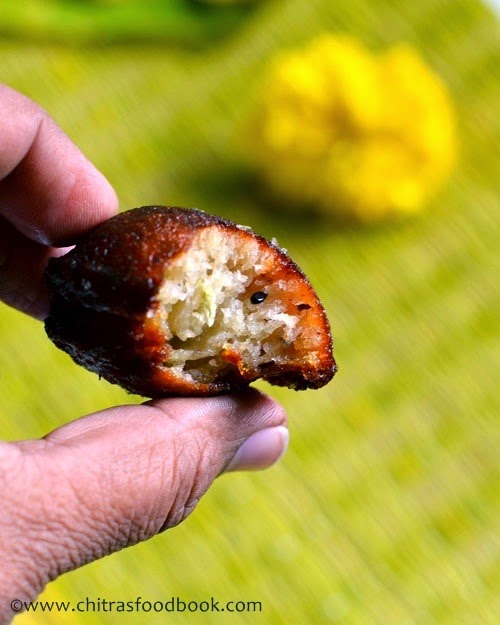
Kerala style sweet appam recipe is known as Unniyappam/Neyappam.I have tasted this several times from my neighbour.It looks dark brown in color with sugar coated on it.I love it a lot.When i was thinking of Onam sadya recipes,i reminded this recipe and asked my neighbour Mrs.Prema about it.She told me an easy , no fermentation method which she learnt from her mom.I also referred Kothiyavunu for some tips to get soft unniyappam.I tried it for the first time today and it came out very well.I was able to achieve the same color & taste of my neighbour's unniappam.It tastes crispy outside & soft inside.As my neighbour suggested, i coated all the appam with sugar which is not usually done in Kerala i guess.But it gave an appealing look to the dish. Also she told me to deep fry the appam but i did it in my paniyaram pan to get a nice shape.I gave some of them to my friends and everybody liked it a lot.I am sure Sendhil would love it too.Thanks to my neighbour for teaching me this yummy sweet appam recipe. Try this dish for Onam festival.I am sure u will love it like us.Lets see how to make this kerala style unniyappam recipe in detail.
Unniappam recipe

Unniyappam recipe


Unniyappam recipe Kerala style unniyappam recipe for Onam festival.
Cuisine: Indian
Category: Sweet
Serves: 10 nos
Prep time: 2 Minutes
Cook time: 10 Minutes
Total time: 12 Minutes


INGREDIENTS
1 cup - 250ml
To soak
  • Raw rice - 1/2 cup ( use high quality Sona masoori)
  • Water - as needed
To Grind & mix
  • Grated jaggery - 1/2 cup
  • Banana - 1 no
  • Urad Papad - 1 no ( any brand) or urad dal - 1 tbsp (soak with rice)
  • Cardamom - 2 nos
  • Grated coconut - 1/3 cup
  • Ghee – 1 tbsp
  • Black sesame seeds – 1/2 tsp
  • Ghee roasted coconut bits – 1 tbsp
  • Oil + ghee – to cook
  • Cooking soda – a pinch (optional,i dint use)
METHOD

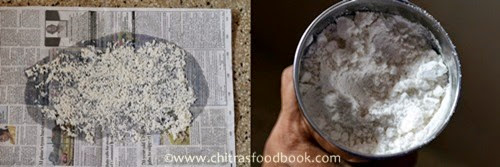
  • Wash and soak the raw rice for 2 hours.Drain all the water completely and spread the rice in a paper for 5-10 minutes.Now grind the rice to make a fine powder.Set aside.Soak papad in little water till use.
How to make unniyappam 1
  • Take jaggery in a wide bowl and add little water to cover it.Melt & strain it.Boil it for a minute till it becomes frothy.Add this syrup to the rice flour & set aside.
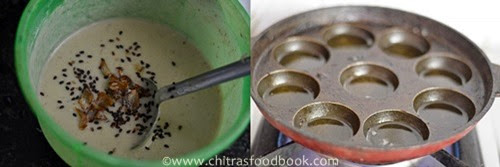
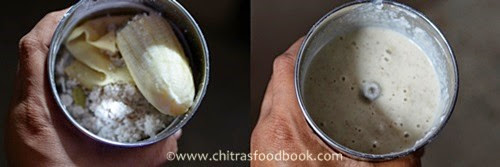
  • In a mixie jar,take the soaked papad,cardamom seeds,grated coconut & banana.Add little water and grind them to a smooth paste.Add this paste to the rice flour,jaggery mixture.Mix well and set aside.
How to make unniyappam 2
  • Add ghee roasted coconut bits & sesame seeds along with ghee to the batter.Mix well.Take a paniyaram pan and add 1/2 tbsp of oil + 1/2 tbsp of ghee to each mould.The oil +ghee mixture should cover half of the mould
unniyappam recipe 1
  • .Heat it.Now pour the batter in each mould.Unniyappam will cook in the oil and oil spreads all over the pan.Keep the flame medium high and let it cook till it becomes golden brown or dark brown as u wish.Flip it and again cook for few minutes.Remove in a tissue paper.Roll it in a  plate of sugar if u like the sugar coated ones.
Unniyappam recipe 2

Enjoy !
Note
  • The batter should not be too thick or too thin.It should be pourable.
  • Always add jaggery in syrup form after straining the impurities..
  • Adding soaked papad gives softness to the appam.No need to add cooking soda or ferment the batter.
  • If u wish,u can also leave the batter for 2 hours & ferment it.
  • The color of appam may very based on the color of jaggery and the heat of pan. 
  • This appam stays good for 1-2 days..


Enjoy this crispy and soft Unniyappam recipe for Onam sadya ! Tastes yum !
Unniappam recipe

Continue Reading...


September 1, 2014

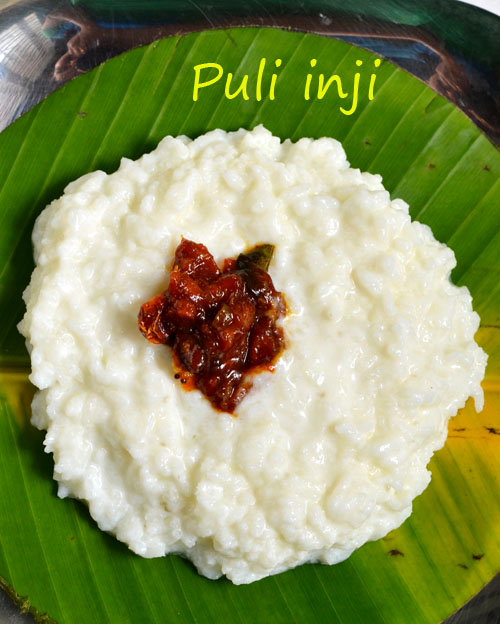
PULI INJI RECIPE-INJI PULI CURRY-ONAM SADYA RECIPES

Puli-inji-curry-recipe
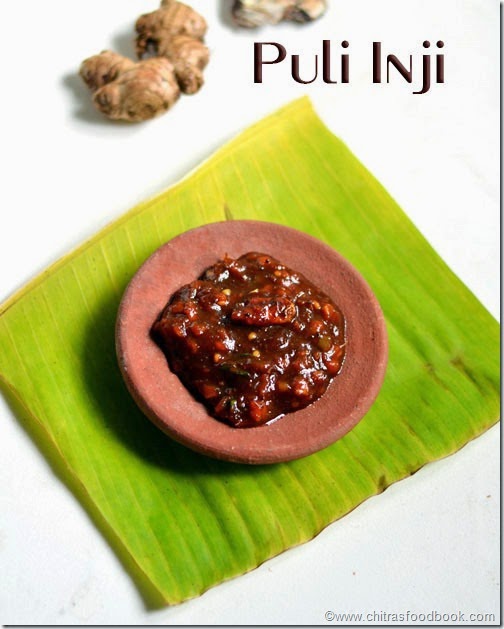
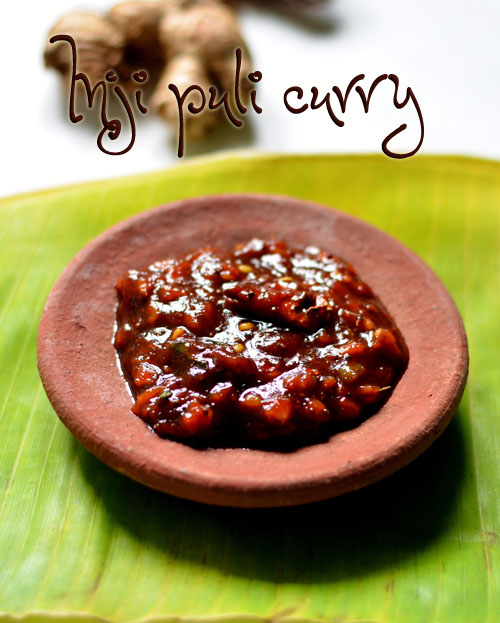
Puli inji curry is my most favorite dish in Onam sadya. Onam festival is around the corner. For the past two years, I have been sharing Onam sadya lunch menu recipes during this time.This year too I had planned to post an elaborate Onam sadya menu. I will do it on Friday or this weekend. But before that, I wanted to share some yummy, must try Kerala sadya recipes. There are some dishes that has to be present in Sadya menu. Puli inji is one among them and its our family favourite recipe too. I can have a plateful of parippu curry rice or curd rice with this inji puli curry. It tastes awesome. In Tamil nadu, especially in Tirunelveli,we make a similar inji pachadi for sodhi. Even people who hates ginger will surely love this puli inji. Its not only tasty but also aids digestion.

This recipe is from my favourite Vanitha magazine given by chef  Pazhayidam Mohanan Namboothiri. I have been following this recipe for the past two years. My neighbour Mrs.Prema used to buy Vanitha magazine and she never forgets to show it to me. Even though I can’t read Malayalam, I love to see the food, apparel, jewelry pictures and drool over them. I love its picture quality very much. Special thanks to her for translating this recipe to me. Last year she had changed her house but still she is the one and only source and inspiration for coking Kerala recipes in my kitchen. Ok, lets see how to make Kerala puli inji curry with step by step pictures .

Puli inji recipe

Puli inji curry recipe - Kerala style


Puli inji curry recipe - Kerala style Kerala style yummy puli inji recipe - Best accompaniment for Dal rice & curd rice.
Cuisine: Indian
Category: Side dish
Serves: 1/4 cup
Prep time: 5 Minutes
Cook time: 10 Minutes
Total time: 15 Minutes


INGREDIENTS
1 cup - 250ml

  • Ginger - 1/4 cup ( peeled and finely chopped)
  • Tamarind – Big gooseberry size
  • Green chilli - 2 nos ( finely chopped)
  • Red chilli powder - 1/2 - 1 tsp ( adjust)
  • Turmeric powder - 1/8 tsp
  • Grated jaggery - 2-3 tbsp
  • Salt and water - as needed
  • Roasted and ground methi seeds powder - 1/4 tsp ( optional)
To temper
  • Coconut oil - 1 tbsp
  • Mustard seeds - 1/2 stp
  • Urad dal - 1/2 tsp
  • Red chilli - 1 no ( pinched)
  • Curry leaves - few
HOW TO MAKE PULI INJI - METHOD

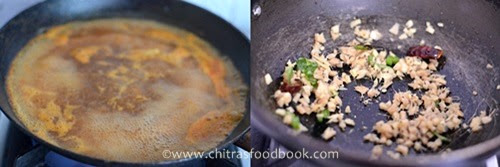
  • Soak tamarind in 1 cup of water. In the mean time, wash and peel the ginger. Chop it very finely and set aside. Chop green chillies. Dry roast methi seeds and powder it. Set aside.
  • In a wide bowl, take the tamarind extract. Add turmeric powder, salt, red chilli powder & jaggery. Allow it to boil well for 5 minutes.
  • In a kadai, heat coconut oil and temper mustard seeds, urad dal, curry leaves, pinched red chillies and finely chopped ginger. Saute well till ginger bits turns golden brown.
How to make puli inji recipe step1
  • Add this to the boiling tamarind mixture and add little water if necessary. Allow it to boil till the mixture thickens. Lastly add the methi seeds powder. Mix well and switch off the flame. Let it cool. Store in an air tight bottle. Use clean spoon for handling. Stays good for weeks under refrigeration.
How to make puli inji recipe step2

Enjoy with rice !
Note
  • Please adjust the quantity of jaggery based on your taste. Some people like it sweetish. Add more if needed.
  • Use clean spoon to handle. Keep in an air tight bottle and store in refrigerator.
  • Stays good for weeks.

Enjoy this tangy, sweet and sour puli inji curry with rice. Tastes divine !
Puli inji recipe


Continue Reading...


June 27, 2014

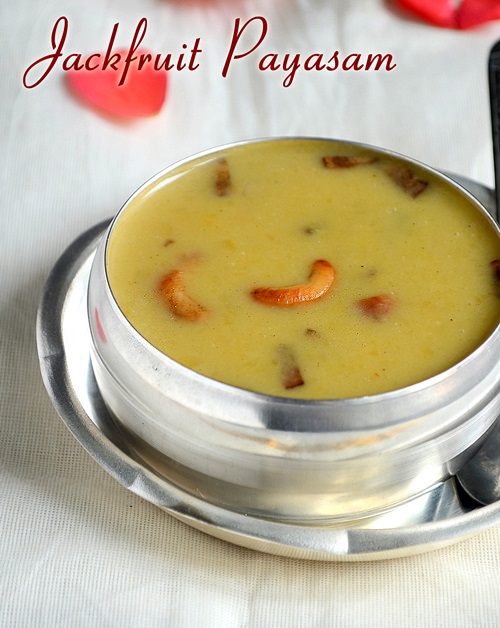
EASY CHAKKA PRADHAMAN PAYASAM /JACKFRUIT PAYASAM RECIPE

jackfruit payasam
Chakka pradhaman payasam / jackfruit payasam is one of the easy and delicious Kerala style payasam recipes. Two weeks back we had a trip to Kumbakonam & we went to Sendhil’s periappa’s house in Manakkarai .They gave us a big jackfruit from their backyard.We brought that to Bangalore & we waited for a week to become fully ripe. Last weekend, myself and Sendhil cut & cleaned this jackfruit for the first time in our life.

We watched some youtube videos on “How to cut jackfruit” and we spent nearly two hours to take out all the pieces. It was a good time pass for us. As there were nearly 150 pieces, I distributed most of them to all my apartment residents and reserved few for us. After so many years, I enjoyed eating my favourite jackfruit. But still I had so many pieces leftover in my pantry. When I was thinking how to make use of it effectively, this Kerala style chakka pradhaman striked my mind. \

As I wanted to include this payasam in my next onam sadya menu, I thought to give this a try. For this recipe, I asked my neighbour Mrs.Prema who is the only source for all the Kerala recipes I posted in my blog. She always suggests me the easiest method of making. This time too, she told me an easy way to prepare this payasam. As I had store bought coconut milk powder in hand, I made this payasam in just 10-15 minutes. 


In this method, you don’t have to pressure cook jackfruit pieces and you can add thick coconut milk or plain milk at the end instead of taking 2, 3 coconut extract and if you have readymade coconut milk powder at home, making this payasam would be even more easy. Taste & texture comes out awesome Thumbs up. Though this is not the authentic method of making chakka payasam, its sure a quick fix to make an easy dessert in minutes.

Indian express article


Last but not the least, I have a happy news to share with you all. Today, my blog got featured in Indian express-Indulge!. This is the first time an article is published for my blog and I am so happy for it. At this instance, I thank all my fellow blogger friends and readers for your continuous encouragement and support. And the above picture is the screenshot of the article. So this post is a kind of celebration post for me !

Chakka pradhaman


Chakka pradhaman Yummy, delicious jackfruit payasam / Chakka pradhaman in easy method - Kerala style payasam recipe. 
Cuisine: Indian
Category: Dessert
Serves: Serves 4
Prep time: 5 Minutes
Cook time: 20 Minutes
Total time: 25 Minutes


INGREDIENTS

  • Ripe jackfruit pieces - 12 nos
  • Grated Jaggery - 1/2 cup
  • Grated coconut - 1 cup or readymade coconut milk powder – 4-5 tbsp or Milk – 1 cup
  • Water – 1/2 cup to 1 cup
  • Cashews - few
  • Roasted coconut pieces - 2 tbsp
  • Ghee – 1-2 tbsp
  • Salt – a pinch
HOW TO MAKECHAKKA PRADHAMAN - METHOD

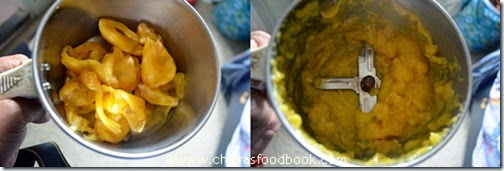
  • Wash the jackfruit pieces, remove the seeds & brown colored skin. Then grind the it to a paste. Add some water while grinding but don’t worry even if its coarsely ground. It tastes good to have those pieces while drinking the payasam.(No need to pressure cook before grinding, refer “notes” for more details)
Chakka pradhaman step1
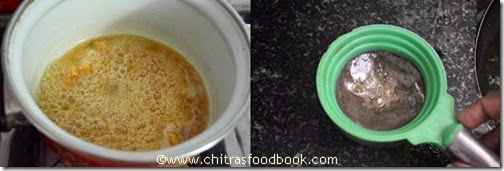
  • Take the grated jaggery in a wide bowl and add 1/4 cup of water to cover it. Melt it and make the syrup. Strain it and take the syrup in a bowl.
Chakka pradhaman step2
  • To this, add the ground jackfruit pulp. Add 1/2 cup of water. Mix well and allow it to boil well till raw smell of jackfruit and jaggery emanates completely. Add a tsp of ghee at this stage. It takes 5-10 minutes. Keep the flame medium. Check for water and add more if necessary. Take care else it will burn.
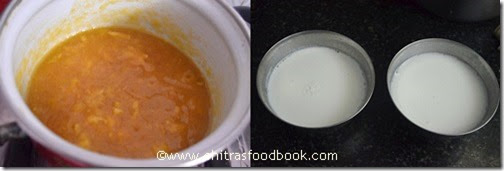
  • In the mean time, take 3 tbsp of coconut milk powder and mix in 1 cup of water to make thick first milk and prepare second coconut milk by adding 1.5 tbsp of coconut milk powder in 1 cup of water. Set aside. If you are using fresh coconut, grind 1 cup of coconut adding 1 cup warm water, strain and take thick milk. Again add 1 cup of water and take the second milk.
Chakka pradhaman step3
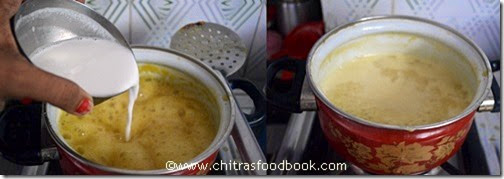
  • Add second milk to the payasam and allow it to to boil well for few minutes.
  • Lastly add the first coconut milk and give one boil. Do not boil for long time. Check for sweetness and add more sugar or jaggery syrup if needed.
Chakka pradhaman step4
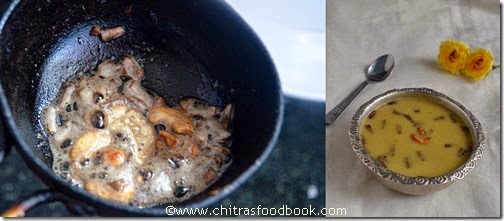
  • Heat ghee in a pan and roast the cashews and chopped coconut pieces till golden brown. Add it to the payasam and mix well.
Chakka pradhaman step5
PS : If you want to make this payasam quickly, add one cup of thick coconut milk at the end instead of adding first and second milk OR skip coconut milk & add boiled n cooled milk at room temperature. But don’t forget to add at the end after switching off the flame.
Enjoy !


Note

  • There is no need to pressure cook the jackfruit pieces before grinding if they are fully ripe and soft. Just grind it to a smooth paste or little coarse. If the jackfruit is hard, then you have to pressure cook it before you grind.
  • Never add milk or coconut milk in the beginning. If you want, you can add third coconut milk which should be very thin or else the mixture will separate and give a curdled look.
  • U can replace coconut milk by plain boiled and cooled milk too. But add it after you switch off the flame.
  • Adjust the quantity of jaggery as per the sweetness of jackfruit.
  • If you find sweet is lesser at the end, add sugar and compensate it.

Tasty n easy chakka payasam is ready to serve !
Chakka pradhaman kerala


Continue Reading...