Search Chitra's Food Book

Showing posts with label NEIVEDYAM RECIPES. Show all posts

August 22, 2016

Gopalkala Recipe / Dahi Poha – Easy Krishna Janmashtami Recipes

Gopalkala recipe
If you are looking for an easy Janmashtami recipe, Gopalkala is the best choice. It is a most popular dish prepared on the occasion of Janmashtami/Krishna jayanthi in North India. It is prepared in temples, offered to Lord Krishna and served as prasad during the festival for the devotees. When  Lord Krishna was young, he used to mix all his Cowherd friend’s lunch recipes with his favorite curd, butter, milk, made this dish and served his friends. 'Gopal' is the name of Lord Sri Krishna. 'Kala' means the mixture. So this dish is named as Gopalkala. It is is a mix of beaten rice/ poha, curd,milk, ghee, green chilli, sugar, salt and cucumber.This is also called as Dahi poha. I followed the recipe from this space. There is no hard and fast rule to make this dish. This salty and sumptuous dish is prepared in every home in North India where the festival of Janmashtami is observed. It is extremely easy to prepare and hardly takes few minutes to prepare. Try this easy Janmashtami recipe and have a great celebration !

Continue Reading...


August 19, 2016

Poha Kheer - Choora Kheer - Aval Payasam With Sugar - Krishna Janmashtami Recipes

Poha kheer
Poha kheer also known as Choora Kheer ( Aval Payasam in Tamil, Pressed rice/Rice flakes pudding in English, Atukula payasam in Telugu, Avalakki payasa in Kannada) is a creamy, rich North Indian dessert recipe made using Milk, pressed rice, sugar, nuts and cardamom powder. Krishna Janmashtami/Gokulashtami festival is around the corner. We South Indians i.e Tamil people make sweet seedai, Salt seedai, Kai murukku, Paal payasam and appam for the festival whereas North Indians make their specialty recipes like Rice Kheer/ Poha kheer, Kalakand, Shrikand, Gopalkala, Mathura Ke peda and many more. Actually I bookmarked these recipes long back but I couldn’t try them.So this year I started with a North Indian recipe for Krishna Jayanthi festival.. I followed Sanjeev Kapoor’s recipe but used more milk than the mentioned quantity. Its so easy to make and it came out creamy and delicious.This kheer can be given for babies too. Actually Sendhil  & Raksha is not a big fan of Poha kheer with sugar. But they liked this a lot. Try this easy kheer recipe for this Janmashtami festival and offer to God. Lets see how to make poha kheer with step by step photos and a video ( Will update soon) !
Check out my other Krishna Jayanthi recipes HERE

Poha kheer recipe

Poha kheer/ Aval Payasam


Poha kheer/ Aval Payasam Poha kheer/Choora kheer recipe - Krishna Janmashtami Recipes
Cuisine: North Indian
Category: Dessert
Serves: Serves 2-3
Prep time: 5 Minutes
Cook time: 15 Minutes
Total time: 20 Minutes


INGREDIENTS
1 cup - 250ml
  • Thick poha/Aval/Rice flakes - 1/4 cup
  • Milk – 1.5 cups
  • Sugar – 2.5 tbsp
  • Cashews, Almonds and Raisins - 5 each
  • Saffron threads - few
  • Cardamom powder - 1/8 tsp
  • Ghee - 1 tbsp
METHOD

  • Boil milk in a pan. In the mean time, heat ghee in a kadai. Roast cashews, almond and raisins. Remove in a plate leaving the ghee in the pan. In the same ghee, roast poha for 2 minutes. It will roast with a nice flavor. (Skip roasting poha. Just wash and add to milk. Some versions call for this method too)
Poha kheer recipe
Poha kheer recipe
  • Add the roasted rice flakes to the boiling milk. Cover and cook the poha in very low flame. It takes nearly 10 minutes to cook. Mix it well once or twice in between. Make sure the bottom is not burnt. If needed, add 1/4 cup more milk in the middle.
Poha kheer recipe
  • After the poha is cooked well, add sugar and mix well. Add cardamom powder and roasted nuts. Add saffron threads if you wish. Mix well and give a boil. Switch off the flame and serve warm.
Note : This kheer thickens over time. So add more milk and sugar while serving to adjust its consistency and sweetness. Boil for a minute and serve warm. Enjoy !

Easy, yummy Poha kheer is ready to enjoy !
Poha kheer recipe


Continue Reading...


August 12, 2016

Poornam Boorelu Recipe – How To Make Poornalu – Andhra Burelu

Poornam boorelu
Poornam Boorelu/Poornalu/ Burelu (In Telugu) is one of the most important Neivedyam /Prasadam recipes for Varalakshmi Vratham in Andhra. Most of the people make this during Diwali and Ganesh chaturthi too. Boorelu is very similar to Tamil nadu style Suzhiyam/Suzhiyan recipe but the ingredients used for the outer covering is different. In suzhiyan, maida and rice flour is used for the outer covering whereas boorelu needs rice + urad dal batter (Just like dosa batter) for the covering. Otherwise, the procedure for making Pooranam is one and the same. Pooranam ( Stuffing) can be made with Senaga pappu ( Chana Dal ), Pesarapappu ( Moong dal ) or Kobbari ( Coconut). This morning I tried it for pooja and of course to post this special recipe on this Varamahalakshmi festival day. Even though its my first attempt, it came out very well and I am happy with the result. For this recipe, I asked my neighbor Sowjanya who is from Andhra. She told, on Varamahalakshmi, they make a count of 9 boorelu/poornalu and offer to God. It should be consumed only by the family members after the pooja. So its a must and should sweet recipe to be made for them during this festival.She shared her recipe along with some useful tips too. Thank you Sowjanya for the perfect recipe. We all loved it. Do try this Andhra special sweet recipe for festivals and have a great celebration. Ok, Lets see how to make Pooranam Boorelu ( Poornalu) with step by step pictures.
Andhra boorelu

Pooranam Boorelu Recipe


Pooranam Boorelu Recipe Pooranam Boorelu - Andhra style senagapappu boorelu recipe
Cuisine: Indian
Category: Sweet
Serves: 9 nos
Prep time: 5 Hours
Cook time: 3 Minutes
Total time: 5H03Minutes


INGREDIENTS
For the stuffing/Pooranam
  • Chana dal - 1/2 cup
  • Grated jaggery - 3/4 cup
  • Water - 1/3 cup
  • Cardamom - 2 nos
  • Grated coconut - 1//4 cup
For the outer covering
  • Raw rice - 1/2 cup
  • Round white urad dal - 1/4 cup
  • Water - as needed
  • Salt - A pinch
  • Sugar - 1/2 tsp
  • Cooking oil - to deep fry
METHOD

  • Wash and soak the rice and dal together for minimum 4 hours. Over night soaking is also fine. Grind it to a slightly coarse paste in dosa batter consistency adding required water. Make sure batter is not too thin. Set the batter aside for one to 5 hours. But I used it immediately without resting time.
  • Wash and pressure cook chana dal adding enough water. Chana dal should be blossomed and retain its shape ( i.e when you press the dal, it should become mushy) Do not over cook the dal. Grind it to a coarse paste without adding water or mash it with a ladle.
Poornalu - Poornam boorelu
  • In a pan, melt jaggery adding water. Strain it to remove the impurities using a metal strainer. Boil the syrup till it becomes frothy or reaches one string consistency. Add the ground chana dal paste, cardamom powder and grated coconut. Mix well till it becomes a whole mass and leaves the sides of pan. Switch off the stove and let it become warm. Make balls of golf balls size and arrange in a plate.
 Poornam boorelu
 Poornam boorelu
  • Heat oil to deep fry. Test the oil temperature by dropping a pinch of batter. If it rises to the top, oil heat is just right. Simmer the flame completely.Take the ground batter, add sugar, mix well. Dip a stuffing ball into the batter using a spoon. Wipe the excess batter in the sides of vessel and deep fry the balls in medium flame till it turns slightly golden with brown spots.Do not fry for long time. Remove in a tissue. Offer to GOD and get the blessings. Enjoy  eating!
 Poornam boorelu
 Poornam boorelu
 Poornam boorelu
NOTE : You should make 9 or 5 balls and offer to GOD. It should be eaten only by the family members.Do not give this as prasad to others.

Tip 1 : Adding sugar in the batter gives a mild sweet taste to the outer covering too. So it won't taste bland.
Tip 2 : Poornam should be thick and there should not be any moisture content in it else it will disperse in oil when you deep fry the balls.So add besan flour if needed to make the stuffing thick.
Tip 3 : If the batter is thin, you can add some rice flour to bring the right consistency.


Note
  • You can use the remaining batter to make dosa or punugulu.
  • While cooking dal , if u add more water , drain the excess water and grind to a smooth paste. 
  • If there is more moisture in the cooked dal, you can add some besan flour to thicken the stuffing quickly.
  • It stays soft and good for 1-2 days.
Enjoy this delicious traditional Andhra sweet at home !
Pooranam boorelu
Continue Reading...


August 9, 2016

Andhra Pulihora Recipe – How To Make Chintapandu Pulihora Pulusu

Chintapandu pulihora
Andhra Pulihora also known as Chintapandu Pulihora in Telugu is a must try recipe during festival time. As Varalakshmi Vratham is fast approaching, I thought of sharing some Andhra style neivedyam recipes for this festival. This morning, I was asking my friend Megha about Varalakshmi Vratham special recipes as her MIL belongs to Andhra. She suggested recipes like Boorelu, appalu, Garelu and Pulihora. As our family is a big fan of tamarind rice, I started with this recipe. The ingredients and preparation of Andhra Pulihora is completely different from our Tamil nadu style Puliodharai. Its a very simple recipe without any grinding job. In the traditional temple style pulihora recipe, they add sesame seeds powder or mustard powder. But I made the basic version as told by Megha and watched Attammaa TV YouTube video recipe too for more reference. This Puliogare paste i.e. Pulihora Pulusu can be quickly made in minutes if you have readymade tamarind paste in hand. Its an ideal choice for quick lunch box recipe. Raksha loved it a lot and asked me for second serving as well. But this pulihora needs a standing time of minimum 2 hours for all its flavors to blend well. So friends do prepare this rice at least two hours before serving to relish its actual taste and flavor. Now lets see the step by step recipe of how to prepare Andhra Pulihora / Chintapandu pulihora in detail.

Check out my Tamil nadu style Puli Sadam and Pepper Puliogare recipes too.
Continue Reading...


July 27, 2016

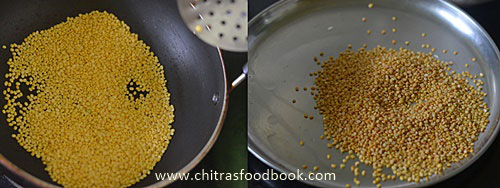
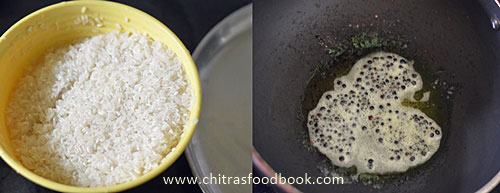
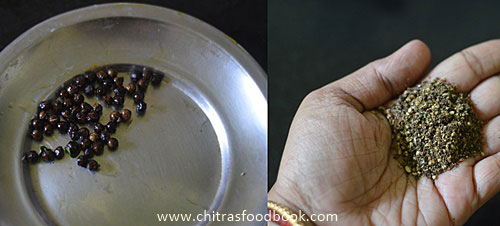
Ven Pongal Recipe – How To Make South Indian Khara Pongal

ven pongal recipe

Ven pongal also known as Khara pongal is one of the most important South Indian breakfast recipes which is very popular in Tamil nadu. I have already shared my MIL’s easy, Venn pongal recipe in a pressure cooker with a video. Today I have come up with my mom’s version of making ven pongal. My parents are with me in Bangalore and I am having a great time with them. I am enjoying my mom’s special recipes. This morning amma made ven pongal and coconut chutney for our breakfast. 

Most of us avoid eating pepper corns if its added as whole ones. So my mom adds coarsely powdered pepper corns just like the ones served in some hotels. And she adds more quantity of moong dal to make the dish more healthy. It doesn't look like hotel style ghee dripping pongal but sure its tasty. Do try this version. You will love it. Ok, Lets see my mom’s style South Indian Ven pongal recipe for breakfast.

Ven pongal recipe

Ven pongal recipe


Ven pongal recipe Ven pongal/Ghee pongal/Khara pongal - South Indian breakfast recipes
Cuisine: South Indian
Category: Breakfast
Serves: 2
Prep time: 10 Minutes
Cook time: 20 Minutes
Total time: 30 Minutes


INGREDIENTS

1 cup - 250ml
  • Raw rice/Pacharisi - 1 cup
  • Yellow moong dal/Paasi paruppu - 1/4 cup
  • Water - 5 cups ( add more based on your desired consistency)
  • Ghee - 4 tbsp
  • Pepper corns – 1 tsp
  • Cumin seeds - 1.5 tsp
  • Curry leaves - few
  • Chopped ginger - 2 tsp
  • Asafetida/Hing - 2 pinches
  • Cashew nuts - few
  • Salt - as needed

HOW TO MAKE VEN PONGAL - METHOD

  • Heat 1 tsp ghee and roast moong dal in a kadai till nice aroma arises. Do it patiently without burning them. Remove in a plate. For variations, you can skip roasting the dal and wash it with rice. 
  • Wash the rice and set aside. In a kadai, heat 2 tbsp of ghee and roast the pepper corns. Let it crackle. Remove half of them and powder it coarsely. If you want, you can powder all the roasted pepper corns. I powdered half & added the remaining as it is for photographic attraction. But my mom usually powders all the pepper corns.
  • Add cumin seeds to the remaining pepper corns and roast the jeera for few seconds without burning. Switch off the flame and set aside. In a cooker base, take the washed rice and roasted moong dal. Add 5 cups of water and required salt. Mix well and add the roasted pepper + cumin mixture, chopped curry leaves, ginger and hing. Mix everything and pressure cook in high flame for 7 to 9 whistles. Remove the weight valve after the steam is released.
Ven pongal recipe
  • Heat 1tbsp of ghee and roast cashew pieces till golden brown. Open the cooker and add the roasted cashews and powdered pepper corns. Mix well till mushy and add the remaining 1 tbsp of ghee. Mix and serve.
Ven pongal recipe
Ven pongal recipe
Serve hot with coconut chutney .Enjoy !

Enjoy yummy ven pongal for breakfast !
South Indian Ven Pongal Recipe
Continue Reading...


January 14, 2016

Paal Pongal | Milk Pongal Recipe (Vellai Pongal)

Paal pongal recipe
Paal Pongal/Milk Pongal – when you hear this name you may think its a sweet pongal recipe using milk. But a big nooo! Its just a white pongal recipe in which rice is cooked in milk+water. We usually make this pongal in a pot along with sakkarai pongal for the festival. It looks super white and tastes creamy & rich. 

We mix this rice with Sambar or kootu and enjoy it. But traditionally we offer this to God by keeping a piece of jaggery, banana with few drops of ghee. If you wish to make it as sweet pongal, you can add sugar & cardamom powder to it. This post is my last minute contribution to Pongal Recipes in this year. Lets see how to prepare Vella pongal/Milk pongal recipe with stepwise pictures !!

Check out my other PONGAL RECIPES

Milk pongal recipe

Paal pongal/Milk pongal/Vellai pongal


Paal pongal/Milk pongal/Vella pongal How to make pongal using milk - Paal pongal recipe
Cuisine: Indian
Category: Lunch
Serves: 2
Prep time: 5 Minutes
Cook time: 15 Minutes
Total time: 20 Minutes
INGREDIENTS
1 cup = 240 ml
  • Raw rice - 1/2 cup
  • Milk - 1 cup
  • Water – 2 cups
  • Salt - a pinch
METHOD
  • Wash the rice and keep aside. In a pressure cooker base take milk + water and a pinch of salt. Add rice to it. Cook in low flame for one whistle. Remove and mash it well. Offer God by keeping a small piece of jaggery, banana & few drops of ghee.
Paal pongal
    Serve with Pongal Kuzhambu & kootu. Enjoy !


Make this creamy, rich Paal Pongal and have a great celebration !

Milk pongal recipe 
Continue Reading...


January 2, 2016

Kesari Bath Recipe-Karnataka Recipes

Karnataka Kesari bath recipe
2015 was a big year for me. My long time dream of buying an own house came true. My blogging life also went well. I got so many new readers & a good fan base. 

Thanks to everyone for your continuous support and encouragement. I wish & I hope 2016 would be much better by God’s grace. I am happy to start this New year post with Karnataka’s most popular Sweet, Kesari bath recipe.

In most of the hotels, kesari bath & khara bath are served together as “Chow Chow bath” for breakfast. I have tasted this kesaribath in brahmin’s coffee bar and many popular restaurants here. My Kannadiga friends make Kesari bath with milk & banana and offer it as prasad for Satya Narayana pooja. I will try to get that recipe from my friends and share it here.

I usually make Rava Kesari following my MIL’s fool proof recipe adding less ghee and more water. Yesterday for our New Year celebration, I tried Kesari bhath (Sooji Ka Halwa in Hindi) in Karnataka style adding more ghee and water. It came out really well and got credits from my family members. I was extremely happy to see the ghee dripping Kesari bath just the way it is served in hotels.

 Actually I wanted to serve in a banana leaf but i couldn’t get it. So I clicked it by keeping it in a banana leaf plate.Soon I will make Chow chow bath and post it with a good picture.

Lets see how to make Karnataka Kesari Bath Recipe with step by step pictures.

Kesari bath recipe

Kesari bath recipe


Kesari bath recipe How to make Karnataka style Kesari bath recipe
Cuisine: Indian
Category: Sweet
Serves: 2
Prep time: 5 Minutes
Cook time: 15 Minutes
Total time: 20 Minutes
INGREDIENTS
1 cup = 250ml
  • Rava/Sooji/Semolina - 1/2 cup
  • Sugar - 1 cup
  • Water - 2 cups
  • Melted Ghee - 1/3 cup
  • Cooking oil – 1 tbsp ( use odourless oil)
  • Cardamom powder - 1/2 tsp
  • Yellow food color -2 pinches
  • Cashewnuts - few to garnish
  • Cloves - 1 to 2 nos
How to make kesaribath - METHOD

  • Heat a kadai with mentioned quantity of ghee+oil.Roast the cloves and cashews till golden. Remove and set aside.In the same kadai, roast the rava till you get a nice smell but without changing its color. Switch off the stove and let the rava be in the same kadai.
Kesari bath recipe
  • Boil 2 cups of water in a bowl adding food color. When the water comes to a roll boil, add this water to the roasted rava.Be careful,water splashes. Stay a feet away and carefully pour the water. Sorry, I missed to take the pictures for this step.
  • Mix the water and rava. Add a pinch of salt. Switch on the stove and keep the flame in medium. Mix well till all the water is absorbed by the rava. Close the kadai with a lid and cook for 3-4 minutes.
    • After the rava is cooked well, add the sugar.Mix well.
Kesari bath recipe
  • When the sugar is melted completely, mixture will become watery. So keep mixing till the kesari bath becomes thick and starts to leave the sides of pan. Add cardamom powder, roasted cashews, cloves and mix well.
Kesari bath recipe

Kesari bath recipe
  • Transfer it to a ghee greased bowl and flatten it with a ladle. It will fall like a ribbon and looks very loose in consistency. But It will become just right when warm. Sprinkle more cashews if needed and serve hot if you like. If you touch the kesari bath when its slightly warm, it should be non-sticky. Scoop it with a ladle and serve hot to enjoy its best taste!
Kesari bath recipe
Kesari bath recipe


Note
  • Adjust the quantity of sugar based on your tastebuds. You can use 3/4 cup of sugar for medium sweetness. I used 1 cup here.
  • You can add more water but do not add less than the mentioned quantity.
  • You can also replace yellow food color with orange color.
  • Use pineapple essence if you like pineapple flavored kesari.
Enjoy this ghee dripping sweet- Kesari bath with your family !
Kesari bath recipe

Continue Reading...


November 11, 2015

Vazhakkai Bajji Recipe | Raw Banana Bajji - How To Make Bajji

Vazhakkai bajji

Hi Friends, Hope you all doing good. I am sure you all had a great Diwali celebration.My Diwali went very well in my new house with my in-laws and family. As I was busy with some personal works, I was not able to make any post here. For Diwali, I made Badam burfi, Doodh peda, Wheat halwa, Thenkuzhal and Ribbon pakoda for my family. Apart from these sweets, I also made Adhirasam, Suzhiyan and Vazhakkai bajji on Diwali day. We love to eat these deep fried stuffs more than sweets and other savories.

Actually I had planned to make this post before Diwali. But I couldn’t do it. So Iam sharing it today. Every year my mom prepares potato bajji, Brinjal/Kathirikai bajji, Onion bajji and my most favorite Valakkai bajji( Raw banana fritters) on Diwali day morning. I guess many of you make bajji and bonda with store bought bajji, bonda mix/powder. But my mom and MIL makes bajji mix on their own. 

Basically I love tea shop Vazhakkai bajji a lot. Eating hot Vazhakkai bajji with a sip of steaming hot tea on a rainy day is a pure bliss! Try and experience it without worrying about the calories. Lets see how to make this easy, yummy South Indian style Vazhakkai bajji recipe.


Check out my Onion bajji , Chilli bajji & Stuffed chilli bajji recipes.

Vazhakkai Bajji Recipe

Vazhakkai bajji/Raw banana fritters


Vazhakkai bajji/Raw banana fritters How to make Vazhakkai bajji / Raw banana fritters !
Cuisine: Indian
Category: Snacks
Serves: 10 
Prep time: 10 Minutes
Cook time: 20 Minutes
Total time: 30 Minutes


INGREDIENTS
1 cup = 250 ml
  • Besan flour/Kadalai maavu - 1 cup
  • Rice flour - 1/3 cup
  • Red chilli powder - 2 tsp
  • Red food color – 2 pinches (optional)
  • Hing/Asafetida - 1/4 tsp
  • Ajwain OR Cumin seeds/Jeera - 1 tsp
  • Salt - as needed
  • Cooking soda / baking soda - 2 big pinch
  • Water - 1 cup + 2 tbsp ( adjust)
  • Cooking oil - to deep fry
HOW TO MAKE RAW BANANA BAJJI - METHOD
  • In a wide bowl , mix all the flours, powders, Ajwain or cumin seeds, salt, baking soda and add water to make a slightly watery batter( like dosa batter). If you make it too watery, bajji will have tails. At the same time, thick batter yields hard bajjis. The batter should be slightly thick and flow like a ribbon. It should coat the raw banana pieces well. Adjust water and flour accordingly.
Raw banana bajji
  • Wash and cut the raw banana into two horizontally. Peel the skin and discard it. Slice the raw banana thinly and arrange in a plate. Dip the raw banana in bajji batter.
Vazhakkai bajji

  • Heat oil in a kadai and check with a drop of batter to find the correct heating point. i.e. If you put a drop of batter , the batter will rise immediately and floats on top. As soon as you get this heating point, simmer the flame and drop the raw banana slices coated well with batter.
Vazhakkai bajji
  • Deep fry till the color changes golden brown and the bubbles ceases. Flip it and again cook for a minute. Drain & remove in a tissue paper. Enjoy with tea/coffee!
Vazhakkai bajji
Vazhakkai bajji
Note
  • Addition of food color gives a nice color to bajji as u see in stalls.
  • My mom & mil adds cumin seeds but i used ajwain for an enhanced flavour. Use any as per ur wish.
  • Please don’t skip adding soda. It gives a  puffy, soft bajji. Make sure you don’t add too much because bajji will be very oily and it is unhealthy too..
  • Adjust the consistency of batter. Batter should not be too thin or too thick. If your batter has become too thin, add besan & rice flour in 3:1 ratio and adjust the batter. If it is too thick add more water. Always add the extra water using a tbsp & check it.

Enjoy puffy, hot Vazhakkai bajji as an evening snack with your family !
Raw banana bajji


Continue Reading...