Search Chitra's Food Book

November 4, 2013

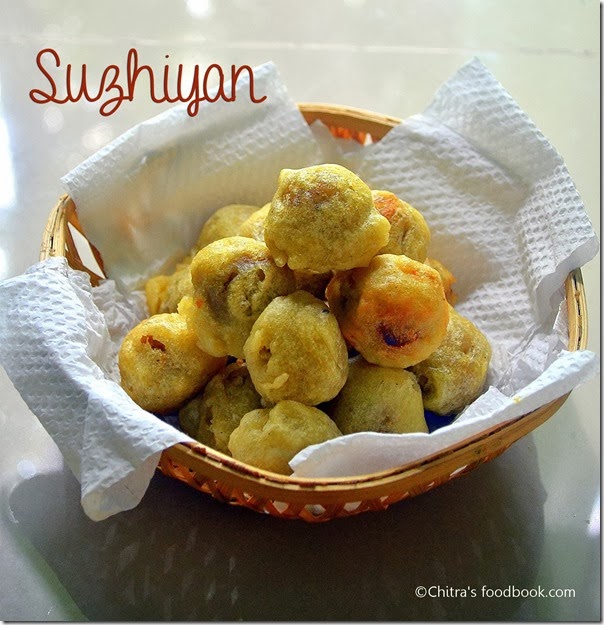
SUZHIYAN RECIPE - HOW TO MAKE SUZHIYAM RECIPE - DIWALI BREAKFAST RECIPES

suzhiyan-picture
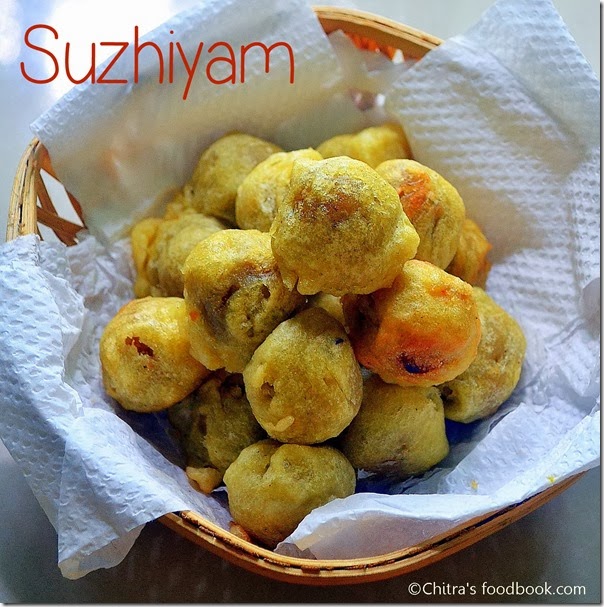
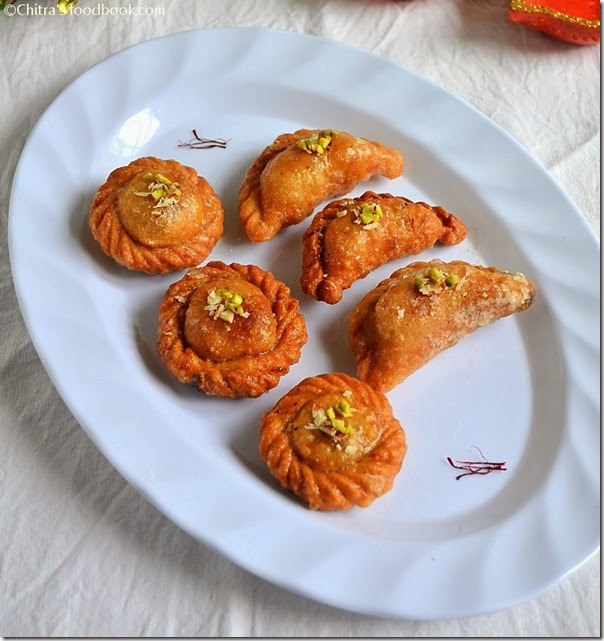
Suzhiyan is Sendhil's most favorite sweet among all the diwali recipes. People call it by different names as suzhiyam, suyyan, susiyam, sweet seeyam, sukhiyan etc. Suzhiyan sweet recipe is very easy to make. Kadalai paruppu pooranam is used for stuffing and maida, rice flour is used for outer covering. 

We usually make it specially on Diwali Day and after ganesh chaturthi with left over channa dal pooranam / kadalai paruppu pooranam made for kozhukattai. I learnt this recipe from my MIL.

 
My mom & Sister's family makes the same with coconut pooranam. In our house, we call this as suseeyam/sugin/ suyyam. Stuffing is our choice.Some people use idli dosa batter to make the outer covering of suzhiyan. But we use maida & rice flour. So I have shared recipe for outer layer of suzhiyam and our easy method of making stuffing/pooranam.

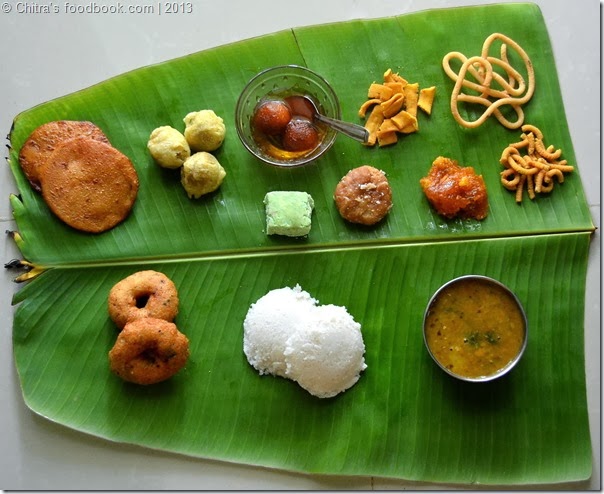
I have shared a picture of our Diwali breakfast recipes below. Hope you all celebrated Diwali very well.. I had a great Diwali celebration in my in-laws place. I got a new saree from my in-laws and two churidhars from my husband. I was so  happy and busy in burning crackers, eating sweets and snacks(my mil's preparation), wishing friends and relatives and in taking pictures..

We usually make Medhu vadai with pepper , Suzhiyan and adhirasam along with idli, sambar for neivedyam on Diwali morning. Diwali breakfast is like a feast for us. We have all the sweets and snacks made for Diwali along with the above said recipes. We keep munching the savories and sweets the whole day. We don’t even make lunch. Our only job is to watch special programmes in TV , eat and sleep ;).

Ok, enough of my stories lets move on to Suzhiyan recipe with step by step pictures.
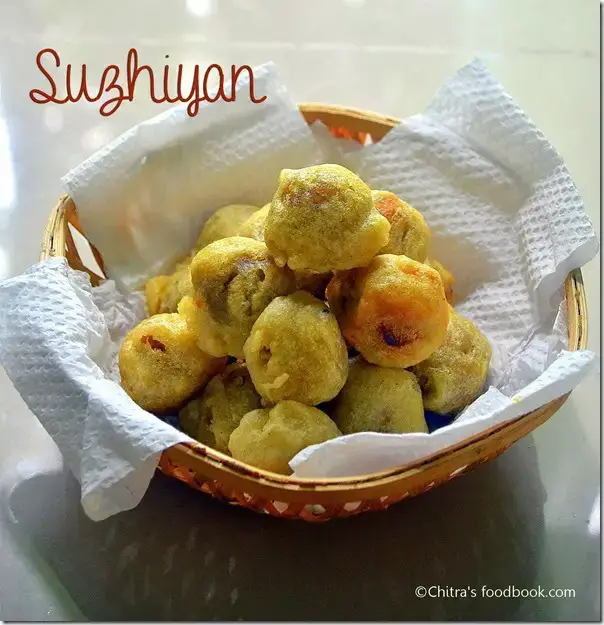
DIWALI BREAKFAST RECIPES-001


Suzhiyan Recipe


Suzhiyan Recipe Suzhiyan is a delicious, deep fried snack stuffed with chana dal pooran. We make this for neivedyam on Diwali and Ganesh chaturthi. 
Cuisine: South Indian Category: Sweet / Snack Yields: 30
Prep Time: 30 Minutes Cook Time: 10 Minutes Total Time: 40 Minutes


INGREDIENTS
1 cup - 250ml
For pooranam
  • Chana dal / Kadalai paruppu – 1/2 cup
  • Grated jaggery –  3/4 cup ( add 1 cup for more sweetness)
  • Grated coconut – 1/2 cup
  • Cardamom powder – 1/2 tsp
  • Water – as needed
For outer layer
  • All purpose flour /Maida – 1 cup
  • Besan flour – 1 tbsp (optional)
  • Rice flour – 1 tbsp
  • Salt – a pinch
  • Cooking soda – A pinch
Oil – to deep fry
HOW TO MAKE SUZHIYAN - METHOD

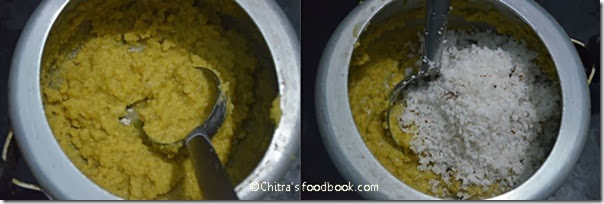
  • Prepare the stuffing first. For this, pressure cook channa dal adding required water and a tsp of oil. Cook for 2-3 whistles in low flame. After the steam is released , mash the dal well with a whisk or ladle. Set aside.
suzhiyan tile1
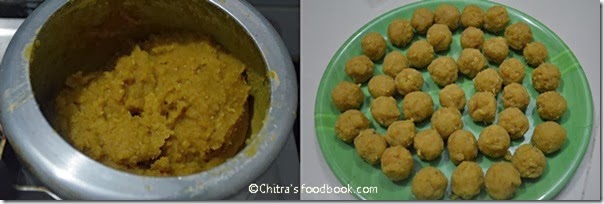
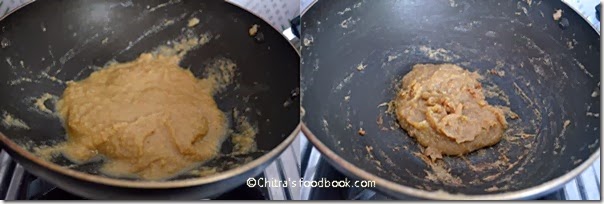
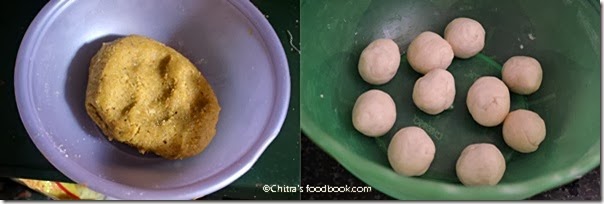
  • To this mashed dal , add grated coconut and jaggery. Mix till the mixture thickens and leave the sides of the pan & becomes non-sticky. Add cardamom powder. Switch off the flame and allow it to cool. Make small lemon sized balls after the stuffing becomes warm..
suzhiyan tile2
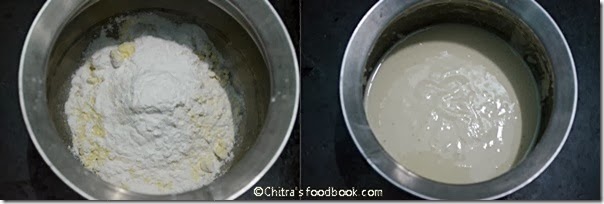
  • In a wide bowl, take the all purpose flour , besan and rice flour. Add a pinch of salt and cooking soda. Add water to make a batter of bajji batter consistency. Batter should flow like a ribbon. It should coat the stuffing well. Put the stuffing balls in the batter.
suzhiyan tile3
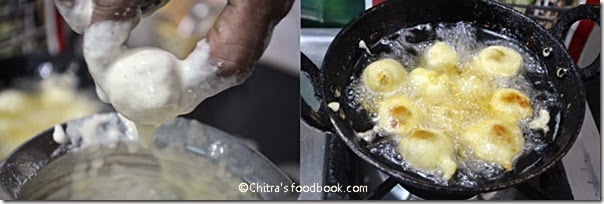
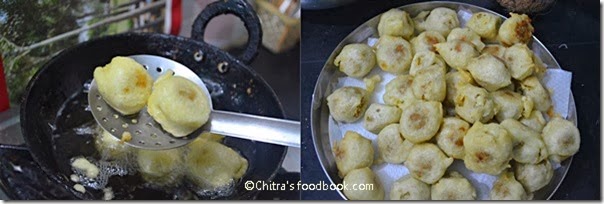
  • Heat oil in a kadai and when it gets heated , use a spoon and take a ball dipped in batter. Put 3 to 4 balls in oil and deep fry for few minutes. Keep turning both the sides for even cooking. Remove as soon as the outer cover gets golden brown spots in the center. Drain in a a colander and store in a box after it cools down. It stays good for 2-3 days. 
suzhiyan tile4

suzhiyan tile5
Enjoy !
Note
  • While cooking dal, if you add more water, drain the excess water and grind to a smooth paste. Also while adding jaggery and coconut, you don’t have to add water.Coconut and jaggery itself leaves water when it melts.
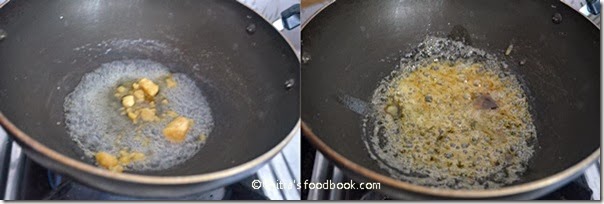
  • If u want to remove the impurities of jaggery, first heat & melt the jaggery adding little water and allow it to become frothy. When it is frothy, add grated coconut and mashed dal. Mix till mixture thickens and leaves the sides.
  • U can make the batter only using maida. Adding rice flour makes it slightly crispy..
  • Besan flour is completely optional. Make the batter in bajji batter consistency. Do not make it too thin or too thick. The stuffing should be coated well.
  • Suzhiyan stays soft and good for 2-3 days.


suzhiyan picture-001

Continue Reading...


November 1, 2013

INJI LEGIYAM /GINGER LEGIYAM – DIWALI MARUNTHU RECIPE

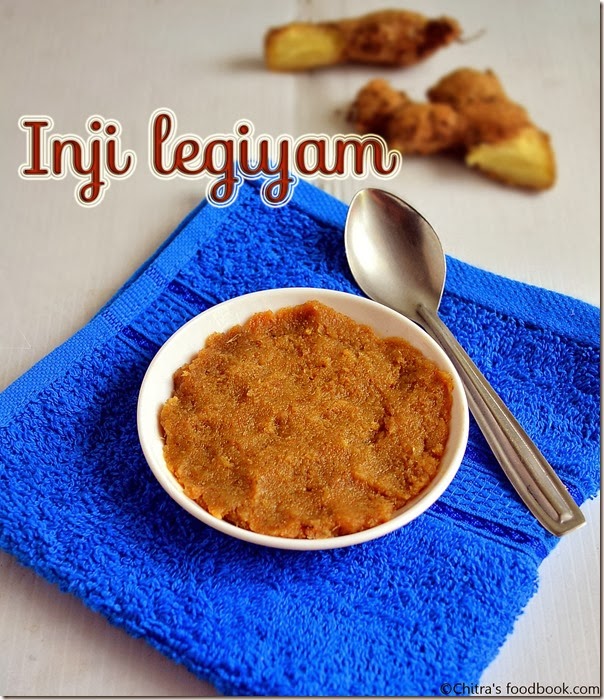
Ginger lehiyam
This year I couldn’t post many recipes for Diwali as I wished. So I thought of finishing this year Diwali recipes at least with this useful post. My mom was with me for the past one week. When I was discussing about diwali legiyam , she immediately told me about this inji legiyam / ginger legiyam recipe.

This is not the authentic Diwali legiyam reipe.But my mom makes this on the eve of Diwali and once in 3 months. We used to have this legiyam for 3 days in empty stomach from Diwali. It is one of the easiest and the best legiyam recipe which can be made with just 3 major ingredients in 10 minutes. As a kid, me & my sister used to cry literally to have this in empty stomach and the worst thing is we should not drink or eat anything for 30 minutes after having this legiyam. We should not drink water too. But now I realise how effective it is. We ( me & my sis) have no digestion & stomach upset problem till today (touchwood). 

Now I am following my mom and I make this legiyam for my family whenever they have indigestion issues. I give a big gooseberry size for my husband and a small berry size for my daughter. This legiyam is not only healthy but also very tasty with mild inji kaaram. It helps for easier digestion of oily and junk foods we have on Diwali. It also improves appetite.Some people make this legiyam for krishna jayanthi and offer to god along with seedai. Do prepare and have this simple & effective legiyam for this diwali. Enjoy sweets & snacks without feeling guilty. I'll try to the post the authentic legiyam next year.

Do refer “Points to note” before doing this legiyam. 

Inji lehiyam

Diwali marundhu recipe - Inji legiyam 


Diwali marundhu recipe Easy ginger legiyam recipe using easily available ingredients in pantry !
Cuisine: Indian Category: Health food Yields: Serves 2
Prep Time: 10 Minutes Cook Time: 15 Minutes Total Time: 25 Minutes


INGREDIENTS
1 cup - 200ml
To grind
  • Fresh ginger (thumb finger size) – 5 pieces
  • Dhania/Coriander seeds – 2 tsp
  • Dry grapes / raisins – 1/4 cup
  • Salt – a pinch
To saute
  • Grated jaggery – 2 tbsp
  • Ghee – 1.5 tbsp
  • Water – as needed
HOW TO MAKE INJI LEGIYAM - METHOD

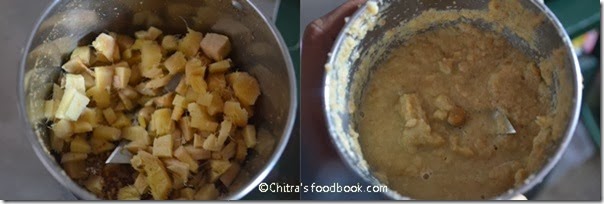
  • Wash and chop the ginger into small pieces. Set aside.
Ginger lehiyam
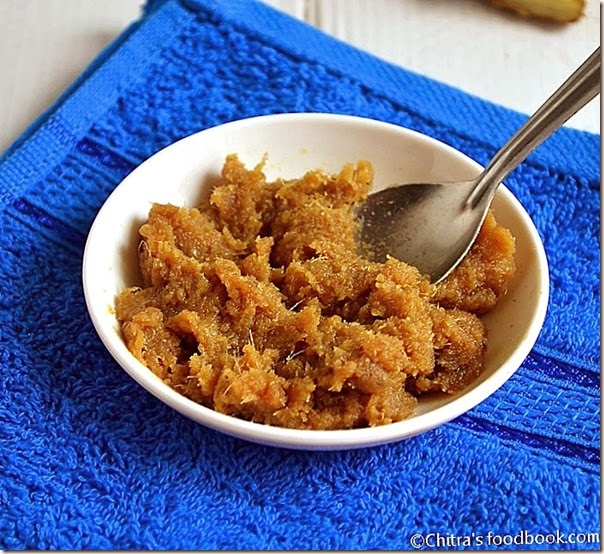
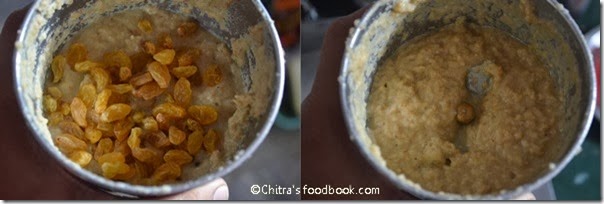
  • In a mixie jar , grind the dhania seeds first to a coarse powder. Then add the chopped ginger, required water and grind it to a smooth paste. Lastly add the dry grapes and grind to smooth paste.
  • Ginger lehiyam
    Ginger lehiyam
  • In a kadai , melt jaggery adding little water ( say 2-3 tbsp). Jaggery will melt completely and becomes frothy. Now add the ginger paste and mix well till the mixture thickens. Add ghee at the end and mix till it leaves the sides of the pan. Make sure there is no water content. It spoils the shelf life of this legiyam.
  • Ginger lehiyam Ginger lehiyam
Allow it to cool completely and store in a clean, air tight box. Always use a dry, clean spoon to take it..It stays good for 4 days without refrigeration..

Note
  1. There should not be water content in this lehiyam. It will spoil this lehiyam very soon. So mix it well in high flame.
  2. Add more jaggery if you want more sweetness. But the quantity I have given is enough to compensate the ginger taste.
  3. U should have this legiyam for 3 days continuously to get its full benefits. Its better to have this in empty stomach or at night before going to bed.
  4. Most important thing is u should not eat or drink anything for 30 minutes after having this legiyam. If you eat food or drink water immediately, you may pass loose stools. Take care ..
  5. This legiyam can be had once in three months generally. It helps to keep our stomach clean and strong.
  6. Coriander seeds/dhania helps to control the bile secretion (pitham) in our body. Ginger is helpful for easy digestion and removes the waste/toxins. Dry grapes gives us good immunity. Ghee is used to subside the heat of body.
  7. Adults can have a big gooseberry size and kids( above 6 yrs) can have  a small berry size of this legiyam.
Continue Reading...


October 30, 2013

SURYAKALA,CHANDRAKALA SWEET RECIPE–DIWALI SWEETS RECIPES

Suryakala,chandrakala sweets
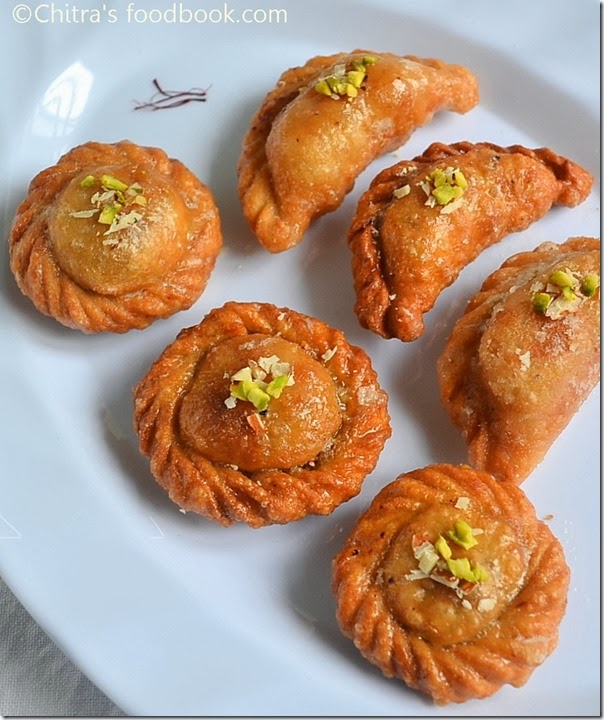
Suryakala and chandrakala are one of the fancy sweets we normally see in sweet stalls. Many people may not be aware of this sweet. Every year I wish to try some interesting sweets apart from our traditional sweets.Last year i tried Kaju lotus.

This year, when I wanted to try something new , this sweet flashed in my mind. I got attracted by its shape. I love its spirals/pleats. I thought it is very difficult to prepare at home . But after I tried for the first time, I felt it very easy. This is a two in one recipe. Anyone can make it easily. 

The method of making this sweet is very similar to sweet samosa recipe. I was very happy with the outcome in the first try itself. I know the shape is not so perfect. Hope I’ll make it well in future. Sendhil and Raksha loved it. The color of the sweet depends on how you want. It comes out white in color. I wanted mine to be golden brown as in sweets stalls. Please have a look at “Note” section before you start making. Celebrate your diwali with this grand sweet.

suryakala sweet

Suryakala,Chandrakala


Suryakala,Chandrakala Suryakala,chandrakala sweet recipes - Rich & grand sweet for diwali!
Cuisine: Indian Category: Sweet Yields: Serves 4
Prep Time: 20 Minutes Cook Time: 20 Minutes Total Time: 40 Minutes


INGREDIENTS

To make dough
  • All purpose flour/Maida – 1 cup
  • Melted ghee – 1tbsp
  • Salt – a pinch
  • Cooking soda – 1/2 pinch
  • Water – as needed
For stuffing
  • Sugarless Khova – 1/2 cup (in room temperature)
  • Powdered sugar –1/4 cup
  • Cashews – 5 nos
  • Pista – 10 nos
  • Badam – 5 nos
  • Cardamom powder – 1/4 tsp
For Sugar Syrup
  • Sugar - 1 cup
  • Water - 1/2 cup
  • Cardamom powder - 1/4 tsp or rose water - few drops
METHOD

    • In a wide bowl , take maida, cooking soda and a pinch of salt. Add melted butter and make a crumbly mixture. Fat should be well distributed with the flour..
    • Add enough water to make a soft , non-sticky pliable dough. Knead the dough well for five minutes. Keep covered for 30 minutes.
suryakala sweet
  • In the mean time , make the stuffing. Take the sugarless khova in a bowl in room temperature.mix well to break the lumps and set aside. Dry roast the nuts in high flame for 2 minutes. Color of the nuts should not change. Powder the roasted nuts along with sugar. Mix this powder and khova to make a thick stuffing.Set aside.
suryakala sweet
suryakala sweet
  • After 30 minutes , make small lemon sized balls out of the dough. Roll the dough into a small poori of palm size. Make it thick in the center and thin in the corners.
    • Keep 2 tsp of stuffing in the center and fold it like a half moon.
suryakala sweet


  • Seal the edges by dipping your finger with water. Once it is sealed completely , do the spirals.While making the spiral shape , if your fingers are sticking to the dough , dip your finger in maida and proceed. U may get some excess dough. Pinch the excess dough and set aside. Fold the corner. Please refer the below picture and video for reference. This is chandrakala/Half moon shaped sweet.
  • For suryakala , divide the lemon sized ball into two and roll it to two small pooris. Place the stuffing in one poori and cover it with another poori. Seal the edges with water as mentioned above. Twist the corners and make spirals. Refer the video below..
  • suryakala sweet


  • suryakala sweet
    • Arrange the prepared suryakala and chandrakala in a plate. Cover it with a wet cloth till you deep fry. Heat oil in a kadai for deep frying. Deep fry them in batches till they turn golden brown on both sides. Drain in a tissue.
    suryakala sweet
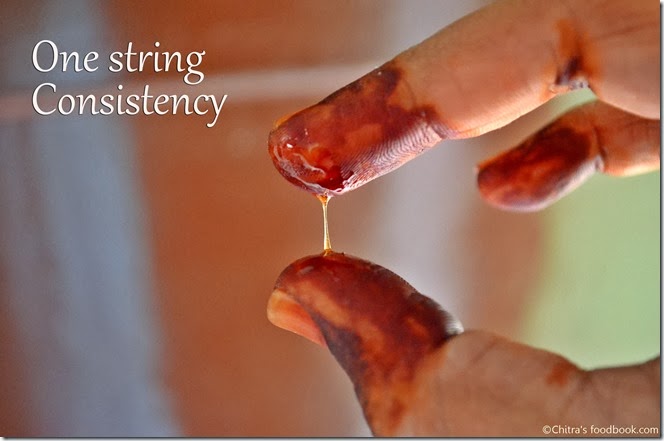
    • Now prepare sugar syrup. Melt sugar in water and boil till frothy. Check for one string consistency. when you take the syrup and slide between your thumb and pointer finger. When you release it, it will form  a single string. Dip suryakala and chandrakala into the sugar syrup for 10 minutes till the next batch is ready. It will get a nice shine. After sometime sugar will be coated on top of it.
    suryakala sweet
    Enjoy !


Note
  • Make the dough non-sticky and pliable. Add water accordingly. Most important thing is dough should be non-sticky.
  • Another important point is “Rolling” . Roll the dough like a thick poori. It should be thick in the centre and slightly thin in the corners. If you make it very thin, stuffing will ooze out in the oil while deep frying and the oil becomes a waste. Please be careful. I had experienced this. If you make it too thick , it takes more time to cook and spiral corners may not be cooked properly. To avoid this disaster, first make one chandrakala & suryakala , deep fry in little oil. If you get it right  proceed making the remaining ones. Else adjust the rolling and try again. This will surely help.
  • Suppose if the stuffing ooze out in oil, immediately switch off the stove and remove the sweet. Strain the oil and reuse it.
  • If u want white sugar coating like badusha, make one string consistency. If you just want a shiny look, make half string consistency and dip the sweets.
  • Dipping 10 – 15 minutes is enough. This sweet will taste crisp even after dipping in the sugar syrup if you eat on the same day. But the consistency of syrup should be right. The next day it tasted soft outside..
  • Store in a box only after the sweet cools down completely.


suryakala,chandrakala sweet recipe
Enjoy your diwali eating suryakala & chandrakala. 
suryakala-chandrakala sweets

Continue Reading...


October 28, 2013

HOW TO MAKE SUGAR SYRUP FOR SWEETS (VIDEO POST) | DIWALI SWEETS RECIPES


one string consistency

Hi friends ,
I wanted to make this post on "How to make sugar syrup for various Indian sweets with stepwise pictures" but i couldn't.Even this time i am doing post in the last minute.Sorry for that:(My parents are here and i was busy in attending family functions.Diwali is nearing our door steps. I hope most of u would have started trying diwali sweets and snacks. Many of u would have got it right and some people would have lost due to sugar syrup. Here is a video post for those who want to learn and see the different stages of sugar syrup. Last year i made a post on sugar syrup consistency with step by step pictures.. From that time i wanted to post a video to help beginners like me.I am happy that i could make it at least now Eye rolling smile..

In this post , i have given 3 videos . One for “How to remove the dirt /scum from sugar” and another one for "Different consistencies of sugar syrup” and the third one for “Jaggery syrup consistency for adhirasam”.
After taking so many videos , i am satisfied with this one and posted here. As i had camera in one hand , i couldn’t use both the hands for mixing and testing the syrup.I usually check the syrup by touching the syrup from the corner or back of the ladle. Here i have not mentioned the time taken for each consistency as i switched off the flame every time to take videos for each consistency.Roughly it takes 3-4 minutes( in medium flame) right from switching on the stove to reach half string .After that it took 1-2 minutes for reaching further consistencies.I’ll try to update the timings soon. I used 1 cup of sugar and 1/2 cup of water to make the consistencies reach very slowly. But it takes lesser water than this quantity.

Thanks for watching these videos. I hope these videos are helpful for beginners to understand the consistencies to certain extent.Keep practicing. U’ll become the master Smile..Experts , do excuse Smile..

VIDEO FOR REMOVING DIRT FROM SUGAR SYRUP

Please click this link for more details with step by step pictures.I have given these videos with description. But it is not visible completely.Some part is getting cut.So please watch the video in full screen to see the description :)


VIDEO FOR SUGAR SYRUP CONSISTENCIES
Please click this link for more details with step by step pictures.


VIDEO FOR ADHIRASAM - JAGGERY SYRUP
Please click this link for more details with step by step pictures

Thanks for watching these videos. Hope it is understandable and useful ! .Keep these videos as reference and practice on ur own. U’ll get it right for sure Smile..
Wish u all a very happy and safe diwali Smile


Continue Reading...


October 23, 2013

SPICY DIAMOND CUTS | SPICY MAIDA BISCUITS RECIPE – DIWALI SNACK RECIPES

spicy maida biscuits
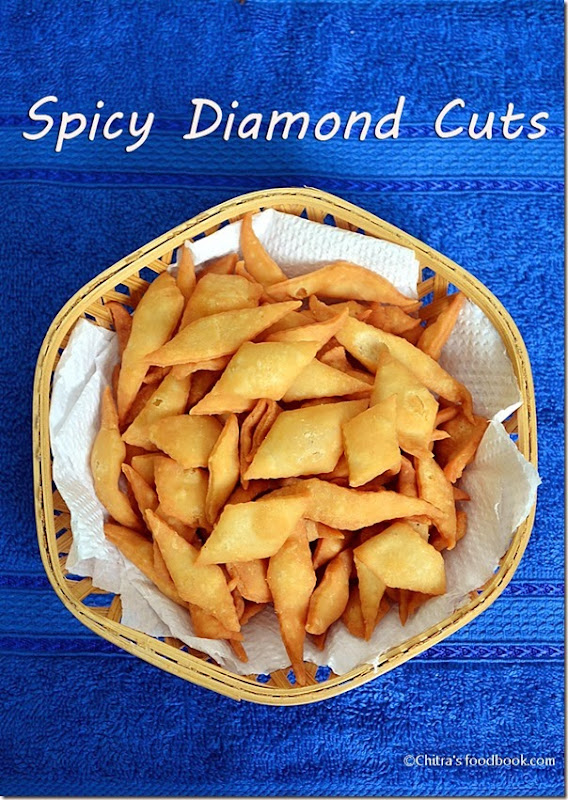
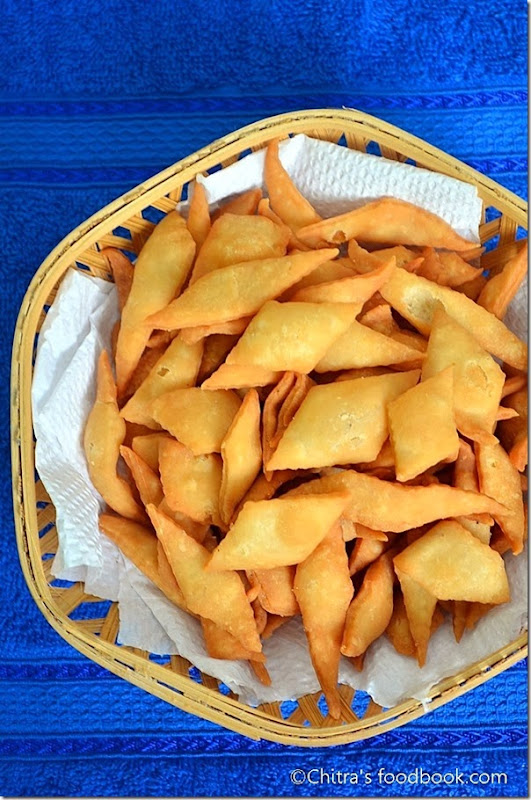
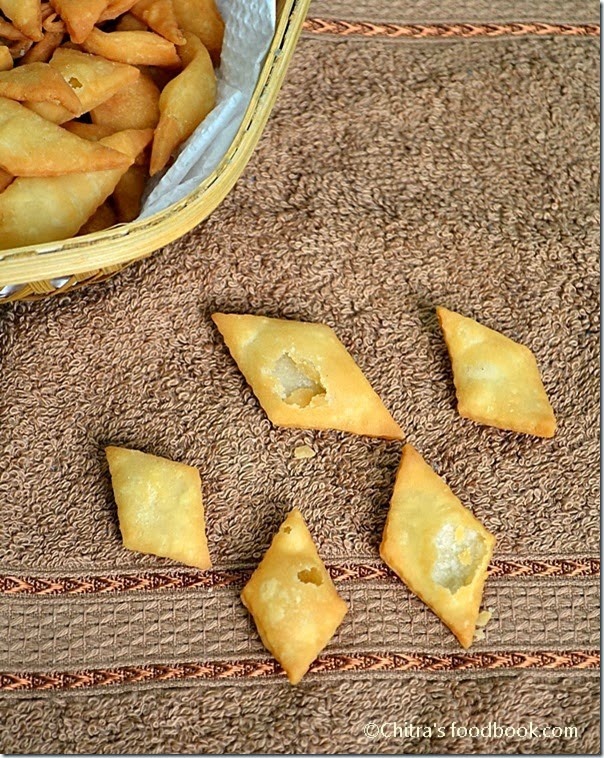
Maida khara biscuit /spicy maida biscuits / Diamond cuts is a very easy and tasty diwali snacks recipe.. I learnt this recipe from my MIL.My mom makes a similar one called “thukkada”, Tirunelveli special snack with wheat flour.  I’ll share it soon. This one is with all purpose flour/ maida. I hope most of you make this snack at home. Generally we all add red chilli powder and the color of this biscuit would be golden brown. I told my mil that i wanted white colored chips. She told me to use green chillies instead of red chillies. As she said , my biscuits were half white in color and not red/golden brown. Thanks a lot aunty. If you try sweet maida biscuit , you can make this one along with it. Both can be made together in 45 minutes..Do try this version. U’ll love it. It comes out crispy and tasty..
maida kara biscuit

INGREDIENTS
1 cup - 250ml
  • All purpose flour / Maida – 1.5 cups
  • Warm oil – 1/4 cup
  • Salt & water  – as needed
To grind
  • Green chillies – 2 nos
  • Ginger – 1 inch piece
  • Garlic cloves – 5 nos
Oil – to deep fry

METHOD
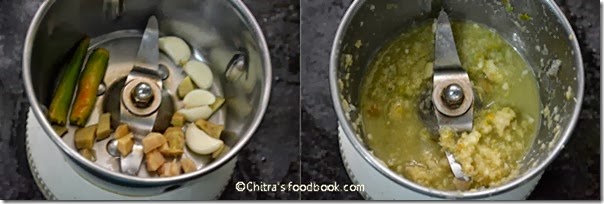
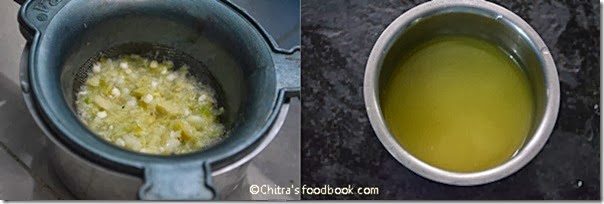
  • Grind all the ingredients given under”to grind” to a smooth paste adding 1/4 cup of water. No problem if it is ground coarsely.Strain the ground mixture completely and collect the water. Discard the ground mixture.
spicy maida biscuit
spicy maida biscuit
  • In a wide bowl, take the maida , warm oil , salt and ground masala water. Mix well to make it crumble. Add more water and make a dough.Dough should be plaible and soft. Knead well for few minutes and keep covered for 15 minutes.
spicy maida biscuit
  • Make 5 even balls out of the dough and roll chapathi dusting with maida.Make thin circles and cut them into diamonds using a samosa cutter.
spicy maida biscuit
  • Heat oil .Pinch little dough and put in oil.If it rises immediately , oil temperature is right.Take the cut diamonds together and drop in oil. It will be separated in the oil as it gets cooked.Turn every now and then.Deep fry till the bubbles cease.Deep fry them in batches.Remove in a tissue paper and store in an air tight box after it cools down completely.
spicy maida biscuit

TIPS
  • Oil should be luke warm and not too hot.Vanaspathi/dalda can be used instead of oil. If so use 3 tbsp..
  • Dough should not be sticky. It should be soft and pliable.Dust with maida while making chapathi. Roll chapthis thinly to get a crispy biscuit.
  • Deep fry in low to medium heat oil to get crispness as well as color.
  • These biscuits tastes great by next day .It needs minimum half day for all the flavours to infuse well.

spicy diamond cuts
Continue Reading...


October 21, 2013

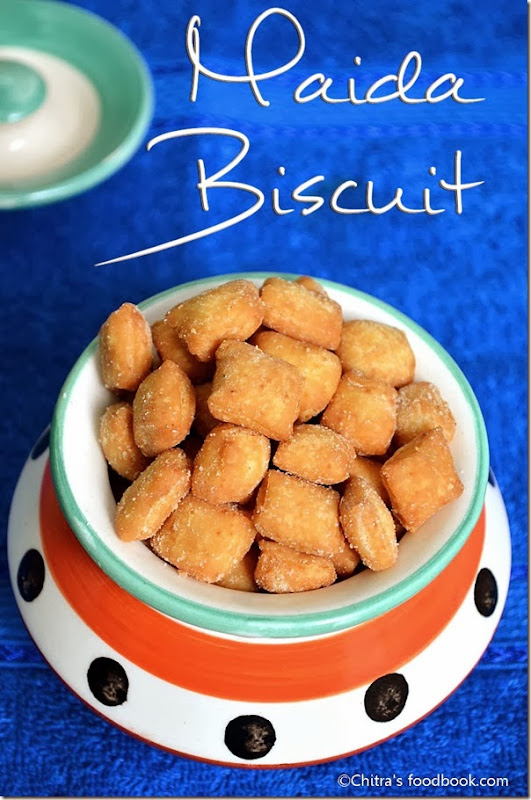
SWEET MAIDA BISCUITS RECIPE– MAIDA BISCUIT - EASY DIWALI SWEETS

sweet maida biscuit
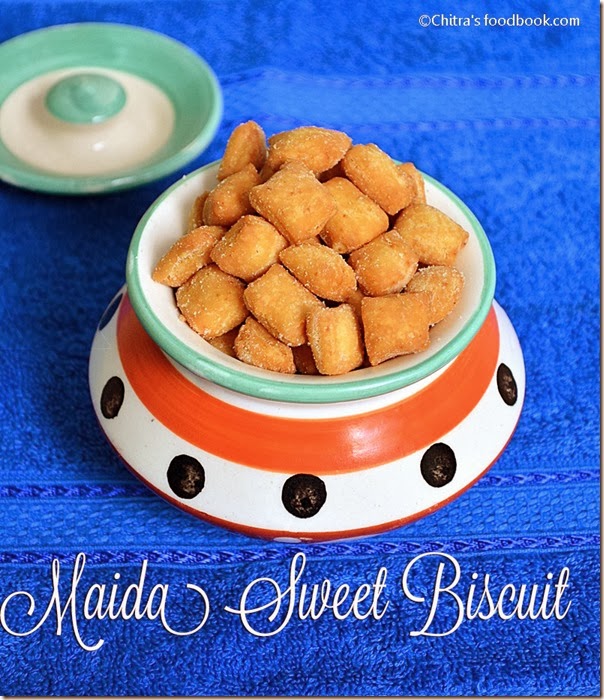
Maida biscuits is an easy sweet recipe which is loved by all in our family. My MIL usually makes this sweet maida biscuits /sweet diamond cuts in a different way. I’ll share that version in my next post. But this recipe is much more easier than my mil’s version. Most of you would have seen these biscuits in South Indian mixture recipe. I am not a big fan of mixture. So I take the mixture in a bowl and I pick only these biscuits and peanuts from it and enjoy munching. 

When I was browsing to see the variety of maida biscuit recipes, I saw this one in Nalini’s cooking. I immediately bookmarked this recipe as I wanted to try this on my own for a long time since before marriage. I made some slight changes and tried yesterday for the fist time. I am completely happy with the results. It came out crunchy and tasty with mild sweetness. Thank you so much Nalini. I would suggest all the beginners to try this easy sweet and snack recipe. Sendhil and Raksha loved this biscuit a lot. I am sure all the kids would love this to munch watching TV.  Try and let me know how u liked it dearies..
maida biscuit recipe

INGREDIENTS
1 cup - 250ml
  • All purpose flour/Maida – 1 cup
  • Melted Butter – 2 tbsp
  • Powdered sugar – 3 tbsp + 2 tbsp (to sprinkle on top)
  • Boiled Milk – 3 tbsp (in room temp)
  • Cardamom powder – 1/4 tsp
  • Cooking soda – a pinch
  • Salt – a pinch
  • Water – as needed
  • Oil – to deep fry

METHOD
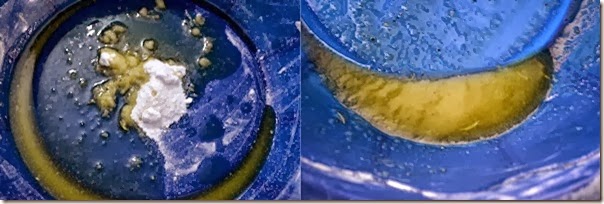
  • In a bowl, take melted butter, sugar , salt , cooking soda and beat well with your hands till it becomes creamy.
maida biscuit tile1
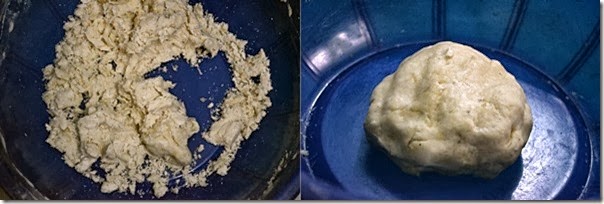
  • To this add maida , cardamom powder and milk. Mix well to make a crumbly mixture. Lastly add water gradually and make a soft , stiff dough like we make for chapathi. Knead well for few minutes and set aside covered for 15 minutes.
maida biscuit tile2
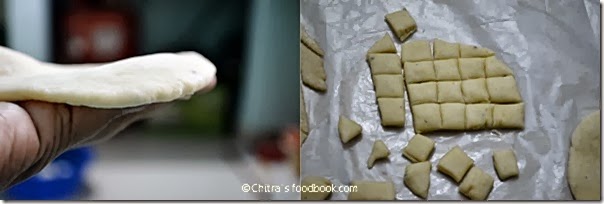
  • Make 5 even sized balls out of the dough and dust it well with maida. Roll 1/4 inch thick chapathi and cut them into small squares using a knife.
  • Allow the squares to dry for 15 minutes before deep frying.
maida biscuit tile3
  • Heat oil in a kadai and deep fry the square biscuits in batches. U can put all the biscuits together in oil ( no need to put one by one) . They get separated in oil as they cook. The most important thing is u should deep fry these biscuits in low to medium flame for even cooking and browning. Else they turn brown quickly without cooking inside. While frying , turn it twice or thrice only. Do not flip often as it may break the biscuit. Remove when the bubbles cease.
maida biscuit tile5
  • Drain them in a paper. Sprinkle powdered sugar on top. Mix well. 
maida biscuit tile6
Allow it to cool completely as these biscuits tastes super crunchy only after cooling down. It tastes soft when hot.
Store in an air tight box after it cools down. Enjoy!!

TIPS
  • Sprinkling sugar on top is optional. It is not mentioned in the original recipe. This biscuit tastes sweet by itself.
  • Frying in medium heat oil is more important to get the crispness and uniform browning. Remove the biscuits after the bubbles cease well. But some bubbles may still be there. no problem!
  • U can make diamond biscuits instead of squares. Its your choice !

maida biscuits recipe
Continue Reading...