Search Chitra's Food Book

September 9, 2014

5 MINUTES MICROWAVE EGGLESS OREO BISCUIT CAKE RECIPE

oreo-cake-recipe
This is my first recipe using Oreo biscuits. After I tried my one minute eggless microwave chocolate mug cake successfully, I kept hunting for some easy microwave cake recipes that can make wonders in few minutes. This is one such recipe & I got it from here. All you need is just 3 major ingredients and 5 minutes. Your cake is done, Cool right ?

The highlight of this eggless oreo cake is, its butterless, eggless, no oil and no curd too. Oreo biscuits & Eno fruit salt will do the magic here. Even your kids can do it by themselves and Iam sure they will enjoy both the cooking process as well as its taste. You can very well replace Oreo biscuit with bourbon or hide n seek biscuits and Eno with baking powder.

I won’t say this cake will double while cooking OR it comes out super soft. It does rise & comes out soft & not as the ones you bake in convection mode. But this recipe really  made wonders in few minutes i should say!  Last year I shared a fool proof, eggless, no oil, no butter Orange biscuit cake recipe using convection microwave oven. Do check it if interested. 

Friends, go ahead and try this cake now. Surprise your kids while they come back from the school.
microwave oreo cake

5 Min Eggless microwave oreo biscuit cake


5 Min Eggless microwave oreo biscuit cake 
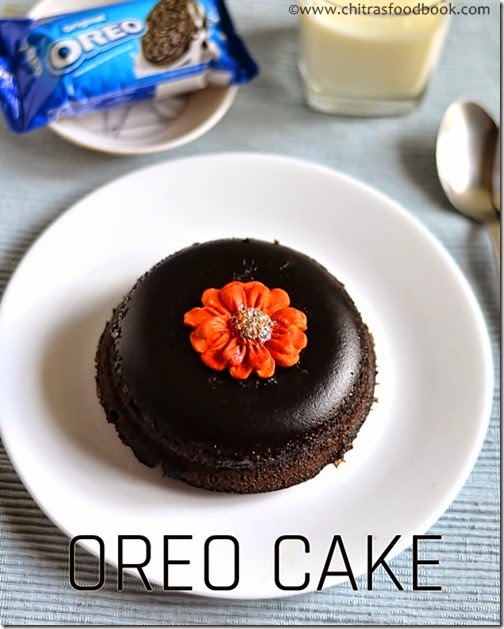
Microwave oreo biscuit cake recipe in just 5 minutes - There is no oil, no butter & no egg !!
Cuisine: Indian
Category: Cake
Serves: 4-5
Prep time: 2 Minutes
Cook time: 5 Minutes
Total time: 7 Minutes


INGREDIENTS

  • Oreo biscuit – 20 nos (any flavor)
  • Milk – 1 cup ( 240 ml)
  • Plain Eno or baking powder – 3/4 tsp
  • Sugar – 2-3 tbsp
HOW TO MAKE MICROWAVE EGGLESS OREO BISCUIT CAKE - METHOD

  • In a big mixie jar, take all the biscuits with cream & sugar.Grind it coarsely. Now add milk & Eno. Grind to a smooth paste.
oreo biscuit cake 1
  • Grease a microwave safe bowl with butter or oil generously (I used oil for greasing the pan and the cake got a shine as you see in the first picture, in stepwise I shown the one in which I used butter paper for lining.) OR line the bowl with parchment paper or butter paper. Pour the cake batter to the bowl. Batter should fall like a ribbon. It should not be too watery or too thick.
oreo biscuit cake 2
  • Pat the bowl in the bottom to spread the batter evenly. Microwave it in high power ( I used 800W) for 3-5 minutes.Check at 3 minutes. If not done, keep it for more time. Mine took 4 minutes. Check it with the back of spoon or tooth pick.
  • If it comes out clean, cake is done. Else keep it for one more minute. Cake will rise but wont double. Remove & keep it outside. Let it cool down. Then invert the cake, cut into pieces and enjoy ! If you try to remove the cake before it cools down, cake will crack. If you use butter paper, you can remove it easily.
oreo biscuit cake 3
Enjoy !


Note

  • You can use either butter paper or grease with oil. But when u use oil, you should wait till the cake cools down completely & the upper part of cake will get a shine as you see in the picture. U won’t get this shine if you use butter paper.
  • U can decorate this cake by sprinkling some icing sugar on top OR apply Instant whipped cream over it. I kept an edible sugar flower.
  • For variations, you can use bourbon OR hide n seek biscuits too. Adjust the quantity of sugar as per your taste.
  • Add plain ENO salt ( blue colored sachet) OR 3/4 tsp of baking powder.
  • Use a butter paper or grease the bowl with butter for easy removal of cake.
Do check out my One minute eggless mug cake and Orange biscuit cake recipes too !


Serve this cake with a glass of milk! Kids would love it & even you can have a bite. 
Oreo-cake
Continue Reading...


September 6, 2014

ONAM SADYA RECIPES - KERALA LUNCH MENU LIST

onam sadya

WISH U ALL A VERY HAPPY ONAM CELEBRATION !

Onam festival is the most anticipated day for me to express my passion for Kerala food. Basically Sendhil loves coconut based recipes a lot and I am a big fan of Kerala style dishes. Not just the food, I love Kerala sarees and their traditional ornaments too. So every year during Onam, I never fail to make sadya feast at home to treat Sendhil and myself with varieties of Kerala delicacies. For the past two years, I have been posting the same different sadya menu list. And this year too, I was eagerly waiting to post this sadya menu.

Every year I love to attempt some new sadya special items for the menu and I prepared Ada pradhaman & Palada Pradhaman recipes using homemade Ada. Pineapple payasam and Pineapple pachadi as suggested by my neighbour Mrs.Prema. Mathanga erissery and kaya mezhukkupuratti out of my own wish. I referred many of our Kerala bloggers websites and I have given the links as well. Thanks to one & all for sharing these wonderful recipes with us.

For other sadya recipes like Kerala sambar, Rasam,Thoran, Puli inji, Parippu curry and avial, I referred my previous sadya recipes. All the recipes came out very well and we enjoyed this Onam feast well in advance. Here you go, my Onam sadya recipes for you all. Hope I have followed the correct serving order too.. I Wish all my readers and friends a very happy Onam.”ONAM ASHAMSAKAL” !!

Onam sadya recipes

HOW TO MAKE ONAM SADYA EASILY

I couldn’t take stepwise pictures for this sadya but I have shared some pictures of how I made this sadya quickly. Last year when I made sadya, I noticed that most of my time was spent in pre preparatory works like grating coconut, extracting coconut milk, grinding masalas, chopping vegetables and for cooking dals & vegetables.

So this year I wanted to make all these works simple and easy. Instead of grating 2 coconuts, I made small slices of it using a ladle with thick edge and blunt handle as you see in the picture below. I did not use knife as I am afraid of using it. Use knife only if you are confident of handling it and make sure your mixie blades are in good condition else it may break. Then I dry ground all the coconut slices together and divided them into 2 parts. I used one part for taking coconut milk and the other part for masala. It saved lot of time for me.
Onam sadya cooking
Also I pressure cooked dals for parippu curry and sambar together in my big pressure cooker by placing moong dal in the bottom of cooker and toor dal for sambar in a tiffin box. Please refer the picture. U can even keep a plate of mixed vegetables required for sambar over the toor dal.
Onam sadya parippu
For cooking Vanpayar and vegetables for olan, kalan and erissery, I again used my big cooker and cooked them together by keeping one above the other in small bowls and plates. As all these veggies gets cooked in one go, you just have to add them in coconut mixture and boil it. For thoran, I cooked it in my small cooker by keeping in high flame for two whistles.
Onam sadya preparation
For pradhaman, I prepared homemade ada. So I made it in the previous night and stored in refrigerator. Also I cleaned & chopped pineapple pieces and kept in a zip lock cover and refrigerated it. When you have ada & pineapple cubes ready in hand, you can make these payasam recipes very quickly.
All these pre preparatory jobs got over in 30 minutes & cooking took nearly one hour. This entire sadya took 1.5 hours totally. Do follow these techniques and make your sadya feast quickly & easily. Do share your methods of quick cooking in the comment section so that others get benefitted.

Disclaimer: I know these are not the authentic method of cooking Kerala food but to make my job easier, I followed these steps and I hope it would help beginners. Friends, please excuse me.

Onam sadya

Onam sadya menu


Onam sadya menu Sadya recipes for Onam festival !
Cuisine: Indian
Category: Lunch
Serves: Serves 2-3
Prep time: 30 Minutes
Cook time: 60 Minutes
Total time: 90 Minutes


INGREDIENTS
Please click on the recipes  
Other sadya recipes in my blog
Click on the recipes to see the blogs from which I tried these recipes. Thank u friends. Everything came out very well.

            I have made separate posts for some of the above mentioned recipes with stepwise pictures. Please click on the link for the recipe.Thanks for visiting this page. Hope you will try all these recipes and like it. Once again, I wish you all a very happy Onam. Enjoy the feast!

WISH U ALL A VERY HAPPY ONAM CELEBRATION !!

Onam sadya recipes

Continue Reading...


September 3, 2014

Unniappam/Unniyappam Recipe-Kerala Onam Sadya Recipes


Unniyappam-recipe
Kerala style sweet appam recipe is known as Unniyappam/Neyappam.I have tasted this several times from my neighbour.It looks dark brown in color with sugar coated on it.I love it a lot.When i was thinking of Onam sadya recipes,i reminded this recipe and asked my neighbour Mrs.Prema about it.She told me an easy , no fermentation method which she learnt from her mom.I also referred Kothiyavunu for some tips to get soft unniyappam.I tried it for the first time today and it came out very well.I was able to achieve the same color & taste of my neighbour's unniappam.It tastes crispy outside & soft inside.As my neighbour suggested, i coated all the appam with sugar which is not usually done in Kerala i guess.But it gave an appealing look to the dish. Also she told me to deep fry the appam but i did it in my paniyaram pan to get a nice shape.I gave some of them to my friends and everybody liked it a lot.I am sure Sendhil would love it too.Thanks to my neighbour for teaching me this yummy sweet appam recipe. Try this dish for Onam festival.I am sure u will love it like us.Lets see how to make this kerala style unniyappam recipe in detail.
Unniappam recipe

Unniyappam recipe


Unniyappam recipe Kerala style unniyappam recipe for Onam festival.
Cuisine: Indian
Category: Sweet
Serves: 10 nos
Prep time: 2 Minutes
Cook time: 10 Minutes
Total time: 12 Minutes


INGREDIENTS
1 cup - 250ml
To soak
  • Raw rice - 1/2 cup ( use high quality Sona masoori)
  • Water - as needed
To Grind & mix
  • Grated jaggery - 1/2 cup
  • Banana - 1 no
  • Urad Papad - 1 no ( any brand) or urad dal - 1 tbsp (soak with rice)
  • Cardamom - 2 nos
  • Grated coconut - 1/3 cup
  • Ghee – 1 tbsp
  • Black sesame seeds – 1/2 tsp
  • Ghee roasted coconut bits – 1 tbsp
  • Oil + ghee – to cook
  • Cooking soda – a pinch (optional,i dint use)
METHOD

  • Wash and soak the raw rice for 2 hours.Drain all the water completely and spread the rice in a paper for 5-10 minutes.Now grind the rice to make a fine powder.Set aside.Soak papad in little water till use.
How to make unniyappam 1
  • Take jaggery in a wide bowl and add little water to cover it.Melt & strain it.Boil it for a minute till it becomes frothy.Add this syrup to the rice flour & set aside.
  • In a mixie jar,take the soaked papad,cardamom seeds,grated coconut & banana.Add little water and grind them to a smooth paste.Add this paste to the rice flour,jaggery mixture.Mix well and set aside.
How to make unniyappam 2
  • Add ghee roasted coconut bits & sesame seeds along with ghee to the batter.Mix well.Take a paniyaram pan and add 1/2 tbsp of oil + 1/2 tbsp of ghee to each mould.The oil +ghee mixture should cover half of the mould
unniyappam recipe 1
  • .Heat it.Now pour the batter in each mould.Unniyappam will cook in the oil and oil spreads all over the pan.Keep the flame medium high and let it cook till it becomes golden brown or dark brown as u wish.Flip it and again cook for few minutes.Remove in a tissue paper.Roll it in a  plate of sugar if u like the sugar coated ones.
Unniyappam recipe 2

Enjoy !
Note
  • The batter should not be too thick or too thin.It should be pourable.
  • Always add jaggery in syrup form after straining the impurities..
  • Adding soaked papad gives softness to the appam.No need to add cooking soda or ferment the batter.
  • If u wish,u can also leave the batter for 2 hours & ferment it.
  • The color of appam may very based on the color of jaggery and the heat of pan. 
  • This appam stays good for 1-2 days..


Enjoy this crispy and soft Unniyappam recipe for Onam sadya ! Tastes yum !
Unniappam recipe

Continue Reading...


September 2, 2014

Medhu Vadai Recipe | How to make Urad Dal Vada In Grinder

Medhu vadai
Medu vada aka Urad dal vada / Ulundu vadai is a famous South indian snacks and breakfast recipe especially in Tamil nadu. We generally make medhu vadai for festivals or for guests. Last month I got a request from a reader to post crispy medhu vadai recipe using grinder. As I myself have not tried medu vada using grinder, I was hesitant to make this post. 

Usually I make medu vada only using mixie. But then I took this as an opportunity to try out vada batter using grinder & I did it. But my vada drank so much of oil but still it was light n crispy.Then I found I have added more water which made my vada absorb more oil. So I tried it confidently for the second time and got it perfect. For some recipes, I feel video would give better understanding. So I wanted to capture vada batter making.

Last week my in-laws were with us. I told my MIL to grind vada batter and I captured it. Hope the video looks good & clear. But the vadas in the pictures what you see here are made by me. If I can make a good shaped vadas, then anyone can make it easily. So do follow this recipe carefully. U will get it right. To make a perfect medu vada, there are some points to be noted while grinding the batter. I have shared them below. Do read it before watching the video or trying this recipe. Hope these points would help all the beginners. Lets see how to make crispy medu vada at home with some tips & tricks!


Urad dal vada

TIPS & TRICKS TO MAKE CRISPY VADA
  • Always soak the white, round urad dal for 45 to 60 minutes maximum. If you are grinding in mixie, then you can soak it for 2-3 hours.
  • When you are grinding the batter using grinder, do stand nearby. U have to spend 12-15 minutes near the grinder by sprinkling water and wiping the sides every now and then which is most important.DO NOT ADD SALT WHILE GRINDING. Add salt just before frying the vada.
  • Never pour all the water in one stretch. Just add little water every 2-3 minutes by wiping the sides of grinder with a spatula. Batter should not get stuck in the sides.
  • Vada batter should not be too light & airy. It should be tight to hold. If the batter is too light,vada will absorb more oil.
  • Also the batter should be non-sticky when u touch it by dipping your hands in water.
  • To check the right consistency of vada batter,drop a small ball of batter in a bowl of water. It will float to some extent. Also when you try to drop the batter, it should form a stiff peak ( Refer picture ).
  • Keep the batter covered in refrigerator till use. Add salt & onions only before frying the vada. Beat the batter before frying to provide aeration which is very important to get crispy, light vadas. Then add onions and other spices.
  • Add 1/2 tsp of toor dal for 1/2 cup of urad dal while soaking. It helps the vada to prevent oil absorption.
  • U can also add 1 tsp of rice flour to get super crispy vadas like in restaurants.
  • But if you grind vada batter properly, then no need to add rice flour or toor dal. Vada will come out super crispy by itself.
  • To keep the vada crispy for hours,just pre heat the oven in the least temperature & place your vadas in a tray inside the oven. By this way,vada stays crispy. I got this tip from Vahchef’s site but I have not tried it personally though.
Medu vadai batter tips

Medhu vadai recipe/Urad dal vada


Medhu vadai recipe/Urad dal vada South Indian breakfast special Urad dal vada aka Medhu vadai recipe with stepwise pictures & video !
Cuisine: Indian
Category: Snacks
Serves: 10
Prep time: 60 Minutes
Cook time: 15 Minutes
Total time: 75 Minutes


INGREDIENTS
1 cup - 250ml
To soak
  • White round urad dal - 1/2 cup
  • Toor dal - 1/2 tsp (optional )
  • Water - as needed
To mix in the batter
  • Small onion - 10 nos or big onion - 1 
  • Curry leaves - few
  • Green chillies - 1  ( finely chopped)
  • Hing/Asafetida - 1/8 tsp
  • Crushed pepper - 1/2 tsp
  • Cumin seeds/Jeera - 1/2 tsp (optional)
  • Salt - as needed
  • Cooking oil - to deep fry
Rice flour – 1 tsp, to add in the batter before making vada ( optional )
METHOD

  • Wash and soak the urad dal & toor dal ( if using ) in enough water for 1 hour minimum and 4 hours maximum. Keep the soaking urad dal inside the refrigerator. Drain all the water completely and use this water for grinding. Add the soaked urad dal to the grinder. Switch on & start running. Do not add water.
How to make medu vada
  • Do not add water in the beginning. Let the grinder run for few seconds without water. When the dal starts to stuck in the sides,add little water ( say 1/8 cup ). Take a spatula and wipe all the sides and center part. Again sprinkle little water and stand nearby wiping the sides. Make sure there are no dals visible or stuck up in the sides. Repeat this by adding water & wiping sides for 12-14 minutes. Batter will become fluffy and the quantity would be more.
How to make medu vada recipe
  • Now remove a small portion of batter in the spatula, when you drop the batter, it should form a pointed tip. Also check the batter by dropping a small ball in a bowl of water. It should not settle down or dissolve instead it should float.
How to make medu vada crispy
  • Remove the batter from the grinder completely and keep in a vessel. If you are making vada immediately proceed OR store the batter in the refrigerator till use. Do not keep it outside.
  • Before deep frying the vada,remove the batter from the refrigerator. Beat the batter well with your hands. It provides aeration and helps to give you crispy & light vada.
  • Now add salt , finely chopped onion, hing, chillies, curry leaves, pepper corns & cumin seeds. Mix well.
How to make medu vada 1
  • Heat oil in a kadai , check the temperature of oil by dropping a pinch of batter. If it rises immediately, oil is just right. Shape the vada using your palm. Make a hole in the center using the thumb finger. Drop the vada into the oil by slightly tilting your fingers. Flip both the sides and cook the vada till the bubbles ceases. Remove & drain in a tissue paper.
How to make medu vada 2
Serve hot & Enjoy !


Medhu vadai recipe

Enjoy this hot & crispy medu vada as breakfast or as an evening snack with coconut chutney !

Medu vada recipe

Continue Reading...


September 1, 2014

PULI INJI RECIPE-INJI PULI CURRY-ONAM SADYA RECIPES

Puli-inji-curry-recipe
Puli inji curry is my most favorite dish in Onam sadya. Onam festival is around the corner. For the past two years, I have been sharing Onam sadya lunch menu recipes during this time.This year too I had planned to post an elaborate Onam sadya menu. I will do it on Friday or this weekend. But before that, I wanted to share some yummy, must try Kerala sadya recipes. There are some dishes that has to be present in Sadya menu. Puli inji is one among them and its our family favourite recipe too. I can have a plateful of parippu curry rice or curd rice with this inji puli curry. It tastes awesome. In Tamil nadu, especially in Tirunelveli,we make a similar inji pachadi for sodhi. Even people who hates ginger will surely love this puli inji. Its not only tasty but also aids digestion.

This recipe is from my favourite Vanitha magazine given by chef  Pazhayidam Mohanan Namboothiri. I have been following this recipe for the past two years. My neighbour Mrs.Prema used to buy Vanitha magazine and she never forgets to show it to me. Even though I can’t read Malayalam, I love to see the food, apparel, jewelry pictures and drool over them. I love its picture quality very much. Special thanks to her for translating this recipe to me. Last year she had changed her house but still she is the one and only source and inspiration for coking Kerala recipes in my kitchen. Ok, lets see how to make Kerala puli inji curry with step by step pictures .

Puli inji recipe

Puli inji curry recipe - Kerala style


Puli inji curry recipe - Kerala style Kerala style yummy puli inji recipe - Best accompaniment for Dal rice & curd rice.
Cuisine: Indian
Category: Side dish
Serves: 1/4 cup
Prep time: 5 Minutes
Cook time: 10 Minutes
Total time: 15 Minutes


INGREDIENTS
1 cup - 250ml

  • Ginger - 1/4 cup ( peeled and finely chopped)
  • Tamarind – Big gooseberry size
  • Green chilli - 2 nos ( finely chopped)
  • Red chilli powder - 1/2 - 1 tsp ( adjust)
  • Turmeric powder - 1/8 tsp
  • Grated jaggery - 2-3 tbsp
  • Salt and water - as needed
  • Roasted and ground methi seeds powder - 1/4 tsp ( optional)
To temper
  • Coconut oil - 1 tbsp
  • Mustard seeds - 1/2 stp
  • Urad dal - 1/2 tsp
  • Red chilli - 1 no ( pinched)
  • Curry leaves - few
HOW TO MAKE PULI INJI - METHOD

  • Soak tamarind in 1 cup of water. In the mean time, wash and peel the ginger. Chop it very finely and set aside. Chop green chillies. Dry roast methi seeds and powder it. Set aside.
  • In a wide bowl, take the tamarind extract. Add turmeric powder, salt, red chilli powder & jaggery. Allow it to boil well for 5 minutes.
  • In a kadai, heat coconut oil and temper mustard seeds, urad dal, curry leaves, pinched red chillies and finely chopped ginger. Saute well till ginger bits turns golden brown.
How to make puli inji recipe step1
  • Add this to the boiling tamarind mixture and add little water if necessary. Allow it to boil till the mixture thickens. Lastly add the methi seeds powder. Mix well and switch off the flame. Let it cool. Store in an air tight bottle. Use clean spoon for handling. Stays good for weeks under refrigeration.
How to make puli inji recipe step2

Enjoy with rice !
Note
  • Please adjust the quantity of jaggery based on your taste. Some people like it sweetish. Add more if needed.
  • Use clean spoon to handle. Keep in an air tight bottle and store in refrigerator.
  • Stays good for weeks.

Enjoy this tangy, sweet and sour puli inji curry with rice. Tastes divine !
Puli inji recipe


Continue Reading...


August 28, 2014

Sweet Appam Recipe With Wheat Flour - Instant Wheat flour appam with banana

 Sweet appam recipe

Usually we make instant sweet appam with wheat flour / godhumai maavu inippu appam / wheat appam with banana for Ganesh Chaturthi, Gokulashtami, Diwali and Karthigai deepam. It can be made with or without paniyaram pan. Being a calorie conscious women, I always make sweet appam in paniyaram pan to reduce oil consumption. But yesterday I purposefully tried this deep fried version to post in my blog. I made it with wheat flour, banana and jaggery asking the recipe from my MIL. It was awesome. I couldn’t resist myself stopping with one or two.

My MIL usually make this instant appam using maida, banana and sugar for our guests as evening snacks. It comes out super soft, spongy and fluffy. We make this instant wheat flour appam on Ganesh chaturthi evening and offer Lord Ganesh. If you have the practice of offering appam for Vinayagar chaturthi, do try this one. U will love its softness and taste. Ok, lets see how to make this sweet appam recipe using wheat flour, banana and jaggery with step by step pictures and video ! I have shown 2 methods in video - Deep fried appam without paniyaram pan and appam in paniyaram pan.


sweet appam with wheat flour


Wheat flour appam recipe


Sweet appam recipe Sweet appam recipe using wheat flour, jaggery for Ganesh chaturthi, Karthigai deepam and Gokulashtami
Cuisine: Indian
Category: Sweet
Serves: 7 nos
Prep time: 5 Minutes
Cook time: 5 Minutes
Total time: 10 Minutes


INGREDIENTS
1 cup - 250ml
  • Wheat flour - 1 cup
  • Fully Ripe banana - 1 no ( You can use yelakki/poovazhai or rasthali banana)
  • Grated jaggery - 1/2 cup ( add 2 tbsp for more sweetness)
  • Rice flour - 1.5 tbsp
  • Cooking soda - a big pinch
  • Salt - a pinch
  • Cardamom seeds - 2 no ( crushed)
  • Cooking oil - to deep fry
  • Water - as needed
HOW TO MAKE SWEET APPAM - METHOD

  • In a wide bowl,take all the ingredients except oil and water. Mash the ripen banana and add to the flour. Add the required water and make a thick batter.The consistency of batter should be like thick idli batter. It should be pourable.
sweet appam 2
  • Heat oil for deep frying. Use less oil to get a nice round shape. Take a small curved ladle and pour a ladleful full of batter. Make one or two at a time. Appam should rise slowly from the bottom to top. This is the correct heating point. It helps the appam to cook evenly. If the oil is very hot, appam will brown outside and it doesn’t get cooked inside. So keep the oil at right heating point. First check with a drop of batter and proceed further. Pour a small ladle of batter and splash the oil over the top of appam while it cooks.
sweet appam 3
  • As soon as the color of appam turns golden brown, flip it and cook the other side till golden brown. Remove & drain in a tissue paper.
  • You can also make this appam using paniyaram pan to use less oil. Please watch the video. I have shown in detail.

    Sweet appam is ready to serve.Enjoy !
Note

  • For variations,u can add maida and sugar instead of wheat flour and jaggery.
  • U can also make spicy version by adding finely chopped onions, ginger, curry leaves, coriander leaves & green chillies along with hing. It tastes great. 
  • Do not add more cooking soda. Less than a pinch would be enough. Adding more soda makes the appam absorb more oil.  Sometimes appam disintegrates in oil if Soda goes more. 
  • Banana gives a super soft, spongy texture to the appam. Never skip it.
  • It stays soft and good for hours. So yoou can make them in advance too.

Make this super soft and delicious appam & offer GOD !
Here is the appam after a bite by me ::P
sweet appam bite


Continue Reading...