Search Chitra's Food Book

March 8, 2015

Brinji Rice Recipe - Tamil nadu Style Plain Brinji With Coconut Milk - Sunday Lunch Recipes-9

Brinji rice

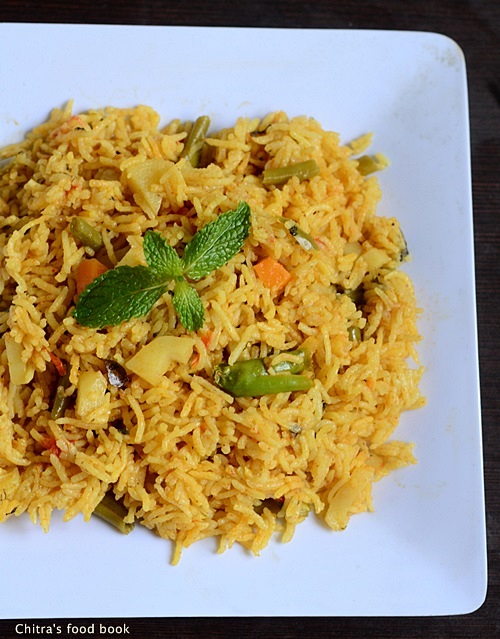
Brinji sadam / Plain Brinji Rice is a popular rice recipe in Tamil nadu. It is served with Vegetable kurma or Brinjal gravy as side dish in marriage feast and road side hotels. My friends in Chennai have told me about this rice. But I don’t have any idea as I have neither tasted nor seen it.

Last week I saw a picture of brinji rice along with brinjal gravy/Kathirikai kurma in facebook’s Food-fun-friends group. I really got tempted by the picture and asked the recipe. Special thanks to Edwin Edy for sharing the pictures of brinji rice & Brinjal gravy for biryani from a Tamil magazine.

I tried brinjal gravy by referring that recipe and Mye’s blog. For this brinji recipe,i referred many blogs,asked some of my friends and tried it. Its a very simple and easy recipe without any masala grinding job. Its more like simple pulao recipe. I am not sure whether this is the authentic brinji recipe that is served in Hotels & marriage feast because I found so many variations for this particular recipe. I did not add any vegetables here & I have made it as plain coconut milk pulao. It tasted awesome with this brinjal gravy. To enjoy brinji’s best flavor, you must try it with some spicy side dishes like kurma.

Non vegetarians can try with egg gravy, chicken gravy or prawn curry as mentioned by my friends. But vegetarians have few side dish like kurma, brinjal gravy, salna. I have shared a seperate post for brinjal gravy because this post will become too lengthy if  I share it here.

I have also shared another version of brinji using with vegetables and masala. Now lets see how to make plain brinji rice @ biryanileaf / bayleaf pulao recipe with stepwise pictures.

Brinji-rice-recipe

Plain Brinji rice recipe


Brinji rice recipe Plain Brinji rice recipe-a popular rice variety of Tamil nadu made using rice, coconut milk and spices. 
Cuisine: Indian
Category: Lunch
Serves: 2
Prep time: 30 Minutes
Cook time: 15 Minutes
Total time: 45 Minutes


INGREDIENTS
1 cup = 240 ml
  • Basmati rice - 1 cup
  • Water or coconut milk - 1.75 cups ( OR use equal quantity)
  • Salt - as needed
To saute
  • Cooking oil + ghee – 3 tbsp ( 2 tbsp+ 1 tbsp)
  • Cinnamon - 1 inch stick -  2 nos
  • Cloves - 4 nos
  • Biryani leaf/Brinji leaves - 3 nos
  • Cardamom /Elakkai - 2 nos
  • Ginger-Garlic paste – 1/2 tbsp
  • Green chilli - 2 nos ( slit it)
  • Big onion - 1 no ( finely chopped)
  • Mint leaves+coriander leaves - a fistful ( optional)
  • Turmeric powder - 1/8 tsp ( optional)
HOW TO MAKE BRINJI - METHOD

  • Wash and soak the basmati rice in enough water for 30 minutes to 1 hour. Drain the water completely and roast the rice in a kadai adding 1 tbsp of ghee for few minutes. I din’t roast the rice here.
  • Now heat oil+ghee in a cooker base and saute the whole spices one by one.Then add the finely chopped onions and slitted green chillies. Saute till onion turns transparent. Don’t allow the onions to turn golden brown because the color of rice may not come white. Lastly add the finely chopped coriander & mint leaves( optional) and saute well. Add turmeric powder if you wish. In some hotels,they add and in some places, brinji is white in color. Lastly add ginger garlic paste and saute for a minute without burning it. 
Brinji rice recipe
  • Add the rice, water and salt. Check for taste and pressure cook in low flame for one whistle. After the steam is released, open the cooker and fluff the rice with a fork. Serve with any kurma or gravy !
Brinji rice recipe


Enjoy !
Check out my Biryani Brinjal gravy HERE

Note

  • There are many variations for this recipe. Some recipes have used ground masala and some recipes call for chilli powder & dhania powder. Here I have shared a very simple version like plain pulao.
  • This rice tastes the best only with a spicy side dish like brinjal gravy which is said to be an ideal and most popular side dish for this brinji rice.

Try this brinji rice with brinjal gravy. Tastes yummy !
Brinji rice
Continue Reading...


March 7, 2015

Stuffed Chilli Bajji Recipe/Andhra Mirapakaya Bajji - Mirchi Bajji Recipe

Andhra mirapakaya bajji recipe
I usually make Chilli bajji / Milagai bajji / Mirchi bajji without any stuffing. Recently when I was talking with my friend Shalini, she told me about this Andhra style chilli bajji with a spicy stuffing. In Telugu, they call it as “Mirapakaya bajji”. The moment she told about this recipe, I started drooling and felt like tasting it right away. Without any delay, I bought the bajji milagai on the same day and made it for our evening tea time snacks. 

By getting an idea from Shalini, I googled some Andhra style stuffed chilli bajji recipes with tamarind, roasted gram dal or roatsed peanuts. I watched few you tube videos for the stuffing part. But I followed my usual bajji batter recipe for the outer cover. I was completely happy and satisfied with the outcome.

You can use either homemade bajji mix as I did or store bought instant bajji/bonda mix. What more to pen down, spicy stuffed chilli bajji along with hot ginger tea tasted divine for us. Friends, do try this chilli bajji in this weekend and share your feedback with me. Serve hot hot bajji topped with finely chopped onions and coriander leaves drizzled with lemon juice. I am sure your family will enjoy it to the core. Lets see how to prepare this spicy, hot Andhra style stuffed mirchi bajji recipe with stepwise pictures.

Stuffed chilli bajji recipe

Andhra Mirapakaya bajji recipe / Mirchi bajji


Andhra Mirapakaya bajji recipe Andhra style mirchi bajji recipe for evening tea time !
Cuisine: Indian
Category: Snacks
Yields: 10 nos
Prep time: 10 Minutes
Cook time: 5 Minutes
Total time: 15 Minutes


INGREDIENTS

  • Long Chilli / Bajji milagai - 5 nos
  • Oil - to deep fry
For the stuffing
  • Fried gram dal/Pottukadalai OR roasted peanuts - 1/2 cup
  • Red chilli powder - 1.5 tsp
  • Ajwain/Omam- 1/2 tsp
  • Cumin powder - 1/4 tsp
  • Hing - 1/8 tsp
  • Chat masala powder - 1/2 tsp
  • Tamarind - small gooseberry size
  • Salt & water - as needed
For the bajji batter
  • Besan flour - 1 cup
  • Rice flour - 1/3 cup
  • Cooking soda / Baking soda - 1/8 tsp
  • Red chilli powder - 1 tsp
  • Food color - a pinch ( optional)
  • Hing - 3 pinches
  • Omam/Ajwain - 1/2 tsp
  • Salt & water - as needed
METHOD - HOW TO MAKE ANDHRA MIRCHI BAJJI

  • To make Andhra michi bajji, take all the ingredients given under “for stuffing” and grind them to a paste. Check for taste and add more chilli powder if  you need.
Andhra mirapakaya bajji
  • Wash and cut the chillies into two vertically. Remove the seeds partially or completely based on the spiciness you need. Keep it aside.

andhra mirapakaya bajji
  • Stuff the chilli as you like and arrange in a plate.
Stuffed chilli bajji
  • In a wide bowl,take the flours, baking soda, salt and mix well to a paste adding little water. Now add more water and bring it to dosa batter consistency. Make sure there are no lumps in the bajji batter. The chilli should be well coated with the batter. So make the batter slightly thick. Too thick batter gives you hard bajji and too thin batter makes tails in the bajji. So consistency of batter is very important.
    Andhra mirapakaya bajji
  • Now take a stuffed chilli and dip in the batter. Heat oil to deep fry. To check the heat of oil, put a pinch of batter and if it rises immediately, batter is just right.simmer the flame and drop the chilli coated with bajji batter by holding its stem.
  • Deep fry both the sides till golden brown and crispy. Enjoy eating hot with tea/coffee !
Andhra mirapakaya bajji recipe
Chop the onions & coriander leaves finely. Sprinkle some salt and add few drops of lemon juice. Mix well. Sprinkle them on top & serve the bajji.
Andhra stuffed mirchi bajji
You don’t need any chutney or side dish for this. But kids may like it with tomato sauce. So serve accordingly !


Note

  • The consistency of batter is very important.To check the right consistency, just dip your finger in batter. If its coated well, the consistency is correct. If the batter is too thin, finger won’t be coated completely. In that case, add some besan and rice flour to adjust the consistency. Check for salt and proceed.
  • For variations, you can powder & grind roasted peanuts and sesame seeds instead of gram dal.
  • Adding ajwain to the bajji batter helps for easy digestion. So do not avoid it. If you don’t have ajwain in hand, use jeera/cumin seeds.
Stuffed mirchi bajji recipe-Andhra

Enjoy this hot, Andhra mirapakaya bajji with your evening tea/coffee ! 
A sip of tea and a bite of bajji is delish !!
Stuffed milagai bajji recipe


Continue Reading...


March 5, 2015

Easy Paneer Kheer|Paneer Payasam Recipe-Holi Recipes

Paneer kheer
Wish u all a very happy HOLIDancing
On this holi day,i have come up with an easy peasy kheer recipe which can be made under 15 minutes.This paneer ki kheer/cottage cheese pudding also known as Chenna kheer is an awesome bengali dessert recipe which they usually make it for festivals like dussehra,Durga pooja,Diwali and Navratri.Actually i had planned to share paneer burfi or Balushahi/Badusha recipe today as my Holi special dish.But unfortunately,all the pics gots deleted from my SD card by mistakeSad.I struggled to retrieve it but i couldn’tNot talking.I became very much disappointed but still i don’t want to give up making a sweet post on this festival day.Suddenly I remembered about this Paneer kheer recipe which i had tried for my last year’s Holi lunch menu.It was a super hit recipe in my house.So i prepared the same and refrigerated it to serve chill for my daughter and husband this evening.I am sure they will love it.Friends,if u have not planned anything for today’s celebration and if u wish to make something special and rich,this paneer kheer is a wise choice.You can make it in the next 15 minutes if u have store bought paneer ready in hand.Of course,freshly made chenna/Paneer tastes the best but still store bought paneer works fine.Its one of the best ways to make our kid consume paneer and as u all know,its a protein rich, healthy recipe for them.Try this easy paneer payasam for this festival of colors & have a fun filled,colorful celebration Party!!
Lets see how to make this paneer ki kheer..
Paneer kheer recipe

Easy paneer kheer recipe


Easy paneer kheer recipe Paneer kheer/Paneer payasam recipe-Easy n delicious dessert recipe for celebrations.
Cuisine: Indian
Category: Sweet
Serves: Serves 3
Prep time: 5 Minutes
Cook time: 10 Minutes
Total time: 15 Minutes


INGREDIENTS

  • Fresh paneer block - 100 gms/Grated paneer - 3/4 cup
  • Milk - 2.5 cups ( 500ml)
  • Sugar – 4-5 tbsp
  • Corn flour or rice flour - 1.5 tsp ( dissolve in 2 tbsp of water)
  • Condensed milk - 1 tbsp ( optional)
  • Cardamom seeds - 2 no ( crushed )
  • Chopped nuts - a fistful
  • Rose essence - few drops
  • Saffron threads - few ( optional)
METHOD

  • Wash and grate the paneer using a small holed grater.Set aside.Boil the milk in a pan and when it comes to boil,add sugar and corn flour water.
Paneer kheer
  • Allow it to roll boil for 5 minutes.In the mean time,chop the nuts and keep it ready.Add the cardamom powder and condensed milk.Lastly add the grated paneer and give a boil for 2 minutes.U will find the kheer becomes thick.Switch off the stove and add few drops of rose essence.Refrigerate for an hour and serve chilled OR enjoy it warm by sprinkling the chopped nuts and few saffron threads!
Paneer kheer
Looks rich and colorful,tastes rich and delicious!!

This kheer tends to thicken as it cools down.So dilute it by adding more milk & sugar if u wish.


Note

  • You can add freshly made chenna/paneer too.It tastes even more delicious and gives melt in mouth texture.
  • When u use store bought paneer,make sure u use the fresh ones.Else u may get a tangy taste.
  • Never boil the kheer for longer time after adding paneer because paneer may turn chewy.
  • Adding cardamom seeds & rose essence gives a nice flavor to the kheer.So do not skip it.
  • I used saffron threads only for photos.I did not add it in the actual recipe.


Paneer kheer

Enjoy this creamy paneer kheer with your loved ones.Tastes even more delicious !! Happy Holi Happy

Paneer payasam recipe

Continue Reading...


March 3, 2015

Easy Caramel Kheer/Payasam Recipe

Caramel Kheer recipe

My MIL shared this recipe with me after watching in a TV show hosted by Revathi Shankaran.Last week i made this payasam within 10 minutes for my Friday Pooja.This kheer recipe is only for Caramel lovers.It tastes very similar to “Lacto King” chocolate with a mild orange color & an awesome smell of caramelWinking
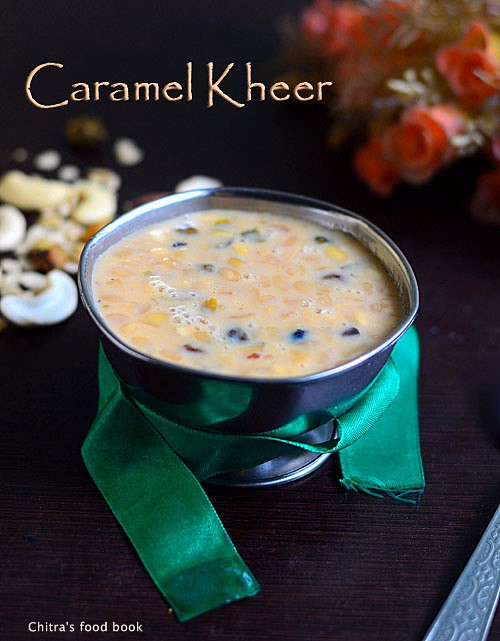
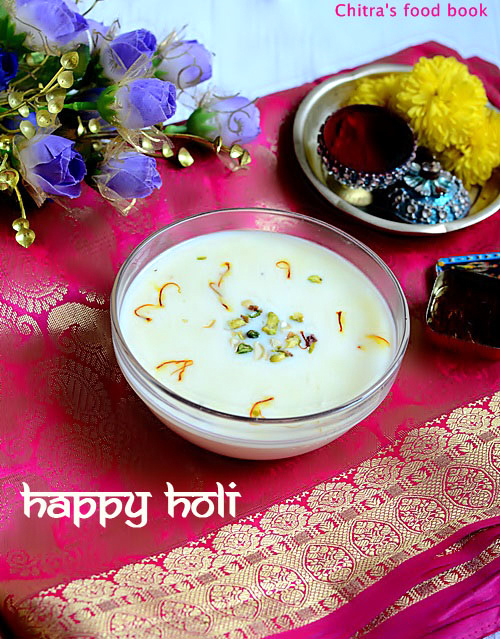
.Let me tell u what is caramel for beginners sake.Caramel is nothing but the sugar syrup heated until it turns brown.It is used as a flavouring or colouring for food or drink.But if you are a beginner,u should be very careful in making it.Over burning of sugar makes the caramel dark and bitter but if u do it patiently in low flame,u can achieve it right.When i browsed for this caramel payasam recipe after my MIL told about it,i found most of the recipes were with  basmati rice,aval/rice flakes and rice flour.But i tried a simple and easy version with milk & nuts as suggested by my MIL.So its like our usual Paal payasam/Milk kheer with caramel flavor.You can make this payasam instantly for your surprise guests.Moreover Holi festival is nearing our door steps.So u can plan and make it on Holi day ! I will try to share some more interesting recipes for HOLI.Stay tuned !
Check out my 15 payasam recipes if interested !
NB: The color & flavor of this kheer may slightly vary based on the color of caramel.The color of payasam in first pic & second pic looks slightly different due to the lighting.I clicked the same bowl under different settings.Pls don’t get confused.

Caramel kheer recipe

Caramel Payasam/Kheer recipe


Caramel Payasam/Kheer recipe Milk payasam/Kheer recipe adding caramelized sugar & nuts !
Cuisine: Indian
Category: Sweet
Serves: Serves 2
Prep time: 5 Minutes
Cook time: 10 Minutes
Total time: 15 Minutes


INGREDIENTS
1 cup = 200 ml
  • Thick boiled milk - 1 cup ( Full fat milk)
  • Sugar - 2 tbsp ( to caramelize) + 1 tbsp
  • Condensed milk – little (optional)
  • Mixed nuts - few tbsp(chopped & roasted in ghee)
  • Ghee - 1 tsp ( to roast nuts)
METHOD

  • Boil milk and add 1 tbsp sugar to it.Chop nuts finely and set aside.(You can also add a tbsp of condensed milk instead of sugar.It will make this kheer richer & thicker)
Caramel kheer recipe
  • Take 2 tbsp of sugar in a kadai and mix in medium flame.It will start to melt as shown in the picture. Keep mixing in low flame.
Caramel kheer recipe
  • Now sugar would be melted completely.Keep the flame very low and keep stirring.Then it will turn golden brown like jaggery syrup.This is called Caramel.Keep the boiled milk ready in one hand.Add the milk as soon as the sugar is caramelized. Make sure flame is low throughout the process.
Caramel kheer recipe
  • As u add milk,it will raise and becomes frothy.Switch off the flame & mix well.Milk would turn slightly orange in color.
Caramel payasam
  • Now roast the nuts in ghee and add to the payasam.Mix well and serve hot or refrigerate for 30 minutes and serve.It tastes delicious.
Caramel payasam recipe
NB: The color & flavor of this kheer may slightly vary based on the color of caramel.


Note

  • Please adjust the quantity of sugar based on your taste buds. I found 1 tbsp is just right for us.U can add 2tbsp to the maximum.
  • Be careful while caramelizing the sugar because if u miss the correct stage,payasam will taste bitter.
  • If u are a beginner,keep the flame completely low while making caramel. The total process takes around 4-5 minutes in very low flame.
  • You can also add a tbsp of condensed milk instead of sugar.It will make this kheer richer & thicker.

Check out my 15 payasam recipes if interested !

Try this easy n quick payasam recipe for festivals or any special days.Tastes yum !

Caramel kheer

Continue Reading...


March 1, 2015

Easy Vegetable Biryani Recipe In Pressure Cooker- Bachelors Veg Biryani

Easy vegetable biryani in pressure cooker
When I was working, my colleague who is a bachelor used to bring this simple veg biryani in a pressure cooker at least twice in a week. It looks like a plain colored rice with vegetables here and there. Whenever we ask for the recipe, he says its a 10 minutes biryani using masala powder. 

When I was planning for this week’s Sunday Lunch recipes, this biryani flashed in my mind. I thought this recipe may be helpful for bachelors & working women to make a chatpat, simple and no grinding biryani recipe for lunch box. Actually I wanted to make this biryani in rice cooker but finally I used pressure cooker. 

Soon I will share a biryani recipe using electric rice cooker. I don’t want to create a hype by saying this biryani tastes awesome, rich, flavourful and all. Rather I would say, its a good biryani recipe with least spices. The result would be worthy for it and I am sure you will love the simplicity of this recipe. Just give a try. I have updated this recipe with a video. Pls check it below.

Check out my other pulao/Biryani recipes here !


Easy veg biryani recipe

Easy biryani recipe for Bachelors


Easy biryani recipe for Bachelors Easy vegetable biryani recipe for bachelors with step by step photos and video
Cuisine: Indian
Category: Lunch
Serves: Serves 2
Prep time: 5 Minutes
Cook time: 10 Minutes
Total time: 15 Minutes


INGREDIENTS
1 cup = 200 ml 

  • Basmati rice - 1 cup ( I used India gate) 
  • Water - 1.75 cups
  • Mixed vegetables - 1/2 cup ( 1 carrot,5 beans,1 potato & fistful
  • peas)
  • Whole garam masala - 1 each ( Cinnamon, cloves, cardamom, bayleaf) OPTIONAL
  • Big onion - 1 no
  • Tomato - 1 no
  • Green chilli - 1 no
  • Ginger - 1 inch piece
  • Garlic - 8 cloves OR use 1/2 tbsp of g&g paste.
  • Mint & coriander leaves - a handful( use more mint than coriander)
  • Turmeric powder - 1/4 tsp
  • Red chilli powder – 3/4 tsp
  • Dhania powder – 1/2 tsp
  • Biryani masala powder or Garam masala powder- 1.5 tsp
  • Salt - as needed
  • Ghee - 2 tbsp ( u can also use cooking oil)
HOW TO MAKE VEG BIRYANI IN PRESSURE COOKER - METHOD

  • Wash and soak the basmati rice for 30 minutes in 1.5 cups of water. If you don’t have time to soak, use 2 cups of water for 1 cup of rice. I used 1.75 cups of water as per my family's taste.
  • Wash and chop all the vegetables into small cubes. Chop onions, tomato, ginger, garlic & green leaves. Slit chilli into two.
Easy vegetable biryani
  • In a pressure cooker base, heat ghee and add the whole garam masala if using. Add sliced onions, chilli, ginger, garlic, mint and coriander leaves. Saute everything well for a minute. Now add the tomato along with the chopped vegetables.Saute till tomato turns mushy. Add the required salt to quicken the process.
Easy vegetable biryani recipe
  • After the tomato turns mushy,add red chilli powder, dhania powder, biryani masala powder and turmeric powder. Mix well for a minute. Lastly add the washed & drained rice and saute well for a minute. Now add the required water and pressure cook in low flame for one whistle.
Easy vegetable biryani recipe
  • Open the cooker after the steam is released. Fluff the rice with a fork.Serve it hot with raita. Enjoy !


Note
  • Adjust the quantity of biryani masala powder as per your taste.
  • You can also add 2 tbsp of curd or 1tsp of lemon juice at the end. i.e before closing the cooker.
  • Mint leaves & coriander leaves gives a nice flavor to this biryani. So don’t skip it.
  • U can replace finely chopped ginger & garlic with g&g paste.
  • You can also prepare the same using electric rice cooker too.In that case,use 2.5 cups of water for one cup of rice.
Check out my other pulao/Biryani recipes here !


Try this easy peasy biryani recipe for your lunch box and enjoy with simple onion raita ! I served it with caramal-nuts payasam & raita !

Easy vegetable biryani recipe


Continue Reading...


February 28, 2015

Palakura Pappu | Andhra Palak Dal Recipe in Pressure cooker

Palakura-pappu-recipe

Palakura pappu/Spinach dal is an Andhra based, simple and easy one pot recipe. It can be made under 15 minutes and its a super healthy dish packed with the nutrition of dal & palak leaves. I had tasted this once in Jayanagar, Nagarjuna restaurant. Long back, I shared this Palakoora pappu recipe tried from Sailu’s food in my Andhra Lunch Menu post. 

This time I tried it by getting the recipe from my friend Megha & I modified it slightly as per our taste. As her in-laws belong to Andhra, she makes this palak dal very often. Nowadays I make this for Sendhil’s lunch box whenever I don’t have enough time to prepare in busy mornings. Its a great recipe for Bachelors and working women. You can prepare this recipe at least once in a week and have a simple and healthy lunch. 

My friend made it spicy but I had reduced the chillies as per my family’s taste. Also Megha told me to add little tamarind extract at the end but I used tomato here. But I read in readers comments in Vahchef's site that palak & tomato should be not be used together. I don't know the actual reason for it. So I am planning to use tamarind extract or lemon juice in place of tomato from next time. Please enlighten me if you know the correct reason. Try this easy palak dal recipe for rice and enjoy !


Palakura pappu recipe

Palakura pappu recipe


Palakura pappu recipe Andhra style dal palak - Palakura pappu
Cuisine: Indian
Category: Lunch
Serves: Serves 4
Prep time: 5 Minutes
Cook time: 10 Minutes
Total time: 15 Minutes


INGREDIENTS
1 cup - 250ml
  • Palak/Spinach - 2 cups ( 1 big bunch)
  • Toor dal - 1/2 cup
  • Tamarind or Tomato OR lemon juice  - Berry size or 1 no (Do not chop the tomato)/ few drops
  • Salt & water - as needed
  • Big onion - 1 no
  • Green chillies – 4 nos ( I used 2)
  • Ginger - 1 inch (finely chopped)
  • Turmeric powder - 1/4 tsp
  • Sugar – a pinch
  • Oil - a drop
To temper
  • Cooking oil or ghee - 1 tbsp
  • Mustard seeds - 1/2 tsp
  • Urad dal - 1 tsp
  • Garlic cloves - 5 nos ( crushed with skin)
  • Red chillies - 2 nos ( I used guntur chilli)
  • Cumin seeds - 1/2 tsp
  • Curry leaves - few
  • Hing/Asafetida - a big pinch
METHOD

  • Wash and chop the palak leaves finely.In a pressure cooker base, take the toor dal and add 1.5 to 2 cups of water. Add turmeric powder,roughly chopped big onion, one full tomato(optional) slitted green chillies ginger, ,salt, sugar and chopped palak leaves.{Here I used one tomato.But I read its not good to add palak & tomato together. So If uou don’t want to use tomato, use 1 tsp tamarind extract after cooking the dal and boil well}
  • Let it pressure cook in low flame for one whistle.After the steam is released,open the cooker and mash everything well using a thick ladle or whisk. Boil it to bring its right consistency.( If you don’t want to use tomato, add tamarind extract after opening the cooker now and boil the mixture  for a minute)
Palakura pappu
  • In a kadai, heat ghee or oil and splutter mustard seeds, urad dal,  cumin seeds, red chilli and crushed garlic cloves. Saute well for a minute and add them to the boiling dal.
  • Add tamarind extract if uing. Boil for a minute. After the dal becomes slightly thick and pourable, remove it and serve hot with rice adding a drop of ghee. Enjoy ! (Note : You can also add few drops of lemon juice instead of tomato or tamarind).
Palakura pappu


Note
  • I read in Vahchef’s site by readers that palak & tomato should not be cooked together. I am not sure about the reason. So if you want to skip tomato, add thick tamarind extract only after cooking the dal palak mixture. You can also use lemon juice instead of tomato or tamarind. 
  • If using tomato, do not chop it and add to dal. Dal won’t be cooked well n mushy. So add it as whole tomato.
  • Make sure the dal is mashed well after cooking else the mixture will look watery and separate.
  • You can replace toor dal with moong dal too.
  • This palakura pappu can be done in another way.ie. Heat oil in a cooker. Temper all the spices given above and then add onions, green chillies, ginger. Saute them for a while and now add the moong dal and washed palak leaves.  Add required water and salt. Pressure cook everything for one whistle in low flame.

Easy, healthy Palakura Pappu is ready to relish with hot rice n ghee !
Palakura pappu

Continue Reading...