Search Chitra's Food Book

March 27, 2015

Eggless Jam biscuit Recipe - Eggless Thumbprint Cookies Recipe

Eggless jam biscuit recipe
Jam biscuits also known as thumbprint cookies is a kids friendly cookies recipe.Summer Vacation is started for my daughter Raksha.She keeps asking me to make some snacks to munch while watching TV.So I baked these cookies for her yesterday.I tried these biscuits for the first time and it came out really well.With melt in mouth texture and awesome vanilla flavour, these jam drop cookies were yummy.Its taste was close to butter biscuit/Nankhatai.So this biscuit would be surely a hit among the kids and elders as well.No doubt my daughter liked it to the core and finished one batch of cookies in few minutes.She called it as "Jim Jam" biscuits.You can try this cookies for small parties,get together and for picnic as well. You can make & store these cookies well in advance.I hope it stays good for a week in an air tight box because mine got over in an hourTongue.Try these yummy jam biscuits for your kids and take the creditsHappy.Lets see how to make this melt in mouth,eggless thumbprint cookies/jam filled cookies recipe in detail.
Eggless jam filled cookies

Eggless jam biscuit/ Eggless Thumbprint cookies


Eggless jam biscuit/Thumbprint cookies Eggless jam filled biscuits for kids evening snacks !
Cuisine: Indian
Category: Cookies
Serves: 40 small
Prep time: 10 Minutes
Cook time: 20 Minutes
Total time: 30 Minutes


INGREDIENTS
1 cup = 200 ml
  • All purpose flour/maida – 1 cup
  • Sugar - 1/4 cup
  • Custard powder – 1/2 cup
  • Corn flour – 1 tbsp
  • Curd – 1 tbsp (semi solid)
  • Butter – 1/2 cup
  • Vanilla essence – 1 tsp
  • Mixed fruit jam - as needed
METHOD

  • Powder 1/4 cup of sugar and take in a wide bowl.U will get 1/4 cup + 1 tbsp pwd sugar.Add softened butter( at room temperature) and vanilla essence to it.Whisk it well till creamy.In a bowl,take maida,corn flour and custard powder.
Eggless jam biscuit recipe
  • Mix well and add this to the beated butter,sugar mixture.Fold it well and try to make a dough.Add 1 tbsp of curd and mix well.Make a stiff dough.No problem if there are mild cracks in the dough.No need to knead or beat the dough.Handle it gently.
Eggless jam biscuit recipe
  • Melt the jam in microwave high power for 30 seconds to 1 minute.I kept in 800w power for 1 minute.
Eggless jam biscuit recipe
  • Now take an orange sized ball from the dough.Roll it into 1/2 inch thick chapathi using a rolling pin.Dust it with maida if needed.Cut the cookies into desired shape using mould.Remove the cookies and arrange in a greased baking tray.( I greased the tray with few drops of oil) Make a small dent in the center of cookies using your forefinger, thumb finger or a bottle cap.Fill the dent with the jam.Put only few drops of jam because it may melt while cooking and spill in the sides.You can also put the jam just before 2 minutes at the end of baking .Its your choice.
Eggless jam biscuit
Eggless jam biscuit recipe
  • Preheat the oven in convection mode in 180c.Bake these cookies in 180c for 18-20 minutes till the sides turn light golden brown color.Remove the tray and let it cool.
Eggless jam biscuit recipe

Take the cookies and store in a box.Enjoy !

Note
  • For variations,u can try with wheat flour.
  • I am not sure of replacing butter with oil.Instead u can replace half of the butter with apple sauce.
  • I used mixed fruit jam.It gives the best taste than other flavors i guess.
  • I baked half of the cookies by filling jam in the beginning and half the batch by adding jam at the end.Both tasted good.

Eggless jam biscuit recipe
Enjoy these yummy cookies with coffee/tea/Milk.Melts in mouth.Tastes yum !
Eggless thumbprint cookies
Continue Reading...


March 25, 2015

Aam Ka Panna Recipe-Raw Mango Drink-Summer Recipes

 aam panna recipe
Aam Panna @Aam ka panna is one of the most popular Summer drinks of North India.It is made using the pulp of cooked Raw mangoes(Kacha Mango) blended with jaggery or sugar along with some spices.It is considered to be the best,healthy beverage/drink to beat Indian summer heat.As green mangoes are rich in source of oxalic acid,Citric acid and malic acid,it is used to treat Gastro intestinal disorders.It is also a good source of Vitamin C,B1,B2.So it is used as a tonic to increase the resistance against tuberculosis,anaemia,Cholera and dysentry.I wanted to start my summer recipes with mangoes.To begin with,i tried this drink today for the first time after referring few recipes from various websites.I came across different versions using smoked raw mangoes and steamed raw mangoes.Some recipes are with sugar & some called for Jaggery.I followed a recipe based on my convenience & family likings.Whatever be the method,making aam panna is so easy and tastes great too.I felt its taste was too close to our South Indian Panagam recipe which we make for Rama Navami.Myself and Sendhil enjoyed a glass of it and we loved it a lot.You can prepare this juice in minutes if u have the panna concentrate ready in hand.Lets see how to prepare this flavorful,popular North Indian drink-Aam Ka Panna/Raw Mango juice recipe.
Check out my other Mango recipes here!
aam panna concentrate

Aam panna recipe


Aam panna recipe Aam panna recipe/Raw mango drink- Healthy North Indian beverage using raw mangoes
Cuisine: Indian
Category: Drinks
Serves: 1.5 cups
Prep time: 10 Minutes
Cook time: 10 Minutes
Total time: 20 Minutes


INGREDIENTS

  • Raw mango - 2 nos (small round ones, I used one long variety)
  • Jaggery - 1 cup ( heaped) ( Pulp & jaggery ratio is 1:2)
  • Cardamom - 2 nos
  • Black salt - 1/2 tsp
  • Roasted cumin powder - 1/2 tsp
  • Pepper corns – 1/4 tsp
  • Mint leaves – few ( to garnish)
METHOD

  • Method – 1 : Wash and steam cook the mangoes in a pressure cooker or idli pot.Once its cooked,peel the skin and squeeze the pulp.Take in a plate and keep aside.( I got 1/2 cup of pulp)
Aam panna recipe
  • Method – 2 :Alternatively,u can burn the mangoes over direct flame till it turns like a charcoal.Cook in medium flame and turn it every now and then.Remove when the mango is cooked completely.Discard the burnt skin and take out the pulp.Keep it ready.U can follow this method if u want smoky flavor in the drink.I followed First method as we don’t like smoky flavor in our food.
  • After taking the pulp from the mangoes,measure it in a cup.Take grated jaggery that is twice the measure of mango pulp.In my case,i got 1/2 cup(heaped) of pulp.So i used 1 cup (heaped) of grated jaggery.
Aam panna recipe
  • In a mixie jar,take the pepper corns,roasted cumin powder,Black salt and cardamom seeds.Powder it nicely.To this powder,add jaggery and pulse it twice.
  • Lastly add the mango pulp and grind it well to make a smooth paste.No need to add water.Aam panna concentrate is ready. Remove the paste using a clean spoon and store in a bottle.
Aam panna recipe
  • To make this drink,take 2 tbsp of concentrate and mix in a cup of water(200ml).Check the taste and add more paste or water based on your taste.Enjoy adding few ice cubes and mint leaves.

Note

  • Follow method 1 or 2 based on ur liking.
  • The ratio of mango pulp and jaggery should be 1:2
  • You can also use sugar instead of jaggery.
  • Black salt gives a nice flavor to this drink.so don’t skip it.

aam ka panna

Enjoy this flavorful,refreshing drink and beat the heat !
aam ka panna recipe
Continue Reading...


March 22, 2015

Ugadi Lunch Menu-Karnataka Style

Karnataka lunch menu
Friends, this week I have shared a Karnataka style Ugadi lunch menu instead of Sunday biryani recipe.  Yesterday I made this simple yet delicious lunch menu for Ugadi celebration. So I thought of sharing that platter here. Its been my long time wish to post a Karnataka style lunch menu in my blog. So I took Ugadi festival as an opportunity and made a simple lunch menu.

After I prepared Holige successfully, I asked my friends to suggest me an easy lunch menu idea for Ugadi festival. Based on their suggestions, I made Obbattu, Obbattu saaru, Mavinakayi chitranna, Mysore Bonda, Beans palya, Shavige payasa, dal, plain rice and the most popular Kosambari recipe. Also Megha suggested me a very easy recipe for Obbattu saaru.

As I had made Obbattu in the previous day, making this menu was easy for me. In this post, I have shared the recipes of Kosambari( using moong dal ) and beans palya. I have made a separate post for Obbattu saaru and Mavinakayi chitranna. I have given links for all these recipes below. Please check it. Ok, Now lets see this yummy Karnataka lunch menu recipes for Ugadi festival.

Check out my other lunch menu posts here . 

Wish you all a very happy Ugadi !!

 Ugadi lunch menu

Ugadi Lunch Menu


Ugadi Lunch Menu Ugadi Lunch Menu Recipes-Karnataka style
Cuisine: Indian
Category: Lunch menu
Serves: 2
Prep time: 30 Minutes
Cook time: 1 Hour
Total time: 1H30M


INGREDIENTS
Kosambari recipe
  • Yellow moong dal - 2 tbsp
  • Carrot - 1 no small
  • Green chilli - 1 no
  • Cucumber- a small piece
  • Coriander leaves - 2 tbsp
  • Grated coconut - 3 tbsp
  • Salt - as needed
To temper
  • Cooking oil - 1 tsp
  • Mustard seeds - 1/4 tsp
  • Curry leaves - few
  • hing/asafetida - a pinch ( optional)
Beans palya recipe
  • Beans - 20 nos
  • Grated coconut - 1/4 cup
  • Green chillies - 2 -3 nos
  • Salt & water - as needed
To temper
  • Cooking oil - 1 tbsp
  • Mustard seeds - 1/2 tsp
  • Urad dal - 1 tsp
  • Curry leaves – few
Click these links for other recipes
METHOD

  • I assumed that you have made obbattu/Holige the previous day and shared the procedure of making other dishes below.
  • Wash and soak moong dal for 30 minutes to make kosambari. Wash and soak urad dal for mysore bonda for 45 minutes in enough water.  You can also make vada instead of bonda. 
  • To make this menu, pressure cook one cup of rice along with moong dal in a small closed container. Soak tamarind in water for 20 minutes. Pressure cooking rice and dal will be done in 15 minutes.
  • In another burner, boil the vermicelli and let it cook. In the mean time, wash and peel the skin of raw mango. Grate it and finely chop the green chillies. Heat a pan and do the tempering, add green chillies and grated mango.
  • Saute well adding salt and turmeric powder. Mix well till mangoes get cooked. Lastly add the grated coconut, saute for a minute and switch off the flame. After the pressure is released, spread the rice in a plate and let it cool. Add this maavinakayi paste and mix well adding sesame oil. Adjust salt and garnish with coriander leaves. Please refer my mavinakayi chitranna recipe post for another method.
  • Now vermicelli will be cooked well, add milk, sugar and roasted nuts and remove from the flame. Set aside.
  • To make kosambari, take the soaked moong dal, drain the water completely and add grated coconut, grated carrot, finely chopped cucumber, green chillies and coriander leaves. Mix well. Add salt just before serving otherwise this mixture will leave more water while serving. So add salt only before serving. Lastly do the tempering and Kosambari is ready.
  • For beans palya,wash and chop the beans into small circles. Heat oil in a kadai and temper mustard seeds, urad dal and curry leaves. Add finely chopped green chillies and beans. Add the required salt and saute well for few minutes. Sprinkle some water and cover cook the beans till its done. Mix it once or twice in the middle. Add the grated coconut in the end, give a stir and switch off the flame. Beans palya is ready.
  • Lastly you can do the obbattu saaru by using the reserved holige pooran dal water. Please check the link for obbattu saaru recipe above. By now, urad dal would have been soaked well. Grind the batter and make bonda. Serve saaru and bonda really hot to enjoy its best taste. So I made it at the end.
You can finish the entire process within an hour if  you plan it right. Serve everything hot and enjoy !

Try this easy yet yummy lunch menu and enjoy Habbada Oota on this auspicious day !

 Ugadi lunch menu
Continue Reading...


March 19, 2015

Karnataka Style Holige/Obbattu/Puran Poli Recipe

OBBATTU RECIPE

Karnataka style Holige also know as Obbattu in Kannada, bobbatlu in Telugu, Puran Poli in Hindi, Paruppu Boli in Tamil is a very popular sweet in Karnataka, Andhra and North India. Of course each recipe has its own variations. People in Karnataka should make this sweet for festivals like Varamahalakshmi pooja, Ganesh chaturthi and Ugadi.  

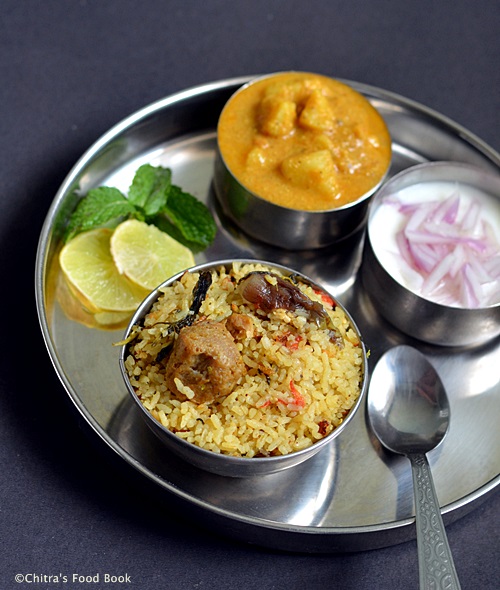
We Tamil people don’t celebrate Ugadi but being in Bangalore for the past ten years, I wanted to celebrate Ugadi at least by making holige. Holige/Obbattu is considered to be one of the most important Neivedyam recipes for Ugadi. People in Karnataka & Andhra make it along with Mango pachadi or Maavinkayi chitranna and vada. Here in Bangalore, people make this holige not only for offering GOD, its a must serve sweet in weddings, Sathya Narayana pooja etc. I

n Karnataka,  people make it with two different stuffing. One using dal ( bele obbattu) and the other one with coconut (Kayi holige). But the most famous one is bele obbattu. In Tamil nadu, we call this as Boli /Poli and we make the same stuffing with chana dal. In North India, it is called as Puran poli. I am not a big fan of this sweet recipe but I love Obbattu saaru (a spicy rasam kind of gravy made from the stuffing and the cooked dal water)so much. My husband Sendhil loves obbattu like anything. He loves to have it hot hot drizzled with a tsp of ghee. I have tasted holige in my school moms friends houses and in marriage feasts. 

My friends make it extremely soft and tasty. So with the help of Megha and Tara’s recipes, I tried holige after a long time to make a special post for Ugadi festival. By God’s grace, it came out well and soft as I expected but not 100% like my friends. No worries. Practice makes a man perfect.After this successful attempt, I am pretty much confident of making it perfect next time. But I became very happy when Sendhil gave thumbs up with a broad smile on his face. So its a hit recipe in my home. I have mentioned all the possible tips and tricks shared by my friends. Hope it will be useful for beginners. 

Now lets see how to make Karnataka special Holige/Obbattu recipe with stepwise pictures in detail ! Please don’t forget to go through the “Points to remember” before you start making it.
Wish u all a very happy Ugadi !.
Points to remember
  1. Please be generous in adding oil. Oil helps you to get a really soft holige. So use the mentioned quantity of oil strictly. U can add more oil but definitely not lesser the given quantity.
  2. My friend Tara use the combination of maida and chiroti rava in the ratio of 2:1 for making the dough but Megha uses only maida. Here I used only maida as I din’t have chiroti rava in hand.
  3. You should knead the dough at least for 5-7 minutes adding oil in regular intervals. Its a very important step.
  4. Holige/Obattu dough needs to be fermented and soaked in oil at least for 8 hours to achieve the best result. i.e. If you want to make obattu in the evening around 6 pm, I suggest you to make the dough in the morning around 7 am. This tip was shared by Tara. This time I fermented the dough for just 4 hours as I wanted to click the pictures before sun light goes off. Next time I am planning to soak the dough overnight.
  5. Rolling the dough along with stuffing also plays a major role in bringing out soft obattu. Do not roll the holige too thin or too thick. You can either pat it using your hands or use a rolling pin by keeping the dough between two greased obbattu sheets which is easily available in Market. If you don’t get it, use oil sheets, milk cover or any plastic sheets. You can use banana leaf as well. 
  6. Make sure the size of maida dough should be half the size of stuffing ball. This helps in uniform spreading of stuffing all over the holige. Suffing should be more than the outer covering.
  7. Always cook the obbattu in medium flame and never forget to drizzle a tsp of oil around the corners and all over the obbattu to get a shiny look.
  8. To keep the obbattu stay soft for long time, always stack the cooked obbattu one over the other after they turn warm. Keep it covered till you eat.
  9. Last but not the least,serve the obbattu adding few tsp of melted ghee topped with it. If desired, you can add warm milk too. This is how it is served in Wedding feasts here. This combo is just out of the world ;)).
  10. You can keep this holige for a week and enjoy !
Obbattu recipe

Obattu/Holige recipe


Obattu/Holige recipe How to make obattu/Holige recipe for Ugadi festival
Cuisine: Indian
Category: Sweet
Serves: 10 nos
Prep time: 8 Hours
Cook time: 5 Minutes
Total time: 8H5Minutes


INGREDIENTS
( 1 cup - 250ml)

  • Maida/All purpose flour - 1 cup (levelled)
  • Cooking oil - 1/4 cup + Extra while cooking holige ( total 1/3 cup) 
  • Turmeric powder - 1/8 tsp
  • Salt - a pinch
  • Water – to make dough ( I used nearly 1/2 cup + 2 tbsp.But it may vary)
For stuffing
  • Toor dal or chana dal – 1/cup
  • Grated/powdered jaggery – 3/4 - 1 cup
  • Grated coconut - 1/4 cup
  • Cardamom - 2 nos
  • Water - as needed
METHOD

  • Prepare the dough part first. For this, take 1 cup of flour and add turmeric powder and  a pinch of salt to it. Mix well. Make a dent in the center and add water little by little. Make a sticky dough.
Obbattu recipe
  • Take 1/4 cup of oil in a bowl and add 1 tsp of oil to the dough. Start kneading using your palm. Knead it for a minute and add another tsp of oil whenever the dough sticks to your hands. Repeat the same thing until the dough is completely soft. I used nearly 6-7 tsp of oil. Knead the dough for 6-8 minutes. No problem if the dough is loose and sticky. 
Obbattu recipe
  • Now pour the remaining oil over the dough. The dough would be immersed in oil and it will be soaked. So add 1 tbsp more oil if needed. Close the bowl with a lid and leave it for 6-8 hours minimum.
Obbattu recipe
  • Next comes the stuffing part. Boil toor dal in an open bowl or pan adding 4 cups of water. Let the dal cook till it blossoms and not mushy.i e.the dal should be mashable by hands but it should look firm and stay in shape. You can also pressure cook but cook in high flame for one or two whistles. Make sure dal is not mushy. It should blossom and cook. People here don't pressure cook dal for making holige. So I too followed the same. 
Obbattu recipe
  • After the dal is cooked, drain all the water and collect it in a bowl. Use this dal water for making obbattu saaru.
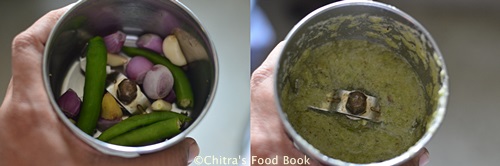
  • Now take the cooked dal, grated coconut, grated jaggery and cardamom in a mixie jar and grind it well to make a paste.
Bele obbattu recipe
  • If you feel the mixture is watery and too wet to handle,saute & cook the mixture in a hot pan till it becomes like a whole non-sticky mass without moisture content. If the mixture is hard and non sticky, cooking the stuffing is not needed. Take the stuffing and make lemon sized balls out of it. Cover the balls and set aside. Reserve 2 balls of stuffing to add in obbattu saaru. 
Bele obbattu recipe
  • After the obbattu dough is rested for 8 hours, take it and pinch a big gooseberry sized ball out of it. The size of dough ball should be half the size of stuffing ball. Stuffing ball should be bigger than dough ball. Keep the ball in a greased obbattu sheet ( U get in shops) and spread it lightly like a poori. Make sure the corners are thinner than the center portion. Now keep the stuffing ball in the middle and cover the stuffing with the dough. You can use banana leaf for rolling holige but obbattu sheet works the best. 
Obbattu recipe
  • Press it using your hands and pat it as much as possible distributing the stuffing evenly all over the holige. Make it medium thin Or thick as you like (If you make polis too thick, it may turn out hard).
Obbattu recipe
Obbattu recipe
  • Heat a dosa tawa (Iron griddle is best) and drizzle few drops of oil. When the pan is heated, take the obbattu sheet and invert it over the tawa. Just drop the holige and remove the sheet. Spread it well. Cook it by adding a tsp of oil. Cook both the sides in medium flame till holige cooks with golden brown spots. Remove in a plate and serve it hot hot adding milk and Ghee generously. Tastes great!!
Obbattu recipe
  • Repeat the same for all the dough and stuffing. Always Stack the holige and store it. It will stay good for a week provided you cook the stuffing part without moisture.

Note

  • Please refer “Points to remember” given above before you start making obbattu. All the best !!

Enjoy making this Karnataka’s most popular Obbattu for Ugadi Habba. 

Wish you all a very happy Ugadi festival celebration !!

Obbattu recipe

Continue Reading...


March 17, 2015

Eggless Banana Walnut Muffin Recipe Without Butter,Condensed milk

Eggless banana muffin recipe
This is my second post on eggless cupcake recipes without butter and condensed milk. Last week I went to my friend’s house to teach baking in her new oven.I found this recipe in that oven manual.I clicked few cake recipes from that manual in my mobile.This morning I tried no egg, no butter banana walnut muffin for the first time following that recipe and I was completely satisfied with the result.It was so soft and spongy. Don’t worry if u have over ripe bananas in hand.Just make this muffin and all the bananas will vanish in no time. .My daughter Raksha had two muffins happily. Its a great way to make our kids consume walnuts without any complaints.Even though i have used maida here,i am happy that the addition of bananas and walnuts make this muffin a healthy choice for kids.I am planning to bake the same using whole wheat flour and will try to update the results here.I have bookmarked few recipes for this cake recipe using microwave too.Soon i will come up with that version.Its a great tea time cake & a healthy breakfast recipe if taken with a glass of milk.So lets see how to make this yummy,spongy banana nut muffin using easily available ingredients in our pantry !!
Check out my super moist chocolate cupcake recipe too.

Continue Reading...


March 15, 2015

Coimbatore Angannan Biryani Recipe - Kovai Mushroom Biryani - Sunday Lunch Recipes Series-10

Angannan biryani recipe
Sorry for the late post. Today I celebrated Karadaiyan nombu and after having adai, I din’t feel like cooking biryani. But I don’t want to miss this week’s Sunday Lunch Recipes Post. So I made this biryani and kept for our dinner today. I had already shared Ambur star biryaniDindigul thalappakatti biryani recipes using vegetables. In continuation of that, I have come up with yet another delicious and a famous biryani recipe. Its nothing but the most popular Coimbatore/Kovai special Sree Angannan hotel biryani. 

Actual recipe uses mutton/chicken but I tried it replacing with a combination of soya chunks, mushroom and brinjal. I referred this & this blog for the recipe and it was great. For the first time, I cooked this biryani in my non-stick kadai and  put in DUM for 10 minutes. It came out very well. I have shared the procedure in detail with stepwise pictures. Hope it is easily understandable. Try this Kovai special biryani and let me know how you liked it!

Friends, if you know any popular Tamil nadu based biryani recipes other than these 3, please leave a comment here. I would love to try it !

Ok, Lets see how to make this yummy Angannan biryani recipe with step by step pictures below!

Check out my other biryani/Pulao recipes HERE

Coimbatore angannan birayni recipe

Coimbatore Angannan Biryani recipe


Coimbatore Angannan Biryani recipe Coimbatore Angannan Biryani recipe using Soya chunks and brinjal !
Cuisine: Indian
Category: Lunch
Serves: 2
Prep time: 10 Minutes
Cook time: 20 Minutes
Total time: 30 Minutes


INGREDIENTS
1 cup = 250 ml
  • Jeera rice/Jeeragasamba rice - 1 cup
  • Water - 1.75 cups
  • Turmeric powder - 1/8 tsp
  • Salt - as needed
  • Soya chunks/meal maker- handful
  • Brinjal - 2nos (optional)
  • Mushroom - 5 
To grind as paste
  • Shallots/Small onions - 7 nos
  • Green chillies - 4 nos
  • Ginger- 1 inch
  • Garlic - 4 nos
  • Cinnamon - 1 inch
  • Cloves - 2 nos
  • Cardamom - 2 nos
  • Water - little
To temper & saute
  • Cooking oil - 2tbsp
  • Ghee - 1 tbsp
  • Cinnamon - 1 inch
  • Cloves - 2 nos
  • Cardamom - 1 no
  • Big onion - 1 no
  • Small onions - 4 nos
  • Garlic cloves - 4 nos
  • Green chillies - 1 no ( optional)
  • Tomato - 2 nos 
  • Coriander leaves& mint leaves - a fistful
  • Lemon juice-1/2 tsp
HOW TO MAKE ANGANNAN VEG BIRYANI - METHOD

  • Wash the jeera rice and drain the water. Set aside. Chop onions & tomato. Wash and clean mushroom, slice and keep it. Boil water and soak the soya chunks till use. Slice brinjals into 4 pieces (if using) and keep them immersed in water.
Angannan biryani recipe

  • Grind all the ingredients given under”to grind” to a smooth paste adding enough water.
  • Heat oil+ghee in a kadai or vessel. Add cinnamon, cloves & cardamom. Then add the small onions & garlic cloves. Saute till transparent.
Angannan biryani recipe
  • Then add the onions & tomatoes. Saute till tomato turns mushy. Add the chopped coriander & mint leaves. Saute & then add the ground masala paste. Saute it for few minutes till it leaves oil. Now add the squeezed soya chunks, mushroom and brinjal pieces.
Angannan biryani recipe
Angannan biryani
  • Mix well and add a cup of water. Keep the flame high and let the brinjal cook well. It will look like a gravy with some water.
Angannan biryani
  • Now add 1 cup of water along with the washed rice. Sprinkle lemon juice. Make sure the total cups of water should be 1.75 cups including the water in the gravy. Add a slit green chilli if you want more spicy.. Let the mixture boil in open pan in medium flame till rice absorbs all the water.
  • Then cover the kadai with a lid and keep a bowl of boiled water over the kadai plate.( I inverted my kadai plate as it was dome shaped and kept the bowl over it). Now simmer the flame completely and cook for 10 minutes. Mix it once in the middle and sprinkle very little water if you feel the rice is too dry and burnt. Cook it in low flame till rice is done. Serve hot with onion raita !!
Angannan biryani


Note

  • Adjust the quantity of chillies if you want more spicy. But don’t add more chillies while grinding. Add in the water while you cook the rice.
  • For variations, you can replace soya chunks , mushroom with mixed vegetables.
I served it with onion raita & potato kurma.It was yummy..
Angannan biryani recipe
Continue Reading...


March 14, 2015

Kuthiraivali Upma Recipe/Barnyard Millet Upma-Millet Recipes

Kuthiravali upma recipe
Its been few weeks I posted a millet recipe in my blog. Last month I posted varagu idli, dosa recipe. After that, I couldn’t try any interesting recipes using millets. Nowadays I started trying some instant upma, kichadi recipes using millets. I will try to share them one by one here. Today I am sharing a simple and easy one pot upma recipe using Kuthiraivali/Barnyard millet. Kuthiraivali is called as barnyard millet in English, Jhangora in Hindi, Odalu in Telugu, Kavadapullu in Malayalam, Oodalu in Kannada. It has 6 times high fiber content when compared with wheat.Its a gluten free millet with high calcium, phosporous & fiber. It is high in carbohydrates & fat too. It improves metabolism.It helps to maintain the body temperature.It acts as a good anti oxidant too. 

I usually make puli upma with kuthiravali. Recently I tried a plain upma recipe just like my noi arisi upma/broken rice upma.It came out very well. I served it with moong dal sambar and we loved that combo.Its a healthy replacement for our regular rice upma and tastewise there is no compromise at all. You can add finely chopped onions & vegetables to make it colorful and healthy. As it is an easy one pot meal,its an ideal recipe for working women & bachelors to prepare breakfast & dinner during busy morning hours or lazy & tired night hours. If you like the taste of this upma,u can experiment the same with other millets like samai, varagu and thinai too. Procedure, quantity of water and ingredients are one and the same. 

Ok, Lets see how to make this healthy barnyard millet upma recipe in detail!
Check out my moong dal sambar here. It is the best side dish for this upma I feel. You can also have it with coconut chutney or thogayals.

Barnyard millet upma

Kuthiravali upma recipe


Kuthiravali upma recipe Barnyard millet upma-Healthy breakfast/dinner recipe using millets
Cuisine: Indian
Category: Millet recipes
Serves: 2
Prep time: 5 Minutes
Cook time: 15 Minutes
Total time: 20 Minutes


INGREDIENTS
1 cup - 240ml
  • Barnyard millet/Kuthiravali - 1 cup
  • Water - 2.5cups
  • Salt - as needed
To temper
  • Coconut oil - 2 tbsp
  • Mustard seeds - 1/2 tsp
  • Urad dal - 2 tsp
  • Chana dal - 1 tbsp
  • Red chillies - 1 no ( pinched)
  • Green chillies - 2 nos ( slitted)
  • Curry leaves - few
  • Hing/Asafetida - 1/4 tsp
  • Ginger - 1 inch piece( chop finely)
  • Big onion - 1 no ( chop finely) optional
  • Mixed vegetables - 1/2 cup ( carrot, beans, potato and peas) Optional.
HOW TO MAKE KUTHIRAVALI UPMA - METHOD

  • Wash the millet and drain the water. Keep it aside. Chop the onions & vegetables finely if using.

  • Heat oil in a cooker base and add the coconut oil or any cooking oil. Coconut oil gives a nice flavor.  After the oil is heated, splutter mustard seeds, urad dal and chana dal. Add the chillies, hing and few torn curry leaves. Saute well.( If using onions & vegetables, add in this stage and saute them for a minute). Now add the required water and salt.Add the finely chopped ginger pieces and few more curry leaves & 2 pinches of hing in the water. Adding raw ginger, curry leaves & hing will give a nice flavor to the upma. Now when the water starts to roll boil, check for taste and add more salt if needed.

  • Simmer the flame and add the washed millet. Mix well and close the cooker. Cook it for one whistle in low flame.Usually it takes 7-9 minutes in my cooker. Timings may vary though. Switch off after one whistle and open the lid after steam is released. Fluff the upma with a fork. 
  • Do not mix it vigorously when the upma is hot because, upma will turn out mushy. So mix it gently. As the upma cools down, it will become separate and grainy. Enjoy with sambar/chutney or coriander leaves thogayal. My personal choice is sambar than chutney : ))
kuthiravali upma


Enjoy !


Note

  • For variations, you can add finely chopped onions & some vegetables like carrot, beans, peas etc. It makes the upma colorful and healthy too.
  • Adding 2.5 cups of water gives a mushy look to the upma when it is hot. But it will turn separate and grainy as it cools down.
Check out my easy, one pot moong dal sambar here !

Enjoy making this easy, healthy one pot millet upma for your breakfast/dinner !
Kuthiravali upma recipe
Continue Reading...