Search Chitra's Food Book

February 14, 2017

How To Make Chocolate At Home Without Coconut Oil – Homemade Chocolate Recipe With Cocoa Powder

Easy-homemade-chocolate-recipe-using-cocoa-powder
Easy homemade chocolate recipe using milk powder and cocoa powder with step by step photos and video !
Wish you all a very happy Valentine’s day !!. When I was looking for some interesting Valentine’s day special recipe, homemade chocolates came to my mind. Long back I have shared a Vegan version of chocolate recipe using cocoa powder,honey and coconut oil. Though it is an easy, perfect and fool proof recipe for homemade chocolate ,the flavor of coconut oil would be dominant which many people don’t like it. Many of my readers who had tried that recipe requested me to share an alternative for coconut oil. I tried it with butter and even with dalda but it didn't work.So I was looking for a chocolate recipe that uses butter and cocoa powder. 

I came across this homemade chocolate recipe without oven in YouTube video . I just halved the quantity of ingredients and tried it today. It came out really well but not tasting like silky smooth Dairy milk. It was pretty good in taste like Five star chocolate with a mildly chewy, fudgy kind. But its quiet addictive to eat :) To make Dairy milk kind of chocolate, we must use cocoa butter to achieve the silky texture. In India, cocoa butter is not easily available and its very costly to buy online too. 

Another easiest option is to melt dark compound or white compound chocolate either in microwave oven or stove top ( Double boiling method) and make chocolates. It tastes really good equal to the store bought ones. Soon I will make a detailed post on that. But this chocolate recipe is made with 4 simple ingredients like milk powder, sugar, cocoa powder, vanilla essence and Butter ( clarified ghee). Cooking procedure is also easy. You don’t need to check for one string consistency sugar syrup. Its just mixing and freezing. Homemade Chocolates would be ready ! Now anyone can make chocolates at home using this recipe

This chocolate tastes the best when served chilled. But it stays good for an hour without refrigeration. So you can make this ahead and serve kids for birthday parties. Kids would love this chocolate for sure. Do try this easy homemade chocolate recipe for this Valentine’s day and have a great celebration. Surprise your Husband and Kids with this lovely chocolates this evening. Soon I must try Raksha’s favorite Milk chocolate/ white chocolate as well by replacing cocoa powder with milk powder. Now lets see how to make chocolate at home using cocoa powder and milk powder with step by step photos and a video for better understanding ! Hope you will try and like it.


Homemade chocolate recipe

Easy homemade chocolate recipe - How to make chocolate at home with cocoa powder


Easy homemade chocolate recipe - How to make chocolate at home with cocoa powder Easy homemade chocolate recipe - How to make chocolate at home with cocoa powder with step by step photos and video !
Cuisine: Indian
Category: Chocolates
Serves: 12 Pieces
Prep time: 5 Minutes
Cook time: 60 Minutes
Total time: 65 Minutes


INGREDIENTS
1 cup - 250ml ; 1 tbsp – 15ml ( 3 tsp)
  • Milk powder - 2.5 tbsp ( I used Nestle Everyday milk powder )
  • Cocoa powder - 1.5 tbsp ( I used Kwality brand)
  • Icing sugar or powdered sugar - 4 tbsp
  • Vanilla extract - 1/2 tsp
  • Butter – 3 tbsp ( Soft, at room temperature)
  • Chopped Nuts & raisins - As needed ( optional)
  • Boiled milk at room temperature - 1 to 2 tbsp ( optional, use only if needed)
HOW TO MAKE CHOCOLATE WITH COCOA POWDER

  • In a bowl, mix milk powder and cocoa powder. Set aside.
    How to make chocolate at home
  • Boil 5 cups of water in a wide bowl or kadai. Allow it to roll boil well. Switch off the flame. Take a bowl that fits in the kadai. Add 3 tbsp soft butter to it. Keep the bowl inside the hot water kadai. Mix the butter and melt it completely.
    How to make chocolate at home
  • Keep the bowl inside the hot water throughout the procedure. Add icing sugar or powdered sugar to the melted butter.Mix well. It will resemble a creamy paste.
    How to make chocolate at home
  • Add milk powder + cocoa powder mixture to this and mix well. It will become a thick paste by absorbing all the butter. Lastly add vanilla essence, mix well. (IF YOU FEEL THE MIXTURE IS TOO THICK, ADD 1 TO 2 TBSP MILK TO LOOSEN IT). 
How to make chocolate at home
  • Take a chocolate mould ( Either plastic or silicone mould) and fill the chocolate mix. Pat it  well to level the chocolate. Excess butter may ooze out. Don’t worry. Just fill the mould and freeze it for one hour. Remove the mould and rest it for 5 minutes. Remove the chocolate and enjoy !!
    How to make chocolate at home
Enjoy this Valentine’s day with this simple homemade chocolate recipe !

Note
  • Butter should be soft at room temperature. So keep it outside for few hours if its hard or soften the butter in microwave for a minute.
  • For variations, you can add finely chopped nuts or raisins to the chocolate batter.
  • Water should be very hot so that butter can melt easily.
  • Remember to keep the bowl inside the hot water throughout the cooking procedure. It helps the chocolate to set well.
  • For making milk chocolate/white chocolate, just replace cocoa powder with milk powder.
  • I used light cocoa powder. If you use dark colored cocoa powder, chocolate tastes like dark chocolate with mild bitterness.
  • You can try to add equal amount of milk powder and cocoa powder i.e 2 tbsp each for more chocolaty taste.
Homemade chocolate recipe

Try this easy, simple chocolate at home and enjoy the occasion !!
How to make chocolate at home
Continue Reading...


February 9, 2017

Microwave Oreo Cookies Brownie Recipe – Eggless Brownie In 2 Minutes

Oreo cookies brownie recipe
This is a super easy and quick eggless brownie recipe using Oreo biscuit in microwave under 2 minutes. I have already shared an eggless microwave Oreo cake which is a super hit recipe in my blog. After that, I couldn’t try and share any Oreo based recipes in my space.

 For this Valentine’s day celebration, I wanted to post some simple, quick and easy recipes. When I saw this easy Oreo cookies brownie recipe in THIS video, I was so tempted to try it. This is my first attempt of making a brownie with biscuit base. It came out really well and tasted mildly sweet, chewy, soft and fudgy. Myself and Sendhil enjoyed it a lot. I served the warm brownie with a scoop of Ice cream and topped with some Hershey's chocolate syrup. Its a prefect dessert ! Our Valentine’s day celebration started with this brownie today. 

Friends, If you are looking for some quick and easy Valentine’s day recipes, this is for you. All you need is a pack of Oreo biscuit, milk, very little butter and baking soda. This is one of the best Oreo recipes ideas. Don’t hesitate to try it, just go on. Everybody would love its taste for sure. Ok, enough of hype, lets check how to make this eggless, microwave Oreo cookies brownie recipe with step by step photos and a video.

Do check out my 1 minute microwave brownie recipe too !


Oreo brownie recipe - eggless microwave

Microwave Oreo Brownie Recipe


Microwave Oreo Brownie Recipe Microwave Oreo Brownie Recipe - Eggless brownie recipe using Oreo Cookies under 2 minutes
Cuisine: Indian
Category: Brownie Recipes
Serves: Serves 2
Prep time: 5 Minutes
Cook time: 2 Minutes
Total time: 7 Minutes


INGREDIENTS
1 tbsp - 15ml ( 3 tsp)
  • Oreo biscuits - 8 nos ( Original flavor)
  • Boiled milk - 3 tbsp + 1tsp ( optional) ( Milk at room temperature)
  • Softened butter - 1/8 tsp
  • Baking soda - A big pinch ( Half of 1/8th tsp)
METHOD

  • Grind 8 Oreo cookies with cream to a fine powder ( There was approx. 6-7 tbsp of powdered cookies). Transfer to a bowl.
    Oreo brownie recipe
  • To this, add 1/8 tsp of soft butter( at room temperature). 
    Oreo brownie recipe
  • Add 3 tbsp boiled milk at room temperature and mix well with a whisk. If the batter is too thick, add 1-2 tsp milk. Quantity of milk should be half the quantity of powdered Oreo. Mix well and continue to add a big pinch of cooking soda. Brownie batter should be thick but pourable. Watch the video for reference.
    Oreo brownie recipe
  • Grease a microwave safe bowl with butter generously. Pour the batter and Pat it to level the batter.
    Oreo brownie recipe
  • Microwave in high power (800w) for 1 minute 30 seconds. Insert a tooth pick and check it comes out clean or with crumbs. If not, keep it for another 30 seconds. It takes maximum 1 to 2 minutes to cook based on the power of microwave. Remove the bowl and let the brownie cool down for 2-3 minutes. Now run a knife along the sides of brownie and invert in a plate. It falls down easily.
    Oreo brownie recipe
  • Top it with Chocolate syrup and garnish with sprinklers, Choco chips or nuts of your choice. Serve warm with a scoop of ice cream. Tastes yum with a mild chewy texture!
    Oreo brownie recipe
Enjoy !

Note
  • The consistency of brownie batter is more important to get perfect texture. If the batter is too thick, brownie comes out hard. If its too thin, brownie takes long time to cook.So make sure batter is thick but pourable.
  • I added 3 tbsp milk as per the original recipe and then added 1 tsp more milk as the batter was slightly thick.
  • Baking time varies as per the power of microwave. If its 900w, check the cake after 1 minute and continue cooking if needed.
  • For variations, u can add chopped nuts or Choco chips to the batter.

Enjoy this quick and easy, microwave, eggless brownie with Oreo cookies with a scoop of ice cream !Tastes delish !! Have a great Valentine’s day celebration with your loved ones. 
 oreo brownie recipe
Continue Reading...


February 7, 2017

Eggless Dates Cake With Wheat Flour & Oats | Eggless Whole Wheat Dates Cake Recipe

Eggless dates cake
I had a pack of black dates lying in my pantry for months. I found dates cake would be the best option to finish off the leftover. So I tried it following THIS healthy, no egg, no butter date cake recipe using  whole wheat flour and instant oats. Its an eggless whole wheat dates cake with oats. 

As this cake recipe is without butter, condensed milk I was doubtful about the texture of cake and flavor. But to my surprise, it came out very well with an awesome flavor just like Christmas fruit cake.
It tasted great and secured 100 marks in my home. Yeah Raksha and Sendhil loved it a lot. Unless you say, no one could find out that this cake is made with dates, whole wheat flour and oats. Its texture was very soft and spongy. 

As my cake had cracks on top, I have given some suggestions below to avoid it. This cake can be made in pressure cooker as well. I strongly recommend everyone to try this recipe at home to enjoy a gluten free cake without maida/ all purpose flour. I am sure its result won’t disappoint you. You can add chopped walnuts, cashews and almonds to make it more healthy. So try this healthy, guilt free, eggless dates cake recipe at home for this Christmas (Indian Khajoor cake) and share your feedback with me. Lets see how to make it with step by step photos.

Eggless dates cake recipe with wheat flour

Eggless dates cake recipe with wheat flour & oats


Eggless dates cake recipe with wheat flour & oats How to make eggless dates cake with whole wheat flour and quick cooking instant oats
Cuisine: Indian
Category: Cakes
Serves: 12 
Prep time: 10 Minutes
Cook time: 40 Minutes
Total time: 50 Minutes


INGREDIENTS
1 cup - 250ml
  • Whole wheat flour - 3/4 cup ( I used Aashrivad atta)
  • Quick cooking oats - 3/4 cup ( I used Quaker )
  • Sugar - 1/4 cup ( Granulated)
  • Baking powder - 1 tsp ( levelled, Weikfiled brand)
  • Baking soda - 1 tsp ( levelled, Bakers brand)
  • Black or brown Dates - 20 nos ( Deseeded, chopped & ground)
  • Boiled milk - 1.5 cups
  • Cooking oil - 1/2 cup
  • Vanilla essence - 1 tsp
METHOD

  • Deseed, chop and grind the dates in batches. Heat 1.5 cups of milk and add the ground dates to the hot milk. Let it soak for 10 minutes. If using brown dates, soak for 30 minutes. In the mean time, mix the dry ingredients.
    Eggless dates cake recipe with wheat flour
    Eggless dates cake recipe with wheat flour
  • Add vanilla essence and cooking oil to the soaked dates + milk. Mix well with a whisk.
    Eggless dates cake recipe with wheat flour
  • In a wide bowl, take the whole wheat flour, oats, baking powder, baking soda and sugar. Mix well.
    Eggless dates cake
  • Add the wet mixture to the dry flour mixture. Mix well with a whisk. Do not over beat. Just mix gently in one direction. Cake batter looks thick but pourable. See the picture below.
    Eggless dates cake recipe with wheat flour
  • Grease a baking pan ( I used loaf pan) with oil and pour the cake batter till 3/4th of the pan. Preheat oven in convection mode at 180c. Keep the baking pan inside the oven.Bake the cake for 30 - 35 minutes. Insert  a toothpick or back of a spoon in the center of cake. If the spoon comes out clean, cake is done. If not, bake for another 5 minutes.
    Eggless dates cake recipe with wheat flour
  • I baked for 40 minutes but cake had cracks on top and the crust was slightly roasted. So I feel 35 minutes baking time would be enough. So keep an eye after 30 minutes. Remove the baking pan and let the cake cool down completely. Do not try to remove the cake. It will break.
  • After the cake is cooled down, run a knife on the sides of cake and invert the pan on a plate. Just pat it. Cake comes off easily. Make slices and enjoy ! Cake tastes more sweet on first day. But it tasted perfect the next day. This cake stays good for 2 days. Store in an airtight box. No need to refrigerate.
    Eggless dates cake recipe with wheat flour
Its a great teatime snack ! Enjoy !!

Note

  • Add more dates and less sugar if you want natural sweetness in the cake.
  • Do not skip vanilla essence as it gives a nice smell when combined with dates.
  • Baking time depends on the heat of oven. Keep an eye after 30 minutes and check with a spoon. Do not over bake.
  • This cake is too soft and moist. It may break or crumble. Cut slices carefully!
  • If using brown dates, soak for 30 minutes in milk.
  • Do not grind all the dates in one time. It will stuck to the walls of mixer. So chop the dates and grind 4-5 in one batch.
Enjoy this super soft, moist, guilt free, eggless dates cake recipe ~!
Eggless dates cake recipe


Continue Reading...


February 6, 2017

Kerala Vegetable Stew | Ishtu Recipe – Side Dish For Appam, Idiyappam

 Kerala Vegetable stew recipe
Vegetable stew also known as Ishtu is one of the most popular side dish recipes served for Appam and Idiyappam/Noolappam in Kerala. I make appam at least twice in a month for breakfast as it is our family favorite. Usually I make mixed vegetable stew, potato kurma/ paya or onion chutney as side dish for appam. I learnt this stew recipe after watching a cookery show by a Chef in Raj TV. He addressed this recipe as “Restaurant style Vegetable Stew”. I got attracted by the title and wrote down the recipe in my cook book. Its a very simple & healthy vegetable stew recipe that looks colorful with awesome flavor and rich taste of mixed vegetables, coconut oil & coconut milk. I made this stew in pressure cooker to make my job easier.So its color was pale white but it tasted great. We loved it a lot with appam.This veg stew post was lying in my drafts for long time.So I thought of bringing out today. Friends, do try this easy, Kerala style vegetable stew recipe at home & relish it with appam or idiyappam for your breakfast. For variations, you can use potato instead of mixed veggies and make it as potato stew. Ok lets see how to make vegetable stew with step by step photos !
Check out my other “Kerala Recipes” too!
Vegetable stew recipe

Kerala Vegetable Stew Recipe


Kerala Vegetable Stew Recipe How to make Kerala style vegetable stew recipe
Cuisine: Indian
Category: Side dish For Appam
Serves: Serves 3
Prep time: 10 Minutes
Cook time: 20 Minutes
Total time: 30 Minutes


INGREDIENTS
1 cup - 240ml
  • *Mixed vegetables ( Carrot, Beans, Potato) - 3/4 cup
  • Big onion - 1 no ( Slice thinly)
  • Ginger - 2 inch piece ( Slice it thinly or finely chopped)
  • Green chilli – 2-3 nos ( slit)
  • Thin coconut milk – 1 cup
  • Thick coconut milk – 1 cup
  • Salt – As needed
  • Sugar – A big pinch
To temper
  • Coconut oil – 1 tbsp
  • Bay leaf - 1 no
  • Cinnamon - 1 inch piece
  • Cloves - 2 nos
  • Curry leaves – Few
** Carrot – 1 medium, Potato – 1 medium, Beans – 4 nos
METHOD

  • Grate or chop 1 coconut into pieces. Grind to a smooth paste adding 1 cup of water. Strain the thick coconut milk and keep it in a bowl. Again grind the coconut adding 1 cup of water.Take the second milk by extracting it. Keep in another bowl.
  • Wash and chop the vegetables of 1 inch length. Slit the green chilli, slice the onion.Chop the ginger into small pieces or slice it thinly.
    Vegetable stew recipe
    Vegetable stew recipe
  • Heat coconut oil in a pressure cooker base. Saute bay leaf, cinnamon, cloves. Add thinly sliced onion, ginger pieces and slit green chilli. Saute till onion turns transparent. Make sure color of onion stays white and not brown.
    Vegetable stew recipe
    Vegetable stew recipe

  • Then add the chopped mixed vegetables, a big pinch of sugar and saute for a minute. Sugar helps to retain the color of vegetables.Add the required salt and the second coconut milk.Mix well and close the cooker. Cook for one whistle in very low flame. It takes 7-8 minutes.Open the cooker after the steam is released.Veggies would be cooked soft.
  • Now add the thick coconut milk now and give one boil.Check for taste, add more salt if needed. Switch off the flame. Garnish with curry leaves and set aside. Give a standing time of 15 minutes and serve with appam/idiyappam.
    Vegetable stew recipe
  • Enjoy !


Note
  • Add more green chilli for spicy taste.
  • Add cashew paste for thickness and richness to the stew. Grind 6 cashews and add the paste.
  • This stew has a mild masala flavor.
  • Coconut oil is very important for tempering. Do not skip it.
Try this Kerala style vegetable stew with appam and enjoy !!
How to make vegetable stew
Continue Reading...


February 3, 2017

Easy Peanut Ladoo Recipe With Skin |Groundnut Laddu Recipe – Ladoo Varieties

Peanut laddu
Peanut ladoo recipe with skin adding jaggery / sugar. Last year I tried Kadalai urundai( Kadalai mittai/Peanut chikki) for Karthigai deepam festival. But it wasn’t up to the mark.When I was telling about this to my friend Shalini, she suggested me to try this easy peanut ladoo which was her favorite childhood snack. She shared her recipe with me and told it is called as “Palli laddu / Verusenega pappu ladoo” in Telugu. In other languages, it is Nilakadalai/Verkadalai laddu or kadalai podi urundai in Tamil, Kadalekai unde in Kannada, Shengdana ladoo in Hindi (Marathi).This is an easy ladoo recipe with just 2 ingredients and amazing health benefits.If you have roasted peanuts in hand, you can prepare this ladoo in the next 5 minutes.Ghee is not used in this recipe. So its a low calorie ladoo when compared with other ladoo varieties. Roasted peanuts with Jaggery is a good source of protein & iron. Kids would love this very much. It can be packed for their school snack box. If your kids don't like jaggery, you can add sugar too. Generally this laddu is made by removing the skin of roasted peanuts but I ground the peanuts with skin. So my job has become even more easy. I din’t find much difference in taste or flavor. Sendhil is a big fan of peanut recipes. So he loved this ladoo very much. The same procedure can be used to make till ladoo/Sesame seeds laddu( ellu urundai) as well. Do try this easy, healthy peanut ladoo for your husband and kids evening snacks, reap its health benefits during this winter season.Ok,  Lets see how to make easy peanut laddu with step by step photos !
Continue Reading...


February 1, 2017

Crispy Corn Cheese Balls Recipe – Indian Party Snacks Recipes

Corn cheese balls recipe
Long back I have shared a recipe for Masala corn cheese balls in which all the spice powders, ginger-garlic paste are used. Its purely of our Indian style with all the masala flavor in it. Its made without potato. Cheese and sweet corn are the major ingredients.I used to make it for my guest and kids parties at home. Recently I came across this video of Corn cheese balls with Oregano & chilli flakes. I got tempted and tried it last Sunday for evening snacks. I followed my Aloo patties( Burger) recipe technique, coated the balls twice in maida paste and bread crumbs to get super crispy exterior. It came out very well. Use Panko crumbs for best result. Raksha liked it very much but she wanted the Indian masala flavor instead of Oregano. Then I made few balls adding garam masala powderWinking
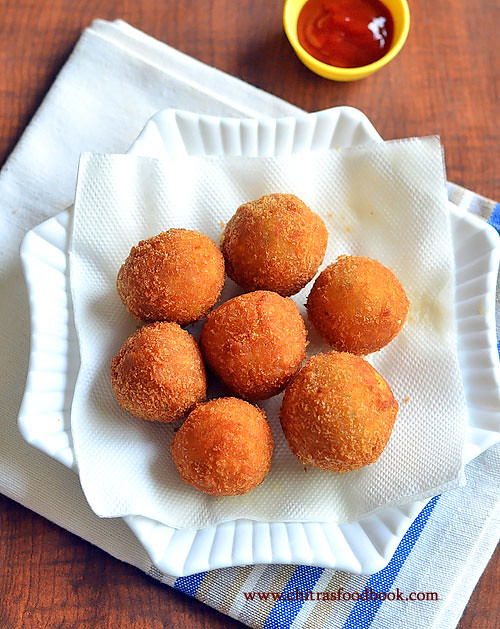
.Overall this recipe is a big hit in home. Friends, do try this recipe either with Indian masala or Italian seasoning based on your kids liking. Follow the same procedure and make this yummy, crispy corn cheese balls to celebrate kids birthday party, get together, kitty parties to serve as a starter. The dough can be made in advanced and refrigerated till use. All the kids would easily fall for this cheesy snackLove Struck. For variations, these balls can be made like nuggets. Ok, Lets see how to make this easy corn cheese balls with step by step photos, tips and tricks and a video !

Continue Reading...


January 30, 2017

Potato Poori – Aloo Puri Recipe - Alu Ki Puri

Potato poori
Potato poori / aloo puri in Hindi is an interesting kids friendly puri recipe. Poori would be our Sunday breakfast mostly. So I started exploring varieties of poori for a change. I have already shared Palak Poori, Masala poori, Beetroot poori, Tomato poori, chola poori recipes. This Sunday I tried potato poori ( Alu ki puri in Hindi) for the first time. I made the poori dough by mixing wheat flour with boiled, mashed potato and spice powders. 

Puri came out super soft with awesome masala flavor. It stays soft for hours together. So it can be packed for lunch box and ideal for travel as well. Side dish is not required for this puri recipe. Still I served it with tomato sabji and onion raita. Mixed veg kurma also goes well I guess.We loved it a lot. Its a winner recipe in my house. Do try this potato poori recipe for your kids and family. They will love it very much. 

Next I am planning to make methi poori and mint poori. Friends, If you know any other interesting poori varieties, do share them in the comments section. I will make it. As I say in all my poori posts, thickness of poori while rolling and the proper temperature(heat) of oil is the secret to get nicely puffed up poori. I have shared those points below in detail. If you are a beginner, It will sure come by practice. Ok, Lets see how to make Aloo Poori recipe with step by step photos and a video !


Aloo ki puri recipe

Potato Poori - Aloo Ki Poori Recipe


Potato Poori - Aloo Ki Poori Recipe How to make aloo ki puri / Potato poori recipe with step by step photos and video
Cuisine: North Indian
Category: Breakfast
Yields : 12 nos
Prep time: 10 Minutes
Cook time: 2 Minutes
Total time: 12 Minutes


INGREDIENTS
1 cup - 250ml
  • Whole Wheat flour / atta - 1 cup ( I used Aashirvad)
  • Medium sized potato - 2 nos
  • Cumin seeds or Ajwain - 1/4 tsp
  • Red chilli powder - 1 tsp ( I used Kashmiri chilli powder)
  • Dhania powder - 1 tsp
  • Garam masala powder - 1/2 tsp
  • Coriander leaves - 2 tbsp ( finely chopped)
  • Crushed kasoori methi – 1 tsp
  • Salt - as needed
  • Water - as required ( I added 1/3 cup)
METHOD

  • Wash and pressure cook potato in required water in very low flame for 2 whistles.Open the cooker and remove the potato. Peel the skin. Place the potato in a wide plate or bowl and mash it.
  • To the mashed potato, add turmeric powder, red chilli powder, dhania powder, cumin seeds, garam masala powder, salt, finely chopped coriander leaves, crushed kasoori methi, wheat flour and mix well without adding water.
    Aloo ki puri
  • Add wheat flour and mix well without adding water.
    Aloo ki puri
  • Now add water little by little and make a smooth, non-sticky dough. No need to rest the dough. Roll immediately. Grease your hands with oil. Take a portion of dough.Knead for a minute. Make balls roughly. Keep the remaining dough closed till use. Take one ball, roll it well and flatten it. Dust in wheat flour once and roll the poori slightly thick. Make sure corners are thick. Remember it should not be rolled too thin like roti. It won’t puff up.
  • Roll all the poori and arrange in a plate without overlapping each other.
    Aloo ki puri
  • Heat oil in a kadai and when it gets heated , put a pinch of dough. If it rises immediately to the top, oil temperature is right. It should not be smoky. Pat the excess flour in the poori and drop one in the oil. Let it rise to the top.
    Aloo ki puri
  • When it comes to top, pat it gently with the ladle. It will puff up nicely. Flip it after the bubbles cease. Cook the other side too.Press with the ladle for uniform cooking. Drain in a tissue paper and serve hot with raita or any sabji. Do not make any side dish with potato. U can make tomato sabji or mixed veg kurma for this poori.
    Aloo poori recipe
Enjoy !

Note
  • Poori gets puffed up only if its rolled thick evenly and properly. Oil temperature should be perfect. If its rolled thin, it comes like a papad. If the oil temperature is less, poori absorbs lot of oil and it won’t puff up.
  • At the same time, oil should not be smoking hot. Poori will become dark golden. So after you deep fry one poori, reduce the flame completely low. After dropping the next poori, increase the flame to high. By doing this way, heat of the oil can be maintained. If oil becomes smoky hot, switch off the stove for sometime. When the oil comes to right temperature, deep fry again.
  • As I have added Kashmiri red chilli powder, color of my poori was red. If you like white colored poori, add finely chopped green chilli instead of red chilli powder.
  • Do not rest the dough for long time. Poori may drink oil while frying.Try to make puri as soon as u make the dough.
  • No side dish is required for this poori. If you want to make it , mixed veg kurma and tomato onion sabji would be some good options.

Enjoy this soft, masala flavored Potato Poori at home with raita and sabji !
Aloo ki puri
Continue Reading...