
Jeera rice vegetable biryani (Seeraga samba arisi biriyani in Tamil , Jeerakasala biryani in Malayalam) is an awesome, flavorful biryani that everyone must try at least once in your kitchen. Most of the South Indian special, traditional biriyani recipes uses jeera rice.This tiny-grained seeraga samba rice gets its name from its resemblance to cumin, which is known as seeragam in Tamil Nadu. It is also known as Kaima rice. Most of us use Basmati rice for making veg biryani. I was also using the same till I tried Ambur veg biryani using jeera rice. I just love its flavor and texture more than basmati rice. From then, I started to use this rice very often for preparing veg biryani at home. So far I have prepared Dindigul thalappakkati biryani, Bangalore special Donne biryani (Veg version using mushroom and soya chunks), Coimbatore Angannan biryani using seeraga samba rice.
This is yet another version of Tamil nadu style jeera rice veg biryani using a pressure cooker. Its so easy to make. It tastes and smells awesome. I have used carrot, potato and soya chunks. You can use beans, green peas, cauliflower to make it colorful and healthy. Do try this easy, yummy vegetable biryani using jeera rice in a pressure cooker. I am sure you will love its taste. Ok, lets see how to make this seeraga samba biriyani with step by step pictures and video.
Do check out my 40+ Vegetable biryani recipes collection.

 How to make Vegetable biryani using jeera rice in a pressure cooker
Do check out my 40+ Vegetable biryani recipes collection.
Jeera Rice Veg Biryani Recipe
How to make Vegetable biryani using jeera rice in a pressure cooker
Cuisine: South Indian
Category: Biryani Recipes
Serves: 3
Prep time: 10 Minutes
Cook time: 20 Minutes
Total time: 30 Minutes
INGREDIENTS
1 cup - 250ml
|
HOW TO MAKE JEERA RICE VEGETABLE BIRYANI - METHOD
- Wash and chop carrot and potato into thin, long strips.
- Grind ingredients for masala. Keep aside.
- Heat oil + ghee in a pressure cooker. Saute bay leaf and black stone flower.
- Add onion. Saute well. Add tomato, saute till mushy. Add masala paste, salt.
- Saute till raw smell goes off. Now add vegetables, soaked soya chunks, washed rice and mix well.
- Pressure cook in low flame for one whistle. Remove and fluff the rice. Serve with raita !
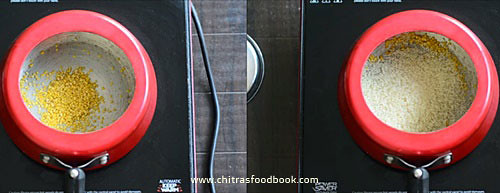
METHOD - STEP BY STEP PICTURES

|


Note
|
Enjoy this yummy, flavorful Jeera rice veg biryani at home !


