Search Chitra's Food Book

May 28, 2021

How to make turmeric powder at home from raw, fresh turmeric roots

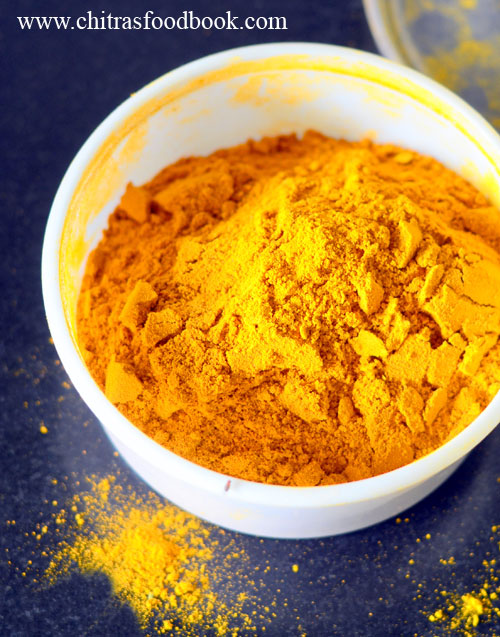
how to make turmeric powder at home

I have never thought of making homemade turmeric powder using fresh turmeric roots (Manjal kothu) we get during Pongal festival time. Last year, when my MIL visited me after Pongal, she made use of the fresh turmeric I had in my pantry by making this homemade turmeric powder. It was so easy to make. The color and flavor of turmeric powder was so good. That was the first time I watched the procedure of making turmeric powder at home using fresh turmeric.

Usually my mom grinds turmeric powder for face in a flour mill by grinding the dried, round turmeric or the thin ones. We call it as gundu manjal and Virali manjal in Tamil. Some people also grind the manjal podi in mixie but the mixie blade should be strong enough and the mixer should be of high power in watts.

But making turmeric powder using fresh turmeric is so easy. The only difficult part is to peel its skin and chop into small roundels. If you want to skip this step, you can just boil the turmeric roots till its soft. Then you can chop without peeling its skin and grind it. As the fresh turmeric is soft in texture, you can grind it easily in any Indian mixer. After grinding the paste, we need to sun dry for a day or two. Grind again to a fine powder. Siev and store it. Tada, your fresh homemade turmeric powder is ready !

Friends, just follow the steps given below and make your own turmeric powder at home. You will love its flavor and color. Above all you will have the satisfaction of using healthy turmeric powder in your cooking more than the adulterated shop ones.

how to make turmeric powder at home

How to make turmeric powder at home using fresh turmeric roots


How to make turmeric powder at home using fresh turmeric roots

How to make turmeric powder at home using fresh turmeric roots


Cuisine: Indian
Category: How to make
Serves: 200 gms
Prep time: 10 Minutes
Cook time: 20 Minutes
Total time: 30 Minutes


INGREDIENTS

  • Fresh, raw turmeric / Pacha manjal - 1/2 kg
  • Water - to grind
HOW TO MAKE TURMERIC POWDER AT HOME
  1. Wash and peel the skin of fresh, raw turmeric roots.
  2. Chop into small roundels. Grind to smooth paste
  3. Grind into smooth paste adding little water.
  4. After grinding, drain the excess water and spread the paste in a plate.
  5. Sun dry the paste for a day or two till its completely dry.
  6. It turns into brown color once its dry. Grind to smooth powder again.
  7. Sieve and transfer to a box and use as needed.
  8. You can use it for your face, use in regular cooking or make turmeric pepper milk.
METHOD - STEP BY STEP PICTURES
  • Wash and peel the skin of fresh turmeric roots. Wash in water.
  • how to make turmeric powder at home
  • Chop into roundels and grind coarsely. Add little water and grind to a smooth paste. Drain the excess water in a small bowl. You can use it for cooking.
how to make turmeric powder at home
  • Now spread the thick paste in a plate and let it sun dry for a day or two till its completely dry. The outer layer changes to slight brown or orange in color.
  • how to make turmeric powder at home
    how to make turmeric powder at home
  • Now break the dried turmeric into pieces and grind to a fine powder. Sieve it through a fine mesh. Transfer to a box. Store and use it for months. 

Check out this post on how to make turmeric milk/ Golden latte recipe.

Note

  • For variations, you can boil the chopped turmeric pieces in hot water for few minutes before grinding.


Try this easy, homemade turmeric powder and enjoy its benefits.

how to make turmeric powder at home


Continue Reading...


May 19, 2021

Lasooni Palak | Lehsuni Palak |Restaurant style Lasooni Palak– Garlic Spinach Curry

lasooni palak recipe


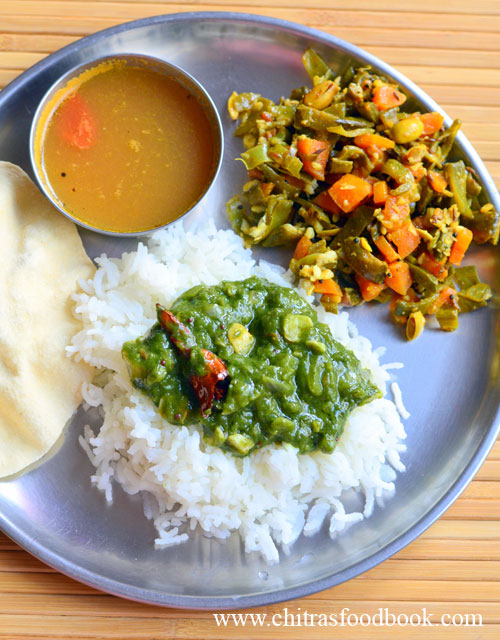
Lasooni palak / Lehsuni palak / Spinach garlic curry is an easy and interesting side dish for rice and roti. I tried a restaurant style lasooni palak for the first time for our lunch yesterday. It came out so well. I enjoyed with both rice and chapathi. The flavor of roasted garlic in palak was so good. If you are looking for a change from the regular dal palak, this lehsuni palak is a good alternative.

Friends, do try this Lasooni palak / Lahsun palak recipe and enjoy with rice and roti.

Lehsuni palak

Lasooni palak recipe / Lahsun palak - Lehsuni palak recipe


Lasooni palak recipe / Lahsun palak - Lehsuni palak recipe

Lasooni palak recipe for rice – Palak gravy with roasted garlic.


Cuisine: Indian
Category: Side dish
Serves: 3
Prep time: 10 Minutes
Cook time: 20 Minutes
Total time: 30 Minutes


INGREDIENTS
  • Palak / Spinach - 2 cups
  • Big onion - 1 ( finely chopped)
  • Green chilli - 1 or 2 (-do-)
  • Gram flour – 1 tsp
  • Cooking oil - 1 tbsp
  • Cumin seeds - 1/2 tsp
  • Ginger garlic paste - 1/2 tsp
  • Turmeric powder – 1/4 tsp
  • Sugar – 1/4 tsp
  • Kasoori methi – 1/2 tsp (crushed)
  • Fresh cream – 1 tbsp (optional)
  • Salt & water - as needed
  • Lemon juice – as needed
To temper
  • Ghee - 2 tsp
  • Garlic cloves - 1- (finely chopped)
  • Red chilli – 1 (pinched into 2)
HOW TO MAKE LASOONI PALAK
  1. Wash and chop palak roughly. Chop onion, green chilli.
  2. Boil water in a pan. Add palak and boil for few minutes.
  3. Remove when its soft. Add to cold water to retain green color.
  4. Once cool, grind to a paste adding turmeric powder and sugar. Set aside.
  5. Heat oil in a kadai. Temper cumin seeds, big onion, green chilli , ginger garlic paste and saute till transparent. Add gram flour and mix well without lumps.
  6. Add the palak paste, salt and required water. Boil for few minutes.
  7. Switch off the flame once its thick. Heat ghee in a kadai.
  8. Add finely chopped garlic and red chilli. Saute till garlic turns light golden in color.
  9. Add to the palak and mix well. Switch off the flame and add lemon juice.
  10. Serve hot with rice and roti. Enjoy !
METHOD - STEP BY STEP PICTURES
  • Wash and chop palak roughly. Wash and chop onion, green chilli finely. Set aside.

  • Boil water in a bowl. Add the chopped palak and cook till its soft. Remove and add to cold water to retain its green color.
  • Lasooni palak
  • Once its cool, take in a mixie jar, add little turmeric powder and sugar. Grind to a smooth paste. Keep it aside.
  • Lasooni palak
  • Heat oil in a kadai. Temper cumin seeds. Add onion, green chilli and ginger garlic paste. Saute till onion turns transparent. Add gram flour and mix quickly without lumps.
  • Add the ground palak paste. Add salt and required water. Boil for few minutes till it becomes thick. Add crushed kasoori methi. If you like you can add a tbsp of fresh cream. Switch off the flame.
  • Lasooni palak
  • Heat ghee in a small kadai. Add finely chopped garlic cloves. Roast till light golden in color. Add red chilli and switch off the flame. Add to the palak. Add lemon juice and Mix well. Serve with rice and roti !
  • Lasooni palak
    Enjoy !

Note

  • For variations, you can saute one bayleaf, cinnamon, cloves and cardamom in oil along with cumin seeds.
  • You can skip fresh cream but adding it gives a rich and creamy restaurant taste to the gravy.
  • You can make the gravy thick or semi thick as you wish.


Try this easy, yummy Lehsuni palak and enjoy !

Lasooni palak

Continue Reading...


May 14, 2021

Drumstick Poriyal | Murungakkai poriyal recipe

murungakkai poriyal

Drumstick / Murungakkai is a super healthy vegetable packed with rich source of vitamins and minerals. It helps to boost immunity, develop strong bones and purifies the blood. Usually we make sambar, poricha kuzhambu and vathakuzhambu with drumstick. Long back I had tried and shared a drumstick masala recipe. After that, I never got a chance to try something different.

Today I tried my mom’s style drumstick poriyal / murungaikai poriyal for our lunch. It came out so well. We all loved it. You can make this poriyal directly in a pressure cooker. Friends, do try this easy, yummy drumstick poriyal for rice and enjoy.

Check out my drumstick masala recipe

drumstick poriyal

Drumstick poriyal / murungaikai poriyal recipe


Drumstick poriyal / murungaikai poriyal recipe

Drumstick poriyal / murungaikai poriyal recipe for rice


Cuisine: Indian
Category: Side dish
Serves: 2
Prep time: 10 Minutes
Cook time: 20 Minutes
Total time: 30 Minutes


INGREDIENTS

  • Drumstick / Murungakkai - 3
  • Big onion - 1
  • Tomato - 2
  • Ginger garlic paste – 1/2 tsp
  • Turmeric powder - 1/4 tsp
  • Red chilli powder - 1/2 tsp
  • Sambar powder - 1 tsp
  • Salt & water - as needed
  • Coriander leaves – 1/4 cup
  • Grated coconut – 1/4 cup
To temper
  • Cooking oil - 1 tbsp
  • Mustard seeds - 1 tsp
  • Urad dal - 1 tsp
  • Chana dal - 2 tsp
  • Cumin seeds - 1/2 tsp
  • Curry leaves - few
HOW TO MAKE MURUNGAKKAI PORIYAL
  1. Wash and chop drumstick into finger length pieces. Finely chop onion, tomato.
  2. Heat oil in a kadai. Splutter mustard seeds, urad dal, chana dal, curry leaves.
  3. Saute onion till transparent. Add ginger garlic paste. Saute till raw smell goes off.
  4. Add tomato and saute till it turns mushy. Add drumstick pieces, turmeric powder, red chilli powder, sambar powder and salt.
  5. Mix well and add required water. Cover cook till drumstick is done.
  6. Once all the water is absorbed, add grated coconut and mix well.
  7. Serve with rice. Enjoy !
METHOD - STEP BY STEP PICTURES
  • Wash and chop drumstick into pointer finger length pieces. Finely chop onion and tomato. Set aside.

  • Heat oil in a pressure cooker. Splutter mustard seeds, urad dal, chana dal and curry leaves. Saute onion till transparent.
  • drumstick poriyal recipe
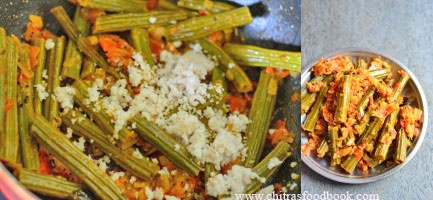
  • Add ginger garlic paste and saute till raw smell vanishes. Add tomato and saute till mushy. Add required salt to cook quickly.

  • Now add the drumstick pieces. Saute for a minute. Add red chilli powder, sambar powder and turmeric powder. Mix well.
  • drumstick poriyal recipe

  • Add required water and cover cook in low flame till drumstick is cooked soft inside. Take one, press the seed and pulp to see if its cooked properly. If cooked, boil the excess water and bring it to semi dry texture.
  • drumstick poriyal recipe
  • Lastly add the grated coconut and mix gently without breaking the drumstick. Serve hot with rice. Enjoy !

Note

  • Adjust the quantity of chilli powder and sambar powder as per your taste.
  • You can skip ginger garlic paste.


Try this easy, yummy Drumstick poriyal for lunch and enjoy !

drumstick poriyal recipe


Continue Reading...


May 10, 2021

Cabbage Moong dal Poriyal / Muttaikose Pasi Paruppu Poriyal With Coconut

 cabbage moong dal poriyal

This cabbage moong dal poriyal / muttaikose pasi paruppu poriyal is our most favorite cabbage recipes. I make this poriyal at least once in a week. I learnt this cabbage poriyal recipe from my MIL. Earlier we used to cook cabbage adding moong dal separately in a closed vessel, temper it with onion, green chilli and garnish with grated coconut.

Recently my MIL started to make this poriyal in pressure cooker directly and taught me the same. Its so easy and can be made quickly under 10 minutes. Friends, do try this easy cabbage poriyal with moong dal and enjoy with sambar rice.

Cabbage poriyal with moong dal

Cabbage moong dal poriyal recipe


Cabbage moong dal poriyal recipe

Cabbage moong dal curry recipe / Muttaikose pasi paruppu poriyal for rice


Cuisine: Indian
Category: Side dish
Serves: 3
Prep time: 10 Minutes
Cook time: 20 Minutes
Total time: 30 Minutes


INGREDIENTS
1 cup = 250ml
  • Cabbage - 2 cups (finely sliced)
  • Moong dal – 2 tbsp
  • Big onion - 1(finely chopped)
  • Green chilli - 2 (slit)
  • Ginger – 1/2 tsp (finely chopped)
  • Grated coconut - 1/4 cup
  • Coriander leaves - 2 tbsp (to garnish, optional)
To temper
  • Coconut oil - 1 tbsp
  • Mustard seeds - 1/2 tsp
  • Urad dal - 1 tsp
  • Cumin seeds - 1/2 tsp
  • Curry leaves - few
HOW TO MAKE CABBAGE MOONG DAL PORIYAL
  1. Wash and shred cabbage. Chop onion, green chilli, ginger.
  2. Heat oil in a pressure cooker base. Splutter mustard seeds, urad dal, cumin seeds and curry leaves.
  3. Add onion, green chilli, ginger and saute till transparent. Add cabbage, moong dal and salt. Mix well.
  4. Add 1/2 cup of water and mix well. Pressure cook in high flame for 2 whistles.
  5. Open the cooker after the steam is released. Boil excess water if there.
  6. Lastly garnish with grated coconut and coriander leaves.
  7. Serve with sambar rice !
METHOD - STEP BY STEP PICTURES
  • Wash and shred cabbage finely. Wash and chop onion, ginger, slit green chilli.

  • Heat oil in a pressure cooker base. Splutter mustard seeds, urad dal, cumin seeds and curry leaves. 

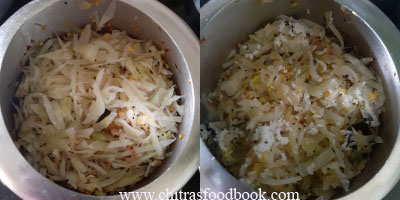
  • Saute onion, green chilli, ginger and curry leaves. Add cabbage, moong dal, salt and mix well.
  • cabbage poriyal with moong dal
  • Add 1/2 cup of water and pressure cook in high flame for 2 whistles. Open the cooker after the steam is released. 
  • cabbage poriyal with moong dal
  • Boil if there is any excess water. Garnish with grated coconut and coriander leaves.
  • cabbage poriyal with moong dal
  • Mix well and serve with sambar rice. Enjoy !

Note

  • For variations, you can use chana dal instead of moong dal but soak chana dal for 2 hours in hot water for quick cooking.
  • You can also use sambar powder instead of green chilli but taste, color and flavor will vary.


Try this easy and yummy cabbage poriyal recipe with moong dal. You will love it !

muttaikose pasi paruppu poriyal


Continue Reading...


May 4, 2021

Veg Kizhi Parotta recipe–Kerala Kizhi Parotta In Banana leaf (Vegetarian)

Veg Kizhi Parotta recipe

I am a big big fan of Parotta based recipes. Recently I came across this Kerala special Kizhi parotta recipe in my Instagram feed. It was chicken kizhi parotta recipe from a Kerala hotel. I got tempted to try and looking for a vegetarian version. Then I found this veg kizhi parotta recipe in a YouTube channel where the host showed the making of vegetarian kizhi parotta with mushroom and paneer from a small hotel in Chennai.

I was so happy to see that video and tried it immediately with some store bought parotta. To layer this kizhi parotta, I made my hotel style plain salna, a dry curry with mushroom and paneer, some grated paneer and coriander leaves to garnish. I layered everything over the roasted banana leaf and cooked in a dosa tawa. You can also steam it for few minutes just like podhi soru.

The flavor of banana leaf over the cooked parotta was awesome. Moreover the parotta was so soft to eat. So you don’t have to tear it and soak in salna to eat. This kizhi parotta is already soaked and cooked in salna. So it was so soft and yummy. We all loved it.

Friends, if you are a parotta lover like me, you must try this kizhi parotta. You will love it for sure. You can also use mixed vegetables or cauliflower in salna for variations. Non-vegetarians, you can make it with chicken salna and chicken curry or prawns masala just like the one I saw in the video.

Ok, lets see how to make veg kizhi parotta recipe with step by step pictures and video !

Check out my Veg Kothu parotta recipe 

Chilli parotta 

Veg kizhi parotta

Veg Kizhi Parotta Recipe


Veg Kizhi Parotta Recipe

Veg Kizhi Parotta Recipe - Kerala style kizhi parotta in vegetarian version using mushroom and paneer.


Cuisine: South Indian
Category: Main course
Serves: 2
Prep time: 10 Minutes
Cook time: 20 Minutes
Total time: 30 Minutes


INGREDIENTS
For layering kizhi parotta
  • Parotta - 4 ( Homemade or readymade)
  • Plain salna / Empty salna or Veg salna - 3 cups
  • Mushroom, paneer dry curry
  • Grated paneer - 1/2 cup
  • Coriander leaves - to garnish
  • Banana leaf - 3
  • Cooking oil - to drizzle
For dry curry
  • Mushroom - 10 (Slice thinly)
  • Paneer - 20 small cubes
  • Red chilli powder - 1/2 tsp
  • Garam masala powder - 1/2 tsp
  • Turmeric powder - 1/4 tsp
  • Salt - as needed
  • Cooking oil - 2 tbsp
HOW TO MAKE VEG KIZHI PAROTTA RECIPE
  1. Wash and slice mushroom. Chop paneer, soak in hot water and set aside.
  2. Make Salna and keep it ready.
  3. Heat oil in a kadai. Add mushroom and paneer pieces. Saute for a minute.
  4. Lower the flame. Add salt, chilli powder, turmeric and garam masala powder.
  5. Mix well and cook till mushroom becomes soft. Switch off the flame. Keep in a bowl.
  6. Now take the parotta and cook both sides in dosa tawa drizzling oil. Remove and press it to form layers. Cook 4 parotta and set aside.
  7. Now take the cooked parotta, salna, mushroom masala, grated paneer and coriander leaves.
  8. Heat a banana leaf in low flame for few seconds.
  9. Add a tsp of ghee. Place one parotta, pour salna to cover it.
  10. Spread the mushroom masala. Now layer it another parotta, pour salna.
  11. Spread the grated paneer and garnish with coriander leaves.
  12. Fold the banana leaf all the sides and tie it with the thread.
  13. Heat dosa tawa and drizzle oil. Place the folded banana leaf.
  14. Cook in low flame for a minute. Flip and cook the other side too.
  15. Remove and serve with onion raita and salna. Enjoy !
METHOD - STEP BY STEP PICTURES
  • Wash and slice mushroom. Chop paneer into small pieces. Soak in hot water till use. Wash and chop onion, tomato for making salna. Grind coconut + poppy seeds for salna.

  • Make salna following THIS RECIPE. You can make it plain or add vegetables like cauliflower, carrot, beans, peas and potato. Keep the salna ready.

  • Now lets make the mushroom masala. Heat oil in a kadai. Add sliced mushroom, paneer cubes. Mix in low flame for few minutes till mushroom turns soft. Add red chilli powder, salt, turmeric powder and garam masala powder. Mix gently to coat the mushroom and paneer pieces. Switch off the flame and remove in a bowl.

  • I used readymade frozen parotta. You can use homemade or store bought parotta too. Cook the parotta drizzling oil in both the sides. Remove in a plate and separate the layers by patting the parotta between your hands. Cook 4 parotta and keep it ready in a plate.
  • Veg kizhi parotta recipeVeg kizhi parotta recipe
  • Grate paneer and finely chop coriander leaves. Keep it ready. Take banana leaf and roast in low flame in both the sides. Roasting the leaf makes it soft and easily foldable.
  • Veg kizhi parotta recipe
  • Place a full banana leaf over the table. Place a small leaf in the middle. Drop a tsp of ghee. Keep one parotta in the center of leaf. Pour salna to cover the parotta.
  • Spread the mushroom, paneer masala. Cover it with another parotta and pour salna again. Spread the grated paneer and garnish with coriander leaves. Fold the banana leaf in both the sides. Tie with a thread or with the fiber part of banana leaf. 
  • Veg kizhi parotta recipeVeg kizhi parotta recipe
  • Heat a dosa tawa. Pour 2 tsp of oil. Place the banana leaf and cook in low flame for few minutes. Flip the other side and cook it. Remove and enjoy the super soft and flavorful Veg kizhi parotta with onion raita, salna ! Enjoy !Veg kizhi parotta recipe

Note

  • You can make plain salna or vegetable salna as per your choice.
  • I made dry mushroom masala. You can saute onion, tomato, ginger garlic paste and make it like a thick curry too.
  • Procedure seems to be lengthy. But it took just 15 minutes to prepare the salna and mushroom masala. If you have readymade parotta, you can make it easily.
  • Instead of mushroom and paneer, you can use cauliflower.


Easy and yummy, hotel style Veg kizhi parotta is ready to enjoy with onion raita and salna !

Kerala Kizhi parotta

Continue Reading...


April 27, 2021

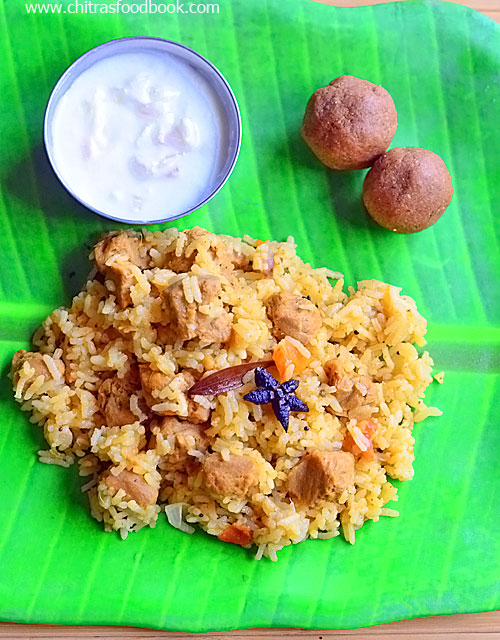
Soya Chunks Biryani Recipe–Meal maker biryani recipe

Soya chunks biryani

Soya chunks biryani recipe / Meal maker biryani is an easy and yummy vegetarian biryani recipe. I have already prepared so many biryani recipes with soya chunks when I was doing my Sunday biryani series. But this meal maker biryani recipe is a completely different one. Here we are making this biryani by marinating the soya chunks in curd and masala mixture. So the taste of this biryani was so good.

Actually I tried this biryani after watching an YouTube channel. As the chef mentioned, the taste of this biryani was similar to non veg biryani. The flavor was so good. Friends, If you are a vegetarian like me and want to try a veg biryani in non veg taste, you must give this a try. Hope you will love it.

Lets see how to make soya chunks biryani / meal maker biryani recipe with step by step pictures.

Check out my soya chunks kurma for rice, roti

Soya chunks manchurian

Dindigul thalapakkatti biryani

Soya chunks biryani

Soya chunks biryani / Meal maker biryani recipe


Soya chunks biryani / Meal maker biryani recipe

Soya chunks biryani recipe - Easy and healthy biryani recipe adding meal maker


Cuisine: Indian
Category: Main course
Serves: 3
Prep time: 10 Minutes
Cook time: 20 Minutes
Total time: 30 Minutes


INGREDIENTS
1 cup = 250ml
  • Steamed rice or basmati rice - 1 cup
  • Meal maker / Soya chunks - 1 cup
  • Big onion - 1 (Sliced)
  • Tomato - 1
  • Turmeric powder - 1/4 tsp
  • Red chilli powder - 1/2 tsp
  • Biryani masala powder or garam masala powder - 1/4 tsp
  • Mint & coriander leaves - 2 tbsp
  • Lemon juice - 1 tsp
  • Salt & water - as needed
To grind & marinate
  • Green chilli -1 or 2
  • Ginger - 1 inch piece
  • Garlic - 5 cloves
  • Mint leaves - 2 tbsp
  • Coriander leaves - 2 tbsp
  • Water - to grind
  • Curd - 1/4 cup (to marinate)
  • Salt - little
  • Red chilli powder - 1/2 tsp
  • Garam masala powder or biryani masala powder - 1 /4 tsp
  • Turmeric powder - 1/4 tsp
To Temper
  • Cooking oil - 2 tbsp
  • Ghee - 1 tbsp
  • Cinnamon - 1 inch piece
  • Cloves - 2
  • Cardamom - 1
  • Star anise - 1
  • Black stone flower / Kalpasi - 1
  • Bay leaf - 1
  • Fennel seeds - 1/2 tsp
HOW TO MAKE SOYA CHUNKS BIRYANI
  1. Wash and soak soya chunks /meal maker in hot water for 10 minutes.
  2. Wash and soak the rice in 2 cups of water for 15 minutes.
  3. Grind green chilli, ginger, garlic, coriander and mint leaves to smooth paste.
  4. Mix half of this paste with curd, chilli powder, biryani masala powder, salt.
  5. Squeeze soya chunks and add to curd mixture. Mix well and marinate for 15 minutes.
  6. Heat oil + ghee in a pressure cooker base. Add the whole garam masala spices.
  7. Add fennel seeds. Saute onion. Add the remaining green paste. Saute for a minute.
  8. Add tomato and saute till mushy. Add the marinated soya chunks. Mix well.
  9. Add the soaked rice along with water, mix well. Add lemon juice and mint+coriander leaves in the water.
  10. Pressure cook in low flame for one whistle. Open the cooker after the steam is released.
  11. Fluff gently and serve with onion raita !
METHOD - STEP BY STEP PICTURES
  • Wash and soak soya chunks in hot water for 10 to 15 minutes. Wash and soak the rice in 2 cups of water for 15 minutes.
  • soya chunks biryani
  • Grind green chilli, ginger, garlic, coriander leaves and mint leaves to smooth paste.
  • soya chunks biryani
  • Take half of this paste and mix with curd, chilli powder, biryani masala powder and little salt. Squeeze soya chunks and add to curd mixture. Let it marinate for 15 minutes.
  • soya chunks biryani
  • Heat oil in a pressure cooker base. Add cinnamon, cloves, cardamom, bay leaf and black stone flower. Add fennel seeds.
  • soya chunks biryanisoya chunks biryani
  • Saute onion till transparent. Add the remaining green paste and saute till its raw smell goes off. Add tomato and saute till mushy. 
  • soya chunks biryani
  • Add the marinated soya chunks and mix well. Add the soaked rice along with water, lemon juice, coriander and mint leaves. Pressure cook in low flame for one whistle. Switch off the flame.
  • Open the cooker after the steam is released. Fluff gently and serve hot with onion raita.
  • soya chunks biryanisoya chunks biryani
    Enjoy !

Note

  • Adjust the quantity of chilli powder as per your need.
  • You can use basmati rice or jeera rice. I used normal Sona masoori rice.
  • If you are using basmati rice or jeera rice, wash and soak it for minimum 30 minutes and use 1.5 cups of water for 1 cup of rice.


Try this easy and healthy Soya chunks biryani. Enjoy with onion raita !

Meal maker biryani

Continue Reading...